2013 BMW 535I XDRIVE GRAN TURISMO transmission
[x] Cancel search: transmissionPage 82 of 240
Electronic displays
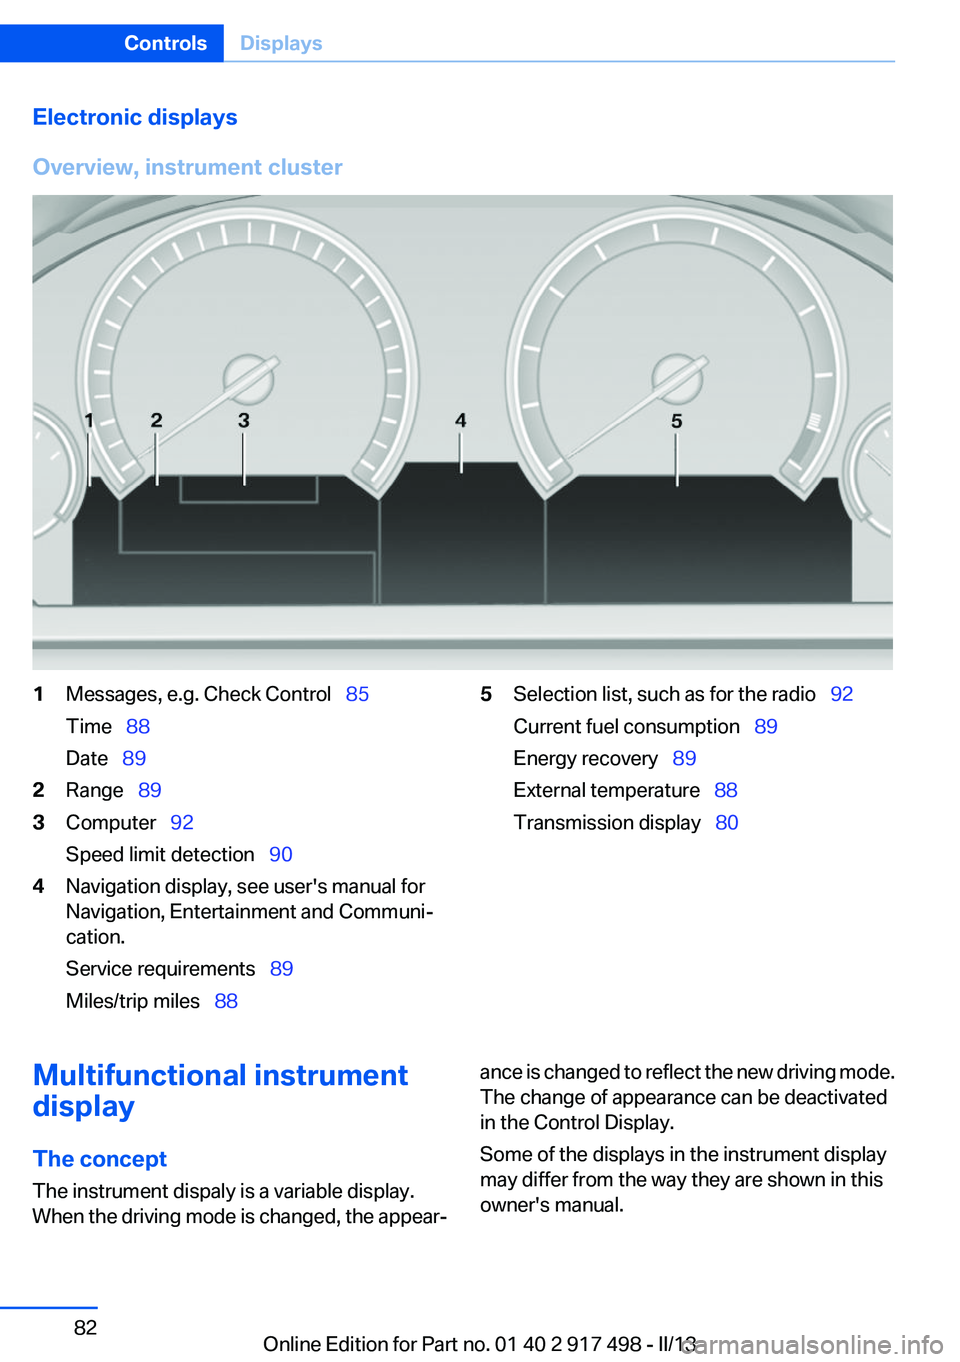
Overview, instrument cluster1Messages, e.g. Check Control 85
Time 88
Date 892Range 893Computer 92
Speed limit detection 904Navigation display, see user's manual for
Navigation, Entertainment and Communi‐
cation.
Service requirements 89
Miles/trip miles 885Selection list, such as for the radio 92
Current fuel consumption 89
Energy recovery 89
External temperature 88
Transmission display 80Multifunctional instrument
display
The concept
The instrument dispaly is a variable display.
When the driving mode is changed, the appear‐ance is changed to reflect the new driving mode.
The change of appearance can be deactivated
in the Control Display.
Some of the displays in the instrument display
may differ from the way they are shown in this
owner's manual.Seite 82ControlsDisplays82
Online Edition for Part no. 01 40 2 917 498 - II/13
Page 84 of 240
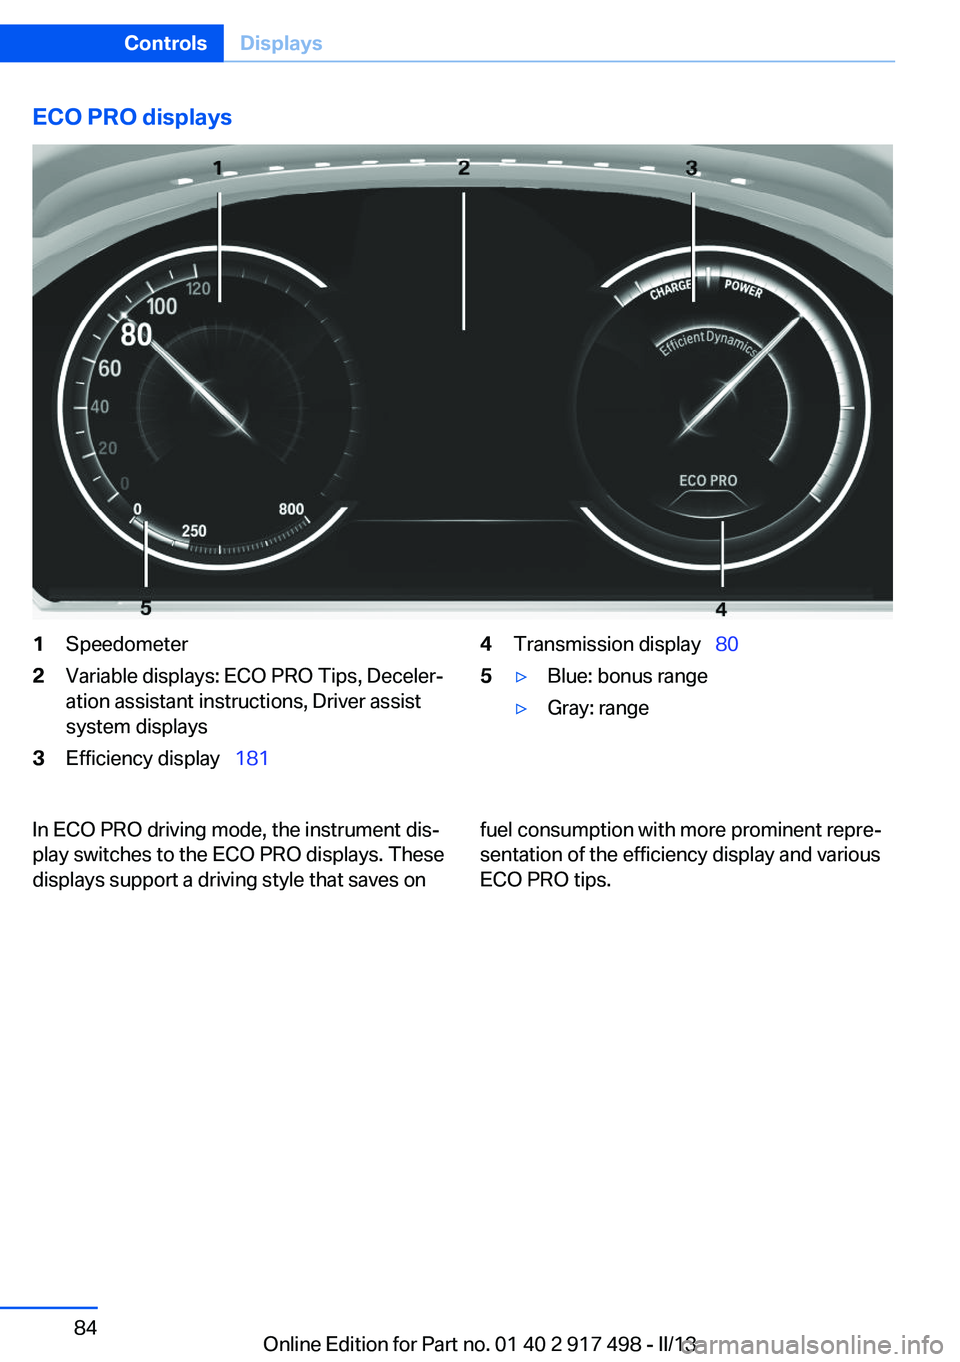
ECO PRO displays1Speedometer2Variable displays: ECO PRO Tips, Deceler‐
ation assistant instructions, Driver assist
system displays3Efficiency display 1814Transmission display 805▷Blue: bonus range▷Gray: rangeIn ECO PRO driving mode, the instrument dis‐
play switches to the ECO PRO displays. These
displays support a driving style that saves onfuel consumption with more prominent repre‐
sentation of the efficiency display and various
ECO PRO tips.Seite 84ControlsDisplays84
Online Edition for Part no. 01 40 2 917 498 - II/13
Page 85 of 240
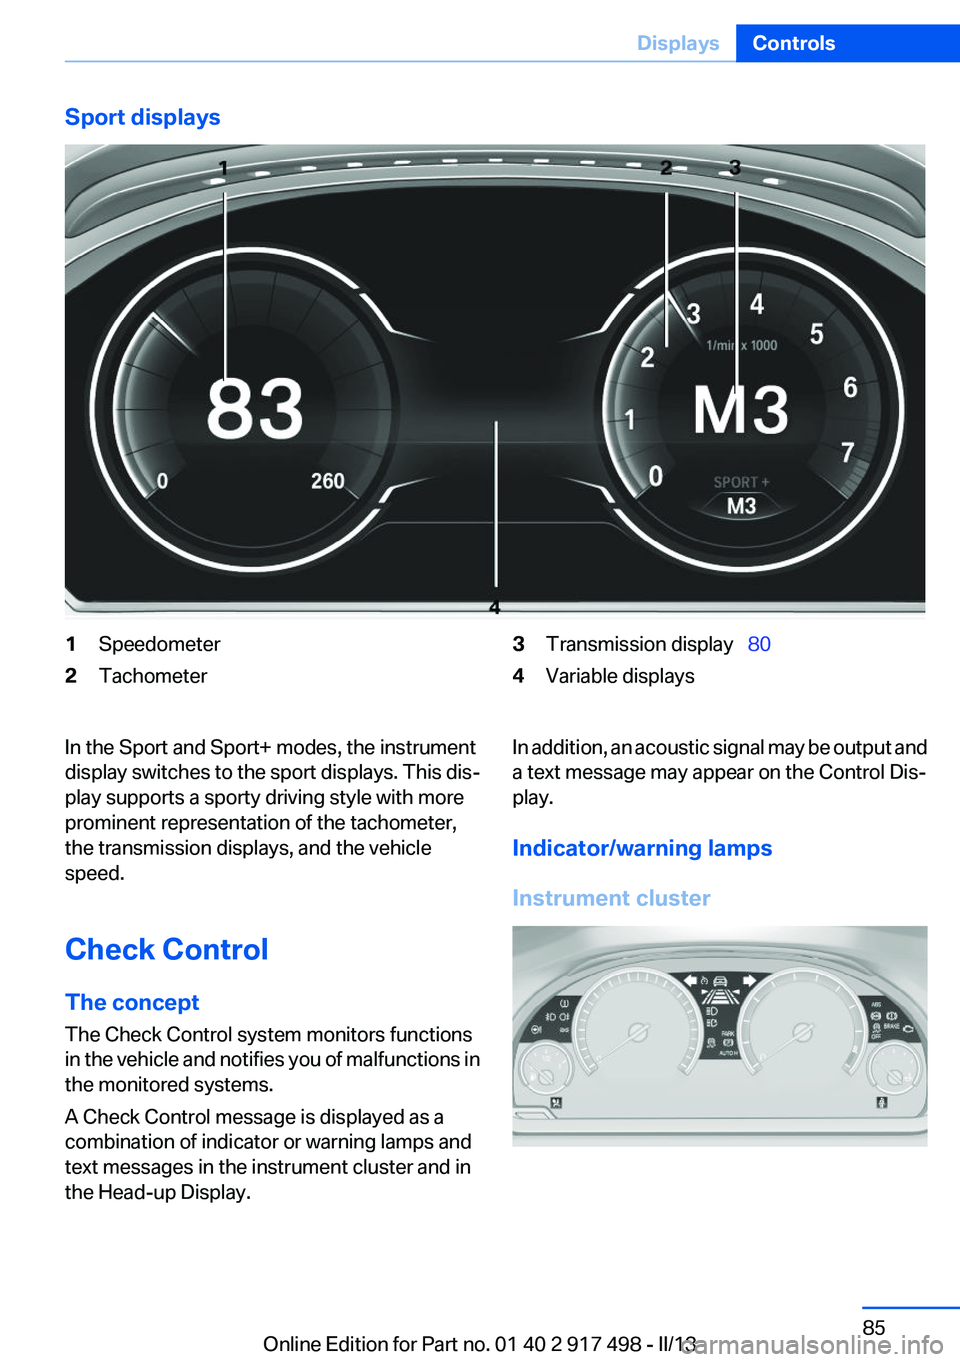
Sport displays1Speedometer2Tachometer3Transmission display 804Variable displaysIn the Sport and Sport+ modes, the instrument
display switches to the sport displays. This dis‐
play supports a sporty driving style with more
prominent representation of the tachometer,
the transmission displays, and the vehicle
speed.
Check Control
The concept
The Check Control system monitors functions
in the vehicle and notifies you of malfunctions in
the monitored systems.
A Check Control message is displayed as a
combination of indicator or warning lamps and
text messages in the instrument cluster and in
the Head-up Display.In addition, an acoustic signal may be output and
a text message may appear on the Control Dis‐
play.
Indicator/warning lamps
Instrument clusterSeite 85DisplaysControls85
Online Edition for Part no. 01 40 2 917 498 - II/13
Page 124 of 240
The indicator lamp lights up: DTC Dy‐
namic Traction Control is activated.
xDrive
xDrive is the all-wheel-drive system of your ve‐
hicle. Concerted action by the xDrive and DSC
further optimize traction and driving dynamics.
The xDrive all-wheel-drive system variably dis‐
tributes the drive forces to the front and rear
axles as demanded by the driving situation and
road surface.
HDC Hill Descent Control
The concept
HDC is a downhill driving assistant that auto‐
matically controls vehicle speed on steep down‐
hill gradients. Without applying the brakes, the
vehicle moves at slightly more than walking
speed.
Hill Descent Control can be activated at speeds
below approx. 22 mph/35 km/h. When driving
downhill, the vehicle reduces its speed to ap‐
prox. walking speed and then keeps its speed
constant.
As long as there is active braking, the system is
on standby. The system does not brake the ve‐
hicle during this time.
Use HDC in low gears or in transmission position
D or R only.
Increasing or decreasing vehicle speed
Specify desired speed in the range from approx.
4 mph/6 km/h to approx. 15 mph/25 km/h using
the rocker switch of the cruise control on the
steering wheel. Vehicle speed can be changed
by lightly accelerating.▷Press up the rocker switch to the point of
resistance: the speed increases gradually.▷Press up the rocker switch past the point of
resistance: the speed increases while the
rocker switch is pressed.▷Press down the rocker switch to the point of
resistance: the speed decreases gradually.▷Press down the rocker switch past the point
of resistance: when driving forward, the
speed decreases to approx. 6 mph/10 km/h;
when reversing, the speed decreases to ap‐
prox. 4 mph/6 km/h.
Activating HDC
Press the button; the LED above the but‐
ton lights up.
Deactivating HDC Press the button again and the LED goes
out. HDC is automatically deactivated
above approx. 37 mph/60 km/h.
Seite 124ControlsDriving stability control systems124
Online Edition for Part no. 01 40 2 917 498 - II/13
Page 131 of 240
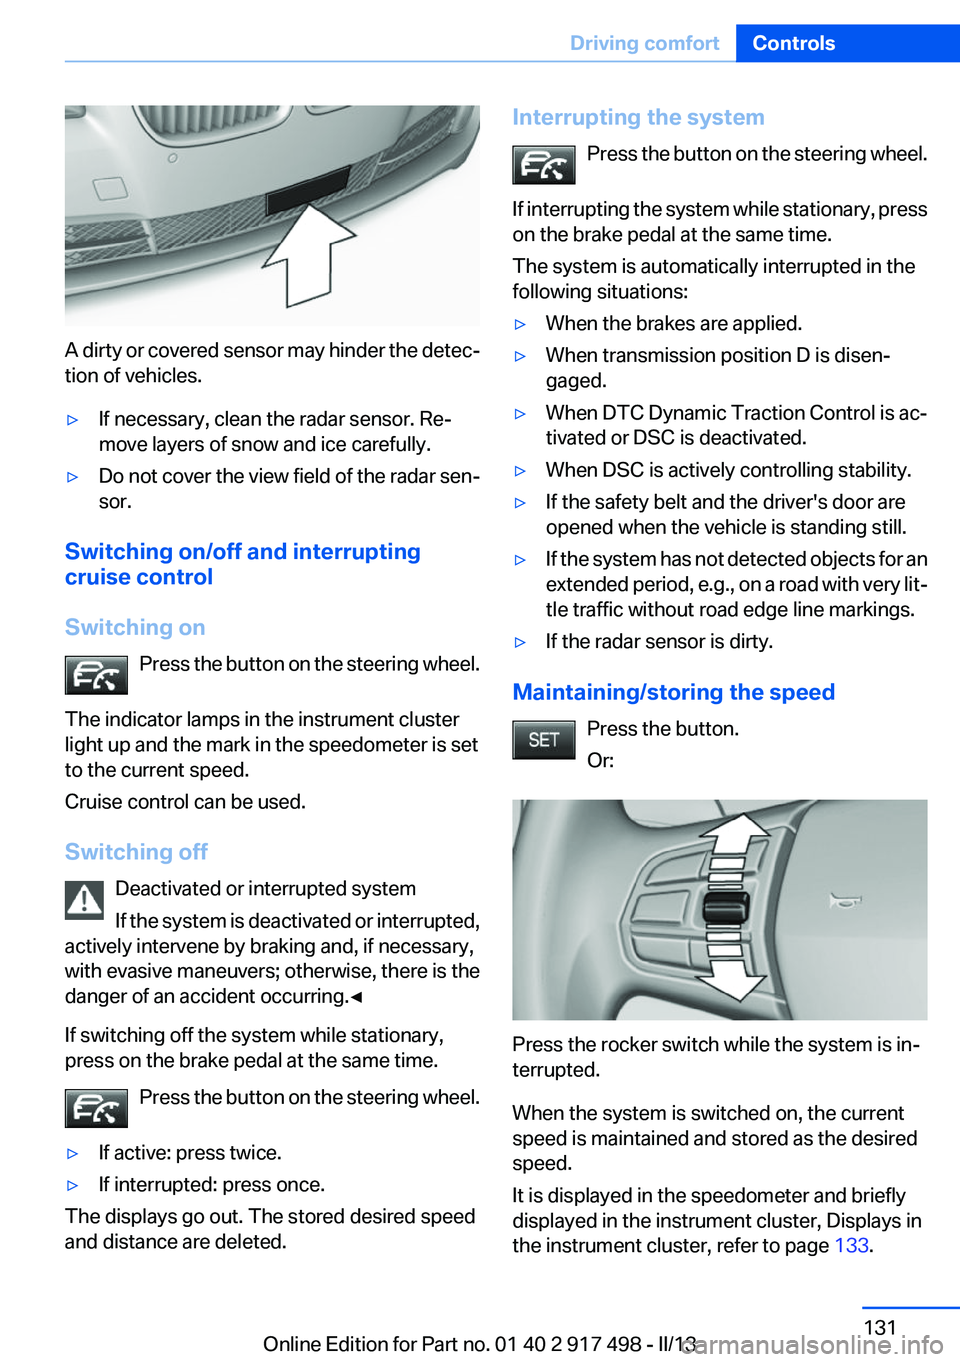
A dirty or covered sensor may hinder the detec‐
tion of vehicles.
▷If necessary, clean the radar sensor. Re‐
move layers of snow and ice carefully.▷Do not cover the view field of the radar sen‐
sor.
Switching on/off and interrupting
cruise control
Switching on Press the button on the steering wheel.
The indicator lamps in the instrument cluster
light up and the mark in the speedometer is set
to the current speed.
Cruise control can be used.
Switching off Deactivated or interrupted system
If the system is deactivated or interrupted,
actively intervene by braking and, if necessary,
with evasive maneuvers; otherwise, there is the
danger of an accident occurring.◀
If switching off the system while stationary,
press on the brake pedal at the same time.
Press the button on the steering wheel.
▷If active: press twice.▷If interrupted: press once.
The displays go out. The stored desired speed
and distance are deleted.
Interrupting the system
Press the button on the steering wheel.
If interrupting the system while stationary, press
on the brake pedal at the same time.
The system is automatically interrupted in the
following situations:▷When the brakes are applied.▷When transmission position D is disen‐
gaged.▷When DTC Dynamic Traction Control is ac‐
tivated or DSC is deactivated.▷When DSC is actively controlling stability.▷If the safety belt and the driver's door are
opened when the vehicle is standing still.▷If the system has not detected objects for an
extended period, e.g., on a road with very lit‐
tle traffic without road edge line markings.▷If the radar sensor is dirty.
Maintaining/storing the speed
Press the button.
Or:
Press the rocker switch while the system is in‐
terrupted.
When the system is switched on, the current
speed is maintained and stored as the desired
speed.
It is displayed in the speedometer and briefly
displayed in the instrument cluster, Displays in
the instrument cluster, refer to page 133.
Seite 131Driving comfortControls131
Online Edition for Part no. 01 40 2 917 498 - II/13
Page 137 of 240
Press the button on the steering wheel.▷If active: press twice.▷If interrupted: press once.
The displays go out. The stored desired speed
is deleted.
Interrupting the system When active, press the button.
The system is automatically interrupted if:
▷The brakes are applied.▷The transmission position D is disengaged.▷DTC Dynamic Traction Control is activated
or DSC is deactivated.▷DSC is actively controlling stability.▷HDC is activated.
Maintaining/storing the current speed
Press the button.
Or:
Press the rocker switch while the system is in‐
terrupted.
When the system is switched on, the current
speed is maintained and stored as the desired
speed.
It is displayed in the speedometer and briefly
displayed in the instrument cluster, Displays in
the speedometer, refer to page 138.
When cruise control is maintained or stored,
DSC Dynamic Stability Control is switched on, if
necessary.
Changing/maintaining speed
The rocker switch can be pressed while the sys‐
tem is interrupted in order to maintain and store
the current speed.
Adapting the desired speed
Adapt the desired speed to the road con‐
ditions and be ready to brake at all times; other‐
wise, there is the danger of an accident occur‐
ring.◀
Press the rocker switch up or down repeatedly
until the desired speed is set.
If active, the displayed speed is stored and the
vehicle reaches the stored speed if the road is
clear.
▷Each time the rocker switch is pressed to the
point of resistance, the desired speed in‐
creases or decreases by approx.
1 mph/1 km/h.▷Each time the rocker switch is pressed past
the point of resistance, the desired speed
increases or decreases by a maximum of
5 mph/10 km/h.
Max. adjustable speed: 140 mph/230 km/h.▷Pressing the rocker switch to the resistance
point and holding it there accelerates or de‐
celerates the vehicle without requiring pres‐
sure on the accelerator. After the rocker
switch is released, the vehicle maintains its
final speed. Pressing the switch beyond the
resistance point causes the vehicle to ac‐
celerate more rapidly.Seite 137Driving comfortControls137
Online Edition for Part no. 01 40 2 917 498 - II/13
Page 139 of 240
At a glance
Button in the vehicle
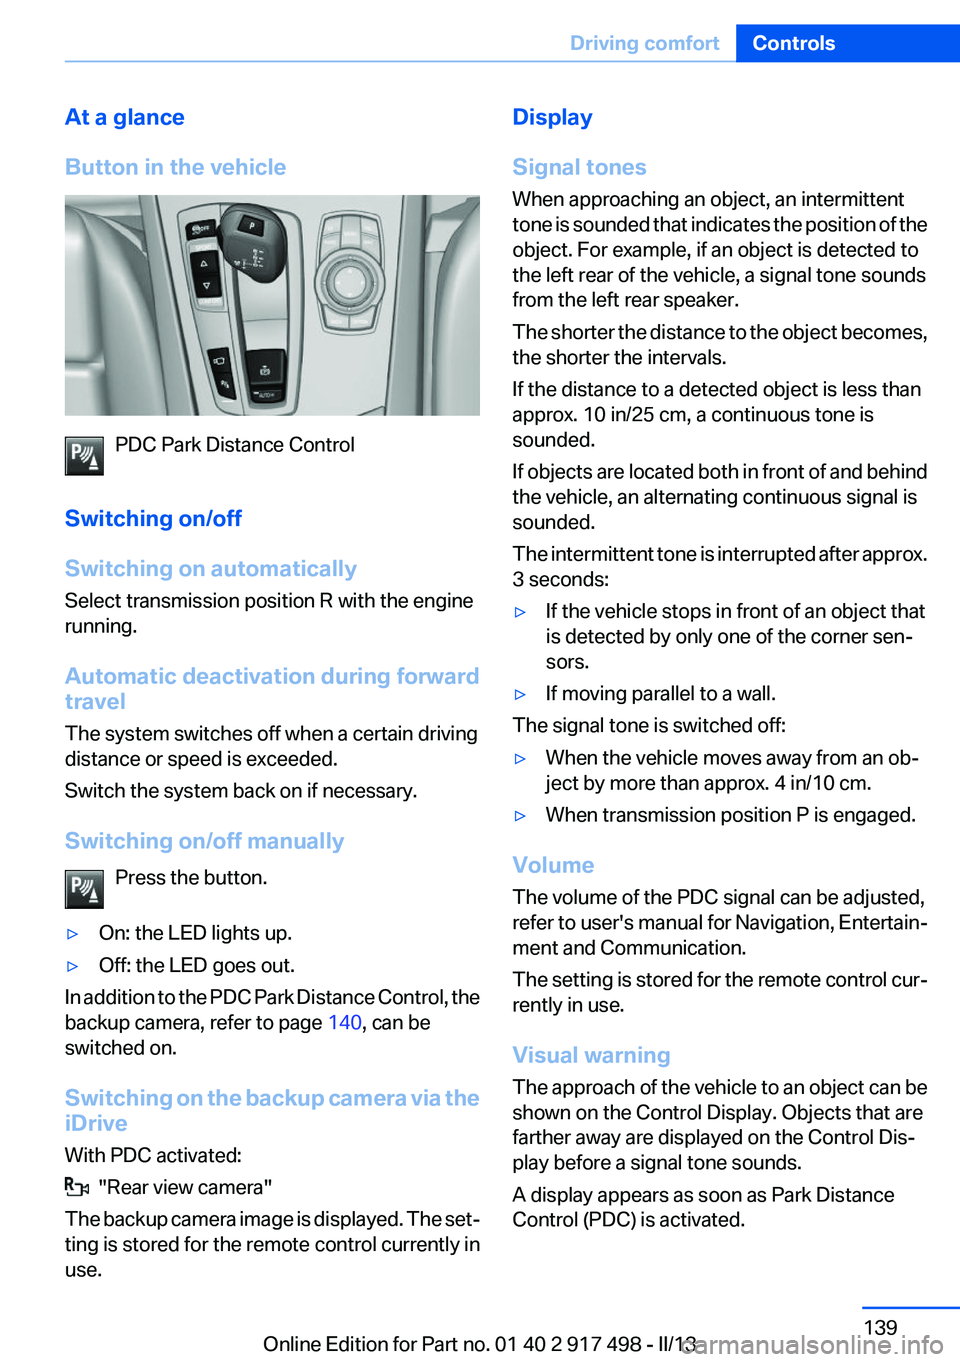
PDC Park Distance Control
Switching on/off
Switching on automatically
Select transmission position R with the engine
running.
Automatic deactivation during forward
travel
The system switches off when a certain driving
distance or speed is exceeded.
Switch the system back on if necessary.
Switching on/off manually Press the button.
▷On: the LED lights up.▷Off: the LED goes out.
In addition to the PDC Park Distance Control, the
backup camera, refer to page 140, can be
switched on.
Switching on the backup camera via the
iDrive
With PDC activated:
"Rear view camera"
The backup camera image is displayed. The set‐
ting is stored for the remote control currently in
use.
Display
Signal tones
When approaching an object, an intermittent
tone is sounded that indicates the position of the
object. For example, if an object is detected to
the left rear of the vehicle, a signal tone sounds
from the left rear speaker.
The shorter the distance to the object becomes,
the shorter the intervals.
If the distance to a detected object is less than
approx. 10 in/25 cm, a continuous tone is
sounded.
If objects are located both in front of and behind
the vehicle, an alternating continuous signal is
sounded.
The intermittent tone is interrupted after approx.
3 seconds:▷If the vehicle stops in front of an object that
is detected by only one of the corner sen‐
sors.▷If moving parallel to a wall.
The signal tone is switched off:
▷When the vehicle moves away from an ob‐
ject by more than approx. 4 in/10 cm.▷When transmission position P is engaged.
Volume
The volume of the PDC signal can be adjusted,
refer to user's manual for Navigation, Entertain‐
ment and Communication.
The setting is stored for the remote control cur‐
rently in use.
Visual warning
The approach of the vehicle to an object can be
shown on the Control Display. Objects that are
farther away are displayed on the Control Dis‐
play before a signal tone sounds.
A display appears as soon as Park Distance
Control (PDC) is activated.
Seite 139Driving comfortControls139
Online Edition for Part no. 01 40 2 917 498 - II/13
Page 141 of 240
At a glance
Button in the vehicle
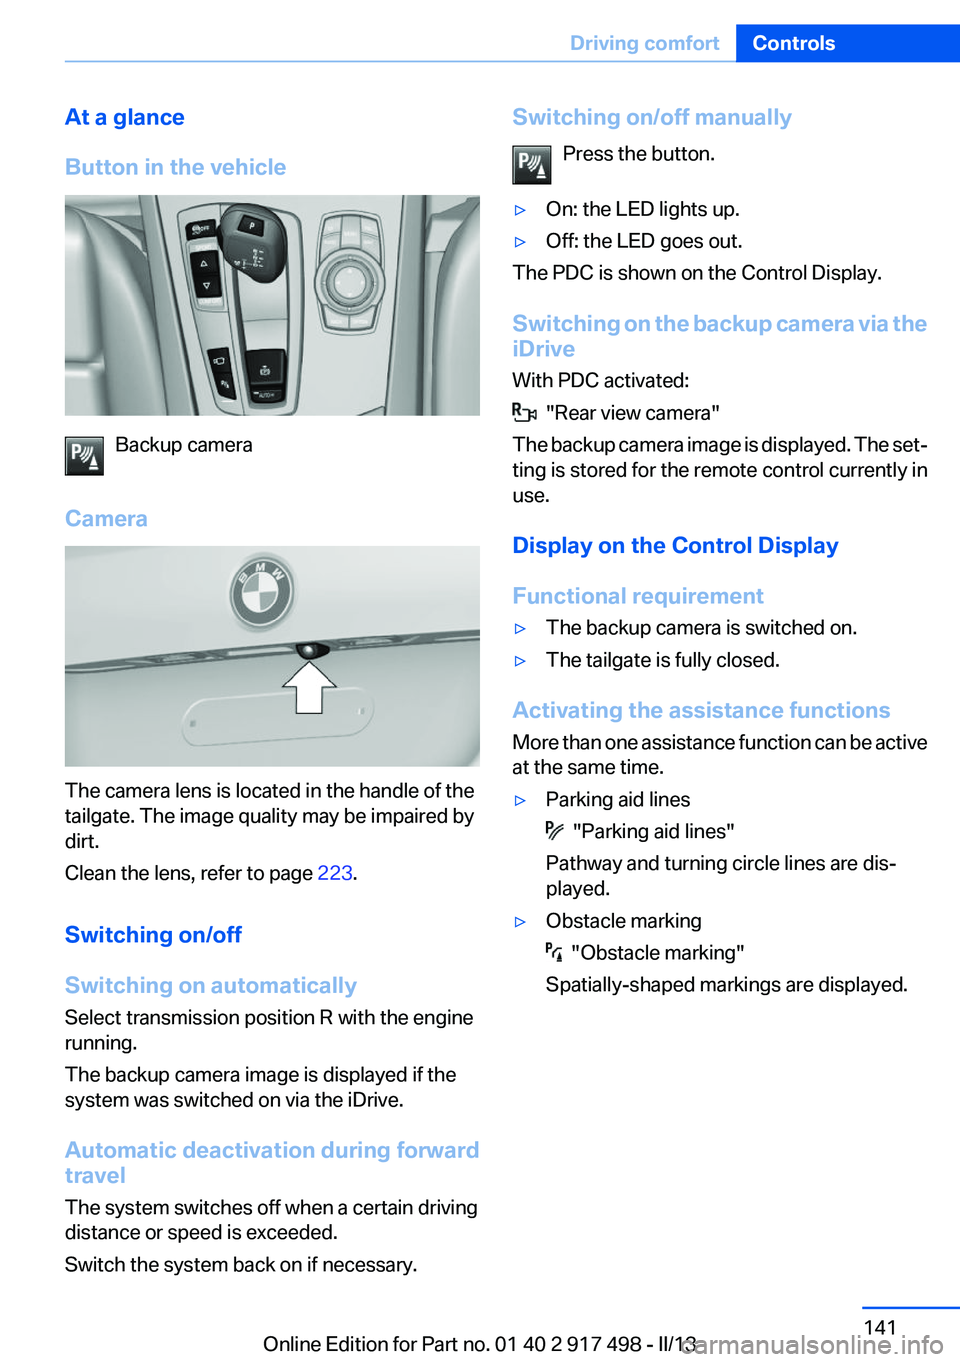
Backup camera
Camera
The camera lens is located in the handle of the
tailgate. The image quality may be impaired by
dirt.
Clean the lens, refer to page 223.
Switching on/off
Switching on automatically
Select transmission position R with the engine
running.
The backup camera image is displayed if the
system was switched on via the iDrive.
Automatic deactivation during forward
travel
The system switches off when a certain driving
distance or speed is exceeded.
Switch the system back on if necessary.
Switching on/off manually
Press the button.▷On: the LED lights up.▷Off: the LED goes out.
The PDC is shown on the Control Display.
Switching on the backup camera via the
iDrive
With PDC activated:
"Rear view camera"
The backup camera image is displayed. The set‐
ting is stored for the remote control currently in
use.
Display on the Control Display
Functional requirement
▷The backup camera is switched on.▷The tailgate is fully closed.
Activating the assistance functions
More than one assistance function can be active
at the same time.
▷Parking aid lines
"Parking aid lines"
Pathway and turning circle lines are dis‐
played.
▷Obstacle marking
"Obstacle marking"
Spatially-shaped markings are displayed.
Seite 141Driving comfortControls141
Online Edition for Part no. 01 40 2 917 498 - II/13