2013 BMW 535I SEDAN power steering
[x] Cancel search: power steeringPage 16 of 273
CockpitVehicle equipment
All standard, country-specific and optional
equipment that is offered in the model series is
described in this chapter. Therefore, equip‐ment is also described that is not available in a
vehicle, e. g., because of the selected optional
equipment or country variant. This also applies
for safety-related functions and systems.
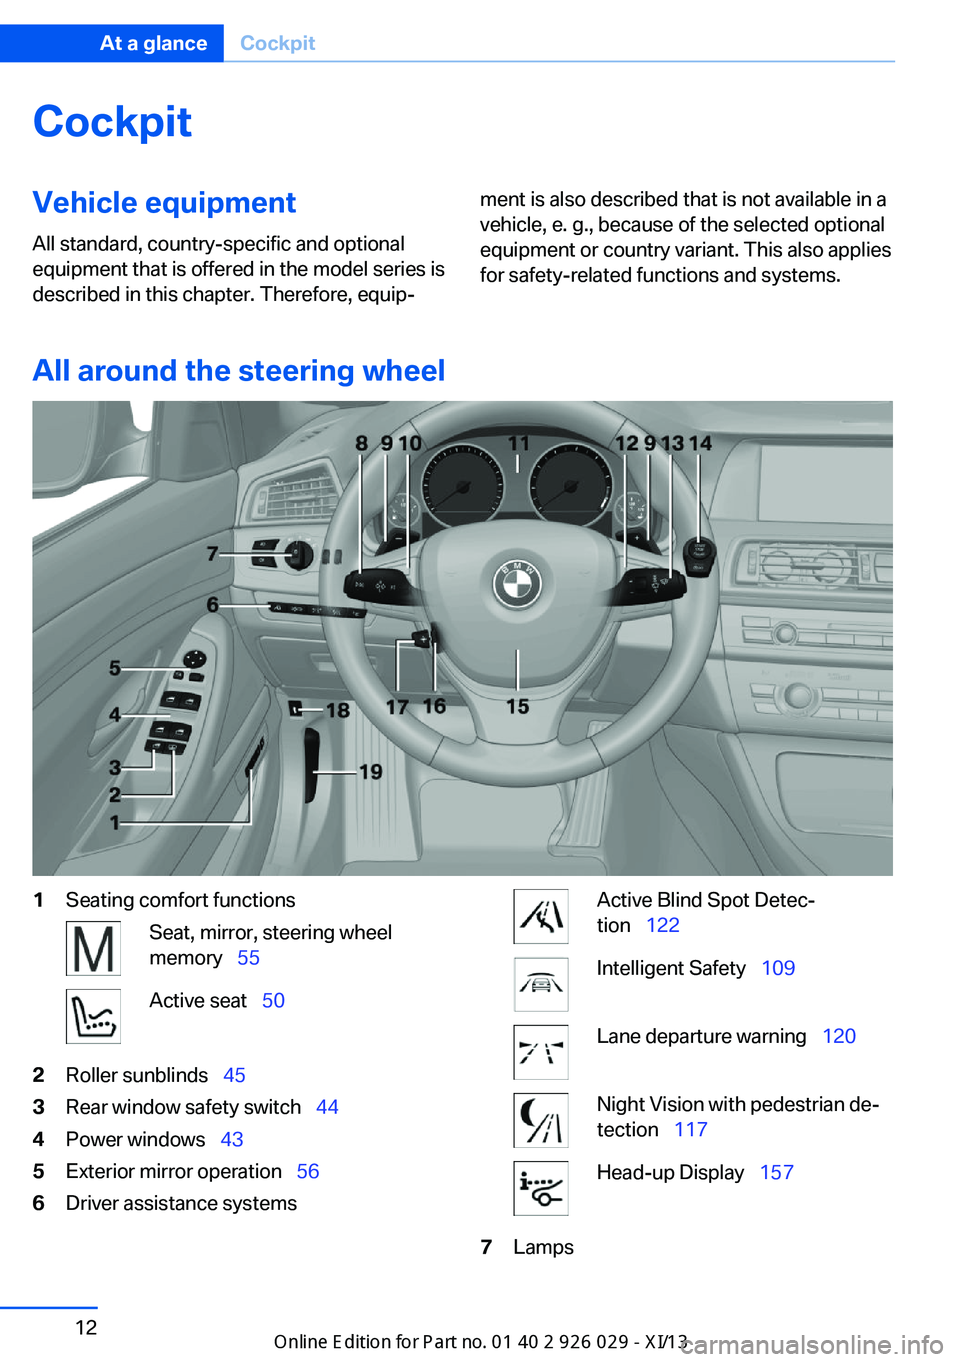
All around the steering wheel
1Seating comfort functionsSeat, mirror, steering wheel
memory 55Active seat 502Roller sunblinds 453Rear window safety switch 444Power windows 435Exterior mirror operation 566Driver assistance systemsActive Blind Spot Detec‐
tion 122Intelligent Safety 109Lane departure warning 120Night Vision with pedestrian de‐
tection 117Head-up Display 1577LampsSeite 12At a glanceCockpit12
Online Edition for Part no. 01 40 2 911 177 - VI/13
Page 45 of 273
Keep the closing path clear
Make sure that the closing path of the
trunk lid is clear; otherwise, injuries may re‐
sult.◀
Do not place the remote control in the
cargo area
Take the remote control with you and do not
leave it in the cargo area; otherwise, the re‐
mote control is locked inside the vehicle when
the trunk lid is closed.◀
Malfunction
Comfort Access may not function properly if it
experiences interference from external sour‐
ces such as mobile phones, metal objects,
overhead power lines, transmission towers,
etc.
In this case, open or close the vehicle using the
buttons on the remote control or use the
integrated key in the door lock.
If there is a malfunction, open the trunk lid with
the remote control button or with the button on
the trunk lid.
Adjusting
Unlocking The setting is stored for the remote control
currently in use.1."Settings"2."Doors/key"3. Select symbol or "Unlock button:"4.Select the desired function:▷"Driver's door only"
Only the driver's door and the fuel filler
flap are unlocked. Pressing again un‐
locks the entire vehicle.▷"All doors"
The entire vehicle is unlocked.Depending on how the vehicle is equipped or
the country-specific variant, you can set
whether the doors are also unlocked with the
button on the remote control.
Confirmation signals from the vehicle
1."Settings"2."Doors/key"3.Deactivate or activate the desired confir‐
mation signals.▷"Acoustic sig. lock/unlock"▷"Flash when lock/unlock"
Automatic locking
The setting is stored for the remote control
currently in use.
1."Settings"2."Doors/key"3.Select the desired function:▷"Lock if no door opened"
The vehicle locks automatically after a
short period of time if a door is not
opened.▷"Lock after start driving"
The vehicle locks automatically after
you drive away.
Retrieving the seat, mirror, and
steering wheel settings
The driver's seat, exterior mirror, and steering
wheel positions selected last are stored for the
currently used remote control.
When the vehicle is unlocked, these positions
are automatically retrieved if this function was
activated.
Pinch hazard when moving back the seat
If this function is used, first make sure
that the footwell behind the driver's seat is
empty. Otherwise, people can be injured or ob‐
jects damaged when the seat is moved back.◀
The adjustment procedure is interrupted:
Seite 41Opening and closingControls41
Online Edition for Part no. 01 40 2 911 177 - VI/13
Page 60 of 273
Calling up settingsDo not retrieve the memory while driving
Do not retrieve the memory setting while
driving, as an unexpected movement of the
seat or steering wheel could result in an acci‐
dent.◀
Comfort function1.Open the driver's door.2.Switch off the ignition.3.Briefly press the desired button 1 or 2.
The corresponding seat position is performed
automatically.
The procedure stops when a switch for adjust‐
ing the seat or one of the buttons is pressed.
Safety mode
1.Close the driver's door or switch on the ig‐
nition.2.Press and hold the desired button 1 or 2
until the adjustment procedure is com‐
pleted.
Calling up of a seat position
deactivated
After a brief period, the calling up of stored
seat positions is deactivated to save battery
power.
To reactivate calling up of a seat position:
▷Open or close the door or trunk lid.▷Press a button on the remote control.▷Press the Start/Stop button.Mirrors
Exterior mirrors
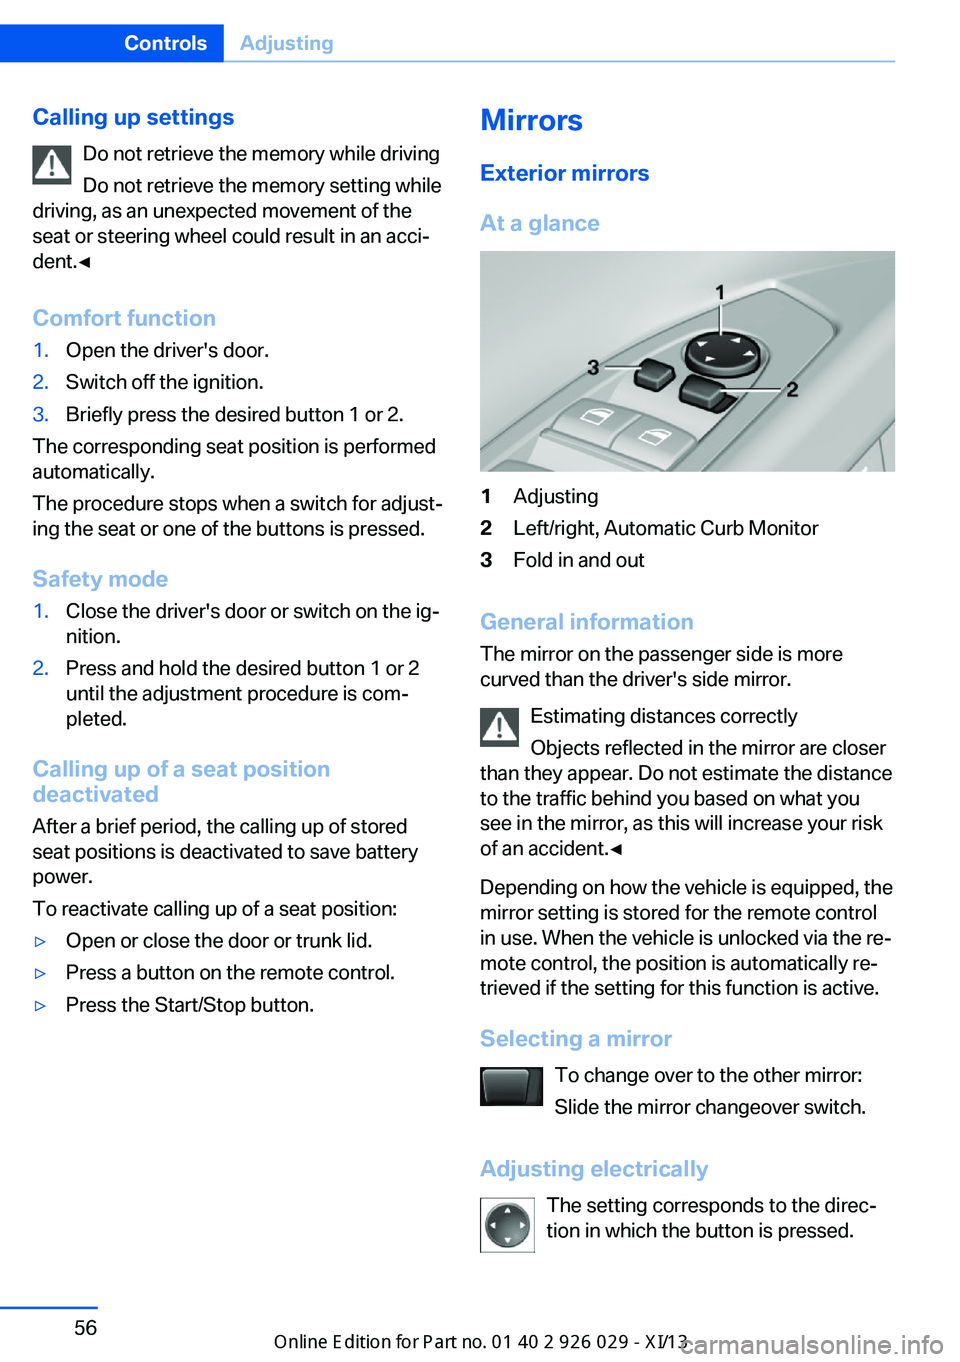
At a glance1Adjusting2Left/right, Automatic Curb Monitor3Fold in and out
General information
The mirror on the passenger side is more
curved than the driver's side mirror.
Estimating distances correctly
Objects reflected in the mirror are closer
than they appear. Do not estimate the distance
to the traffic behind you based on what you
see in the mirror, as this will increase your risk
of an accident.◀
Depending on how the vehicle is equipped, the
mirror setting is stored for the remote control
in use. When the vehicle is unlocked via the re‐
mote control, the position is automatically re‐
trieved if the setting for this function is active.
Selecting a mirror To change over to the other mirror:Slide the mirror changeover switch.
Adjusting electrically The setting corresponds to the direc‐
tion in which the button is pressed.
Seite 56ControlsAdjusting56
Online Edition for Part no. 01 40 2 911 177 - VI/13
Page 62 of 273
▷On the back of the mirror.
Functional requirementFor proper operation:
▷Keep the photocells clean.▷Do not cover the area between the inside
rearview mirror and the windshield.
Steering wheel
General information Do not adjust while driving
Do not adjust the steering wheel while
driving; otherwise, an unexpected movement
could result in an accident.◀
Manual steering wheel adjustment
1.Fold the lever down.2.Move the steering wheel to the preferred
height and angle to suit your seating posi‐
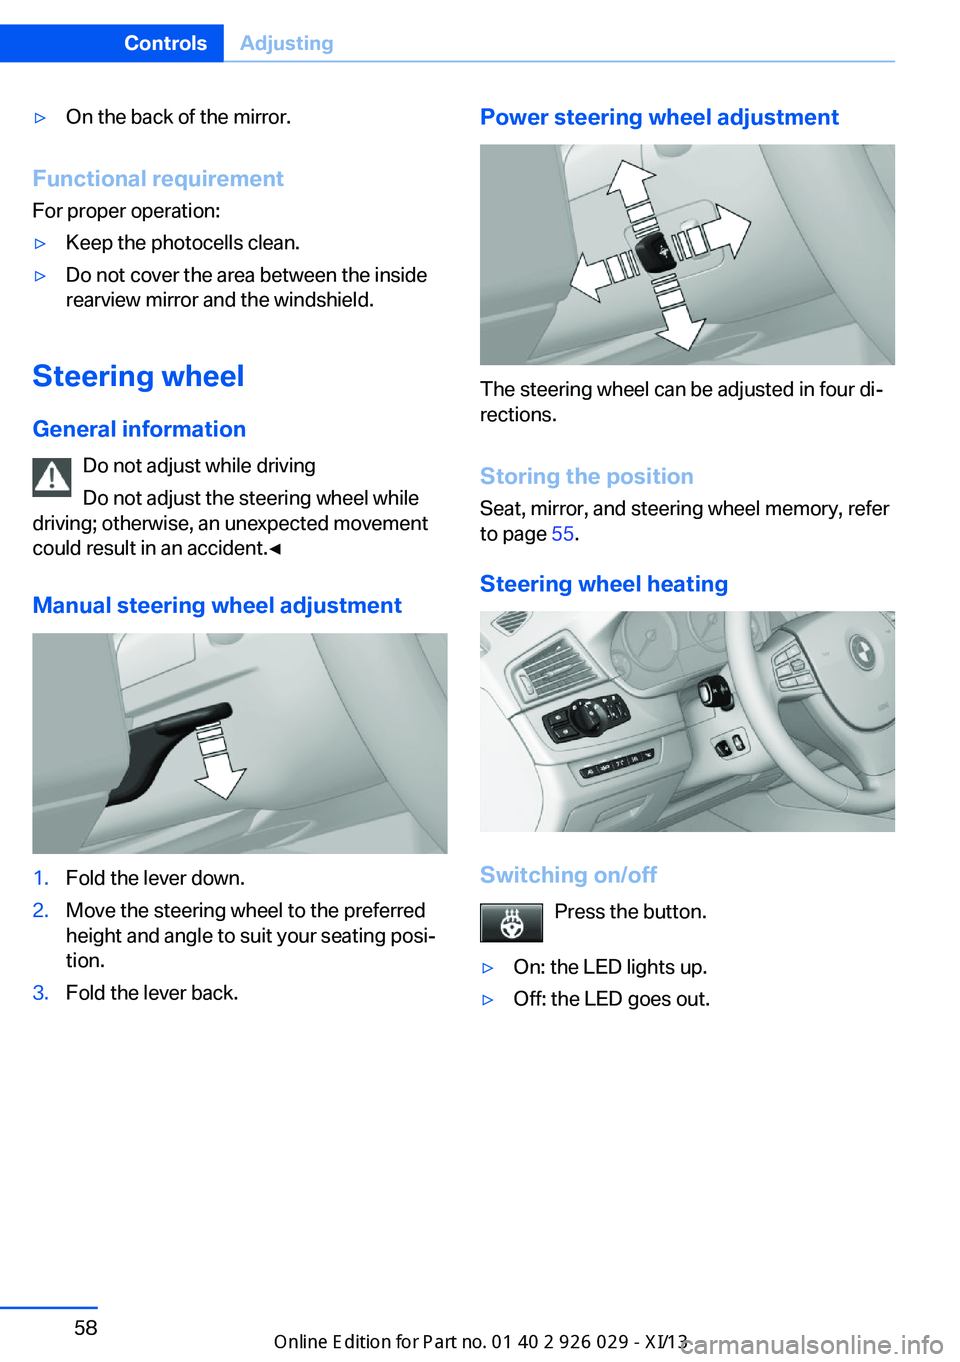
tion.3.Fold the lever back.Power steering wheel adjustment
The steering wheel can be adjusted in four di‐
rections.
Storing the position Seat, mirror, and steering wheel memory, refer
to page 55.
Steering wheel heating
Switching on/off Press the button.
▷On: the LED lights up.▷Off: the LED goes out.Seite 58ControlsAdjusting58
Online Edition for Part no. 01 40 2 911 177 - VI/13
Page 137 of 273
Driving comfortVehicle equipment
All standard, country-specific and optional
equipment that is offered in the model series is
described in this chapter. Therefore, equip‐
ment is also described that is not available in a
vehicle, e. g., because of the selected optional
equipment or country variant. This also applies
for safety-related functions and systems.
Active Cruise Control with Stop & Go function, ACC
The conceptThis system can be used to select a desired
speed that the vehicle will maintain automati‐
cally on clear roads.
To the extent possible, the system automati‐
cally adjusts the speed to a slower vehicle
ahead of you.
The distance that the vehicle maintains to the
vehicle ahead of you can be varied.
For safety reasons, it depends on the speed.
To maintain a certain distance, the system au‐
tomatically decelerates, applies the brakes
lightly, or accelerates again if the vehicle ahead
begins moving faster.
If the vehicle ahead of you brakes to a halt, the
system is able to detect this within the given
system limits. If the vehicle ahead of your
drives away again from a halt, your vehicle is
able to accelerate if operated accordingly.
Even if some time passes before the vehicle
drives away again, the BMW can still be accel‐
erated automatically and simply.
As soon as the road is clear, it accelerates to
the desired speed.
The speed is also maintained on downhill gra‐
dients, but may not be maintained on uphill
slopes if engine power is insufficient.General information
When ECO PRO is activated, cruise control is
also set to a driving style that saves on fuel
consumption.
Notes Personal responsibility
The system does not relieve the driver of
the responsibility to adapt his or her speed,
distance and driving style to the traffic condi‐
tions. Drive attentively, and react to the current
traffic events. Intervene actively when neces‐
sary, e.g., by braking, steering or making an
evasive maneuver, otherwise, there is danger
of an accident.◀
At a glance
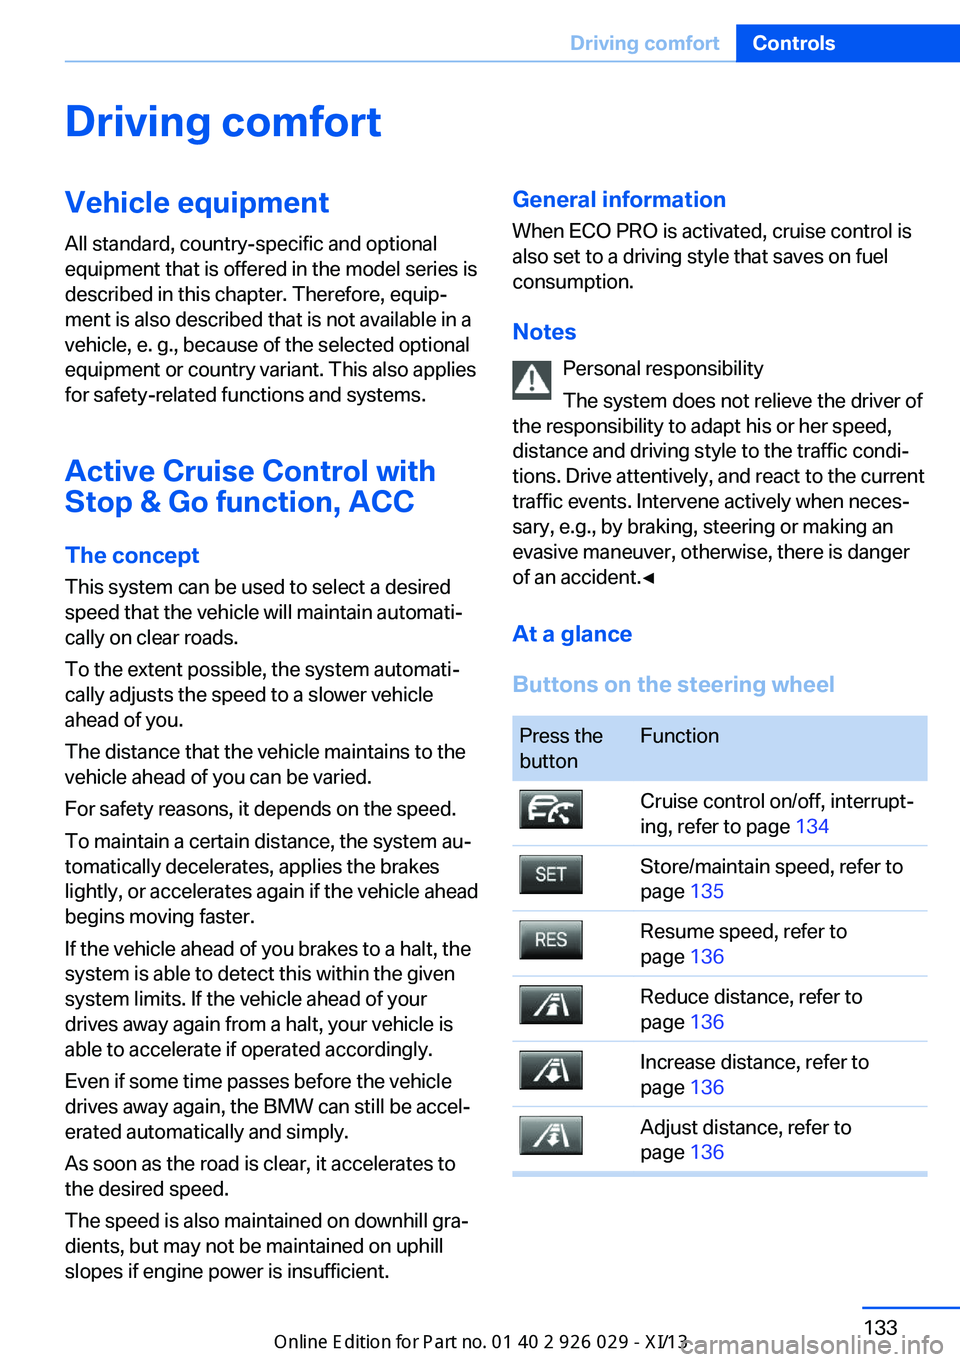
Buttons on the steering wheelPress the
buttonFunctionCruise control on/off, interrupt‐
ing, refer to page 134Store/maintain speed, refer to
page 135Resume speed, refer to
page 136Reduce distance, refer to
page 136Increase distance, refer to
page 136Adjust distance, refer to
page 136Seite 133Driving comfortControls133
Online Edition for Part no. 01 40 2 911 177 - VI/13
Page 242 of 273
Changing wheels
Hints
The vehicle equipment does not include a
spare tire.
When using run-flat tires or tire sealants, a tire
does not need to be changed immediately in
the event of pressure loss due to a flat tire.
The tools for changing wheels are available as
accessories from your service center.
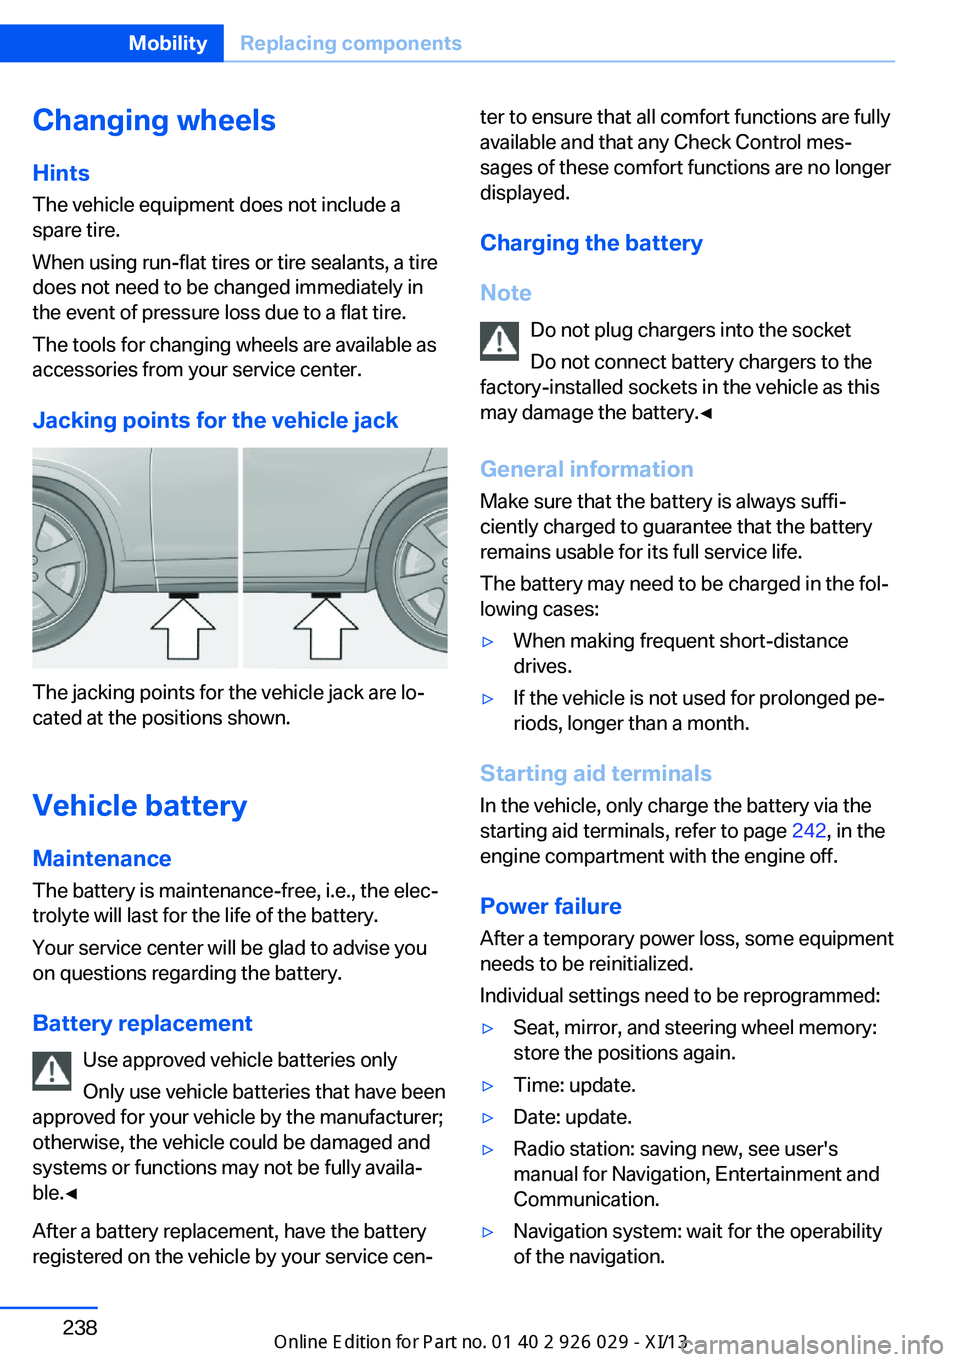
Jacking points for the vehicle jack
The jacking points for the vehicle jack are lo‐
cated at the positions shown.
Vehicle battery Maintenance
The battery is maintenance-free, i.e., the elec‐
trolyte will last for the life of the battery.
Your service center will be glad to advise you
on questions regarding the battery.
Battery replacement Use approved vehicle batteries only
Only use vehicle batteries that have been
approved for your vehicle by the manufacturer;
otherwise, the vehicle could be damaged and
systems or functions may not be fully availa‐
ble.◀
After a battery replacement, have the battery
registered on the vehicle by your service cen‐
ter to ensure that all comfort functions are fully
available and that any Check Control mes‐
sages of these comfort functions are no longer
displayed.
Charging the battery
Note Do not plug chargers into the socketDo not connect battery chargers to the
factory-installed sockets in the vehicle as this
may damage the battery.◀
General information Make sure that the battery is always suffi‐
ciently charged to guarantee that the battery
remains usable for its full service life.
The battery may need to be charged in the fol‐
lowing cases:▷When making frequent short-distance
drives.▷If the vehicle is not used for prolonged pe‐
riods, longer than a month.
Starting aid terminals
In the vehicle, only charge the battery via the
starting aid terminals, refer to page 242, in the
engine compartment with the engine off.
Power failure After a temporary power loss, some equipment
needs to be reinitialized.
Individual settings need to be reprogrammed:
▷Seat, mirror, and steering wheel memory:
store the positions again.▷Time: update.▷Date: update.▷Radio station: saving new, see user's
manual for Navigation, Entertainment and
Communication.▷Navigation system: wait for the operability
of the navigation.Seite 238MobilityReplacing components238
Online Edition for Part no. 01 40 2 911 177 - VI/13
Page 247 of 273
If the first starting attempt is not success‐
ful, wait a few minutes before making an‐
other attempt in order to allow the dis‐
charged battery to recharge.3.Let both engines run for several minutes.4.Disconnect the jumper cables in the re‐
verse order.
Check the battery and recharge if necessary.
Tow-starting and towing Automatic transmission: transporting
your vehicle
Note
Your vehicle is not permitted to be towed.
Therefore, contact a service center in the
event of a breakdown.
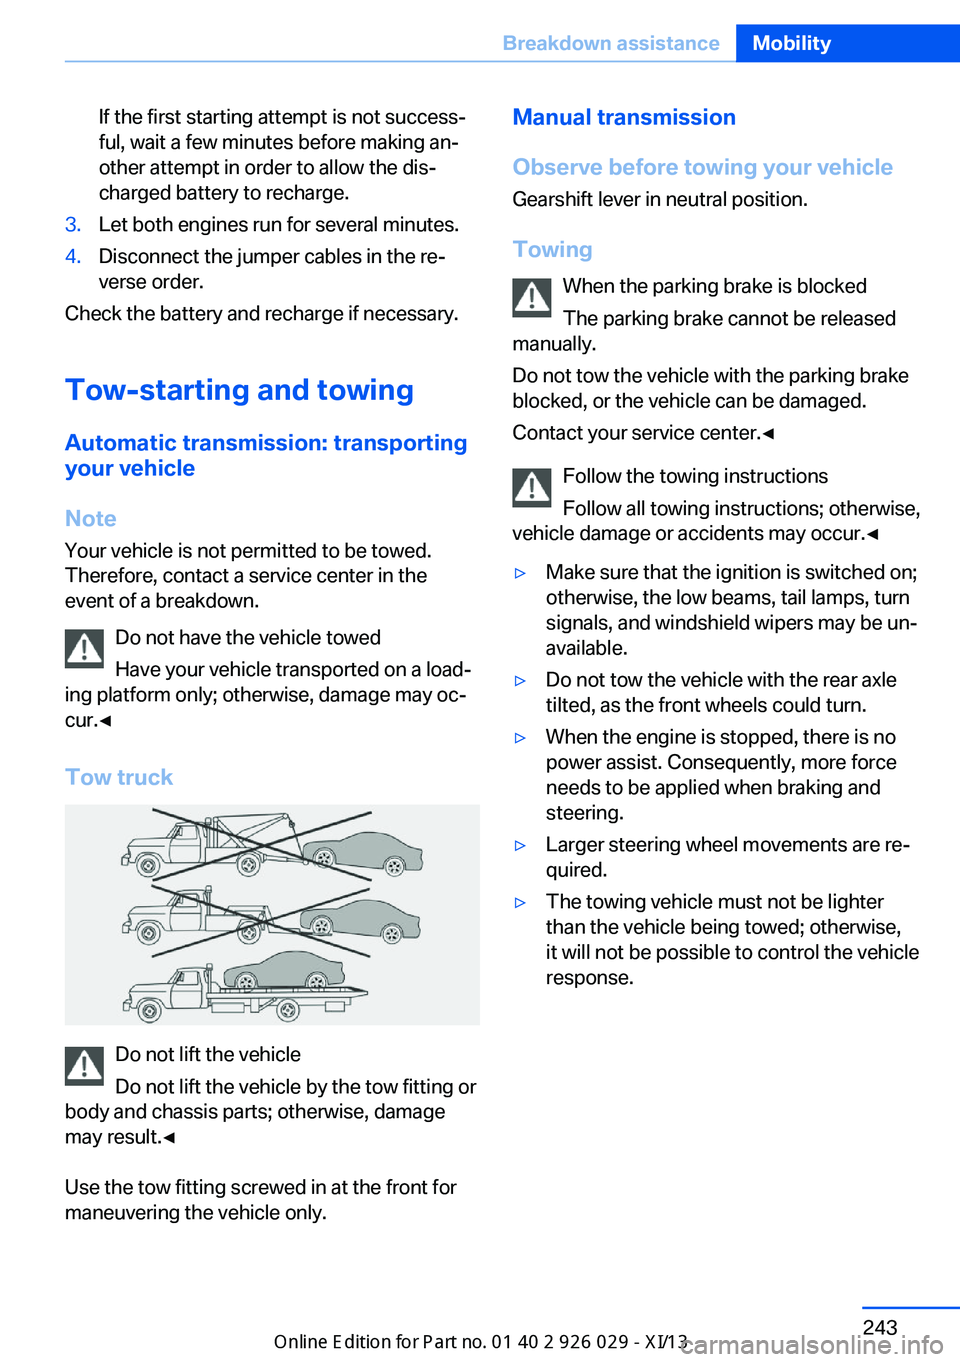
Do not have the vehicle towed
Have your vehicle transported on a load‐
ing platform only; otherwise, damage may oc‐
cur.◀
Tow truck
Do not lift the vehicle
Do not lift the vehicle by the tow fitting or
body and chassis parts; otherwise, damage
may result.◀
Use the tow fitting screwed in at the front for
maneuvering the vehicle only.
Manual transmission
Observe before towing your vehicle Gearshift lever in neutral position.
Towing When the parking brake is blocked
The parking brake cannot be released
manually.
Do not tow the vehicle with the parking brake
blocked, or the vehicle can be damaged.
Contact your service center.◀
Follow the towing instructions
Follow all towing instructions; otherwise,
vehicle damage or accidents may occur.◀▷Make sure that the ignition is switched on;
otherwise, the low beams, tail lamps, turn
signals, and windshield wipers may be un‐
available.▷Do not tow the vehicle with the rear axle
tilted, as the front wheels could turn.▷When the engine is stopped, there is no
power assist. Consequently, more force
needs to be applied when braking and
steering.▷Larger steering wheel movements are re‐
quired.▷The towing vehicle must not be lighter
than the vehicle being towed; otherwise,
it will not be possible to control the vehicle
response.Seite 243Breakdown assistanceMobility243
Online Edition for Part no. 01 40 2 911 177 - VI/13
Page 267 of 273
LED headlamps, Bulb re‐placement 236
LED light 236
LEDs, light-emitting di‐ odes 234
Length, vehicle 253
Letters and numbers, enter‐ ing 21
License plate lamp, bulb re‐ placement 236
Light alloy wheels, care 248
Light control 97
Light-emitting diodes, LEDs 234
Lighter, front 169, 170
Lighter, rear 170
Lighting 96
Lighting, speaker 100
Lighting via remote con‐ trol 34
Light switch 96
Load 188
Loading 188
Lock, door 35
Locking/unlocking from in‐ side 36
Locking/unlocking via door lock 35
Locking/unlocking with re‐ mote control 34
Locking, automatic 41
Locking, central 33
Locking, settings 41
Locking via trunk lid 37
Lock, power window 44
Locks, doors, and win‐ dows 62
Low beams 96
Low beams, automatic, refer to High-beam Assistant 98
Lower back support 50
Low-Sulfur Diesel 202
Luggage rack, refer to Roof- mounted luggage rack 189
Lumbar support 50 M
Maintenance 231
Maintenance require‐ ments 231
Maintenance, service require‐ ments 88
Maintenance system, BMW 231
Malfunction displays, refer to Check Control 84
Manual air distribution 161
Manual air flow 161
Manual brake, refer to Parking brake 67
Manual mode, transmis‐ sion 75
Manual operation, backup camera 148
Manual operation, door lock 36
Manual operation, exterior mirrors 57
Manual operation, fuel filler flap 200
Manual operation, Park Dis‐ tance Control PDC 145
Manual operation, Side View 152
Manual operation, Top View 150
Manual transmission 73
Marking on approved tires 221
Marking, run-flat tires 222
Massage seat, front 50
Master key, refer to Remote control 30
Maximum cooling 162
Maximum speed, display 90
Maximum speed, winter tires 221
Measure, units of 94
Medical kit 241
Memory for seat, mirrors, steering wheel 55 Menu, EfficientDynamics 194
Menu in instrument clus‐ ter 91
Menus, operating, iDrive 16
Menus, refer to iDrive operat‐ ing concept 17
Messages, refer to Check Control 84
Microfilter 163
Minimum tread, tires 219
Mirror 56
Mirror memory 55
Mobile communication devi‐ ces in the vehicle 185
Modifications, technical, refer to Safety 7
Moisture in headlamp 234
Monitor, refer to Control Dis‐ play 16
Mounting of child restraint fix‐ ing systems 59
Multifunctional instrument display 81
Multifunction steering wheel, buttons 12
N Navigation, see user's manual for Navigation, Entertain‐
ment and Communication
Neck restraints, front, refer to Head restraints 53
Neck restraints, rear, refer to Head restraints 54
Neutral cleaner, see wheel cleaner 248
New wheels and tires 220
Night Vision with pedestrian detection 117
No Passing Information 90
Nylon rope for tow-starting/ towing 244 Seite 263Everything from A to ZReference263
Online Edition for Part no. 01 40 2 911 177 - VI/13