2013 BMW 535I navigation
[x] Cancel search: navigationPage 144 of 246
Switching on with reverse gear
Shift into reverse.
The current status of the parking space search
is indicated on the Control Display.
Activate:
"Parking Assistant" Select the
symbol in the Control Display.
Switching off
The system can be deactivated as follows:
▷Press the button.▷Switch off the ignition.
Display on the Control Display
Activating/deactivating the system
SymbolMeaning Gray: the system is not available.
White: the system is available but not
activated. The system is activated.
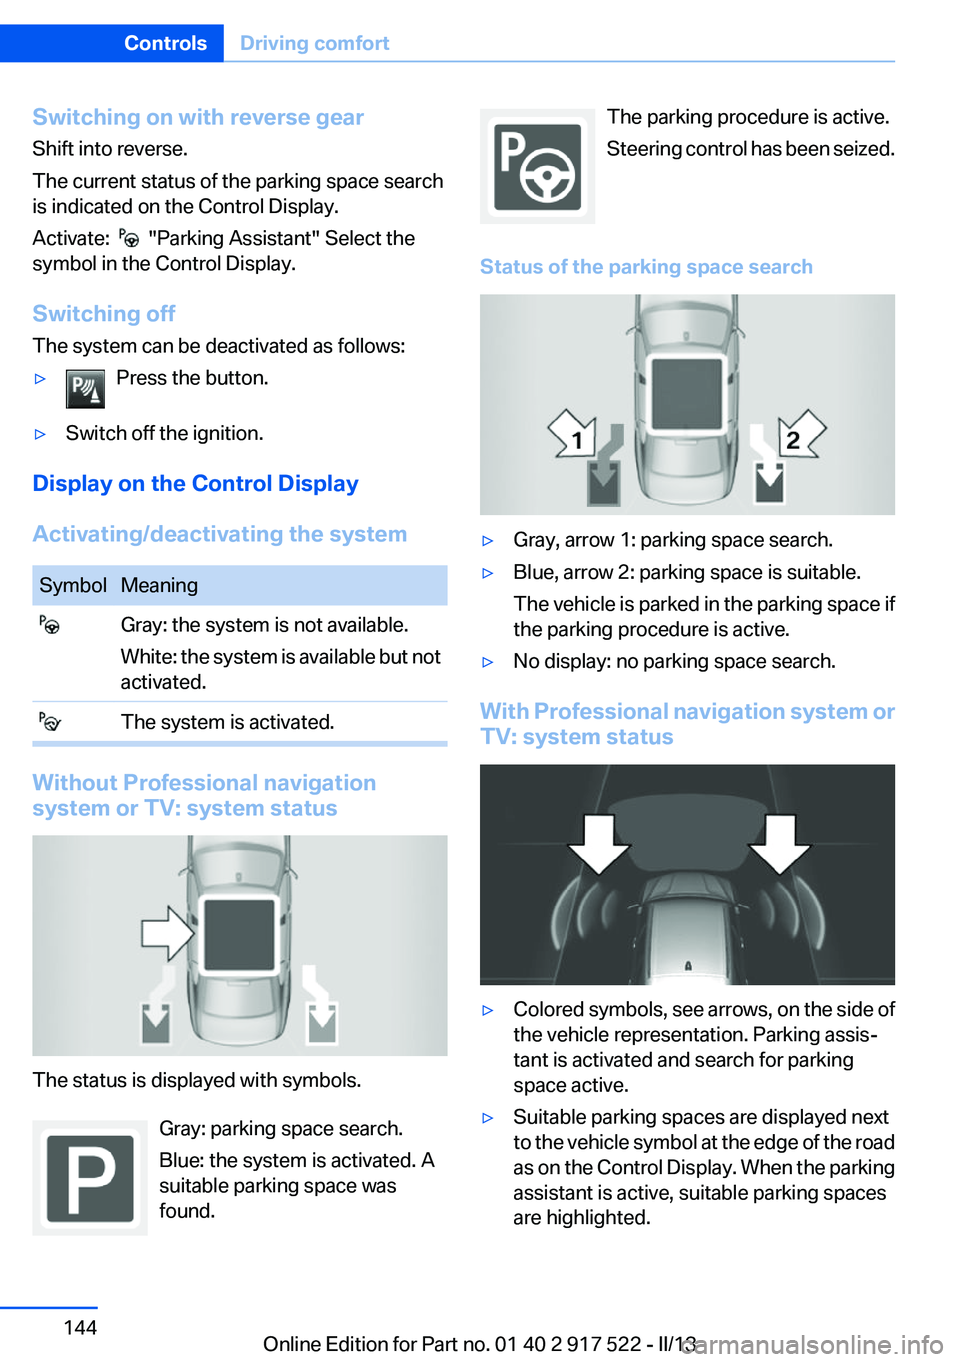
Without Professional navigation
system or TV: system status
The status is displayed with symbols.
Gray: parking space search.
Blue: the system is activated. A
suitable parking space was
found.
The parking procedure is active.
Steering control has been seized.
Status of the parking space search▷Gray, arrow 1: parking space search.▷Blue, arrow 2: parking space is suitable.
The vehicle is parked in the parking space if
the parking procedure is active.▷No display: no parking space search.
With Professional navigation system or
TV: system status
▷Colored symbols, see arrows, on the side of
the vehicle representation. Parking assis‐
tant is activated and search for parking
space active.▷Suitable parking spaces are displayed next
to the vehicle symbol at the edge of the road
as on the Control Display. When the parking
assistant is active, suitable parking spaces
are highlighted.Seite 144ControlsDriving comfort144
Online Edition for Part no. 01 40 2 917 522 - II/13
Page 146 of 246
Limits of ultrasonic measurement
The detection of objects can reach the physical
limits of ultrasonic measurement, e.g., in the fol‐
lowing circumstances:▷With tow bars and trailer hitches.▷With thin or wedge-shaped objects.▷With elevated, protruding objects such as
ledges or cargo.▷With objects with corners and sharp edges.▷With objects with a fine surface structure,
such as fences.
Low objects already displayed, e.g., curbs, can
move into the blind area of the sensors before or
after a continuous tone sounds.
High, protruding objects such as ledges may not
be detected.
The parking assistant may identify parking
spaces that are not suitable for parking.
Malfunction
A Check Control message is displayed.
The parking assistant failed. Have the system
checked.
Head-up Display
The concept
This system projects important information into
the driver's field of vision, e.g., the speed.
In this way, the driver can get information with‐
out averting his or her eyes from the road.
Display visibility
The visibility of the displays in the Head-up Dis‐
play is influenced by:▷Certain sitting positions.▷Objects on the cover of the Head-up Dis‐
play.▷Sunglasses with certain polarization filters.▷Wet roads.▷Unfavorable light conditions.
If the image is distorted, check the basic set‐
tings.
Switching on/off
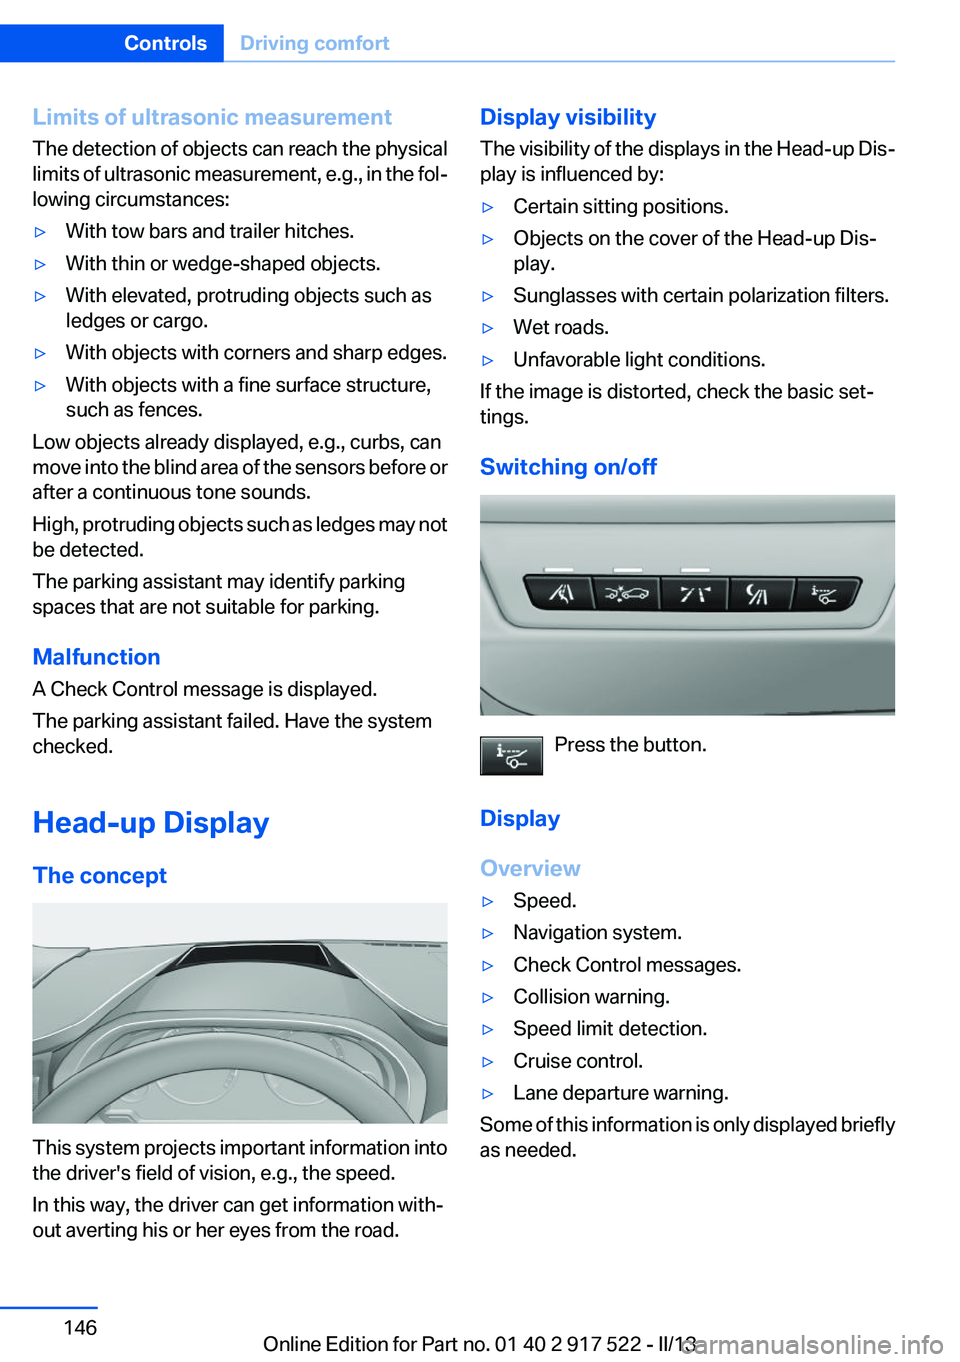
Press the button.
Display
Overview
▷Speed.▷Navigation system.▷Check Control messages.▷Collision warning.▷Speed limit detection.▷Cruise control.▷Lane departure warning.
Some of this information is only displayed briefly
as needed.
Seite 146ControlsDriving comfort146
Online Edition for Part no. 01 40 2 917 522 - II/13
Page 160 of 246
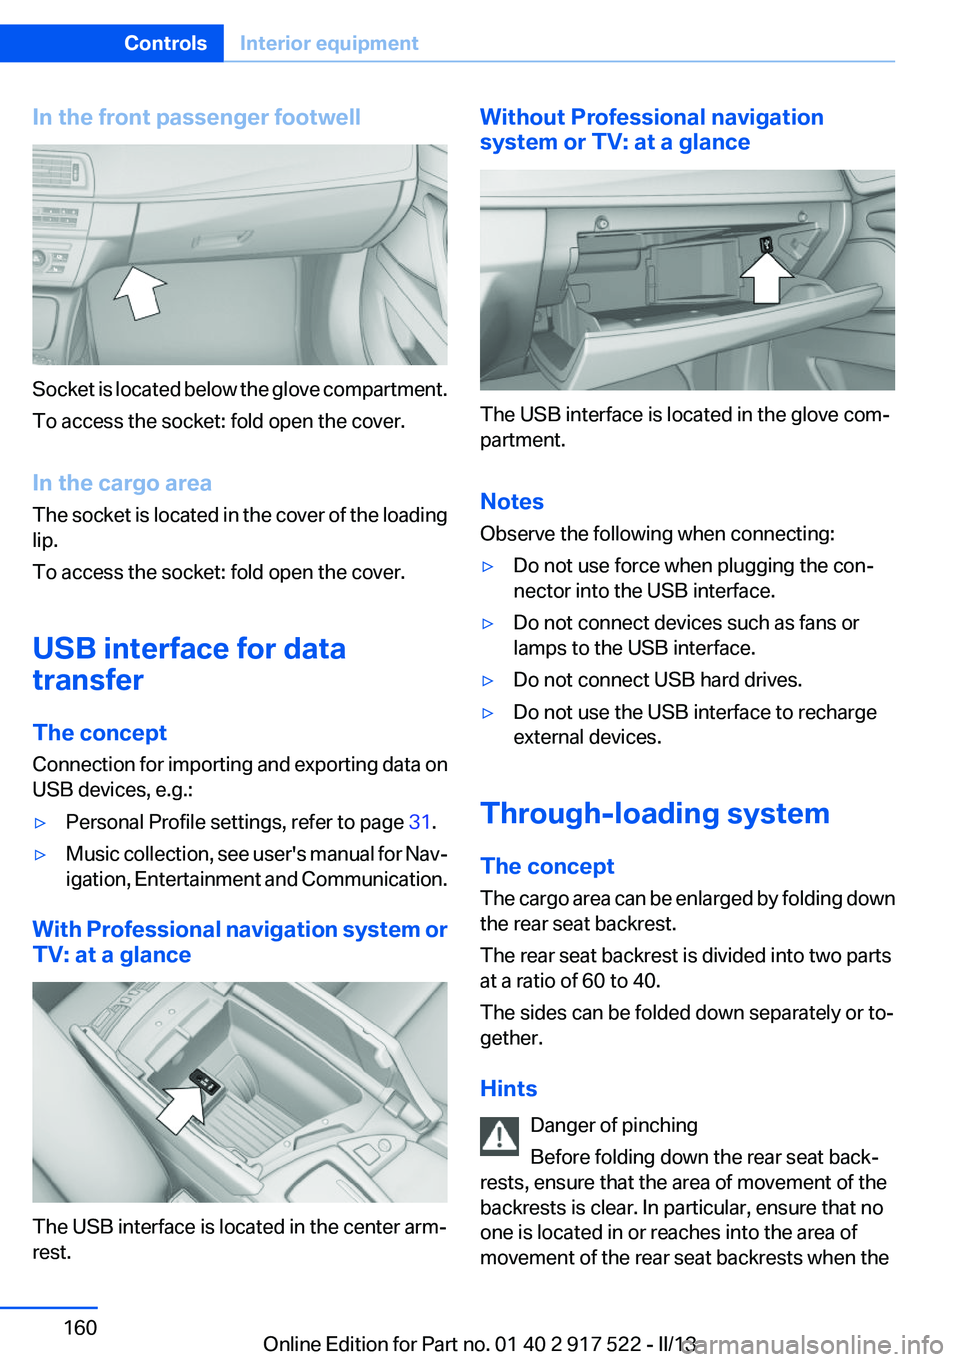
In the front passenger footwell
Socket is located below the glove compartment.
To access the socket: fold open the cover.
In the cargo area
The socket is located in the cover of the loading
lip.
To access the socket: fold open the cover.
USB interface for data
transfer
The concept
Connection for importing and exporting data on
USB devices, e.g.:
▷Personal Profile settings, refer to page 31.▷Music collection, see user's manual for Nav‐
igation, Entertainment and Communication.
With Professional navigation system or
TV: at a glance
The USB interface is located in the center arm‐
rest.
Without Professional navigation
system or TV: at a glance
The USB interface is located in the glove com‐
partment.
Notes
Observe the following when connecting:
▷Do not use force when plugging the con‐
nector into the USB interface.▷Do not connect devices such as fans or
lamps to the USB interface.▷Do not connect USB hard drives.▷Do not use the USB interface to recharge
external devices.
Through-loading system
The concept
The cargo area can be enlarged by folding down
the rear seat backrest.
The rear seat backrest is divided into two parts
at a ratio of 60 to 40.
The sides can be folded down separately or to‐
gether.
Hints Danger of pinching
Before folding down the rear seat back‐
rests, ensure that the area of movement of the
backrests is clear. In particular, ensure that no
one is located in or reaches into the area of
movement of the rear seat backrests when the
Seite 160ControlsInterior equipment160
Online Edition for Part no. 01 40 2 917 522 - II/13
Page 165 of 246
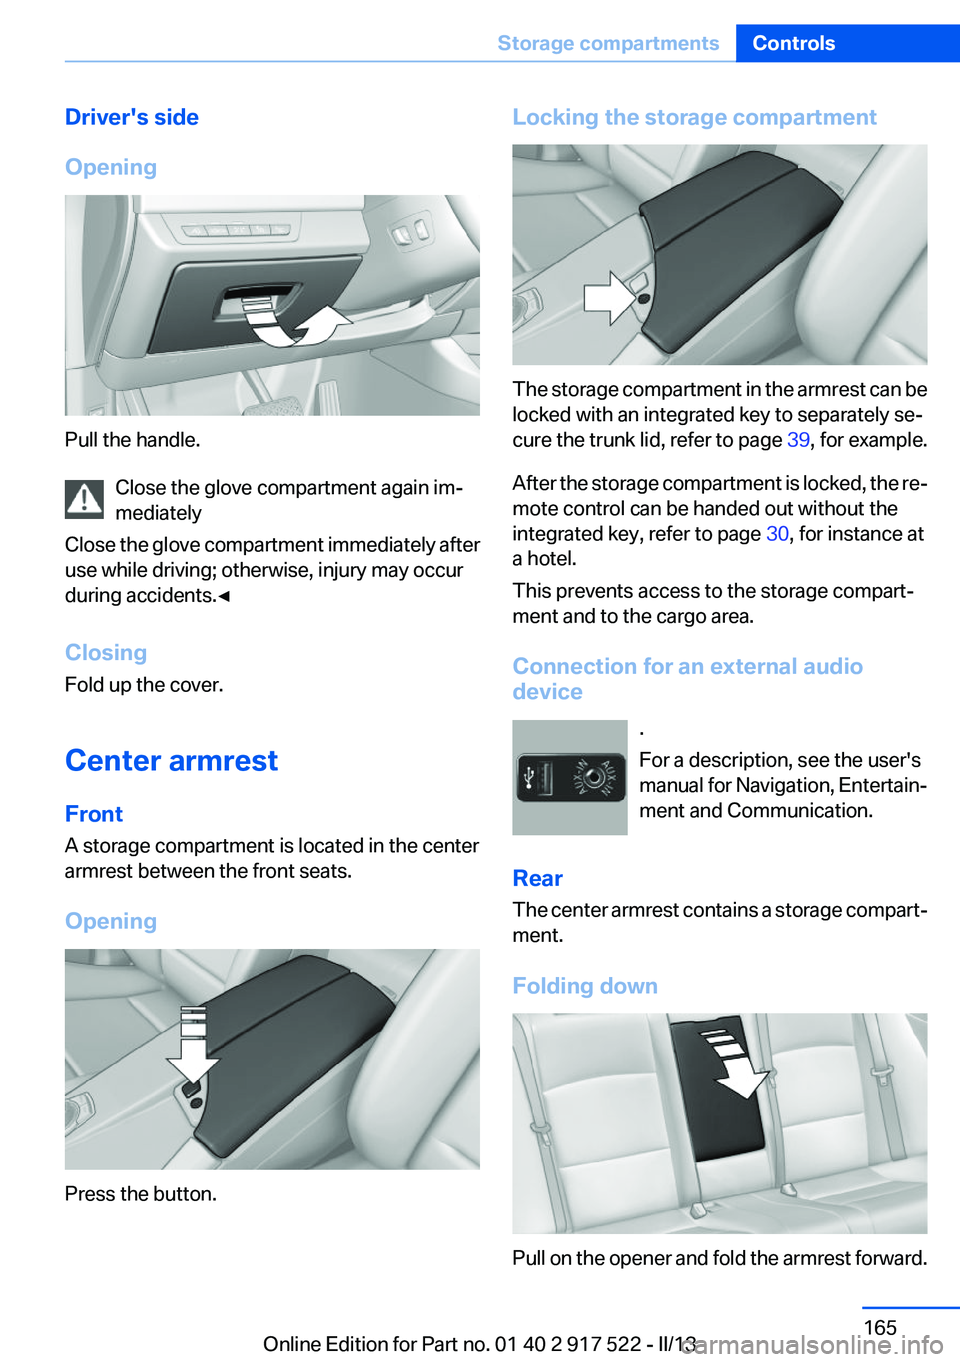
Driver's side
Opening
Pull the handle. Close the glove compartment again im‐
mediately
Close the glove compartment immediately after
use while driving; otherwise, injury may occur
during accidents.◀
Closing
Fold up the cover.
Center armrest
Front
A storage compartment is located in the center
armrest between the front seats.
Opening
Press the button.
Locking the storage compartment
The storage compartment in the armrest can be
locked with an integrated key to separately se‐
cure the trunk lid, refer to page 39, for example.
After the storage compartment is locked, the re‐
mote control can be handed out without the
integrated key, refer to page 30, for instance at
a hotel.
This prevents access to the storage compart‐
ment and to the cargo area.
Connection for an external audio
device
.
For a description, see the user's
manual for Navigation, Entertain‐
ment and Communication.
Rear
The center armrest contains a storage compart‐
ment.
Folding down
Pull on the opener and fold the armrest forward.
Seite 165Storage compartmentsControls165
Online Edition for Part no. 01 40 2 917 522 - II/13
Page 219 of 246

Starting aid terminals
In the vehicle, only charge the battery via the
starting aid terminals, refer to page 222, in the
engine compartment with the engine off.
Power failure
After a temporary power loss, some equipment
needs to be reinitialized.
Individual settings need to be reprogrammed:▷Seat, mirror, and steering wheel memory:
store the positions again.▷Time: update.▷Date: update.▷Radio station: save again.▷Navigation system: wait for the operability of
the navigation.
Disposing of old batteries
Have old batteries disposed of by your
service center or bring them to a recy‐
cling center.
Maintain the battery in an upright position for
transport and storage. Secure the battery so
that it does not tip over during transport.
Fuses
Notes Replacing fuses
Never attempt to repair a blown fuse and
do not replace a defective fuse with a substitute
of another color or amperage rating; this could
lead to a circuit overload, ultimately resulting in
a fire in the vehicle.◀
Plastic tweezers and information on the fuse
types and locations are stored in the fuse box in
the cargo area.
In the glove compartment
Push the handle up, arrow 1, and open the lid,
arrow 2.
In the cargo area
Open the cover on the right side trim.
Information on the fuse types and locations is
found on a separate sheet.
Seite 219Replacing componentsMobility219
Online Edition for Part no. 01 40 2 917 522 - II/13
Page 221 of 246
▷The LED flashes when a connection to the
BMW Response Center has been estab‐
lished.
When the emergency request is received at
the BMW Response Center, the BMW Re‐
sponse Center contacts you and takes fur‐
ther steps to help you.
Even if you are unable to respond, the BMW
Response Center can take further steps to
help you under certain circumstances.
For this purpose, data that are used to de‐
termine the necessary rescue measures,
such as the current position of the vehicle if
it can be established, are transmitted to the
BMW Response Center.▷If the LED is flashing but the BMW Response
Center cannot be heard on the hands-free
system, the hands-free system may be mal‐
functioning. However, the BMW Response
Center may still be able to hear you.
Initiating an Emergency Request
automatically
Under certain conditions, an Emergency Re‐
quest is automatically initiated immediately after
a severe accident. Automatic Collision Notifica‐
tion is not affected by pressing the SOS button.
Warning triangle
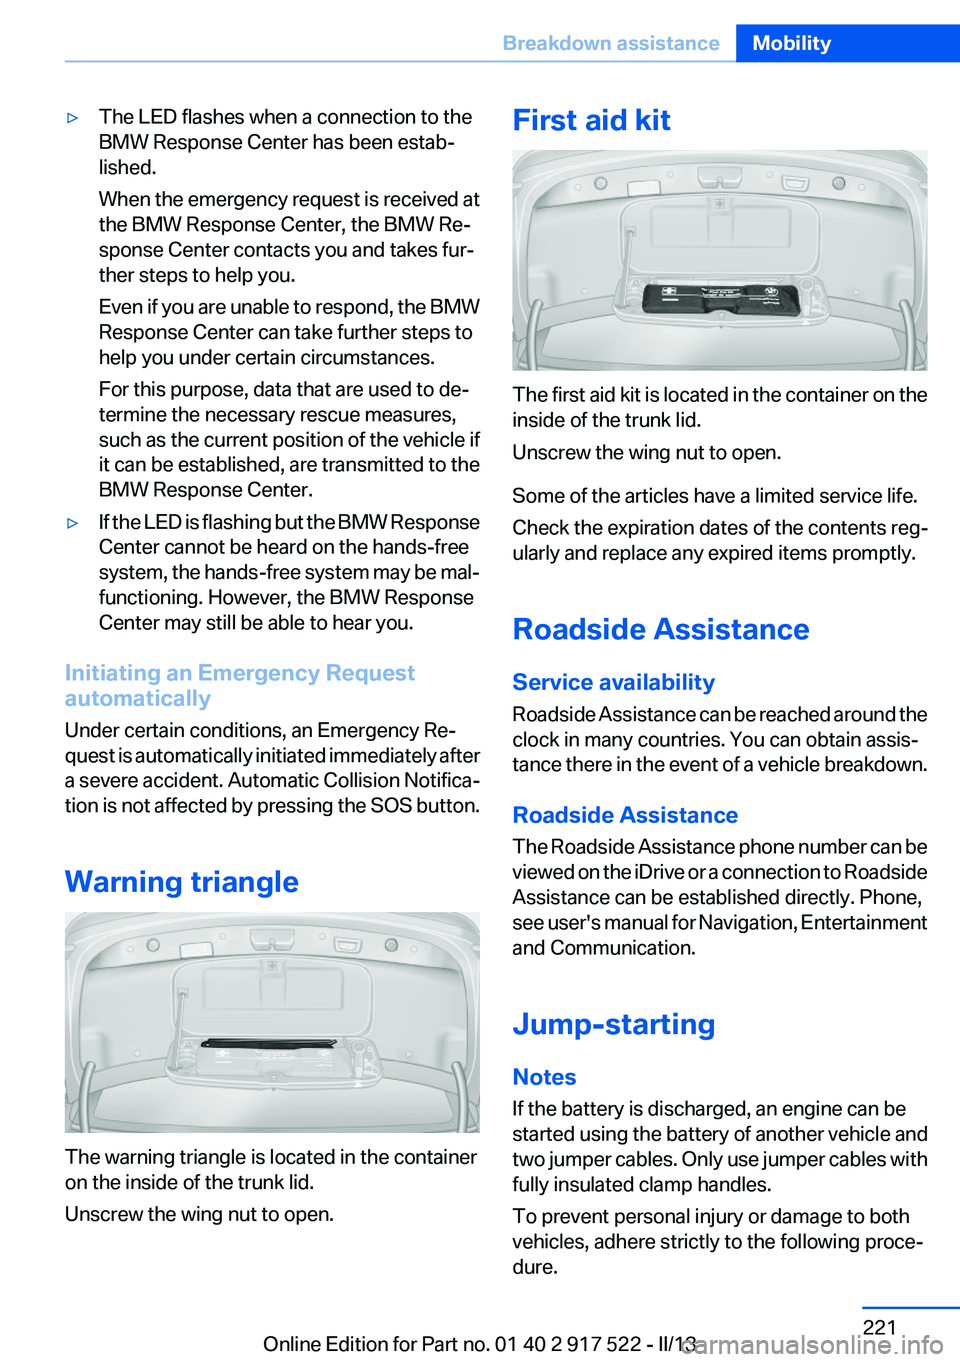
The warning triangle is located in the container
on the inside of the trunk lid.
Unscrew the wing nut to open.
First aid kit
The first aid kit is located in the container on the
inside of the trunk lid.
Unscrew the wing nut to open.
Some of the articles have a limited service life.
Check the expiration dates of the contents reg‐
ularly and replace any expired items promptly.
Roadside Assistance
Service availability
Roadside Assistance can be reached around the
clock in many countries. You can obtain assis‐
tance there in the event of a vehicle breakdown.
Roadside Assistance
The Roadside Assistance phone number can be
viewed on the iDrive or a connection to Roadside
Assistance can be established directly. Phone,
see user's manual for Navigation, Entertainment
and Communication.
Jump-starting
Notes
If the battery is discharged, an engine can be
started using the battery of another vehicle and
two jumper cables. Only use jumper cables with
fully insulated clamp handles.
To prevent personal injury or damage to both
vehicles, adhere strictly to the following proce‐
dure.
Seite 221Breakdown assistanceMobility221
Online Edition for Part no. 01 40 2 917 522 - II/13
Page 236 of 246
Everything from A to Z
IndexA
ABS, Antilock Brake Sys‐ tem 119
ACC, Active Cruise Control with Stop & Go 126
Activated-charcoal filter 151
Active Blind Spot Detec‐ tion 115
Active Cruise Control with Stop & Go, ACC 126
Active Protection 117
Active seat, front 49
Active seat ventilation, front 50
Active Steering, integral 122
Adaptive brake assistant 119
Adaptive brake lights, refer to Brake force display 117
Adaptive drive 122
Adaptive light control 96
Additives, oil 207
Adjustments, seats/head re‐ straints 47
After washing vehicle 227
Airbags 99
Airbags, indicator/warning light 100
Air circulation, refer to Recir‐ culated-air mode 150
Air, dehumidifying, refer to Cooling function 150
Air distribution, manual 149
Air flow, automatic climate control 149
Air pressure, tires 189
Air vents, refer to Ventila‐ tion 151
Alarm system 42
Alarm, unintentional 43 All around the center con‐
sole 14
All around the headliner 15
All around the steering wheel 12
ALL program, automatic cli‐ mate control 150
All-season tires, refer to Win‐ ter tires 201
All-wheel-drive 121
Alternating-code hand-held transmitter 156
Alternative oil types 207
Ambient light 98
Antifreeze, washer fluid 71
Antilock Brake System, ABS 119
Anti-slip control, refer to DSC 119
Approved axle load 233
Approved engine oils 207
Armrest, refer to Center arm‐ rest 165
Arrival time 90
Ashtray 157
Ashtray, front 157, 158
Ashtray, rear 158
Assistance, Roadside Assis‐ tance 221
Assistance when driving off 119
AUTO H button, refer to Auto‐ matic Hold 67
AUTO intensity 149
Automatic car wash 226
Automatic climate con‐ trol 148
Automatic Cruise Control with Stop & Go 126
Automatic Curb Monitor 56 Automatic deactivation, front
passenger airbags 101
Automatic headlamp con‐ trol 95
Automatic Hold 67
Automatic locking 37
Automatic recirculated-air control 150
Automatic Soft Closing, doors 37
Automatic tailgate 38
Automatic transmission with Steptronic 72
AUTO program, automatic cli‐ mate control 149
AUTO program, intensity 149
Auto Start/Stop function 64
Average fuel consumption 89
Average speed 89
Axle loads, weights 233
B
Backrest curvature, refer to Lumbar support 49
Backup camera 136
Band-aids, refer to First aid kit 221
Bar for tow-starting/tow‐ ing 224
Battery replacement, vehicle battery 218
Battery replacement, vehicle remote control 30
Battery, vehicle 218
Belts, safety belts 51
Beverage holder, cu‐ pholder 166
Blinds, sun protection 44
BMW Assist, see user's manual for Navigation, Enter‐Seite 236ReferenceEverything from A to Z236
Online Edition for Part no. 01 40 2 917 522 - II/13
Page 237 of 246
tainment and Communica‐
tion
BMW Homepage 6
BMW Internet page 6
BMW maintenance sys‐ tem 210
Bonus range, ECO PRO 180
Bottle holder, refer to Cu‐ pholder 166
Brake assistant 119
Brake assistant, adaptive 119
Brake discs, breaking in 172
Brake force display 117
Brake lamps, brake force dis‐ play 117
Brake lamps, bulb replace‐ ment 217
Brake lights, adaptive 117
Brake pads, breaking in 172
Braking, notes 173
Breakdown assis‐ tance 220, 221
Breaking in 172
Brightness of Control Dis‐ play 92
Bulb replacement 212
Bulb replacement, front 213
Bulb replacement, rear 216
Bulbs and lamps 212
Button, RES 128
Button, Start/Stop 62
Bypassing, refer to Jump- starting 221
C
California Proposition 65 Warning 7
Camera, backup camera 137
Camera, care 229
Camera, Side View 141
Camera, Top View 139
Can holder, refer to Cu‐ pholder 166
Car battery 218
Car care products 227 Care, displays 229
Care, vehicle 227
Cargo 175
Cargo area, enlarging 160
Cargo area lid 37
Cargo area, storage compart‐ ments 167
Cargo straps, securing cargo 176
Car key, refer to Remote con‐ trol 30
Carpet, care 228
Car wash 226
Catalytic converter, refer to Hot exhaust system 173
CBS Condition Based Serv‐ ice 210
CD/Multimedia, see user's manual for Navigation, Enter‐
tainment and Communica‐
tion
Center armrest 165
Center console 14
Central locking system 33
Central screen, refer to Control Display 16
Changes, technical, refer to Safety 7
Changing parts 212
Changing wheels 218
Changing wheels/tires 201
Check Control 81
Children, seating position 58
Children, transporting safely 58
Child restraint fixing sys‐ tem 58
Child restraint fixing system LATCH 59
Child restraint fixing systems, mounting 58
Child safety locks 61
Child seat, mounting 58
Child seats 58
Chrome parts, care 228
Cigarette lighter 157 Cleaning, displays 229
Climate control 148
Climate control wind‐ shield 173
Clock 84
Closing/opening from in‐ side 37
Closing/opening via door lock 36
Closing/opening with remote control 34
Clothes hooks 167
Collision warning 107, 109
Combination switch, refer to Turn signals 69
Combination switch, refer to Wiper system 69
COMFORT+ program, Driving Dynamics Control 124
Comfort Access 40
COMFORT program, Driving Dynamics Control 124
Computer 88
Condensation on win‐ dows 149
Condensation under the vehi‐ cle 174
Condition Based Service CBS 210
Configure driving mode 125
Confirmation signal 35
ConnectedDrive, see user's manual for Navigation, Enter‐
tainment and Communica‐
tion
Control Display 16
Control Display, settings 91
Controller 16
Control systems, driving sta‐ bility 119
Convenient opening 34
Coolant 209
Coolant temperature 84
Cooling function 150
Cooling, maximum 149
Cooling system 209 Seite 237Everything from A to ZReference237
Online Edition for Part no. 01 40 2 917 522 - II/13