2013 BMW 528I XDRIVE SEDAN warning lights
[x] Cancel search: warning lightsPage 132 of 273
Deactivating DTCPress the button again.
TRACTION and the DSC OFF indica‐
tor lamp go out.
Indicator/warning lamps When DTC is activated, TRACTION is dis‐
played in the tachometer.
The indicator lamp lights up: DTC Dy‐
namic Traction Control is activated.
xDrive
xDrive is the all-wheel-drive system of your ve‐
hicle. Concerted action by the xDrive and DSC
further optimize traction and driving dynamics.
The xDrive all-wheel-drive system variably dis‐
tributes the drive forces to the front and rear
axles as demanded by the driving situation and
road surface.
HDC Hill Descent Control
The concept HDC is a downhill driving assistant that auto‐
matically controls vehicle speed on steep
downhill gradients. Without applying the
brakes, the vehicle moves at slightly more than
walking speed.
Hill Descent Control can be activated at
speeds below approx. 22 mph/35 km/h. When
driving downhill, the vehicle reduces its speed
to approx. walking speed and then keeps its
speed constant.
As long as there is active braking, the system
is on standby. The system does not brake the
vehicle during this time.
Use HDC in low gears or in transmission posi‐
tion D or R only.Increasing or decreasing vehicle
speed
Specify desired speed in the range from ap‐
prox. 4 mph/6 km/h to approx. 15 mph/25 km/h
using the rocker switch of the cruise control on
the steering wheel. Vehicle speed can be
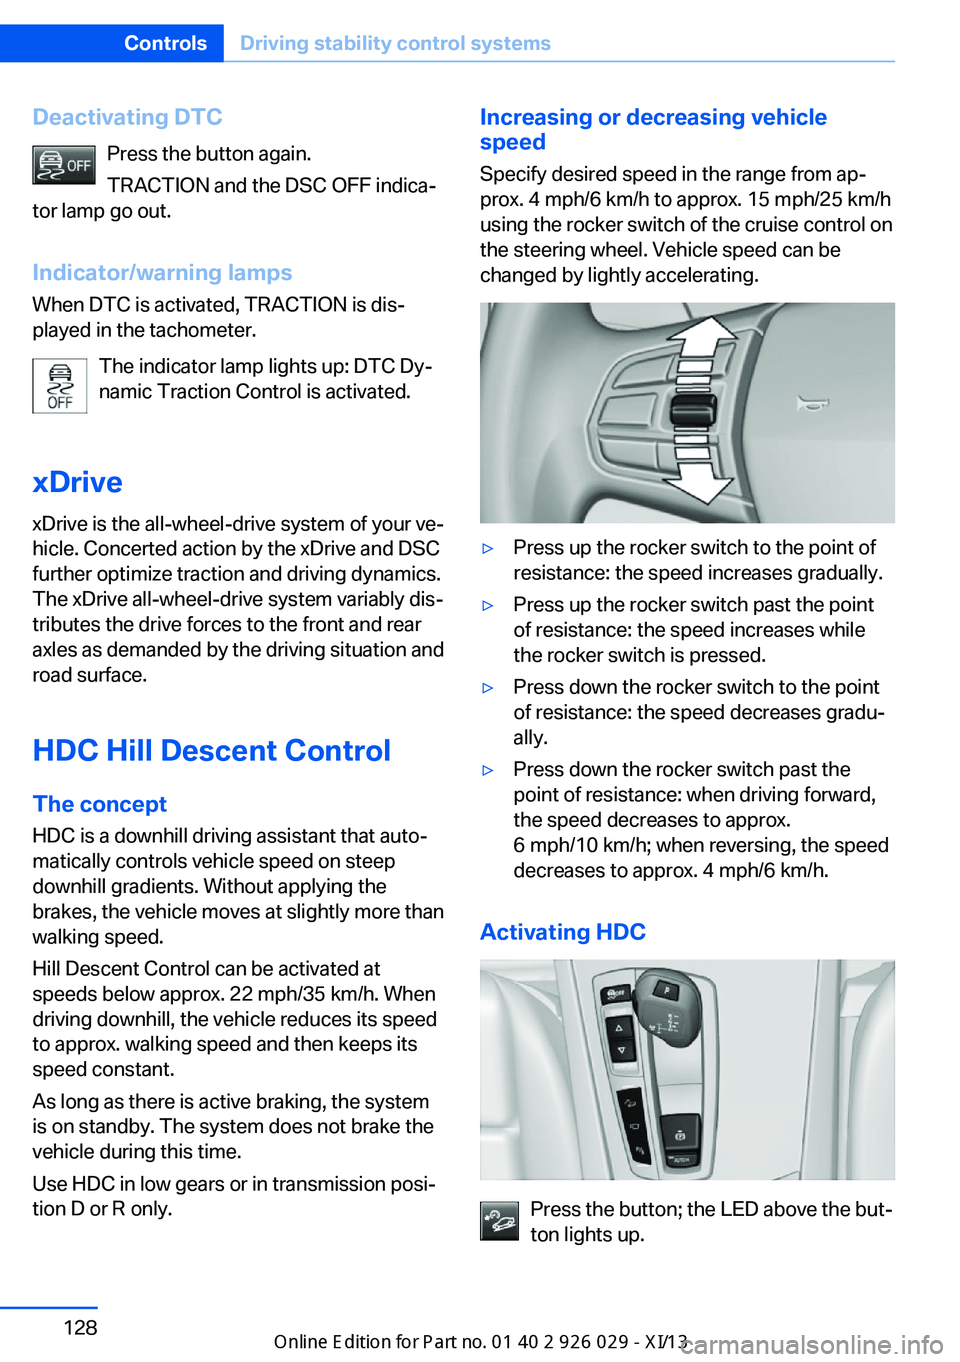
changed by lightly accelerating.▷Press up the rocker switch to the point of
resistance: the speed increases gradually.▷Press up the rocker switch past the point
of resistance: the speed increases while
the rocker switch is pressed.▷Press down the rocker switch to the point
of resistance: the speed decreases gradu‐
ally.▷Press down the rocker switch past the
point of resistance: when driving forward,
the speed decreases to approx.
6 mph/10 km/h; when reversing, the speed
decreases to approx. 4 mph/6 km/h.
Activating HDC
Press the button; the LED above the but‐
ton lights up.
Seite 128ControlsDriving stability control systems128
Online Edition for Part no. 01 40 2 911 177 - VI/13
Page 134 of 273
Integral Active SteeringThe concept
Integral Active Steering is a combination of Ac‐
tive Steering and rear axle steering.
Active Steering varies the steering angle of the
wheels in relation to the steering wheel move‐
ment as a function of the speed.
At speeds up to approx. 37 mph/60 km/h, e.g.,
in curves, the steering angle is increased, i.e.,
steering becomes more direct.
The rear axle steering acts to increase maneu‐
verability by turning the rear wheels slightly in
a direction opposite to the front wheels.
At higher speeds, the steering angle is increas‐
ingly reduced.
The rear wheels are turned to the same angle
as the front wheels.
In critical situations, Integral Active Steering
can specifically steer the front and rear wheels
to stabilize the vehicle before the driver inter‐
venes, e.g., when braking where road condi‐
tions differ on the left and right sides of the ve‐
hicle.
InitializingIn rare cases, it may become necessary to initi‐
alize the Integral Active Steering.
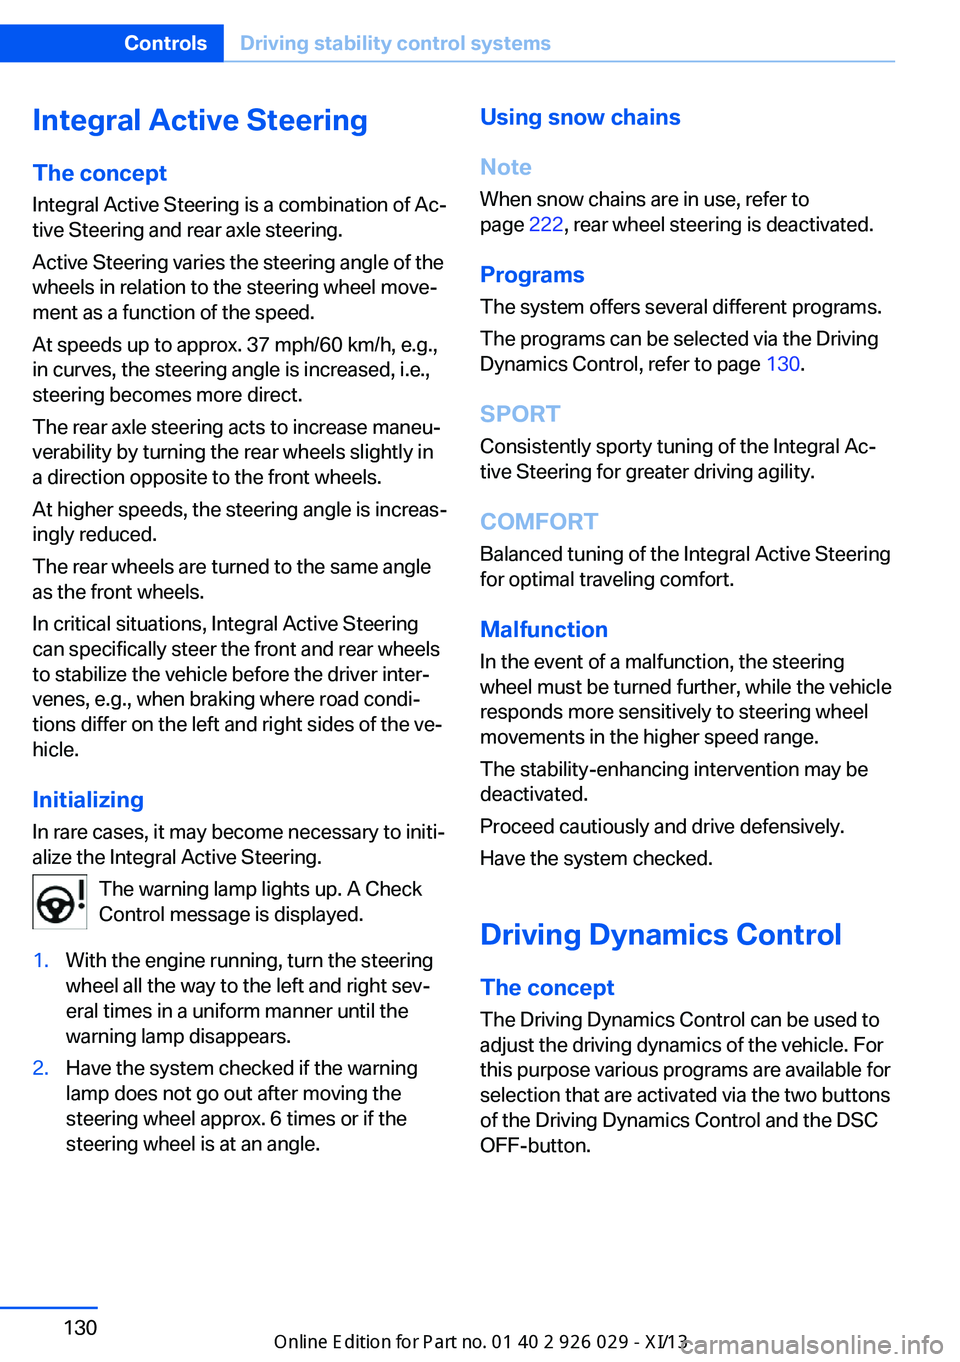
The warning lamp lights up. A Check
Control message is displayed.1.With the engine running, turn the steering
wheel all the way to the left and right sev‐
eral times in a uniform manner until the
warning lamp disappears.2.Have the system checked if the warning
lamp does not go out after moving the
steering wheel approx. 6 times or if the
steering wheel is at an angle.Using snow chains
Note When snow chains are in use, refer to
page 222, rear wheel steering is deactivated.
Programs The system offers several different programs.
The programs can be selected via the Driving
Dynamics Control, refer to page 130.
SPORT
Consistently sporty tuning of the Integral Ac‐
tive Steering for greater driving agility.
COMFORT Balanced tuning of the Integral Active Steering
for optimal traveling comfort.
Malfunction
In the event of a malfunction, the steering
wheel must be turned further, while the vehicle
responds more sensitively to steering wheel
movements in the higher speed range.
The stability-enhancing intervention may be
deactivated.
Proceed cautiously and drive defensively.
Have the system checked.
Driving Dynamics Control The conceptThe Driving Dynamics Control can be used to
adjust the driving dynamics of the vehicle. For
this purpose various programs are available for
selection that are activated via the two buttons
of the Driving Dynamics Control and the DSC
OFF-button.Seite 130ControlsDriving stability control systems130
Online Edition for Part no. 01 40 2 911 177 - VI/13
Page 135 of 273
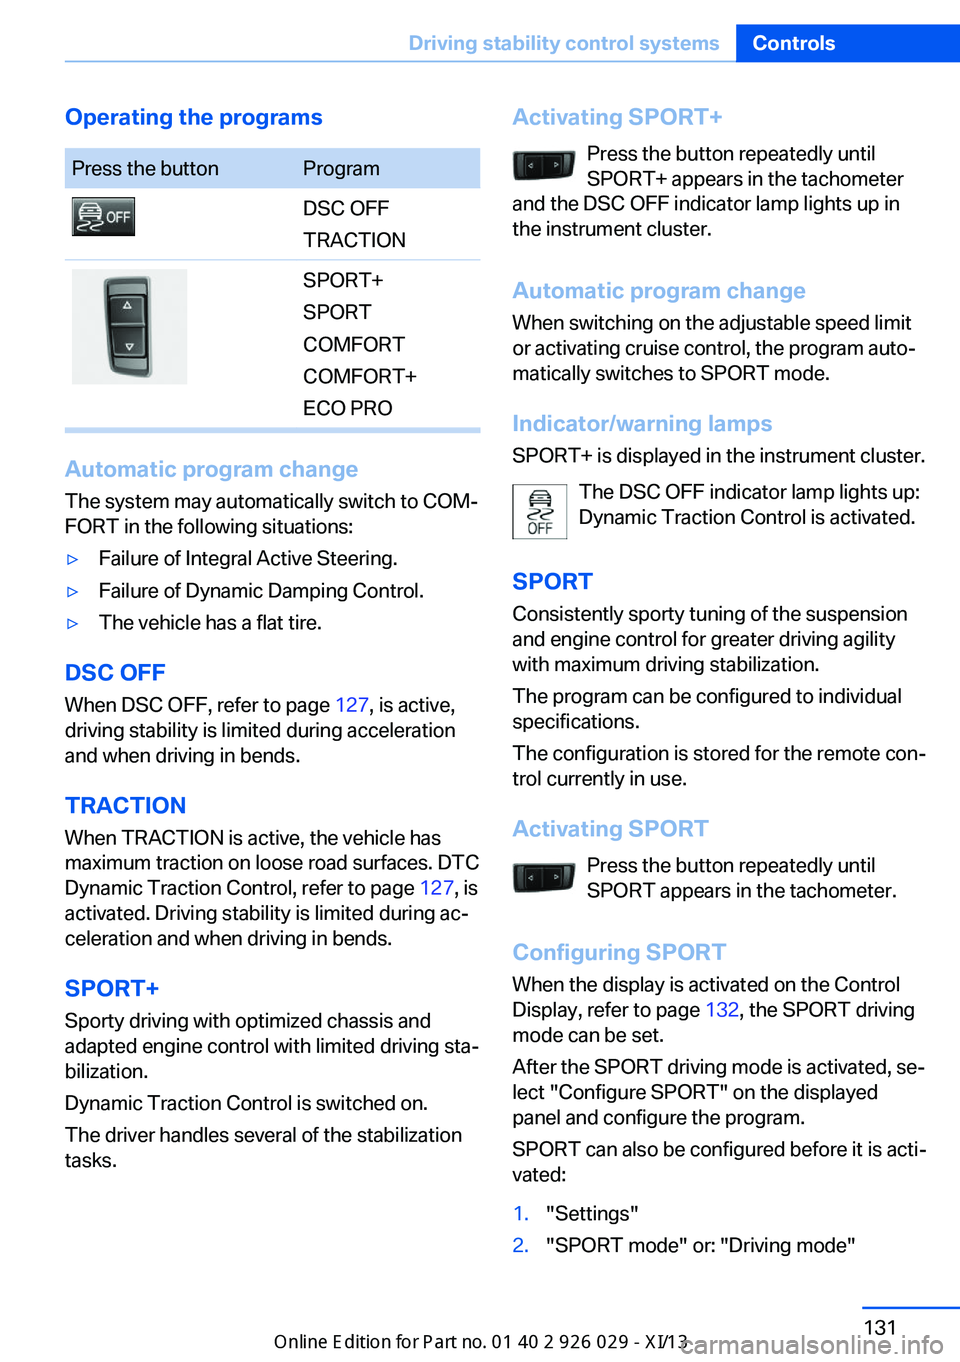
Operating the programsPress the buttonProgramDSC OFF
TRACTIONSPORT+
SPORT
COMFORT
COMFORT+
ECO PRO
Automatic program change
The system may automatically switch to COM‐
FORT in the following situations:
▷Failure of Integral Active Steering.▷Failure of Dynamic Damping Control.▷The vehicle has a flat tire.
DSC OFF
When DSC OFF, refer to page 127, is active,
driving stability is limited during acceleration
and when driving in bends.
TRACTION When TRACTION is active, the vehicle has
maximum traction on loose road surfaces. DTC
Dynamic Traction Control, refer to page 127, is
activated. Driving stability is limited during ac‐
celeration and when driving in bends.
SPORT+
Sporty driving with optimized chassis and
adapted engine control with limited driving sta‐
bilization.
Dynamic Traction Control is switched on.
The driver handles several of the stabilization
tasks.
Activating SPORT+
Press the button repeatedly until
SPORT+ appears in the tachometer
and the DSC OFF indicator lamp lights up in
the instrument cluster.
Automatic program change
When switching on the adjustable speed limit
or activating cruise control, the program auto‐
matically switches to SPORT mode.
Indicator/warning lamps
SPORT+ is displayed in the instrument cluster.
The DSC OFF indicator lamp lights up:
Dynamic Traction Control is activated.
SPORT Consistently sporty tuning of the suspension
and engine control for greater driving agility
with maximum driving stabilization.
The program can be configured to individual
specifications.
The configuration is stored for the remote con‐
trol currently in use.
Activating SPORT Press the button repeatedly untilSPORT appears in the tachometer.
Configuring SPORT When the display is activated on the ControlDisplay, refer to page 132, the SPORT driving
mode can be set.
After the SPORT driving mode is activated, se‐
lect "Configure SPORT" on the displayed
panel and configure the program.
SPORT can also be configured before it is acti‐
vated:1."Settings"2."SPORT mode" or: "Driving mode"Seite 131Driving stability control systemsControls131
Online Edition for Part no. 01 40 2 911 177 - VI/13
Page 141 of 273
3.Press on the accelerator briefly, or press
the RES button or the rocker switch when
the vehicle ahead of you drives away.
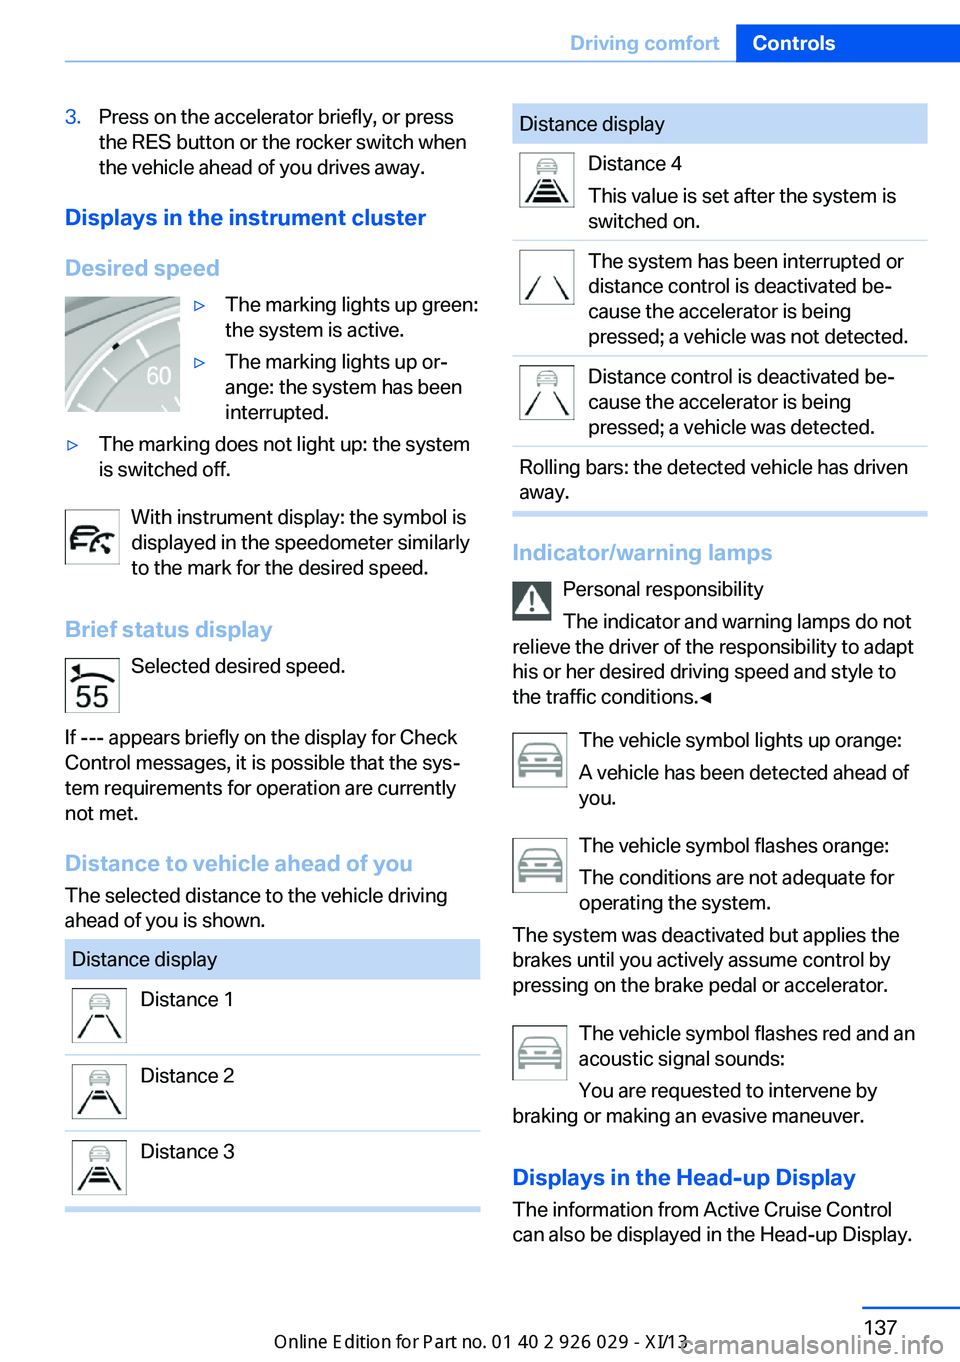
Displays in the instrument cluster
Desired speed
▷The marking lights up green:
the system is active.▷The marking lights up or‐
ange: the system has been
interrupted.▷The marking does not light up: the system
is switched off.
With instrument display: the symbol is
displayed in the speedometer similarly
to the mark for the desired speed.
Brief status display Selected desired speed.
If --- appears briefly on the display for Check
Control messages, it is possible that the sys‐
tem requirements for operation are currently
not met.
Distance to vehicle ahead of you
The selected distance to the vehicle driving
ahead of you is shown.
Distance displayDistance 1Distance 2Distance 3Distance displayDistance 4
This value is set after the system is
switched on.The system has been interrupted or
distance control is deactivated be‐
cause the accelerator is being
pressed; a vehicle was not detected.Distance control is deactivated be‐
cause the accelerator is being
pressed; a vehicle was detected.Rolling bars: the detected vehicle has driven
away.
Indicator/warning lamps
Personal responsibility
The indicator and warning lamps do not
relieve the driver of the responsibility to adapt
his or her desired driving speed and style to
the traffic conditions.◀
The vehicle symbol lights up orange:
A vehicle has been detected ahead of
you.
The vehicle symbol flashes orange:
The conditions are not adequate for
operating the system.
The system was deactivated but applies the
brakes until you actively assume control by
pressing on the brake pedal or accelerator.
The vehicle symbol flashes red and an
acoustic signal sounds:
You are requested to intervene by
braking or making an evasive maneuver.
Displays in the Head-up Display The information from Active Cruise Control
can also be displayed in the Head-up Display.
Seite 137Driving comfortControls137
Online Edition for Part no. 01 40 2 911 177 - VI/13
Page 149 of 273
tem requirements for operation are currently
not met.
PDC Park Distance Control
The concept PDC supports you when parking. Objects that
you are approaching slowly in front of or be‐
hind your vehicle are indicated by:▷Signal tones.▷Visual display.
General information
Measurements are made by ultrasound sen‐
sors in the bumpers.
The range is approx. 6 ft/2 m.
An acoustic warning is first given:
▷By the front sensors and the two rear cor‐
ner sensors at approx. 24 in/60 cm.▷By the rear middle sensors at approx.
5 ft/1.50 m.
Notes
Check the traffic situation as well
PDC cannot serve as a substitute for the
driver's personal judgment of the traffic situa‐
tion. Check the traffic situation around the ve‐
hicle with your own eyes. Otherwise, an acci‐
dent could result from road users or objects
located outside of the PDC detection range.
Loud noises from outside and inside the vehi‐ cle may prevent you from hearing the PDC's
signal tone.◀
Avoid driving quickly with PDC
Avoid approaching an object quickly.
Avoid driving away quickly while PDC is not yet
active.
For technical reasons, the system may other‐
wise be too late in issuing a warning.◀
At a glance
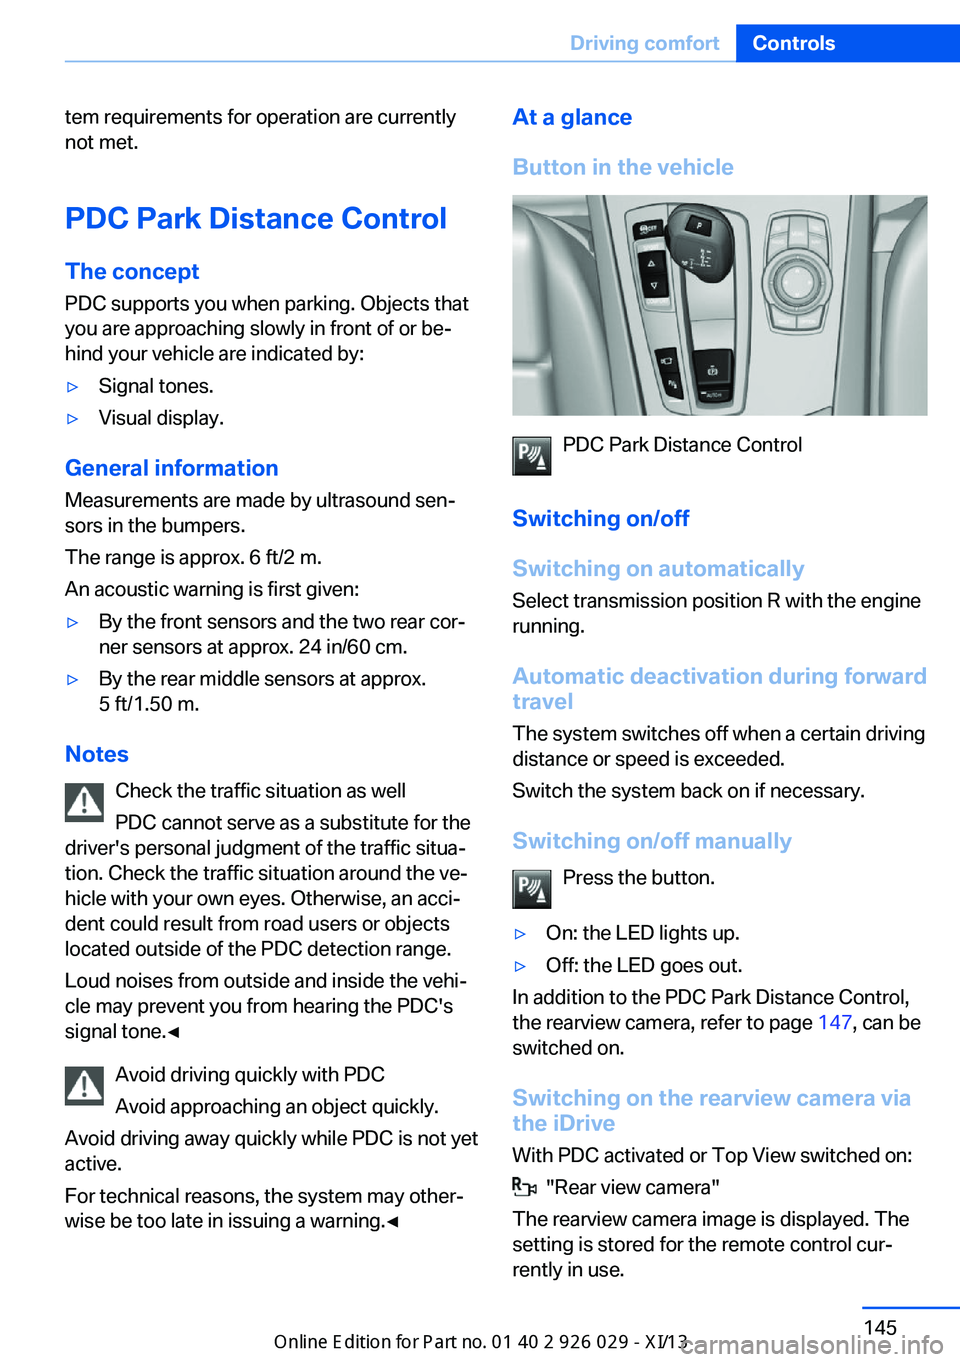
Button in the vehicle
PDC Park Distance Control
Switching on/off
Switching on automatically Select transmission position R with the engine
running.
Automatic deactivation during forward
travel
The system switches off when a certain driving
distance or speed is exceeded.
Switch the system back on if necessary.
Switching on/off manually Press the button.
▷On: the LED lights up.▷Off: the LED goes out.
In addition to the PDC Park Distance Control,
the rearview camera, refer to page 147, can be
switched on.
Switching on the rearview camera viathe iDrive
With PDC activated or Top View switched on:
"Rear view camera"
The rearview camera image is displayed. The
setting is stored for the remote control cur‐
rently in use.
Seite 145Driving comfortControls145
Online Edition for Part no. 01 40 2 911 177 - VI/13
Page 236 of 273
Socket for OBD Onboard
Diagnosis
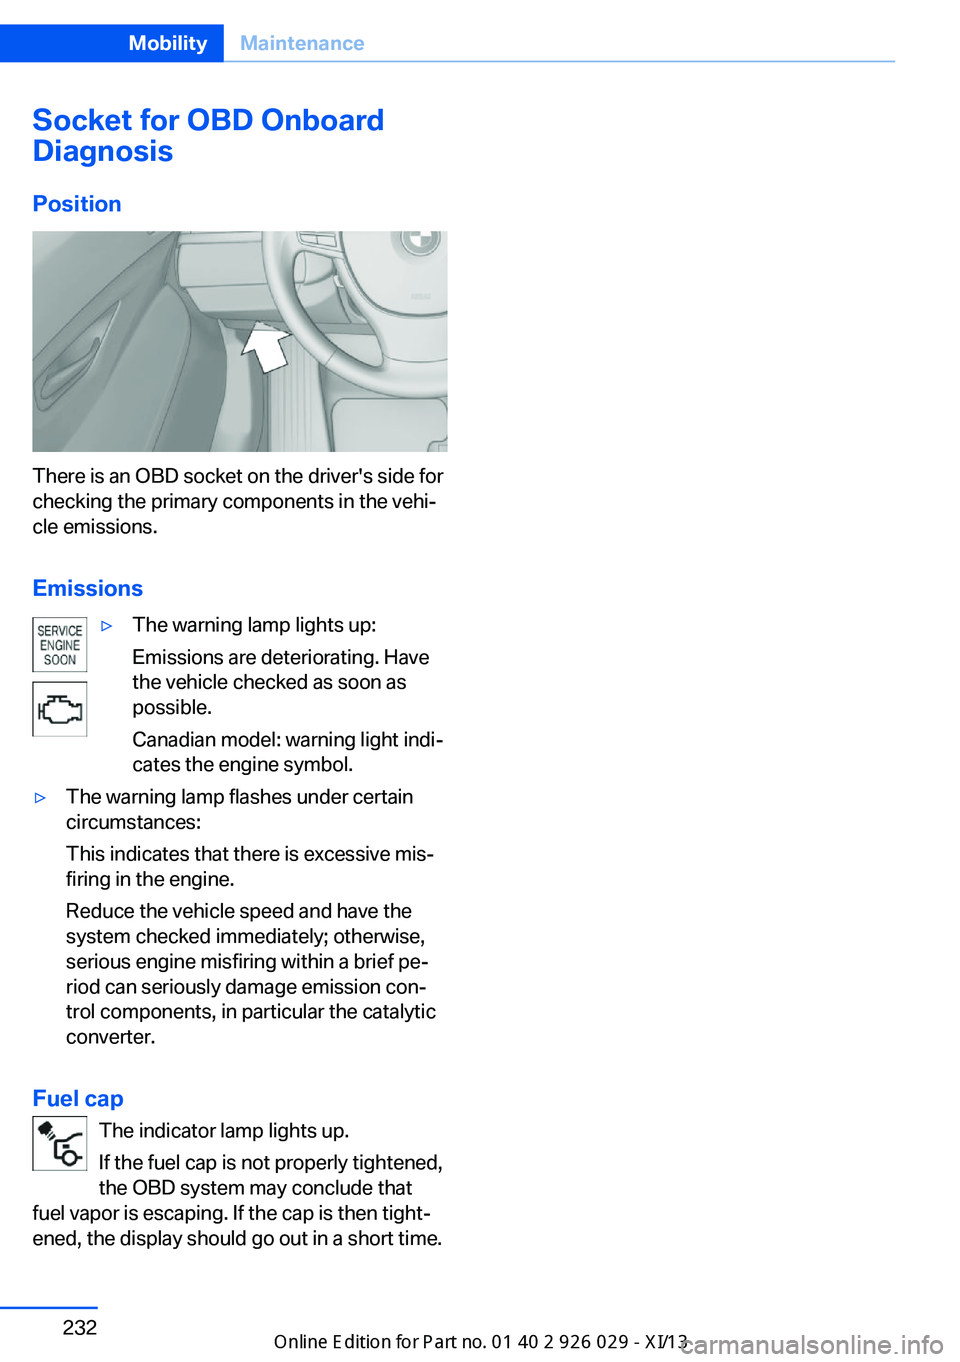
Position
There is an OBD socket on the driver's side for
checking the primary components in the vehi‐
cle emissions.
Emissions
▷The warning lamp lights up:
Emissions are deteriorating. Have
the vehicle checked as soon as
possible.
Canadian model: warning light indi‐
cates the engine symbol.▷The warning lamp flashes under certain
circumstances:
This indicates that there is excessive mis‐
firing in the engine.
Reduce the vehicle speed and have the
system checked immediately; otherwise,
serious engine misfiring within a brief pe‐
riod can seriously damage emission con‐
trol components, in particular the catalytic
converter.
Fuel cap
The indicator lamp lights up.
If the fuel cap is not properly tightened,
the OBD system may conclude that
fuel vapor is escaping. If the cap is then tight‐
ened, the display should go out in a short time.
Seite 232MobilityMaintenance232
Online Edition for Part no. 01 40 2 911 177 - VI/13
Page 244 of 273
Breakdown assistanceVehicle equipment
All standard, country-specific and optional
equipment that is offered in the model series is
described in this chapter. Therefore, equip‐
ment is also described that is not available in a
vehicle, e. g., because of the selected optional
equipment or country variant. This also applies
for safety-related functions and systems.
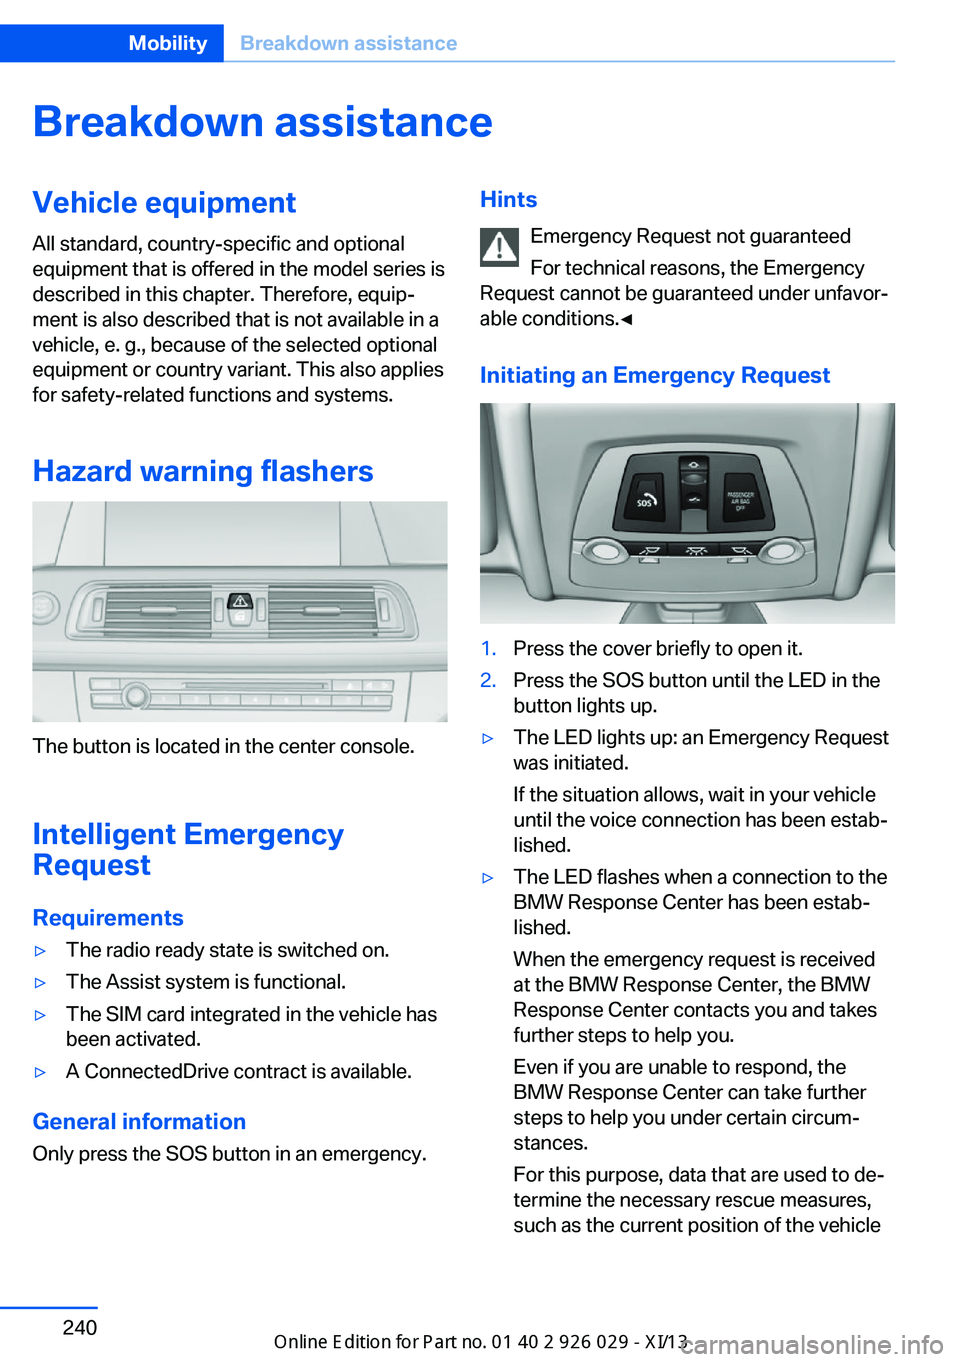
Hazard warning flashers
The button is located in the center console.
Intelligent Emergency
Request
Requirements
▷The radio ready state is switched on.▷The Assist system is functional.▷The SIM card integrated in the vehicle has
been activated.▷A ConnectedDrive contract is available.
General information
Only press the SOS button in an emergency.
Hints
Emergency Request not guaranteed
For technical reasons, the Emergency
Request cannot be guaranteed under unfavor‐
able conditions.◀
Initiating an Emergency Request1.Press the cover briefly to open it.2.Press the SOS button until the LED in the
button lights up.▷The LED lights up: an Emergency Request
was initiated.
If the situation allows, wait in your vehicle
until the voice connection has been estab‐
lished.▷The LED flashes when a connection to the
BMW Response Center has been estab‐
lished.
When the emergency request is received
at the BMW Response Center, the BMW
Response Center contacts you and takes
further steps to help you.
Even if you are unable to respond, the
BMW Response Center can take further
steps to help you under certain circum‐
stances.
For this purpose, data that are used to de‐
termine the necessary rescue measures,
such as the current position of the vehicleSeite 240MobilityBreakdown assistance240
Online Edition for Part no. 01 40 2 911 177 - VI/13
Page 262 of 273
Everything from A to Z
IndexA ABS, Antilock Brake Sys‐ tem 126
ACC, Active Cruise Control with Stop & Go 133
Acceleration Assistant, refer to Launch Control 76
Activated-charcoal filter 163
Active Blind Spot Detec‐ tion 122
Active Cruise Control with Stop & Go, ACC 133
Active Protection 123
Active roll stabilization, see Dynamic Drive 129
Active seat, front 50
Active seat ventilation, front 51
Active Steering, integral 130
Adaptive brake assistant 126
Adaptive brake lights, refer to Brake force display 123
Adaptive drive 129
Adaptive light control 97
Additives, oil 227
Adjustments, seats/head re‐ straints 48
After washing vehicle 247
Airbags 101
Airbags, indicator/warning light 102
Air circulation, refer to Recir‐ culated-air mode 162
Air distribution, manual 161
Air drying, refer to Cooling function 162
Air flow, automatic climate control 161
Air pressure, tires 207 Air vents, refer to Ventila‐
tion 163
Alarm system 42
Alarm, unintentional 43
All around the center con‐ sole 14
All around the headliner 15
All around the steering wheel 12
All-season tires, refer to Win‐ ter tires 221
All-wheel-drive 128
Alternating-code hand-held transmitter 168
Alternative oil types 227
Ambient light 100
Antifreeze, washer fluid 72
Antilock Brake System, ABS 126
Anti-slip control, refer to DSC 126
Approved engine oils 227
Armrest, refer to Center arm‐ rest 177
Arrival time 93
Ashtray 169
Ashtray, front 169, 170
Ashtray, rear 170
Assistance, Roadside Assis‐ tance 241
Assistance when driving off 126
Attentiveness assistant 124
AUTO H button, refer to Au‐ tomatic Hold 68
AUTO intensity 161
Automatic car wash 246
Automatic climate con‐ trol 160
Automatic Cruise Control with Stop & Go 133 Automatic Curb Monitor 57
Automatic deactivation, front passenger airbags 103
Automatic headlamp con‐ trol 97
Automatic Hold 68
Automatic locking 41
Automatic recirculated-air control 162
Automatic Soft Closing, doors 36
Automatic tailgate 37
Automatic transmission with Steptronic 73
AUTO program, automatic cli‐ mate control 161
AUTO program, intensity 161
Auto Start/Stop function 65
Average fuel consumption 92
Average speed 92
Axle loads, weights 253
B Backrest curvature, refer to Lumbar support 50
Backrest, width 50
Backup camera 147
Band-aids, refer to First aid kit 241
Bar for tow-starting/ towing 244
Battery replacement, vehicle battery 238
Battery replacement, vehicle remote control 30
Battery, vehicle 238
Belts, safety belts 52
Beverage holder, cu‐ pholder 178
Blinds, sun protection 45 Seite 258ReferenceEverything from A to Z258
Online Edition for Part no. 01 40 2 911 177 - VI/13