2013 BMW 5 SERIES GRAN TURISMO Glove
[x] Cancel search: GlovePage 18 of 255

15Steering wheel heating 6016Adjust the steering wheel 5917Open the tailgate 3818Unlocking the hood
All around the center console
1Headliner 152Control Display 163Glove compartment 1774Air vent 1655Hazard warning system 225Central locking system 366Radio/CD/Multimedia, see user's manual
for Navigation, Entertainment and Commu‐
nication7Automatic climate control 1628Controller with buttons 169Parking brake 71Auto Hold 7310PDC Park Distance Control 147
Top View 153
Rearview camera 149Side View 151Seite 14At a glanceCockpit14
Online Edition for Part no. 01 40 2 909 928 - VI/13
Page 25 of 255

2."Split screen"
Selecting the display
1. Press the button.2."Split screen"3.Move the controller until the split screen is
selected.4.Press the controller or select "Split screen
content".5.Select the desired menu item.
Programmable memory
buttons
General information
The iDrive functions can be stored on the pro‐
grammable memory buttons and called up di‐
rectly, e.g., radio stations, navigation destina‐
tions, phone numbers and entry points into the
menu.
The settings are stored for the remote control
currently in use.
Saving a function
1.Highlight the function via the iDrive.2. Press the desired button for more
than 2 seconds.
Running a function
Press the button.
The function will run immediately. This means,
for example, that the number is dialed when a
phone number is selected.
Displaying the button assignment
Use a finger to touch the buttons. Do not wear
gloves or use objects.
The key assignment is displayed at the top
edge of the screen.▷To display short information: touch the
button.▷To display detailed information: touch the
button for an extended period.
Deleting the button assignments
1.Press buttons 1 and 8 simultaneously for
approx. five seconds.2."OK"
Entering letters and numbers
General information
1.Turn the controller: select letters or num‐
bers.2.Select additional letters or numbers if
needed.3."OK": confirm the entry.
Depending on the menu, you can switch be‐
tween entering upper and lower case, letters
and numbers:
Seite 21iDriveAt a glance21
Online Edition for Part no. 01 40 2 909 928 - VI/13
Page 146 of 255

General information
The congestion assistant determines speed
and distance from the vehicle in front via a ra‐
dar sensor and the position of the lane marking
via a camera.
Sensors on the steering wheel detect whether
the steering wheel is being touched.
The system is deactivated as soon as contact
with the steering wheel is no longer detected.
In order to be able to use the Congestion As‐
sistant, place your hands around the steering
wheel.
When driving with gloves or with protective
covers, contact with the steering wheel cannot
be detected by the sensors. The system in this
case cannot be used.
Notes Personal responsibility
The system does not relieve the driver of
the responsibility to adapt his or her speed,
distance and driving style to the traffic condi‐
tions. Drive attentively, and react to the current
traffic events. Intervene actively when neces‐
sary, e.g., by braking, steering or making an
evasive maneuver, otherwise, there is danger
of an accident.◀
Functional requirements▷Drive on approved road type. The data on
this are stored in the navigation system.▷Driving on the limited access highway or
divided lane roads.▷Sufficient lane width.▷Lane marking is detected.▷Vehicle driving ahead is detected.▷Speed below 25 mph/40 km/h.▷Both hands on the steering wheel rim.At a glance
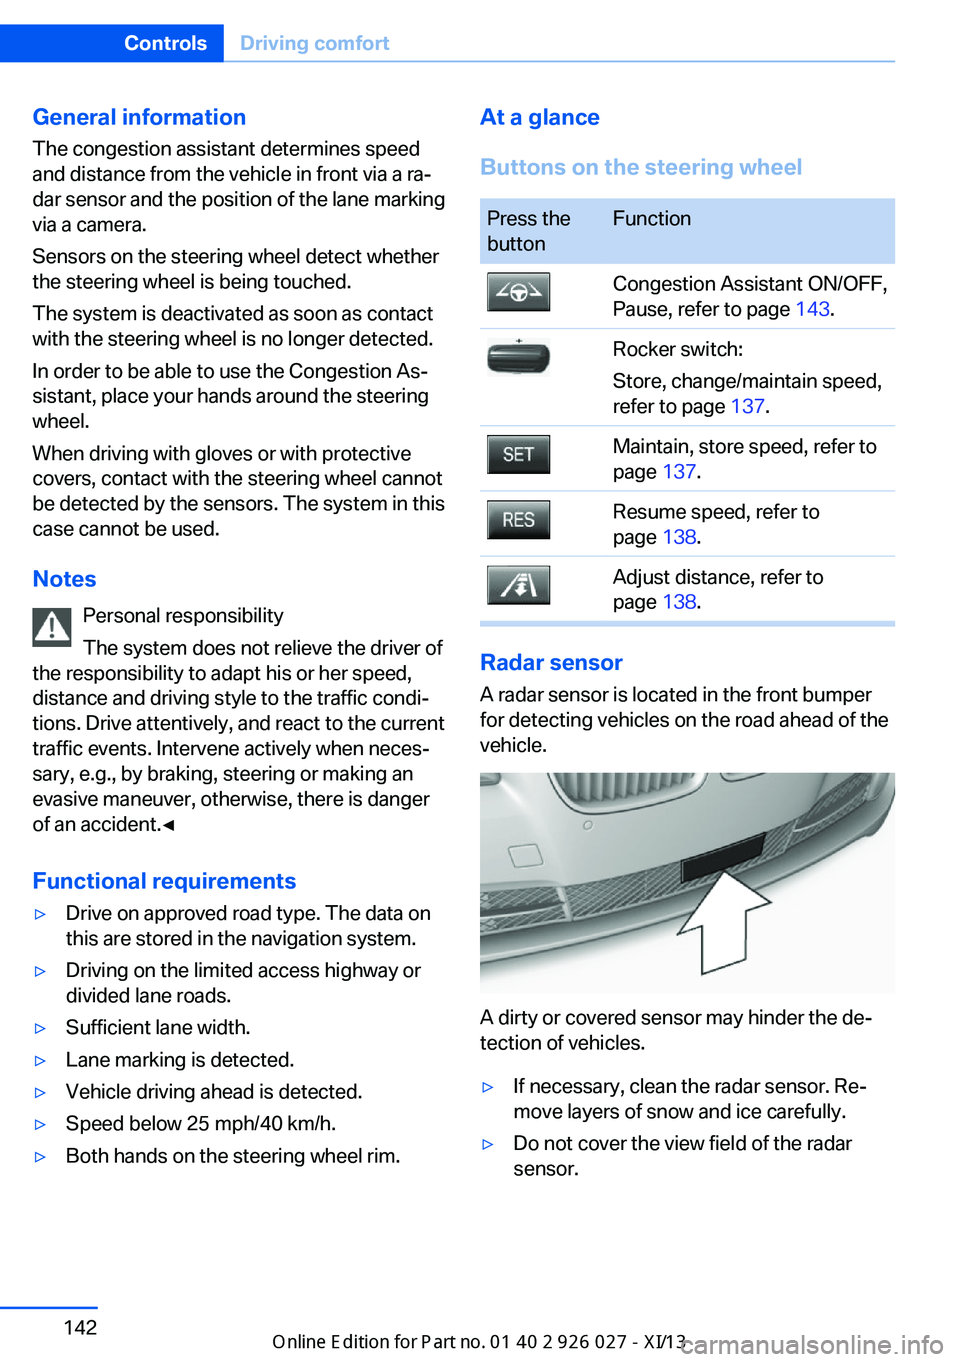
Buttons on the steering wheelPress the
buttonFunctionCongestion Assistant ON/OFF,
Pause, refer to page 143.Rocker switch:
Store, change/maintain speed,
refer to page 137.Maintain, store speed, refer to
page 137.Resume speed, refer to
page 138.Adjust distance, refer to
page 138.
Radar sensor
A radar sensor is located in the front bumper
for detecting vehicles on the road ahead of the
vehicle.
A dirty or covered sensor may hinder the de‐
tection of vehicles.
▷If necessary, clean the radar sensor. Re‐
move layers of snow and ice carefully.▷Do not cover the view field of the radar
sensor.Seite 142ControlsDriving comfort142
Online Edition for Part no. 01 40 2 909 928 - VI/13
Page 176 of 255

Switch off the ignition and take the remote
control with you when leaving the vehicle so
that children cannot use the lighter and burn
themselves.◀
Replace the cover after use
Reinsert the lighter or socket cover after
use, otherwise objects may get into the lighter
socket or fixture and cause a short circuit.◀
Rear
Opening
Press on the cover.
Emptying Take out the insert.
Connecting electrical devices
Hints Do not plug chargers into the socket
Do not connect battery chargers to the
factory-installed sockets in the vehicle as this
may damage the battery.◀
Replace the cover after use
Reinsert the lighter or socket cover after
use, otherwise objects may get into the lighter
socket or fixture and cause a short circuit.◀
Sockets
The lighter socket can be used as a socket for
electrical equipment while the engine is run‐
ning or when the ignition is switched on. The
total load of all sockets must not exceed
140 watts at 12 volts.
Do not damage the socket by using unsuitable
connectors.
Front center console
Press on the cover.
Remove the cover or cigarette lighter.
In the front passenger footwell
Socket is located below the glove compart‐
ment.
To access the socket: fold open the cover.
Seite 172ControlsInterior equipment172
Online Edition for Part no. 01 40 2 909 928 - VI/13
Page 177 of 255

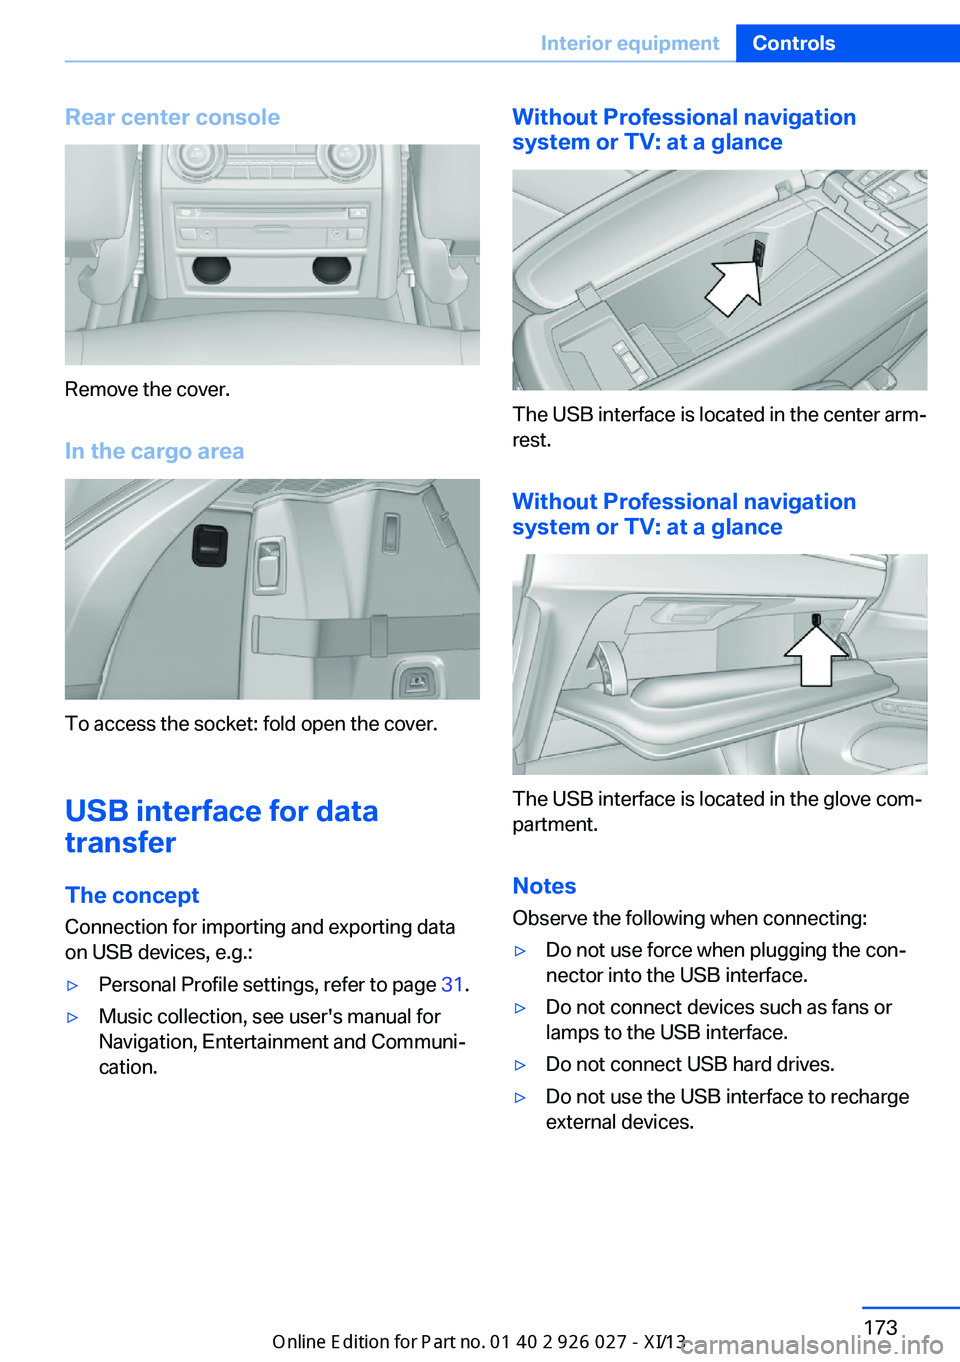
Rear center console
Remove the cover.
In the cargo area
To access the socket: fold open the cover.
USB interface for data
transfer
The concept Connection for importing and exporting data
on USB devices, e.g.:
▷Personal Profile settings, refer to page 31.▷Music collection, see user's manual for
Navigation, Entertainment and Communi‐
cation.Without Professional navigation
system or TV: at a glance
The USB interface is located in the center arm‐
rest.
Without Professional navigation
system or TV: at a glance
The USB interface is located in the glove com‐
partment.
Notes
Observe the following when connecting:
▷Do not use force when plugging the con‐
nector into the USB interface.▷Do not connect devices such as fans or
lamps to the USB interface.▷Do not connect USB hard drives.▷Do not use the USB interface to recharge
external devices.Seite 173Interior equipmentControls173
Online Edition for Part no. 01 40 2 909 928 - VI/13
Page 181 of 255

Storage compartmentsVehicle equipmentAll standard, country-specific and optional
equipment that is offered in the model series is
described in this chapter. Therefore, equip‐
ment is also described that is not available in a
vehicle, e. g., because of the selected optional
equipment or country variant. This also applies
for safety-related functions and systems.
Notes No loose objects in the passenger com‐
partment
Do not stow any objects in the passenger
compartment without securing them; other‐
wise, they may present a danger to occupants
for instance during braking and avoidance ma‐
neuvers.◀
Do not place anti-slip mats on the dash‐
board
Do not place anti-slip mats on the dashboard.
The mat materials could damage the dash‐
board.◀
Storage compartments
The following storage compartments are avail‐
able in the vehicle interior:▷Glove compartment on the driver's and
front passenger side, refer to page 177.▷Storage compartment in the center con‐
sole, refer to page 179.▷Storage compartment in the center arm‐
rest, refer to page 178, in the front and
rear.▷Compartments in the doors.▷Pockets on the backrests of the front
seats.▷Net in the front passenger footwell.
Glove compartment
Front passenger side
Note Close the glove compartment again im‐
mediately
Close the glove compartment immediately af‐
ter use while driving; otherwise, injury may oc‐
cur during accidents.◀
Opening
Pull the handle.
The light in the glove compartment switches
on.
ClosingFold up the cover.
Driver's side
Note Close the glove compartment again im‐
mediately
Close the glove compartment immediately af‐ ter use while driving; otherwise, injury may oc‐ cur during accidents.◀
Seite 177Storage compartmentsControls177
Online Edition for Part no. 01 40 2 909 928 - VI/13
Page 228 of 255

In the glove compartment
Push the handle up, arrow 1, and open the lid,
arrow 2.
In the cargo area
Open the cover on the right side trim.
Information on the fuse types and locations is
found on a separate sheet.
Seite 224MobilityReplacing components224
Online Edition for Part no. 01 40 2 909 928 - VI/13
Page 247 of 255

Engine, automatic Start/Stopfunction 69
Engine, automatic switch- off 69
Engine compartment 211
Engine compartment, work‐ ing in 211
Engine coolant 215
Engine idling when driving, coasting 194
Engine oil 213
Engine oil, adding 214
Engine oil additives 214
Engine oil change 214
Engine oil filler neck 214
Engine oil temperature 87
Engine oil types, alterna‐ tive 214
Engine oil types, ap‐ proved 214
Engine start during malfunc‐ tion 31
Engine start, jump-start‐ ing 227
Engine start, refer to Starting the engine 68
Engine stop 68
Engine temperature 87
Entering a car wash 230
Equipment, interior 169
ESP Electronic Stability Pro‐ gram, refer to DSC 127
Exchanging wheels/tires 207
Exhaust system 184
Exterior mirror, automatic dimming feature 58
Exterior mirrors 57
External start 227
External temperature dis‐ play 88
External temperature warn‐ ing 88
Eyes for securing cargo 188 F
Failure message, refer to Check Control 85
False alarm, refer to Uninten‐ tional alarm 44
Fan, refer to Air flow 163
Fault displays, refer to Check Control 85
Filler neck for engine oil 214
Fine wood, care 232
First aid kit 226
Fitting for towing, refer to Tow fitting 229
Flat tire, changing wheels 222
Flat Tire Monitor FTM 105
Flat tire, Tire Pressure Moni‐ tor TPM 107
Flat tire, warning lamp 106, 108
Flooding 185
Floor carpet, care 233
Floor mats, care 233
Fold-out position, windshield wipers 77
Foot brake 185
Front airbags 102
Front fog lamps 100
Front fog lamps, bulb replace‐ ment 221
Front fog lamps, front, bulb replacement 221
Front passenger airbags, au‐ tomatic deactivation 104
Front passenger airbags, indi‐ cator lamp 104
FTM Flat Tire Monitor 105
Fuel 200
Fuel cap 198
Fuel consumption, current 89
Fuel consumption, refer to Average fuel consump‐
tion 93
Fuel filler flap 198
Fuel gauge 87 Fuel quality 200
Fuel recommendation 200
Fuel, tank capacity 239
Fuse 223
G
Garage door opener, refer to Integrated universal remote
control 169
Gasoline 200
Gasoline quality 200
Gear change, automatic transmission 78
Gear shift indicator 90
General driving notes 184
Glass sunroof, refer to Panor‐ amic glass sunroof 47
Glove compartment 177
Gross vehicle weight, ap‐ proved 237
Gross weight, permissible for trailer towing 237
H
Handbrake, refer to Parking brake 71
Hand-held transmitter, alter‐ nating code 170
Hazard warning flashers 225
HDC Hill Descent Con‐ trol 129
Head airbags 102
Headlamp control, auto‐ matic 98
Headlamp courtesy delay fea‐ ture 97
Headlamp courtesy delay fea‐ ture via remote control 34
Headlamp flasher 75
Headlamp glass 219
Headlamps, care 231
Headlamp washer system 75
Headliner 15
Head restraints 49 Seite 243Everything from A to ZReference243
Online Edition for Part no. 01 40 2 909 928 - VI/13