2013 BMW 335IS COUPE ECU
[x] Cancel search: ECUPage 67 of 308
66
ControlsDriving
the clutch slip, as this may cause the transmis-
sion to overheat.
Selector lever positions
P R N D M/S + –
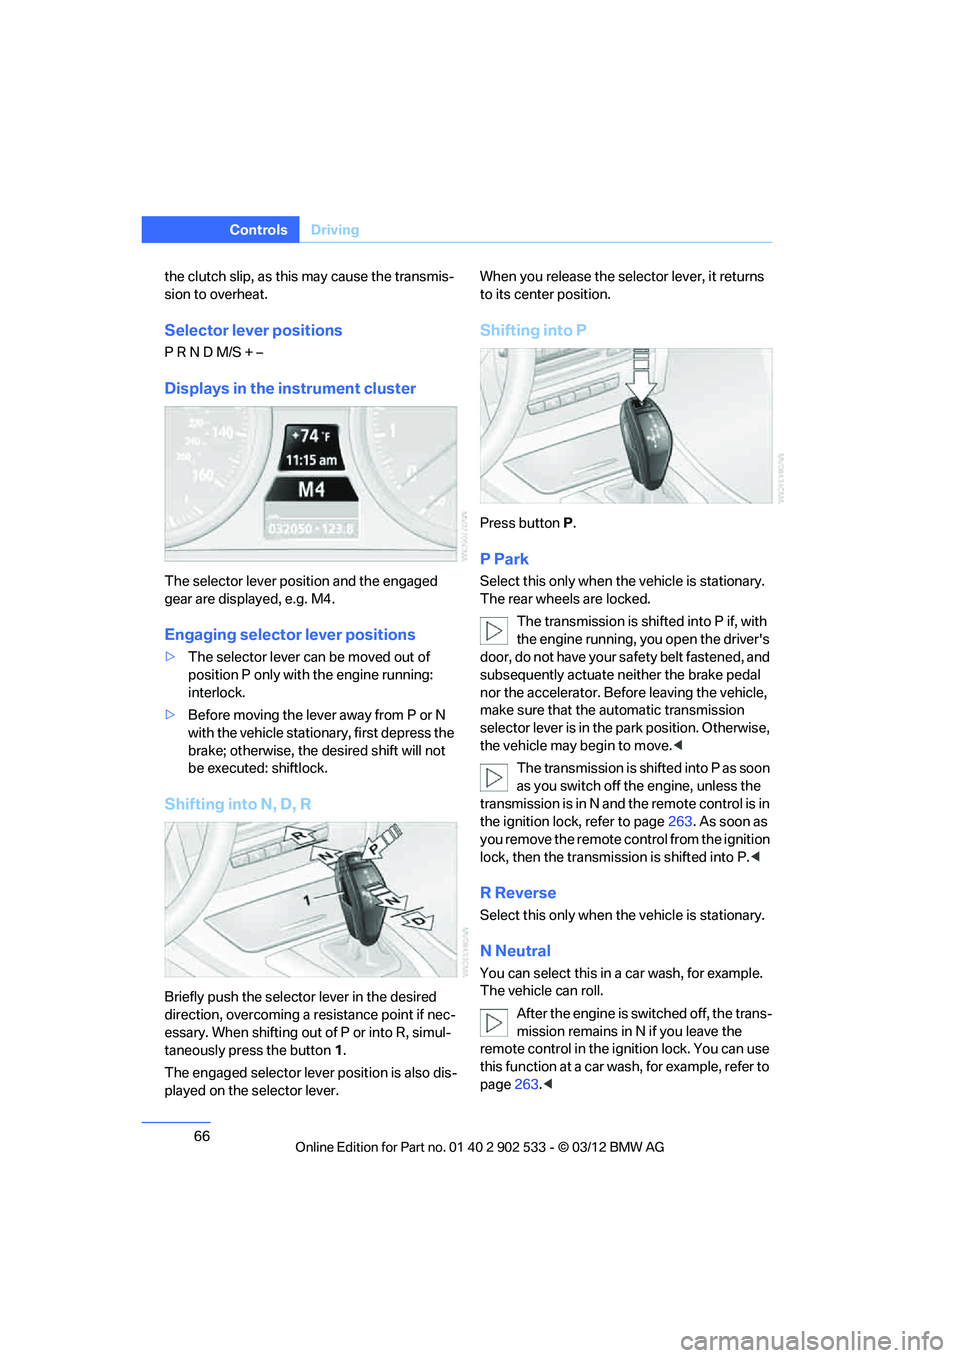
Displays in the instrument cluster
The selector lever position and the engaged
gear are displayed, e.g. M4.
Engaging selector lever positions
>The selector lever can be moved out of
position P only with the engine running:
interlock.
> Before moving the lever away from P or N
with the vehicle stationary, first depress the
brake; otherwise, the desired shift will not
be executed: shiftlock.
Shifting into N, D, R
Briefly push the selector lever in the desired
direction, overcoming a resistance point if nec-
essary. When shifting out of P or into R, simul-
taneously press the button 1.
The engaged selector lever position is also dis-
played on the selector lever. When you release the selector lever, it returns
to its center position.
Shifting into P
Press button
P.
P Park
Select this only when the vehicle is stationary.
The rear wheels are locked.
The transmission is shifted into P if, with
the engine running, you open the driver's
door, do not have your sa fety belt fastened, and
subsequently actuate neither the brake pedal
nor the accelerator. Before leaving the vehicle,
make sure that the automatic transmission
selector lever is in the park position. Otherwise,
the vehicle may begin to move. <
The transmission is shifted into P as soon
as you switch off the engine, unless the
transmission is in N and the remote control is in
the ignition lock, refer to page 263. As soon as
you remove the remote control from the ignition
lock, then the transmission is shifted into P. <
R Reverse
Select this only when the vehicle is stationary.
N Neutral
You can select this in a car wash, for example.
The vehicle can roll.
After the engine is switched off, the trans-
mission remains in N if you leave the
remote control in the ignition lock. You can use
this function at a car wash, for example, refer to
page 263.<
00320051004F004C00510048000300280047004C0057004C005200510003
Page 68 of 308
67
Driving
Controls
D Drive mode
In Drive mode, all forward gears are shifted
automatically.
Kickdown
For sudden acceleration maneuvers such as
passing, depress the accelerator past the resis-
tance point. This provides maximum accelera-
tion.
Sport program and manual mode M/S
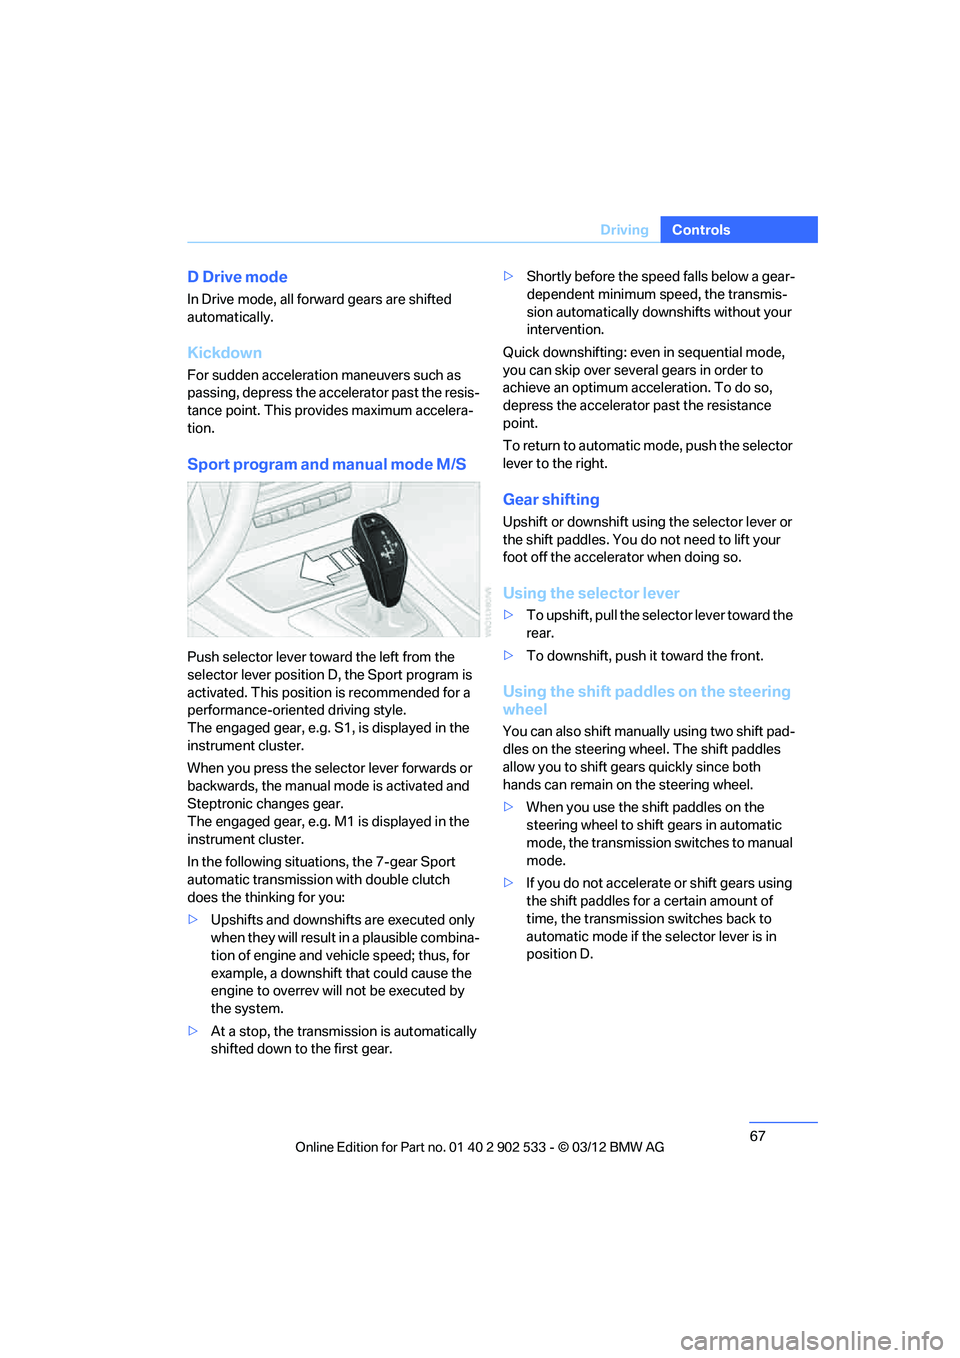
Push selector lever toward the left from the
selector lever position D, the Sport program is
activated. This position is recommended for a
performance-oriented driving style.
The engaged gear, e.g. S1, is displayed in the
instrument cluster.
When you press the selector lever forwards or
backwards, the manual mode is activated and
Steptronic changes gear.
The engaged gear, e.g. M1 is displayed in the
instrument cluster.
In the following situations, the 7-gear Sport
automatic transmission with double clutch
does the thinking for you:
>
Upshifts and downshifts are executed only
when they will result in a plausible combina-
tion of engine and vehicle speed; thus, for
example, a downshift that could cause the
engine to overrev will not be executed by
the system.
> At a stop, the transmission is automatically
shifted down to the first gear. >
Shortly before the speed falls below a gear-
dependent minimum speed, the transmis-
sion automatically downshifts without your
intervention.
Quick downshifting: even in sequential mode,
you can skip over several gears in order to
achieve an optimum acceleration. To do so,
depress the accelerator past the resistance
point.
To return to automatic mode, push the selector
lever to the right.
Gear shifting
Upshift or downshift using the selector lever or
the shift paddles. You do not need to lift your
foot off the accelerator when doing so.
Using the selector lever
> To upshift, pull the selector lever toward the
rear.
> To downshift, push it toward the front.
Using the shift paddles on the steering
wheel
You can also shift manually using two shift pad-
dles on the steering wheel. The shift paddles
allow you to shift gears quickly since both
hands can remain on the steering wheel.
>When you use the shift paddles on the
steering wheel to shift gears in automatic
mode, the transmission switches to manual
mode.
> If you do not accelerate or shift gears using
the shift paddles for a certain amount of
time, the transmission switches back to
automatic mode if the selector lever is in
position D.
00320051004F004C00510048000300280047004C0057004C005200510003
Page 91 of 308
90
ControlsControls overview
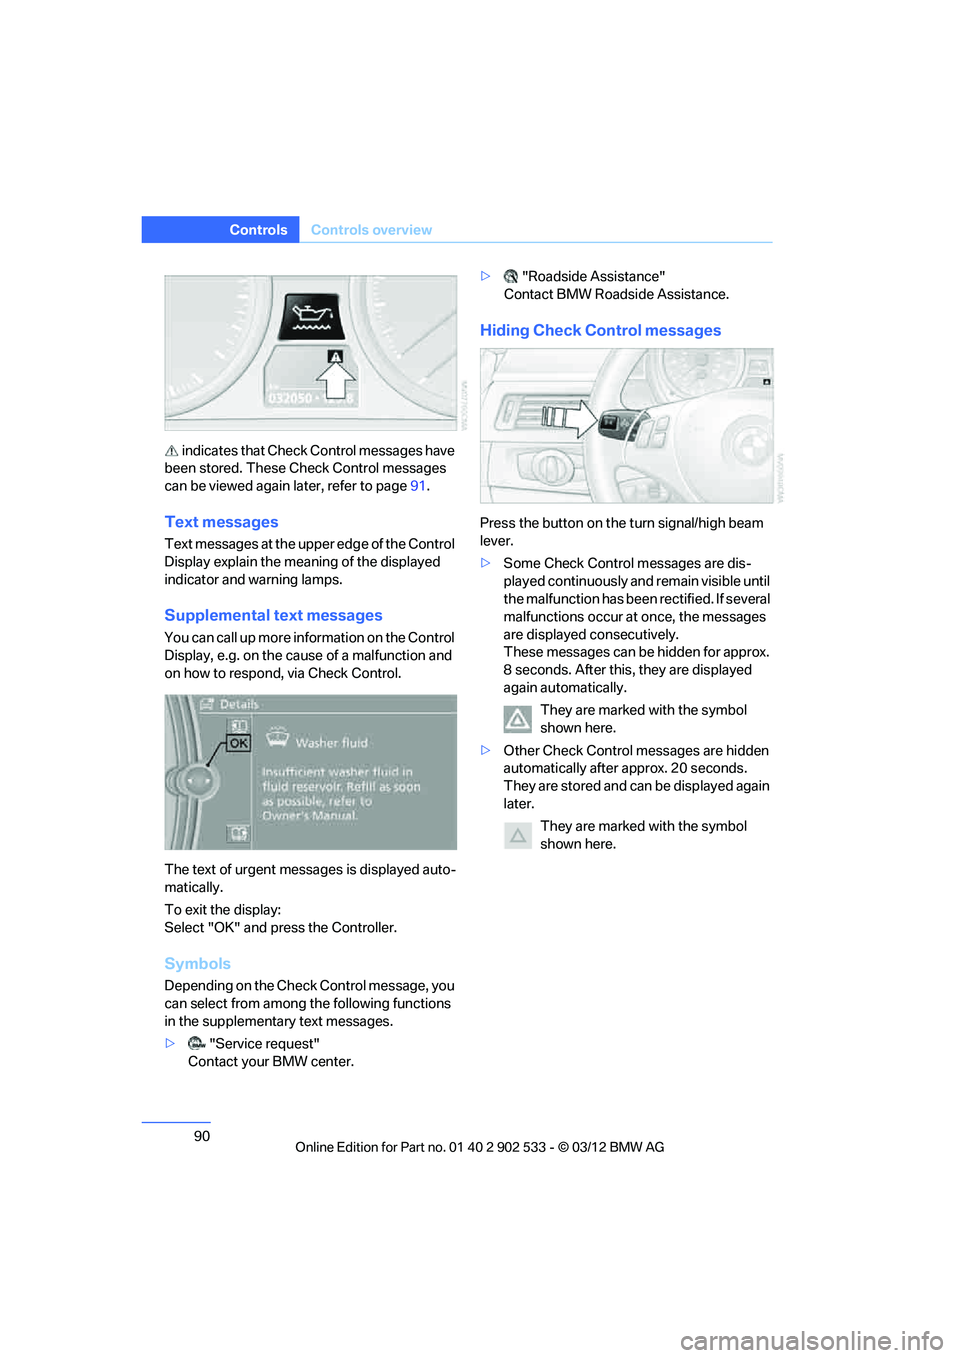
indicates that Check Control messages have
been stored. These Check Control messages
can be viewed again later, refer to page 91.
Text messages
Text messages at the upper edge of the Control
Display explain the meaning of the displayed
indicator and warning lamps.
Supplemental text messages
You can call up more in formation on the Control
Display, e.g. on the cause of a malfunction and
on how to respond, via Check Control.
The text of urgent messages is displayed auto-
matically.
To exit the display:
Select "OK" and press the Controller.
Symbols
Depending on the Check Control message, you
can select from among the following functions
in the supplementary text messages.
> "Service request"
Contact your BMW center. >
"Roadside Assistance"
Contact BMW Roadside Assistance.
Hiding Check Control messages
Press the button on the turn signal/high beam
lever.
> Some Check Control messages are dis-
played continuously and remain visible until
the malfunction has been rectified. If several
malfunctions occur at once, the messages
are displayed consecutively.
These messages can be hidden for approx.
8 seconds. After this, they are displayed
again automatically.
They are marked with the symbol
shown here.
> Other Check Control messages are hidden
automatically after approx. 20 seconds.
They are stored and can be displayed again
later.
They are marked with the symbol
shown here.
00320051004F004C00510048000300280047004C0057004C005200510003
Page 97 of 308
96
ControlsTechnology for driving comfort and safety
safety margin again by taking risks, as this could
result in an accident. <
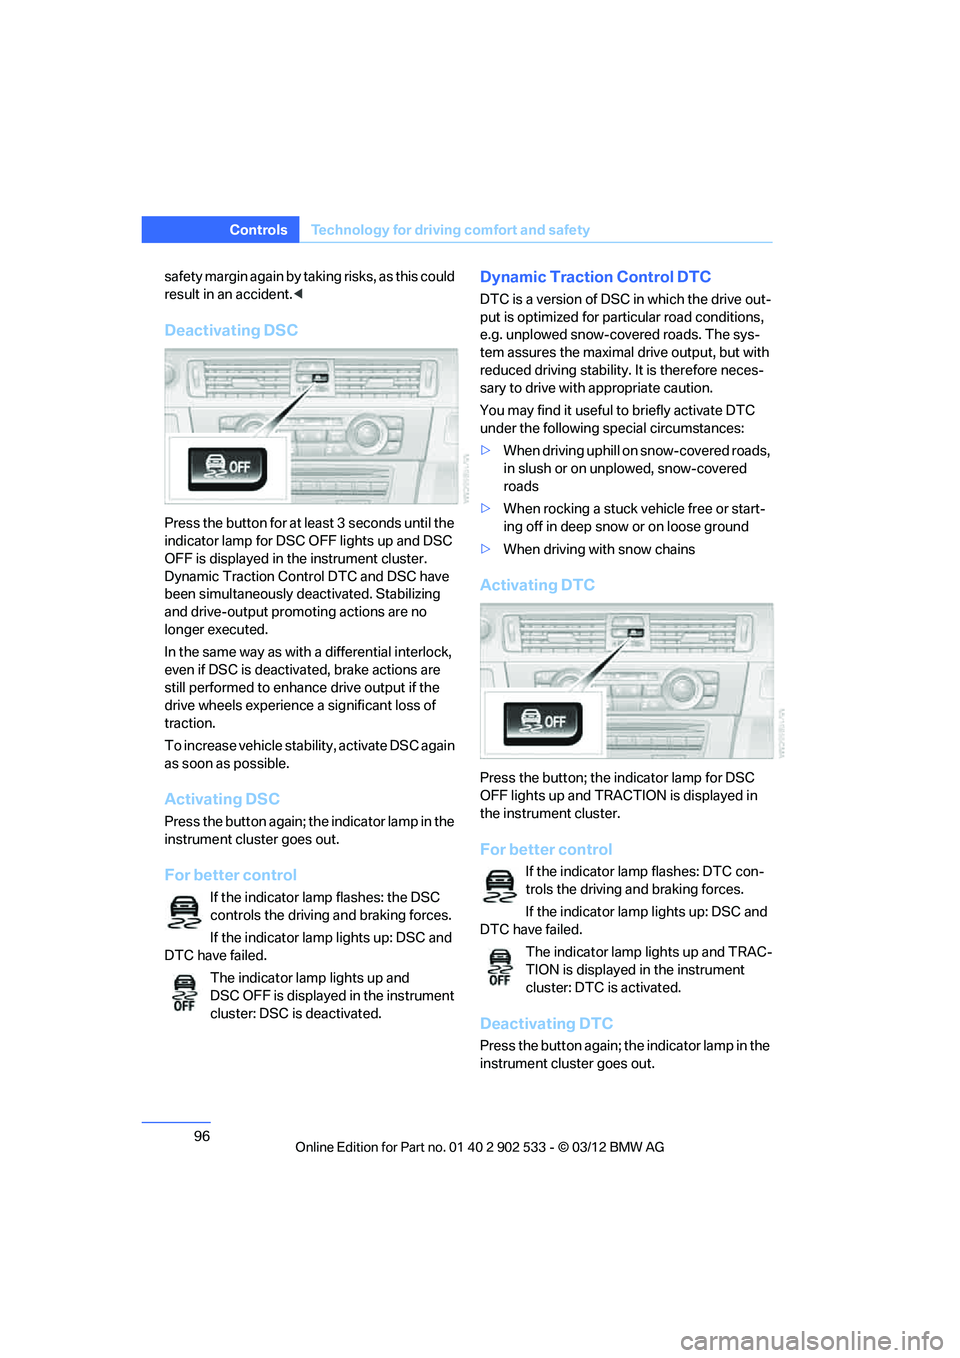
Deactivating DSC
Press the button for at least 3 seconds until the
indicator lamp for DSC OFF lights up and DSC
OFF is displayed in the instrument cluster.
Dynamic Traction Control DTC and DSC have
been simultaneously deactivated. Stabilizing
and drive-output promoting actions are no
longer executed.
In the same way as with a differential interlock,
even if DSC is deactivated, brake actions are
still performed to enhance drive output if the
drive wheels experience a significant loss of
traction.
To increase vehicle stability, activate DSC again
as soon as possible.
Activating DSC
Press the button again; the indicator lamp in the
instrument cluster goes out.
For better control
If the indicator lamp flashes: the DSC
controls the driving and braking forces.
If the indicator lamp lights up: DSC and
DTC have failed.
The indicator lamp lights up and
DSC OFF is displayed in the instrument
cluster: DSC is deactivated.
Dynamic Traction Control DTC
DTC is a version of DSC in which the drive out-
put is optimized for particular road conditions,
e.g. unplowed snow-covered roads. The sys-
tem assures the maximal drive output, but with
reduced driving stability. It is therefore neces-
sary to drive with appropriate caution.
You may find it useful to briefly activate DTC
under the following special circumstances:
>When driving uphill on snow-covered roads,
in slush or on unplowed, snow-covered
roads
> When rocking a stuck vehicle free or start-
ing off in deep snow or on loose ground
> When driving with snow chains
Activating DTC
Press the button; the indicator lamp for DSC
OFF lights up and TRACTION is displayed in
the instrument cluster.
For better control
If the indicator lamp flashes: DTC con-
trols the driving and braking forces.
If the indicator lamp lights up: DSC and
DTC have failed.
The indicator lamp lights up and TRAC-
TION is displayed in the instrument
cluster: DTC is activated.
Deactivating DTC
Press the button again; the indicator lamp in the
instrument cluster goes out.
00320051004F004C00510048000300280047004C0057004C005200510003
Page 121 of 308
120
ControlsPractical interior accessories
Practical interior accessories
Vehicle equipment
In this chapter, all production, country, and
optional equipment that is offered in the model
range is described. For this reason, descrip-
tions will be given of some equipment that may
not be available in a vehicle, for example due to
the special options or national-market version
selected. This also applies to safety related
functions and systems.
Integrated universal remote
control
The concept
The Integrated universal remote control can be
used to operate up to 3 functions of remote-
controlled devices such as garage door open-
ers or lighting systems. The Integrated univer-
sal remote control thus replaces as many as
three different hand-held transmitters. To oper-
ate them, the buttons on the interior rearview
mirror must be programmed with the desired
functions. Programming requires the hand-held
transmitter for the respective device.
To prevent possible damage or injury,
before programming or using the inte-
grated universal remote control to operate a
device, always inspect the immediate area to
make certain that no people, animals or objects
are within the pivoting or travel range of the
device being operated.
Also follow the safety instructions supplied with
the hand-held transmitter. <
For security reasons, make sure to delete the
stored functions before selling the vehicle, refer
to page 122.
Compatibility
If this symbol appears on the package
or in the instructions supplied with the
device to be operated, you can gener-
ally assume that the device is compatible with
the Integrated universal remote control.
For additional questions, please consult:
> your BMW center.
> www.homelink.com on the Internet.
HomeLink is a registered trademark of Johnson
Controls, Inc.
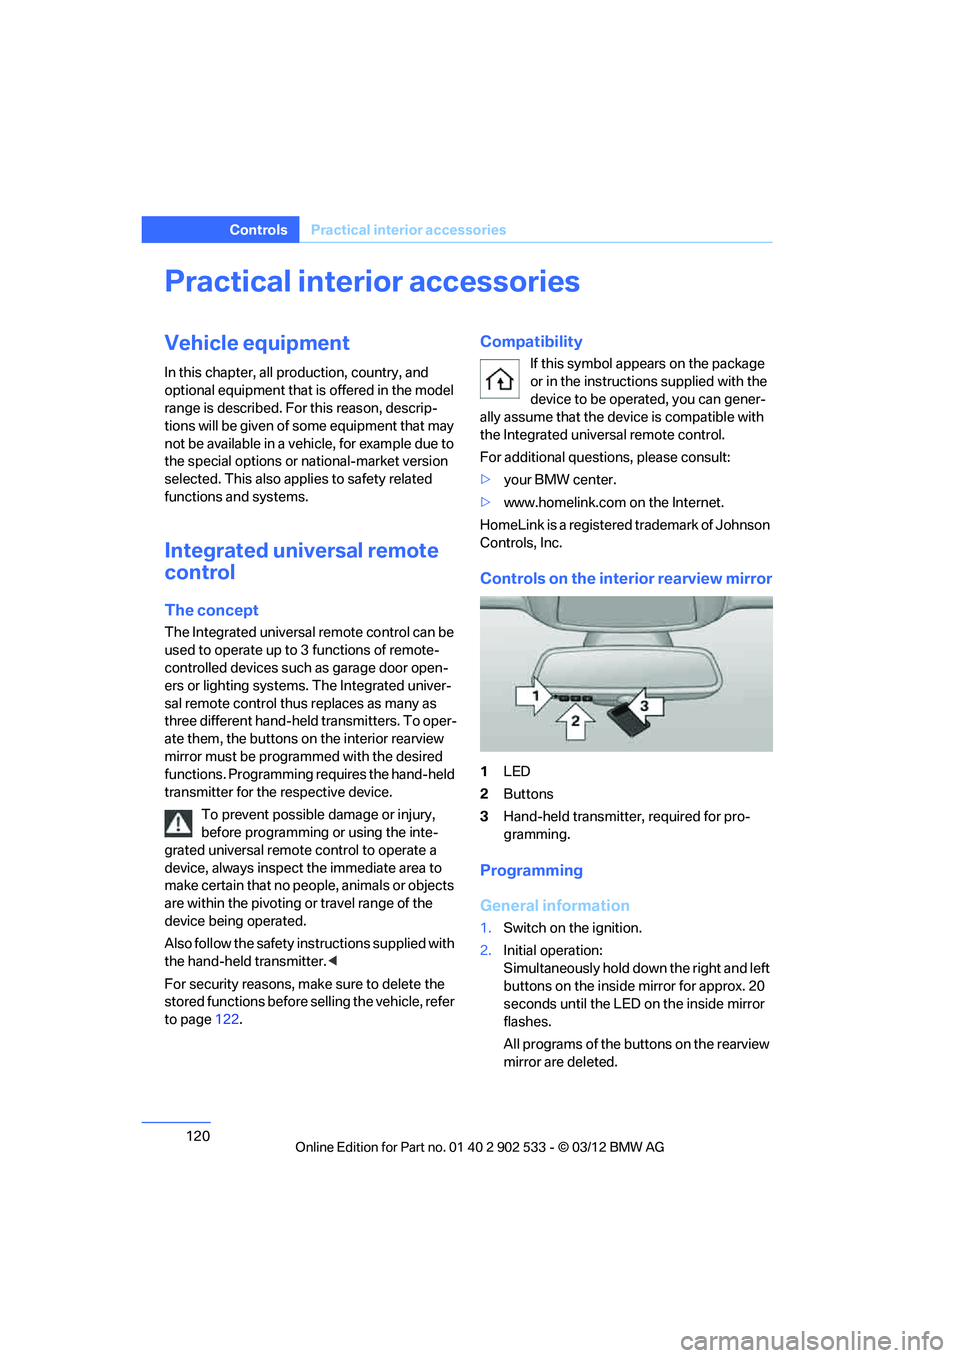
Controls on the interior rearview mirror
1 LED
2 Buttons
3 Hand-held transmitter, required for pro-
gramming.
Programming
General information
1.Switch on the ignition.
2. Initial operation:
Simultaneously hold down the right and left
buttons on the inside mirror for approx. 20
seconds until the LED on the inside mirror
flashes.
All programs of the buttons on the rearview
mirror are deleted.
00320051004F004C00510048000300280047004C0057004C005200510003
Page 126 of 308
125
Practical interior accessories
Controls
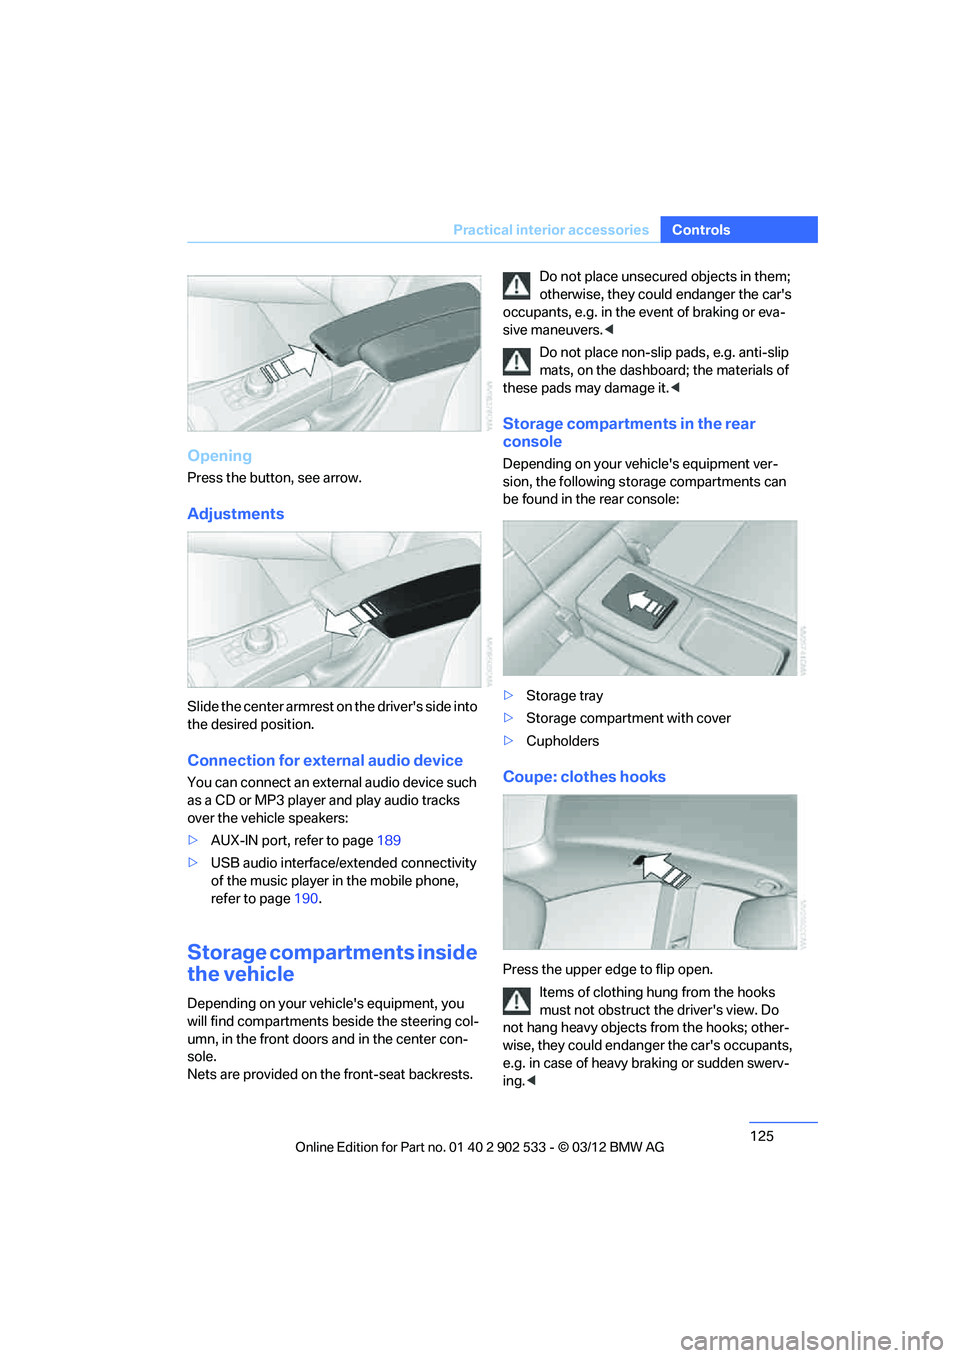
Opening
Press the button, see arrow.
Adjustments
Slide the center armrest on the driver's side into
the desired position.
Connection for external audio device
You can connect an external audio device such
as a CD or MP3 player and play audio tracks
over the vehicle speakers:
>
AUX-IN port, refer to page 189
> USB audio interface/extended connectivity
of the music player in the mobile phone,
refer to page 190.
Storage compartments inside
the vehicle
Depending on your vehicle's equipment, you
will find compartments beside the steering col-
umn, in the front doors and in the center con-
sole.
Nets are provided on the front-seat backrests. Do not place unsecured objects in them;
otherwise, they could endanger the car's
occupants, e.g. in the event of braking or eva-
sive maneuvers. <
Do not place non-slip pads, e.g. anti-slip
mats, on the dashboard; the materials of
these pads may damage it. <
Storage compartments in the rear
console
Depending on your vehicle's equipment ver-
sion, the following storage compartments can
be found in the rear console:
>Storage tray
> Storage compartment with cover
> Cupholders
Coupe: clothes hooks
Press the upper edge to flip open.
Items of clothing hung from the hooks
must not obstruct the driver's view. Do
not hang heavy objects from the hooks; other-
wise, they could endanger the car's occupants,
e.g. in case of heavy braking or sudden swerv-
ing. <
00320051004F004C00510048000300280047004C0057004C005200510003
Page 129 of 308
128
ControlsPractical interior accessories
Coupe:
Through-loading system
Opening
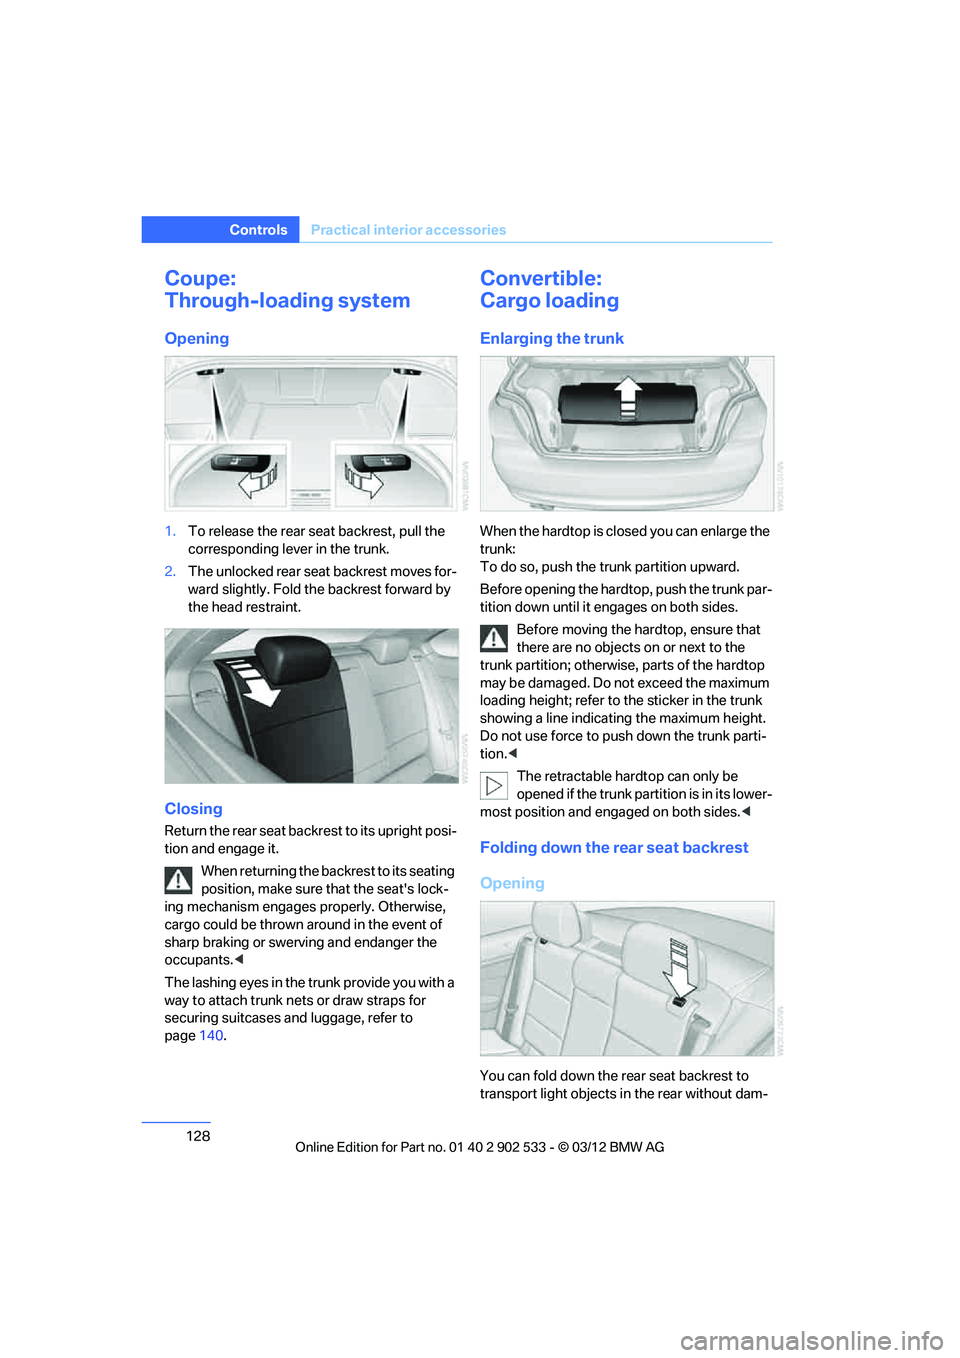
1.To release the rear seat backrest, pull the
corresponding lever in the trunk.
2. The unlocked rear seat backrest moves for-
ward slightly. Fold the backrest forward by
the head restraint.
Closing
Return the rear seat backrest to its upright posi-
tion and engage it.
When returning the backrest to its seating
position, make sure that the seat's lock-
ing mechanism engages properly. Otherwise,
cargo could be thrown around in the event of
sharp braking or swerving and endanger the
occupants. <
The lashing eyes in the trunk provide you with a
way to attach trunk nets or draw straps for
securing suitcases and luggage, refer to
page 140.
Convertible:
Cargo loading
Enlarging the trunk
When the hardtop is closed you can enlarge the
trunk:
To do so, push the trunk partition upward.
Before opening the hardtop, push the trunk par-
tition down until it engages on both sides.
Before moving the hardtop, ensure that
there are no objects on or next to the
trunk partition; otherwise, parts of the hardtop
may be damaged. Do not exceed the maximum
loading height; refer to the sticker in the trunk
showing a line indicating the maximum height.
Do not use force to push down the trunk parti-
tion. <
The retractable hardtop can only be
opened if the trunk partition is in its lower-
most position and engaged on both sides. <
Folding down the rear seat backrest
Opening
You can fold down the rear seat backrest to
transport light objects in the rear without dam-
00320051004F004C00510048000300280047004C0057004C005200510003
Page 130 of 308
129
Practical interior accessories
Controls
aging the seats. Depending on the vehicle
equipment, the mounting points for the trunk
net are found on the rear panel of the backrest.
To unlock the rear seat backrest: press the but-
ton on the driver's or the opposite side.
Closing
Return the rear seat backrest to the upright
seating position and engage it.
When returning the backrest to its seating
position, make sure that the seat's lock-
ing mechanism engages properly. Otherwise,
cargo could be thrown around in the event of
sharp braking or swerving and endanger the
occupants. <
Bag holder
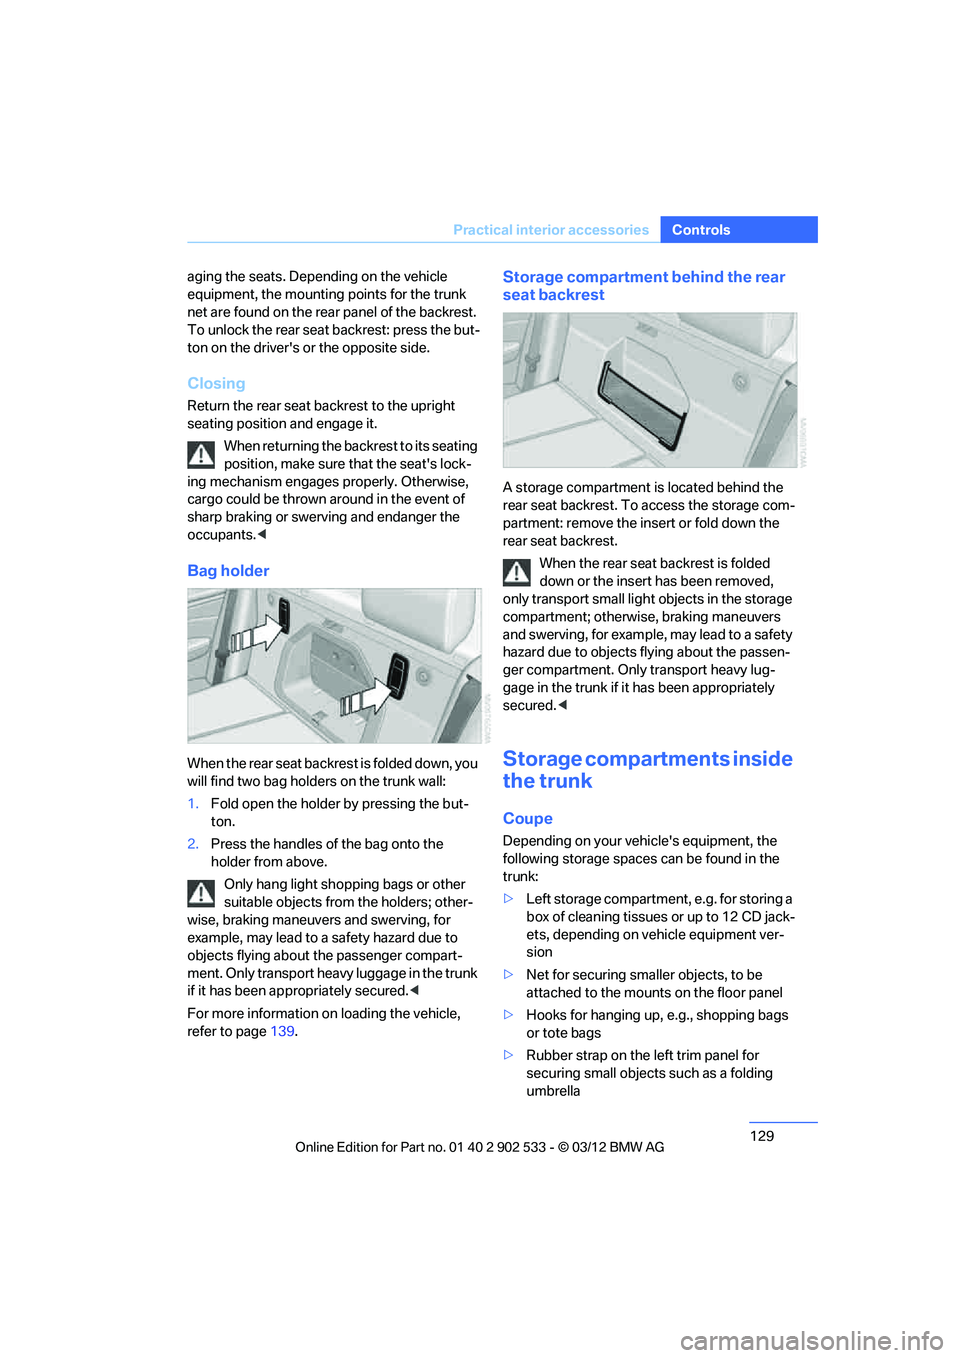
When the rear seat backrest is folded down, you
will find two bag holders on the trunk wall:
1.Fold open the holder by pressing the but-
ton.
2. Press the handles of the bag onto the
holder from above.
Only hang light shopping bags or other
suitable objects from the holders; other-
wise, braking maneuvers and swerving, for
example, may lead to a safety hazard due to
objects flying about the passenger compart-
ment. Only transport heavy luggage in the trunk
if it has been appropriately secured. <
For more information on loading the vehicle,
refer to page 139.
Storage compartment behind the rear
seat backrest
A storage compartment is located behind the
rear seat backrest. To access the storage com-
partment: remove the insert or fold down the
rear seat backrest.
When the rear seat backrest is folded
down or the insert has been removed,
only transport small ligh t objects in the storage
compartment; otherwise, braking maneuvers
and swerving, for example, may lead to a safety
hazard due to objects flying about the passen-
ger compartment. Only transport heavy lug-
gage in the trunk if it has been appropriately
secured. <
Storage compartments inside
the trunk
Coupe
Depending on your vehicle's equipment, the
following storage spaces can be found in the
trunk:
>Left storage compartment, e.g. for storing a
box of cleaning tissues or up to 12 CD jack-
ets, depending on vehicle equipment ver-
sion
> Net for securing smaller objects, to be
attached to the mounts on the floor panel
> Hooks for hanging up, e.g., shopping bags
or tote bags
> Rubber strap on the left trim panel for
securing small objects such as a folding
umbrella
00320051004F004C00510048000300280047004C0057004C005200510003