2013 BMW 335I XDRIVE COUPE window
[x] Cancel search: windowPage 12 of 308

11
Dashboard
At a glance
4
Exterior mirrors folding in and out 53
5 Adjusting exterior mirrors, automatic curb
monitor 53
9 Instrument cluster 12 12
Ignition lock 60
13 Buttons on the steering wheel
15 Horn, entire surface
16 Adjusting the steering wheel 55
18 Releasing the hood 256
19 OBD socket 261
20 Opening the trunk lid 35
1
Convertible: opening and closing
windows jointly
40
2 Convertible: opening and closing
rear windows
40
3 Opening and closing front
windows
40
6 Parking lamps 108
Low beams 108
Automatic headlamp control 108
Adaptive Light Control 109
High-beam Assistant 110
7 Fog lamps 112
8 Turn signals 70
High beams, headlamp
flasher 110
High-beam Assistant 110
Roadside parking lamps 110
Computer 82
Settings and information about the
vehicle 84
10 Windshield wipers 70
Rain sensor 71
11Switching the ignition on/off and
starting/stopping the engine
60
Telephone: accepting and ending
a call; dialing the selected phone
number; redialing if no phone
number is selected
Convertible: microphone on steer-
ing column
Volume
Activating/deactivating the voice
activation system 25
Convertible: microphone on steer-
ing column
Changing the radio station
Interrupting a traffic bulletin
Selecting a music track
Scrolling through the redial list
Next entertainment source
Recirculated air mode 116
14 Steering wheel heating 55
17 Cruise control 74
Active Cruise Control 74
00320051004F004C00510048000300280047004C0057004C005200510003
Page 16 of 308
15
Dashboard
At a glance
6
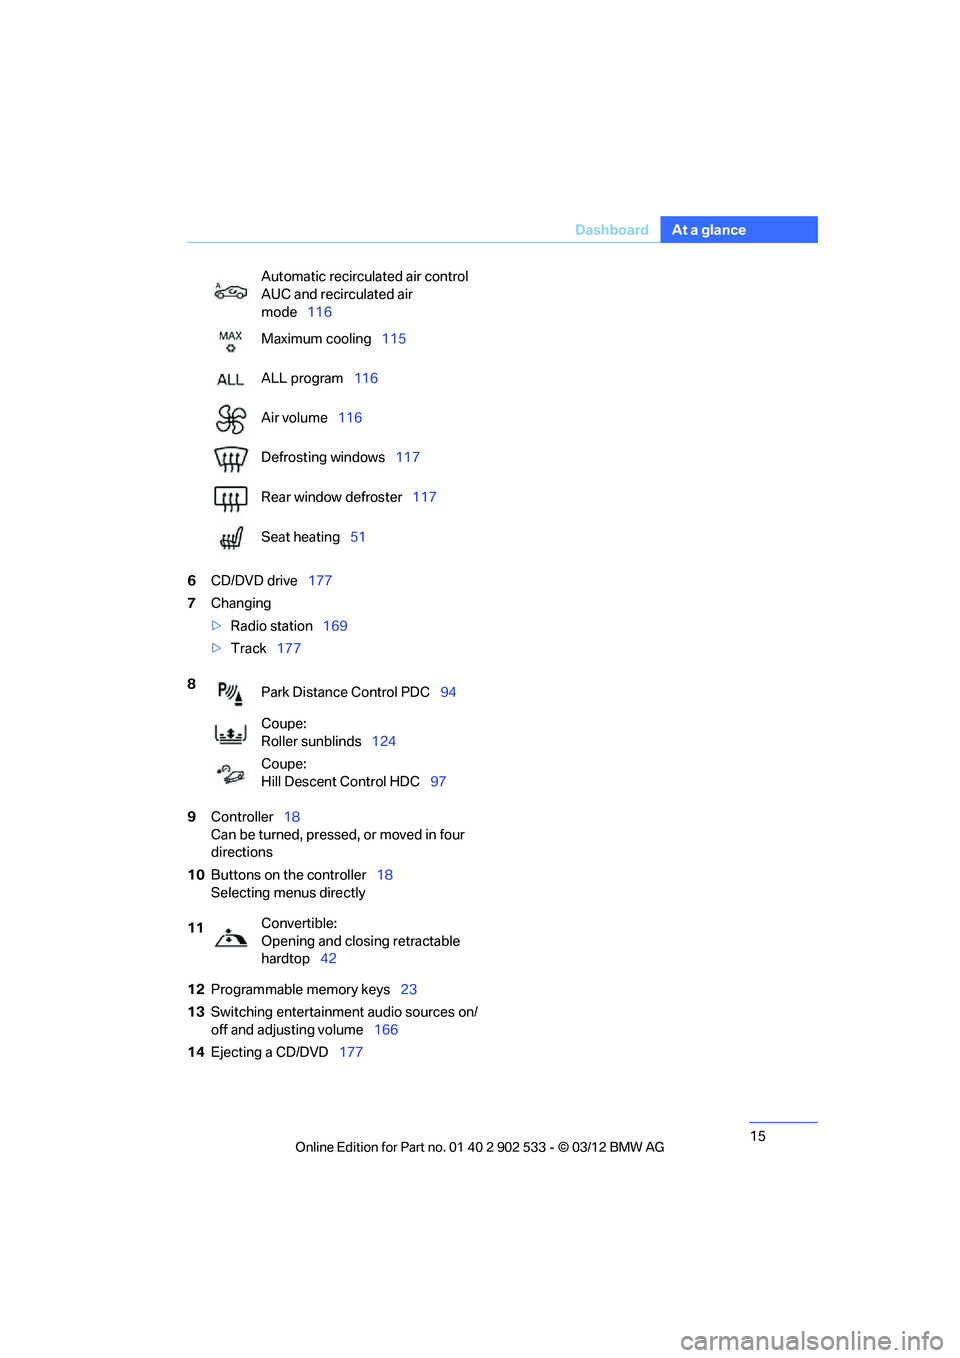
CD/DVD drive 177
7 Changing
>Radio station 169
> Track 177
9 Controller 18
Can be turned, pressed, or moved in four
directions
10 Buttons on the controller 18
Selecting menus directly
12 Programmable memory keys 23
13 Switching entertainment audio sources on/
off and adjusting volume 166
14 Ejecting a CD/DVD 177
Automatic recirculated air control
AUC and recirculated air
mode
116
Maximum cooling 115
ALL program 116
Air volume 116
Defrosting windows 117
Rear window defroster 117
Seat heating 51
8 Park Distance Control PDC 94
Coupe:
Roller sunblinds 124
Coupe:
Hill Descent Control HDC 97
11 Convertible:
Opening and closing retractable
hardtop
42
00320051004F004C00510048000300280047004C0057004C005200510003
Page 28 of 308
27
Voice activation system
At a glance
>
When selecting a radio station, use the
standard pronunciation of the station name:
{Station … } e.g. National Public Radio
> Keep the doors, windows, glass roof/pan-
oramic glass roof closed to prevent interfer-
ence from ambient noise.
> Avoid ambient noise in the vehicle while
speaking.
00320051004F004C00510048000300280047004C0057004C005200510003
Page 33 of 308
32
ControlsOpening and closing
Opening and closing:
Using the remote control
Persons or animals in a parked vehicle
could lock the doors from the inside. You
should therefore take the remote control with
you when you leave the vehicle so that the latter
can be opened from outside. <
Convertible: to operate the retractable
hardtop with the remote control, the
doors and trunk lid must be closed and the
trunk partition must be folded down and
engaged on both sides. Refer also to page 43.<
Unlocking
Press the button.
The interior lamps, the courtesy lighting of the
doors, and the welcome lamps come on.
Setting unlocking characteristics
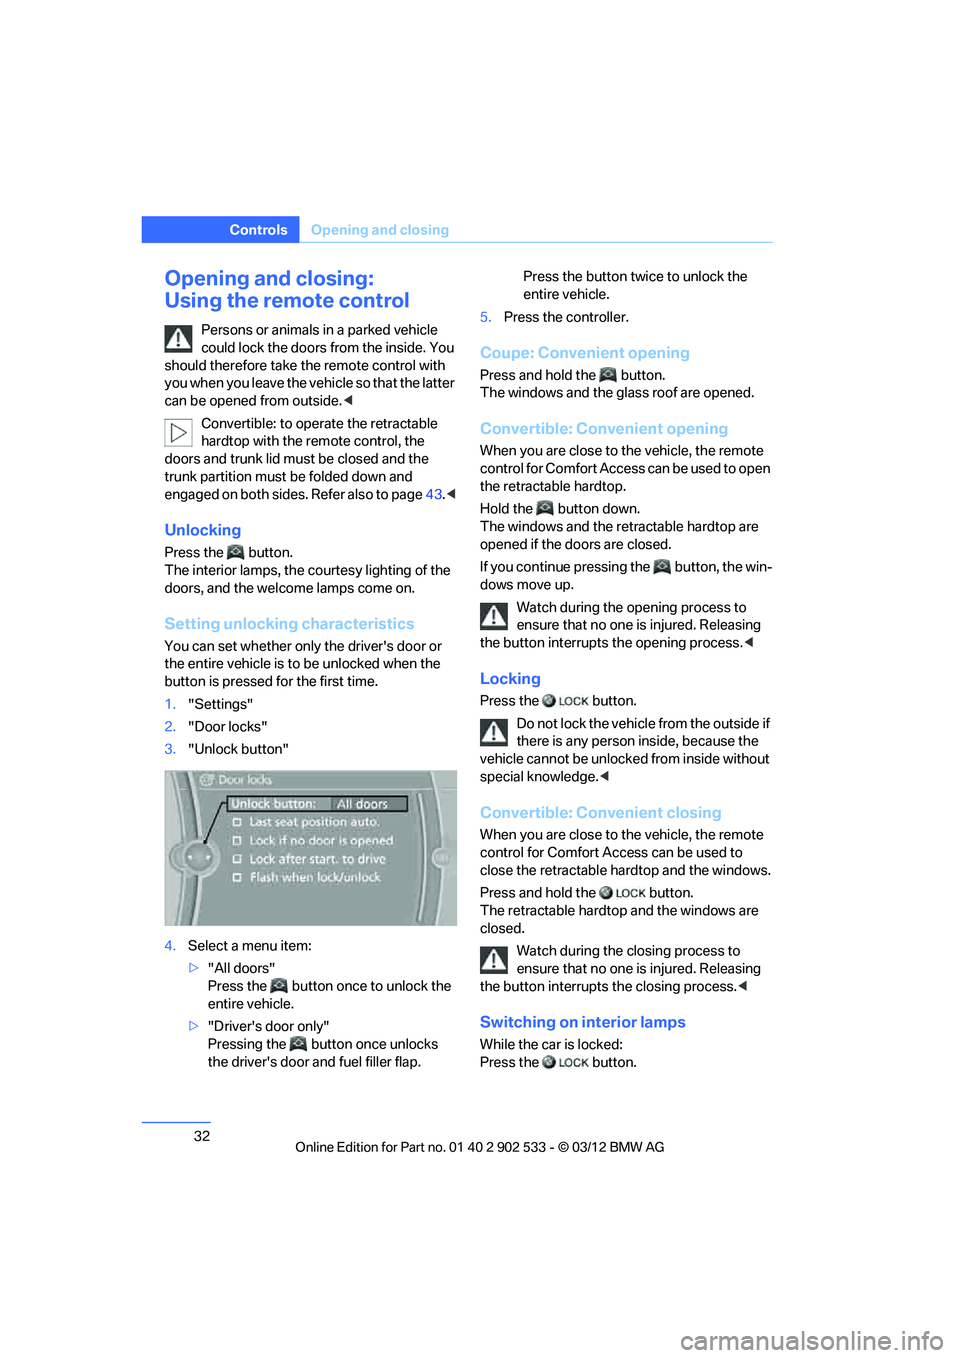
You can set whether only the driver's door or
the entire vehicle is to be unlocked when the
button is pressed for the first time.
1. "Settings"
2. "Door locks"
3. "Unlock button"
4. Select a menu item:
>"All doors"
Press the button once to unlock the
entire vehicle.
> "Driver's door only"
Pressing the button once unlocks
the driver's door and fuel filler flap. Press the button twice to unlock the
entire vehicle.
5. Press the controller.
Coupe: Convenient opening
Press and hold the button.
The windows and the glass roof are opened.
Convertible: Convenient opening
When you are close to the vehicle, the remote
control for Comfort Access can be used to open
the retractable hardtop.
Hold the button down.
The windows and the retractable hardtop are
opened if the doors are closed.
If you continue pressing the button, the win-
dows move up.
Watch during the opening process to
ensure that no one is injured. Releasing
the button interrupts the opening process. <
Locking
Press the button.
Do not lock the vehicle from the outside if
there is any person inside, because the
vehicle cannot be unlocked from inside without
special knowledge. <
Convertible: Convenient closing
When you are close to the vehicle, the remote
control for Comfort Access can be used to
close the retractable hardtop and the windows.
Press and hold the button.
The retractable hardtop and the windows are
closed.
Watch during the closing process to
ensure that no one is injured. Releasing
the button interrupts the closing process. <
Switching on interior lamps
While the car is locked:
Press the button.
00320051004F004C00510048000300280047004C0057004C005200510003
Page 38 of 308
37
Opening and closing
Controls
>
When there has been an interruption of
power supply from the battery
The alarm system signals unauthorized entry
attempts for a short time by means of:
> An acoustic alarm
> Switching on the hazard warning flashers
> Flashing the high beams
Arming and disarming
General information
When you lock or unlock the vehicle, either with
the remote control or at the door lock, the alarm
system is armed or disarmed at the same time.
Door lock with armed alarm system
In some national-market versions, unlocking via
the door lock triggers the alarm.
To switch off this alarm, unlock the vehicle with
the remote control or switch on the ignition.
Trunk lid with the alarm system armed
The trunk lid can be opened via the remote con-
trol even when the alarm system is armed.
Press the button on the remote control for
approx. 1 second.
The trunk lid is locked and monitored again as
soon as it is closed.
Panic mode
You can trigger the alarm system if you find
yourself in a dangerous situation:
Press the button for at least three seconds.
To switch off the alarm: press any button.
Switching off an alarm
>Unlock the car with the remote control, refer
to page 32.
> Insert the remote control all the way into the
ignition lock.
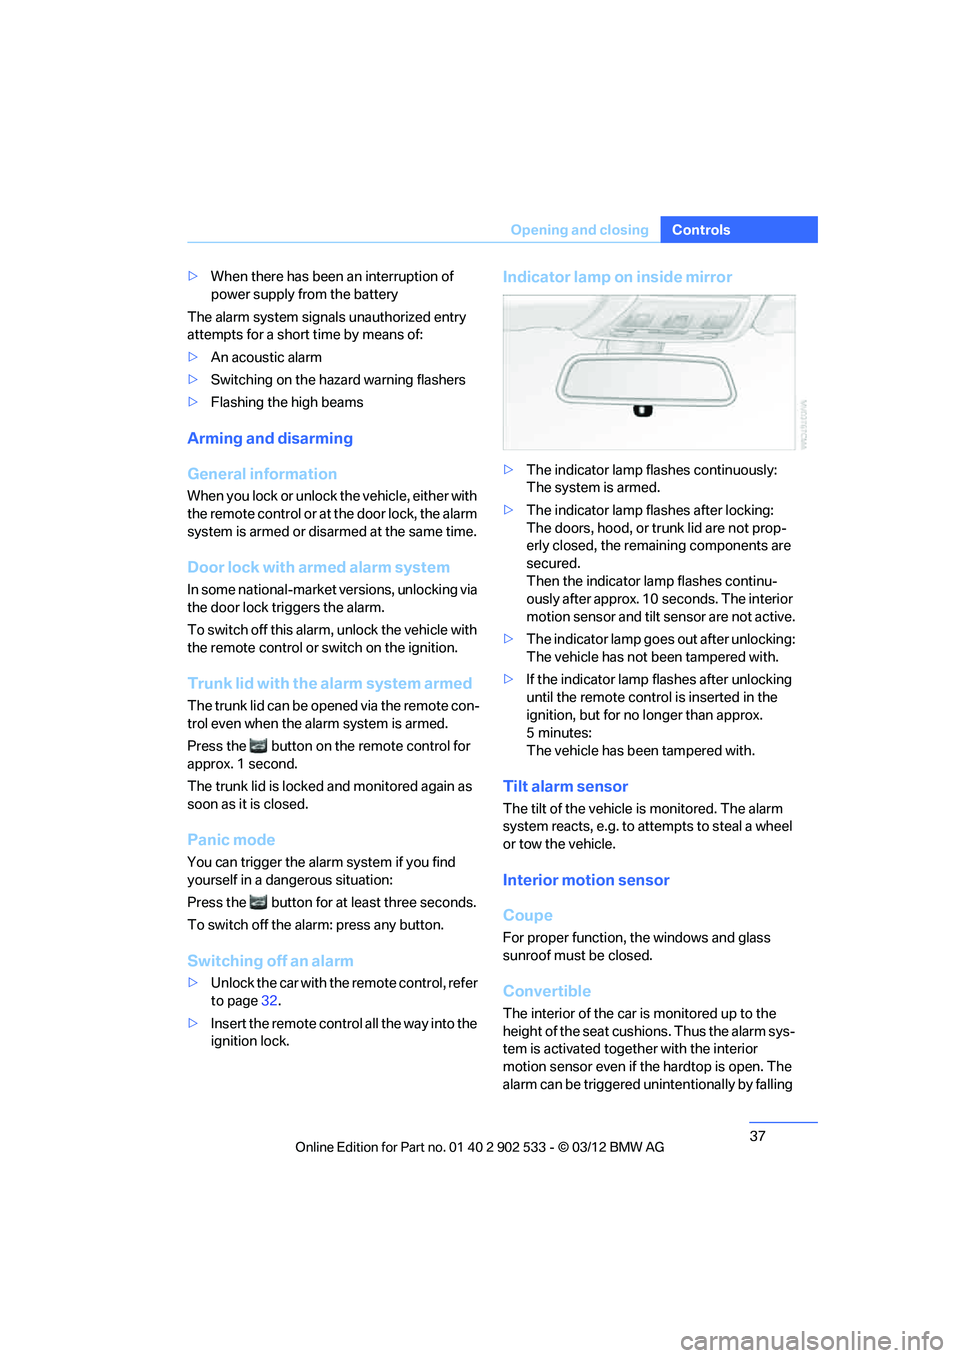
Indicator lamp on inside mirror
>The indicator lamp flashes continuously:
The system is armed.
> The indicator lamp flashes after locking:
The doors, hood, or trunk lid are not prop-
erly closed, the remaining components are
secured.
Then the indicator lamp flashes continu-
ously after approx. 10 seconds. The interior
motion sensor and tilt sensor are not active.
> The indicator lamp goes out after unlocking:
The vehicle has not been tampered with.
> If the indicator lamp flashes after unlocking
until the remote control is inserted in the
ignition, but for no longer than approx.
5minutes:
The vehicle has been tampered with.
Tilt alarm sensor
The tilt of the vehicle is monitored. The alarm
system reacts, e.g. to attempts to steal a wheel
or tow the vehicle.
Interior motion sensor
Coupe
For proper function, the windows and glass
sunroof must be closed.
Convertible
The interior of the car is monitored up to the
height of the seat cushions. Thus the alarm sys-
tem is activated together with the interior
motion sensor even if the hardtop is open. The
alarm can be triggered unintentionally by falling
00320051004F004C00510048000300280047004C0057004C005200510003
Page 39 of 308

38
ControlsOpening and closing
objects such as leaves, refer to Avoiding unin-
tentional alarms.
Avoiding unintentional alarms
The tilt sensor and interior motion sensor can
be deactivated together, for example in the fol-
lowing situations:
>In car washes
> In stacking garages
> During transport on car-carrying trains,
boats/ships or on a trailer
> When leaving animals in the vehicle
Switching off tilt alarm sensor and
interior motion sensor
Once the vehicle is locked, press the
button on the remote control again within
approx. 10 seconds.
The indicator lamp lights up briefly and then
flashes continuously. The tilt alarm sensor and
the interior motion sensor are switched off until
the next time the vehicle is unlocked and subse-
quently locked again.
Comfort Access
The concept
It is possible to access the vehicle without actu-
ating the remote control. It is sufficient to have
the remote control with you, for example in your
jacket pocket. The vehicle automatically
detects the remote control in the vicinity or in
the passenger compartment.
Comfort Access supports the following func-
tions:
>Unlocking/locking the vehicle
> Convenient closing
> Unlocking the trunk lid separately
> Engine starting
Functional requirement
>There are no external sources of interfer-
ence in the vicinity.
> The remote control must be outside the
vehicle to lock it.
> The next unlocking and locking cycle is not
possible until after approx. 2 seconds.
> It is only possible to start the engine if the
remote control is inside the vehicle.
Comparison to the standard remote
control
The above functions can be controlled by
pressing the remote control buttons or by using
Comfort Access.
If you notice a brief delay while opening or
closing windows, the glass roof or retract-
able hardtop, the system is checking whether a
remote control is inside the vehicle. Please
repeat the opening or closing procedure, if nec-
essary. <
Unlocking
Grasp the handle on the driver's or front pas-
senger door completely, arrow 1.
This corresponds to pressing the button.
Locking
Touch the surface on the door handle, arrow 2,
with your finger for approx. 1 second.
This corresponds to pressing the but-
ton.
To preserve the battery, please make
sure that the ignition and all electrical
00320051004F004C00510048000300280047004C0057004C005200510003
Page 40 of 308

39
Opening and closing
Controls
consumers are switched off before locking the
vehicle.
<
Coupe: Convenient closing
Keep pressing the surface, arrow 2, with your
finger.
Convertible: window and convertible
top operation
With the ignition at radio readiness or beyond,
you can open and close the windows and the
convertible top when a remote control is
located inside the vehicle.
Unlocking the trunk lid separately
Press the button on the outside of the trunk lid.
This corresponds to pressing the button.
If the vehicle detects that a remote con-
trol has been accidentally left inside the
locked vehicle's trunk after the trunk lid is
closed, the lid will reopen. The hazard warning
flashers flash and a signal sounds. <
Switching on radio readiness
Pressing the Start/Stop button switches on
radio readiness.
Do not depress the brake or the clutch; other-
wise, the engine will start immediately.
Starting the engine
The engine can be started or the ignition can be
switched on when a remote control is inside the
vehicle. It is not necessary to insert a remote
control into the ignition lock, refer to page 60.
Switching off the engine in cars with
automatic transmission
The engine can only be switched off when the
selector lever is in position P, refer to page 62.
To switch the engine off when the selector lever
is in position N, the remote control must be in
the ignition lock.
Malfunction
Local radio waves can interfere with the func-
tion of Comfort Access, for example when a
mobile phone is in the immediate vicinity of the
remote control or by when a mobile phone is
being charged in the vehicle.
If this happens, open or close the vehicle via the
buttons on the remote control or using the inte-
grated key. To start the engine afterward, insert
the remote control into the ignition lock.
Warning lamps
The warning lamp in the instrument
cluster lights up when you attempt to
start the engine: the engine cannot
be started. The remote control is not inside the
vehicle or is malfunctioning.
Take the remote control with you inside the
vehicle or have it checked. If necessary, insert
another remote control into the ignition lock.
The warning lamp in the instrument
cluster lights up while the engine is
running: the remote control is no
longer inside the vehicle. After the engine is
switched off, the engine can only be restarted
within approx. 10 seconds.
The indicator lamp in the instrument
cluster lights up and a message
appears on the Control Display:
replace the battery in the remote control.
Replacing the battery
The remote control for Comfort Access con-
tains a battery that will need to be replaced from
time to time.
00320051004F004C00510048000300280047004C0057004C005200510003
Page 41 of 308
40
ControlsOpening and closing
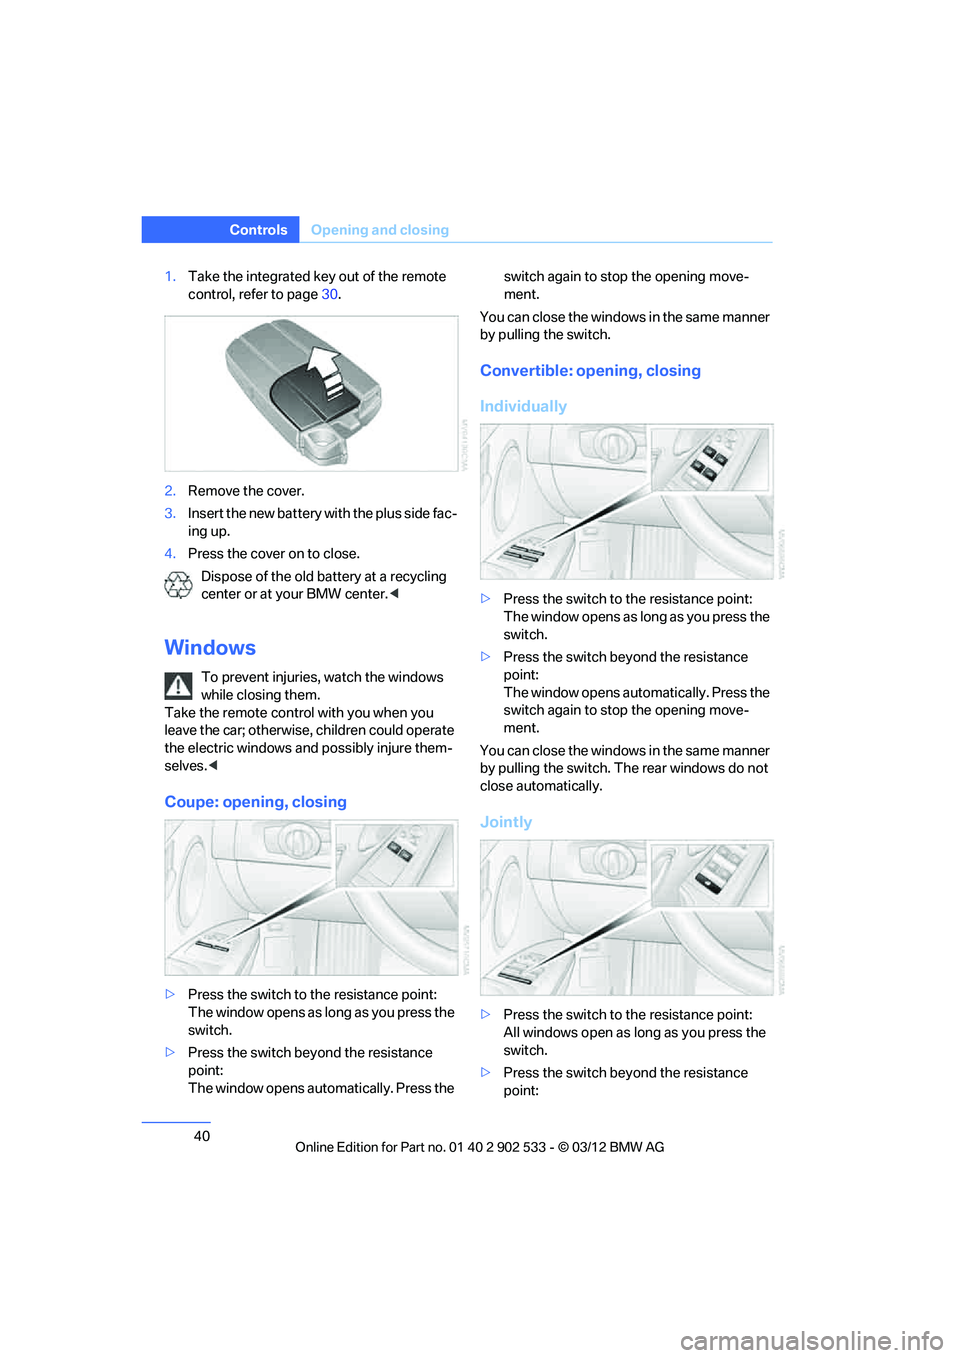
1.Take the integrated key out of the remote
control, refer to page 30.
2. Remove the cover.
3. Insert the new battery with the plus side fac-
ing up.
4. Press the cover on to close.
Dispose of the old battery at a recycling
center or at your BMW center. <
Windows
To prevent injuries, watch the windows
while closing them.
Take the remote control with you when you
leave the car; otherwise, children could operate
the electric windows and possibly injure them-
selves. <
Coupe: opening, closing
>Press the switch to the resistance point:
The window opens as long as you press the
switch.
> Press the switch beyond the resistance
point:
The window opens automatically. Press the switch again to stop the opening move-
ment.
You can close the windows in the same manner
by pulling the switch.
Convertible: opening, closing
Individually
> Press the switch to the resistance point:
The window opens as long as you press the
switch.
> Press the switch beyond the resistance
point:
The window opens automatically. Press the
switch again to stop the opening move-
ment.
You can close the windows in the same manner
by pulling the switch. The rear windows do not
close automatically.
Jointly
> Press the switch to the resistance point:
All windows open as long as you press the
switch.
> Press the switch beyond the resistance
point:
00320051004F004C00510048000300280047004C0057004C005200510003