2013 BMW 335I XDRIVE COUPE change
[x] Cancel search: changePage 4 of 308
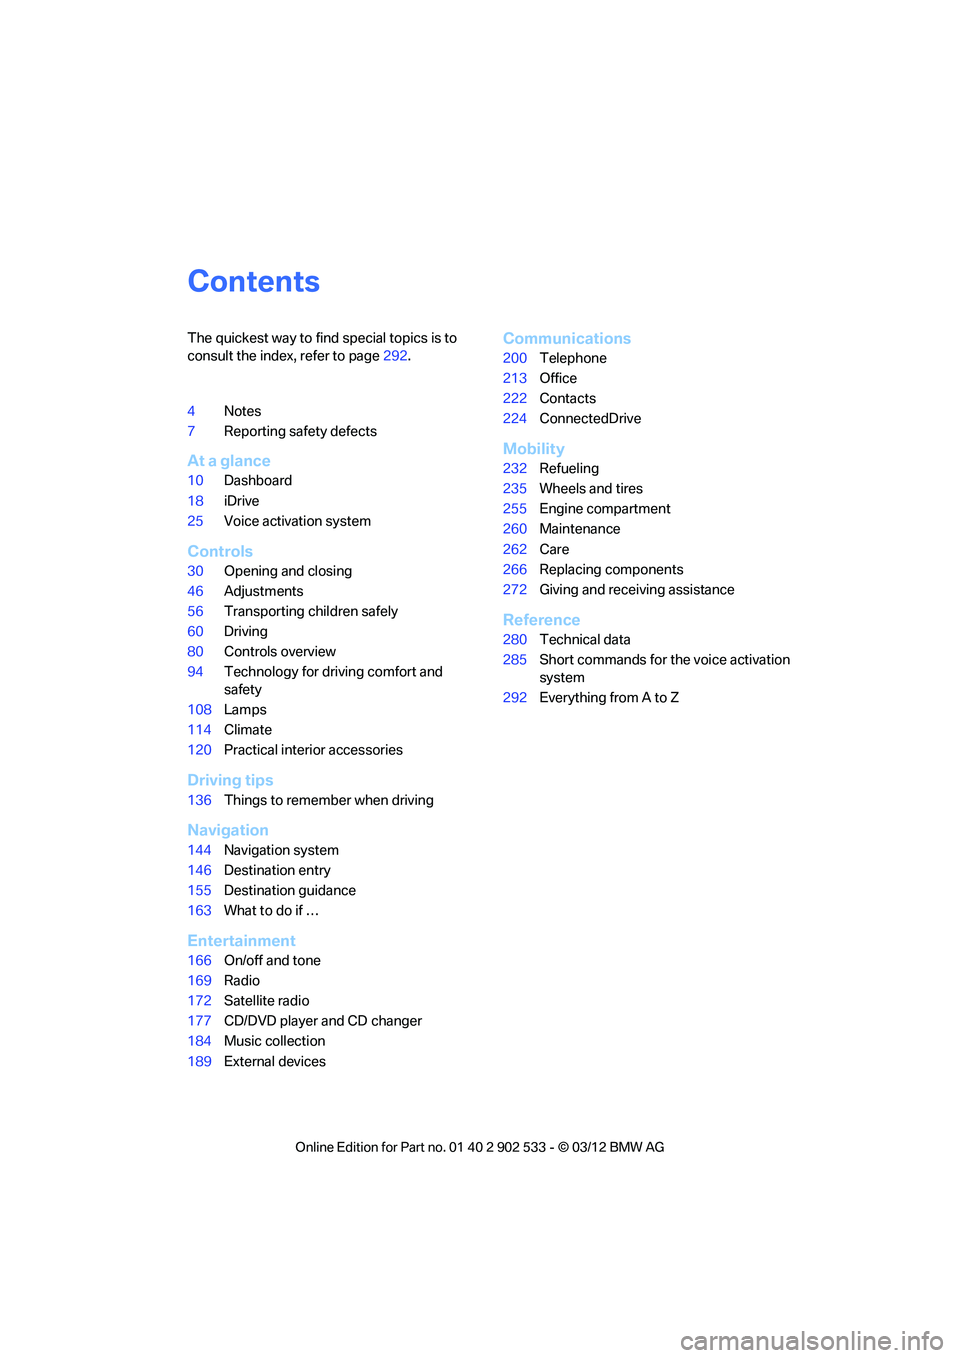
Contents
The quickest way to find special topics is to
consult the index, refer to page292.
4 Notes
7 Reporting safety defects
At a glance
10Dashboard
18 iDrive
25 Voice activation system
Controls
30Opening and closing
46 Adjustments
56 Transporting children safely
60 Driving
80 Controls overview
94 Technology for driving comfort and
safety
108 Lamps
114 Climate
120 Practical interior accessories
Driving tips
136Things to remember when driving
Navigation
144Navigation system
146 Destination entry
155 Destination guidance
163 What to do if …
Entertainment
166On/off and tone
169 Radio
172 Satellite radio
177 CD/DVD player and CD changer
184 Music collection
189 External devices
Communications
200Telephone
213 Office
222 Contacts
224 ConnectedDrive
Mobility
232Refueling
235 Wheels and tires
255 Engine compartment
260 Maintenance
262 Care
266 Replacing components
272 Giving and receiving assistance
Reference
280Technical data
285 Short commands for the voice activation
system
292 Everything from A to Z
00320051004F004C00510048000300280047004C0057004C005200510003
Page 21 of 308
20
At a glanceiDrive
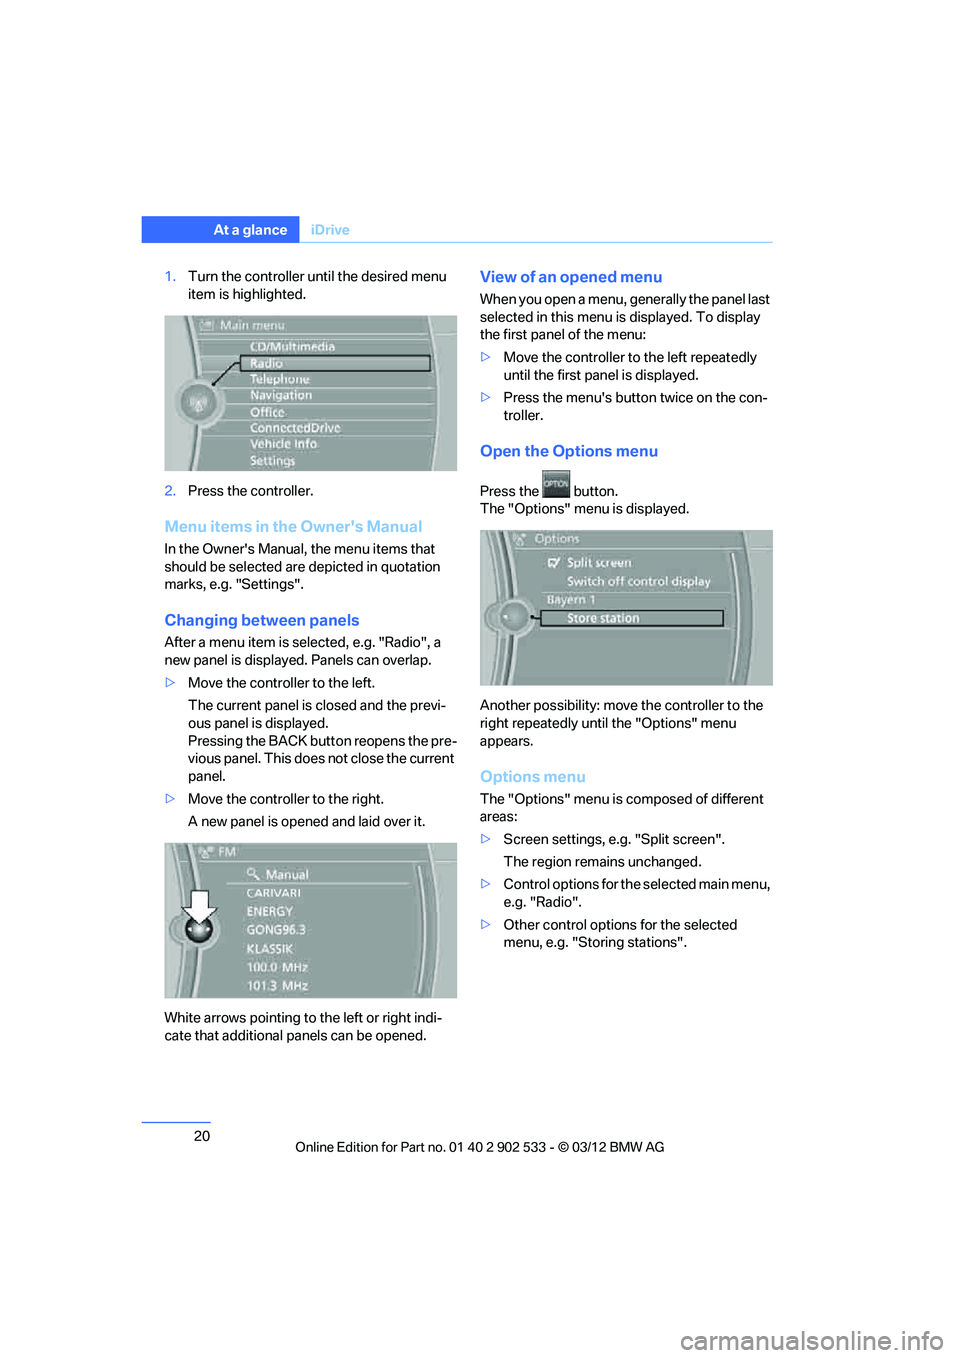
1.Turn the controller until the desired menu
item is highlighted.
2. Press the controller.
Menu items in the Owner's Manual
In the Owner's Manual, the menu items that
should be selected are depicted in quotation
marks, e.g. "Settings".
Changing between panels
After a menu item is selected, e.g. "Radio", a
new panel is displayed. Panels can overlap.
>Move the controller to the left.
The current panel is closed and the previ-
ous panel is displayed.
Pressing the BACK button reopens the pre-
vious panel. This does not close the current
panel.
> Move the controller to the right.
A new panel is opened and laid over it.
White arrows pointing to the left or right indi-
cate that additional panels can be opened.
View of an opened menu
When you open a menu, generally the panel last
selected in this menu is displayed. To display
the first panel of the menu:
> Move the controller to the left repeatedly
until the first panel is displayed.
> Press the menu's button twice on the con-
troller.
Open the Options menu
Press the button.
The "Options" menu is displayed.
Another possibility: move the controller to the
right repeatedly until the "Options" menu
appears.
Options menu
The "Options" menu is composed of different
areas:
>Screen settings, e.g. "Split screen".
The region remains unchanged.
> Control options for the selected main menu,
e.g. "Radio".
> Other control options for the selected
menu, e.g. "Storing stations".
00320051004F004C00510048000300280047004C0057004C005200510003
Page 23 of 308
22
At a glanceiDrive
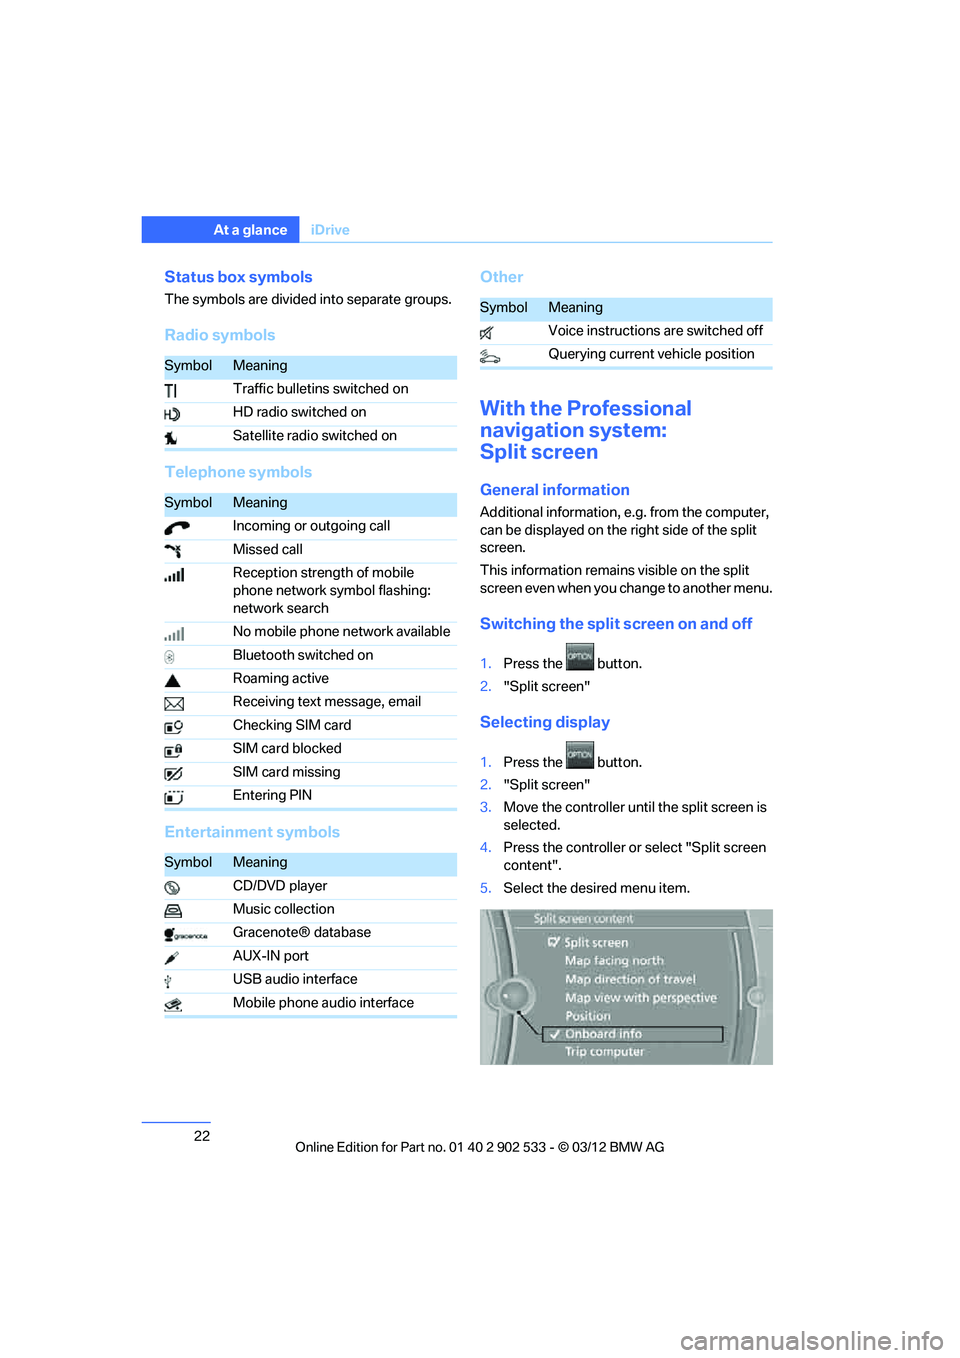
Status box symbols
The symbols are divided into separate groups.
Radio symbols
Telephone symbols
Entertainment symbols Other
With the Professional
navigation system:
Split screen
General information
Additional information, e.g. from the computer,
can be displayed on the right side of the split
screen.
This information remains visible on the split
screen even when you change to another menu.
Switching the split screen on and off
1.
Press the button.
2. "Split screen"
Selecting display
1.Press the button.
2. "Split screen"
3. Move the controller until the split screen is
selected.
4. Press the controller or select "Split screen
content".
5. Select the desired menu item.
SymbolMeaning
Traffic bulletins switched on
HD radio switched on
Satellite radio switched on
SymbolMeaning
Incoming or outgoing call
Missed call
Reception strength of mobile
phone network symbol flashing:
network search
No mobile phone network available
Bluetooth switched on
Roaming active
Receiving text message, email
Checking SIM card
SIM card blocked
SIM card missing
Entering PIN
SymbolMeaning
CD/DVD player
Music collection
Gracenote® database
AUX-IN port
USB audio interface
Mobile phone audio interface
SymbolMeaning
Voice instructions are switched off
Querying current vehicle position
00320051004F004C00510048000300280047004C0057004C005200510003
Page 27 of 308
26
At a glanceVoice activation system
For example, if the "Settings" menu is dis-
played, the commands relating to settings are
read aloud.
Performing functions using short
commands
Functions from the main menu can be per-
formed directly by means of short commands,
essentially regardless of which menu item is
selected, e.g. {Vehicle status }.
List of short command of the voice activation
system, refer to page 285.
Help dialog for voice activation system
Accessing help:
Other commands for the help dialog:
>{Help with examples }: information about
the current control options and the most
important commands relating to them are
read aloud.
> {Help with voice activation }: information
about the principle operation of the voice
activation system is read aloud.
Example: playing back a CD
1. If necessary, switch on entertainment audio
output.
2. Press the button on the steering wheel.
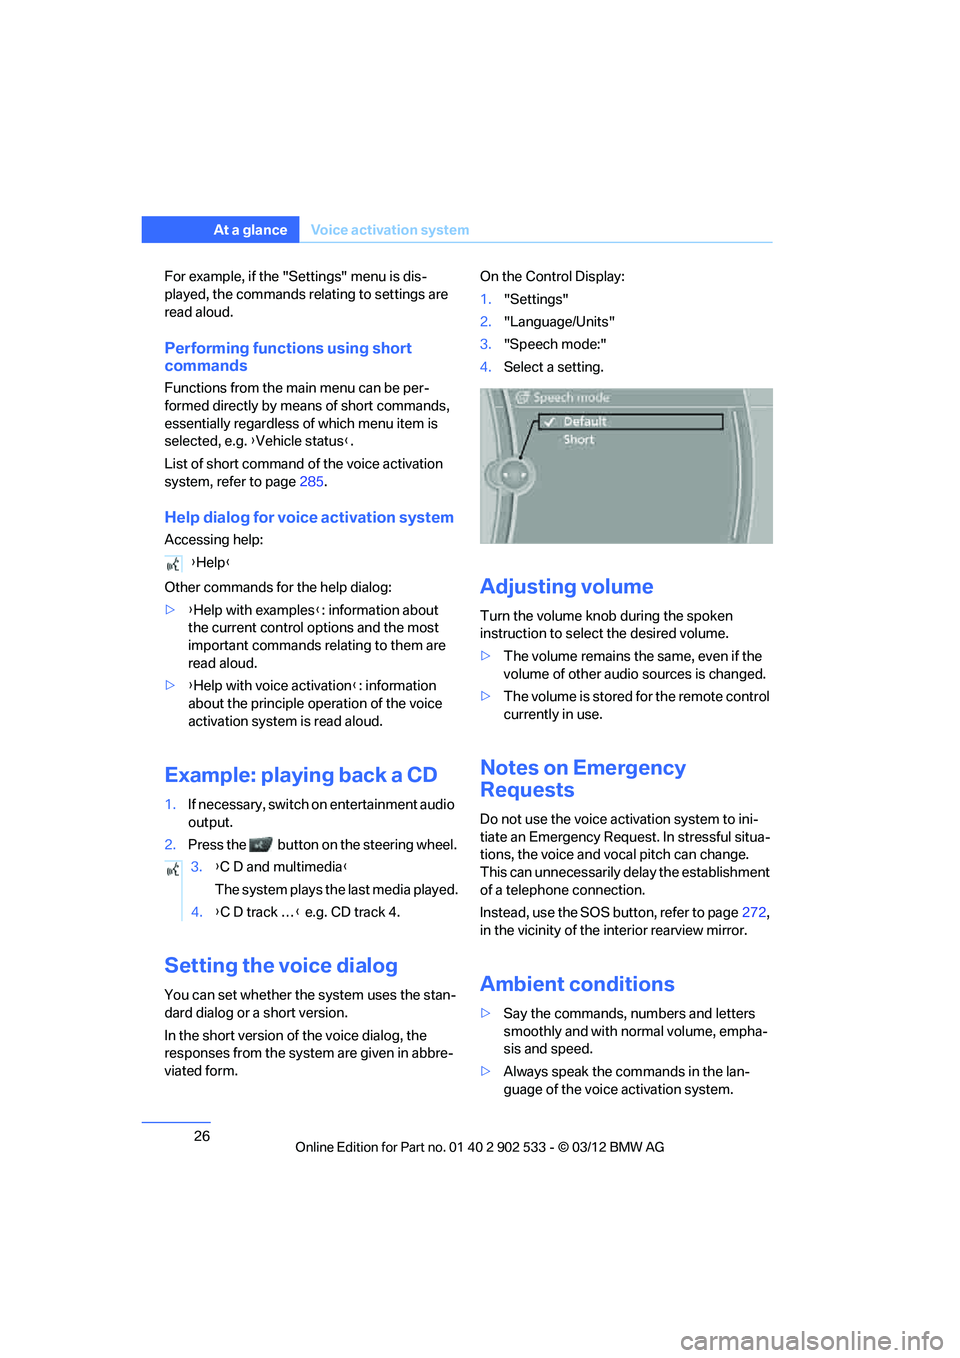
Setting the voice dialog
You can set whether the system uses the stan-
dard dialog or a short version.
In the short version of the voice dialog, the
responses from the system are given in abbre-
viated form. On the Control Display:
1.
"Settings"
2. "Language/Units"
3. "Speech mode:"
4. Select a setting.
Adjusting volume
Turn the volume knob during the spoken
instruction to select the desired volume.
>The volume remains the same, even if the
volume of other audio sources is changed.
> The volume is stored for the remote control
currently in use.
Notes on Emergency
Requests
Do not use the voice activation system to ini-
tiate an Emergency Request. In stressful situa-
tions, the voice and vocal pitch can change.
This can unnecessarily delay the establishment
of a telephone connection.
Instead, use the SOS button, refer to page 272,
in the vicinity of the interior rearview mirror.
Ambient conditions
> Say the commands, numbers and letters
smoothly and with normal volume, empha-
sis and speed.
> Always speak the commands in the lan-
guage of the voice activation system.
{
Help }
3. {C D and multimedia }
The system plays the last media played.
4. {C D track … } e.g. CD track 4.
00320051004F004C00510048000300280047004C0057004C005200510003
Page 35 of 308
34
ControlsOpening and closing
Malfunctions
The remote control may malfunction due to
local radio waves. If this occurs, unlock and lock
the car at the door lock with the integrated key.
Convertible: if hardtop movement via the
remote control is interrupted briefly, the move-
m e n t w i l l b e c o m p l e t e d m o r e q u i c k l y i f y o u k e e p
the corresponding button pressed continu-
ously.
If the car can no longer be locked with a remote
control, the battery in the remote control is dis-
charged. Use the remote control on an
extended trip to recharge the battery, refer to
page30. The remote control for Comfort
Access contains a battery that may have to be
changed, refer to page 39.
For US owners only
The transmitter and receiver units comply with
part 15 of the FCC/Federal Communications
Commission regulations. Operation is gov-
erned by the following:
FCC ID:
LX8766S
LX8766E
LX8CAS
Compliance statement:
This device complies with part 15 of the FCC
Rules. Operation is subject to the following two
conditions:
> This device must not cause harmful inter-
ference, and
> this device must accept any interference
received, including interference that may
cause undesired operation.
Any unauthorized modifications or
changes to these devices could void the
user's authority to operate this equipment. <
Opening and closing:
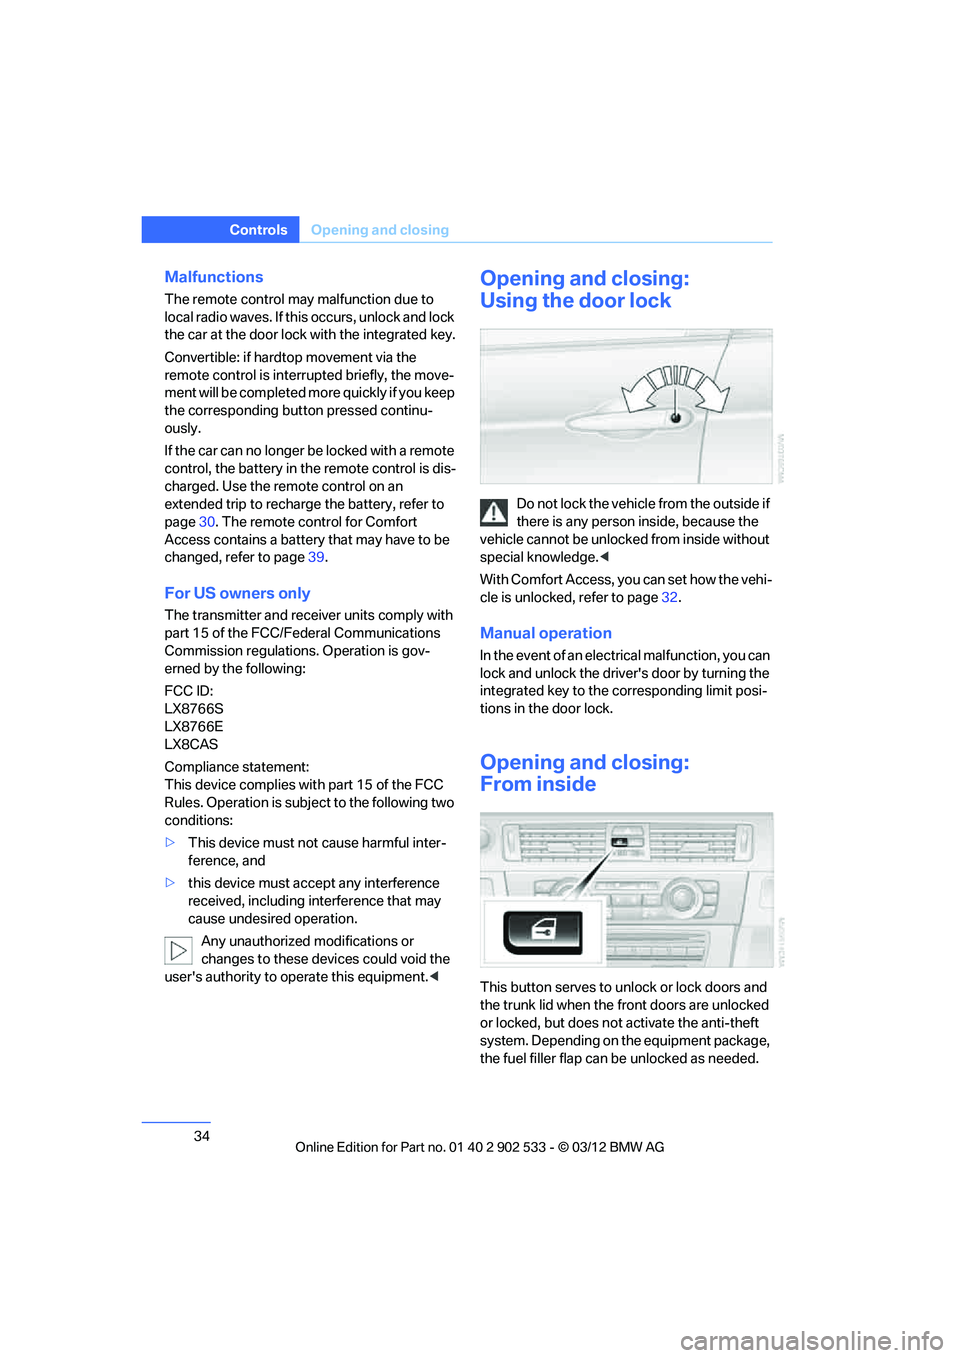
Using the door lock
Do not lock the vehicle from the outside if
there is any person inside, because the
vehicle cannot be unlocked from inside without
special knowledge. <
With Comfort Access, you can set how the vehi-
cle is unlocked, refer to page 32.
Manual operation
In the event of an electrical malfunction, you can
lock and unlock the driver's door by turning the
integrated key to the corresponding limit posi-
tions in the door lock.
Opening and closing:
From inside
This button serves to unlock or lock doors and
the trunk lid when the front doors are unlocked
or locked, but does not activate the anti-theft
system. Depending on the equipment package,
the fuel filler flap can be unlocked as needed.
00320051004F004C00510048000300280047004C0057004C005200510003
Page 37 of 308
36
ControlsOpening and closing
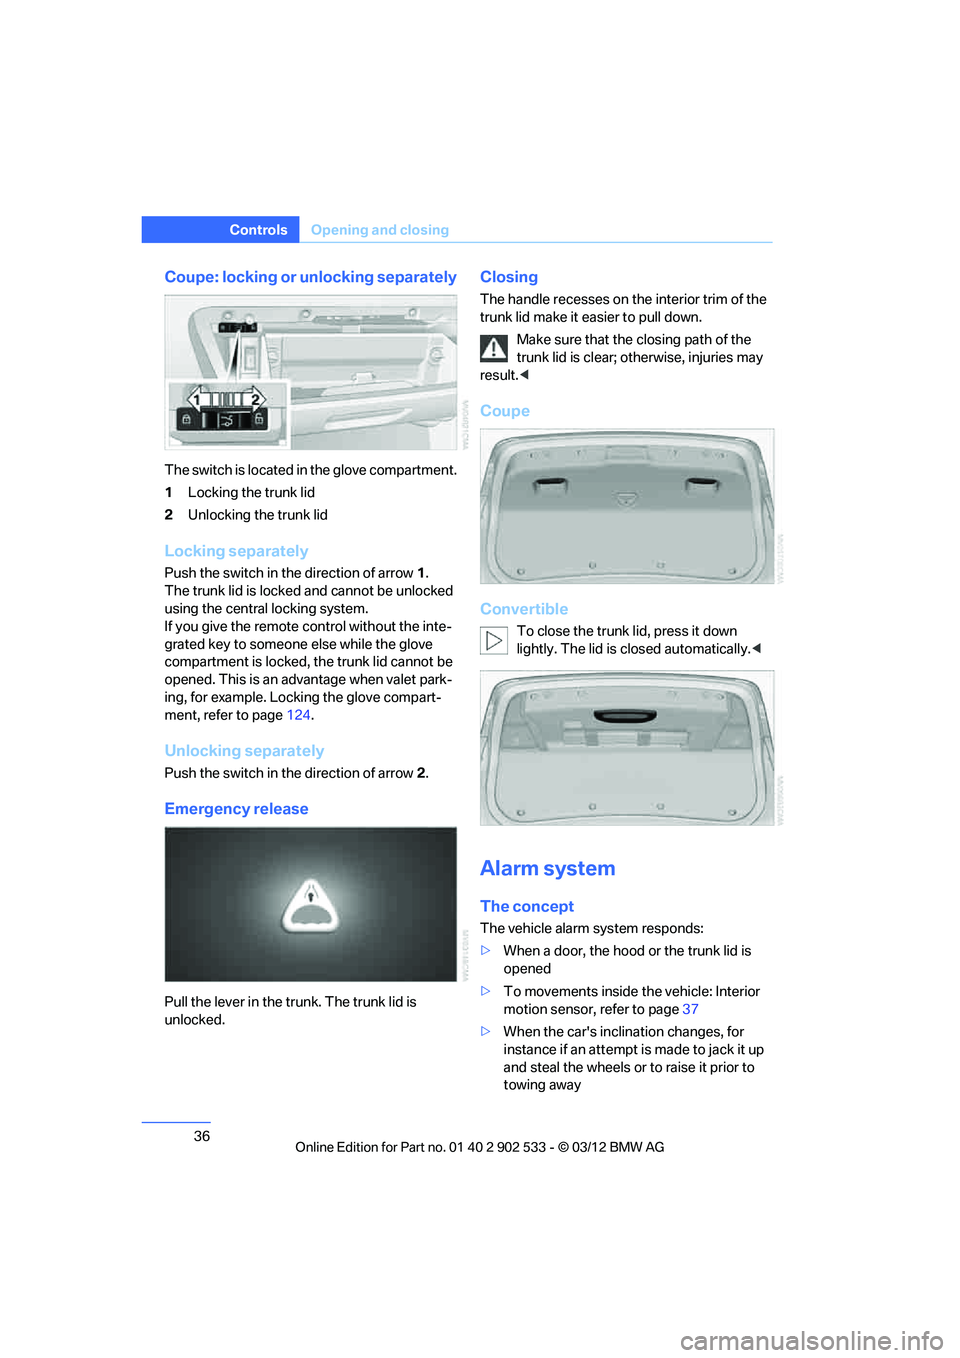
Coupe: locking or unlocking separately
The switch is located in the glove compartment.
1Locking the trunk lid
2 Unlocking the trunk lid
Locking separately
Push the switch in the direction of arrow 1.
The trunk lid is locked and cannot be unlocked
using the central locking system.
If you give the remote control without the inte-
grated key to someone else while the glove
compartment is locked, the trunk lid cannot be
opened. This is an advantage when valet park-
ing, for example. Locking the glove compart-
ment, refer to page 124.
Unlocking separately
Push the switch in the direction of arrow 2.
Emergency release
Pull the lever in the trunk. The trunk lid is
unlocked.
Closing
The handle recesses on the interior trim of the
trunk lid make it easier to pull down.
Make sure that the closing path of the
trunk lid is clear; otherwise, injuries may
result. <
Coupe
Convertible
To close the trunk lid, press it down
lightly. The lid is closed automatically. <
Alarm system
The concept
The vehicle alarm system responds:
>When a door, the hood or the trunk lid is
opened
> To movements inside the vehicle: Interior
motion sensor, refer to page 37
> When the car's inclination changes, for
instance if an attempt is made to jack it up
and steal the wheels or to raise it prior to
towing away
00320051004F004C00510048000300280047004C0057004C005200510003
Page 49 of 308
48
ControlsAdjustments
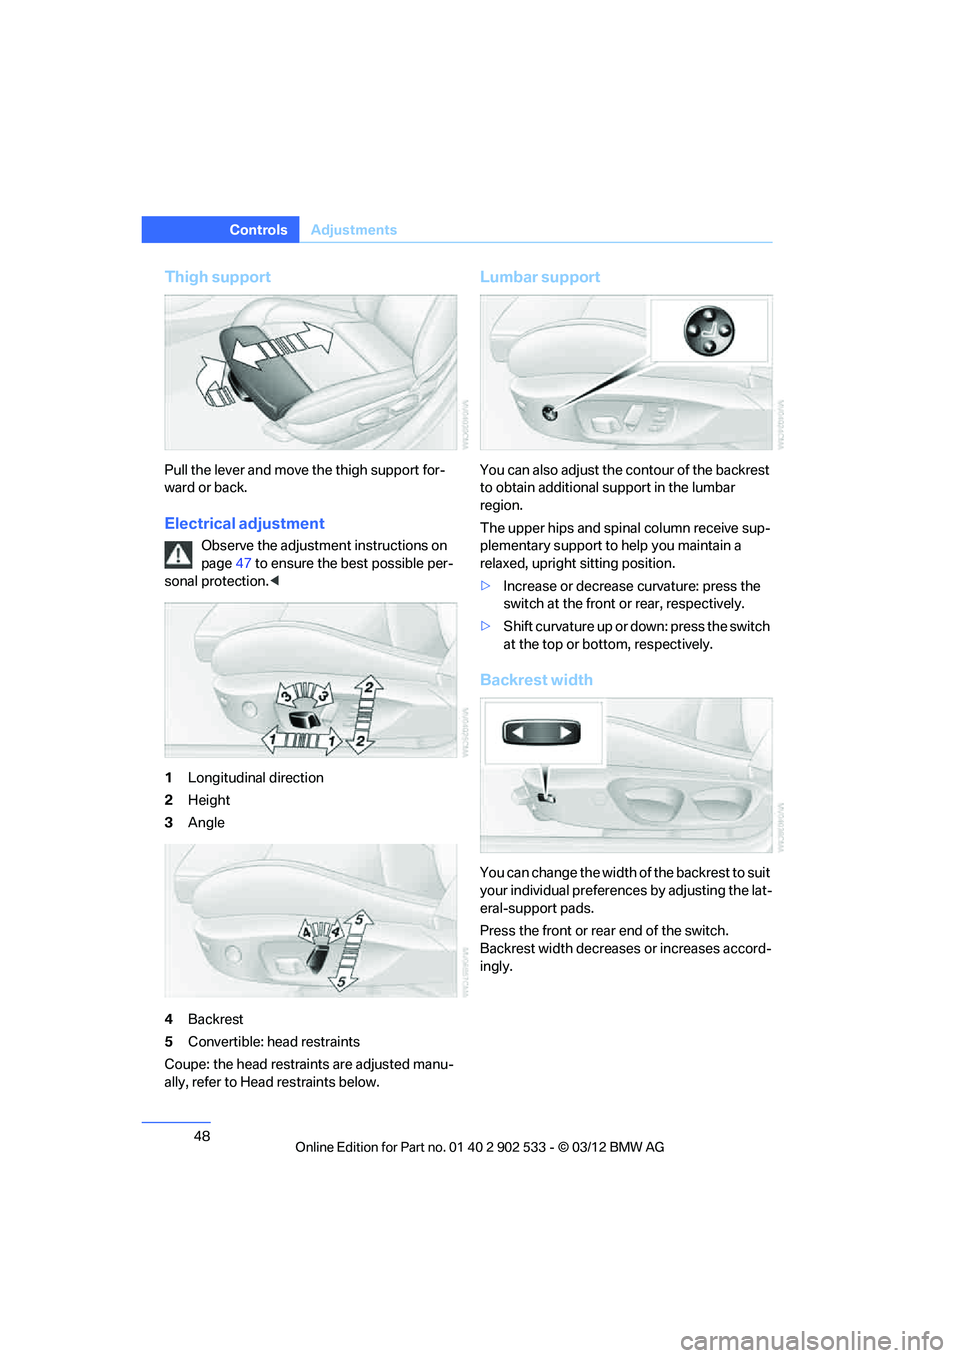
Thigh support
Pull the lever and move the thigh support for-
ward or back.
Electrical adjustment
Observe the adjustment instructions on
page47 to ensure the best possible per-
sonal protection. <
1 Longitudinal direction
2 Height
3 Angle
4 Backrest
5 Convertible: head restraints
Coupe: the head restraints are adjusted manu-
ally, refer to Head restraints below.
Lumbar support
You can also adjust the contour of the backrest
to obtain additional support in the lumbar
region.
The upper hips and spinal column receive sup-
plementary support to help you maintain a
relaxed, upright sitting position.
> Increase or decrease curvature: press the
switch at the front or rear, respectively.
> Shift curvature up or down: press the switch
at the top or bottom, respectively.
Backrest width
You can change the width of the backrest to suit
your individual preferences by adjusting the lat-
eral-support pads.
Press the front or rear end of the switch.
Backrest width decreases or increases accord-
ingly.
00320051004F004C00510048000300280047004C0057004C005200510003
Page 58 of 308
57
Transporting children safely
Controls
Keep key pushed in and turn it until reaching the
stop at the position. Pull key out at this stop.
Make sure that the passenger belt is
unlocked; otherwise, the front passenger
may become trapped by the safety belt. <
Installing child restraint
systems
Observe the child restraint system manu-
facturer's instructions when selecting,
installing and using child restraint systems.
Otherwise, the protective effect may be dimin-
ished. <
Standard child restraint systems are designed
to be secured with a lap belt or with the lap-belt
section of a lap-and-shoulder belt. Incorrectly
or improperly installed child restraint systems
can increase the risk of injury to children.
Always follow the installation instructions for
the system with the greatest care.
On the front passenger seat
After installing a child restraint system on
the front passenger seat, make sure that
the front and side airbag s for the front passen-
ger are deactivated; otherwise, there is an
increased risk of injury if the airbags deploy. <
Seat position
Before installing a child restraint system, move
the front passenger seat as far back and up as
possible to obtain the best possible position for
the belt. Do not change the seat position after
this.
Backrest width
The backrest width of the front passenger
seat must be at its widest possible set-
ting. Do not change the setting after installing
the child seat; otherwise, the child seat's stabil-
ity on the front passenger seat is limited. <1.
Adjust the backrest width to its widest set-
ting, refer to page 48.
2. Install the child seat.
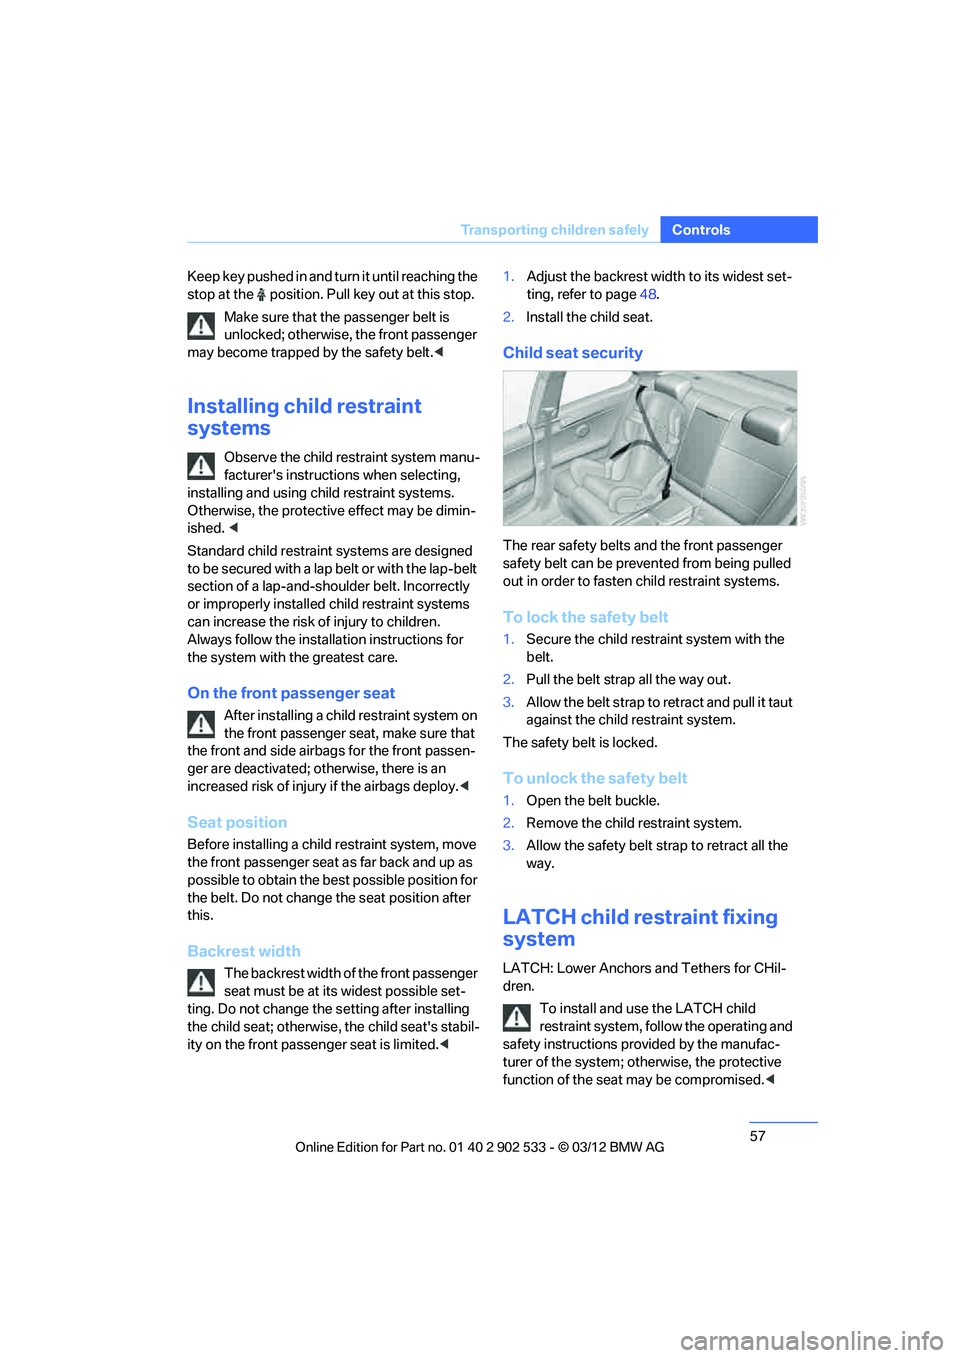
Child seat security
The rear safety belts and the front passenger
safety belt can be prevented from being pulled
out in order to fasten child restraint systems.
To lock the safety belt
1.Secure the child restraint system with the
belt.
2. Pull the belt strap all the way out.
3. Allow the belt strap to retract and pull it taut
against the child restraint system.
The safety belt is locked.
To unlock the safety belt
1. Open the belt buckle.
2. Remove the child restraint system.
3. Allow the safety belt strap to retract all the
way.
LATCH child restraint fixing
system
LATCH: Lower Anchors and Tethers for CHil-
dren.
To install and use the LATCH child
restraint system, follow the operating and
safety instructions provided by the manufac-
turer of the system; otherwise, the protective
function of the seat may be compromised.<
00320051004F004C00510048000300280047004C0057004C005200510003