2013 BMW 335I glove compartment
[x] Cancel search: glove compartmentPage 12 of 242

CockpitVehicle equipment
All standard, country-specific and optional
equipment that is offered in the model series is
described in this chapter. Therefore, equipmentis also described that is not available in a vehicle,
e. g., because of the selected optional equip‐
ment or country variant. This also applies for
safety-related functions and systems.
All around the steering wheel
1Roller sunblinds 432Rear window safety switch 423Power windows 414Exterior mirror operation 525Glove compartment on the driver's
side 152
Driver assistance systemsActive Blind Spot Detec‐
tion 105Collision warning 102
Collision warning with braking
function 100Lane departure warning 1046LampsSeite 12At a glanceCockpit12
Online Edition for Part no. 01 40 2 917 801 - II/13
Page 14 of 242
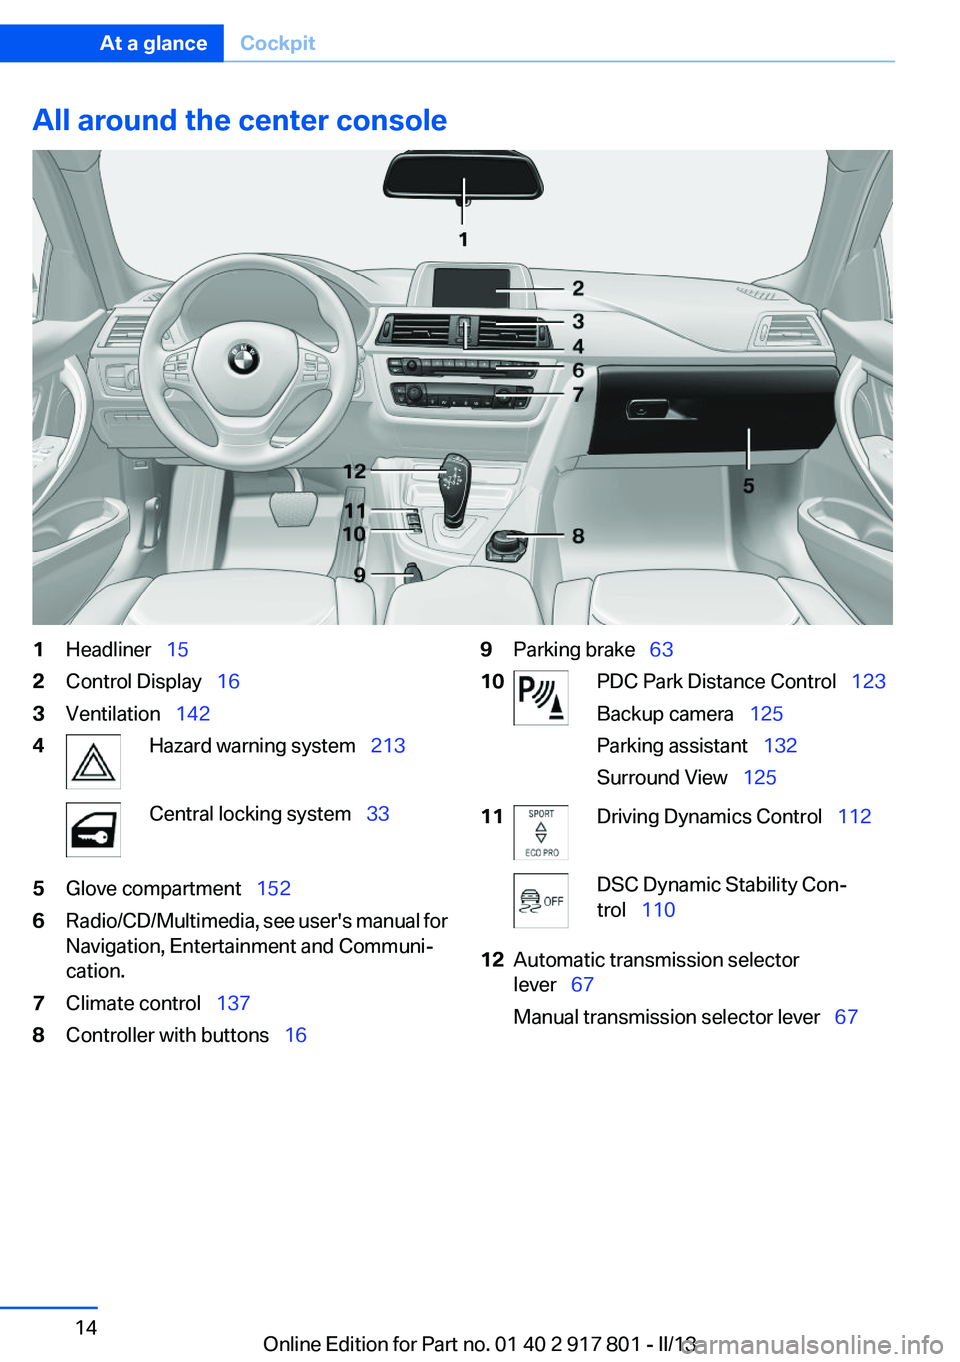
All around the center console1Headliner 152Control Display 163Ventilation 1424Hazard warning system 213Central locking system 335Glove compartment 1526Radio/CD/Multimedia, see user's manual for
Navigation, Entertainment and Communi‐
cation.7Climate control 1378Controller with buttons 169Parking brake 6310PDC Park Distance Control 123
Backup camera 125
Parking assistant 132
Surround View 12511Driving Dynamics Control 112DSC Dynamic Stability Con‐
trol 11012Automatic transmission selector
lever 67
Manual transmission selector lever 67Seite 14At a glanceCockpit14
Online Edition for Part no. 01 40 2 917 801 - II/13
Page 30 of 242
Opening and closingVehicle equipment
All standard, country-specific and optional
equipment that is offered in the model series is
described in this chapter. Therefore, equipment
is also described that is not available in a vehicle,
e. g., because of the selected optional equip‐
ment or country variant. This also applies for
safety-related functions and systems.
Remote control/key
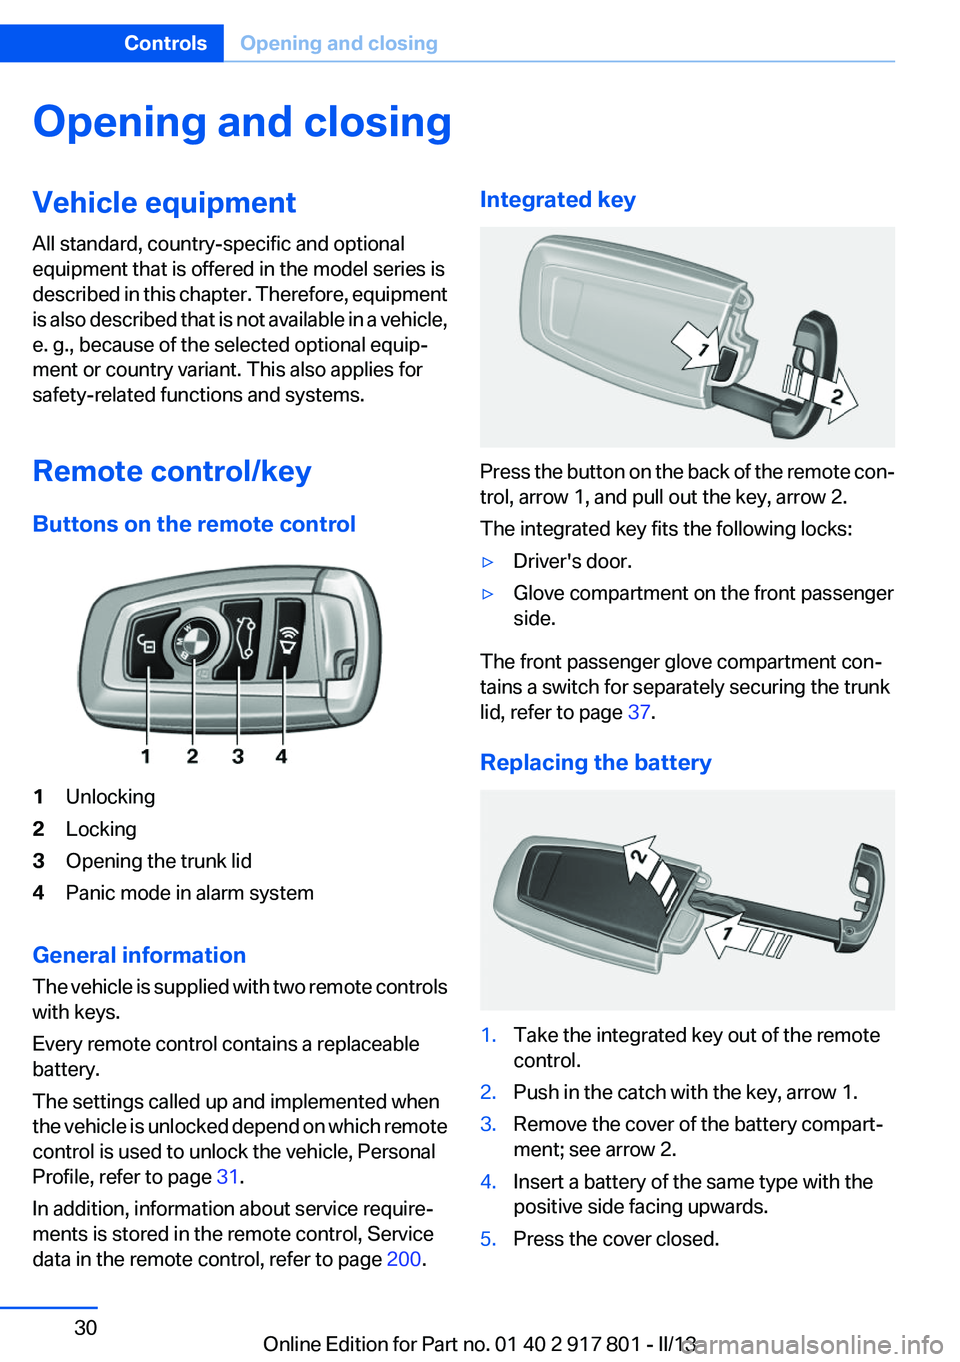
Buttons on the remote control1Unlocking2Locking3Opening the trunk lid4Panic mode in alarm system
General information
The vehicle is supplied with two remote controls
with keys.
Every remote control contains a replaceable
battery.
The settings called up and implemented when
the vehicle is unlocked depend on which remote
control is used to unlock the vehicle, Personal
Profile, refer to page 31.
In addition, information about service require‐
ments is stored in the remote control, Service
data in the remote control, refer to page 200.
Integrated key
Press the button on the back of the remote con‐
trol, arrow 1, and pull out the key, arrow 2.
The integrated key fits the following locks:
▷Driver's door.▷Glove compartment on the front passenger
side.
The front passenger glove compartment con‐
tains a switch for separately securing the trunk
lid, refer to page 37.
Replacing the battery
1.Take the integrated key out of the remote
control.2.Push in the catch with the key, arrow 1.3.Remove the cover of the battery compart‐
ment; see arrow 2.4.Insert a battery of the same type with the
positive side facing upwards.5.Press the cover closed.Seite 30ControlsOpening and closing30
Online Edition for Part no. 01 40 2 917 801 - II/13
Page 38 of 242

▷Trunk lid secured, arrow 1.▷Trunk lid not secured, ar‐
row 2.
Slide the switch into the arrow 1 position. This
secures the trunk lid and disconnects it from the
central locking system.
When the front passenger glove compartment
is locked, the trunk lid cannot be opened.
This is beneficial when the vehicle is parked us‐
ing valet service. The infrared remote control
can be handed out without the key.
Emergency unlocking
Pull the handle inside the cargo area.
The trunk lid unlocks.
Comfort Access
The concept
The vehicle can be accessed without activating
the remote control.
All you need to do is to have the remote control
with you, e.g., in your jacket pocket.
The vehicle automatically detects the remote
control when it is nearby or in the passenger
compartment.
Comfort Access supports the following func‐
tions:
▷Unlocking/locking of the vehicle.▷Convenient closing.▷Unlocking of the trunk lid separately.▷Open trunk lid with no-touch activation.▷Start the engine.
Functional requirements
▷There are no external sources of interfer‐
ence nearby.▷To lock the vehicle, the remote control must
be located outside of the vehicle.▷The next unlocking and locking cycle is not
possible until after approx. 2 seconds.▷The engine can only be started if the remote
control is inside the vehicle.
Comparison with ordinary remote
control
The functions can be controlled by pressing the
buttons of the remote control or Comfort Ac‐
cess.
Unlocking
Grasp the door handle on the driver's or front
passenger door completely, arrow 1. This cor‐
responds to pressing the
button on the re‐
mote control.
Seite 38ControlsOpening and closing38
Online Edition for Part no. 01 40 2 917 801 - II/13
Page 149 of 242
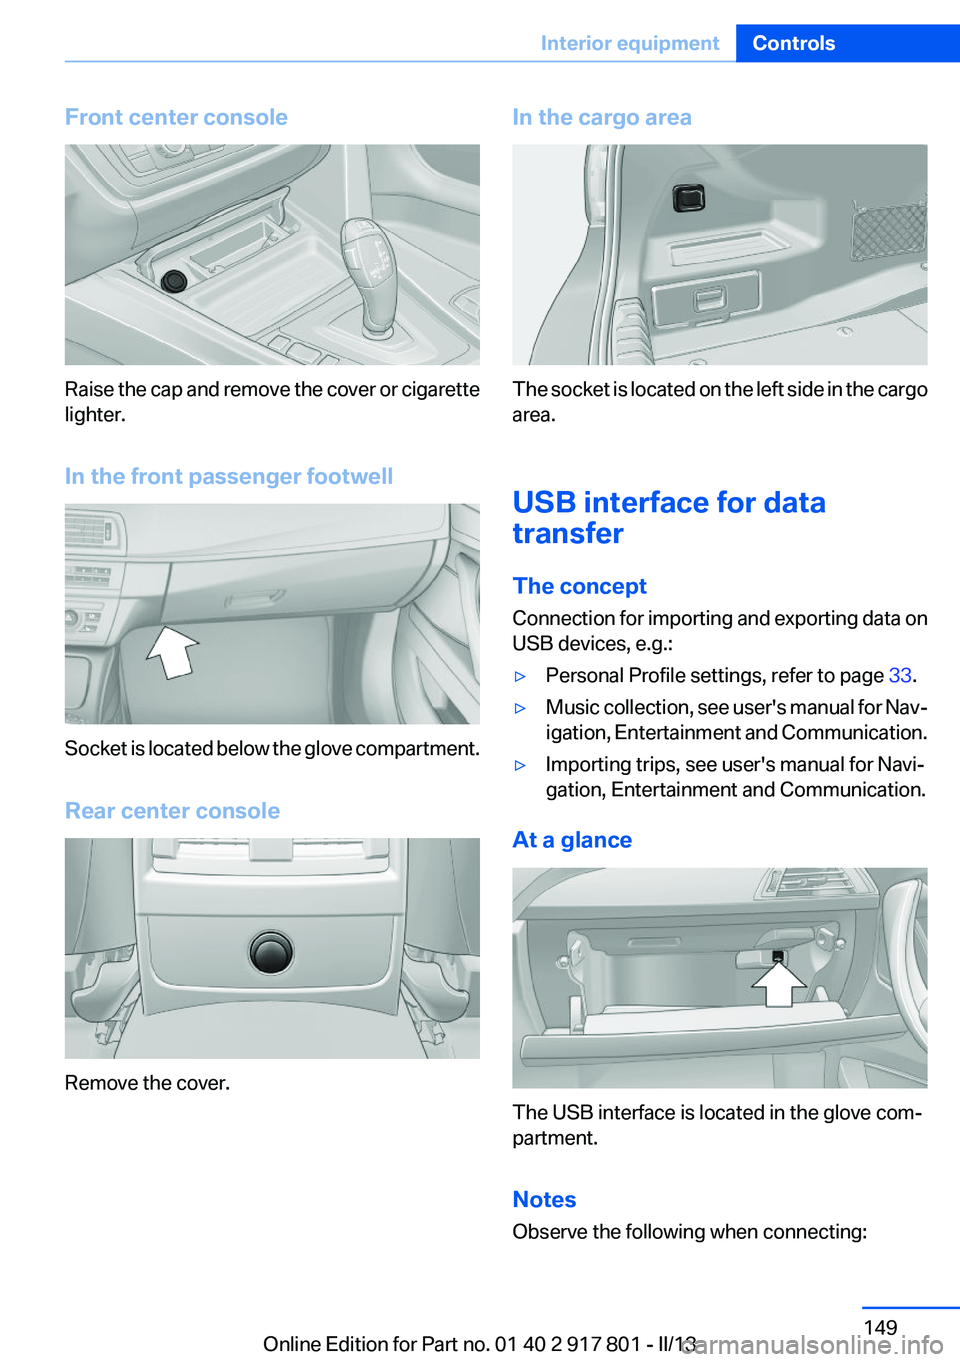
Front center console
Raise the cap and remove the cover or cigarette
lighter.
In the front passenger footwell
Socket is located below the glove compartment.
Rear center console
Remove the cover.
In the cargo area
The socket is located on the left side in the cargo
area.
USB interface for data
transfer
The concept
Connection for importing and exporting data on
USB devices, e.g.:
▷Personal Profile settings, refer to page 33.▷Music collection, see user's manual for Nav‐
igation, Entertainment and Communication.▷Importing trips, see user's manual for Navi‐
gation, Entertainment and Communication.
At a glance
The USB interface is located in the glove com‐
partment.
Notes
Observe the following when connecting:
Seite 149Interior equipmentControls149
Online Edition for Part no. 01 40 2 917 801 - II/13
Page 152 of 242
Storage compartmentsVehicle equipment
All standard, country-specific and optional
equipment that is offered in the model series is
described in this chapter. Therefore, equipment
is also described that is not available in a vehicle,
e. g., because of the selected optional equip‐
ment or country variant. This also applies for
safety-related functions and systems.
Notes No loose objects in the passenger com‐
partment
Do not stow any objects in the passenger com‐
partment without securing them; otherwise,
they may present a danger to occupants for in‐
stance during braking and avoidance maneu‐
vers.◀
Do not place anti-slip mats on the dash‐
board
Do not place anti-slip mats on the dashboard.
The mat materials could damage the dash‐
board.◀
Storage compartments
The following storage compartments are avail‐
able in the vehicle interior:▷Glove compartment on the driver's side, re‐
fer to page 152.▷Glove compartment on the front passenger
side, refer to page 153.▷Without Smoker's package: Front storage
compartment, in front of the cupholders, re‐
fer to page 153.▷Storage compartment in the front center
armrest, refer to page 153.▷Compartments in the doors, refer to
page 153.▷Nets on the backrests of the front seats.▷Storage compartment in the rear center
console, refer to page 154.
Glove compartment
Driver's side
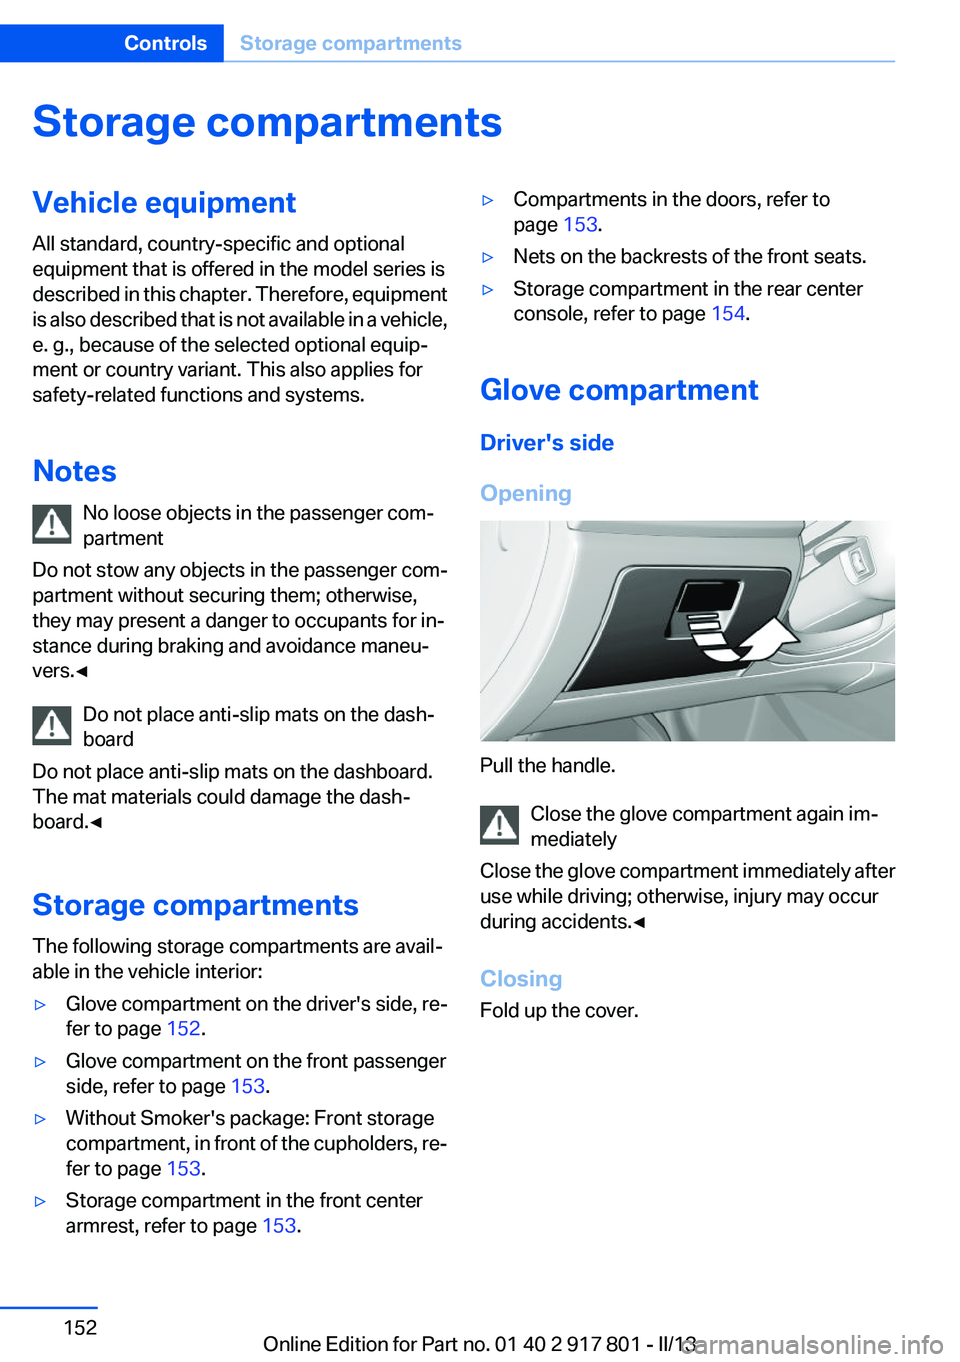
Opening
Pull the handle. Close the glove compartment again im‐
mediately
Close the glove compartment immediately after
use while driving; otherwise, injury may occur
during accidents.◀
Closing
Fold up the cover.
Seite 152ControlsStorage compartments152
Online Edition for Part no. 01 40 2 917 801 - II/13
Page 153 of 242
Front passenger side
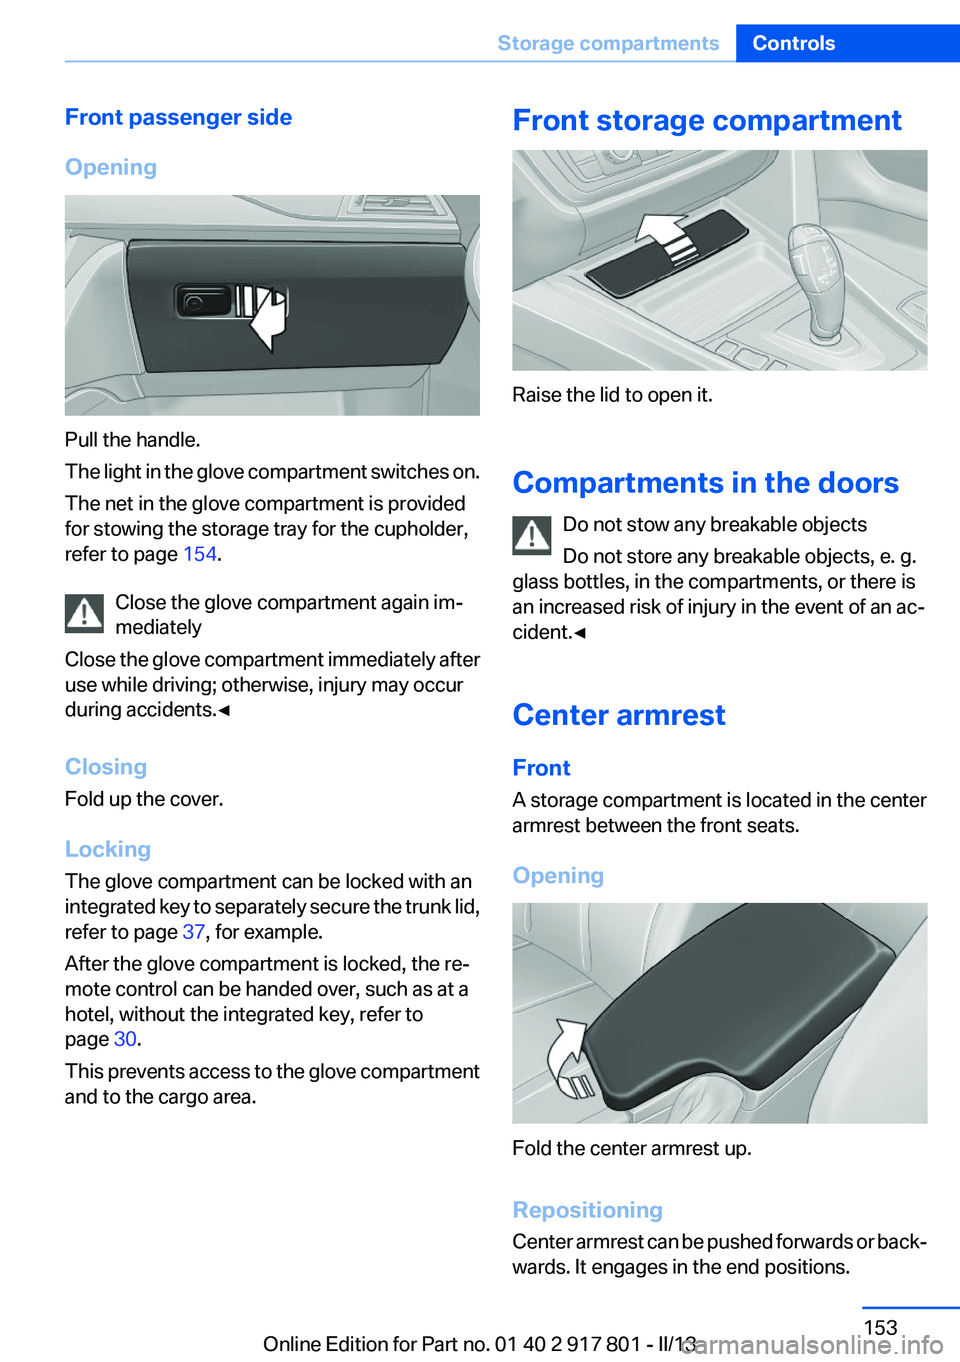
Opening
Pull the handle.
The light in the glove compartment switches on.
The net in the glove compartment is provided
for stowing the storage tray for the cupholder,
refer to page 154.
Close the glove compartment again im‐
mediately
Close the glove compartment immediately after
use while driving; otherwise, injury may occur
during accidents.◀
Closing
Fold up the cover.
Locking
The glove compartment can be locked with an
integrated key to separately secure the trunk lid,
refer to page 37, for example.
After the glove compartment is locked, the re‐
mote control can be handed over, such as at a
hotel, without the integrated key, refer to
page 30.
This prevents access to the glove compartment
and to the cargo area.
Front storage compartment
Raise the lid to open it.
Compartments in the doors Do not stow any breakable objects
Do not store any breakable objects, e. g.
glass bottles, in the compartments, or there is
an increased risk of injury in the event of an ac‐
cident.◀
Center armrest
Front
A storage compartment is located in the center
armrest between the front seats.
Opening
Fold the center armrest up.
Repositioning
Center armrest can be pushed forwards or back‐
wards. It engages in the end positions.
Seite 153Storage compartmentsControls153
Online Edition for Part no. 01 40 2 917 801 - II/13
Page 154 of 242
Connection for an external audio
device
.
For a description, see the user's
manual for Navigation, Entertain‐
ment and Communication.
Storage compartment in the
rear
Storage compartment is located in the rear cen‐
ter console.
Cupholders
Notes Shatter-proof containers and no hot
drinks
Use light and shatter-proof containers and do
not transport hot drinks. Otherwise, there is the
increased danger of injury in an accident.◀
Unsuitable containers
Do not forcefully push unsuitable contain‐
ers into the cupholders. This may result in dam‐
age.◀
FrontStorage tray for front cupholders
The cupholder with the storage tray can be used
for additional storage. To do this, place the stor‐
age tray in the cupholder.
Only use the storage tray for small objects, such
as keys or the remote control.
When not in use, stow the storage tray in the
glove compartment net. Insert the storage tray
into the net so that the top surface faces up.
Note the trapezoidal shape of the net and tray.
Rear
In the center armrest.
Pull the center armrest forward at the strap.
To open: press the button.
To close: push both covers back in, one after the
other.
Pushing back the covers
Push back the covers before folding up the
center armrest; otherwise, the cupholder could
become damaged.◀
Clothes hooks
The clothes hooks are located in the grab han‐
dles in the rear.
Do not obstruct view
When suspending clothing from the
hooks, ensure that it will not obstruct the driver's
vision.◀
Seite 154ControlsStorage compartments154
Online Edition for Part no. 01 40 2 917 801 - II/13