2013 BMW 335I warning light
[x] Cancel search: warning lightPage 166 of 242
▷ECO PRO tips driving instruction, refer to
page 167▷ECO PRO climate control, refer to
page 166
Activating ECO PRO
Press button repeatedly until ECO PRO
is displayed in the instrument cluster.
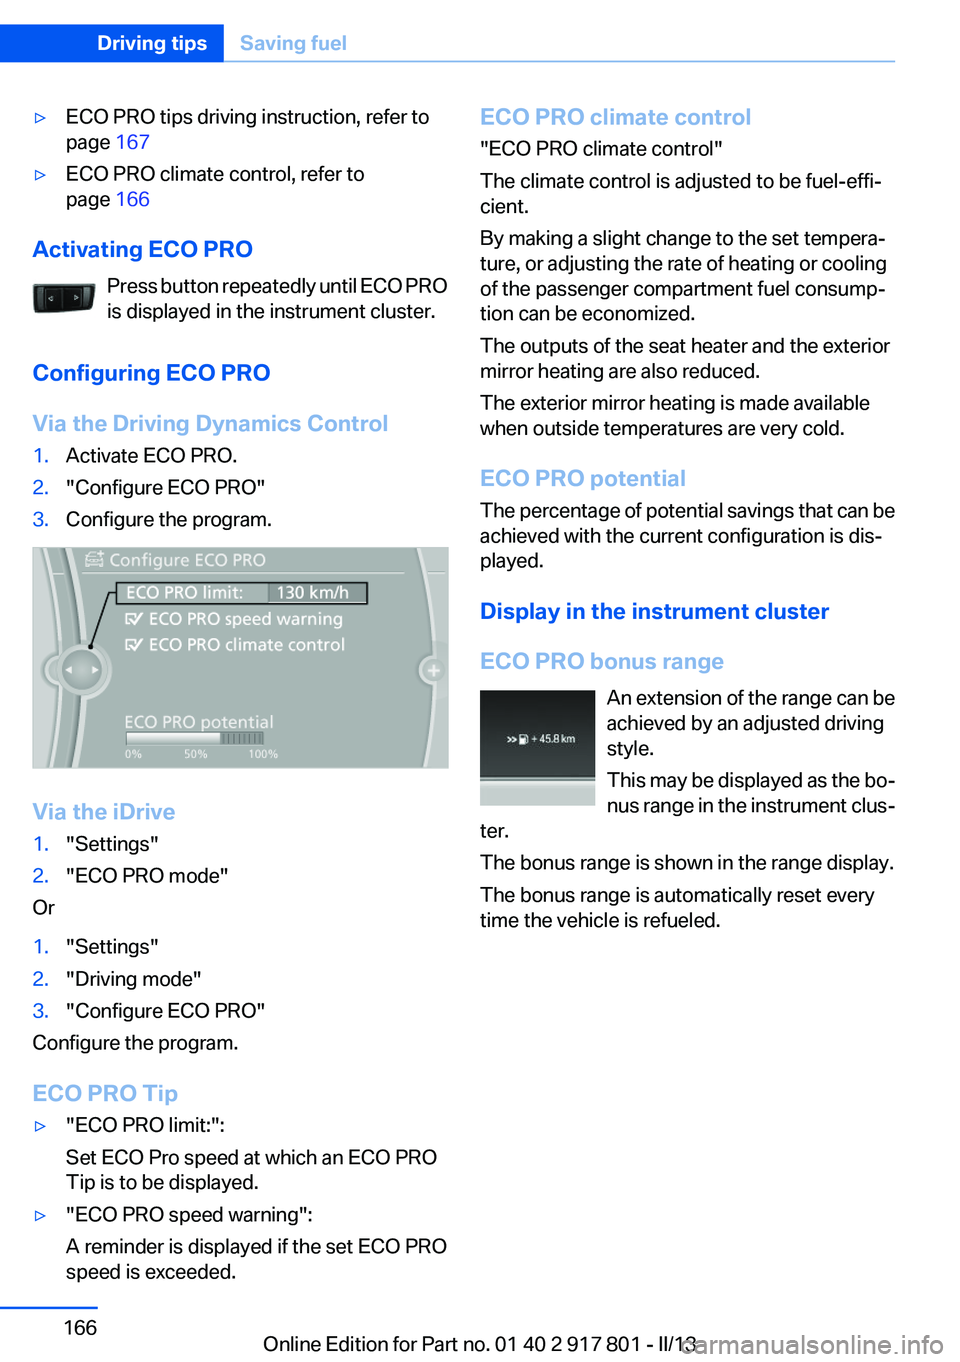
Configuring ECO PRO
Via the Driving Dynamics Control
1.Activate ECO PRO.2."Configure ECO PRO"3.Configure the program.
Via the iDrive
1."Settings"2."ECO PRO mode"
Or
1."Settings"2."Driving mode"3."Configure ECO PRO"
Configure the program.
ECO PRO Tip
▷"ECO PRO limit:":
Set ECO Pro speed at which an ECO PRO
Tip is to be displayed.▷"ECO PRO speed warning":
A reminder is displayed if the set ECO PRO
speed is exceeded.ECO PRO climate control
"ECO PRO climate control"
The climate control is adjusted to be fuel-effi‐
cient.
By making a slight change to the set tempera‐
ture, or adjusting the rate of heating or cooling
of the passenger compartment fuel consump‐
tion can be economized.
The outputs of the seat heater and the exterior
mirror heating are also reduced.
The exterior mirror heating is made available
when outside temperatures are very cold.
ECO PRO potential
The percentage of potential savings that can be
achieved with the current configuration is dis‐
played.
Display in the instrument cluster
ECO PRO bonus range An extension of the range can be
achieved by an adjusted driving
style.
This may be displayed as the bo‐
nus range in the instrument clus‐
ter.
The bonus range is shown in the range display.
The bonus range is automatically reset every
time the vehicle is refueled.Seite 166Driving tipsSaving fuel166
Online Edition for Part no. 01 40 2 917 801 - II/13
Page 176 of 242
Engine does not start
Do not continue driving to the limit of the
remaining travel distance. Otherwise, you will
not be able to restart the engine after switching
it off.◀
Filling with incorrect fuel If the incorrect fuel is used to refuel the
vehicle, a warning light comes on on the
instrument cluster.
After adding the wrong fuel, contact your service
center.
Having the vehicle refilled with Diesel
exhaust fluid
Diesel exhaust fluid is replenished by your Serv‐
ice Center in the course of regularly scheduled
maintenance. Provided you observe this main‐
tenance schedule, it is not normally necessary
to replenish the fluid between maintenance ap‐
pointments.
It may be necessary to have the fluid replenished
under particular circumstances, for example if
the vehicle is driven in a particularly sporty style
or if it is driven at high altitudes.
The Diesel exhaust fluid must be replenished as
soon as the reserve display appears in the in‐
strument cluster to avoid not being able to re‐
start the engine.
You can have the fluid replenished by any Serv‐
ice Center.
Diesel exhaust fluid at low
temperatures
Due to its physical properties, it is possible that
Diesel exhaust fluid may also need to be replen‐
ished between regular maintenance appoint‐
ments if it is exposed to temperatures below
+23 ℉/ -5 ℃.
The need to replenish it is indicated by the Re‐
serve display in the in the instrument cluster, re‐
fer to page 175.You can replenish the Diesel exhaust
fluid yourself in exceptional
circumstances
In order to reach the nearest Service Center with
your vehicle, you can replenish the Diesel ex‐
haust fluid yourself, provided you pay close at‐
tention to the following warning notices.
Handling Diesel exhaust fluid
Do not allow Diesel exhaust fluid to come
into contact with your skin, as this may cause
skin or eye irritation. Preferably, wear protective
goggles and gloves. Follow the safety instruc‐
tions on the bottle. When the bottle or container
is opened, acrid smelling fumes may escape.
When handling Diesel exhaust fluid indoors,
make sure the room is well ventilated. After
working with Diesel exhaust fluid, wash your
hands thoroughly, otherwise you may inadver‐
tently transfer fluid to your eyes and suffer irri‐
tation. If irritation of the eyes does occur, flush
your eyes immediately with abundant water and
consult a doctor as necessary. If Diesel exhaust
fluid comes into contact with the surfaces of
your vehicle, wash off the affected surfaces with
water, otherwise the surface may be damaged.
Keep Diesel exhaust fluid out of reach of chil‐
dren.◀
Suitable Diesel exhaust fluid▷Preferred: BMW Diesel Exhaust Fluid. With
this bottle and its special adapter, Diesel ex‐
haust fluid can be replenished simply and
safely.▷Alternative: NOx reduction agent AUS 32
Diesel exhaust fluid can be purchased at your
Service Center.
Refill quantity
Refill quantity when the Reserve display first ap‐
pears:
Max. 3 gallons/11.3 liters
Seite 176MobilityFuel176
Online Edition for Part no. 01 40 2 917 801 - II/13
Page 197 of 242

Performing a detailed measurement
In order to perform a detailed measurement of
the engine oil level:1."Vehicle Info"2."Vehicle status"3. "Measure engine oil level"4."Start measurement"
The oil level is checked and displayed via a scale.
Duration: approx. 1 minute.
Adding engine oil
Filler neck
When the indicator lights up in the instrument
cluster, add 1 US quart/liter of engine oil within
the next 125 miles/200 km.
Do not add too much engine oil
When too much engine oil is added, im‐
mediately have the vehicle checked, otherwise,
this may cause engine damage.◀
Protect children
Keep oil, grease, etc., out of reach of chil‐
dren and heed the warnings on the containers
to prevent health risks.◀
Oil types for refilling
Hints No oil additives
Oil additives may lead to engine damage. ◀
Viscosity grades for engine oils
When selecting an engine oil, ensure that
the engine oil belongs to one of the viscosity
grades SAE 0W-40, SAE 0W-30, SAE 5W-40,
and SAE 5W-30 or malfunctions or engine dam‐
age may occur.◀
The engine oil quality is critical for the life of the
engine.
Some types of oils in some cases are not avail‐
able in all countries.
Approved oil typesGasoline engineBMW High Performance SAE 5W-30BMW Longlife-01BMW Longlife-01 FEDiesel engineBMW Longlife-04
Additional information about the approved
types of oils can be requested from the service
center.
Alternative oil types
If the approved engine oils are not available, up
to 1 US quart/liter of an oil with the following
specification can be added:
Gasoline engineAPI SM or superior grade specificationSeite 197Engine oilMobility197
Online Edition for Part no. 01 40 2 917 801 - II/13
Page 201 of 242
Socket for OBD Onboard
Diagnosis
Position
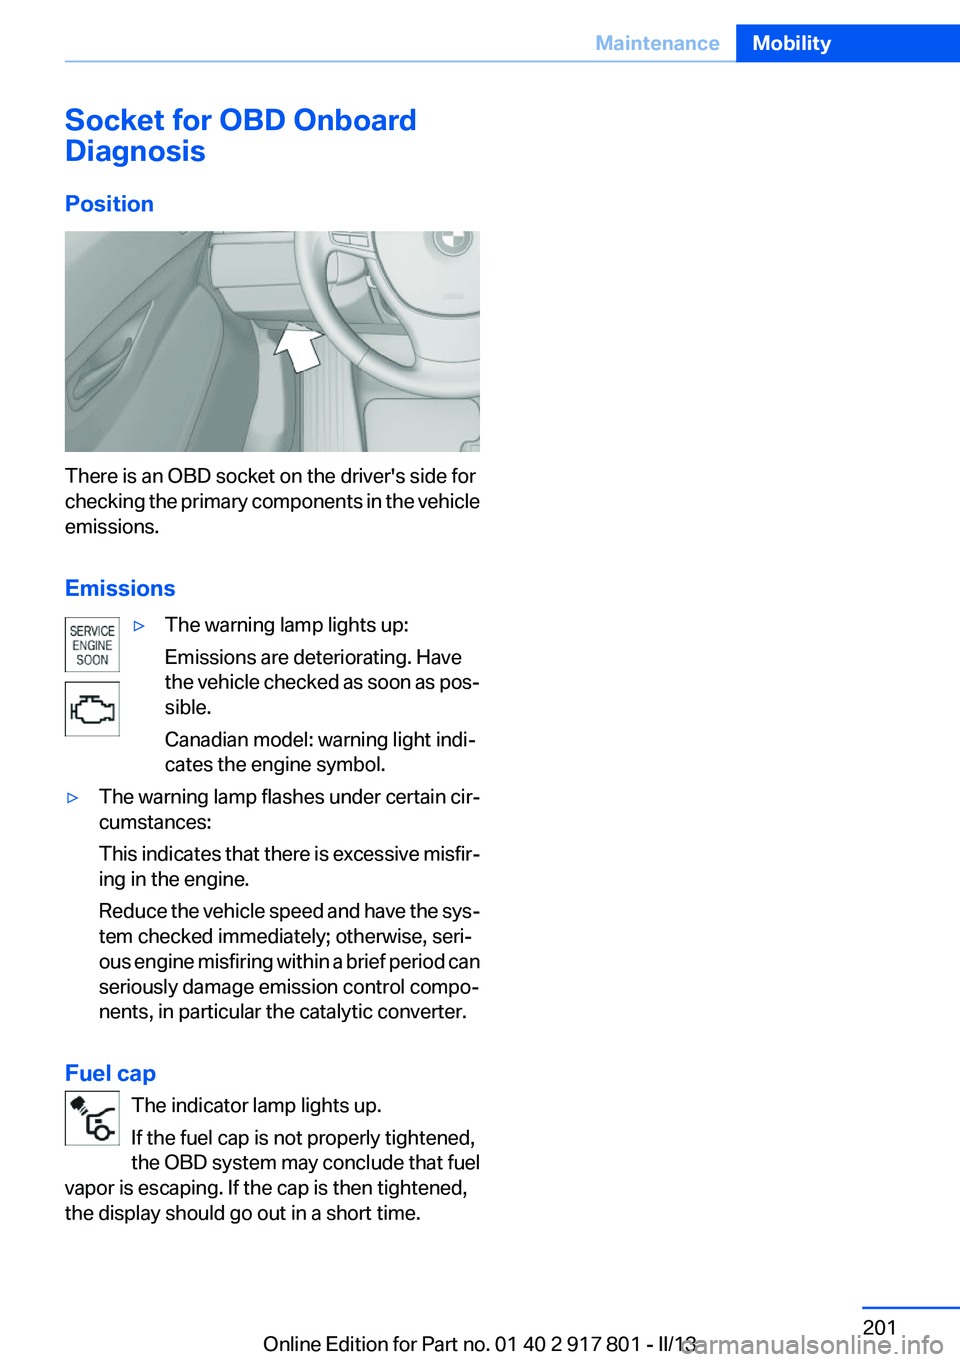
There is an OBD socket on the driver's side for
checking the primary components in the vehicle
emissions.
Emissions
▷The warning lamp lights up:
Emissions are deteriorating. Have
the vehicle checked as soon as pos‐
sible.
Canadian model: warning light indi‐
cates the engine symbol.▷The warning lamp flashes under certain cir‐
cumstances:
This indicates that there is excessive misfir‐
ing in the engine.
Reduce the vehicle speed and have the sys‐
tem checked immediately; otherwise, seri‐
ous engine misfiring within a brief period can
seriously damage emission control compo‐
nents, in particular the catalytic converter.
Fuel cap
The indicator lamp lights up.
If the fuel cap is not properly tightened,
the OBD system may conclude that fuel
vapor is escaping. If the cap is then tightened,
the display should go out in a short time.
Seite 201MaintenanceMobility201
Online Edition for Part no. 01 40 2 917 801 - II/13
Page 213 of 242
Breakdown assistanceVehicle equipment
All standard, country-specific and optional
equipment that is offered in the model series is
described in this chapter. Therefore, equipment
is also described that is not available in a vehicle,
e. g., because of the selected optional equip‐
ment or country variant. This also applies for
safety-related functions and systems.
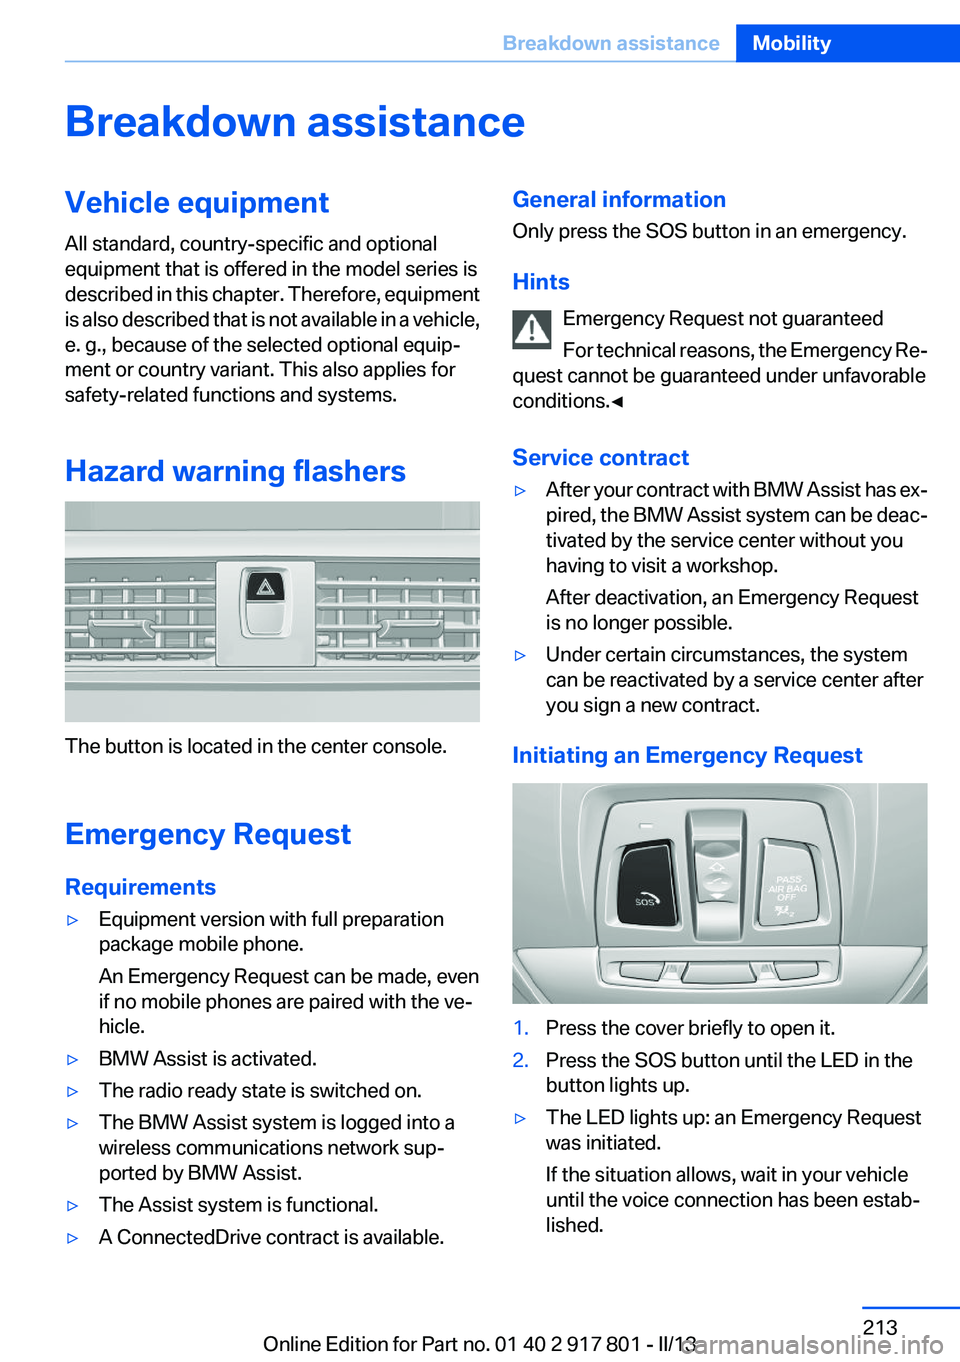
Hazard warning flashers
The button is located in the center console.
Emergency Request
Requirements
▷Equipment version with full preparation
package mobile phone.
An Emergency Request can be made, even
if no mobile phones are paired with the ve‐
hicle.▷BMW Assist is activated.▷The radio ready state is switched on.▷The BMW Assist system is logged into a
wireless communications network sup‐
ported by BMW Assist.▷The Assist system is functional.▷A ConnectedDrive contract is available.General information
Only press the SOS button in an emergency.
Hints Emergency Request not guaranteed
For technical reasons, the Emergency Re‐
quest cannot be guaranteed under unfavorable
conditions.◀
Service contract▷After your contract with BMW Assist has ex‐
pired, the BMW Assist system can be deac‐
tivated by the service center without you
having to visit a workshop.
After deactivation, an Emergency Request
is no longer possible.▷Under certain circumstances, the system
can be reactivated by a service center after
you sign a new contract.
Initiating an Emergency Request
1.Press the cover briefly to open it.2.Press the SOS button until the LED in the
button lights up.▷The LED lights up: an Emergency Request
was initiated.
If the situation allows, wait in your vehicle
until the voice connection has been estab‐
lished.Seite 213Breakdown assistanceMobility213
Online Edition for Part no. 01 40 2 917 801 - II/13
Page 217 of 242
Do not lift the vehicle
Do not lift the vehicle by the tow fitting or
body and chassis parts; otherwise, damage may
result.◀
Towing other vehicles
General information Light towing vehicle
The towing vehicle must not be lighter
than the vehicle being towed; otherwise, it will
not be possible to control the vehicle re‐
sponse.◀
Attaching the tow bar/tow rope correctly
Attach the tow bar or tow rope to the tow
fitting; connecting it to other vehicle parts may
cause damage.◀▷Switch on the hazard warning system, de‐
pending on local regulations.▷If the electrical system has failed, clearly
identify the vehicle being towed by placing
a sign or a warning triangle in the rear win‐
dow.
Tow bar
The tow fittings used should be on the same
side on both vehicles.
Should it prove impossible to avoid mounting
the tow bar at an offset angle, please observe
the following:
▷Maneuvering capability is limited during cor‐
nering.▷The tow bar will generate lateral forces if it
is secured with an offset.
Tow rope
When starting to tow the vehicle, make sure that
the tow rope is taut.
To avoid jerking and the associated stresses on
the vehicle components when towing, always
use nylon ropes or nylon straps.
Attaching the tow rope correctly
Only secure the tow rope on the tow fit‐
ting; otherwise, damage can occur when it is se‐
cured on other parts of the vehicle.◀
Tow fitting
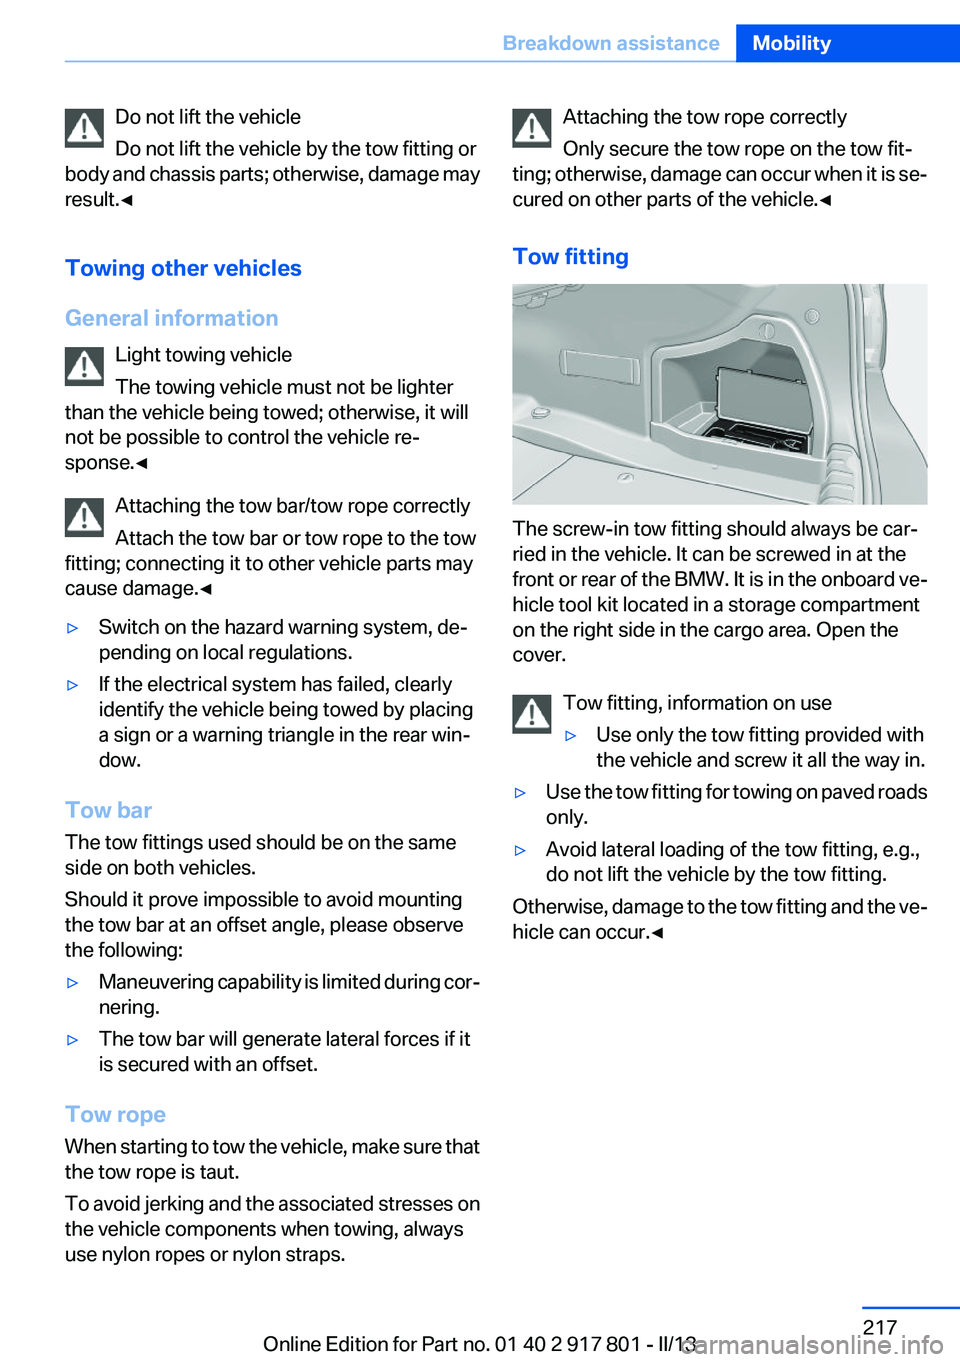
The screw-in tow fitting should always be car‐
ried in the vehicle. It can be screwed in at the
front or rear of the BMW. It is in the onboard ve‐
hicle tool kit located in a storage compartment
on the right side in the cargo area. Open the
cover.
Tow fitting, information on use
▷Use only the tow fitting provided with
the vehicle and screw it all the way in.▷Use the tow fitting for towing on paved roads
only.▷Avoid lateral loading of the tow fitting, e.g.,
do not lift the vehicle by the tow fitting.
Otherwise, damage to the tow fitting and the ve‐
hicle can occur.◀
Seite 217Breakdown assistanceMobility217
Online Edition for Part no. 01 40 2 917 801 - II/13
Page 232 of 242
Everything from A to Z
IndexA
ABS, Antilock Brake Sys‐ tem 110
ACC, Active Cruise Control with Stop & Go 115
Activated-charcoal filter 142
Active Blind Spot Detec‐ tion 105
Active Cruise Control with Stop & Go, ACC 115
Active Protection 107
Adaptive brake lights, refer to Brake force display 107
Adaptive light control 89
Additives, oil 197
Adjustments, seats/head re‐ straints 45
After washing vehicle 220
Airbags 92
Airbags, indicator/warning light 93
Air circulation, refer to Recir‐ culated-air mode 138, 141
Air, dehumidifying, refer to Cooling function 138, 140
Air distribution, manual 138, 141
Air flow, air conditioner 138
Air flow, automatic climate control 141
Air pressure, tires 178
Air vents, refer to Ventila‐ tion 142
Alarm system 40
Alarm, unintentional 41
All around the center con‐ sole 14
All around the headliner 15
All around the steering wheel 12 All-season tires, refer to Win‐
ter tires 192
All-wheel-drive 111
Alternating-code hand-held transmitter 145
Alternative oil types 197
Antifreeze, washer fluid 66
Antilock Brake System, ABS 110
Anti-slip control, refer to DSC 110
Approved axle load 227
Approved engine oils 197
Arrival time 82
Ash tray 148
Assistance, Roadside Assis‐ tance 214
Assistance when driving off 114
Assist system information, on Control Display 85
Attentiveness assistant 107
AUTO intensity 140
Automatic car wash 219
Automatic climate con‐ trol 137
Automatic climate control with enhanced features 139
Automatic Cruise Control with Stop & Go 115
Automatic Curb Monitor 53
Automatic deactivation, front passenger airbags 94
Automatic headlamp con‐ trol 88
Automatic locking 37
Automatic recirculated-air control 141
Automatic transmission with Steptronic 67 AUTO program, automatic cli‐
mate control 140
AUTO program, climate con‐ trol 138
AUTO program, intensity 140
Auto Start/Stop function 61
Average fuel consumption 82
Average speed 82
Axle loads, weights 227
B
Backrest curvature, refer to Lumbar support 47
Backrest, width 47
Backup camera 125
Band-aids, refer to First aid kit 214
Bar for tow-starting/tow‐ ing 217
Battery replacement, vehicle battery 210
Battery replacement, vehicle remote control 30
Battery, vehicle 210
Belts, safety belts 48
Beverage holder, cu‐ pholder 154
Blinds, sun protection 43
BMW Advanced Diesel 175
BMW Assist, see user's manual for Navigation, Enter‐
tainment and Communica‐
tion
BMW Homepage 6
BMW Internet page 6
BMW maintenance sys‐ tem 200
Bonus range, ECO PRO 166
Bottle holder, refer to Cu‐ pholder 154 Seite 232ReferenceEverything from A to Z232
Online Edition for Part no. 01 40 2 917 801 - II/13
Page 233 of 242

Brake assistant 110
Brake discs, breaking in 158
Brake force display 107
Brake lamps, brake force dis‐ play 107
Brake lights, adaptive 107
Brake pads, breaking in 158
Braking, notes 159
Breakdown assis‐ tance 213, 214
Breaking in 158
Brightness of Control Dis‐ play 85
Bulb replacement 202
Bulb replacement, front 203
Bulb replacement, halogen headlamps 203
Bulb replacement, rear 208
Bulb replacement, xenon headlamps 206
Bulbs and lamps 202
Button, RES 117
Button, Start/Stop 59
Bypassing, refer to Jump- starting 214
C
California Proposition 65 Warning 7
Camera, backup camera 126
Camera, care 222
Camera, Side View 130
Camera, Top View 128
Can holder, refer to Cu‐ pholder 154
Car battery 210
Car care products 220
Care, displays 222
Care, vehicle 220
Cargo 161
Cargo area, enlarging 150
Cargo area lid 37
Cargo area, storage compart‐ ments 155 Cargo straps, securing
cargo 162
Car key, refer to Remote con‐ trol 30
Carpet, care 221
Car wash 219
Catalytic converter, refer to Hot exhaust system 159
CBS Condition Based Serv‐ ice 200
CD/Multimedia, see user's manual for Navigation, Enter‐
tainment and Communica‐
tion
Center armrest 153
Center console 14
Central locking system 33
Central screen, refer to Control Display 16
Changes, technical, refer to Safety 7
Changing parts 202
Changing wheels 210
Changing wheels/tires 191
Check Control 73
Children, seating position 55
Children, transporting safely 55
Child restraint fixing sys‐ tem 55
Child restraint fixing system LATCH 56
Child restraint fixing systems, mounting 55
Child safety locks 58
Child seat, mounting 55
Child seats 55
Chrome parts, care 221
Cigarette lighter 148
Cleaning, displays 222
Climate control 137, 139
Clock 76
Closing/opening from in‐ side 36
Closing/opening via door lock 36 Closing/opening with remote
control 34
Clothes hooks 154
Cold starting, refer to Starting the engine 60
Collision warning 100, 102
Combination switch, refer to Turn signals 64
Combination switch, refer to Wiper system 64
Comfort Access 38
COMFORT program, Dynamic Driving Control 113
Compartments in the doors 153
Compass 146
Computer 81
Condensation on win‐ dows 141
Condensation under the vehi‐ cle 160
Condition Based Service CBS 200
Configure driving mode 113
Confirmation signal 35
ConnectedDrive, see user's manual for Navigation, Enter‐
tainment and Communica‐
tion
Control Display 16
Control Display, settings 84
Controller 16, 17
Control systems, driving sta‐ bility 110
Convenient opening 34
Coolant 199
Coolant temperature 76
Cooling function 138, 140
Cooling, maximum 140
Cooling system 199
Corrosion on brake discs 160
Cruise control 121
Cruise control, active with Stop & Go 115
Cruising range 77
Cupholder 154 Seite 233Everything from A to ZReference233
Online Edition for Part no. 01 40 2 917 801 - II/13