2013 BMW 335I CONVERTIBLE child restraint
[x] Cancel search: child restraintPage 47 of 308
46
ControlsAdjustments
Adjustments
Vehicle equipment
In this chapter, all production, country, and
optional equipment that is offered in the model
range is described. As a result, some equip-
ment described may not be available in a partic-
ular vehicle, for example due to the options or
national-market version selected. This also
applies to safety related functions and systems.
Sitting safely
The ideal sitting position can make a vital con-
tribution to relaxed, fatigue-free driving. In con-
junction with the safety belts, the head
restraints and the airbags, the seated position
has a major influence on your safety in the event
of an accident. To ensure that the safety sys-
tems operate with optimal efficiency, we
strongly urge you to ob serve the instructions
contained in the following section.
For additional information on transporting chil-
dren safely, refer to page 56.
Airbags
Always maintain an adequate distance
between yourself and the airbags. Always
grip the steering wheel on the rim, with your
hands in the 3 o'clock and 9 o'clock positions,
to minimize the risk of injury to the hands or
arms in the event of the airbag being triggered
off.
No one and nothing should come between the
airbags and the seat occupant.
Do not use the cover of the front airbag on the
front passenger side as a storage area. Make
sure that the front passenger is sitting correctly,
e.g. not resting feet or legs on the dashboard;
otherwise, leg injuries can occur if the front air-
bag deploys.
Make sure that passengers keep their heads
away from the side airbag and do not lean against the cover of the head airbag; otherwise,
serious injuries can result if the airbag
deploys.
<
Even if you follow all the instructions, injuries
resulting from contact with airbags cannot be
fully excluded, depending on the circum-
stances. The ignition and inflation noise may
provoke a mild hearing loss in extremely sensi-
tive individuals. This effect is usually only tem-
porary.
For airbag locations and additional information
on airbags, refer to page 104.
Head restraint
A correctly adjusted head restraint reduces the
risk of neck injury in the event of an accident.
Adjust the head restraint in such a way
that its center is at approx. ear level. Oth-
erwise, there is an increased risk of injury in the
event of an accident. <
Head restraints, refer to page 49.
Safety belt
Before every drive, make sure that all occupants
wear their safety belts. Airbags complement the
safety belt as an additional safety device, but
they do not represent a substitute.
Your vehicle has four seats, each of which is
equipped with a safety belt.
Never allow more than one person to
wear a single safety belt. Never allow
infants or small children to ride in a passenger's
lap. Make sure that the belt in the lap area sits
low across the hips and does not press against
the abdomen.
The safety belt must not rest against the throat,
run across sharp edges, pass over hard or frag-
ile objects or be pinched. Fasten the safety belt
so that it sits as snugly as possible against the
lap and shoulder without being twisted. Other-
wise, the belt could slide over your hips and
00320051004F004C00510048000300280047004C0057004C005200510003
Page 54 of 308
53
Adjustments
Controls
"Fasten safety belts" reminder for
driver's and front passenger seat
The indicator lamps light up and an
acoustic signal sounds. In addition, a
message appears on the Control Dis-
play. Check whether the safety belt
has been fastened correctly.
The 'Fasten safety belts' reminder is issued as
long as the driver's safety belt has not been fas-
tened. The "Fasten safety belts" reminder is
also activated at road speeds above approx.
5 mph or 8 km/h if the front passenger safety
belt is not fastened, if objects are placed on the
front passenger seat, or if driver or front pas-
senger unfasten their safety belts.
Damage to safety belts
If the safety belts are damaged or
stressed in an accident: have the belt sys-
tem, including any belt tensioners or child
restraint systems, replaced and the belt
anchors checked. Have this work carried out
only at your BMW center. Otherwise correct
operation of this safety equipment is not guar-
anteed. <
Coupe: belt hand-over
The concept
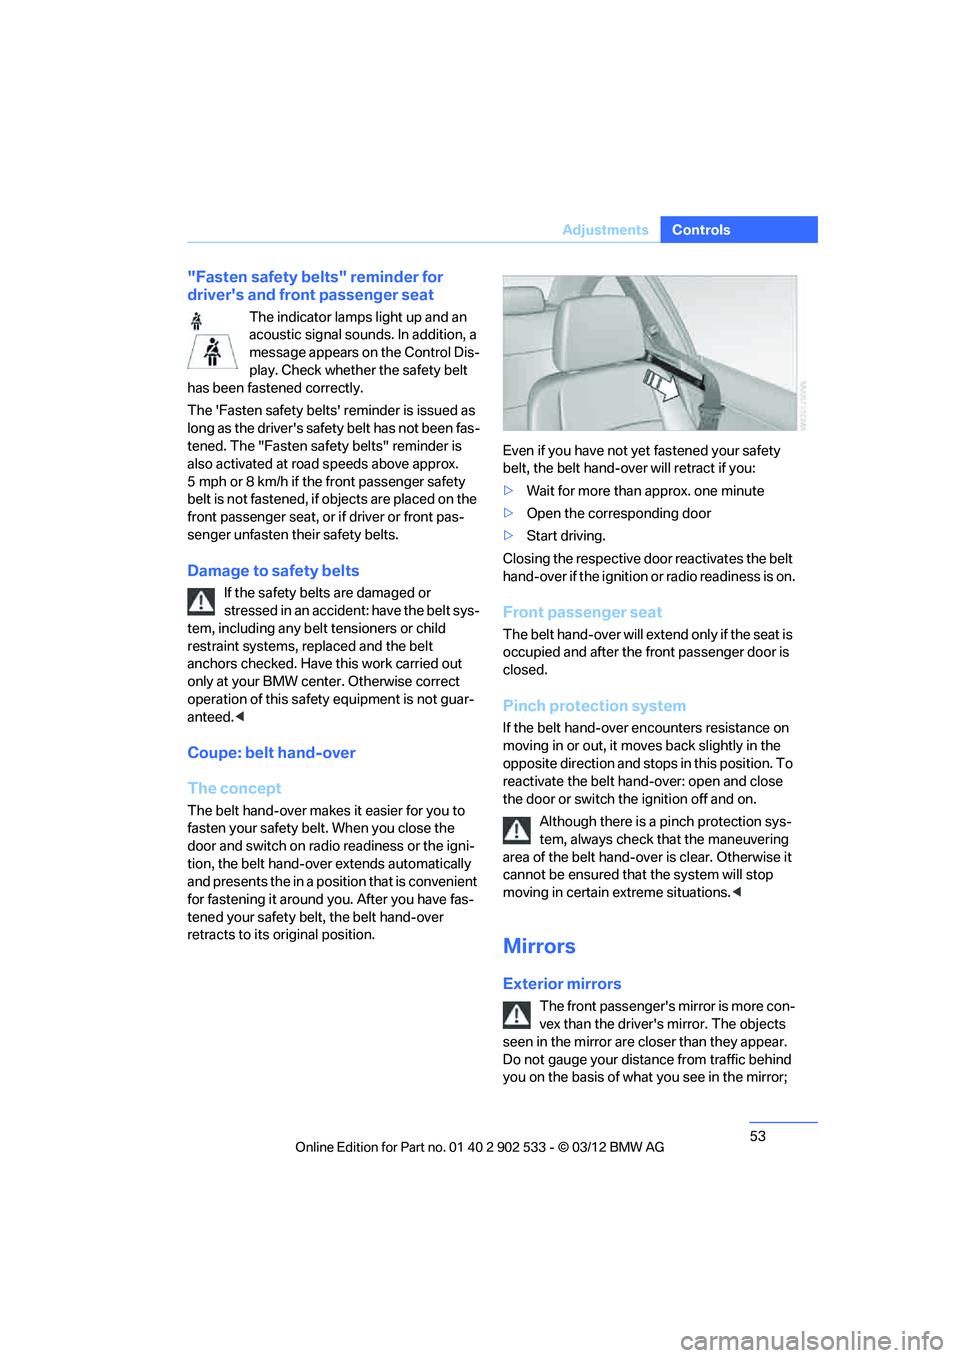
The belt hand-over makes it easier for you to
fasten your safety belt. When you close the
door and switch on radio readiness or the igni-
tion, the belt hand-over extends automatically
and presents the in a position that is convenient
for fastening it around you. After you have fas-
tened your safety belt, the belt hand-over
retracts to its original position. Even if you have not yet fastened your safety
belt, the belt hand-over will retract if you:
>
Wait for more than approx. one minute
> Open the corresponding door
> Start driving.
Closing the respective door reactivates the belt
hand-over if the ignition or radio readiness is on.
Front passenger seat
The belt hand-over will extend only if the seat is
occupied and after the front passenger door is
closed.
Pinch protection system
If the belt hand-over encounters resistance on
moving in or out, it moves back slightly in the
opposite direction and stops in this position. To
reactivate the belt hand-over: open and close
the door or switch the ignition off and on. Although there is a pinch protection sys-
tem, always check that the maneuvering
area of the belt hand-over is clear. Otherwise it
cannot be ensured that the system will stop
moving in certain extreme situations. <
Mirrors
Exterior mirrors
The front passenger's mirror is more con-
vex than the driver's mirror. The objects
seen in the mirror are closer than they appear.
Do not gauge your distance from traffic behind
you on the basis of what you see in the mirror;
00320051004F004C00510048000300280047004C0057004C005200510003
Page 57 of 308
56
ControlsTransporting children safely
Transporting children safely
Vehicle equipment
In this chapter, all production, country, and
optional equipment that is offered in the model
range is described. As a result, some equip-
ment described may not be available in a partic-
ular vehicle, for example due to the options or
national-market version selected. This also
applies to safety related functions and systems.
The right place for children
Do not leave children unattended in the
vehicle; otherwise, they could endanger
themselves and/or other persons by opening
the doors, for example. <
Children should always sit in the rear
Accident research has shown that the safest
place for children is on the rear seat.
Children under the age of 13 or smaller
than 5 ft/150 cm may be transported only
in the rear in suitable child restraint systems
appropriate for their age, weight and size. Oth-
erwise, there is an increased risk of injury in the
event of an accident. <
Children 13 years of age or older must be buck-
led in with a safety belt as soon as there no
longer is any child restraint system that is
appropriate for their age, size and weight.
Children in the front passenger seat
Should it be necessary to use a child
restraint system on the front passenger
seat, the front and side airbags for the front pas-
senger must be deactivated. Otherwise, a child
traveling on that seat will face a significant risk
of injury if the airbags are triggered off, even
with a child restraint system.
page
105.
Convertible: key switch for
passenger belt
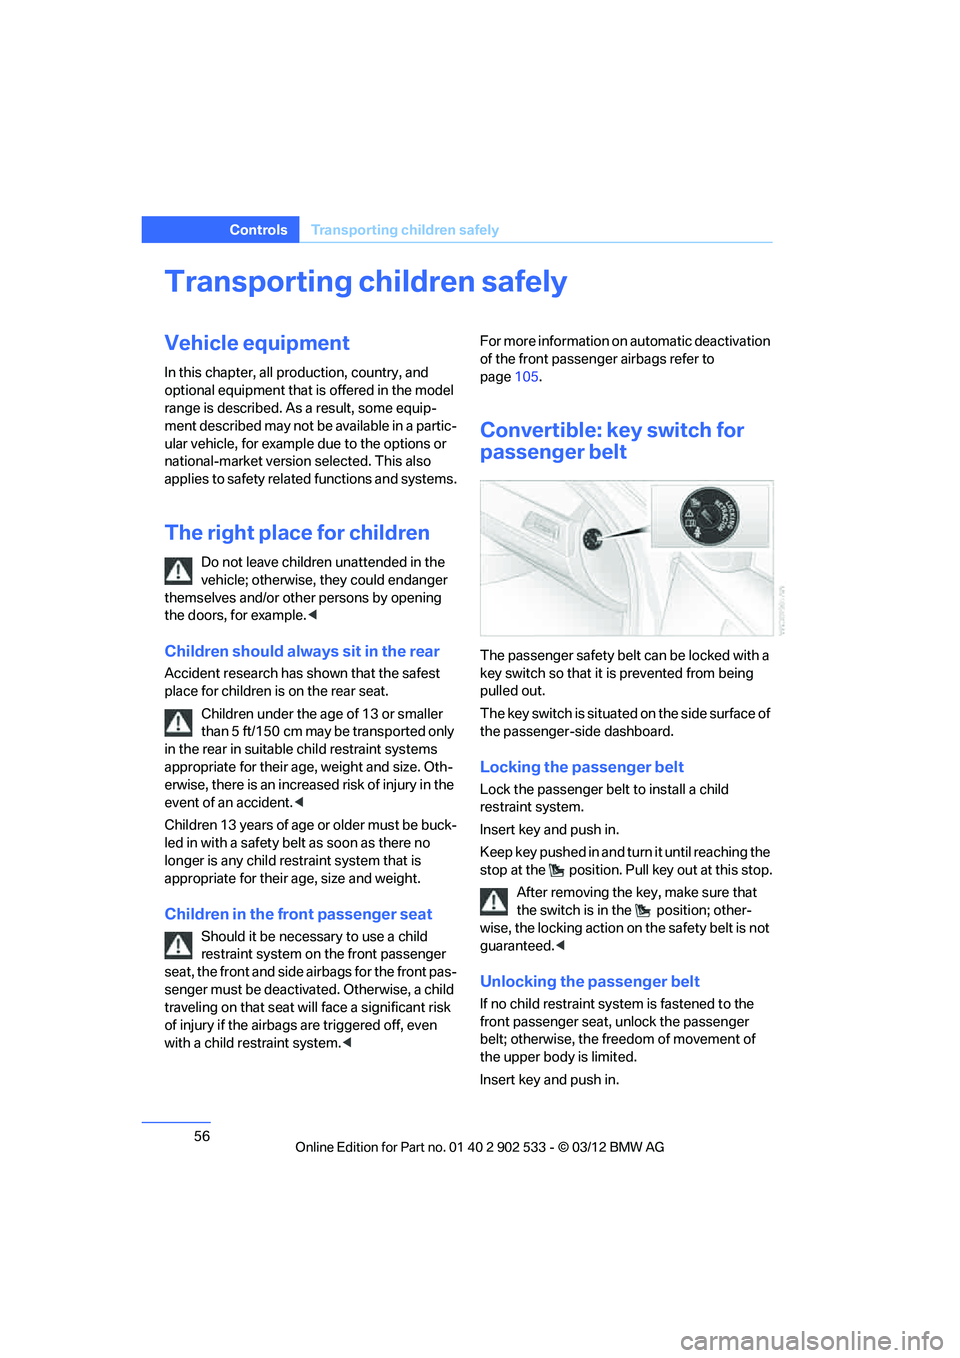
The passenger safety belt can be locked with a
key switch so that it is prevented from being
pulled out.
The key switch is situated on the side surface of
the passenger-side dashboard.
Locking the passenger belt
Lock the passenger belt to install a child
restraint system.
Insert key and push in.
Keep key pushed in and turn it until reaching the
stop at the position. Pu ll key out at this stop.
After removing the key, make sure that
the switch is in the position; other-
wise, the locking action on the safety belt is not
guaranteed. <
Unlocking the passenger belt
If no child restraint system is fastened to the
front passenger seat, unlock the passenger
belt; otherwise, the freedom of movement of
the upper body is limited.
Insert key and push in.
00320051004F004C00510048000300280047004C0057004C005200510003
Page 58 of 308
57
Transporting children safely
Controls
Keep key pushed in and turn it until reaching the
stop at the position. Pull key out at this stop.
Make sure that the passenger belt is
unlocked; otherwise, the front passenger
may become trapped by the safety belt. <
Installing child restraint
systems
Observe the child restraint system manu-
facturer's instructions when selecting,
installing and using child restraint systems.
Otherwise, the protective effect may be dimin-
ished. <
Standard child restraint systems are designed
to be secured with a lap belt or with the lap-belt
section of a lap-and-shoulder belt. Incorrectly
or improperly installed child restraint systems
can increase the risk of injury to children.
Always follow the installation instructions for
the system with the greatest care.
On the front passenger seat
After installing a child restraint system on
the front passenger seat, make sure that
the front and side airbag s for the front passen-
ger are deactivated; otherwise, there is an
increased risk of injury if the airbags deploy. <
Seat position
Before installing a child restraint system, move
the front passenger seat as far back and up as
possible to obtain the best possible position for
the belt. Do not change the seat position after
this.
Backrest width
The backrest width of the front passenger
seat must be at its widest possible set-
ting. Do not change the setting after installing
the child seat; otherwise, the child seat's stabil-
ity on the front passenger seat is limited. <1.
Adjust the backrest width to its widest set-
ting, refer to page 48.
2. Install the child seat.
Child seat security
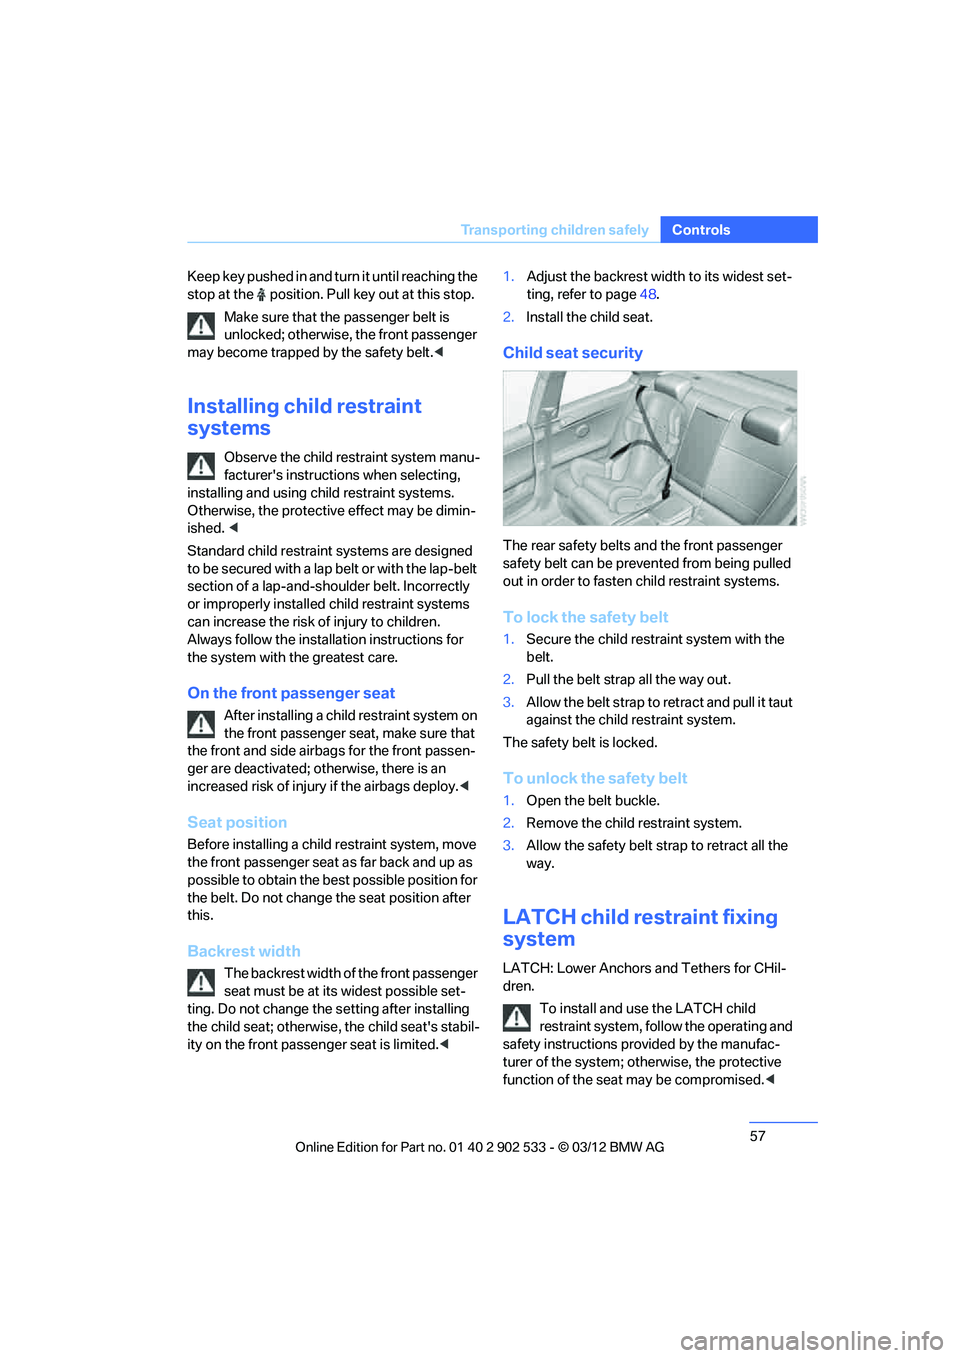
The rear safety belts and the front passenger
safety belt can be prevented from being pulled
out in order to fasten child restraint systems.
To lock the safety belt
1.Secure the child restraint system with the
belt.
2. Pull the belt strap all the way out.
3. Allow the belt strap to retract and pull it taut
against the child restraint system.
The safety belt is locked.
To unlock the safety belt
1. Open the belt buckle.
2. Remove the child restraint system.
3. Allow the safety belt strap to retract all the
way.
LATCH child restraint fixing
system
LATCH: Lower Anchors and Tethers for CHil-
dren.
To install and use the LATCH child
restraint system, follow the operating and
safety instructions provided by the manufac-
turer of the system; otherwise, the protective
function of the seat may be compromised.<
00320051004F004C00510048000300280047004C0057004C005200510003
Page 59 of 308
58
ControlsTransporting children safely
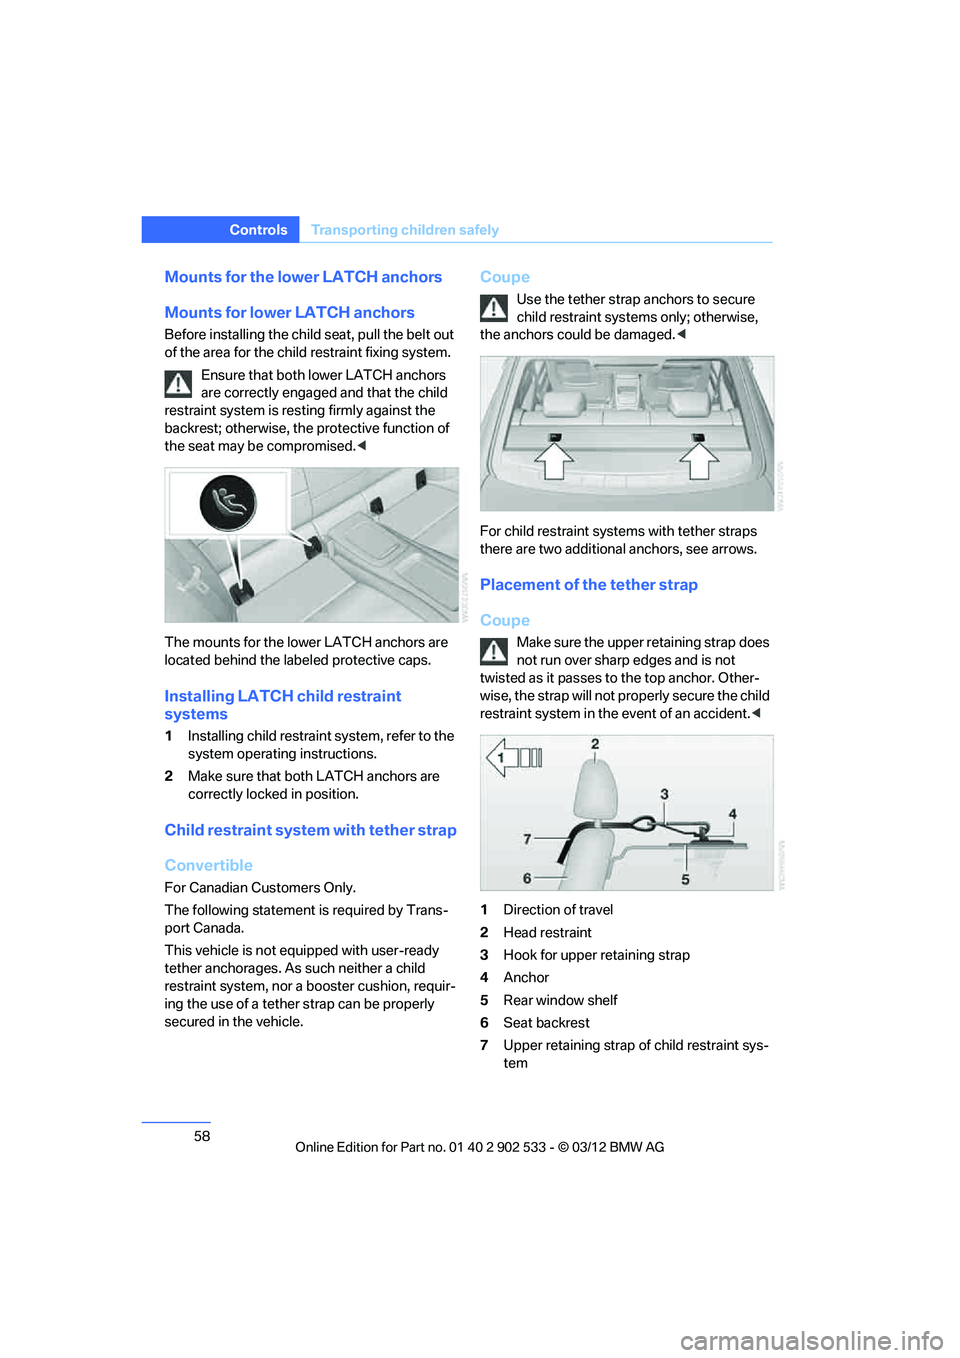
Mounts for the lower LATCH anchors
Mounts for lower LATCH anchors
Before installing the child seat, pull the belt out
of the area for the child restraint fixing system.
Ensure that both lower LATCH anchors
are correctly engaged and that the child
restraint system is resting firmly against the
backrest; otherwise, the protective function of
the seat may be compromised. <
The mounts for the lower LATCH anchors are
located behind the labeled protective caps.
Installing LATCH child restraint
systems
1 Installing child restraint system, refer to the
system operating instructions.
2 Make sure that both LATCH anchors are
correctly locked in position.
Child restraint system with tether strap
Convertible
For Canadian Customers Only.
The following statement is required by Trans-
port Canada.
This vehicle is not equipped with user-ready
tether anchorages. As such neither a child
restraint system, nor a booster cushion, requir-
ing the use of a tether strap can be properly
secured in the vehicle.
Coupe
Use the tether strap anchors to secure
child restraint systems only; otherwise,
the anchors could be damaged. <
For child restraint systems with tether straps
there are two additional anchors, see arrows.
Placement of the tether strap
Coupe
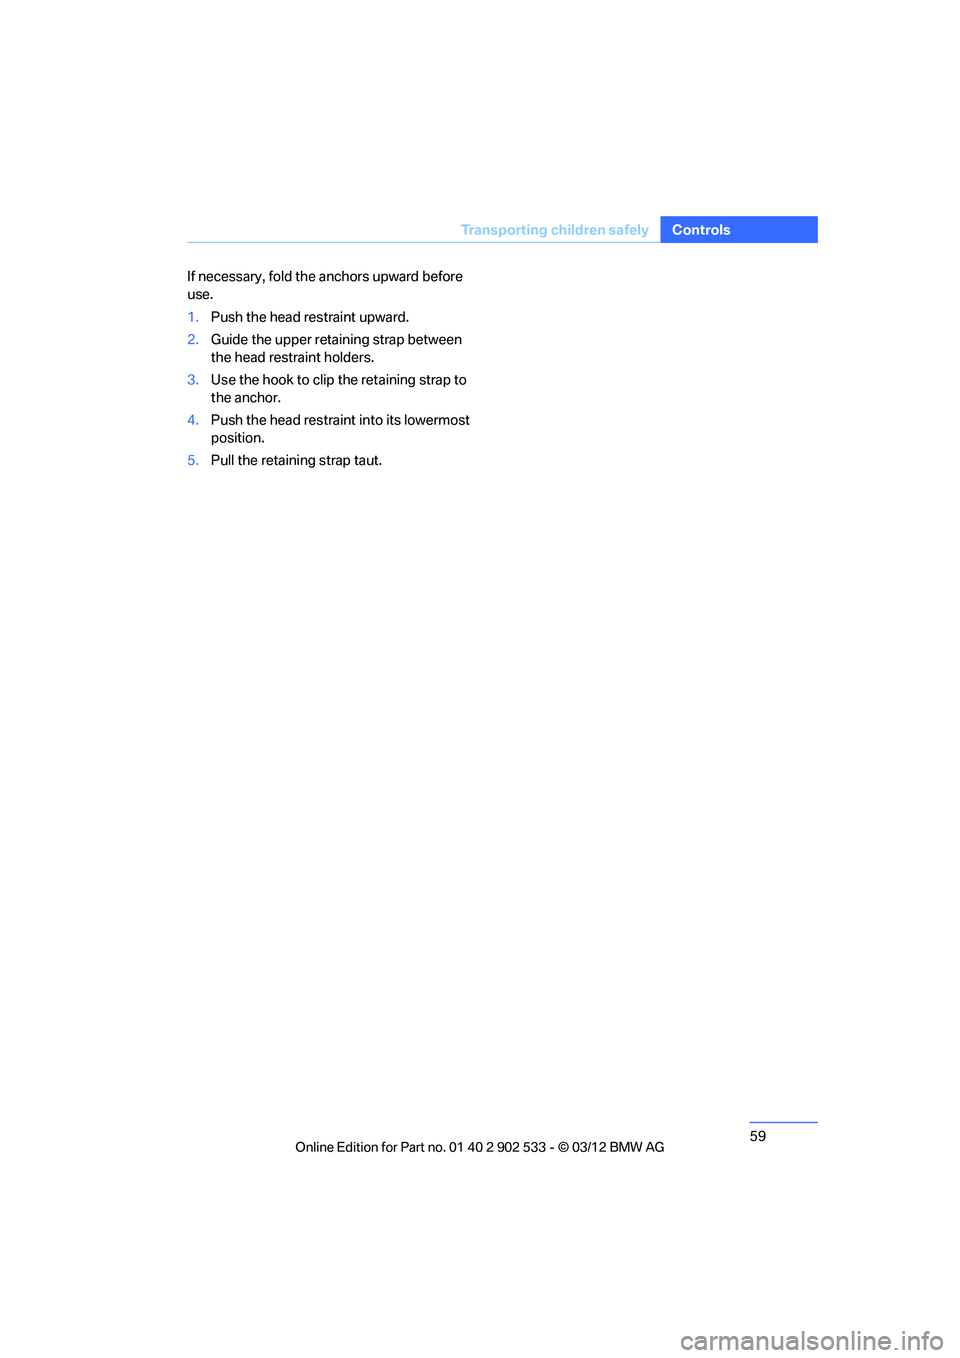
Make sure the upper retaining strap does
not run over sharp edges and is not
twisted as it passes to the top anchor. Other-
wise, the strap will not properly secure the child
restraint system in the event of an accident. <
1 Direction of travel
2 Head restraint
3 Hook for upper retaining strap
4 Anchor
5 Rear window shelf
6 Seat backrest
7 Upper retaining strap of child restraint sys-
tem
00320051004F004C00510048000300280047004C0057004C005200510003
Page 60 of 308
59
Transporting children safely
Controls
If necessary, fold the anchors upward before
use.
1.
Push the head restraint upward.
2. Guide the upper retaining strap between
the head restraint holders.
3. Use the hook to clip the retaining strap to
the anchor.
4. Push the head restraint into its lowermost
position.
5. Pull the retaining strap taut.
00320051004F004C00510048000300280047004C0057004C005200510003
Page 106 of 308

105
Technology for driving comfort and safety
Controls
the airbag retention system from the vehicle. Do
not modify the individual components of the
system or its wiring in any way. This includes
the upholstered covers on the steering wheel,
instrument panel, seats and roof posts, as well
as the sides of the roof lining. Do not attempt to
remove or dismantle the steering wheel.
Do not touch the individual components imme-
diately after the system has been triggered,
because there is a danger of burns.
In the event of faults, immobilization, or after the
airbag system has been triggered, have the
testing, repair, or disassembly and scrapping of
gas generators performed only by your BMW
center or a workshop that has the required
explosives licenses. Unprofessional attempts to
work on the system could lead to failure in an
emergency or to undesired airbag activation,
either of which could result in personal injury.
<
Warning notices and information about the air-
bags can also be found on the sun visors.
Automatic deactivation of the front
passenger airbags
An analysis of the impression in the front pas-
senger seat cushion determines whether and
how the seat is occupied. The front and side air-
bags for the front passenger are activated or
deactivated by the system accordingly. The indicator lamp above the interior
rearview mirror shows the current status
of the front passenger airbags, deactivated or
activated, refer to Status of front passenger air-
bags below. <
Before transporting a child on the front
passenger seat, read the safety precau-
tions and handling instructions under Trans-
porting children safely, refer to page 56.
The front and side airbags can also be deacti-
vated by adolescents and adults sitting in cer-
tain positions; the indicator lamp for the front
passenger airbags lights up. In such cases, the
passenger should change his or her sitting
position so that the front passenger airbags are
activated and the indicator lamp goes out. If the
desired airbag status cannot be achieved by changing the sitting posi
tion, transport the rele-
vant passenger on a rear seat. Do not attach
seat covers, seat cushion padding, ball mats or
other items to the front passenger seat unless
they are specifically recommended by BMW.
Do not place any items under the seat which
could press against the seat from below. Other-
wise, a correct analysis of the seat cushion is
not ensured. <
Status of front passenger airbags
The indicator lamp for the front passenger air-
bags shows the functional status of the front
passenger front and side airbags in accordance
with whether and how the front passenger seat
is occupied. The indicator lamp shows whether
the front passenger airbags are activated or
deactivated.
>The indicator lamp lights up when a child in
a specially designated child restraint sys-
tem is detected, as intended, on the seat.
The front and side airbags for the front pas-
senger are not activated.
Most child seats are detected by the
system, This particularly applies to
child seats that were required by NHTSA at
the time of manufacture of the vehicle. After
mounting a child seat, ensure that the indi-
cator lamp for the front passenger airbag is
lit. It indicates that the child seat has been
detected and that the front passenger air-
bags are deactivated. <
> The indicator lamp does not light up as long
as a person of sufficient size and in a correct
sitting position is detected on the seat.
00320051004F004C00510048000300280047004C0057004C005200510003
Page 295 of 308

294
Referen ceEverything from A to Z
Car care, refer to Care 262
Care 262
– automatic car washes 262
– care products 262
– carpets 265
– CD/DVD drives 265
– chrome parts 264
– displays 265
– exterior 262
– fine wood parts 265
– headlamps 263
– high-pressure washer 263
– interior 264
– leather 264
– light-alloy wheels 264
– paintwork 263
– plastic parts 265
– retractable hardtop 263
– rubber seals 264
– safety belts 265
– sensors and cameras 265
– upholstery and cloth
trim 264
– washing the car manually 263
– windows 263
Cargo, securing 140
Cargo loading 139
– securing cargo 140
– stowing cargo 140
– vehicle 139
Car jack
– jacking points 270
Car key, refer to Integrated
key/remote control 30
Car phone
– installation location, refer to Center armrest 124
– refer to separate Owner's Manual
Car phone, refer to Telephone 200
Car shampoo 265
Catalytic converter, refer to Hot exhaust system 137
Center armrest 124 Center brake lamp
– replacing bulb
269
Center console, refer to Around the center
console 14
Central locking
– from inside 34
– from outside 31
Central locking system 31
– Comfort Access 38
– hotel function 36
– setting unlocking characteristics 32
Ch an
ges, technical, refer to
For your own safety 5
Changing bulbs, refer to
Lamps and bulbs 266
Changing gears 67
Changing the language on the
Control Display 92
Changing the measurement units on the Control
Display 85
Changing wheels 269
Chassis number, refer to
Engine compartment 255
Check Control 89
Child restraint fixing system
LATCH 57
Child restraint systems 56
Child seats, refer to
Transporting children
safely 56
Chrome parts 265
Chrome polish 265
Cigarette lighter, refer to Lighter 127
Cleaning headlamps 71
– washer fluid 71
Cleaning your BMW, refer to
Care 262
Climate control
– automatic air distribution 115 Clock
80
– 12h/24h mode 88
– setting the time and date 88
– setting time 87
Closing
– from inside 34
– from outside 32
Clothes hooks 125
Cockpit 10
Cold start, refer to Starting the
engine 61
Comfort Access 38
– replacing the battery 39
Comfort access, refer to Comfort Access 38
Comfort area, refer to Around
the center console 14
Compartment for remote control, refer to Ignition
lock 60
Compass 122
Computer 82
– displays on Control Display 82
Computer, refer to iDrive 18
Concierge service 225
Condensation, refer to When the vehicle is parked 139
Condition Based Service CBS 260
Configuring settings, refer to
Personal Profile 30
Confirma tio
n signals for
locking/unlocking the
vehicle 33
ConnectedDrive 224
Connecting vacuum cleaner,
refer to Connecting
electrical appliances 127
Consumption, refer to
Average fuel
consumption 82
Contacts 214
– deleting 216,223
– exporting/importing 223
– new contact 215
00320051004F004C00510048000300280047004C0057004C005200510003