2013 BMW 335I CONVERTIBLE CD player
[x] Cancel search: CD playerPage 4 of 308

Contents
The quickest way to find special topics is to
consult the index, refer to page292.
4 Notes
7 Reporting safety defects
At a glance
10Dashboard
18 iDrive
25 Voice activation system
Controls
30Opening and closing
46 Adjustments
56 Transporting children safely
60 Driving
80 Controls overview
94 Technology for driving comfort and
safety
108 Lamps
114 Climate
120 Practical interior accessories
Driving tips
136Things to remember when driving
Navigation
144Navigation system
146 Destination entry
155 Destination guidance
163 What to do if …
Entertainment
166On/off and tone
169 Radio
172 Satellite radio
177 CD/DVD player and CD changer
184 Music collection
189 External devices
Communications
200Telephone
213 Office
222 Contacts
224 ConnectedDrive
Mobility
232Refueling
235 Wheels and tires
255 Engine compartment
260 Maintenance
262 Care
266 Replacing components
272 Giving and receiving assistance
Reference
280Technical data
285 Short commands for the voice activation
system
292 Everything from A to Z
00320051004F004C00510048000300280047004C0057004C005200510003
Page 23 of 308

22
At a glanceiDrive
Status box symbols
The symbols are divided into separate groups.
Radio symbols
Telephone symbols
Entertainment symbols Other
With the Professional
navigation system:
Split screen
General information
Additional information, e.g. from the computer,
can be displayed on the right side of the split
screen.
This information remains visible on the split
screen even when you change to another menu.
Switching the split screen on and off
1.
Press the button.
2. "Split screen"
Selecting display
1.Press the button.
2. "Split screen"
3. Move the controller until the split screen is
selected.
4. Press the controller or select "Split screen
content".
5. Select the desired menu item.
SymbolMeaning
Traffic bulletins switched on
HD radio switched on
Satellite radio switched on
SymbolMeaning
Incoming or outgoing call
Missed call
Reception strength of mobile
phone network symbol flashing:
network search
No mobile phone network available
Bluetooth switched on
Roaming active
Receiving text message, email
Checking SIM card
SIM card blocked
SIM card missing
Entering PIN
SymbolMeaning
CD/DVD player
Music collection
Gracenote® database
AUX-IN port
USB audio interface
Mobile phone audio interface
SymbolMeaning
Voice instructions are switched off
Querying current vehicle position
00320051004F004C00510048000300280047004C0057004C005200510003
Page 126 of 308
125
Practical interior accessories
Controls
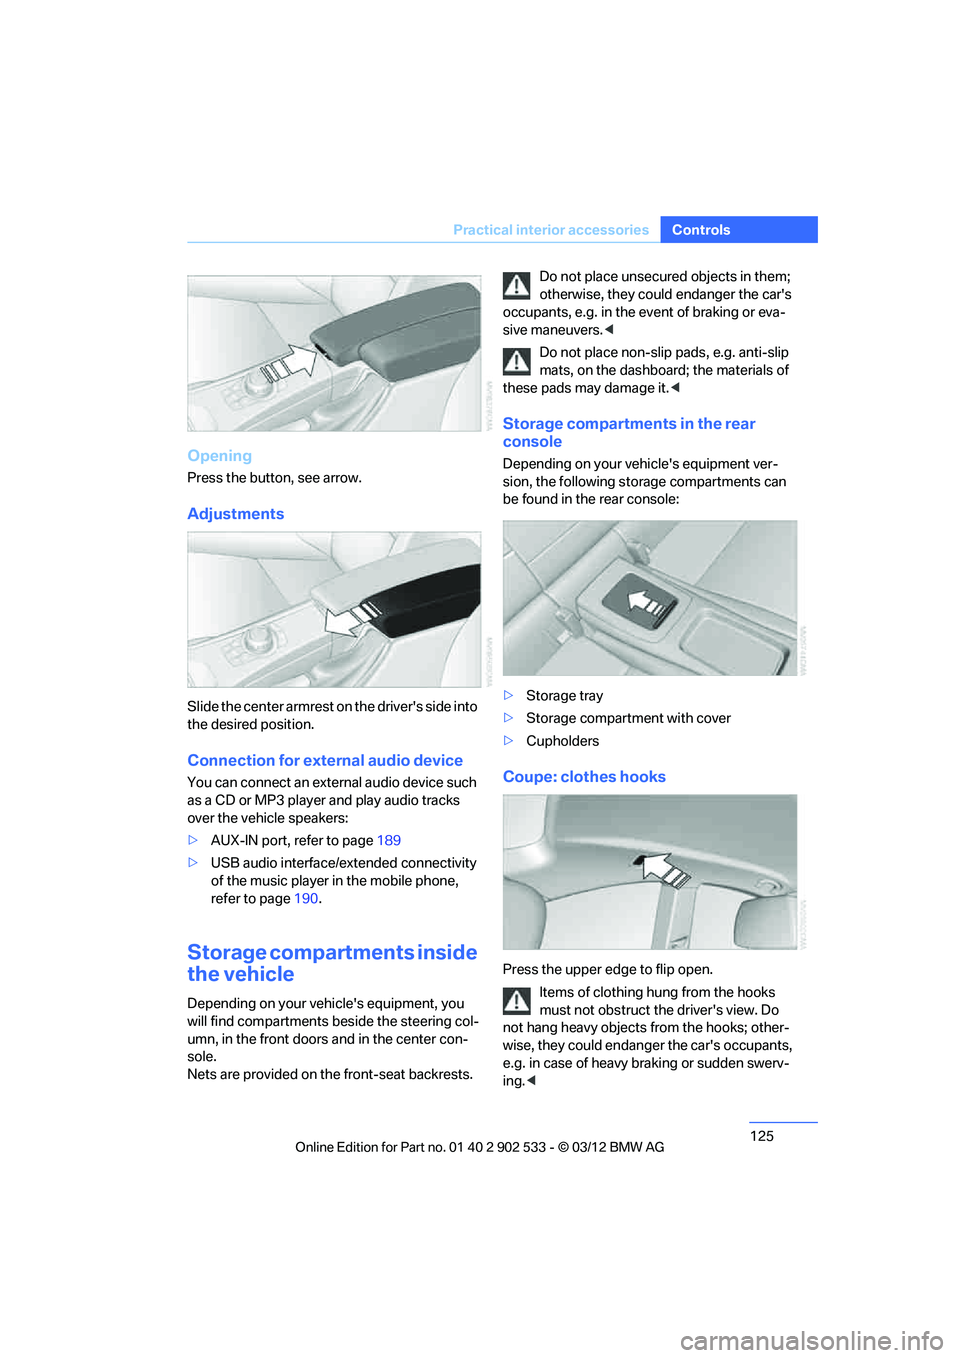
Opening
Press the button, see arrow.
Adjustments
Slide the center armrest on the driver's side into
the desired position.
Connection for external audio device
You can connect an external audio device such
as a CD or MP3 player and play audio tracks
over the vehicle speakers:
>
AUX-IN port, refer to page 189
> USB audio interface/extended connectivity
of the music player in the mobile phone,
refer to page 190.
Storage compartments inside
the vehicle
Depending on your vehicle's equipment, you
will find compartments beside the steering col-
umn, in the front doors and in the center con-
sole.
Nets are provided on the front-seat backrests. Do not place unsecured objects in them;
otherwise, they could endanger the car's
occupants, e.g. in the event of braking or eva-
sive maneuvers. <
Do not place non-slip pads, e.g. anti-slip
mats, on the dashboard; the materials of
these pads may damage it. <
Storage compartments in the rear
console
Depending on your vehicle's equipment ver-
sion, the following storage compartments can
be found in the rear console:
>Storage tray
> Storage compartment with cover
> Cupholders
Coupe: clothes hooks
Press the upper edge to flip open.
Items of clothing hung from the hooks
must not obstruct the driver's view. Do
not hang heavy objects from the hooks; other-
wise, they could endanger the car's occupants,
e.g. in case of heavy braking or sudden swerv-
ing. <
00320051004F004C00510048000300280047004C0057004C005200510003
Page 145 of 308

144
NavigationNavigation system
Navigation system
Vehicle equipment
In this chapter, all production, country, and
optional equipment that is offered in the model
range is described. Equipment is also described
that is not available because of, for example,
selected options or country version. This also
applies to safety related functions and systems.
General information
The navigation system can determine the pre-
cise position of the vehicle, with the aid of satel-
lites and vehicle sensors, and can reliably guide
you to every entered destination.
Enter data only with the vehicle station-
ary, and always give priority to the appli-
cable traffic regulations in the event of any con-
tradiction between traffic and road conditions
and the instructions issued by the navigation
system. Failure to take to this precaution can
place you in violation of the law and put vehicle
occupants and other road users in danger. <
Accessing navigation system
1.Press the button.
2. "Navigation"
The navigation system can also be
accessed directly with the button on the
controller.
Navigation data
General information
Navigation data and authorization codes are
available from your BMW center. Navigation
data are stored in the vehicle and can be
updated. >
Depending on the data volume, a data
update may take several hours.
> Update data while driving to reduce the
drain on the battery.
> Only the main functions of the navigation
system are available during updating.
The update is resumed automatically when a
trip is continued after an interruption.
> You can inquire as to the status of the
update.
> The data are stored in the vehicle.
> After the update, the system restarts.
> The medium that holds the navigation data
can be removed after the update is com-
pleted.
Information about navigation data
1."Navigation"
2. Open "Options".
3. "Navigation system version":
Information about the data version is dis-
played.
Updating the navigation data
Inserting navigation DVD
1.Insert the navigation DVD into the DVD
player with the labeled side facing up.
2. Follow the instructions on the Control Dis-
play.
3. Enter the authorization code of the naviga-
tion DVD and change the DVD if needed.
00320051004F004C00510048000300280047004C0057004C005200510003
Page 167 of 308
166
EntertainmentOn/off and tone
On/off and tone
Vehicle equipment
In this chapter, all production, country, and
optional equipment that is offered in the model
range is described. Equipment is also described
that is not available because of, for example,
selected options or country version. This also
applies to safety related functions and systems.
General information
The following audio and video sources share
the same control elements and adjustments:
>Radio
> CD/DVD player
> CD changer
> Video
> External devices, e.g. MP3 player
Controls
The audio and video sources can be controlled
using the:
>Buttons near the CD/DVD player
> iDrive
> Buttons on the steering wheel, refer to
page 11
> Programmable memory keys, refer to
page 23
> Voice activation system
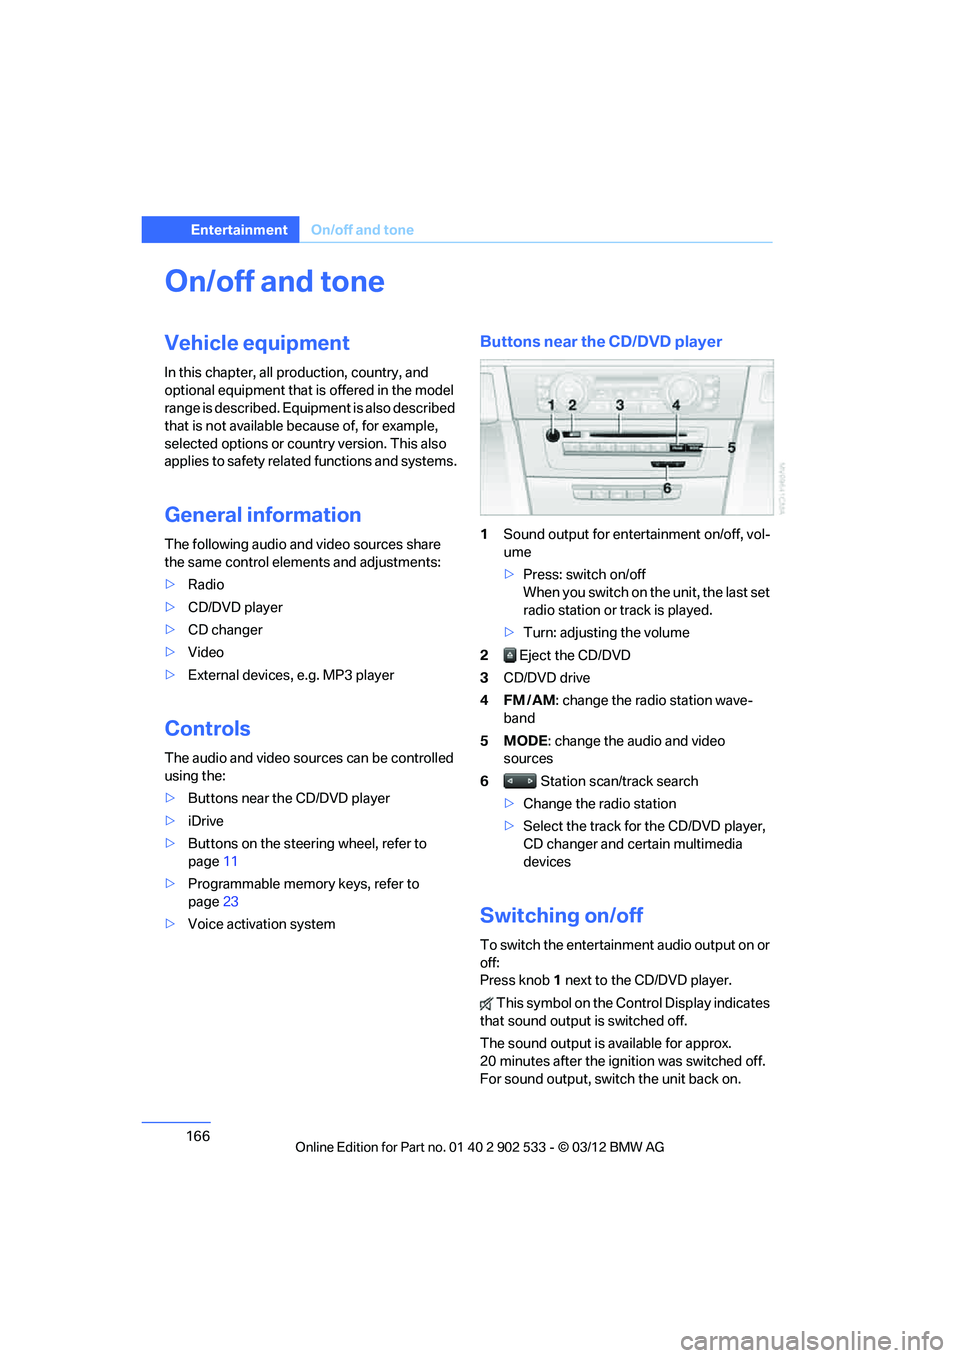
Buttons near the CD/DVD player
1Sound output for entertainment on/off, vol-
ume
>Press: switch on/off
When you switch on the unit, the last set
radio station or track is played.
> Turn: adjusting the volume
2 Eject the CD/DVD
3 CD/DVD drive
4FM/AM : change the radio station wave-
band
5MODE : change the audio and video
sources
6 Station scan/track search
> Change the radio station
> Select the track for the CD/DVD player,
CD changer and certain multimedia
devices
Switching on/off
To switch the entertainment audio output on or
off:
Press knob 1 next to the CD/DVD player.
This symbol on the Control Display indicates
that sound output is switched off.
The sound output is available for approx.
20 minutes after the ignition was switched off.
For sound output, switch the unit back on.
00320051004F004C00510048000300280047004C0057004C005200510003
Page 168 of 308
167
On/off and tone
Entertainment
Adjusting volume
Turn knob
1 next to the CD/DVD player until the
desired volume is obtained.
You can also adjust the volume with buttons on
the steering wheel, refer to page 11.
Setting tone controls
You can alter various tone settings, e.g. treble
and bass or the speed-dependent volume
increase.
The tone settings are set for all audio sources at
once.
The settings are stored for the remote control
currently in use.
Treble, bass, balance, fader
> "Treble": treble adjustment.
> "Bass": bass adjustment.
> "Balance": left/right volume distribution
> "Fader": front/rear volume distribution
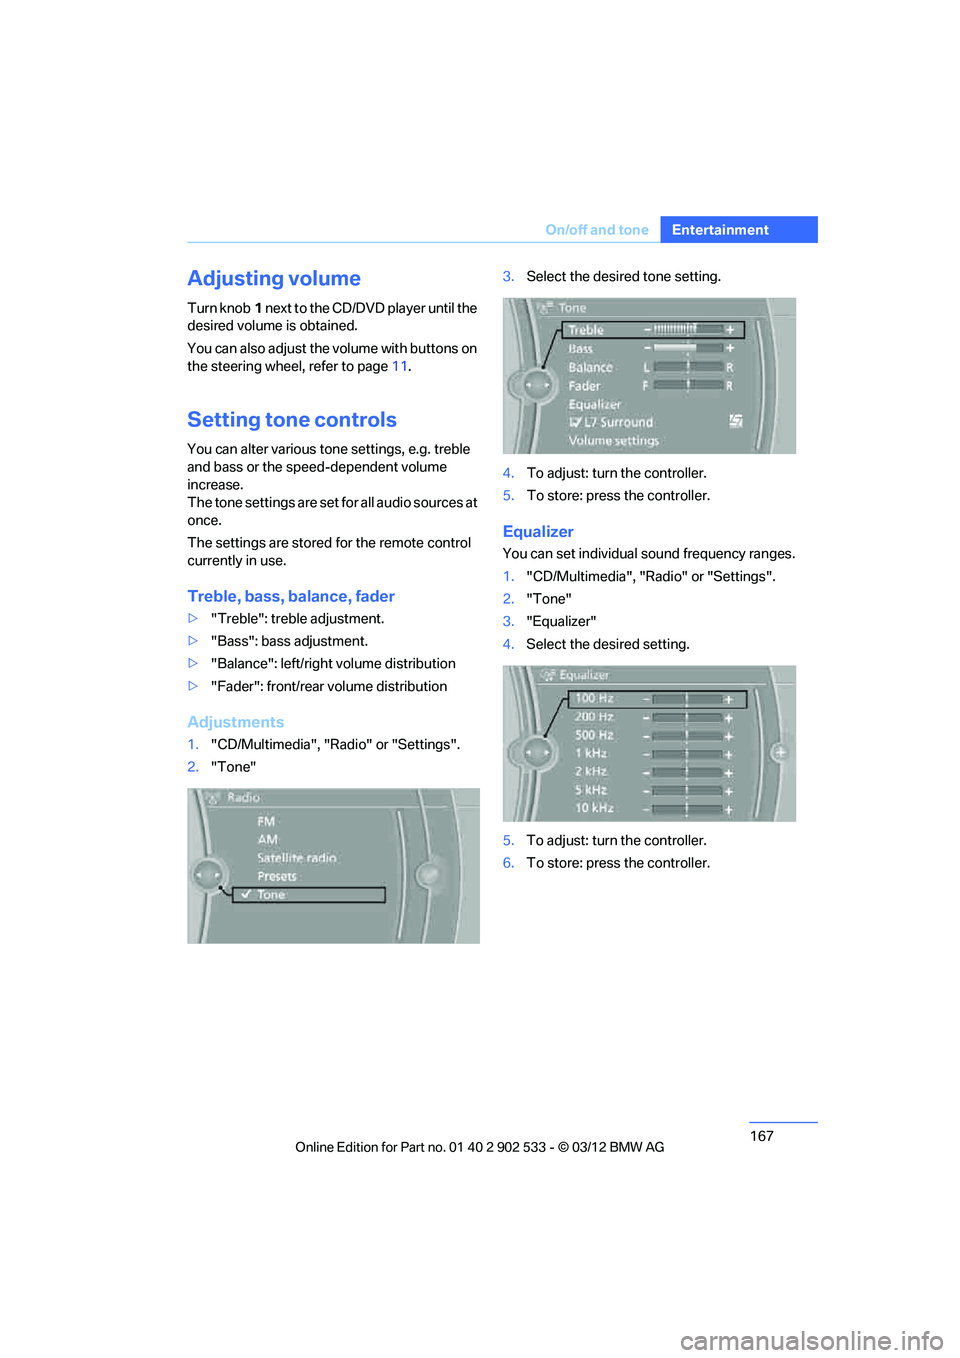
Adjustments
1."CD/Multimedia", "Radio" or "Settings".
2. "Tone" 3.
Select the desired tone setting.
4. To adjust: turn the controller.
5. To store: press the controller.
Equalizer
You can set individual sound frequency ranges.
1."CD/Multimedia", "Radio" or "Settings".
2. "Tone"
3. "Equalizer"
4. Select the desired setting.
5. To adjust: turn the controller.
6. To store: press the controller.
00320051004F004C00510048000300280047004C0057004C005200510003
Page 174 of 308
173
Satellite radio
Entertainment
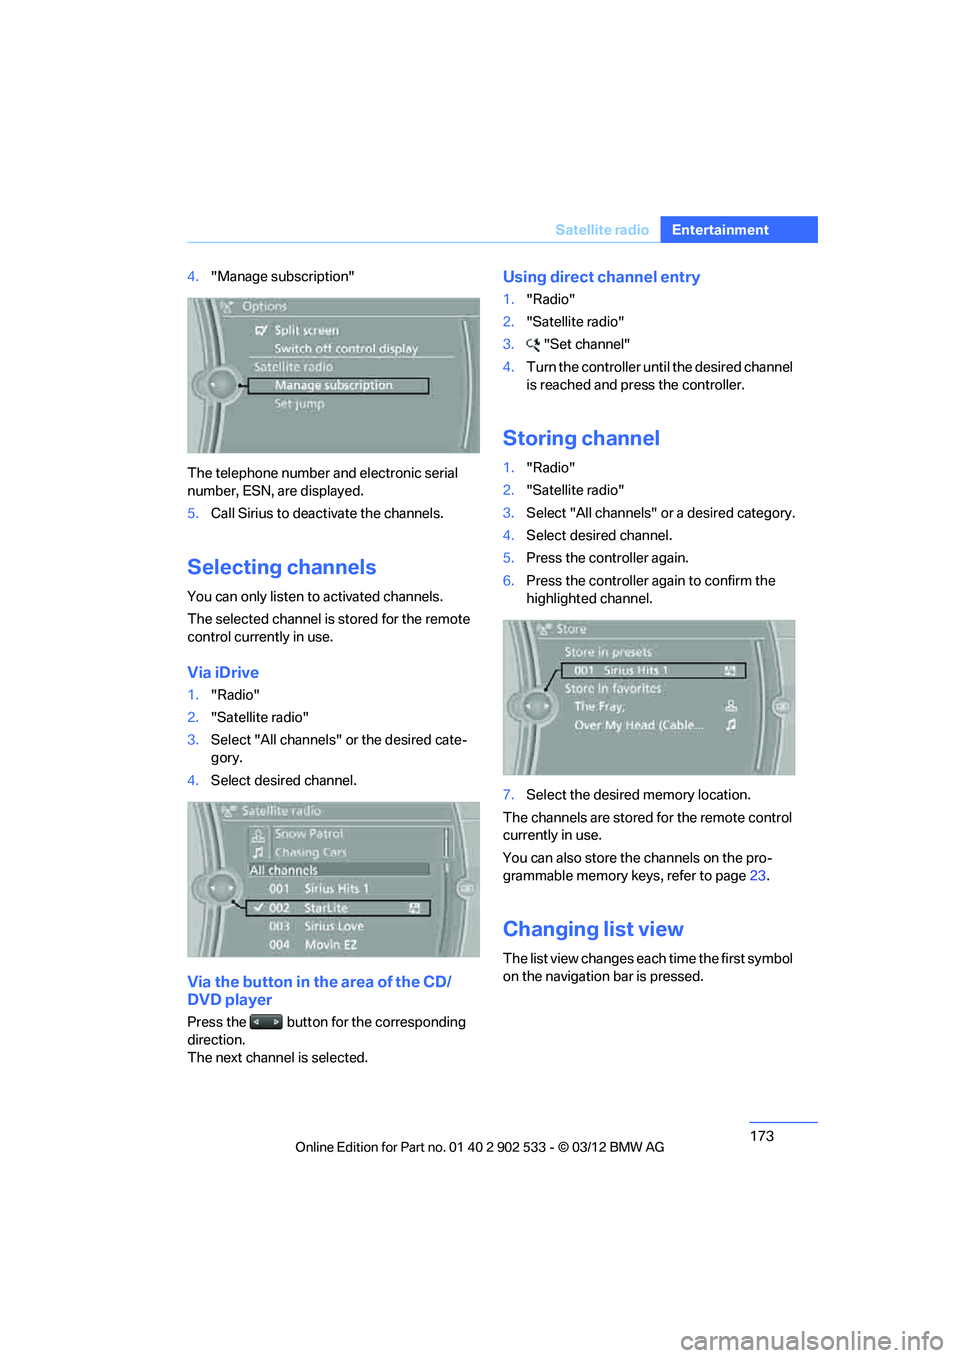
4.
"Manage subscription"
The telephone number and electronic serial
number, ESN, are displayed.
5. Call Sirius to deactivate the channels.
Selecting channels
You can only listen to activated channels.
The selected channel is stored for the remote
control currently in use.
Via iDrive
1."Radio"
2. "Satellite radio"
3. Select "All channels" or the desired cate-
gory.
4. Select desired channel.
Via the button in the area of the CD/
DVD player
Press the button for the corresponding
direction.
The next channel is selected.
Using direct channel entry
1."Radio"
2. "Satellite radio"
3. "Set channel"
4. Turn the controller until the desired channel
is reached and press the controller.
Storing channel
1."Radio"
2. "Satellite radio"
3. Select "All channels" or a desired category.
4. Select desired channel.
5. Press the controller again.
6. Press the controller again to confirm the
highlighted channel.
7. Select the desired memory location.
The channels are stored for the remote control
currently in use.
You can also store the channels on the pro-
grammable memory keys, refer to page 23.
Changing list view
The list view changes each time the first symbol
on the navigation bar is pressed.
00320051004F004C00510048000300280047004C0057004C005200510003
Page 178 of 308
177
CD/DVD player and CD changer
Entertainment
CD/DVD player and CD changer
Vehicle equipment
In this chapter, all production, country, and
optional equipment that is offered in the model
range is described. Equipment is also described
that is not available because of, for example,
selected options or country version. This also
applies to safety related functions and systems.
CD/DVD playback
Inserting a CD/DVD
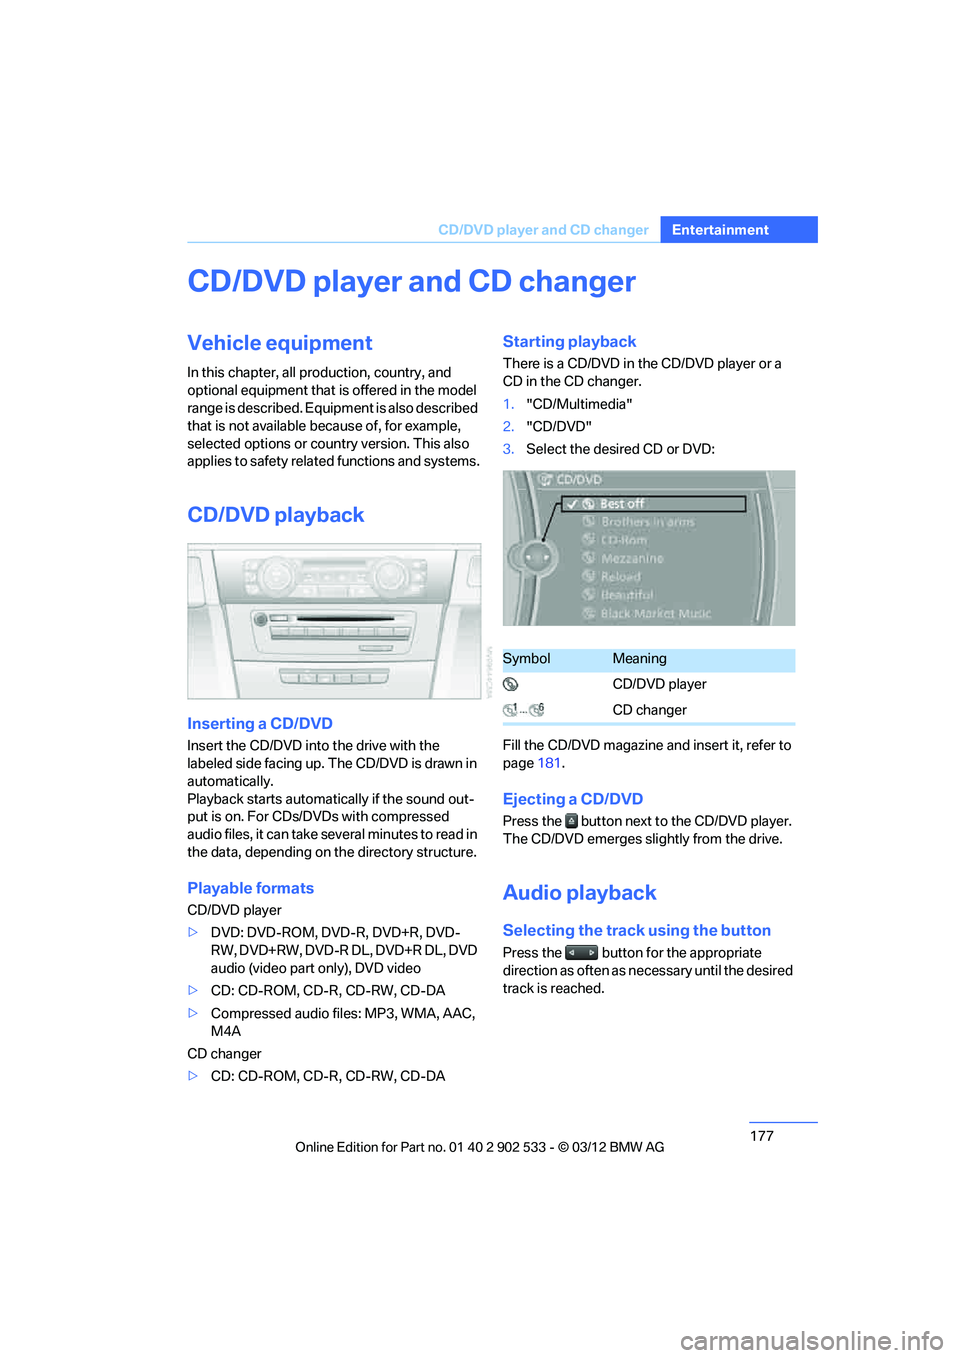
Insert the CD/DVD into the drive with the
labeled side facing up. The CD/DVD is drawn in
automatically.
Playback starts automatically if the sound out-
put is on. For CDs/DVDs with compressed
audio files, it can take several minutes to read in
the data, depending on the directory structure.
Playable formats
CD/DVD player
>
DVD: DVD-ROM, DVD-R, DVD+R, DVD-
RW, DVD+RW, DVD-R DL, DVD+R DL, DVD
audio (video part only), DVD video
> CD: CD-ROM, CD-R, CD-RW, CD-DA
> Compressed audio files: MP3, WMA, AAC,
M4A
CD changer
> CD: CD-ROM, CD-R, CD-RW, CD-DA
Starting playback
There is a CD/DVD in the CD/DVD player or a
CD in the CD changer.
1."CD/Multimedia"
2. "CD/DVD"
3. Select the desired CD or DVD:
Fill the CD/DVD magazine and insert it, refer to
page 181.
Ejecting a CD/DVD
Press the button next to the CD/DVD player.
The CD/DVD emerges slightly from the drive.
Audio playback
Selecting the track using the button
Press the button for the appropriate
direction as often as necessary until the desired
track is reached.
SymbolMeaning
CD/DVD player
CD changer
00320051004F004C00510048000300280047004C0057004C005200510003