2013 BMW 328I CONVERTIBLE tow
[x] Cancel search: towPage 115 of 308

114
ControlsClimate
Climate
Vehicle equipment
In this chapter, all production, country, and
optional equipment that is offered in the model
range is described. For this reason, descrip- tions will be given of some equipment that may
not be available in a vehicle, for example due to
the special options or national-market version
selected. This also applies to safety related
functions and systems.
Overview
1
Airflow directed toward the windshield and
side windows
2 Air to the upper body area
Draft-free ventilation 117 3
Air to the footwell
4 Air distribution, manual
5 Temperature, left side
6 Maximum cooling
00320051004F004C00510048000300280047004C0057004C005200510003
Page 117 of 308
116
ControlsClimate
directed toward the windshield, the side win-
dows, the upper body and the footwell.
Pressing the AUTO button automatically
switches on the cooling function.
At the same time, a condensation sensor con-
trols the program so as to prevent window con-
densation as much as possible.
The program is switched off when the air distri-
bution is set manually or the button is pressed
again.
Intensity of the AUTO program
With the AUTO program switched on, auto-
matic control of the air volume and air distribu-
tion can be adjusted:
Press the left side of the button to
reduce the intensity. Press the
right side of the button to increase
it.
The selected intensity is shown on the display
of the automatic climate control.
Convertible program
The Convertible program is active when the
hardtop is open and the AUTO program is
switched on. In the Convertible program, the
automatic climate control is optimized for driv-
ing with the hardtop open. In addition, the air
volume is increased as vehicle speed increases.
The effectiveness of the Convertible pro-
gram can be enhanced considerably by
installing the wind deflector. <
Adjusting air volume manually
To be able to manually adjust the air volume,
switch off the AUTO program first.
Press the left side of the button to
reduce the air volume. Press the
right side of the button to increase
it.
The air flow rate is lowered or switched off
entirely to reduce the drain on the battery. The
display remains the same.
Automatic recirculated air control
AUC/Recirculated air mode
You can respond to unpleasant odors or pollut-
ants in the immediate environment by tempo-
rarily suspending the supply of outside air. The
system then recirculates the air currently within
the vehicle.
Press the button repeatedly to
select an operating mode:
> LED off: outside air flows in continuously.
> Left-hand LED on, AUC mode: a sensor
detects pollutants in the outside air and
controls the shut-off automatically.
> Right-hand LED on, recirculated air mode:
the supply of outside air is permanently
shut off. If the windows fog over, switch off
recirculated air mode and increase the air
volume, if necessary. Make sure that air can
flow onto the windshield.
The recirculated air mode should not be
used over an extended period of time;
otherwise, the air quality inside the car will dete-
riorate continuously. <
Via the button on the steering wheel
You can switch quickly between the recircu-
lated air mode and the previous mode using a
button on the steering wheel, refer to page 11.
ALL program
Press the button.
The current temperature setting
on the driver's side is transferred to
the front passenger side.
If the temperature setting on the driver's side is
changed, the temperature on the front passen-
ger side is changed as well.
The program is switched off when the setting is
adjusted on the front passenger side or the but-
ton is pressed again.
00320051004F004C00510048000300280047004C0057004C005200510003
Page 119 of 308
118
ControlsClimate
Ventilation in the rear
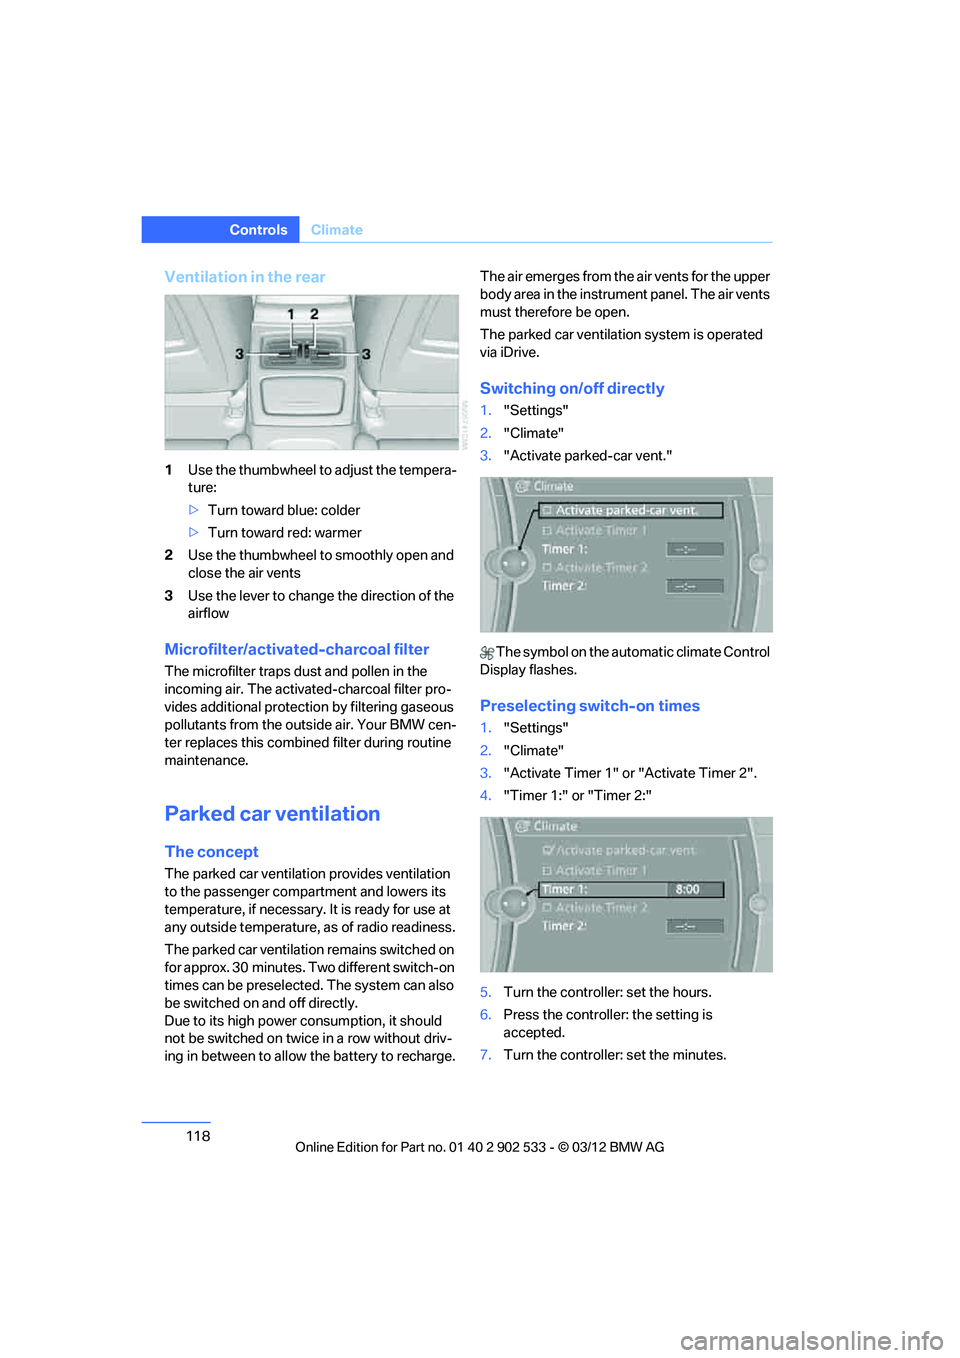
1Use the thumbwheel to adjust the tempera-
ture:
>Turn toward blue: colder
> Turn toward red: warmer
2 Use the thumbwheel to smoothly open and
close the air vents
3 Use the lever to change the direction of the
airflow
Microfilter/activated-charcoal filter
The microfilter traps dust and pollen in the
incoming air. The activated-charcoal filter pro-
vides additional protecti on by filtering gaseous
pollutants from the outside air. Your BMW cen-
ter replaces this combined filter during routine
maintenance.
Parked car ventilation
The concept
The parked car ventilation provides ventilation
to the passenger compartment and lowers its
temperature, if necessary. It is ready for use at
any outside temperature, as of radio readiness.
The parked car ventilation remains switched on
for approx. 30 minutes. Two different switch-on
times can be preselected. The system can also
be switched on and off directly.
Due to its high power co nsumption, it should
not be switched on twice in a row without driv-
ing in between to allow the battery to recharge. The air emerges from the air vents for the upper
body area in the instrument panel. The air vents
must therefore be open.
The parked car ventilation system is operated
via iDrive.
Switching on/off directly
1.
"Settings"
2. "Climate"
3. "Activate parked-car vent."
The symbol on the automatic climate Control
Display flashes.
Preselecting switch-on times
1. "Settings"
2. "Climate"
3. "Activate Timer 1" or "Activate Timer 2".
4. "Timer 1:" or "Timer 2:"
5. Turn the controller: set the hours.
6. Press the controller: the setting is
accepted.
7. Turn the controller: set the minutes.
00320051004F004C00510048000300280047004C0057004C005200510003
Page 131 of 308
130
ControlsPractical interior accessories
>Net for small objects on the right trim panel
of the trunk
Convertible
Depending on your vehicle's equipment, the
following storage spaces can be found in the
trunk:
>Storage compartment on the left side of the
trunk. To open turn handle by 90°
> Net for securing smaller objects, to be
attached to the mounts on the floor panel
> Rubber strap for subdividing the trunk; can
be hooked onto the lateral lashing eyes
> Stowage compartment under the floor
panel
Folding up the floor panel
Do not exceed the maximum permissible
load of 55 lbs/25 kg for the storage com-
partment under the floor panel; otherwise, dam-
age may result. <
Coupe
Press the floor panel up and secure it with the
catch.
Convertible
To lift, grab hold of the floor panel at the open-
ing at the rear of the panel.
Lashing eyes
You will find lashing eyelets in the trunk for
securing luggage items with nets or tensioning
straps, refer to page 140.
Coupe: ski bag
The ski bag is designed for safe, clean transport
of up to 4 pairs of sta nda rd s kis o r up to 2 s now-
boards.
With the ski bag you can stow skis with a length
of up to 6.9 ft/2.10 m. When skis of 6.9 ft/
2.10 m length are loaded, the overall capacity of
the ski bag is reduced due to its tapered design.
Loading
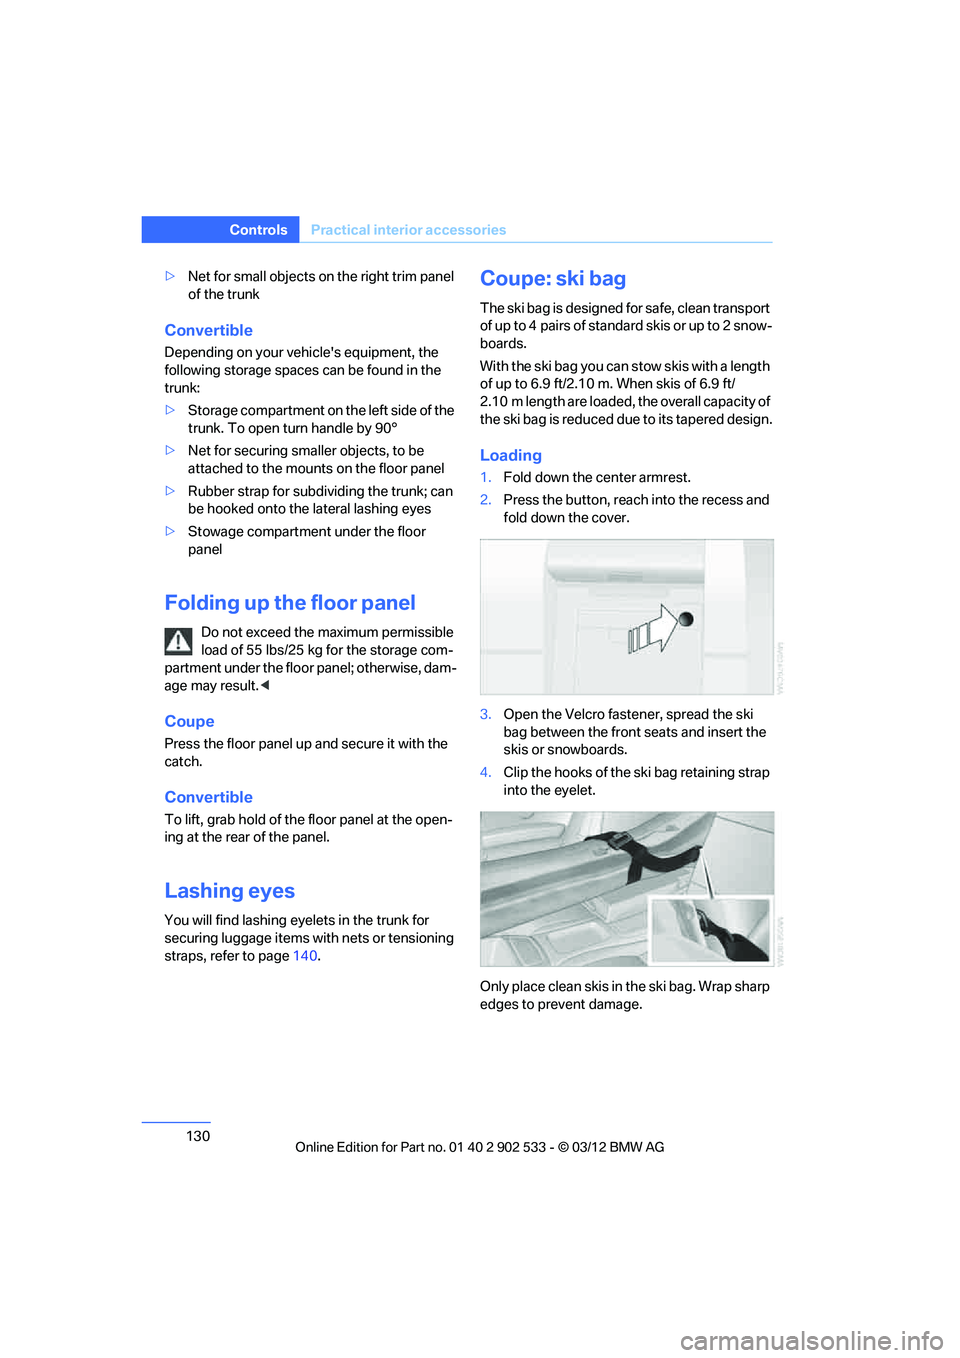
1.Fold down the center armrest.
2. Press the button, reach into the recess and
fold down the cover.
3. Open the Velcro fastener, spread the ski
bag between the front seats and insert the
skis or snowboards.
4. Clip the hooks of the ski bag retaining strap
into the eyelet.
Only place clean skis in the ski bag. Wrap sharp
edges to prevent damage.
00320051004F004C00510048000300280047004C0057004C005200510003
Page 132 of 308
131
Practical interior accessories
Controls
Securing cargo
After loading, secure the ski bag and its con-
tents. Tighten the retaining strap on the ten-
sioning buckle for this purpose.
Secure the ski bag in the manner
described; otherwise, it could endanger
the car's occupants, e.g. in case of heavy brak-
ing or sudden swerving. <
To store the ski bag, perform the steps
described for loading in reverse order.
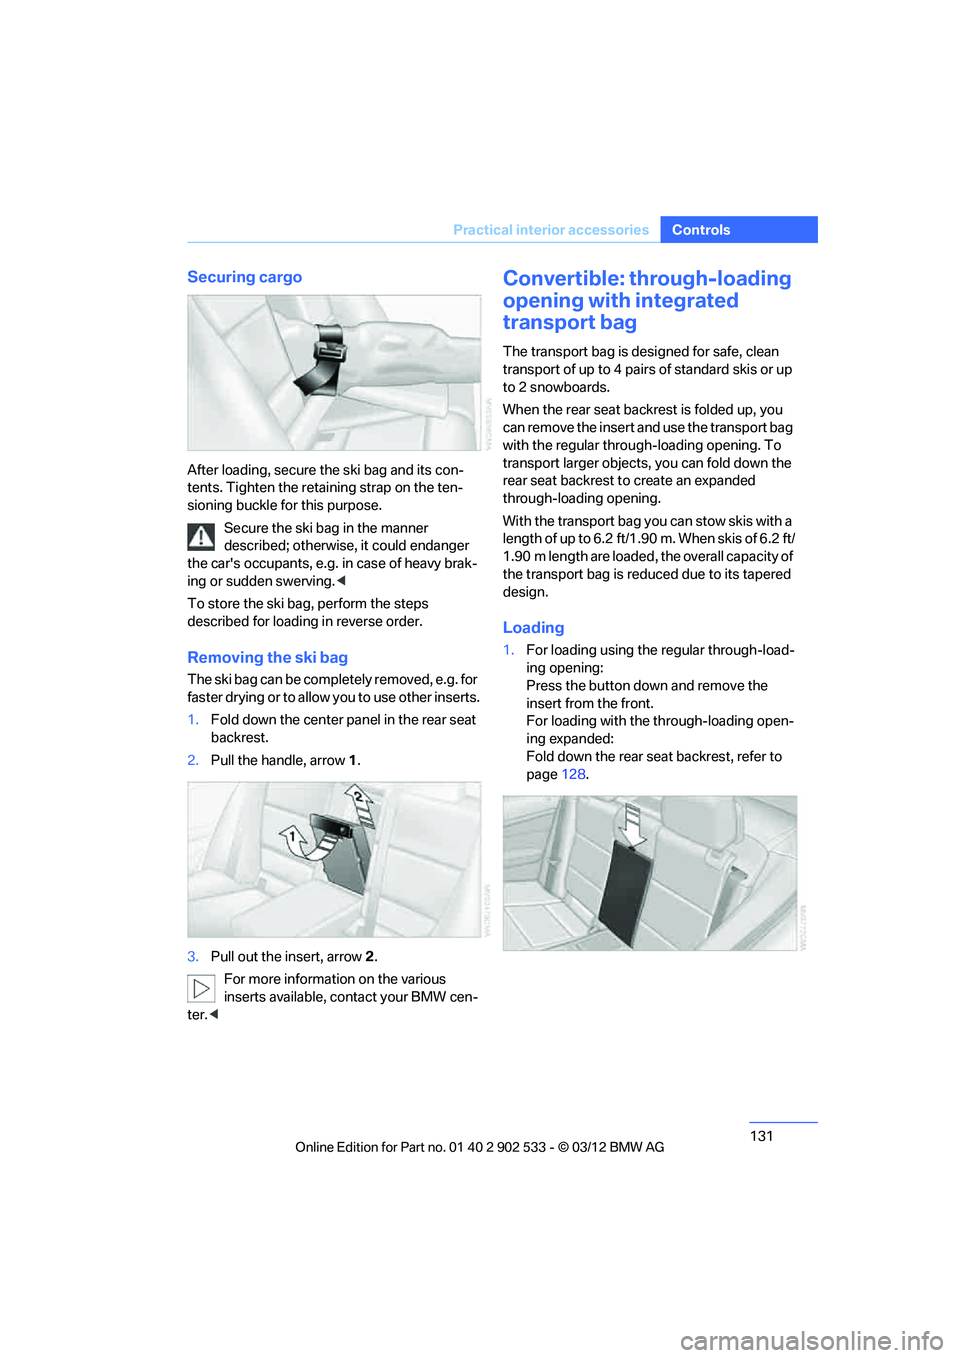
Removing the ski bag
The ski bag can be comple tely removed, e.g. for
faster drying or to allow you to use other inserts.
1. Fold down the center panel in the rear seat
backrest.
2. Pull the handle, arrow 1.
3. Pull out the insert, arrow 2.
For more information on the various
inserts available, contact your BMW cen-
ter. <
Convertible: through-loading
opening with integrated
transport bag
The transport bag is designed for safe, clean
transport of up to 4 pairs of standard skis or up
to 2 snowboards.
When the rear seat backrest is folded up, you
can remove the insert and use the transport bag
with the regular through-loading opening. To
transport larger objects, you can fold down the
rear seat backrest to create an expanded
through-loading opening.
With the transport bag you can stow skis with a
length of up to 6.2 ft/1.90 m. When skis of 6.2 ft/
1.90 m length are loaded, the overall capacity of
the transport bag is reduced due to its tapered
design.
Loading
1. For loading using the regular through-load-
ing opening:
Press the button down and remove the
insert from the front.
For loading with the through-loading open-
ing expanded:
Fold down the rear seat backrest, refer to
page 128.
00320051004F004C00510048000300280047004C0057004C005200510003
Page 133 of 308
132
ControlsPractical interior accessories
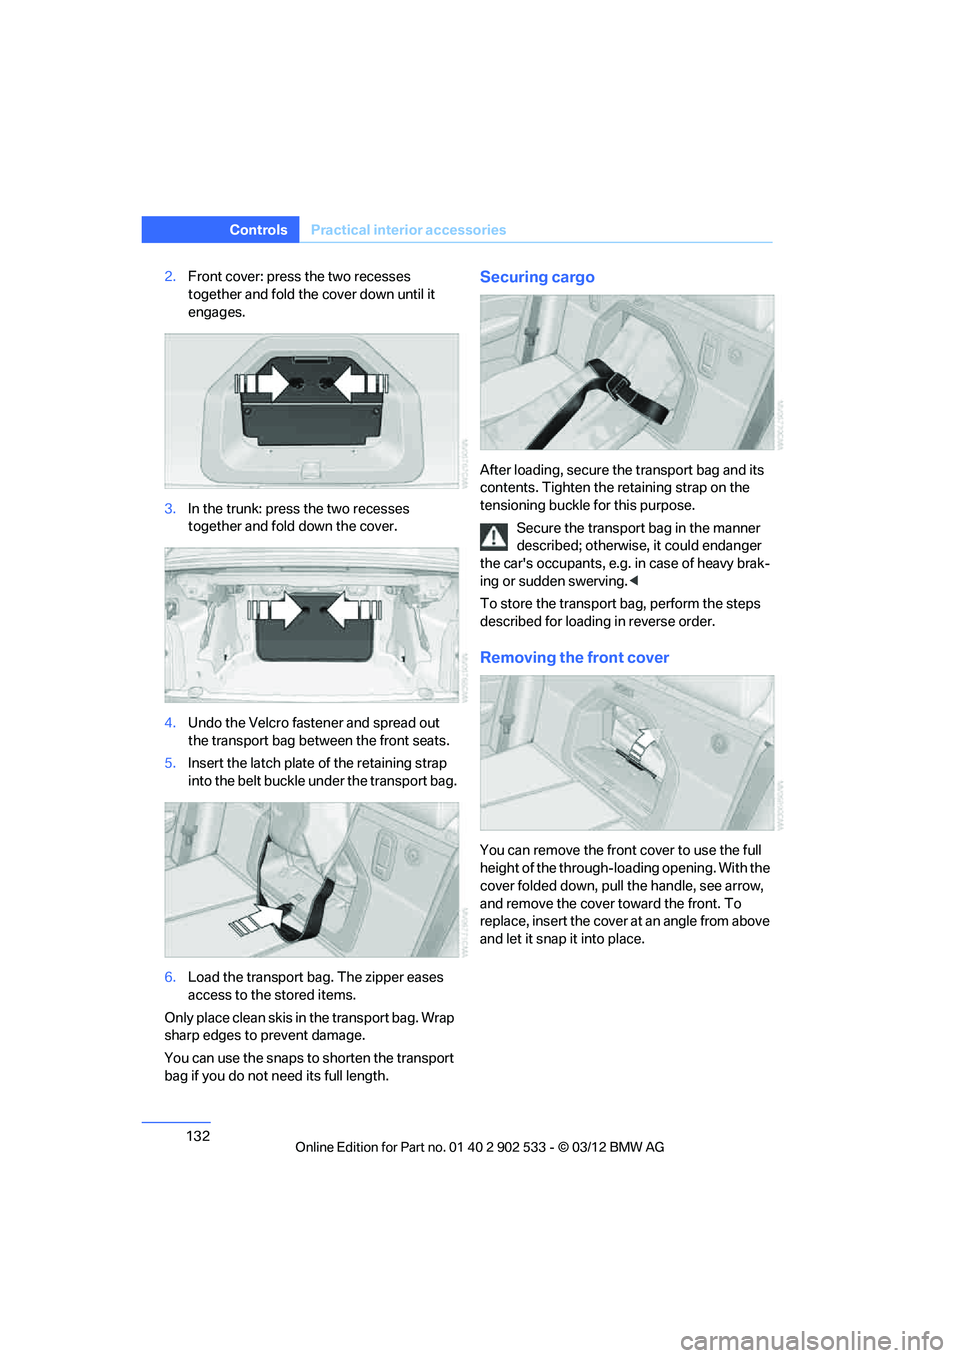
2.Front cover: press the two recesses
together and fold the cover down until it
engages.
3. In the trunk: press the two recesses
together and fold down the cover.
4. Undo the Velcro fastener and spread out
the transport bag between the front seats.
5. Insert the latch plate of the retaining strap
into the belt buckle under the transport bag.
6. Load the transport bag. The zipper eases
access to the stored items.
Only place clean skis in the transport bag. Wrap
sharp edges to prevent damage.
You can use the snaps to shorten the transport
bag if you do not need its full length.Securing cargo
After loading, secure the transport bag and its
contents. Tighten the retaining strap on the
tensioning buckle for this purpose. Secure the transport bag in the manner
described; otherwise, it could endanger
the car's occupants, e.g. in case of heavy brak-
ing or sudden swerving. <
To store the transport bag, perform the steps
described for loading in reverse order.
Removing the front cover
You can remove the front cover to use the full
height of the through-loading opening. With the
cover folded down, pull the handle, see arrow,
and remove the cover toward the front. To
replace, insert the cover at an angle from above
and let it snap it into place.
00320051004F004C00510048000300280047004C0057004C005200510003
Page 141 of 308
140
Driving tipsThings to remember when driving
4.The resulting figure equals the available
amount of cargo and luggage load capacity.
For example, if the YYY amount equals
1,400 lbs and there will be five 150-lb pas-
sengers in your vehicle, the amount of avail-
able cargo and luggage load capacity is
650 lbs:
1,400 lbs minus 750 lbs = 650 lbs.
5. Determine the combined weight of luggage
and cargo being loaded on the vehicle. That
weight may not safely exceed the available
cargo and luggage load capacity calculated
in step 4.
6. If your vehicle will be towing a trailer, part of
the load from your trailer will be transferred
to your vehicle. Consult the manual for
transporting a trailer to determine how this
may reduce the available cargo and luggage
load capacity of your vehicle.
Load
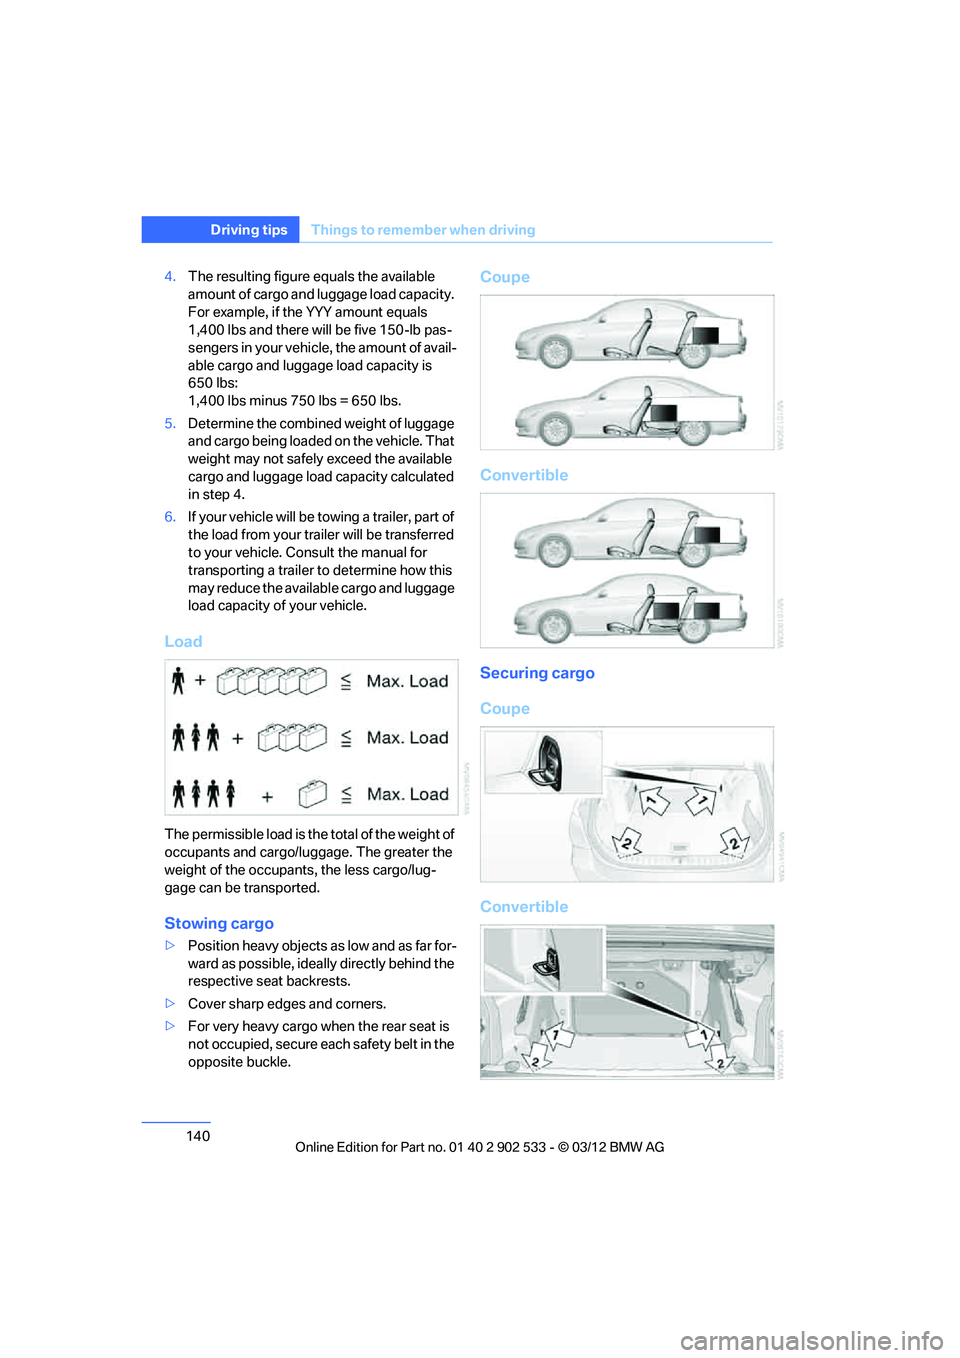
The permissible load is the total of the weight of
occupants and cargo/lu ggage. The greater the
weight of the occupants, the less cargo/lug-
gage can be transported.
Stowing cargo
> Position heavy objects as low and as far for-
ward as possible, ideally directly behind the
respective seat backrests.
> Cover sharp edges and corners.
> For very heavy cargo when the rear seat is
not occupied, secure each safety belt in the
opposite buckle.
Coupe
Convertible
Securing cargo
Coupe
Convertible
00320051004F004C00510048000300280047004C0057004C005200510003
Page 147 of 308
146
NavigationDestination entry
Destination entry
Vehicle equipment
In this chapter, all production, country, and
optional equipment that is offered in the model
range is described. Equipment is also described
that is not available because of, for example,
selected options or country version. This also
applies to safety related functions and systems.
General information
In entering your destination you can select from
the following options:
>Entering a destination manually, see below
> Selecting destination from address book,
refer to page 148
> Last destinations, refer to page 149
> Special destinations, refer to page 150
> Entering a destination on the map, refer to
page 151
> Selecting home address, refer to page 149
> Destination entry via voice, refer to
page 152
> Destination entry via BMW Assist, refer to
page 151
You can also store a navigation destination on
the programmable memory keys, refer to
page 23.
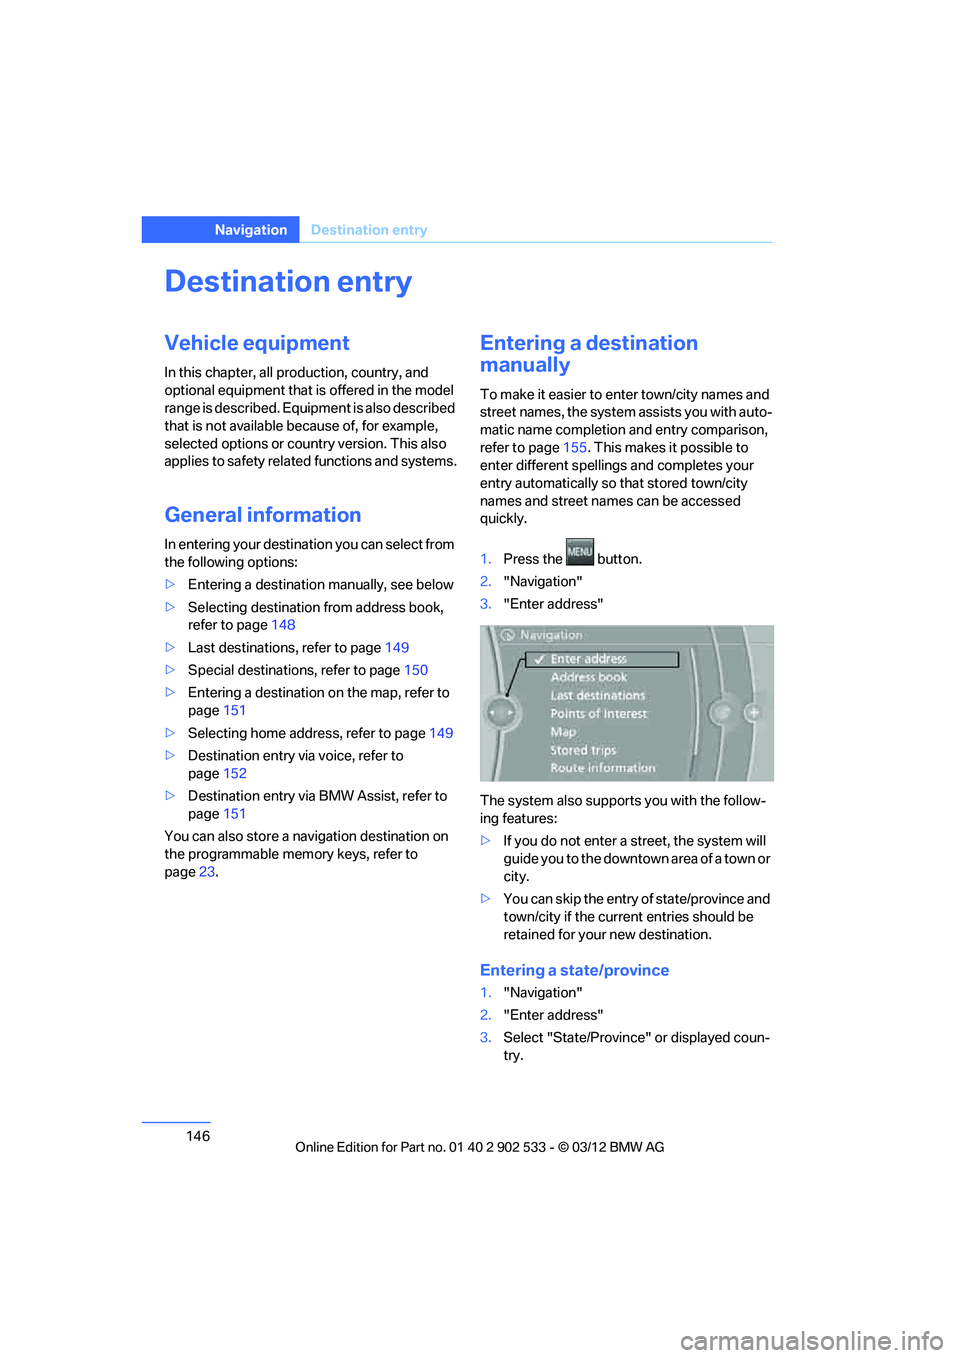
Entering a destination
manually
To make it easier to enter town/city names and
street names, the system assists you with auto-
matic name completion and entry comparison,
refer to page 155. This makes it possible to
enter different spellings and completes your
entry automatically so that stored town/city
names and street names can be accessed
quickly.
1. Press the button.
2. "Navigation"
3. "Enter address"
The system also supports you with the follow-
ing features:
> If you do not enter a street, the system will
guide you to the downtown area of a town or
city.
> You can skip the entry of state/province and
town/city if the current entries should be
retained for your new destination.
Entering a state/province
1."Navigation"
2. "Enter address"
3. Select "State/Province" or displayed coun-
try.
00320051004F004C00510048000300280047004C0057004C005200510003