2013 BMW 328I CONVERTIBLE display
[x] Cancel search: displayPage 40 of 308

39
Opening and closing
Controls
consumers are switched off before locking the
vehicle.
<
Coupe: Convenient closing
Keep pressing the surface, arrow 2, with your
finger.
Convertible: window and convertible
top operation
With the ignition at radio readiness or beyond,
you can open and close the windows and the
convertible top when a remote control is
located inside the vehicle.
Unlocking the trunk lid separately
Press the button on the outside of the trunk lid.
This corresponds to pressing the button.
If the vehicle detects that a remote con-
trol has been accidentally left inside the
locked vehicle's trunk after the trunk lid is
closed, the lid will reopen. The hazard warning
flashers flash and a signal sounds. <
Switching on radio readiness
Pressing the Start/Stop button switches on
radio readiness.
Do not depress the brake or the clutch; other-
wise, the engine will start immediately.
Starting the engine
The engine can be started or the ignition can be
switched on when a remote control is inside the
vehicle. It is not necessary to insert a remote
control into the ignition lock, refer to page 60.
Switching off the engine in cars with
automatic transmission
The engine can only be switched off when the
selector lever is in position P, refer to page 62.
To switch the engine off when the selector lever
is in position N, the remote control must be in
the ignition lock.
Malfunction
Local radio waves can interfere with the func-
tion of Comfort Access, for example when a
mobile phone is in the immediate vicinity of the
remote control or by when a mobile phone is
being charged in the vehicle.
If this happens, open or close the vehicle via the
buttons on the remote control or using the inte-
grated key. To start the engine afterward, insert
the remote control into the ignition lock.
Warning lamps
The warning lamp in the instrument
cluster lights up when you attempt to
start the engine: the engine cannot
be started. The remote control is not inside the
vehicle or is malfunctioning.
Take the remote control with you inside the
vehicle or have it checked. If necessary, insert
another remote control into the ignition lock.
The warning lamp in the instrument
cluster lights up while the engine is
running: the remote control is no
longer inside the vehicle. After the engine is
switched off, the engine can only be restarted
within approx. 10 seconds.
The indicator lamp in the instrument
cluster lights up and a message
appears on the Control Display:
replace the battery in the remote control.
Replacing the battery
The remote control for Comfort Access con-
tains a battery that will need to be replaced from
time to time.
00320051004F004C00510048000300280047004C0057004C005200510003
Page 43 of 308
42
ControlsOpening and closing
After switching off the ignition
When the remote control is removed or the igni-
tion is switched off, you can still operate the roof
for approx. 1 minute as long as no door has
been opened.
Pinch protection system
If the glass roof encounters an obstruction dur-
ing closing from approximately the middle of
the opening in the roof, or during closing from
the tilted position, the closing movement is
interrupted and the glass roof is opened again
slightly.
Despite the pinch protection system
check and clear the roof's travel path prior
to closing it; otherwise, the safety system might
fail to detect certain kinds of obstructions, such
as very thin objects, and the roof would con-
tinue closing.<
Closing without pinch protection
If there is an external danger, press the switch
forward past the resistance point. The roof
closes without pinch protection.
Following interruptions in electrical
power supply
After a power failure, there is a possibility that
the glass roof can only be tilted. The system
must be initialized. BMW recommends having
this work performed by your BMW center.
Convertible: retractable
hardtop
The retractable hardtop combines reliable
weather protection with simple and convenient
operation.
The following tips will enhance your driving
pleasure in your Convertible:
> It is advisable that you close the retractable
hardtop when you park the vehicle. Not only
does the closed hardtop protect the vehicle
interior against unanticipated weather dam- age, it also offers theft protection. However,
even when the hardtop is closed, valuables
should only be stored in the locked trunk.
> Do not attach roof rack systems to the
retractable hardtop, and in particular do not
attach magnetic racks.
> Do not attach rack systems to the trunk lid,
and in particular do not attach magnetic
racks.
> When the retractable hardtop is operated,
the trunk lid swings back and up. Before
operating the retractable hardtop, ensure
that there is enough clearance, e.g. when
parked in front of a wall.
> If you open the hardtop while it is wet, e.g.
after driving in the rain, water may drip into
the trunk. If necessary, remove items from
the trunk beforehand to avoid water stains
or soiling.
Do not place any objects on the retract-
able hardtop or on the trunk lid; other-
wise, they could fall during movements of the
retractable hardtop and cause damage or injury.
Never move the retractable hardtop when the
rollover protection system is in the activated
position.
Driving when the hardtop is not fully opened or
closed may result in damage or injury.
Do not reach into the mechanism during the
opening or closing procedure. Keep children
away from the swiveling area of the retractable
hardtop. <
The retractable hardtop cannot be moved
at temperatures below + 14 7/–10 6. A
message appears on the Control Display. <
The retractable hardtop can only be
opened and closed when the vehicle is
stationary. To avoid causing damage, do not
drive off until the hardtop has stopped mov-
ing. <
00320051004F004C00510048000300280047004C0057004C005200510003
Page 44 of 308
43
Opening and closing
Controls
Before opening and closing
>
Comply with the safety precautions
described above.
> Ensure that the trunk partition is folded
down and engaged on both sides, refer to
page 128; otherwise, it will not be possible
to open the retractable hardtop.
> Do not place any objects next to or on the
trunk partition and close the storage com-
partment on the left side of the trunk.
> Do not exceed the maximum loading height
under the trunk partition; refer to the label in
the trunk showing a line indicating the max-
imum height.
> Ensure that the trunk lid is closed.
> The vehicle should be parked on fairly level
ground. Excessive angle is indicated by a
lamp.
Before moving the hardtop, make sure
that there are no objects on or next to the
trunk partition, the storage compartment on the
left side of the trunk is closed, and the maximum
loading height in the trunk has not been
exceeded; otherwise, damage may occur. <
Opening and closing
When the vehicle is stationary and at radio
readiness or beyond, refer to page60:
If possible, conserve the battery by only
operating the retractable hardtop when
the engine is running.
Before closing the retractable hardtop, remove
all foreign objects from the windshield frame as
these could prevent the hardtop from closing
properly. < 1
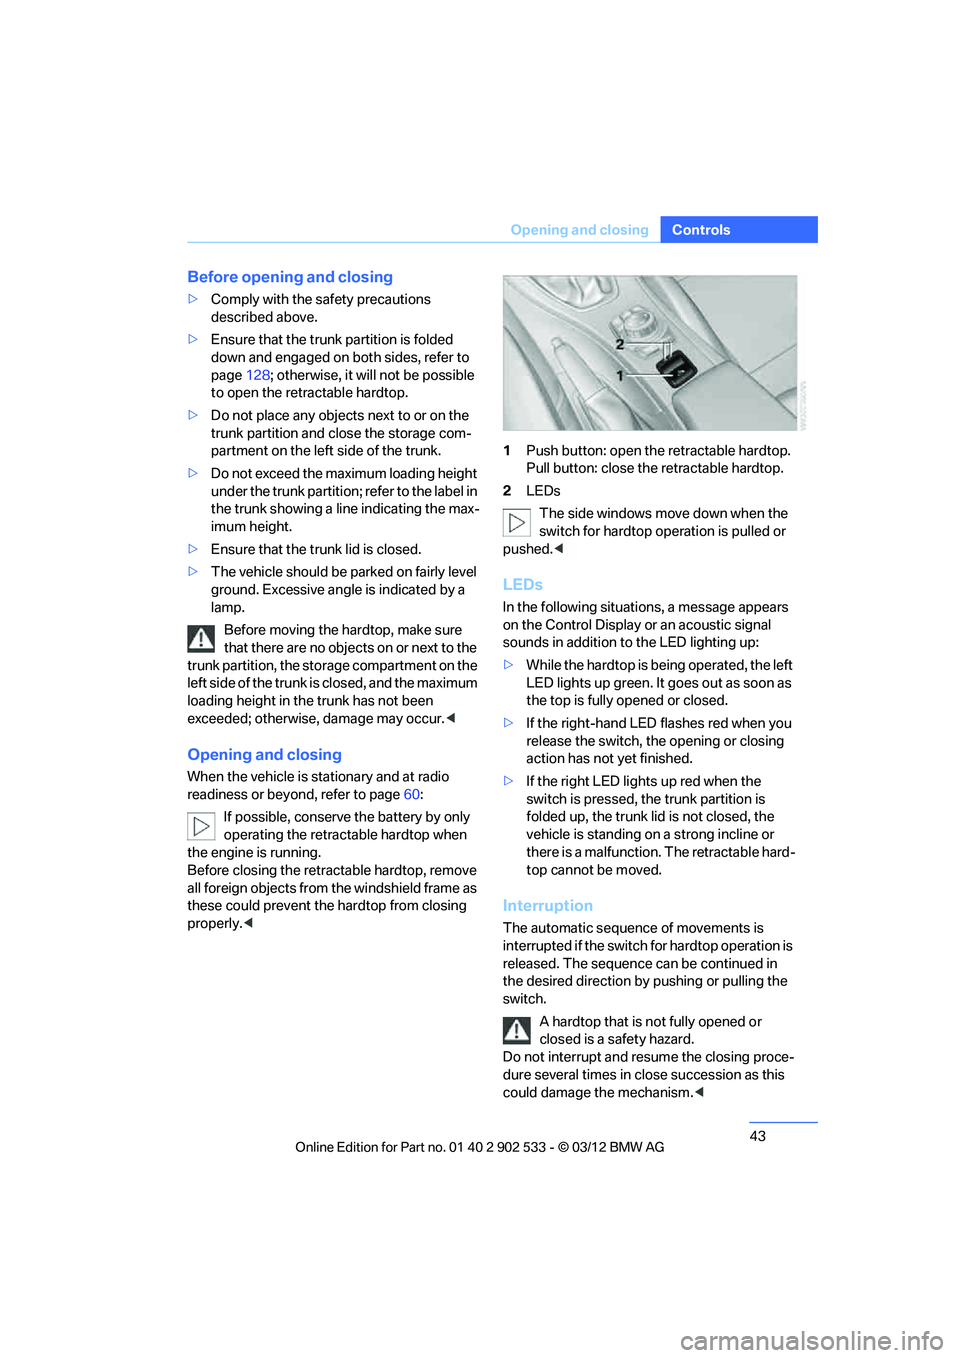
Push button: open the retractable hardtop.
Pull button: close the retractable hardtop.
2 LEDs
The side windows move down when the
switch for hardtop operation is pulled or
pushed. <
LEDs
In the following situations, a message appears
on the Control Display or an acoustic signal
sounds in addition to the LED lighting up:
>While the hardtop is being operated, the left
LED lights up green. It goes out as soon as
the top is fully opened or closed.
> If the right-hand LED flashes red when you
release the switch, the opening or closing
action has not yet finished.
> If the right LED lights up red when the
switch is pressed, the trunk partition is
folded up, the trunk lid is not closed, the
vehicle is standing on a strong incline or
there is a malfunction. The retractable hard-
top cannot be moved.
Interruption
The automatic sequence of movements is
interrupted if the switch for hardtop operation is
released. The sequence can be continued in
the desired direction by pushing or pulling the
switch.
A hardtop that is not fully opened or
closed is a safety hazard.
Do not interrupt and resume the closing proce-
dure several times in close succession as this
could damage the mechanism. <
00320051004F004C00510048000300280047004C0057004C005200510003
Page 52 of 308
51
Adjustments
Controls
1.
Pull the lever and swing the backrest for-
ward.
2. Push the seat forward.
Previous position
Push the seat backward and swing the backrest
back.
When pushing the seat into its rearmost
position, make sure that no one is injured
and that no objects are damaged.
Before driving off, engage both seats and back-
rests so that they are locked in place. Other-
wise, there is a risk of an accident due to unex-
pected movement. <
Seat with electrical longitudinal
adjustment
Coupe
Convertible
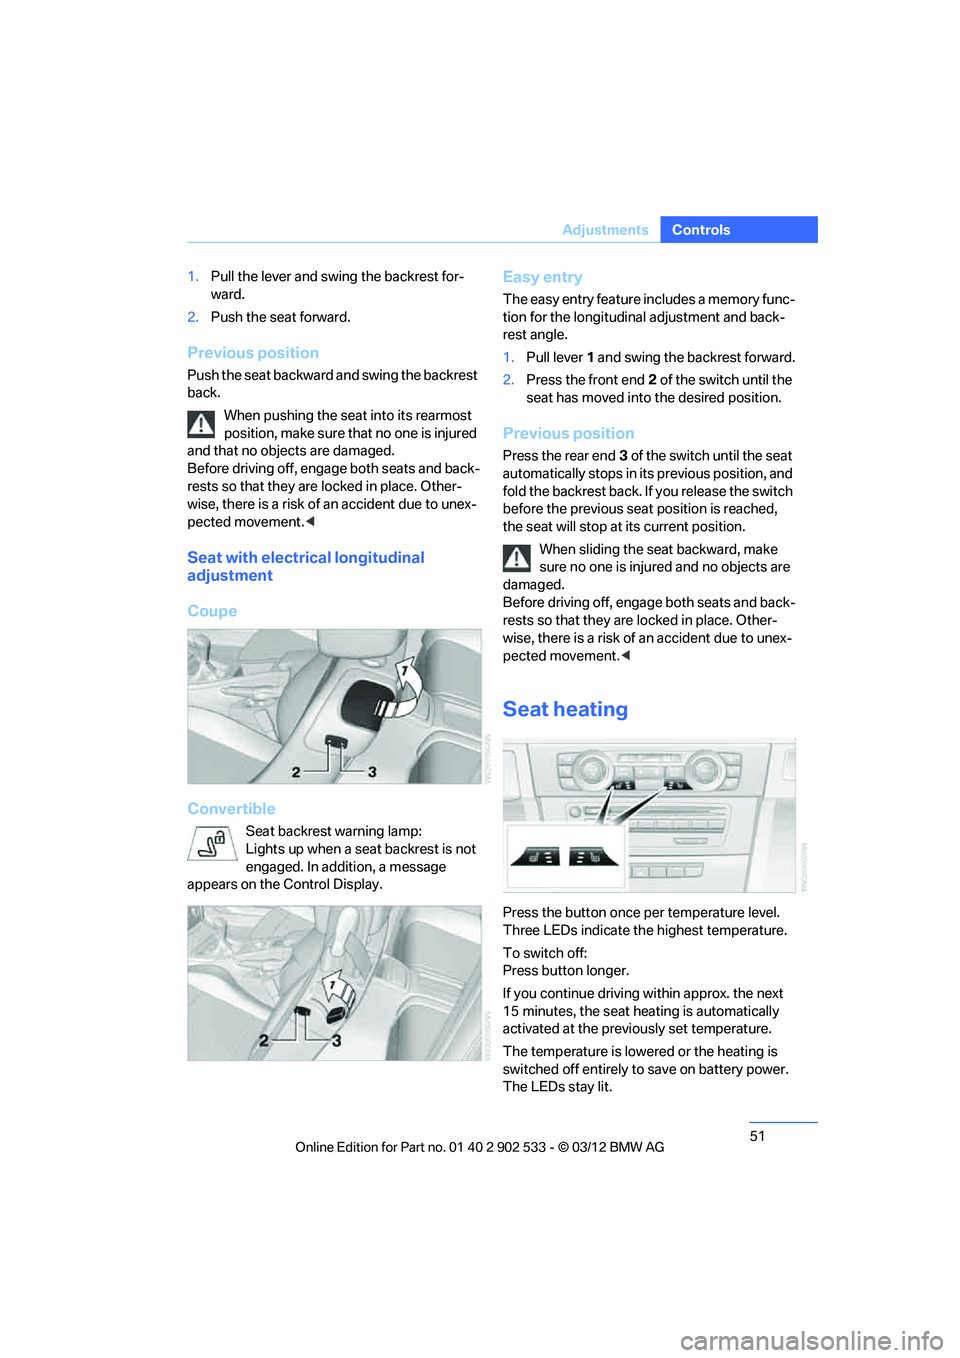
Seat backrest warning lamp:
Lights up when a seat backrest is not
engaged. In addition, a message
appears on the Control Display.
Easy entry
The easy entry feature includes a memory func-
tion for the longitudinal adjustment and back-
rest angle.
1. Pull lever 1 and swing the backrest forward.
2. Press the front end 2 of the switch until the
seat has moved into the desired position.
Previous position
Press the rear end 3 of the switch until the seat
automatically stops in its previous position, and
fold the backrest back. If you release the switch
before the previous seat position is reached,
the seat will stop at its current position.
When sliding the seat backward, make
sure no one is injured and no objects are
damaged.
Before driving off, engage both seats and back-
rests so that they are locked in place. Other-
wise, there is a risk of an accident due to unex-
pected movement. <
Seat heating
Press the button once per temperature level.
Three LEDs indicate the highest temperature.
To switch off:
Press button longer.
If you continue driving within approx. the next
15 minutes, the seat heating is automatically
activated at the previously set temperature.
The temperature is lowered or the heating is
switched off entirely to save on battery power.
The LEDs stay lit.
00320051004F004C00510048000300280047004C0057004C005200510003
Page 62 of 308
61
Driving
Controls
Ignition on
All electrical consumers can operate. The
odometer and trip odometer are displayed in
the instrument cluster.
When the engine is off, please switch off
the ignition and any unnecessary electri-
cal consumers in order to preserve the bat-
tery.<
Radio readiness and ignition off
All indicator and warning lamps as well as dis-
plays in the instrument cluster go out.
Starting the engine
Do not run the engine in enclosed areas;
otherwise, the inhalation of toxic exhaust
gases can cause loss of consciousness and
death. The exhaust gases contain carbon mon-
oxide, an odorless and colorless, but highly
toxic gas. Never leave an unattended vehicle
with the engine running; otherwise, such a vehi-
cle represents a potential safety hazard.
Before leaving the car with the engine running,
place the transmission in neutral or move the
selector lever to position P and forcefully apply
the parking brake to prevent the car from mov-
ing. <
Avoid frequent starting in quick succes-
sion as well as repeated start attempts in
which the engine does not start. Otherwise, the
fuel is not burned or incompletely burned and
there is a danger of overheating and damaging
the catalytic converter.<
Do not wait for the engine to warm up while the
vehicle remains stationary. Start driving right
away, but at moderate engine speeds.
Manual transmission
Remote control in the ignition lock or, with
Comfort Access, inside the vehicle, refer to
page 38.
1. Depress the brake.
2. Depress the clutch and shift into neutral.
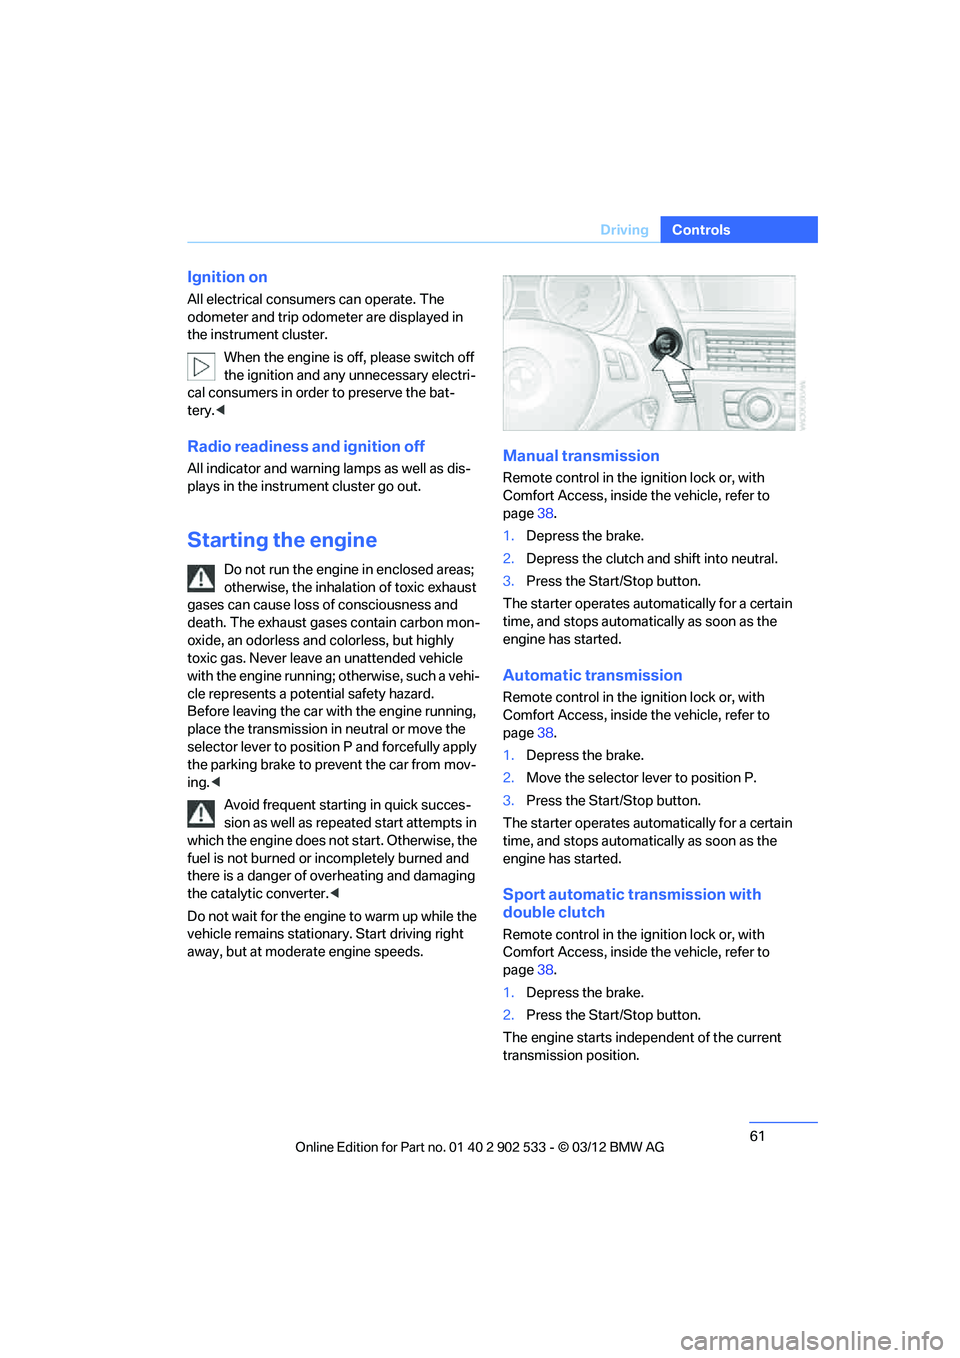
3. Press the Start/Stop button.
The starter operates automatically for a certain
time, and stops automatically as soon as the
engine has started.
Automatic transmission
Remote control in the ignition lock or, with
Comfort Access, inside the vehicle, refer to
page 38.
1. Depress the brake.
2. Move the selector lever to position P.
3. Press the Start/Stop button.
The starter operates automatically for a certain
time, and stops automatically as soon as the
engine has started.
Sport automatic transmission with
double clutch
Remote control in the ignition lock or, with
Comfort Access, inside the vehicle, refer to
page 38.
1. Depress the brake.
2. Press the Start/Stop button.
The engine starts independent of the current
transmission position.
00320051004F004C00510048000300280047004C0057004C005200510003
Page 64 of 308
63
Driving
Controls
The brake lamps do not light up when the park-
ing brake is applied.
<
Manual transmission
When shifting into 5th or 6th gear, press
the gearshift lever to the right. Otherwise,
the engine could be da maged if you inadvert-
ently shift into 3rd or 4th gear. <
Reverse gear
Select this only when the vehicle is stationary.
When the gearshift lever is pressed to the left, a
slight resistance has to be overcome.
Automatic transmission with
Steptronic
In addition to fully automatic operation, you can
also manually shift with the Steptronic, refer to
page64.
Vehicle parking
To prevent the vehicle from rolling,
always select position P and apply the
parking brake before leaving the vehicle with
the engine running. <
Disengaging the remote control
In order to remove the remote control from the
ignition lock, you must first move the selector
lever to position P and switch off the engine:
interlock. Removing the remote control from
the ignition lock, refer to page 60.
Selector lever positions
P R N D M/S + –
Displays in the instrument cluster
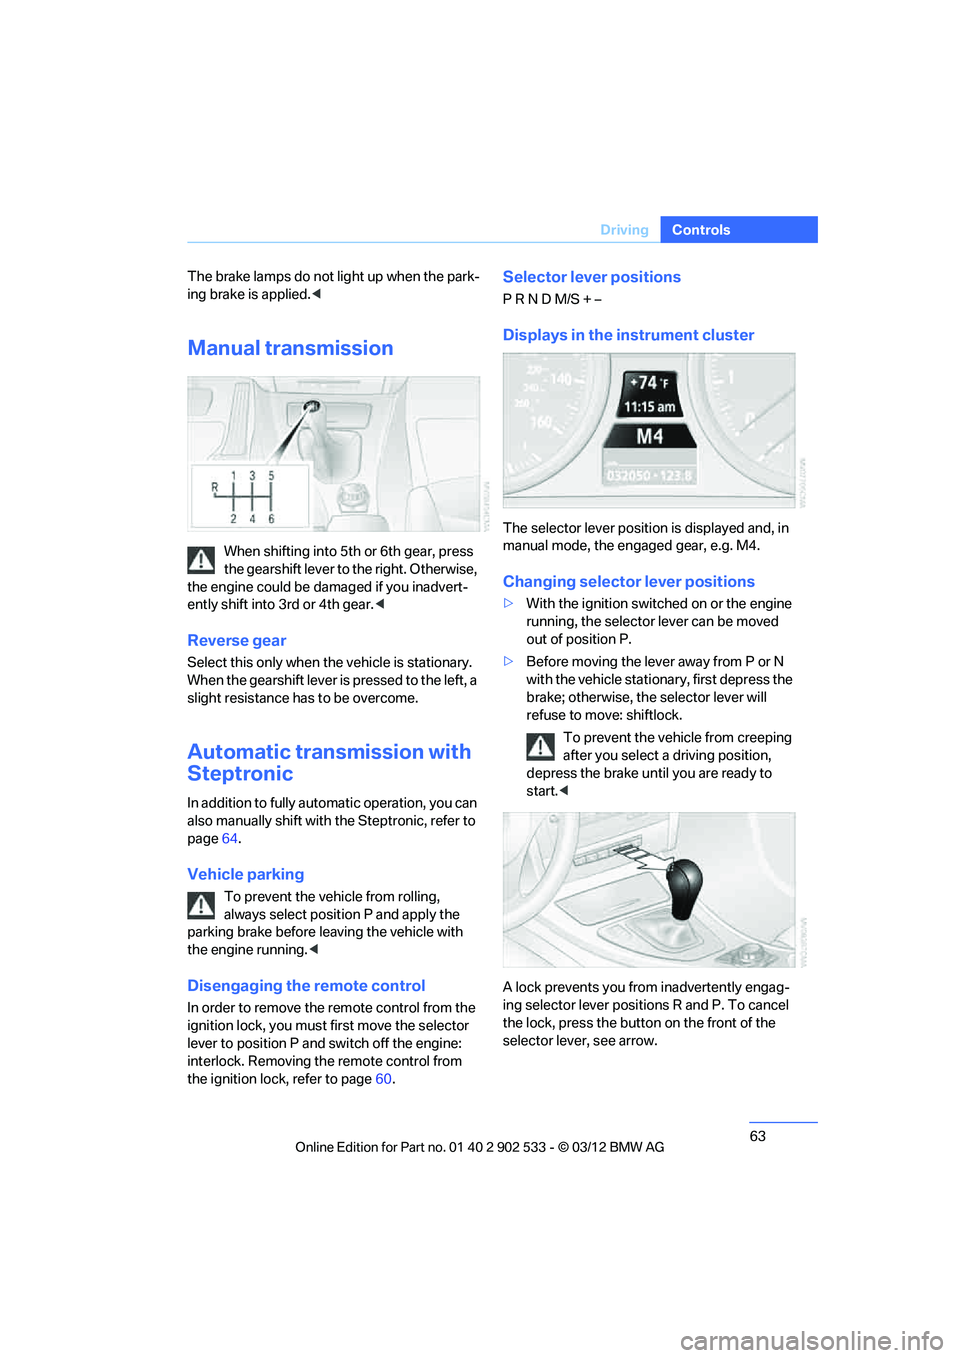
The selector lever position is displayed and, in
manual mode, the engaged gear, e.g. M4.
Changing selector lever positions
> With the ignition switched on or the engine
running, the selector lever can be moved
out of position P.
> Before moving the lever away from P or N
with the vehicle stationary, first depress the
brake; otherwise, the selector lever will
refuse to move: shiftlock.
To prevent the vehicle from creeping
after you select a driving position,
depress the brake until you are ready to
start.<
A lock prevents you from inadvertently engag-
ing selector lever positions R and P. To cancel
the lock, press the butto n on the front of the
selector lever, see arrow.
00320051004F004C00510048000300280047004C0057004C005200510003
Page 65 of 308
64
ControlsDriving
P Park
Select this only when the vehicle is stationary.
The rear wheels are locked.
R Reverse
Select this only when the vehicle is stationary.
N Neutral
You can select this in a car wash, for example.
The vehicle can roll.
D Drive, automatic position
Position for normal vehicle operation. All for-
ward gears are selected automatically.
Under normal operating conditions, fuel con-
sumption is lowest when you are driving in posi-
tion D.
Kickdown
Kickdown enables you to achieve maximum
performance.
Press the accelerator pedal beyond the full-
throttle resistance point.
Sport program and manual mode M/S
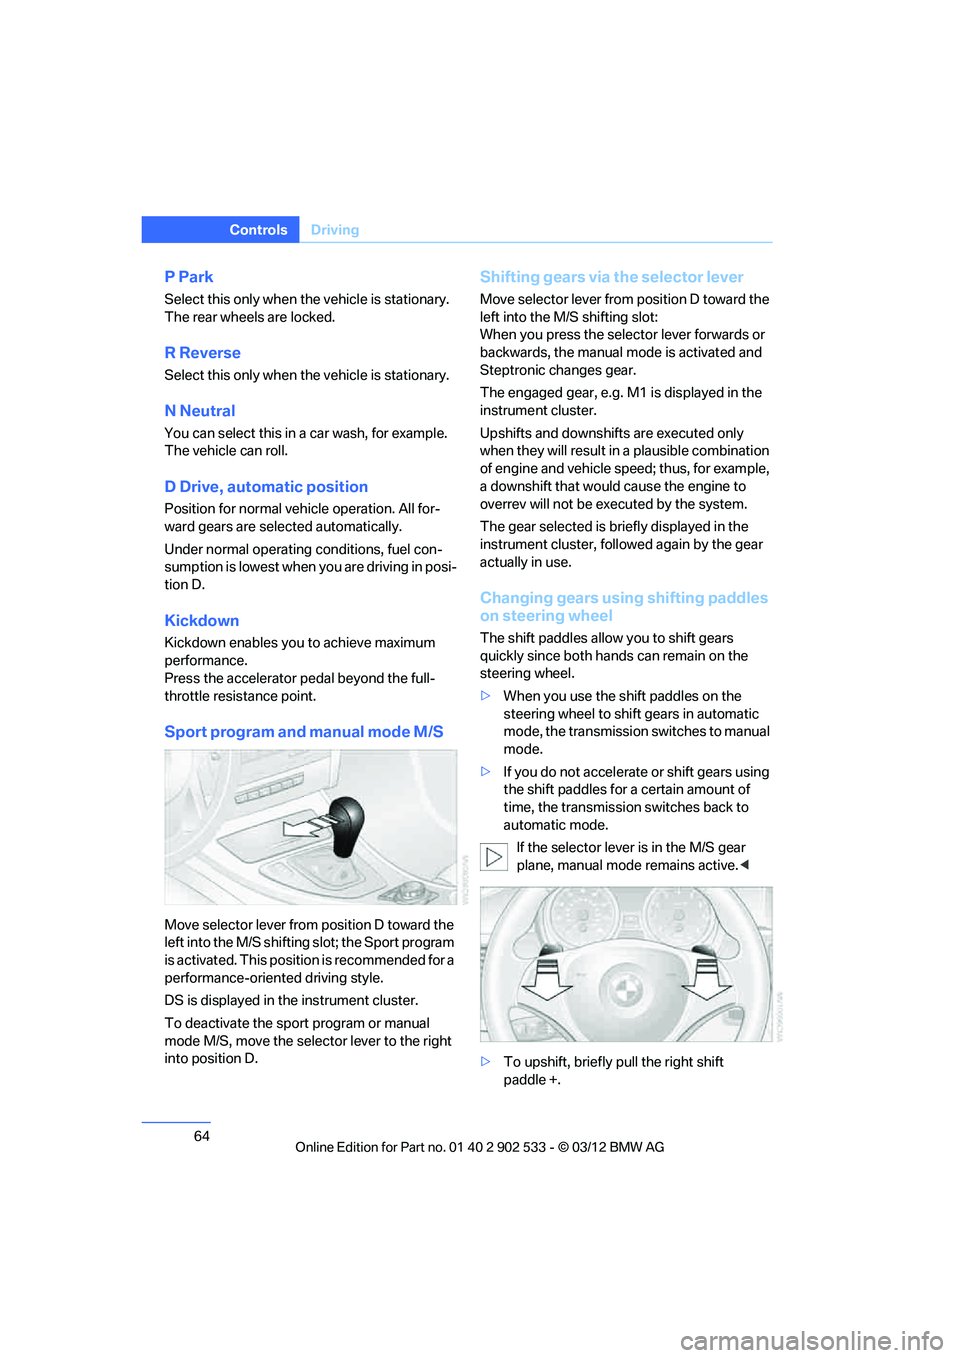
Move selector lever from position D toward the
left into the M/S shifting slot; the Sport program
is activated. This position is recommended for a
performance-oriented driving style.
DS is displayed in the instrument cluster.
To deactivate the sport program or manual
mode M/S, move the selector lever to the right
into position D.
Shifting gears via the selector lever
Move selector lever from position D toward the
left into the M/S shifting slot:
When you press the selector lever forwards or
backwards, the manual mode is activated and
Steptronic changes gear.
The engaged gear, e.g. M1 is displayed in the
instrument cluster.
Upshifts and downshifts are executed only
when they will result in a plausible combination
of engine and vehicle speed; thus, for example,
a downshift that would cause the engine to
overrev will not be executed by the system.
The gear selected is briefly displayed in the
instrument cluster, followed again by the gear
actually in use.
Changing gears using shifting paddles
on steering wheel
The shift paddles allow you to shift gears
quickly since both hands can remain on the
steering wheel.
>When you use the shift paddles on the
steering wheel to shift gears in automatic
mode, the transmission switches to manual
mode.
> If you do not accelerate or shift gears using
the shift paddles for a certain amount of
time, the transmission switches back to
automatic mode.
If the selector lever is in the M/S gear
plane, manual mode remains active. <
> To upshift, briefly pull the right shift
paddle +.
00320051004F004C00510048000300280047004C0057004C005200510003
Page 66 of 308
65
Driving
Controls
>
To downshift, briefly pull the left shift
paddle –.
Upshifts and downshifts are executed only
when they will result in a plausible combination
of engine and vehicle speed; thus, for example,
a downshift that would cause the engine to
overrev will not be executed by the system.
The gear selected is briefly displayed in the
instrument cluster, followed again by the gear
actually in use.
Overriding selector lever lock
Should the selector lever refuse to move out of
position P even though the ignition is switched
on, the brake is depressed and the button on
the selector lever is pressed, the selector lever
lock can be overridden:
1. Switch off ignition.
2. Unclip the sleeve of the selector lever.
3. Pull the sleeve up over the selector lever
until the sleeve is inside out.
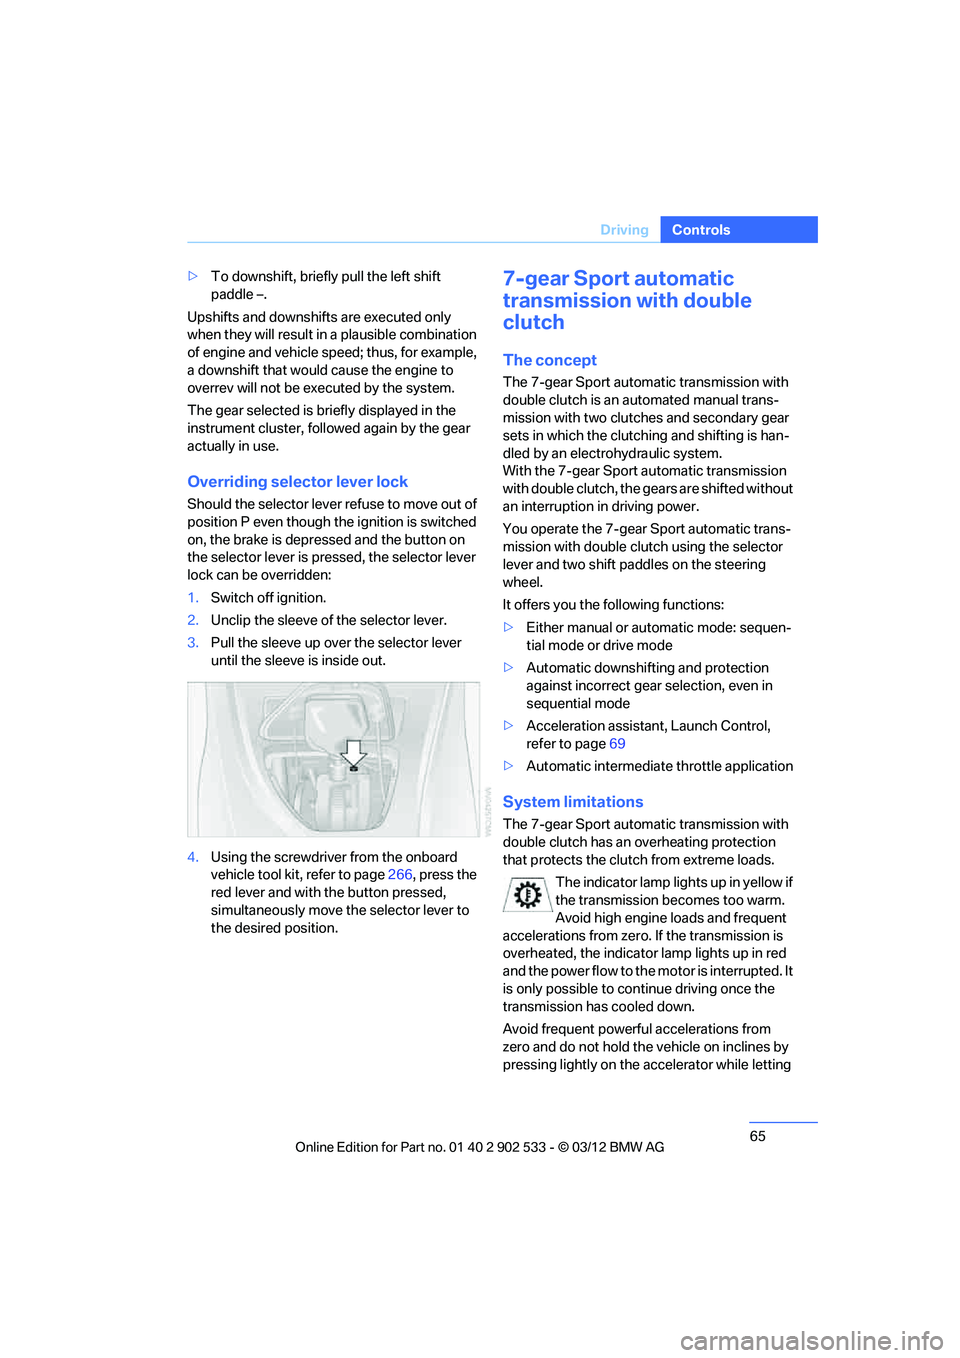
4. Using the screwdriver from the onboard
vehicle tool kit, refer to page 266, press the
red lever and with the button pressed,
simultaneously move the selector lever to
the desired position.
7-gear Sport automatic
transmission with double
clutch
The concept
The 7-gear Sport automatic transmission with
double clutch is an automated manual trans-
mission with two clutches and secondary gear
sets in which the clutching and shifting is han-
dled by an electrohydraulic system.
With the 7-gear Sport automatic transmission
with double clutch, the gears are shifted without
an interruption in driving power.
You operate the 7-gear Sport automatic trans-
mission with double clutch using the selector
lever and two shift paddles on the steering
wheel.
It offers you the following functions:
> Either manual or automatic mode: sequen-
tial mode or drive mode
> Automatic downshifting and protection
against incorrect gear selection, even in
sequential mode
> Acceleration assistant, Launch Control,
refer to page 69
> Automatic intermediate throttle application
System limitations
The 7-gear Sport automatic transmission with
double clutch has an overheating protection
that protects the clutch from extreme loads.
The indicator lamp lights up in yellow if
the transmission becomes too warm.
Avoid high engine loads and frequent
accelerations from zero. If the transmission is
overheated, the indicator lamp lights up in red
and the power flow to the motor is interrupted. It
is only possible to continue driving once the
transmission has cooled down.
Avoid frequent powerful accelerations from
zero and do not hold the vehicle on inclines by
pressing lightly on the accelerator while letting
00320051004F004C00510048000300280047004C0057004C005200510003