2013 BMW 3 SERIES SEDAN Changing the time
[x] Cancel search: Changing the timePage 26 of 248

▷For the input of upper/lower case letters
and numbers, it may be necessary to
switch via the controller to the correspond‐
ing Input mode, refer to page 25, e.g.
when the spelling of upper and lower case
letters is identical.▷Enter characters as they are displayed on
the Control Display.▷Always enter accompanying signs, such as
accents or periods so that the letter can be
clearly recognized. The possibility of input
depends on the set language. Where nec‐
essary, enter special characters via the
controller.▷To delete a character, slide to the left on
the touchpad.▷To enter a blank space, slide to the right in
the center of the touchpad.▷To enter a hyphen, slide to the right in the
upper area of the touchpad.▷To enter an underscore, slide to the right in
the lower area of the touchpad.
Using interactive map and Internet
The interactive map in the navigation system
and Internet sites can be moved via the touch‐
pad.
FunctionControlsMove interactive map
or Internet sites.Slide in the corre‐
sponding direction.Enlarge/shrink interac‐
tive map or Internet
sites.Drag inwards or
outwards on the
touchpad with the
fingers.Display the menu or
open a link in the Inter‐
net.Tap once.Changing settings
Settings on the control display, such as the
volume, can be made via the touchpad. To do
this slide to the left or right accordingly.
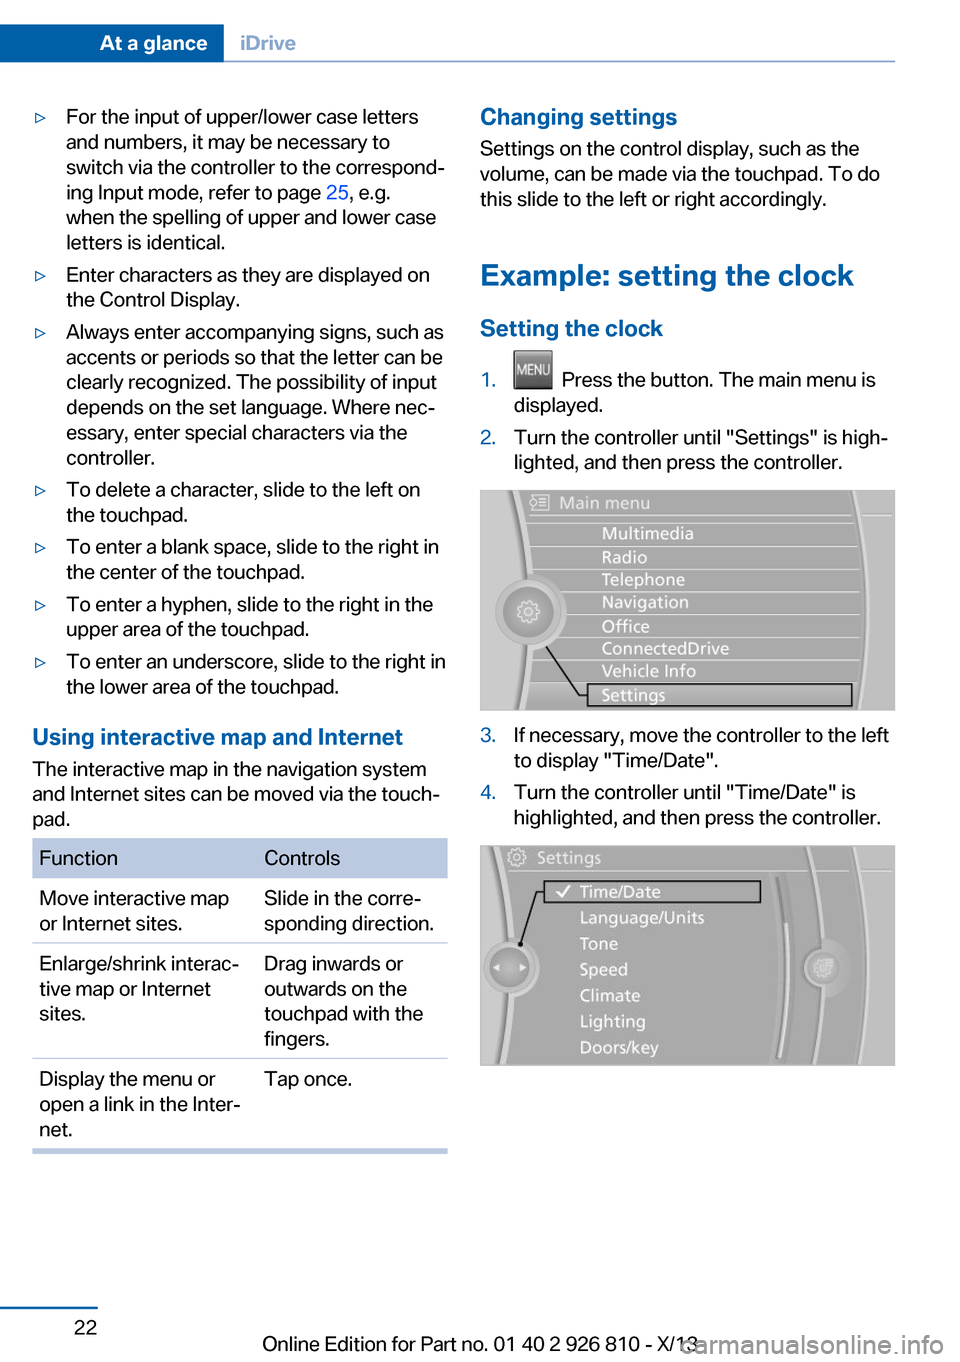
Example: setting the clock Setting the clock1. Press the button. The main menu is
displayed.2.Turn the controller until "Settings" is high‐
lighted, and then press the controller.3.If necessary, move the controller to the left
to display "Time/Date".4.Turn the controller until "Time/Date" is
highlighted, and then press the controller.Seite 22At a glanceiDrive22
Online Edition for Part no. 01 40 2 926 810 - X/13
Page 34 of 248

Context help - Owner's Manual to the
temporarily selected function
The relevant information can be opened di‐
rectly.
Opening via the iDrive
To move directly from the application on the
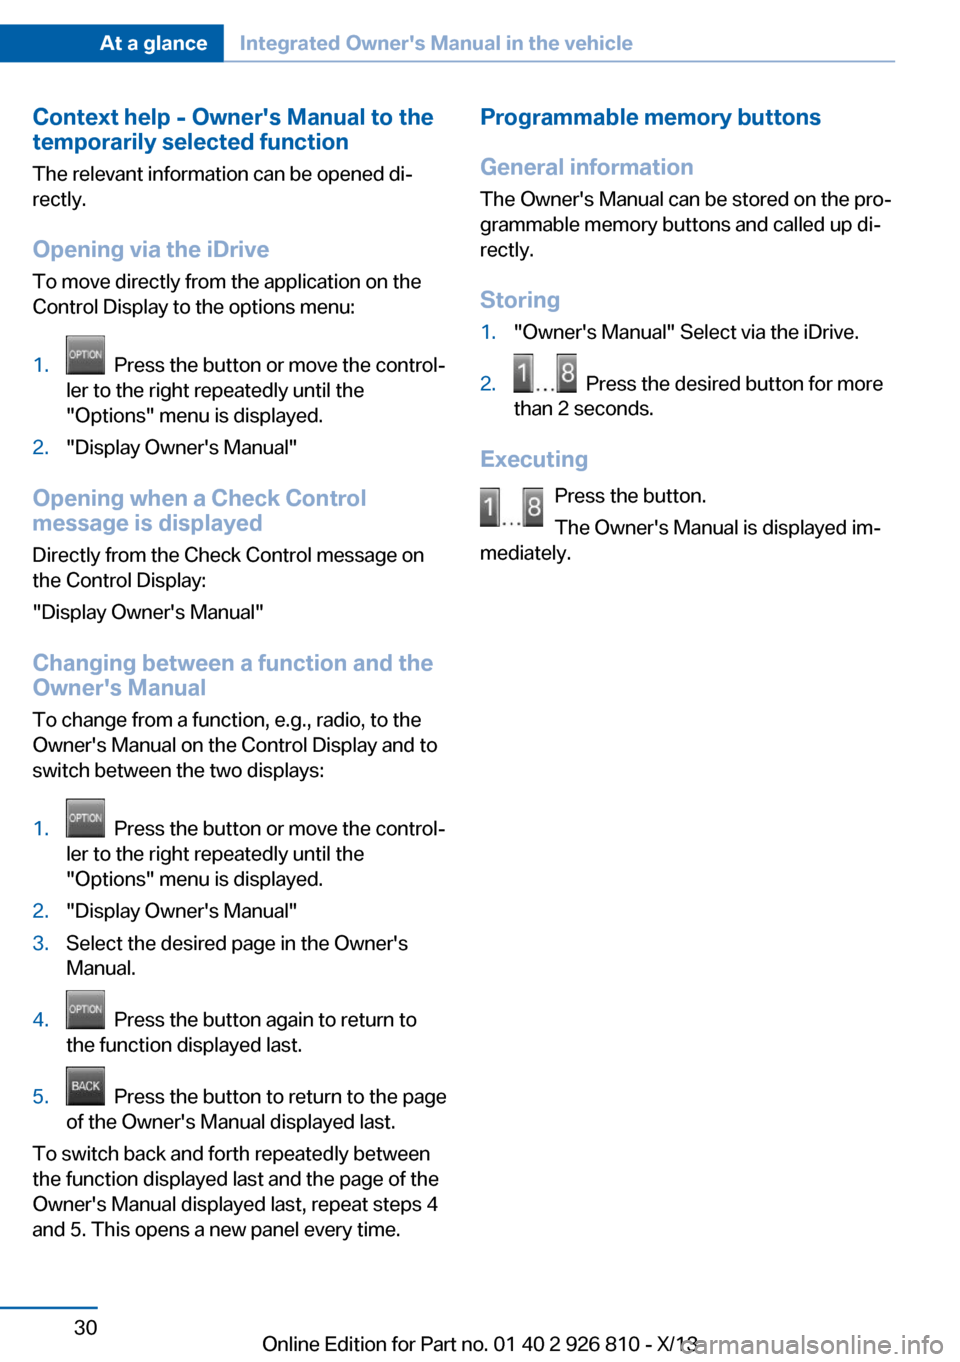
Control Display to the options menu:1. Press the button or move the control‐
ler to the right repeatedly until the
"Options" menu is displayed.2."Display Owner's Manual"
Opening when a Check Control
message is displayed
Directly from the Check Control message on
the Control Display:
"Display Owner's Manual"
Changing between a function and the
Owner's Manual
To change from a function, e.g., radio, to the
Owner's Manual on the Control Display and to
switch between the two displays:
1. Press the button or move the control‐
ler to the right repeatedly until the
"Options" menu is displayed.2."Display Owner's Manual"3.Select the desired page in the Owner's
Manual.4. Press the button again to return to
the function displayed last.5. Press the button to return to the page
of the Owner's Manual displayed last.
To switch back and forth repeatedly between
the function displayed last and the page of the
Owner's Manual displayed last, repeat steps 4
and 5. This opens a new panel every time.
Programmable memory buttons
General information
The Owner's Manual can be stored on the pro‐
grammable memory buttons and called up di‐
rectly.
Storing1."Owner's Manual" Select via the iDrive.2. Press the desired button for more
than 2 seconds.
Executing
Press the button.
The Owner's Manual is displayed im‐
mediately.
Seite 30At a glanceIntegrated Owner's Manual in the vehicle30
Online Edition for Part no. 01 40 2 926 810 - X/13
Page 91 of 248

Distance to destination
The distance remaining to the destination is
displayed if a destination is entered in the navi‐
gation system before the trip is started.
The distance to the destination is adopted au‐
tomatically.
Time of arrival The estimated time of arrival is
displayed if a destination is en‐
tered in the navigation system
before the trip is started.
The time must be correctly set.
Speed limit detection
Description of the speed limit detection, refer
to page 83, function.
Speed limit
Display of a speed limit which, when reached,
should cause a warning to be issued.
The warning is repeated if the vehicle speed
drops below the set speed limit once by at least 3 mph/5 km/h.
Displaying, setting or changing the
limit1."Settings"2."Speed"3."Warning at:"4.Turn the controller until the desired limit is
displayed.5.Press the controller.
The speed limit is stored.
Activating/deactivating the limit
1."Settings"2."Speed"3."Warning"4.Press the controller.Setting your current speed as the limit1."Settings"2."Speed"3."Select current speed"4.Press the controller.
The current vehicle speed is stored as the
limit.
Trip computer
The vehicle features two types of computer.
▷"Onboard info": the values can be reset as
often as necessary.▷"Trip computer": the values provide an
overview of the current trip.
Resetting the trip computer
1."Vehicle Info"2."Trip computer"3."Reset": all values are reset.
"Automatically reset": all values are reset
approx. 4 hours after the vehicle comes to
a standstill.
Display on the Control Display
Display the onboard computer or trip computer
on the Control Display.
1."Vehicle Info"2."Onboard info" or "Trip computer"
Resetting the fuel consumption or
speed
1."Vehicle Info"2."Onboard info"3."Consumpt." or "Speed"4."Yes"
Sport displays
In the Control Display, the current values for
power and torque can be displayed.
Seite 87DisplaysControls87
Online Edition for Part no. 01 40 2 926 810 - X/13
Page 126 of 248

At a glance
Buttons on the steering wheelPress the
buttonFunctionSystem on/off, interrupt, refer to
page 122Maintaining/storing the speed,
refer to page 123Resume speed, refer to
page 124Reduce distance, refer to
page 124Increase distance, refer to
page 124Rocker switch:
Maintaining/storing the speed,
refer to page 123
Changing, maintaining, and
storing the speed, refer to
page 123
The arrangement of the buttons varies accord‐
ing to the how the vehicle is equipped or coun‐
try-specific variants.
Radar sensor
A radar sensor is located in the front bumper
for detecting vehicles on the road ahead of the
vehicle.
A dirty or covered sensor may hinder the de‐
tection of vehicles.
▷If necessary, clean the radar sensor. Re‐
move layers of snow and ice carefully.▷Do not cover the view field of the radar
sensor.
Switching on/off and interrupting cruise control
Switching on Press the button on the steering
wheel.
The indicator lamps in the instrument cluster
light up and the mark in the speedometer is set
to the current speed.
Cruise control can be used.
Switching off Deactivated or interrupted system
If the system is deactivated or inter‐
rupted, actively intervene by braking, steering
and, if necessary, with evasive maneuvers; oth‐
erwise, there is the danger of an accident oc‐
curring.◀
If switching off the system while stationary,
press on the brake pedal at the same time.
Press the button.
▷If active: press twice.▷If interrupted: press once.Seite 122ControlsDriving comfort122
Online Edition for Part no. 01 40 2 926 810 - X/13
Page 127 of 248

The displays go out. The stored desired speed
and distance are deleted.
Interrupting When active, press the button.
If interrupting the system while stationary,
press on the brake pedal at the same time.
The system is automatically interrupted in the
following situations:▷When the brakes are applied.▷When transmission position D is disen‐
gaged.▷When DTC Dynamic Traction Control is
activated or DSC is deactivated.▷When DSC is actively controlling stability.▷When SPORT+ is activated with Driving
Dynamics Control.▷If the safety belt and the driver's door are
opened when the vehicle is standing still.▷If the system has not detected objects for
an extended period, e.g., on a road with
very little traffic without road edge line
markings.▷If the detection range of the radar is dis‐
rupted, for example, by dirt or heavy fog.
Maintaining/storing the speed
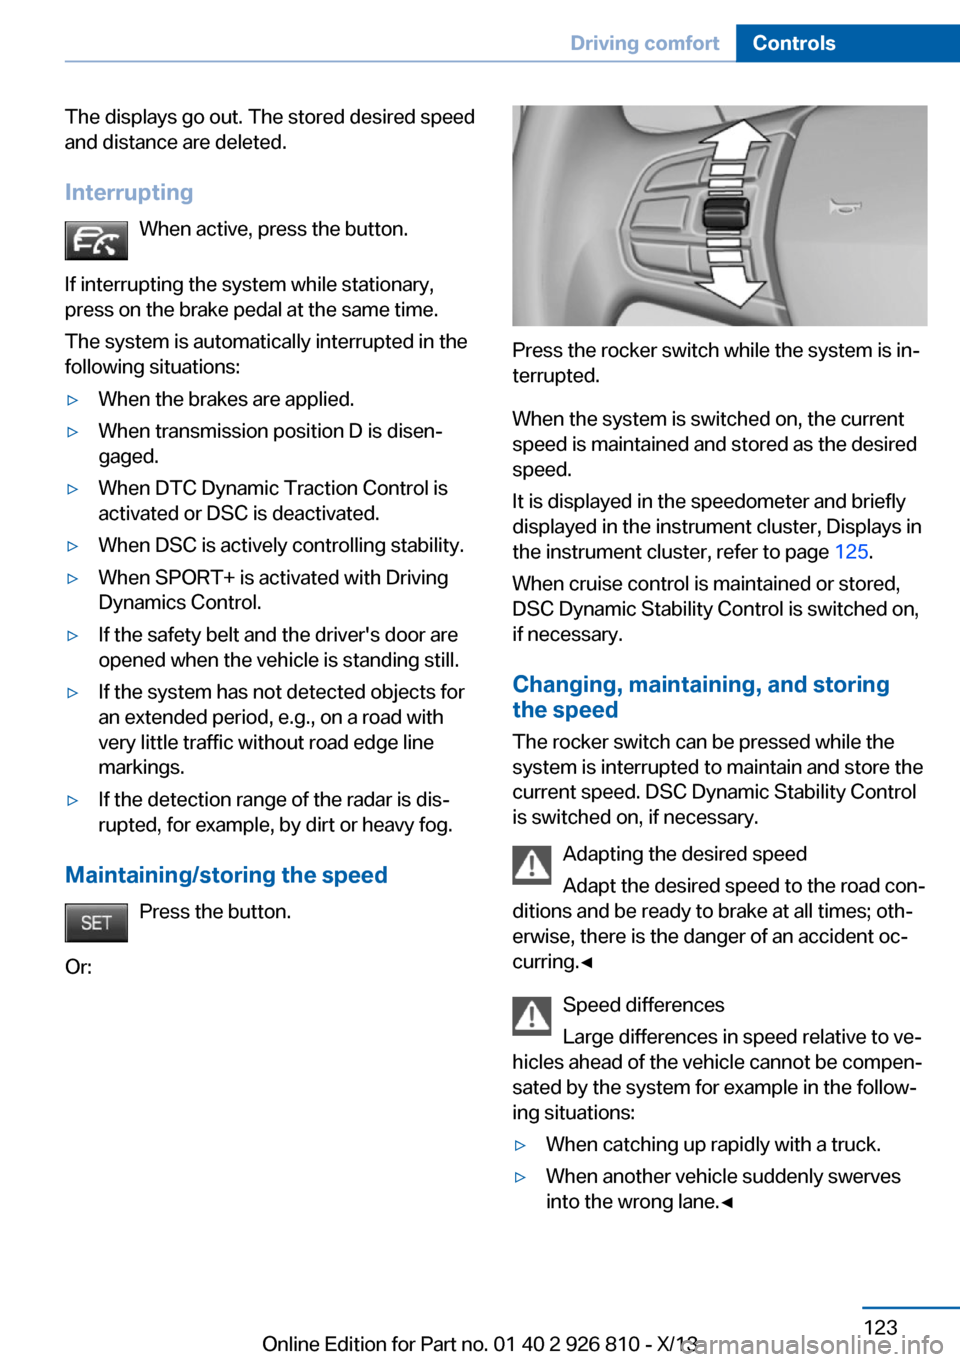
Press the button.
Or:
Press the rocker switch while the system is in‐
terrupted.
When the system is switched on, the current
speed is maintained and stored as the desired
speed.
It is displayed in the speedometer and briefly
displayed in the instrument cluster, Displays in
the instrument cluster, refer to page 125.
When cruise control is maintained or stored,
DSC Dynamic Stability Control is switched on,
if necessary.
Changing, maintaining, and storing
the speed
The rocker switch can be pressed while the
system is interrupted to maintain and store the
current speed. DSC Dynamic Stability Control
is switched on, if necessary.
Adapting the desired speed
Adapt the desired speed to the road con‐
ditions and be ready to brake at all times; oth‐
erwise, there is the danger of an accident oc‐
curring.◀
Speed differences
Large differences in speed relative to ve‐
hicles ahead of the vehicle cannot be compen‐
sated by the system for example in the follow‐
ing situations:
▷When catching up rapidly with a truck.▷When another vehicle suddenly swerves
into the wrong lane.◀Seite 123Driving comfortControls123
Online Edition for Part no. 01 40 2 926 810 - X/13
Page 133 of 248

▷The brakes are applied.▷The clutch pedal is depressed for a few
seconds or released while a gear is not en‐
gaged.▷The gear engaged is too high for the cur‐
rent speed.▷The transmission position D is disengaged.▷DTC Dynamic Traction Control is activated
or DSC is deactivated.▷DSC is actively controlling stability.▷When SPORT+ is activated with Driving
Dynamics Control.
Maintaining/storing the current speed
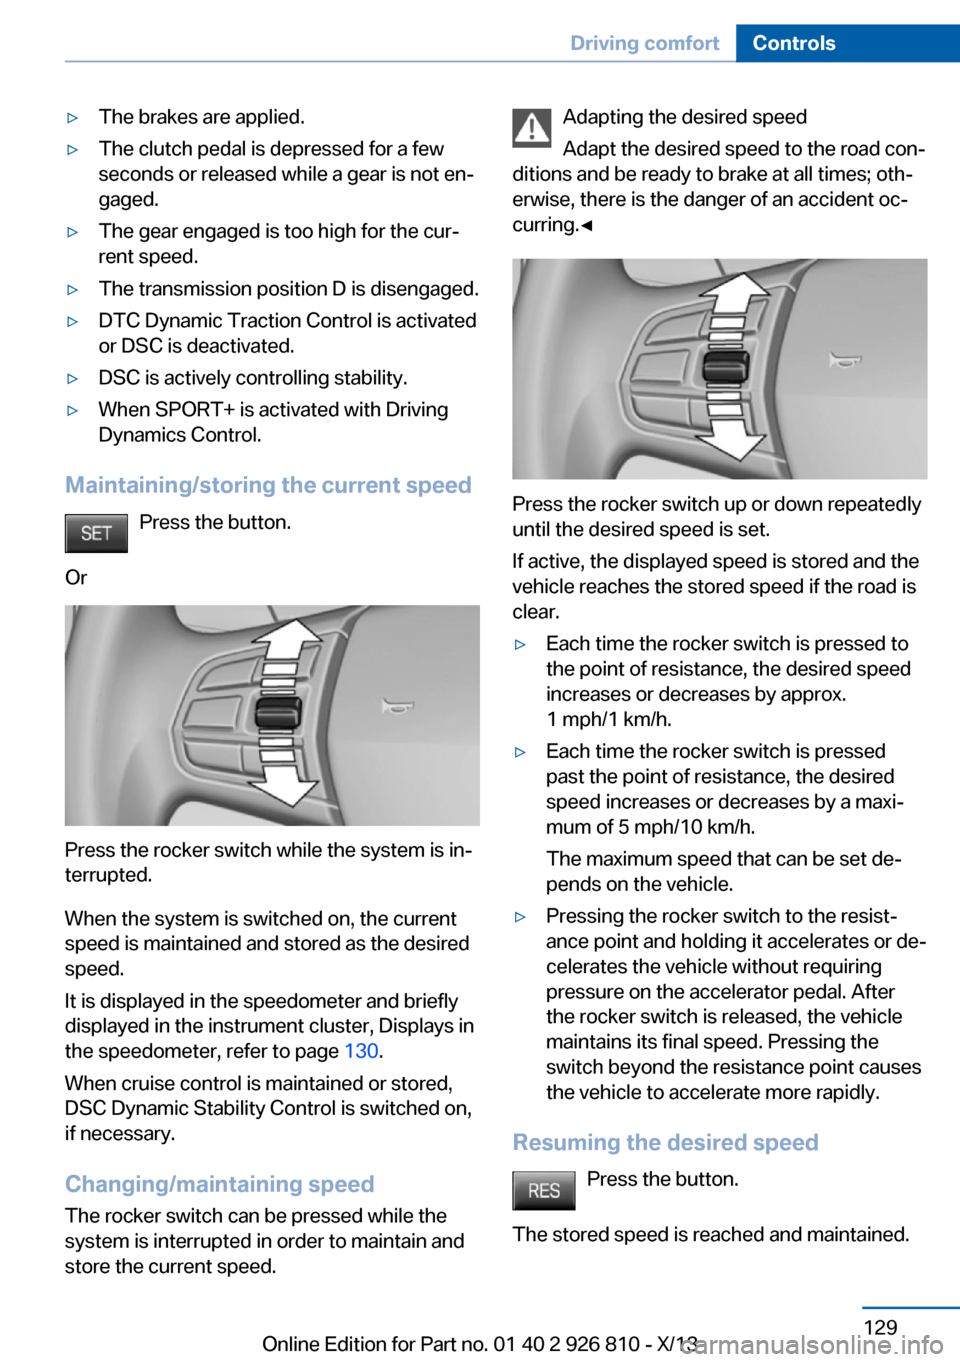
Press the button.
Or
Press the rocker switch while the system is in‐
terrupted.
When the system is switched on, the current
speed is maintained and stored as the desired
speed.
It is displayed in the speedometer and briefly
displayed in the instrument cluster, Displays in
the speedometer, refer to page 130.
When cruise control is maintained or stored,
DSC Dynamic Stability Control is switched on,
if necessary.
Changing/maintaining speed The rocker switch can be pressed while the
system is interrupted in order to maintain and
store the current speed.
Adapting the desired speed
Adapt the desired speed to the road con‐
ditions and be ready to brake at all times; oth‐
erwise, there is the danger of an accident oc‐
curring.◀
Press the rocker switch up or down repeatedly
until the desired speed is set.
If active, the displayed speed is stored and the
vehicle reaches the stored speed if the road is
clear.
▷Each time the rocker switch is pressed to
the point of resistance, the desired speed
increases or decreases by approx.
1 mph/1 km/h.▷Each time the rocker switch is pressed
past the point of resistance, the desired
speed increases or decreases by a maxi‐
mum of 5 mph/10 km/h.
The maximum speed that can be set de‐
pends on the vehicle.▷Pressing the rocker switch to the resist‐
ance point and holding it accelerates or de‐
celerates the vehicle without requiring
pressure on the accelerator pedal. After
the rocker switch is released, the vehicle
maintains its final speed. Pressing the
switch beyond the resistance point causes
the vehicle to accelerate more rapidly.
Resuming the desired speed
Press the button.
The stored speed is reached and maintained.
Seite 129Driving comfortControls129
Online Edition for Part no. 01 40 2 926 810 - X/13
Page 153 of 248

Switching the system on/off
Switching off Press the left button for the minimum
speed.
Switching on
Press any button except▷Rear window defroster.▷Seat heating.
Microfilter/activated-charcoal filter
In external and recirculated air mode the mi‐
crofilter/activated charcoal filter filters dust,
pollen, and gaseous pollutants out of the air.
This filter should be replaced during scheduled
maintenance, refer to page 204, of your vehi‐
cle.
Ventilation
Front ventilation
▷Lever for changing the air flow direction,
arrow 1.▷Thumbwheels for opening and closing the
vents continuously, arrows 2.▷Thumbwheel to vary the temperature, ar‐
row 3.
Toward blue: colder.
Toward red: warmer.Adjusting the ventilation▷Ventilation for cooling:
Adjust the vent to direct the air in your di‐
rection, such as if the vehicle interior is hot
from the sun.▷Draft-free ventilation:
Adjust the vent to let the air flow past you.
Ventilation in the rear
▷Thumbwheel for continuous opening and
closing of the vents, arrow 1.▷Thumbwheel to vary the temperature, ar‐
row 2.
Toward blue: colder.
Toward red: warmer.▷Lever for changing the air flow direction,
arrow 3.
Parked-car ventilation
The concept The parked-car ventilation ventilates the vehi‐
cle interior and lowers its temperature, if nec‐
essary.
The system can be switched on and off at any
external temperature, either directly or by us‐
ing two preset switch-on times. It remains
switched on for 30 minutes.
Open the vents to allow air to flow out.
Seite 149Climate controlControls149
Online Edition for Part no. 01 40 2 926 810 - X/13
Page 208 of 248

MaintenanceVehicle equipment
All standard, country-specific and optional
equipment that is offered in the model series is
described in this chapter. Therefore, equip‐
ment is also described that is not available in a
vehicle, e. g., because of the selected optional
equipment or country variant. This also applies
for safety-related functions and systems.
BMW maintenance system The maintenance system indicates required
maintenance measures, and thereby provides
support in maintaining road safety and the op‐ erational reliability of the vehicle.
Condition Based Service
CBS
Sensors and special algorithms take into ac‐
count the driving conditions of your vehicle.
Based on this, Condition Based Service deter‐
mines the maintenance requirements.
The system makes it possible to adapt the
amount of maintenance you need to your user
profile.
Detailed information on service requirements,
refer to page 82, can be displayed on the Con‐
trol Display.
Service data in the remote control Information on the required maintenance is
continuously stored in the remote control. Your service center will read out this data and
suggest the right array of service procedures
for your vehicle.
Therefore, hand your service specialist the re‐
mote control with which the vehicle was driven
most recently.Storage periods
Storage periods during which the vehicle bat‐
tery was disconnected are not taken into ac‐
count.
If this occurs, have a service center update the
time-dependent maintenance procedures,
such as checking brake fluid and, if necessary,
changing the engine oil and the microfilter/
activated-charcoal filter.
Service and Warranty Information Booklet for US
models and Warranty and
Service Guide Booklet for
Canadian models
Please consult your Service and Warranty In‐
formation Booklet for US models and Warranty
and Service Guide Booklet for Canadian mod‐ els for additional information on service re‐
quirements.
Maintenance and repair should be performed
by your service center. Make sure to have reg‐
ular maintenance procedures recorded in the
vehicle's Service and Warranty Information
Booklet for US models, and in the Warranty
and Service Guide Booklet for Canadian mod‐
els. These entries are proof of regular mainte‐
nance.
Socket for OBD Onboard
Diagnosis
Note Socket for Onboard Diagnosis
The socket for onboard diagnostics may
only be used by the service center or a work‐
shop that operates in accordance with the
specifications of the vehicle manufacturer withSeite 204MobilityMaintenance204
Online Edition for Part no. 01 40 2 926 810 - X/13