2013 BMW 3 SERIES COUPE remove
[x] Cancel search: removePage 46 of 311

41
Opening and closing
Controls
Unlocking the trunk lid separately
Press the button on the ou
tside of the trunk lid.
This corresponds to pressing the button.
If the vehicle detects that a remote
control has been accide ntally left inside
the locked vehicle's trunk after the trunk lid is
closed, the lid will reopen. The hazard warning
flashers flash and a signal sounds. <
Switching on radio readiness
Pressing the Start/Stop button switches on
radio readiness.
Do not depress the brake or the clutch; other-
wise, the engine will start immediately.
Starting the engine
The engine can be started or the ignition can be
switched on when a remote control is inside the
vehicle. It is not necessa ry to insert a remote
control into the ignition lock, refer to page 62.
Switching off the engine in cars with
automatic transmission
The engine can only be switched off when the
selector lever is in po sition P, refer to page 64.
To switch the engine off when the selector lever
is in position N, the remote control must be in
the ignition lock.
Malfunction
Local radio waves can in terfere with the func-
tion of Comfort Access, for example when a
mobile phone is in the immediate vicinity of the
remote control or by when a mobile phone is
being charged in the vehicle.
If this happens, open or close the vehicle via the
buttons on the remote co ntrol or using the inte-
grated key. To start the engine afterward, insert
the remote control into the ignition lock.
Warning lamps
The warning lamp in the instrument
cluster lights up when you attempt to
start the engine: the engine cannot
be started. The remote co ntrol is not inside the
vehicle or is malfunctioning. Take the remote contro
l with you inside the
vehicle or have it checked. If necessary, insert
another remote control in to the ignition lock.
The warning lamp in the instrument
cluster lights up wh ile the engine is
running: the remote control is no
longer inside the vehicle. After the engine is
switched off, the engine can only be restarted
within approx. 10 seconds.
The indicator lamp in the instrument
cluster lights up and a message
appears on the Control Display:
replace the battery in the remote control.
Replacing the battery
The remote control for Comfort Access con-
tains a battery that will need to be replaced from
time to time.
1. Take the integrated ke y out of the remote
control, refer to page 32.
2. Remove the cover.
3. Insert the new battery with the plus side
facing up.
4. Press the cover on to close.
Dispose of the old battery at a recycling
center or at your BMW center. <
Windows
To prevent injuries, watch the windows
while closing them.
Take the remote contro l with you when you
leave the car; otherwise, children could operate
the electric windows and possibly injure
themselves. <
00320051004F004C00510048000300280047004C0057004C005200510003
Page 47 of 311

42
ControlsOpening and closing
Coupe: opening, closing
>Press the switch to the resistance point:
The window opens as long as you press the
switch.
> Press the switch beyond the resistance
point:
The window opens automatically. Press
the switch again to stop the opening
movement.
You can close the windows in the same manner
by pulling the switch.
Convertible: opening, closing
Individually
> Press the switch to the resistance point:
The window opens as long as you press the
switch.
> Press the switch beyond the resistance
point:
The window opens automatically. Press
the switch again to stop the opening
movement.
You can close the windows in the same manner
by pulling the switch. The rear windows do not
close automatically.
Jointly
> Press the switch to the resistance point:
All windows open as lo ng as you press the
switch.
> Press the switch beyond the resistance
point:
All windows open automatically. Press
the switch again to stop the opening
movement.
> Pull the switch:
All windows close as long as you pull the
switch.
After switching off the ignition
When the remote control is removed or the igni-
tion is switched off, you can still operate the
windows for approx. 1 minute as long as no
door is opened.
Convenient opening and closing
For information on Convenient opening and
closing via the remote control, refer to page 33.
For information on Convenient closing with
Comfort Access, refer to locking on page 34.
Pinch protection system
If the closing force exceeds a specific value as a
window closes, the closing action is interrupted
and the window reopens slightly.
Despite the pinch protection system
check and clear the window's travel path
prior to closing it; otherw ise, the safety system
might fail to detect certain kinds of obstruc-
tions, such as thin objects, and the window
would continue closing.
00320051004F004C00510048000300280047004C0057004C005200510003
Page 48 of 311
43
Opening and closing
Controls
Do not install any accessories that might inter-
fere with window movement. Otherwise, the
pinch protection system could be impaired.
Convertible: the rear windows are not equipped
with pinch protection. Therefore, watch them
closely when closing to avoid personal injury.
<
Closing without pinch protection
If there is an external danger, or if ice on the
windows, etc., prevents you from closing the
windows normally, proceed as follows:
1.Pull the switch past the resistance point and
hold it there. Pinch protection is limited and
the window reopens slightly if the closing
force exceeds a certain value.
2. Pull the switch again past the resistance
point within approx. 4 seconds and hold it
there. The window closes without pinch
protection.
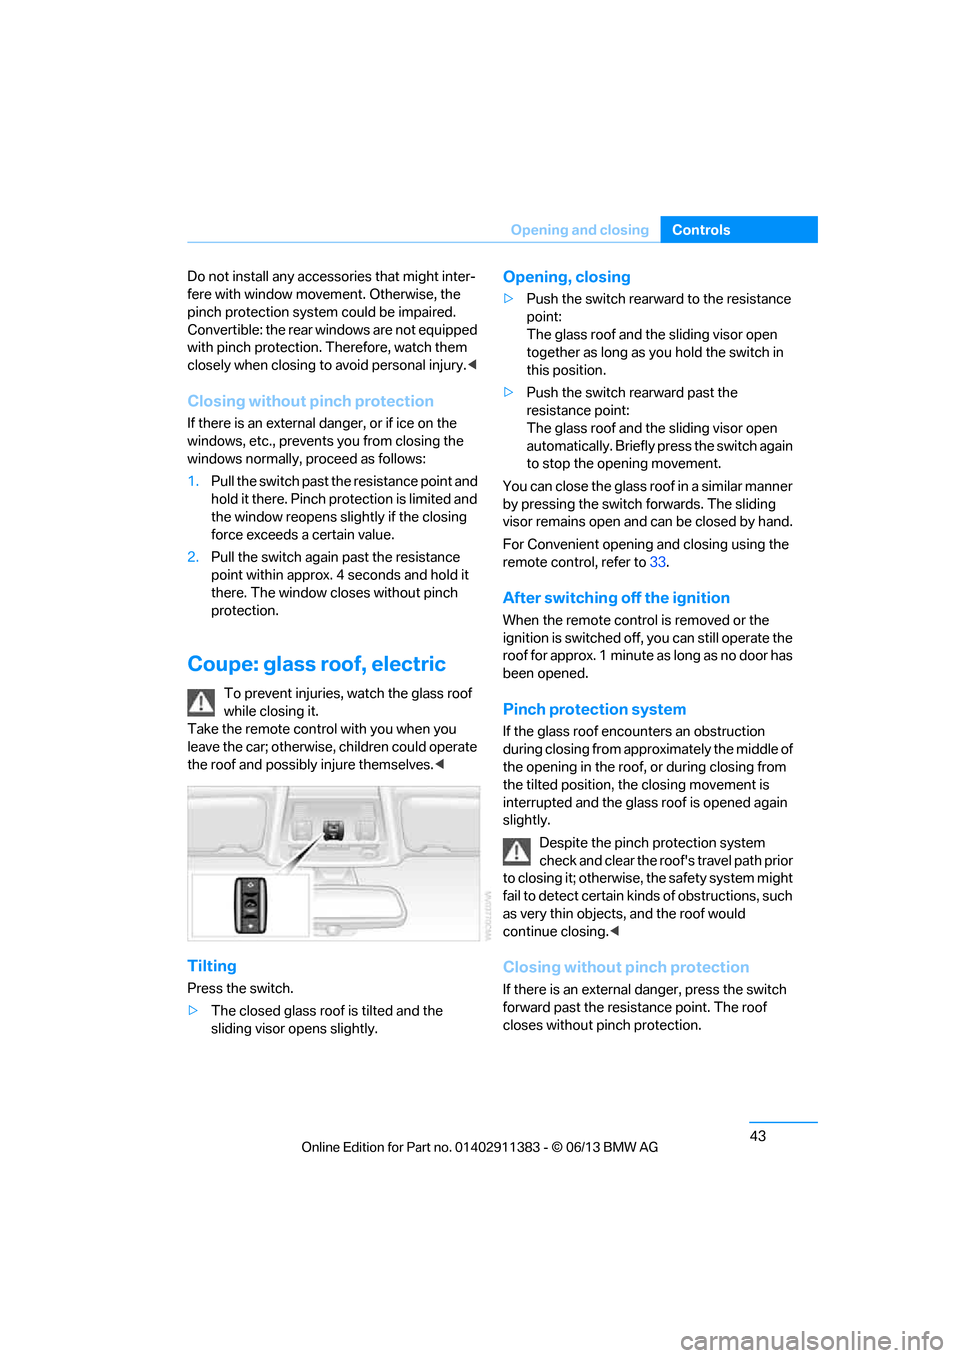
Coupe: glass roof, electric
To prevent injuries, watch the glass roof
while closing it.
Take the remote contro l with you when you
leave the car; otherwise, children could operate
the roof and possibly injure themselves. <
Tilting
Press the switch.
>The closed glass roof is tilted and the
sliding visor opens slightly.
Opening, closing
>Push the switch rearward to the resistance
point:
The glass roof and the sliding visor open
together as long as you hold the switch in
this position.
> Push the switch rearward past the
resistance point:
The glass roof and the sliding visor open
automatically. Briefly press the switch again
to stop the opening movement.
You can close the glass roof in a similar manner
by pressing the switch forwards. The sliding
visor remains open and can be closed by hand.
For Convenient opening and closing using the
remote control, refer to 33.
After switching off the ignition
When the remote contro l is removed or the
ignition is switched off, you can still operate the
roof for approx. 1 minute as long as no door has
been opened.
Pinch protection system
If the glass roof encounters an obstruction
during closing from approximately the middle of
the opening in the roof, or during closing from
the tilted position, the closing movement is
interrupted and the glass roof is opened again
slightly.
Despite the pinch protection system
check and clear the roof's travel path prior
to closing it; otherwise, the safety system might
fail to detect certain kinds of obstructions, such
as very thin objects, and the roof would
continue closing. <
Closing without pinch protection
If there is an external danger, press the switch
forward past the resistance point. The roof
closes without pinch protection.
00320051004F004C00510048000300280047004C0057004C005200510003
Page 49 of 311

44
ControlsOpening and closing
Following interruptions in electrical
power supply
After a power failure, there is a possibility that
the glass roof can only be tilted. The system
must be initialized. BMW recommends having
this work performed by your BMW center.
Convertible: retractable
hardtop
The retractable hardto p combines reliable
weather protection with simple and convenient
operation.
The following tips will enhance your driving
pleasure in your Convertible:
> It is advisable that you close the retractable
hardtop when you park the vehicle. Not only
does the closed hardtop protect the vehicle
interior against unanticipated weather dam-
age, it also offers theft protection. However,
even when the hardtop is closed, valuables
should only be stored in the locked trunk.
> Do not attach roof rack systems to the
retractable hardtop, and in particular do not
attach magnetic racks.
> Do not attach rack sy stems to the trunk lid,
and in particular do not attach magnetic
racks.
> When the retractable hardtop is operated,
the trunk lid swings back and up. Before
operating the retracta ble hardtop, ensure
that there is enough clearance, e.g. when
parked in front of a wall.
> If you open the hardtop while it is wet, e.g.
after driving in the rain, water may drip into
the trunk. If necessary, remove items from
the trunk beforehand to avoid water stains
or soiling. Do not place any objects on the retract-
able hardtop or on
the trunk lid; other-
wise, they could fall du ring movements of the
retractable hardtop and cause damage or injury.
Never move the retractable hardtop when the
rollover protection system is in the activated
position.
Driving when the hardtop is not fully opened or
closed may result in damage or injury.
Do not reach into the mechanism during the
opening or closing procedure. Keep children
away from the swiveling area of the retractable
hardtop. <
The retractabl e hardtop cannot be moved
at temperatures below + 14 7/–10 6.
A message appears on the Control Display. <
The retractable hard top can only be
opened and closed when the vehicle is
stationary. To avoid causing damage, do not
drive off until the hardtop has stopped
moving. <
Before opening and closing
>Comply with the safety precautions
described above.
> Ensure that the trunk partition is folded
down and engaged on both sides, refer to
page 128; otherwise, it will not be possible
to open the retractable hardtop.
> Do not place any objects near or on the
trunk partition, refer to page 128.
> Close the storage compartment on the left
side of the trunk.
> Observe the maximum loading height under
the trunk partition.
> Ensure that the trunk lid is closed.
> The vehicle should be pa rked on fairly level
ground. Excessive angle is indicated by a
lamp.
00320051004F004C00510048000300280047004C0057004C005200510003
Page 50 of 311

45
Opening and closing
Controls
Before moving the ha
rdtop, make sure
that there are no objects on or next to the
trunk partition, the storage compartment on the
left side of the trunk is closed, and the maximum
loading height in th e trunk has not been
exceeded; otherwise, damage may occur. <
Opening and closing
When the vehicle is stationary and at radio
readiness or beyond, refer to page62:
If possible, conserve the battery by only
operating the retractable hardtop when
the engine is running.
Before closing the retractable hardtop, remove
all foreign objects from the windshield frame as
these could prevent the hardtop from closing
properly. <
1 Push button: open th e retractable hardtop.
Pull button: close the retractable hardtop.
2 LEDs
The side windows move down when the
switch for hardtop operation is pulled or
pushed. <
LEDs
In the following situations, a message appears
on the Control Display or an acoustic signal
sounds in addition to the LED lighting up:
>While the hardtop is be ing operated, the left
LED lights up green. It goes out as soon as
the top is fully op ened or closed. >
If the right-hand LED flashes red when you
release the switch, the opening or closing
action has not yet finished.
> If the right LED lights up red when the
switch is pressed, the trunk partition is
folded up, the trunk lid is not closed, the
vehicle is standing on a strong incline or
there is a malfunction. The retractable hard-
top cannot be moved.
Interruption
The automatic sequence of movements is
interrupted if the switch for hardtop operation is
released. The sequence can be continued in
the desired direction by pushing or pulling the
switch.
A hardtop that is not fully opened or
closed is a safety hazard.
Do not interrupt and resume the closing proce-
dure several times in close succession as this
could damage the mechanism. <
If the hardtop is not fully opened or
closed, the trunk lid cannot be opened
and the windows cannot be moved. <
Convenient opening and closing using
the remote control
Refer to pages34.
Wind deflector
The wind deflector keeps air movements in the
passenger compartment to a minimum when
the hardtop is open and provides an even more
comfortable ride, particularly at high speeds.
00320051004F004C00510048000300280047004C0057004C005200510003
Page 51 of 311

46
ControlsOpening and closing
Installation
The wind deflector is stored in a protective
cover in the trunk. Brief instructions for opera-
tion can be found on the protective cover.
1.Remove the wind deflector from the
protective cover and unfold it, arrows 1.
2. Press together the to p and bottom parts of
the wind deflector until the catch engages,
arrow 2.
3. Push the fastening pin, arrow 3, into the
opening provided on the right side of the
vehicle until it snaps into place. Remove the
protective caps befo rehand, if necessary.
4. Push the fastening pin, arrow 4, into the
opening provided on the left side of the
vehicle until it snaps into place. 5.
Turn the rotary handle in the direction of
arrow 5 as far as the first stop to insert the
right fastening pin into the holders.
6. Turn the rotary handle in the direction of
arrow 6 as far as the symbol to insert the
left fastening pin into the holders.
7. Fold up the top section of the wind
deflector.
With the wind deflector installed: do not
recline the front-seat backrests too far if
the seat is to be slid all the way back, as this
would damage the wind deflector. <
Only turn the rotary handle within the
range between the two symbols; other-
wise, the cable system inside the wind deflector
could be damaged. <
Removing the wind deflector
Proceed in the revers e order as used for
installation.
Protective caps are provided in the vehicle for
the holders of the wind deflector.
Folding
Slide the red release leve r towards the middle of
the wind deflector and push the two halves
apart.
00320051004F004C00510048000300280047004C0057004C005200510003
Page 56 of 311

51
Adjustments
Controls
Head restraints
Correctly adjusted head restraint
A correctly adjusted head
restraint reduces the
risk of neck injury in the event of an accident.
Correctly adjust the he ad restraints of all
occupied seats; otherwise, there is an
increased risk of inju ry in an accident.<
Height
Adjust the head restraint so that its center is
approximately at ear level.
Distance
Adjust the distance so that the head restraint is
as close as possible to the back of the head.
Front active head restraints
In a rear collision of a sufficient strength, the
active head restraint re duces the distance to
the head.
Do not use seat or head restraint covers
that could impair the function of the active
head restraint.
Do not hang any items, e.g. clothes hangers,
directly on the head re straints. Attach only
BMW approved accessories to the seat or head
restraint.
Otherwise, the protective function of the active
head restraint will not be ensured and its full
potential in reducing the risk of injury in the
event of a rear collision may not be realized.
In the event of faults, immobilization, or after the
active head restraints have been triggered,
have the testing, repair, or disassembly per-
f o r m e d o n l y b y y o u r B M W c e n t e r o r a w o r k s h o p
that has the required explosives licenses.
Unprofessional attempts to work on the system
could lead to failure in an emergency or to
undesired airbag activation, either of which
could result in personal injury.<
For technical reasons, the head restraint
cannot be removed.<
Coupe: front seats
Height adjustment
> To raise: pull up.
> To lower: press the button, arrow 1, and
slide the head restraint down.
Convertible: front seats
Height adjustment
> To raise: press the button upward.
> To lower: press th e button downward.
Adjusting the distance to the back of
the head
>Forward: pull up.
> Back: press the button and push the head
cushion toward the rear.
00320051004F004C00510048000300280047004C0057004C005200510003
Page 57 of 311
52
ControlsAdjustments
Do not insert objects behind the head
cushion; otherwise, the head restraint
may not function properly. <
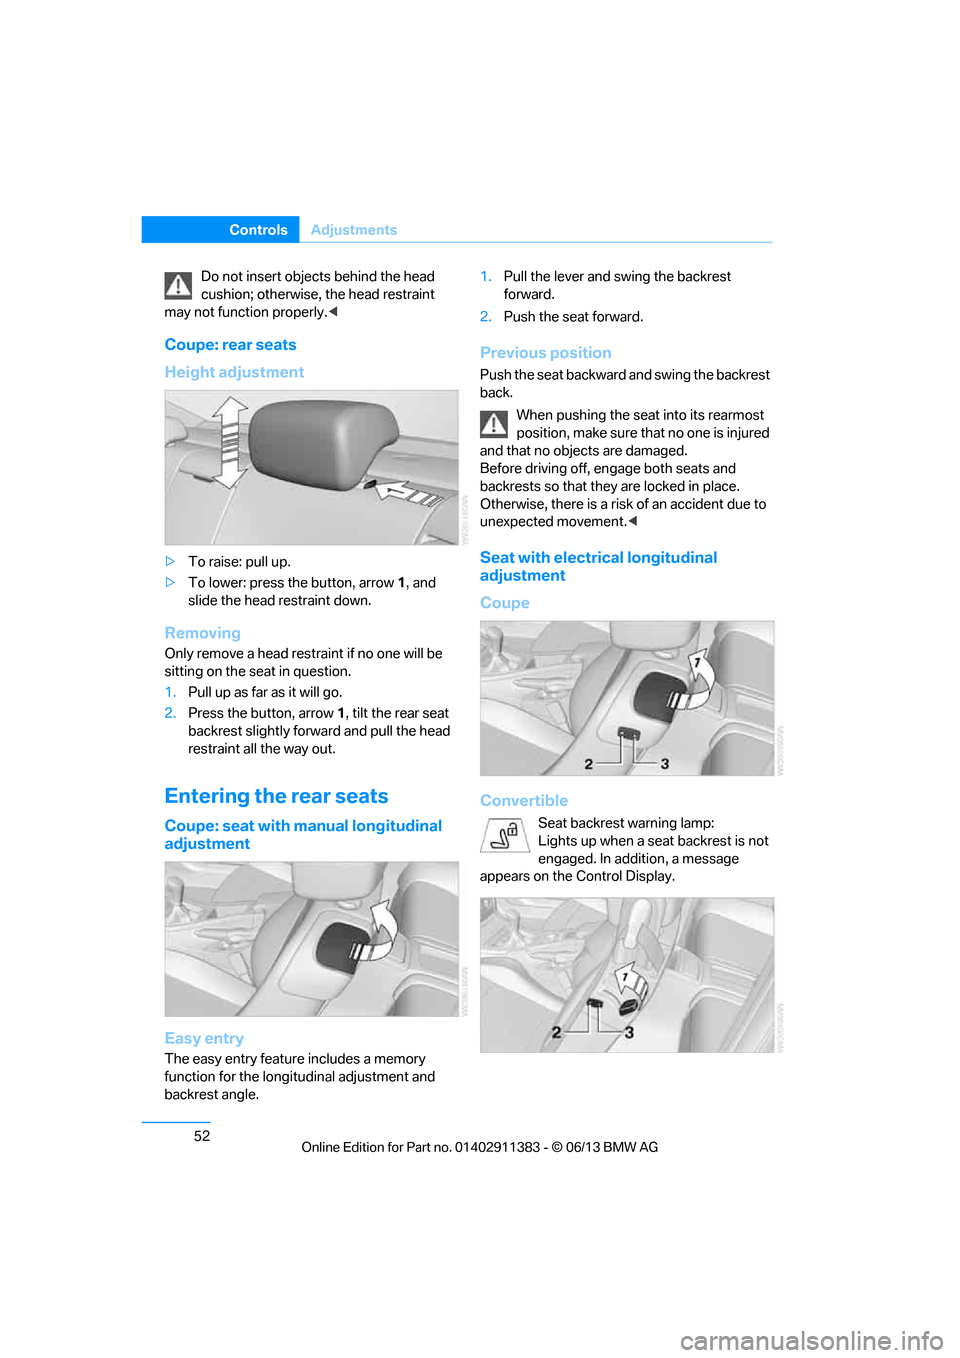
Coupe: rear seats
Height adjustment
>To raise: pull up.
> To lower: press the button, arrow 1, and
slide the head restraint down.
Removing
Only remove a head rest raint if no one will be
sitting on the seat in question.
1. Pull up as far as it will go.
2. Press the button, arrow 1, tilt the rear seat
backrest slightly forward and pull the head
restraint all the way out.
Entering the rear seats
Coupe: seat with manual longitudinal
adjustment
Easy entry
The easy entry feature includes a memory
function for the longitudinal adjustment and
backrest angle. 1.
Pull the lever and swing the backrest
forward.
2. Push the seat forward.
Previous position
Push the seat backward and swing the backrest
back.
When pushing the seat into its rearmost
position, make sure that no one is injured
and that no objects are damaged.
Before driving off, en gage both seats and
backrests so that they are locked in place.
Otherwise, there is a risk of an accident due to
unexpected movement. <
Seat with electrical longitudinal
adjustment
Coupe
Convertible
Seat backrest warning lamp:
Lights up when a seat backrest is not
engaged. In addition, a message
appears on the Control Display.
00320051004F004C00510048000300280047004C0057004C005200510003