2013 BMW 135I COUPE ESP
[x] Cancel search: ESPPage 225 of 284

224
MobilityWheels and tires
Tire inflation pressures for driving up to
100 mph or 160 km/h
For normal driving up to 100 mph or 160 km/h
and to achieve optimum driving comfort, adjust
pressures to the respecti ve tire inflation pres-
sures listed on the following pages in the col-
umns for traveling speeds up to a maximum of
100 mph or 160 km/h.
These tire inflation pre ssures can also be found
on the driver's side door pillar when the driver's
door is open.
The maximum permissible speed for
these tire pressures is 100 mph or
160 km/h. Do not exceed this speed; otherwise,
tire damage and accidents could occur. <
Tire inflation pressures for driving
above 100 mph or 160 km/h
In order to drive at maximum speeds in
excess of 100 mph or 160 km/h, adjust
pressures to the respecti ve tire inflation pres-
sures listed on the following pages in the col-
umns for traveling speeds including those
exceeding 100 mph or 160 km/h. Otherwise,
tire damage and accidents could occur. <
Observe all national an d local maximum speed
limits; otherwise, violations of the laws could
occur.
00320051004F004C00510048000300280047004C0057004C005200510003
Page 230 of 284
229
Wheels and tires
Mobility
The traction grade assigned to this tire is
based on straight-ahe
ad braking traction
tests, and does not include acceleration,
cornering, hydroplaning, or peak traction
characteristics. <
Temperature
The temperature grades are A, the highest, B,
and C, representing the ti re's resistance to the
generation of heat and its ability to dissipate
heat when tested under controlled conditions
on a specified indoor laboratory test wheel.
Sustained high temperature can cause the
material of the tire to degenerate and reduce
tire life, and excessive temperature can lead to
sudden tire failure. The grade C corresponds to
a level of performance which all passenger car
tires must meet under the Federal Motor Vehi-
cle Safety Standard No. 109. Grades B and A
represent higher levels of performance on the
laboratory test whee l than the minimum
required by law.
The temperature grade for this tire is
established for a tire that is properly
inflated and not overloaded. Excessive speed,
underinflation, or exce ssive loading, either
separately or in combin ation, can cause heat
buildup and possible tire failure. <
RSC – run-flat tires
You will recognize run-flat tires by a circular
symbol containing the letters RSC on the side
of the tire, refer to page230.
M+S
Winter and all-season tires.
These have better wint er properties than
summer tires.
XL
Designation for specia lly reinforced tires.
Tire condition
Inspect your tires frequently for tread wear,
signs of damage and for foreign objects lodged
in the tread. Check the tread depth.
Minimum tread depth
The tread depth should not drop below 0.12 in/
3 mm, although, for example, European legisla-
tion only specifies a minimum tread depth of
0.063 in/1.6 mm. At tread depths below 0.12 in/
3 mm there is an increased risk of high-speed
hydroplaning, even when only small amounts of
water are present on the road surface.
When winter tires wear down past a tread depth
of 0.16 in/4 mm, they be come perceptibly less
suitable for winter condit ions. In the interest of
safety, new tires sh ould be installed.
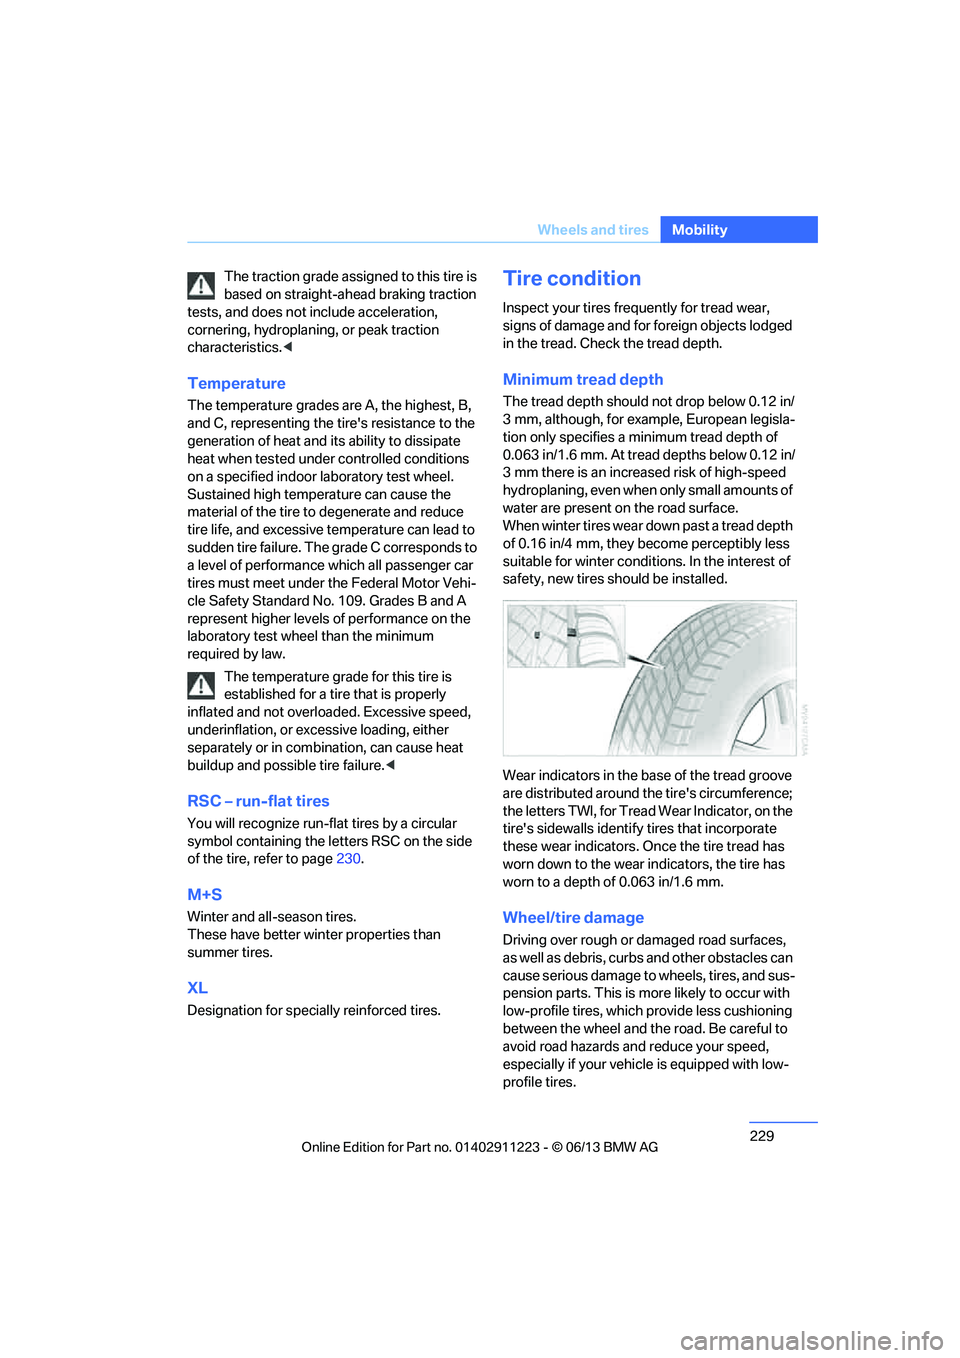
Wear indicators in the base of the tread groove
are distributed around th e tire's circumference;
the letters TWI, for Tread Wear Indicator, on the
tire's sidewalls identify tires that incorporate
these wear indicators. On ce the tire tread has
worn down to the wear indicators, the tire has
worn to a depth of 0.063 in/1.6 mm.
Wheel/tire damage
Driving over rough or damaged road surfaces,
as well as debris, curbs and other obstacles can
cause serious damage to wheels, tires, and sus-
pension parts. This is more likely to occur with
low-profile tires, which provide less cushioning
between the wheel and th e road. Be careful to
avoid road hazards and reduce your speed,
especially if your vehi cle is equipped with low-
profile tires.
00320051004F004C00510048000300280047004C0057004C005200510003
Page 231 of 284

230
MobilityWheels and tires
Unusual vibrations encountered during normal
vehicle operation can indicate tire failure or
some other vehicle defect. This can, for exam-
ple, be caused by driving over curbs. The same
applies to any other abnormal road behavior,
such as pulling severely to the right or left.
In these cases, reduce speed immedi-
ately and have wheels and tires thor-
oughly checked. To do so , drive carefully to the
nearest BMW center or tire dealer. If necessary,
have the vehicle towed there.
O t h e r w i s e , t i r e d a m a g e c a n p o s e a l e t h a l h a z a r d
to vehicle occupants and other road users. <
Tire age
For various reasons, such as the development
of brittleness, BMW recommends tire replace-
ment after no more than 6 years, regardless of
the actual wear of the tires.
The manufacturing date of tires is contained in
the tire coding:
DOT ... 1013 means that the tire was manufac-
tured in week 10 of 2013.
New wheels and tires
Have new wheels and tires mounted only
by your BMW center or by a tire dealer. If
this work is not carried out properly, there is a
danger of subsequent damage and related
safety hazards. Make sure that the new wheels
are balanced. <
Retreaded tires
BMW recommends that you do not use
retreaded tires, since driving safety may
be impaired. The causes for this include poten-
tially different tire casing structures and often
wide variations in tire ag e, which can result in a
limited service life. <
Correct wheels and tires
When mounting new tires or changing over
from summer to winter tires and vice versa,
mount run-flat tires for your own safety. In the
event of a flat, no spare wheel is available. Your
BMW center will be glad to advise you.
BMW recommends that you use only
wheel and tire combinations that BMW
has tested and approved for your particular
vehicle. Variations in factors such as manufac-
turing tolerances mean that even wheels and
tires with identical offi cial size ratings could
actually have different dimensions, which could
lead to body contact an d thus to severe acci-
dents. If non-approved wheels and tires are
used, BMW cannot evaluate their suitability,
and therefore cannot guarantee their driving
safety. <
You can inquire about the right wheel/tire
combination at your BMW center.
The correct combination of wheels and tires is
also necessary to ensure reliable operation of
various vehicle systems such as ABS, DSC or
FTM.
To maintain good handling and vehicle
response, use only tires of a single brand and
tread configuration. Af ter a tire has been
damaged, mount the previous wheel and tire
combination again as soon as possible.
Wheels with Tire Pressure Monitor
TPM electronics
When mounting new tires or changing over
from summer to winter tires, or vice versa, only
use wheels with TPM electronics; otherwise,
the Tire Pressure Monito r may not be able to
detect a puncture, refer to page 94. Your BMW
center will be glad to advise you.
00320051004F004C00510048000300280047004C0057004C005200510003
Page 236 of 284
235
Engine compartment
Mobility
Have the vehicle checked immedi-
ately; otherwise, the excess oil may
lead to engine damage. <
> "Measurement inactive. Have this
checked.":
Do not add engine oil. Before continuing to
drive, note the recalc ulated remaining mile-
age until the next oil ch ange service, refer to
Service requirements on page 80. Have the
system checked as soon as possible.
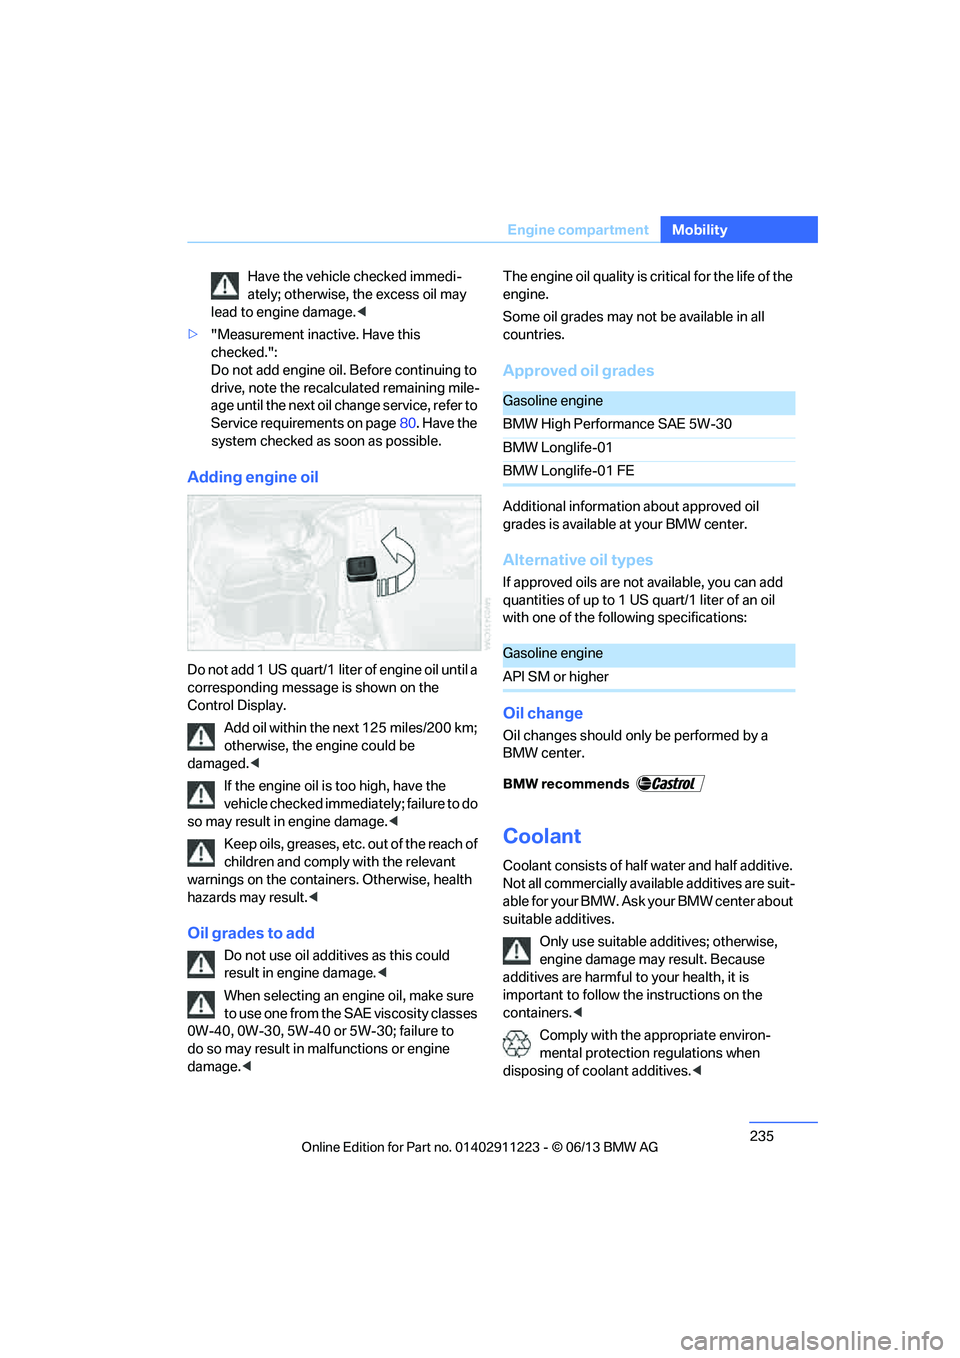
Adding engine oil
Do not add 1 US quart/1 liter of engine oil until a
corresponding message is shown on the
Control Display.
Add oil within the next 125 miles/200 km;
otherwise, the engine could be
damaged. <
If the engine oil is too high, have the
vehicle checked immediately; failure to do
so may result in engine damage. <
Keep oils, greases, etc. out of the reach of
children and comply with the relevant
warnings on the containers. Otherwise, health
hazards may result.<
Oil grades to add
Do not use oil additives as this could
result in engine damage. <
When selecting an engi ne oil, make sure
to use one from the SAE viscosity classes
0W-40, 0W-30, 5W-40 or 5W-30; failure to
do so may result in ma lfunctions or engine
damage. < The engine oil quality is critical for the life of the
engine.
Some oil grades may not be available in all
countries.
Approved oil grades
Additional information about approved oil
grades is available at your BMW center.
Alternative oil types
If approved oils are not available, you can add
quantities of up to 1 US quart/1 liter of an oil
with one of the following specifications:
Oil change
Oil changes should only be performed by a
BMW center.
Coolant
Coolant consists of half
water and half additive.
Not all commercially availa ble additives are suit-
able for your BMW. Ask your BMW center about
suitable additives.
Only use suitable a dditives; otherwise,
engine damage may result. Because
additives are harmful to your health, it is
important to follow the instructions on the
containers. <
Comply with the appropriate environ-
mental protection regulations when
disposing of coolant additives. <
Gasoline engine
BMW High Performance SAE 5W-30
BMW Longlife-01
BMW Longlife-01 FE
Gasoline engine
API SM or higher
00320051004F004C00510048000300280047004C0057004C005200510003
Page 237 of 284
236
MobilityEngine compartment
Coolant temperature
If the coolant and therefore the engine over-
heats, a warning lamp lights up. A message
appears on the Control Display.
Checking coolant level
Do not add coolant to the cooling system
when the engine is ho t. Escaping coolant
can cause burns. <
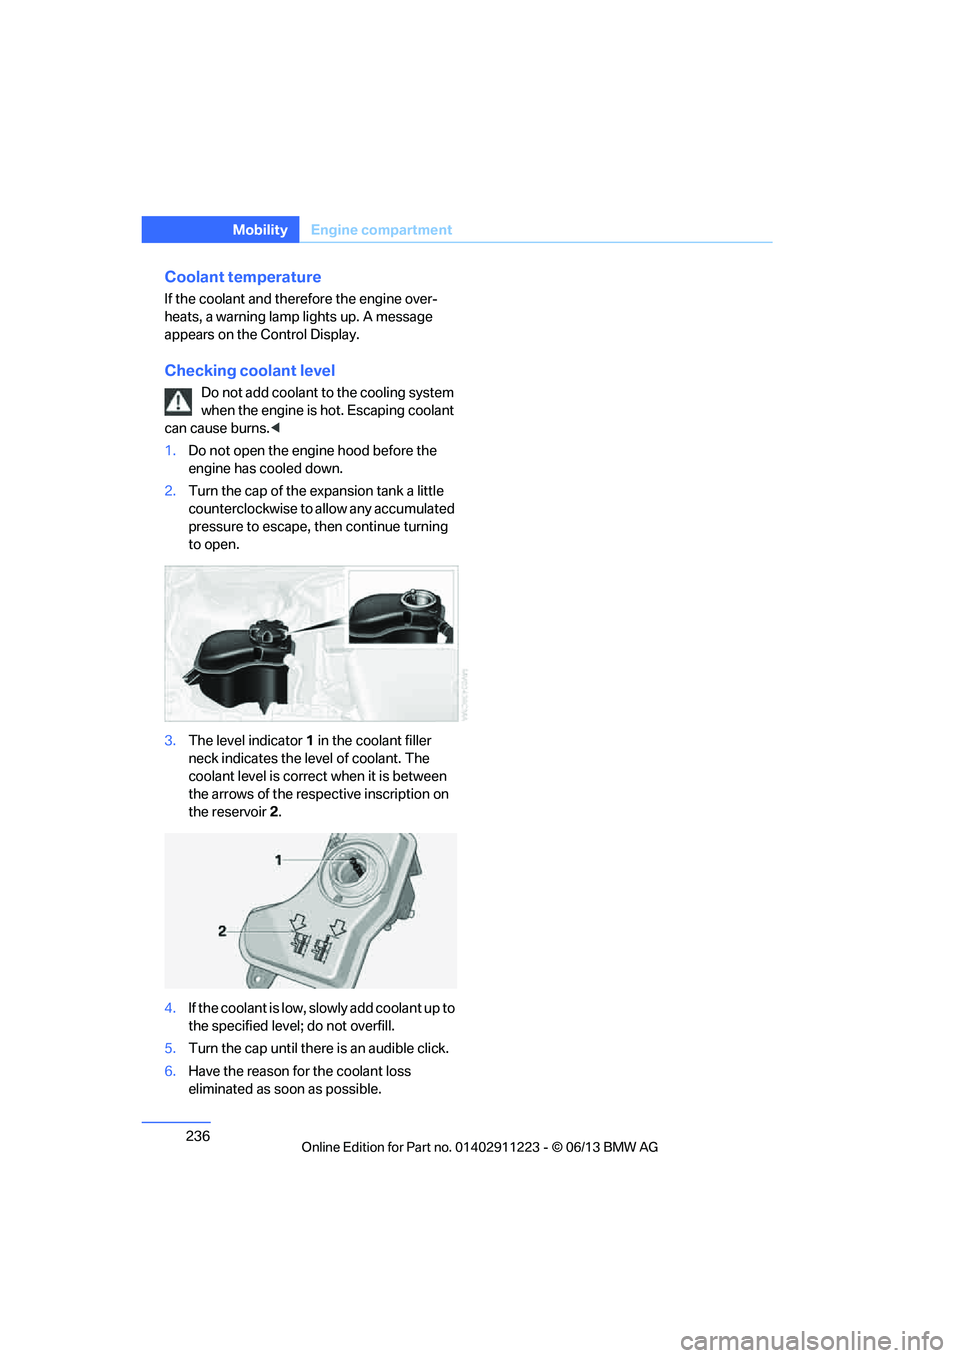
1. Do not open the engine hood before the
engine has cooled down.
2. Turn the cap of the expansion tank a little
counterclockwise to allow any accumulated
pressure to escape, th en continue turning
to open.
3. The level indicator 1 in the coolant filler
neck indicates the level of coolant. The
coolant level is correct when it is between
the arrows of the respective inscription on
the reservoir 2.
4. If the coolant is low, sl owly add coolant up to
the specified level; do not overfill.
5. Turn the cap until there is an audible click.
6. Have the reason for the coolant loss
eliminated as so on as possible.
00320051004F004C00510048000300280047004C0057004C005200510003
Page 239 of 284
238
MobilityMaintenance
Socket for Onboard
Diagnosis OBD
The socket for onboard diagnosis should
only be used by your BMW center or at a
workshop that works according to BMW repair
procedures with correspondingly trained per-
sonnel and by otherwise authorized personnel;
otherwise, use can result in malfunctioning of
the vehicle.<
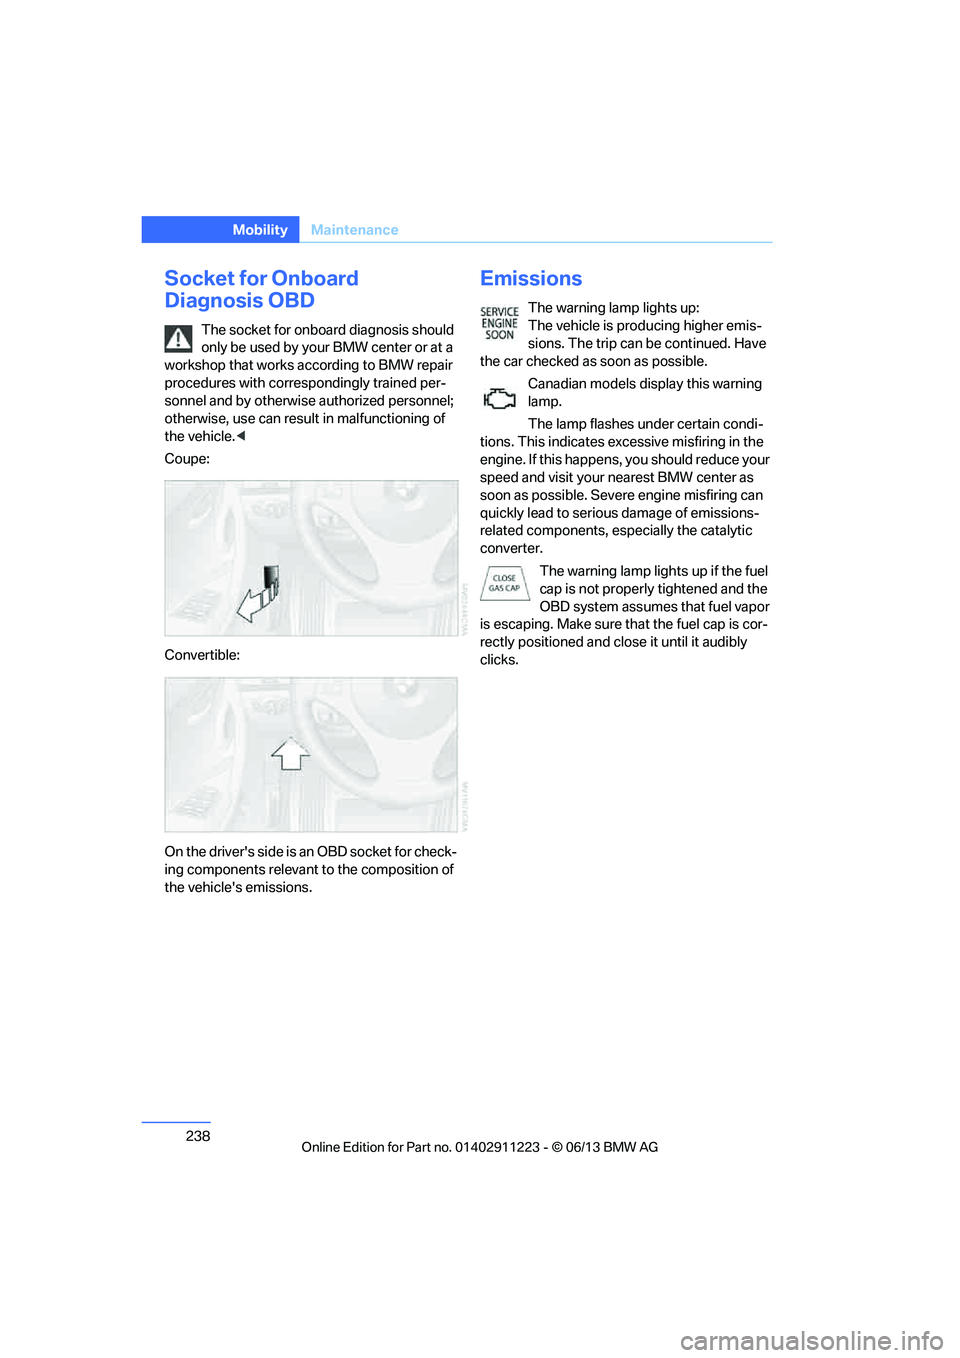
Coupe:
Convertible:
On the driver's side is an OBD socket for check-
ing components relevant to the composition of
the vehicle's emissions.
Emissions
The warning lamp lights up:
The vehicle is producing higher emis-
sions. The trip can be continued. Have
the car checked as soon as possible.
Canadian models display this warning
lamp.
The lamp flashes under certain condi-
tions. This indicates ex cessive misfiring in the
engine. If this happens, you should reduce your
speed and visit your nearest BMW center as
soon as possible. Severe engine misfiring can
quickly lead to serious damage of emissions-
related components, especially the catalytic
converter.
The warning lamp lights up if the fuel
cap is not properly tightened and the
OBD system assumes that fuel vapor
is escaping. Make sure that the fuel cap is cor-
rectly positioned and cl ose it until it audibly
clicks.
00320051004F004C00510048000300280047004C0057004C005200510003
Page 243 of 284

242
MobilityCare
Carpet and floor mats
Keep floor mats, carpet, and other objects
out of the movement range of the pedals;
otherwise, they may inhi bit the function of the
pedals during driving.
Do not place additional floor mats onto an
existing one or onto other objects.
Only use floor mats that have been approved for
the vehicle and can be appropriately fastened.
Make sure that the floo r mats are securely fas-
tened again after they ha ve been removed, e.g.
for cleaning. <
Floor mats can be removed for the cleaning of
the passenger compartment.
When inserting the floor mats, secure them
again to prevent slippage.
When carpets are heavily soiled, clean with a
microfibre cloth and water or textile cleaner.
When doing so, rub back and forth in the direc-
tion of travel; otherwise, the carpet may
become matted.
Sensors/cameras
Use a microfibre cloth moistened with some
glass cleaner for cleani ng sensors or cameras.
Displays/screens
Use an antistatic microfibre cloth for cleaning
displays.
Do not use chemical or abrasive house-
hold cleaning agents. Keep all types of
fluid and moisture away from the device. Other-
wise, surfaces or electrical components may be
corroded or damaged. When cleaning, avoid
excessive pressure and do not use abrasive
materials; otherwise, you may damage them. <
Convertible top care
The appearance and service life of the convert-
ible top largely depends on its proper care and
operation.
Please follow these instructions:
>Never attempt to fold and stow the convert-
ible top in the convertible compartment
when the top is wet or frozen. Otherwise,
water stains, mildew, and chafe marks may
occur.
> If water spots occur on the inside headliner
despite precautions, remove them using a
microfiber cloth and interior cleaner.
> If the vehicle is parked in an enclosed area
for a longer period of time, make sure that
there is sufficient ventilation.
> Remove any bird droppings immediately,
since they have corrosive properties which
will corrode the conver tible top and damage
the rubber seals.
To remove stains from the convertible
top, do not use stain removers, paint thin-
ners, solvents, benzine or similar substances.
These cleaners may damage the rubber seals.
The improper care or cleaning methods may
cause the convertible top and its seams to
leak. <
To remove heavy soiling, use a special convert-
ible top cleaner.
Always read and follow the manufacturer's
instructions.
After washing the convertible top three to five
times, treat it with an impregnating agent.
Vehicle storage
Your BMW center will be happy to advise you on
preparatory steps for parking the vehicle for
more than three months.
00320051004F004C00510048000300280047004C0057004C005200510003
Page 245 of 284
244
MobilityReplacing components
Headlight lenses
In cool or humid weather, condensation may
form on the interior of outside lamps. The con-
densation will disappear after a short time when
driving with the headlamps switched on. The
headlamp glasses do not need to be changed.
If the headlamps do not defrost despite driving
with the headlamps switch ed on, and additional
moisture builds up, for example water droplets
in the lamps, have them checked by your BMW
center.
Xenon lamps
These bulbs have a very long service life and are
highly unlikely to fail. If a xenon lamp fails never-
theless, switch on the fog lamps and continue
the journey with great ca re, provided that local
legislation does not prohibit this.
Have all work on the xenon lamp system
performed only by your BMW center. Due
to high voltage, there is a risk of fatal injury if
work on the xenon lamps is carried out
improperly. <
Removing the headlamp cover
1.Pull the wire brackets over the notches, see
arrows, and fold to the side.
2. Fold away the headlamp cover.
Be careful when attaching the headlamp
cover and ensure that both wire brackets
are securely in place; otherwise, leaks could
occur and cause damage to the headlamp
system. <
Attach the headlamp cover in reverse order.
Halogen headlamps
Halogen low beams and high beams
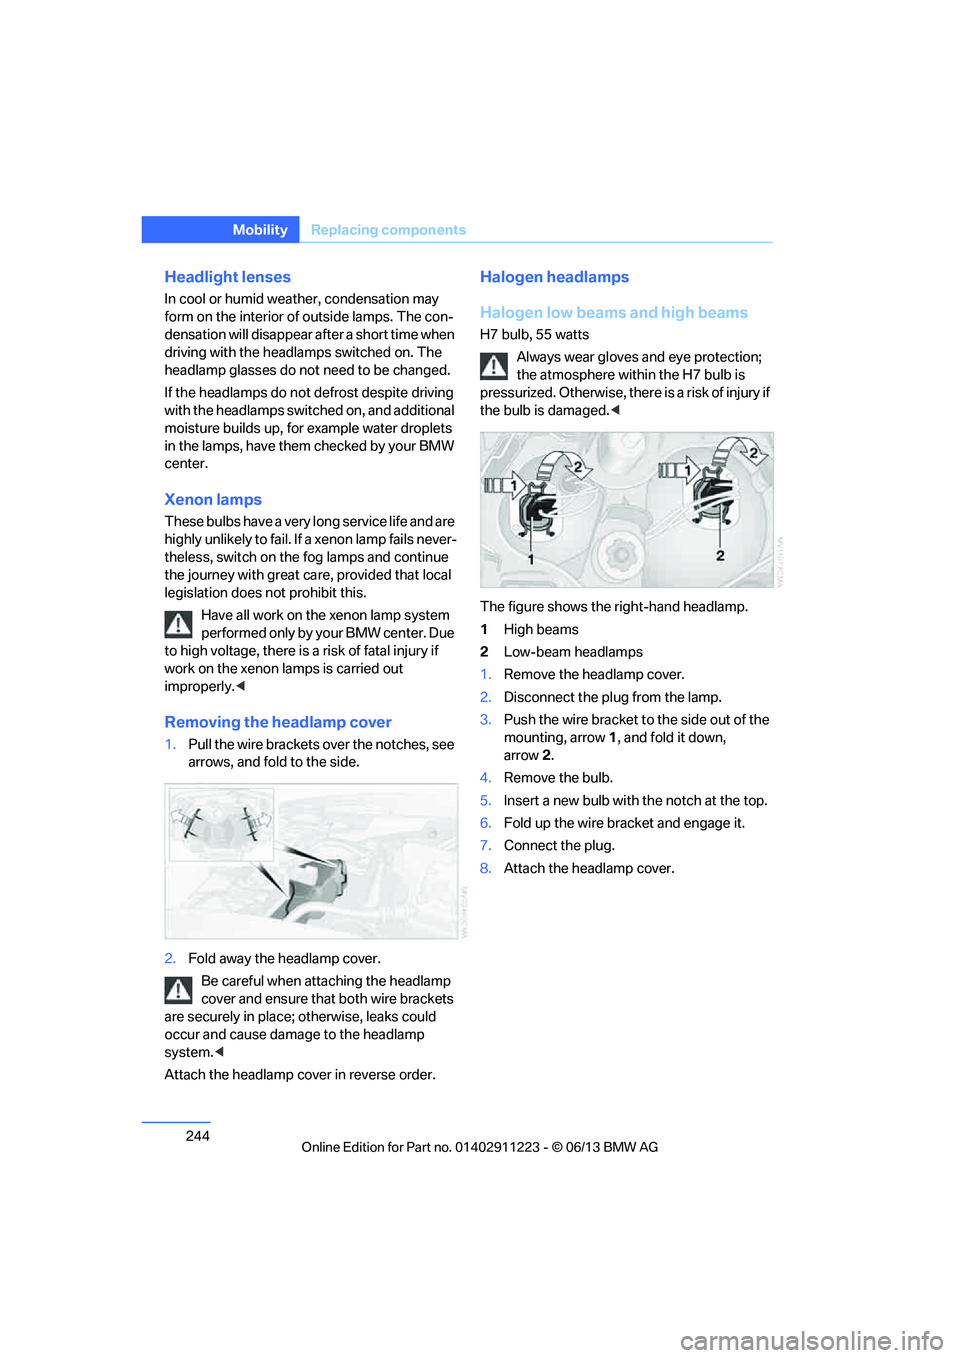
H7 bulb, 55 watts Always wear gloves and eye protection;
the atmosphere within the H7 bulb is
pressurized. Otherwise, ther e is a risk of injury if
the bulb is damaged. <
The figure shows the right-hand headlamp.
1 High beams
2 Low-beam headlamps
1. Remove the headlamp cover.
2. Disconnect the plug from the lamp.
3. Push the wire bracket to the side out of the
mounting, arrow 1, and fold it down,
arrow 2.
4. Remove the bulb.
5. Insert a new bulb with the notch at the top.
6. Fold up the wire bracket and engage it.
7. Connect the plug.
8. Attach the headlamp cover.
00320051004F004C00510048000300280047004C0057004C005200510003