2013 BMW 135I CONVERTIBLE power steering
[x] Cancel search: power steeringPage 67 of 284
66
ControlsDriving
>To upshift, briefly pull the right shift
paddle +.
> To downshift, briefly pull the left shift
paddle –.
Upshifts and downshifts are executed only
when they will result in a plausible combination
of engine and vehicle speed; thus, for example,
a downshift that would cause the engine to
overrev will not be exec uted by the system.
The gear selected is briefly displayed in the
instrument cluster, followed again by the gear
actually in use.
Overriding selector lever lock
If the selector lever will not move out of
position P even though the ignition is switched
on, the brake is depressed, and the button on
the selector lever is pre ssed, the selector lever
lock can be overridden:
1. Unclip the sleeve of the selector lever.
2. Pull the sleeve up over the selector lever
until the sleeve is inside out.
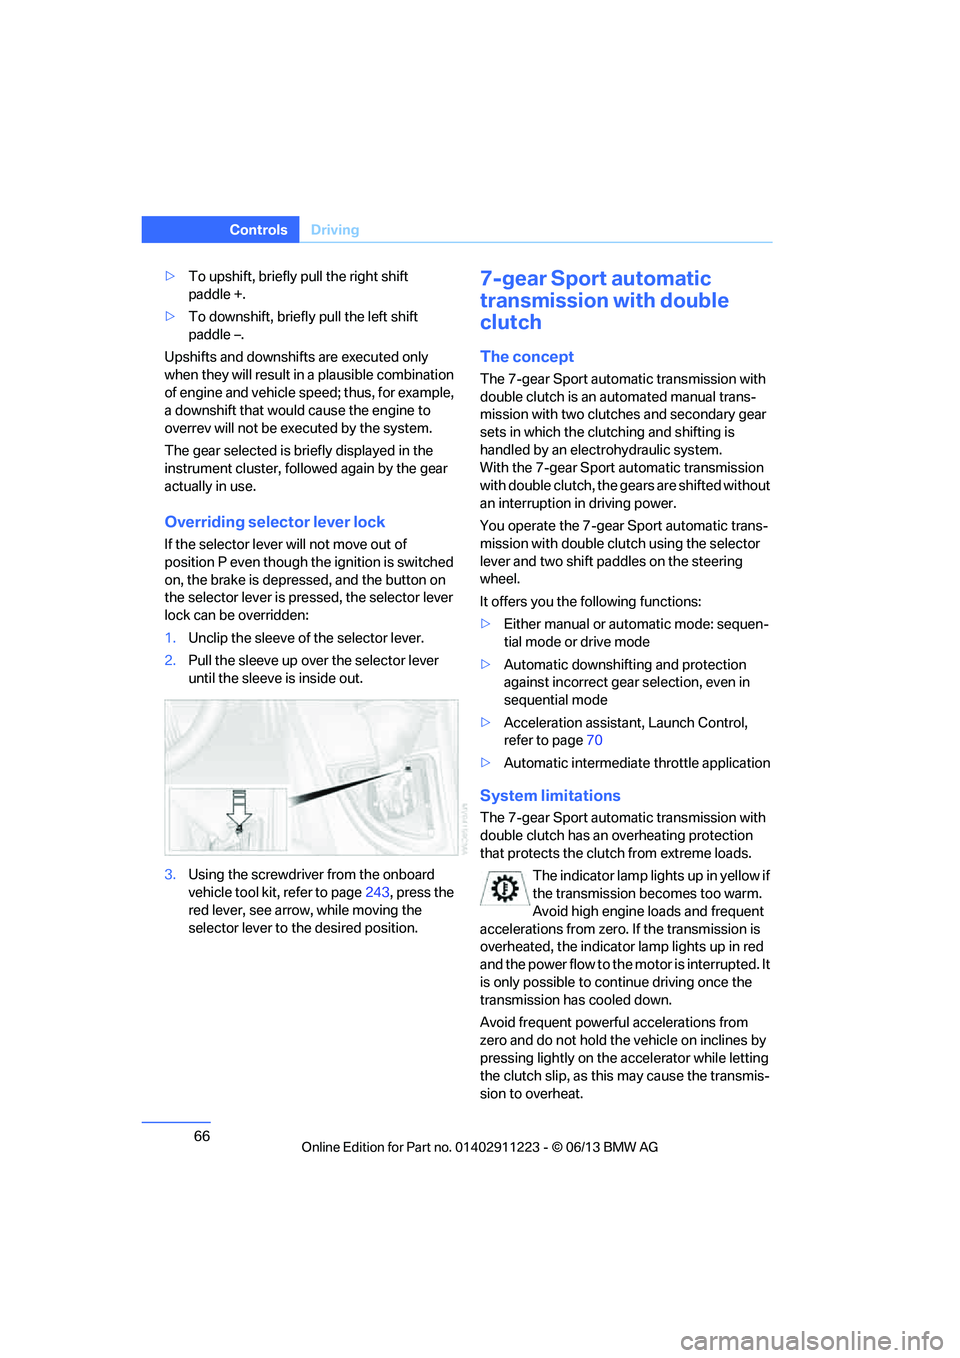
3. Using the screwdriver from the onboard
vehicle tool kit, refer to page 243, press the
red lever, see arrow, while moving the
selector lever to the desired position.
7-gear Sport automatic
transmission with double
clutch
The concept
The 7-gear Sport automatic transmission with
double clutch is an automated manual trans-
mission with two clutches and secondary gear
sets in which the clutching and shifting is
handled by an electr ohydraulic system.
With the 7-gear Sport automatic transmission
with double clutch, the gears are shifted without
an interruption in driving power.
You operate the 7-gear Sport automatic trans-
mission with double clutch using the selector
lever and two shift paddles on the steering
wheel.
It offers you the following functions:
> Either manual or au tomatic mode: sequen-
tial mode or drive mode
> Automatic downshifting and protection
against incorrect gear selection, even in
sequential mode
> Acceleration assistan t, Launch Control,
refer to page 70
> Automatic intermediate throttle application
System limitations
The 7-gear Sport automatic transmission with
double clutch has an overheating protection
that protects the clutch from extreme loads.
The indicator lamp lights up in yellow if
the transmission becomes too warm.
Avoid high engine loads and frequent
accelerations from zero. If the transmission is
overheated, the indicator lamp lights up in red
and the power flow to the motor is interrupted. It
is only possible to continue driving once the
transmission has cooled down.
Avoid frequent powerful accelerations from
zero and do not hold the vehicle on inclines by
pressing lightly on the accelerator while letting
the clutch slip, as this may cause the transmis-
sion to overheat.
00320051004F004C00510048000300280047004C0057004C005200510003
Page 74 of 284
73
Driving
Controls
United States: the washer
fluid mixture ratio is
regulated by the U.S. EPA and many individual
states; do not exceed the allowable washer fluid
dilution ratio limits that apply. Follow the usage
instructions on the washer fluid container. Use
BMW's Windshield Washer Concentrate or the
equivalent.
Washer fluid filler neck
Only add washer fluid after allowing the
engine to cool and close the cover com-
pletely in order to prevent the washer fluid from
contacting hot engine parts. Otherwise, fluid
spills or leaks constitute a fire hazard and a risk
to personal safety. <
All washer nozzles are supplied with washer
fluid by the same reservoir.
The recommended minimum filling quantity is
0.2 US gal/1 liter.
Fill with a mixture of window cleaner concen-
trate, tap water and, if required, with a washer
antifreeze, according to manufacturer's recom-
mendations.
Do not fill with und iluted window cleaner
concentrate or with pure water since these can
result in damage to the wiper system.
Do not mix window cleaner concentrates from
different manufacturers si nce this may clog the
washer nozzles.
Cruise control
The concept
You can use the cruise control feature begin-
ning at approx. 20 mph/30 km/h. The car then
stores and maintains the speed that you specify
using the lever on the steering column.
Do not use cruise control when driving at
constant speed is prevented by adverse
conditions, e.g. winding roads, dense traffic or
poor road conditions due to, e.g. snow, rain, ice
or loose surfaces. Otherwise, you could lose
control of the vehicle and cause an accident as a
result.<
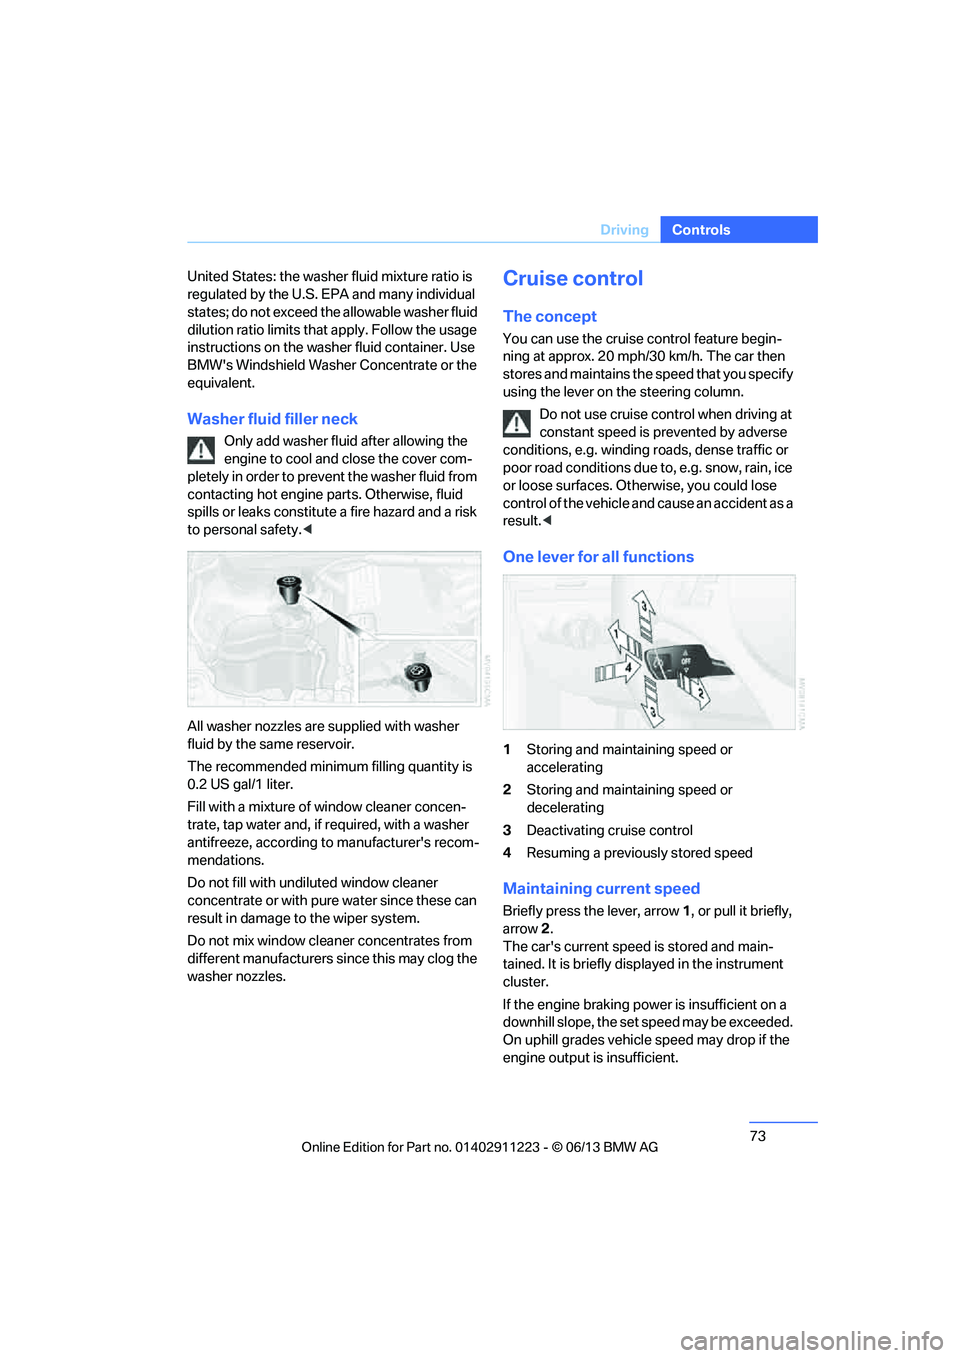
One lever for all functions
1 Storing and maintaining speed or
accelerating
2 Storing and maintaining speed or
decelerating
3 Deactivating cr uise control
4 Resuming a previously stored speed
Maintaining current speed
Briefly press the lever, arrow 1, or pull it briefly,
arrow 2 .
The car's current speed is stored and main-
tained. It is briefly disp layed in the instrument
cluster.
If the engine braking power is insufficient on a
downhill slope, the set speed may be exceeded.
On uphill grades vehicle speed may drop if the
engine output is insufficient.
00320051004F004C00510048000300280047004C0057004C005200510003
Page 97 of 284
96
ControlsTechnology for driving comfort and safety
Active steering
The concept
Active steering varies the turning angle of the
front wheels in relation to steering wheel move-
ments. It also varies the steering force required
to turn the wheels depending on the speed at
which you are driving.
When you are driving in the low speed range,
e.g. in a town or when parking, the steering
angle is increased, i.e. steering becomes very
direct and less effort is required to turn the
wheels. In the higher speed range, on the other
hand, the steering angle is reduced as the
speed increases. This improves the handling of
your BMW over the entire speed range.
In critical situations, the system can make tar-
geted corrections to th e steering angle pro-
vided by the driver and thus stabilize the vehicle
before the driver intervenes. This stabilizing
intervention is simult aneously deactivated
when DSC is switched off, refer to page 89.
Malfunction
The warning lamps come on. Active
steering is malfunctioning or is tem-
porarily deactivate d. At low speeds,
greater steering wheel movements
are required, whereas at higher speeds the
vehicle reacts more sensitively to steering
wheel movements. Th e stability-enhancing
feature may also be deactivated. Drive cau-
tiously and think well ahead.
Deactivation
Active steering is deacti vated to perform an ini-
tialization. A message indicates that the feature
is deactivated. Initializ ation may take several
minutes.
If the message does not disappear during the
current trip, have the system checked.
Defect
If there is a defect, a corresponding text mes-
sage appears. Have the system checked.
Servotronic
The concept
The Servotronic varies the steering force
required to turn the wh eels relative to the
vehicle speed.
At low speeds, the steering force is strongly
assisted, i.e. less force is needed for steering.
As the vehicle speed increases, the steering
assisting power is reduced.
This system functions automatically.
Malfunctions
The warning lamp lights up. A mes-
sage appears on the Control Display.
Servotronic is malfunctioning or has
failed. Steering response will be different. You
can continue your journey, but moderate your
speed and exercise due caution. Have the
system checked as soon as possible.
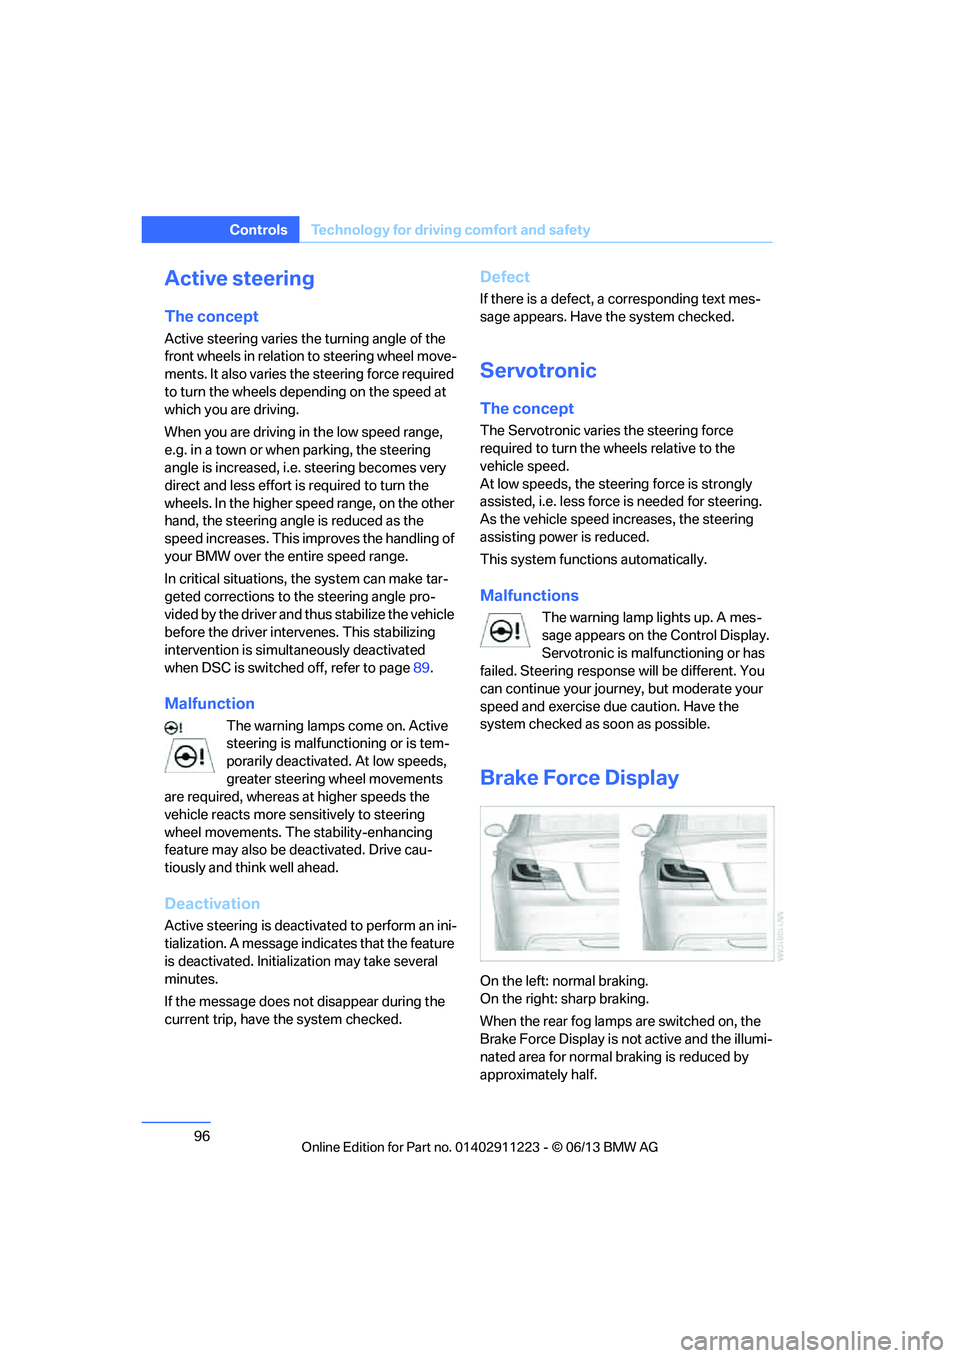
Brake Force Display
On the left: normal braking.
On the right: sharp braking.
When the rear fog lamps are switched on, the
Brake Force Display is no t active and the illumi-
nated area for normal braking is reduced by
approximately half.
00320051004F004C00510048000300280047004C0057004C005200510003
Page 103 of 284
102
ControlsLamps
angle and other parameters, the light from the
headlamp follows the course of the road.
In tight curves such as on switchbacks or when
turning, at speeds up to approx. 40 mph/
70 km/h, an additional, cornering light is
switched on that lights up the area inside the
curve.
Activating Adaptive Light Control
With the ignition switched on, turn the light
switch to position 3, refer to page 100.
The corner-illuminating lamp is switched on
automatically, depending on the steering wheel
angle or turn signal indicator.
Standstill function: to avoid blinding oncoming
traffic, the Adaptive Light Control does not
direct light toward the driver's side when the
vehicle is at a standstill.
When you are reversing, only the corner-illumi-
nating lamps are switched on and active on
both sides.
Malfunction
The warning lamp lights up. A mes-
sage appears on the Control Display.
The Adaptive Light Control is mal-
functioning or failed. Ha ve the system checked
as soon as possible.
High beams/roadside parking
lamps
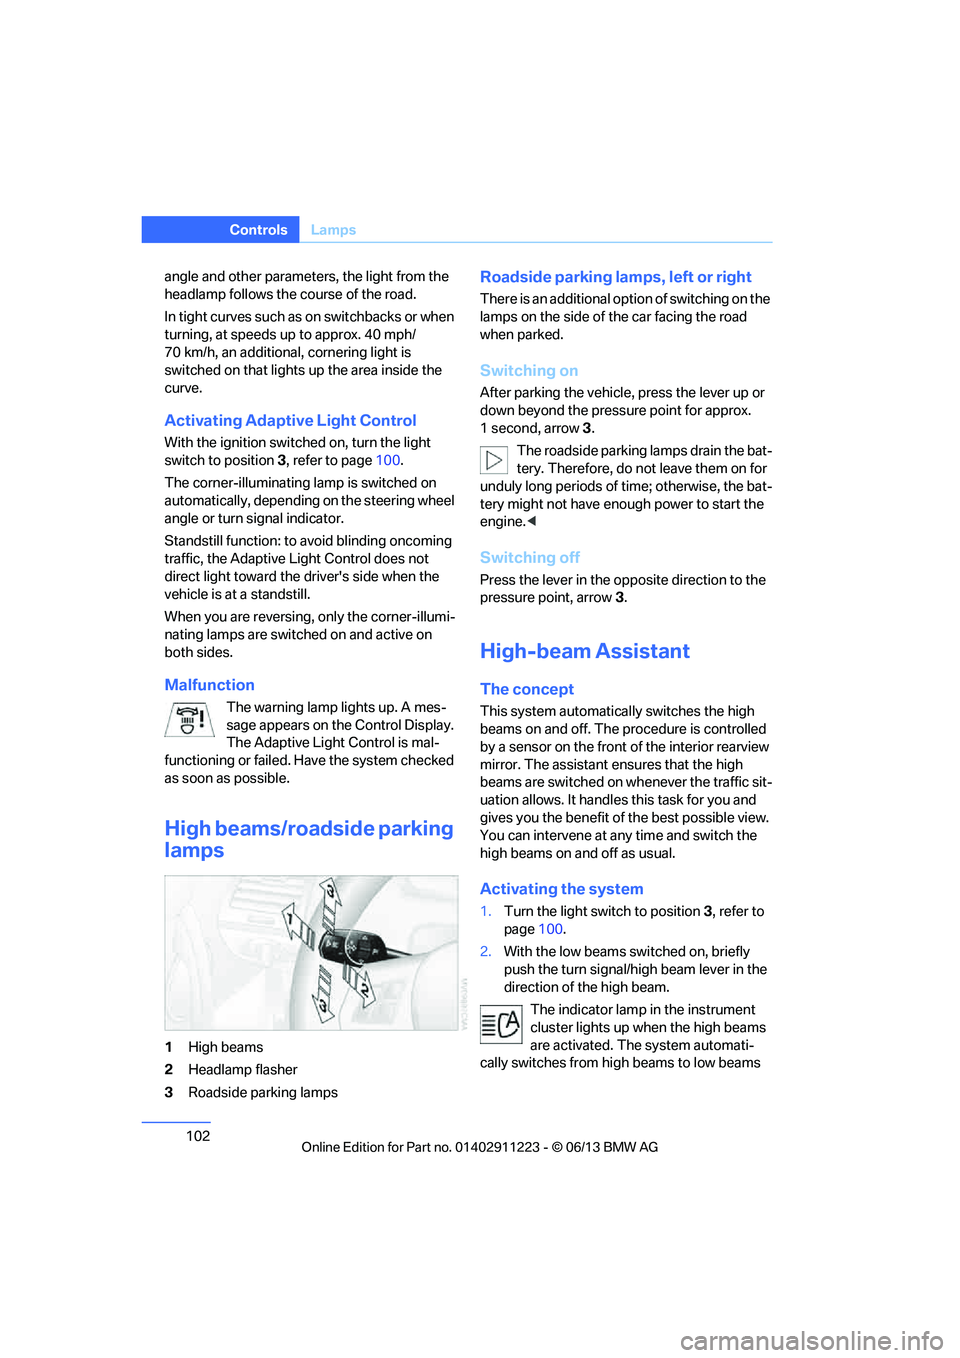
1 High beams
2 Headlamp flasher
3 Roadside parking lamps
Roadside parking lamps, left or right
There is an additional option of switching on the
lamps on the side of the car facing the road
when parked.
Switching on
After parking the vehicle, press the lever up or
down beyond the pressu re point for approx.
1 second, arrow 3.
The roadside parking lamps drain the bat-
tery. Therefore, do not leave them on for
unduly long periods of time; otherwise, the bat-
tery might not have enou gh power to start the
engine. <
Switching off
Press the lever in the o pposite direction to the
pressure point, arrow 3.
High-beam Assistant
The concept
This system automatically switches the high
beams on and off. The procedure is controlled
by a sensor on the front of the interior rearview
mirror. The assistant ensures that the high
beams are switched on whenever the traffic sit-
uation allows. It handle s this task for you and
gives you the benefit of the best possible view.
You can intervene at any time and switch the
high beams on and off as usual.
Activating the system
1. Turn the light switch to position 3, refer to
page 100.
2. With the low beams switched on, briefly
push the turn signal/high beam lever in the
direction of the high beam.
The indicator lamp in the instrument
cluster lights up when the high beams
are activated. The system automati-
cally switches from hi gh beams to low beams
00320051004F004C00510048000300280047004C0057004C005200510003
Page 115 of 284
114
ControlsPractical interior accessories
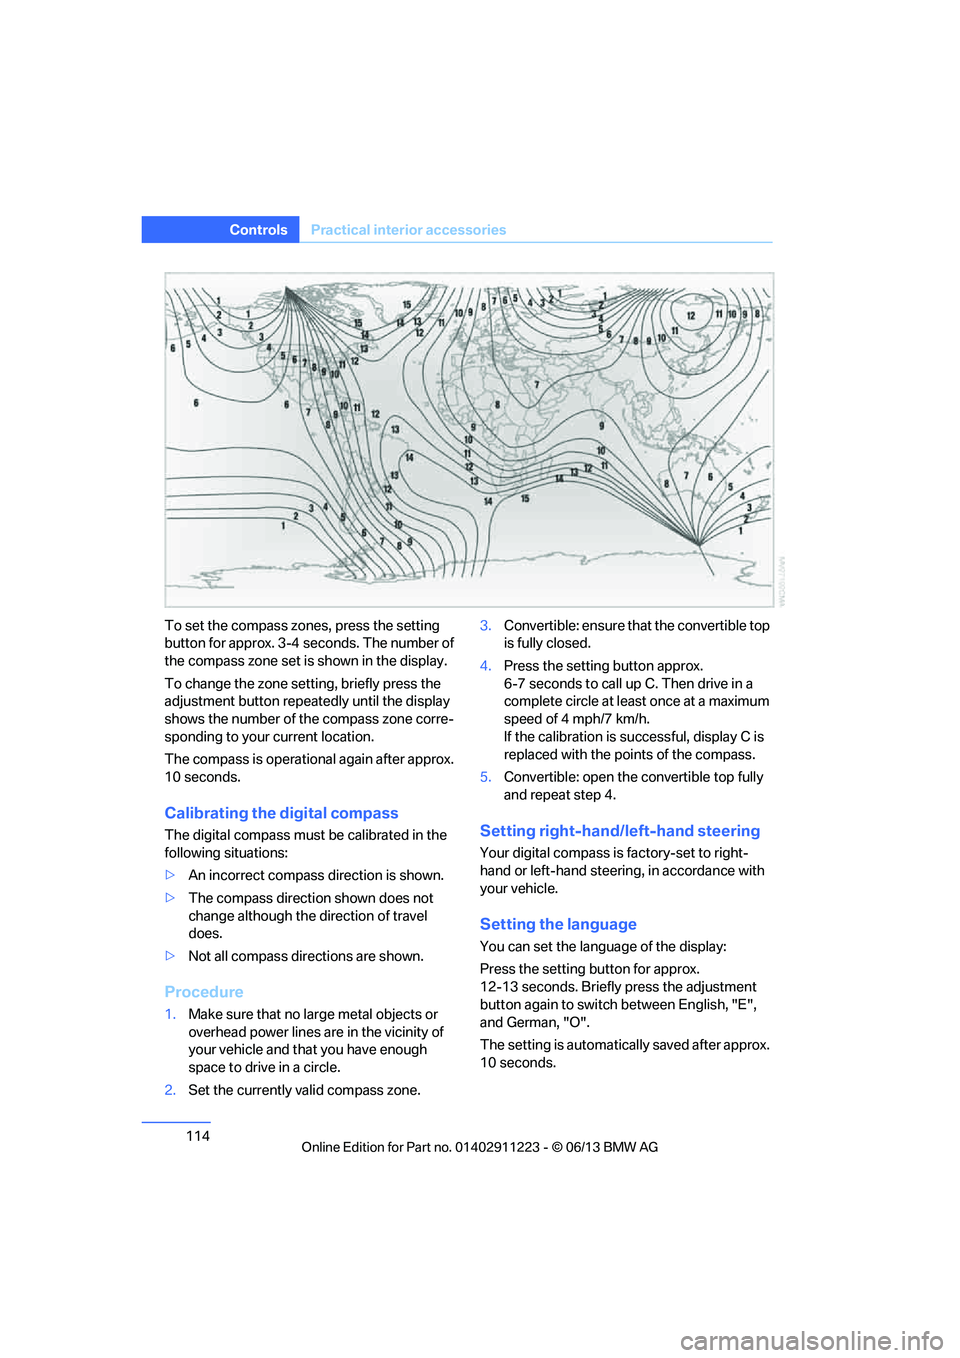
To set the compass zones, press the setting
button for approx. 3-4 seconds. The number of
the compass zone set is shown in the display.
To change the zone setting, briefly press the
adjustment button repeat edly until the display
shows the number of th e compass zone corre-
sponding to your current location.
The compass is operatio nal again after approx.
10 seconds.
Calibrating the digital compass
The digital compass must be calibrated in the
following situations:
> An incorrect compass direction is shown.
> The compass direction shown does not
change although the direction of travel
does.
> Not all compass directions are shown.
Procedure
1.Make sure that no large metal objects or
overhead power lines are in the vicinity of
your vehicle and that you have enough
space to drive in a circle.
2. Set the currently valid compass zone. 3.
Convertible: ensure that the convertible top
is fully closed.
4. Press the setting button approx.
6-7 seconds to call up C. Then drive in a
complete circle at least once at a maximum
speed of 4 mph/7 km/h.
If the calibration is su ccessful, display C is
replaced with the points of the compass.
5. Convertible: open the convertible top fully
and repeat step 4.
Setting right-hand/left-hand steering
Your digital compass is factory-set to right-
hand or left-hand steering, in accordance with
your vehicle.
Setting the language
You can set the langua ge of the display:
Press the setting button for approx.
12-13 seconds. Briefly press the adjustment
button again to switch between English, "E",
and German, "O".
The setting is automatically saved after approx.
10 seconds.
00320051004F004C00510048000300280047004C0057004C005200510003
Page 128 of 284
127
Things to remember when driving
Driving tips
Hills
To prevent overheating and the resulting
reduced efficiency of the brake system,
drive long or steep downhill gradients in the
gear in which the least br aking is required. Even
light but consistent brak e pressure can lead to
high temperatures, brake wear and possibly
even brake failure. <
You can increase the engine's braking effect
by shifting down, all the way to first gear if nec-
essary. This strategy helps you avoid placing
excessive loads on the brake system. Down-
shifting in manual mo de of the automatic
transmission, refer to page 65.
Sport automatic transm ission with double
clutch: never drive with the transmission
in neutral or with the en gine switched off; other-
wise, there will be no en gine braking action and
no power assistance to the brakes and steering.
Manual transmission: never drive with the
clutch held down, with the transmission in neu-
tral or with the engine switched off; otherwise,
there will be no engine braking action and no
power assistance to the brakes and steering.
Never allow floor mats, carpets or any other
objects to protrude into the area around the
pedals; otherwise, pedal function could be
impaired. <
Corrosion on brake rotors
When the vehicle is driv en only occasionally,
during extended periods when the vehicle is not
used at all, and in operating conditions where
brake applications are le ss frequent, there is an
increased tendency for corrosion to form on
rotors, while contaminan ts accumulate on the
brake pads. This occurs because the minimum
pressure which must be exerted by the pads
during brake applications to clean the rotors is
not reached.
Should corrosion form on the brake rotors, the
brakes will tend to respond with a pulsating
effect that even extended application will fail to
cure.
When the vehicle is parked
Condensation forms while the automatic
climate control is in operation, and then exits
under the vehicle. Traces of condensed water
under the vehicle are therefore normal.
Cargo loading
To avoid loading the tires beyond their
approved carrying ca pacity, never over-
load the vehicle. Overlo ading can lead to over-
heating and increases the rate at which damage
develops inside the tires. In some situations,
this can result in sudden loss of tire pressure. <
Avoid fluid spills in the trunk as they could
damage the vehicle. <
Determining loading limit
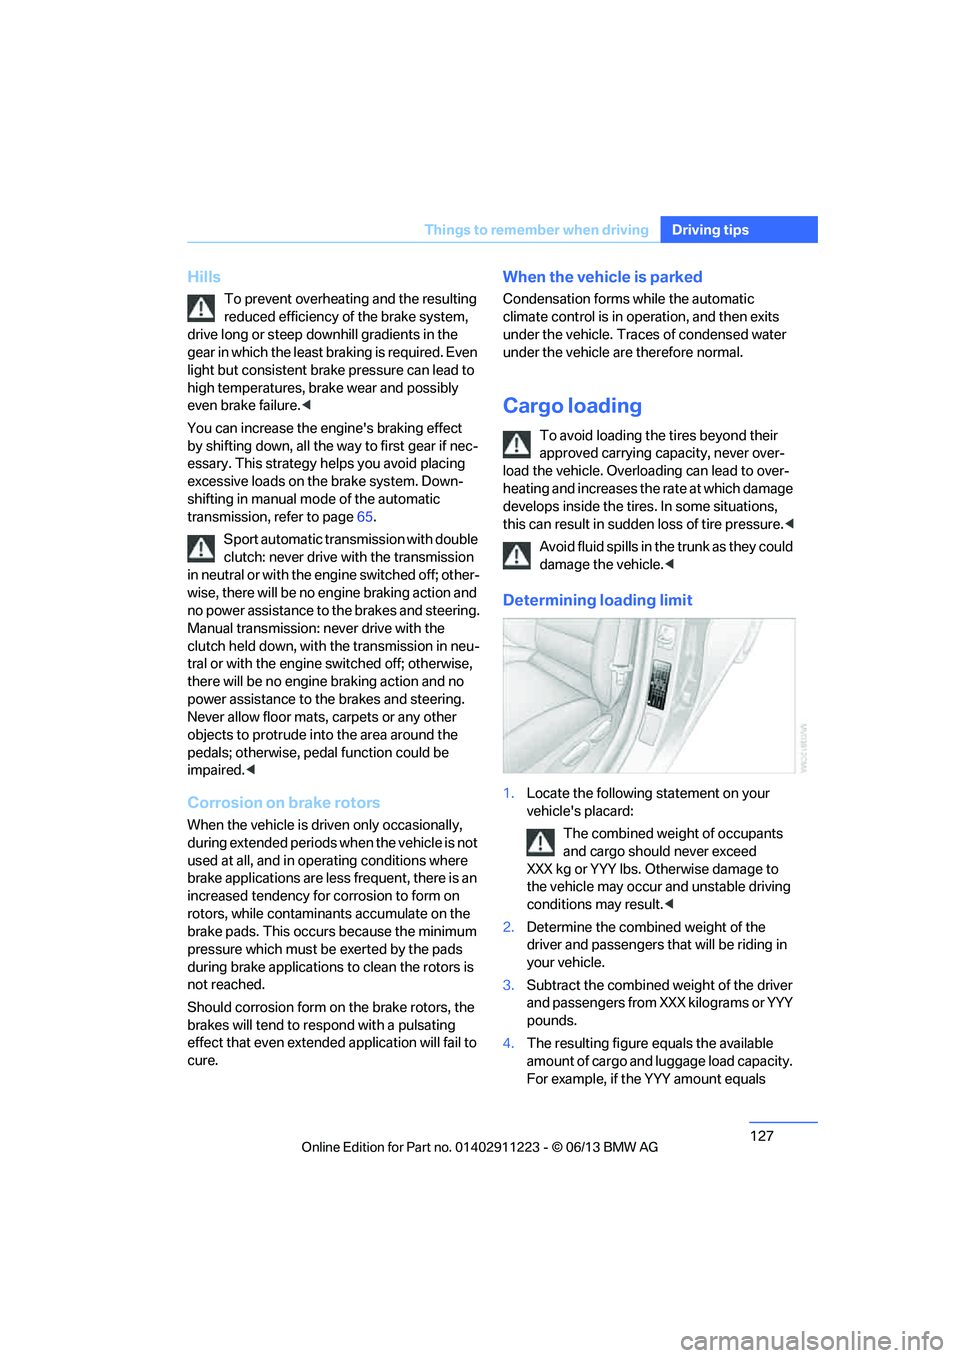
1.Locate the following statement on your
vehicle's placard:
The combined weight of occupants
and cargo should never exceed
XXX kg or YYY lbs. Otherwise damage to
the vehicle may occur and unstable driving
conditions may result.<
2. Determine the combined weight of the
driver and passengers that will be riding in
your vehicle.
3. Subtract the combined weight of the driver
and passengers from XXX kilograms or YYY
pounds.
4. The resulting figure equals the available
amount of cargo and luggage load capacity.
For example, if the YYY amount equals
00320051004F004C00510048000300280047004C0057004C005200510003
Page 254 of 284
253
Giving and receiving assistance
Mobility
Use only the tow fitting provided with the
vehicle and screw it a
ll the way in. Use the
tow fitting for towing on paved roads only. Avoid
lateral loading of the tow fitting, e.g. do not lift
the vehicle by the tow fitting. Otherwise, the
tow fitting and the vehicle could be damaged. <
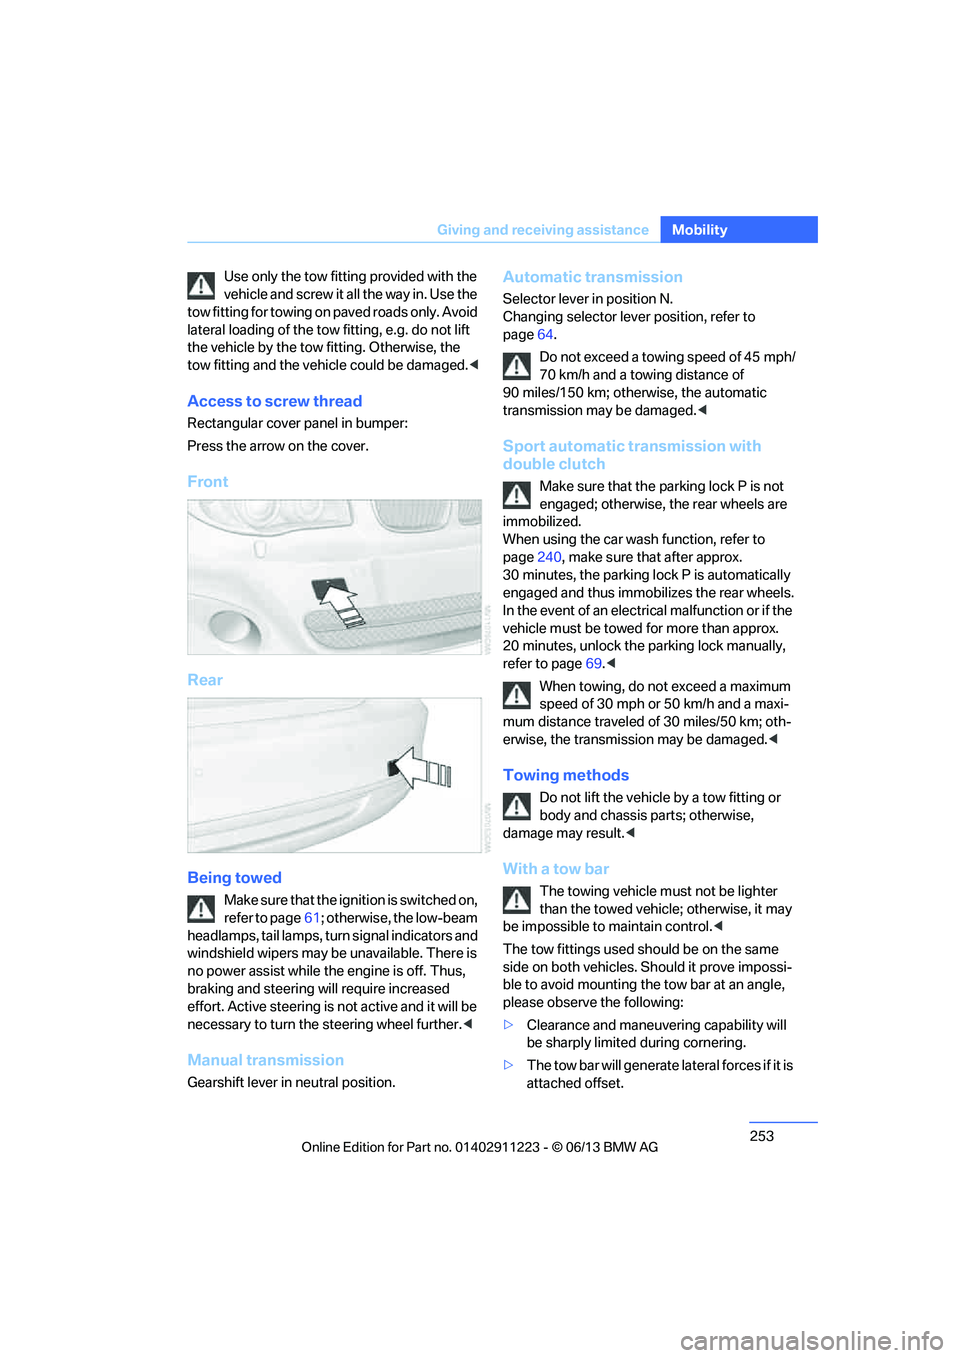
Access to screw thread
Rectangular cover panel in bumper:
Press the arrow on the cover.
Front
Rear
Being towed
Make sure that the ignition is switched on,
refer to page61; otherwise, the low-beam
headlamps, tail lamps, turn signal indicators and
windshield wipers may be unavailable. There is
no power assist while the engine is off. Thus,
braking and steering will require increased
effort. Active steering is not active and it will be
necessary to tu rn the steering wheel further. <
Manual transmission
Gearshift lever in neutral position.
Automatic transmission
Selector lever in position N.
Changing selector lever position, refer to
page 64.
Do not exceed a towing speed of 45 mph/
70 km/h and a towing distance of
90 miles/150 km; otherwise, the automatic
transmission may be damaged. <
Sport automatic transmission with
double clutch
Make sure that the parking lock P is not
engaged; otherwise, the rear wheels are
immobilized.
When using the car wash function, refer to
page 240, make sure that after approx.
30 minutes, the parking lock P is automatically
engaged and thus immobilizes the rear wheels.
In the event of an electrical malfunction or if the
vehicle must be towed for more than approx.
20 minutes, unlock the parking lock manually,
refer to page 69.<
When towing, do not exceed a maximum
speed of 30 mph or 50 km/h and a maxi-
mum distance traveled of 30 miles/50 km; oth-
erwise, the transmission may be damaged. <
Towing methods
Do not lift the vehicle by a tow fitting or
body and chassis parts; otherwise,
damage may result. <
With a tow bar
The towing vehicle must not be lighter
than the towed vehicle; otherwise, it may
be impossible to maintain control.<
The tow fittings used sh ould be on the same
side on both vehicles. Should it prove impossi-
ble to avoid mounting the tow bar at an angle,
please observe the following:
> Clearance and maneuvering capability will
be sharply limited during cornering.
> The tow bar will ge nerate lateral forces if it is
attached offset.
00320051004F004C00510048000300280047004C0057004C005200510003
Page 270 of 284
269
Everything from A to Z
Reference
Average speed
77
Avoid highways in
navigation 143
Avoiding unintentional alarms 40
Axle loads, refer to Weights 259
B
Backrests, refer to Seats 50
Backrest width adjustment 51
Back seats, refer to Rear seats
– adjusting head restraints 52
Backup lamp, replacing bulb 247
Bag for skis, refer to Ski bag 118
Band-aids, refer to First aid
pouch 251
Bar, refer to Tow-starting, towing away 253
Base plate for telephone or mobile phone
– refer to Snap-in adapter 199
Bass, tone control 155
Battery 248
– charging 248
– disposal 42,249
– jump starting 251
– replacing 248
– temporary power failure 248
Battery renewal
– remote control for vehicle 41
Being towed 253
Belts, refer to Safety belts 54
Belt tensioner, refer to Safety
belts 54
Beverage holders, refer to Cupholders 116
Blower, refer to Air volume 108 Bluetooth, activating/
deactivating 189
Bluetooth audio 180
– disconnecting an audio connection 183
– pairing device 181
– playback 182
– unpairing device 183
– what to do if … 183
BMW Assist 212
– updating 216
BMW Info 206
BMW Maintenance System 237
BMW Online 214
Bottle holders, refer to
Cupholders 116
Brake Assist, refer to Dynamic Brake Control 89
Brake fluid
– service requirements 80
Brake Force Display 96
Brake lamps
– brake force display 96
– replacing bulb 247
Brake pads, breaking in 124
Brake pedal, refer to Braking safely 126
Bra k
e rotors 127
– brakes 124
– breaking in 124
Brakes
– ABS 89
– BMW Maintenance
System 237
– braking safely 126
– breaking in 124
– parking brake 63
– service requirements 80Brake system
124
– BMW Maintenance
System 237
– breaking in 124
– disc brakes 127
Breakdown services, refer to Roadside Assistance 251
Breaking in the clutch 124
Break-in period 124
Bulb changing, refer to Lamps and bulbs 243
Button for starting the engine 61
Buttons on the steering
wheel 13
C
Calendar 207
– displaying appointment 207
– selecting calendar day 207
California Proposition 65
warning 6
Call
– accepting 193
– ending 193
– muting the microphone 195
– rejecting 193
Calling, refer to Phone numbers, dialing 194
Calls
– with multiple parties 194
Can holders, refer to Cupholders 116
Capacities 259
Capacity of the trunk 259
Car battery, refer to Vehicle
battery 248
Car care, refer to Care 239
00320051004F004C00510048000300280047004C0057004C005200510003