2013 BMW 135I CONVERTIBLE steering
[x] Cancel search: steeringPage 69 of 284
68
ControlsDriving
D Drive mode
In Drive mode, all forward gears are shifted
automatically.
Kickdown
For sudden acceleration maneuvers such as
passing, depress the accelerator past the resis-
tance point. This prov ides maximum accelera-
tion.
Sport program and manual operation
M/S
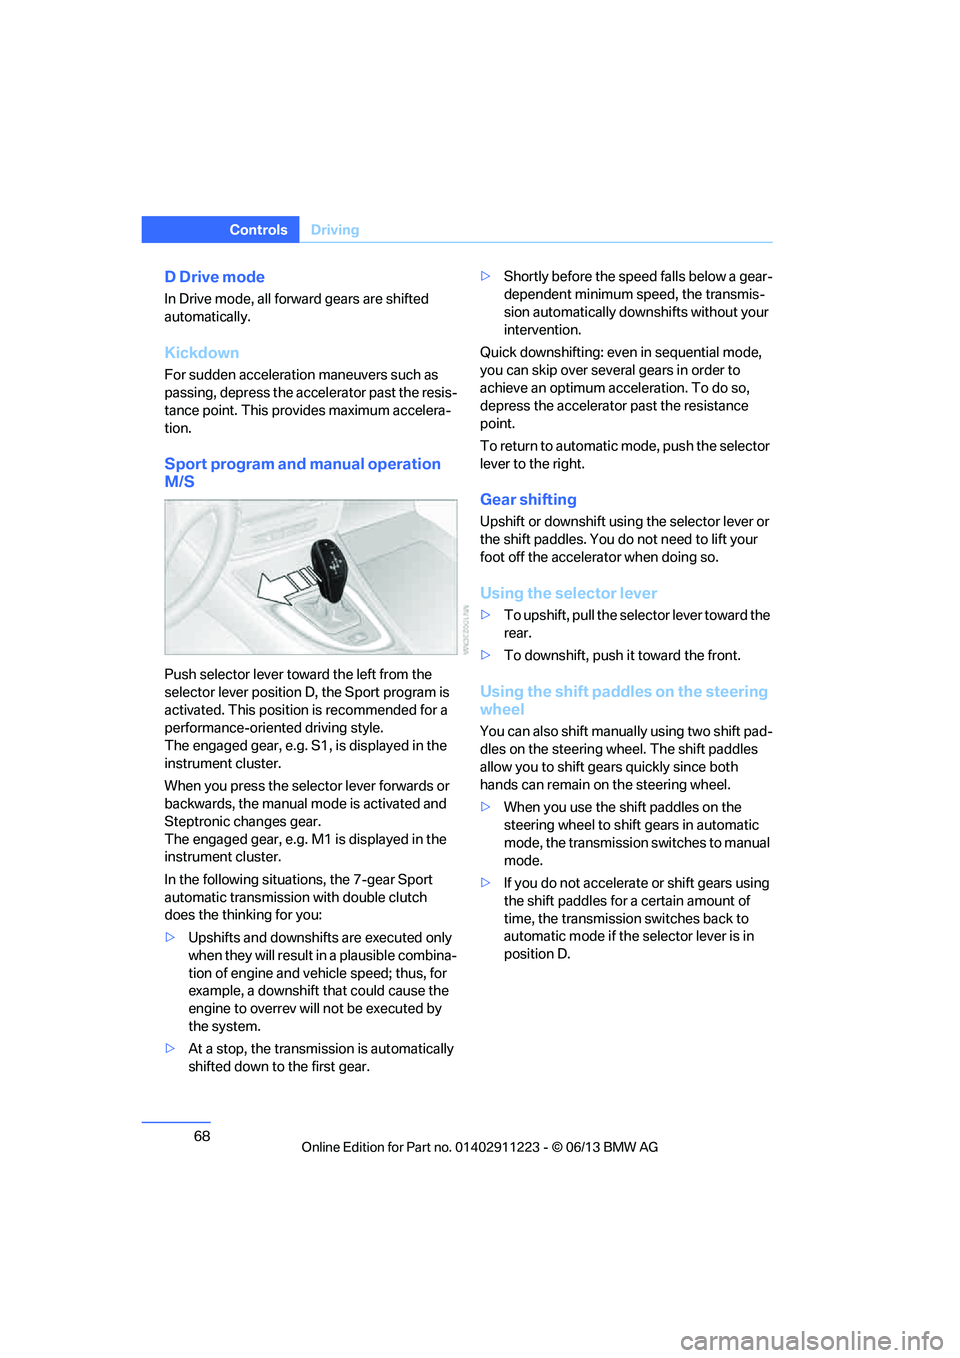
Push selector lever towa rd the left from the
selector lever position D, the Sport program is
activated. This position is recommended for a
performance-oriented driving style.
The engaged gear, e.g. S1, is displayed in the
instrument cluster.
When you press the selector lever forwards or
backwards, the manual mode is activated and
Steptronic changes gear.
The engaged gear, e.g. M1 is displayed in the
instrument cluster.
In the following situat ions, the 7-gear Sport
automatic transmission with double clutch
does the thinking for you:
> Upshifts and downshifts are executed only
when they will result in a plausible combina-
tion of engine and vehicle speed; thus, for
example, a downshift that could cause the
engine to overrev will not be executed by
the system.
> At a stop, the transmission is automatically
shifted down to the first gear. >
Shortly before the spee d falls below a gear-
dependent minimum speed, the transmis-
sion automatically down shifts without your
intervention.
Quick downshifting: even in sequential mode,
you can skip over several gears in order to
achieve an optimum acceleration. To do so,
depress the accelerator past the resistance
point.
To return to automatic mode, push the selector
lever to the right.
Gear shifting
Upshift or downshift usin g the selector lever or
the shift paddles. You do not need to lift your
foot off the accelerator when doing so.
Using the selector lever
> To upshift, pull the sele ctor lever toward the
rear.
> To downshift, push it toward the front.
Using the shift paddl es on the steering
wheel
You can also shift manua lly using two shift pad-
dles on the steering wheel. The shift paddles
allow you to shift gear s quickly since both
hands can remain on the steering wheel.
> When you use the shift paddles on the
steering wheel to shift gears in automatic
mode, the transmission switches to manual
mode.
> If you do not accelerate or shift gears using
the shift paddles for a certain amount of
time, the transmission switches back to
automatic mode if the selector lever is in
position D.
00320051004F004C00510048000300280047004C0057004C005200510003
Page 74 of 284
73
Driving
Controls
United States: the washer
fluid mixture ratio is
regulated by the U.S. EPA and many individual
states; do not exceed the allowable washer fluid
dilution ratio limits that apply. Follow the usage
instructions on the washer fluid container. Use
BMW's Windshield Washer Concentrate or the
equivalent.
Washer fluid filler neck
Only add washer fluid after allowing the
engine to cool and close the cover com-
pletely in order to prevent the washer fluid from
contacting hot engine parts. Otherwise, fluid
spills or leaks constitute a fire hazard and a risk
to personal safety. <
All washer nozzles are supplied with washer
fluid by the same reservoir.
The recommended minimum filling quantity is
0.2 US gal/1 liter.
Fill with a mixture of window cleaner concen-
trate, tap water and, if required, with a washer
antifreeze, according to manufacturer's recom-
mendations.
Do not fill with und iluted window cleaner
concentrate or with pure water since these can
result in damage to the wiper system.
Do not mix window cleaner concentrates from
different manufacturers si nce this may clog the
washer nozzles.
Cruise control
The concept
You can use the cruise control feature begin-
ning at approx. 20 mph/30 km/h. The car then
stores and maintains the speed that you specify
using the lever on the steering column.
Do not use cruise control when driving at
constant speed is prevented by adverse
conditions, e.g. winding roads, dense traffic or
poor road conditions due to, e.g. snow, rain, ice
or loose surfaces. Otherwise, you could lose
control of the vehicle and cause an accident as a
result.<
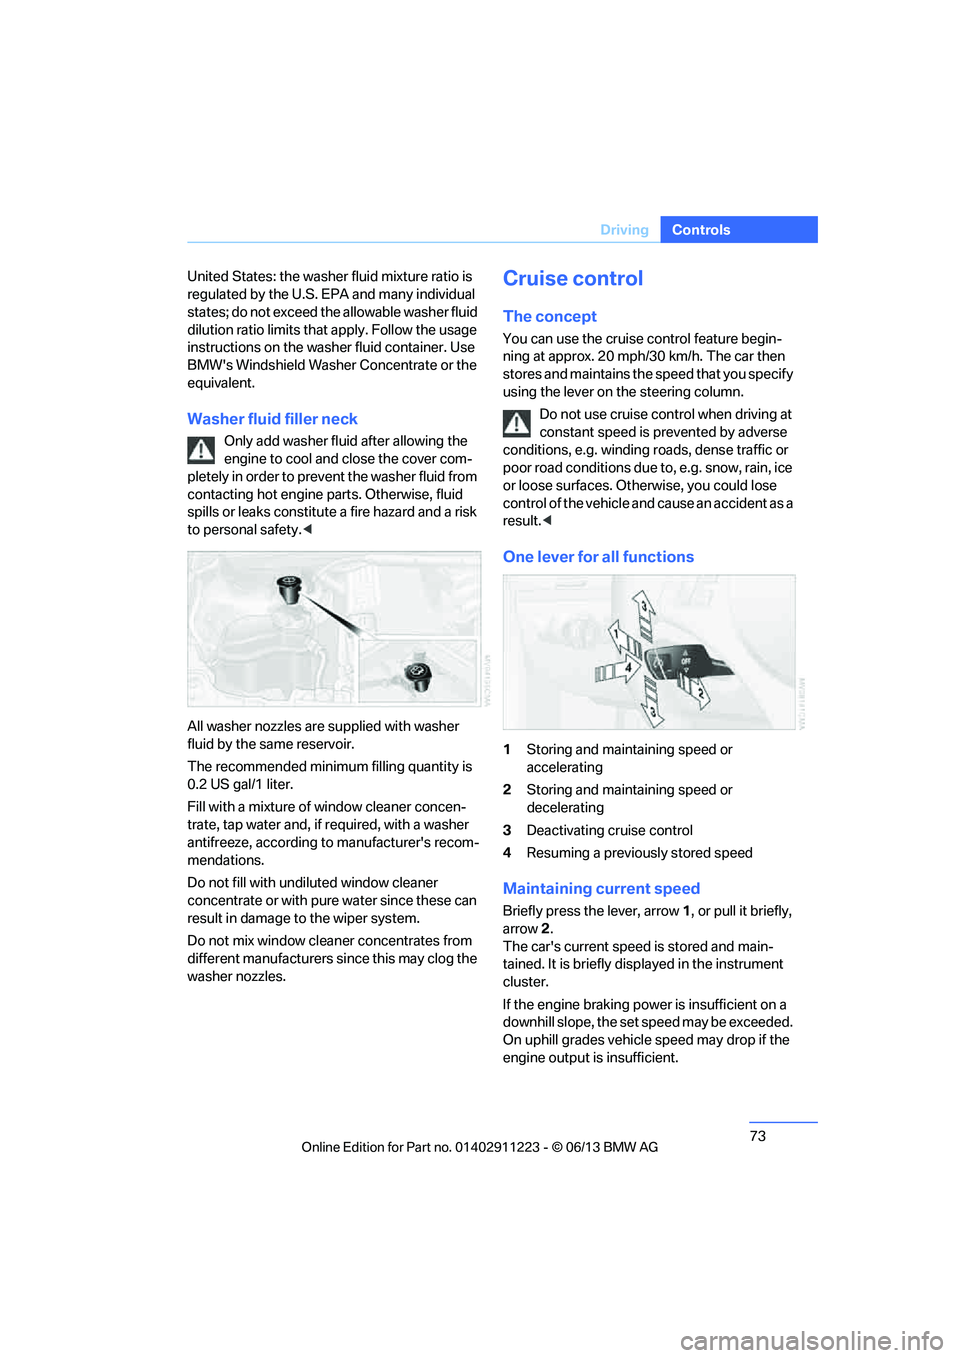
One lever for all functions
1 Storing and maintaining speed or
accelerating
2 Storing and maintaining speed or
decelerating
3 Deactivating cr uise control
4 Resuming a previously stored speed
Maintaining current speed
Briefly press the lever, arrow 1, or pull it briefly,
arrow 2 .
The car's current speed is stored and main-
tained. It is briefly disp layed in the instrument
cluster.
If the engine braking power is insufficient on a
downhill slope, the set speed may be exceeded.
On uphill grades vehicle speed may drop if the
engine output is insufficient.
00320051004F004C00510048000300280047004C0057004C005200510003
Page 90 of 284

89
Technology for driving comfort and safety
Controls
System limitations
Even with PDC, final responsibility for
estimating the distance between the
vehicle and any obstructions always remains
with the driver. Even when sensors are pro-
vided, there is a blind spot in which objects can
no longer be detected. The system is also sub-
ject to the physical limit s that apply to all forms
of ultrasonic measurement, such as those
encountered with traile r towbars and hitches,
thin or wedge-shaped objects, etc. Low objects
that have already been displayed, e.g. curbs,
can disappear again from the detection area of
the sensors before or after a continuous tone
sounds. Higher, protruding objects, e.g. ledges,
cannot be detected. Loud sound sources out-
side or inside the car can drown out the PDC
signal. Therefore, always drive cautiously; oth-
erwise, there is a risk of personal injury or prop-
erty damage. <
Driving stability control
systems
Your BMW has a number of systems that help
to maintain the vehicle's stability even in
adverse driving conditions.
Antilock Brake System ABS
ABS prevents locking of the wheels during
braking. Safe steering response is maintained
even during full braking. Active safety is thus
increased.
The ABS is operational every time you start the
engine. Braking safely, refer to page 126.
Electronic brake-force distribution
EBV
The system controls the brake pressure in the
rear wheels to ensure stable braking behavior.
Dynamic Brake Control DBC
When you apply the brakes rapidly, this system
automatically produces the maximum braking
force boost and thus helps to achieve the short-
est possible braking distance during full brak-
ing. This system exploi ts all of the benefits
provided by ABS.
Do not reduce the pressu re on the brake for the
duration of the full braking application.
Dynamic Stability Control DSC
DSC prevents the driving wheels from losing
traction when you pull aw ay from rest or accel-
erate. The system also recognizes unstable
driving conditions, for example if the rear of the
car is about to swerve or if momentum is acting
at an angle past the front wheels. In these
cases, DSC helps the vehicle maintain a safe
course within physical limits by reducing engine
output and through brakin g actions at the indi-
vidual wheels.
The laws of physics cannot be repealed,
even with DSC. An appropriate driving
style always remains th e responsibility of the
driver. Therefore, do no t reduce the additional
s a f e t y m a r g i n a g a i n b y t a k i n g r i s k s , a s t h i s c o u l d
result in an accident. <
Deactivating DSC
Press the button for at least 3 seconds until the
indicator lamp for DSC OFF lights up and DSC
OFF is displayed in the instrument cluster.
Dynamic Traction Cont rol DTC and DSC have
been simultaneously de activated. Stabilizing
and drive-output promoting actions are no
longer executed.
00320051004F004C00510048000300280047004C0057004C005200510003
Page 93 of 284
92
ControlsTechnology for driving comfort and safety
Indication of a flat tire
The warning lamps come on in yellow
and red. A message appears on the
Control Display. In addition, a signal
sounds. There is a flat tire or a major
loss in tire pressure.
1. Reduce speed and stop the vehicle with
caution. Avoid sudden braking and steering
maneuvers.
If the vehicle is not equipped with run-flat
tires, do not continue driving; continuing
to drive can result in serious accidents. <
When a flat tire is reported, the Dynamic Stabil-
ity Control DSC is activated.
Actions in the event of a flat tire
Run-flat tires
With a damaged tire, is possible to continue
driving at speeds of up to 50 mph/80 km/h.
When driving with a damaged tire:
1. Avoid sudden braking and steering
maneuvers.
2. Do not exceed a speed of 50 mph/80 km/h.
3. At the next opportunity, check the inflation
pressure in all four tires.
If the inflation pressure in all four tires is cor-
rect, the Flat Tire Monitor might not have
been initialized. The sy stem must then be
initialized.
Possible driving distance with complete loss of
tire pressure:
The distance it is possible to drive with a flat tire
depends on the load and the stress on the
vehicle while driving.
With an average load, it may be possible to drive
for approx. 50 miles/80 km.
When driving with damaged tires, the handling
characteristics ch ange, e.g. the vehicle will skid
sooner when braking, braking distances will be
longer, or self-steerin g response will change. Adapt your driving style accordingly. Avoid
turning abruptly and driving over obstacles
such as curbs, potholes, etc.
Since the possible driving distance depends to
a considerable degree on
the strain exerted on
the vehicle while driving, it can be shorter or,
with a gentle driving style, can also be longer,
depending on the speed, road condition, out-
side temperature, vehicle load, etc.
Drive cautiously an d do not exceed a
speed of 50 mph/80 km/h.
When there is a tire pressure loss, the handling
characteristics change , e.g. there will be
reduced directional stability during braking,
braking distances will be longer, and self-
steering response will change. <
Vibrations or loud noises while driving can
indicate final failure of the tire. Reduce
your speed and bring the vehicle to a stop; oth-
erwise, tire components may become
detached, which could result in an accident. Do
not continue driving; instead, contact your
BMW center. <
Tire Pressure Monitor TPM
The concept
Check the inflation pressure in the four installed
tires. The system notifies you if there is a signif-
icant loss of pressure in one or more tires.
Functional requirement
The system must have been reset while the
inflation pressure was correct; otherwise, reli-
able signaling of a flat tire is not ensured.
Always use wheels with TPM electronics to
ensure that the system will operate properly.
Each time a tire inflation pressure has been
corrected or a wheel or tire has been changed,
reset the system.
00320051004F004C00510048000300280047004C0057004C005200510003
Page 95 of 284
94
ControlsTechnology for driving comfort and safety
5.Reset the inflation pr essure by selecting
"Reset".
6. Start driving.
The tires are shown in gray and "Resetting
TPM..." is displayed.
After driving a few minutes, the set inflation
pressures in the tires are accepted as the target
values to be monitored. The resetting process
is completed automatically as you drive. On the
Control Display, the wheels are shown in green
and "Status: TPM active" is displayed.
The trip can be interrupted at any time. When
driving resumes, resetting continues automati-
cally.
If a flat tire is detect ed while the system is
resetting, all tires on the Control Display
are displayed in yello w. The message "Low
tire!" is displayed.<
Message for low tire inflation pressure
The warning lamps light up in yellow
and red. A message appears on the
Control Display. In addition, a signal
sounds.
> There is a flat tire or substantial loss of tire
pressure in the indicated wheel.
> The system was not reset after a wheel
change and thus issues a warning based on
the inflation pressure s initialized last.
Reduce speed and stop the vehicle with
caution. Avoid sudden braking and steering
maneuvers. If the vehicle is not equipped with run-flat
tires, do not continue driving; continuing
to drive can result in serious accidents. <
When a low tire pressure is reported, the
Dynamic Stability Control DSC is activated.
Actions in the event of a flat tire
Run-flat tires
You can continue driving with a damaged tire at
speeds up to 50 mph/80 km/h.
When driving with a damaged tire: 1.
Avoid sudden braking and steering
maneuvers.
2. Do not exceed a speed of 50 mph/80 km/h.
3. At the next opportunity, check the inflation
pressure in all four tires.
If the inflation pressure is correct in all four
tires, then the Tire Pressure Monitor may
not have been reset. The system must then
be reset.
Possible driving distance with complete loss of
tire pressure:
The distance it is possible to drive with a flat tire
depends on the load and the stress on the vehi-
cle while driving.
With an average load, it may be possible to drive
for approx. 50 miles/80 km.
When driving with damaged tires, the handling
characteristics ch ange, e.g. the vehicle will skid
sooner when braking, braking distances will be
longer, or self-steerin g response will change.
Adapt your driving style accordingly. Avoid
turning abruptly and driving over obstacles
such as curbs, potholes, etc.
Since the possible driving distance depends to
a considerable degree on the strain exerted on
the vehicle while driving, it can be shorter or,
with a gentle driving style, can also be longer,
depending on the speed, road condition, out-
side temperature, vehicle load, etc.
Drive cautiously an d do not exceed a
speed of 50 mph/80 km/h.
When there is a tire pressure loss, the handling
characteristics change , e.g. there will be
reduced directional stability during braking,
braking distances will be longer, and self-steer-
ing response will change. <
Vibrations or loud noises while driving can
indicate complete fa ilure of the tire.
Reduce your speed and bring the vehicle to a
stop; otherwise, tire components may become
detached, which could result in an accident. Do
not continue driving; instead, contact your
BMW center. <
00320051004F004C00510048000300280047004C0057004C005200510003
Page 97 of 284
96
ControlsTechnology for driving comfort and safety
Active steering
The concept
Active steering varies the turning angle of the
front wheels in relation to steering wheel move-
ments. It also varies the steering force required
to turn the wheels depending on the speed at
which you are driving.
When you are driving in the low speed range,
e.g. in a town or when parking, the steering
angle is increased, i.e. steering becomes very
direct and less effort is required to turn the
wheels. In the higher speed range, on the other
hand, the steering angle is reduced as the
speed increases. This improves the handling of
your BMW over the entire speed range.
In critical situations, the system can make tar-
geted corrections to th e steering angle pro-
vided by the driver and thus stabilize the vehicle
before the driver intervenes. This stabilizing
intervention is simult aneously deactivated
when DSC is switched off, refer to page 89.
Malfunction
The warning lamps come on. Active
steering is malfunctioning or is tem-
porarily deactivate d. At low speeds,
greater steering wheel movements
are required, whereas at higher speeds the
vehicle reacts more sensitively to steering
wheel movements. Th e stability-enhancing
feature may also be deactivated. Drive cau-
tiously and think well ahead.
Deactivation
Active steering is deacti vated to perform an ini-
tialization. A message indicates that the feature
is deactivated. Initializ ation may take several
minutes.
If the message does not disappear during the
current trip, have the system checked.
Defect
If there is a defect, a corresponding text mes-
sage appears. Have the system checked.
Servotronic
The concept
The Servotronic varies the steering force
required to turn the wh eels relative to the
vehicle speed.
At low speeds, the steering force is strongly
assisted, i.e. less force is needed for steering.
As the vehicle speed increases, the steering
assisting power is reduced.
This system functions automatically.
Malfunctions
The warning lamp lights up. A mes-
sage appears on the Control Display.
Servotronic is malfunctioning or has
failed. Steering response will be different. You
can continue your journey, but moderate your
speed and exercise due caution. Have the
system checked as soon as possible.
Brake Force Display
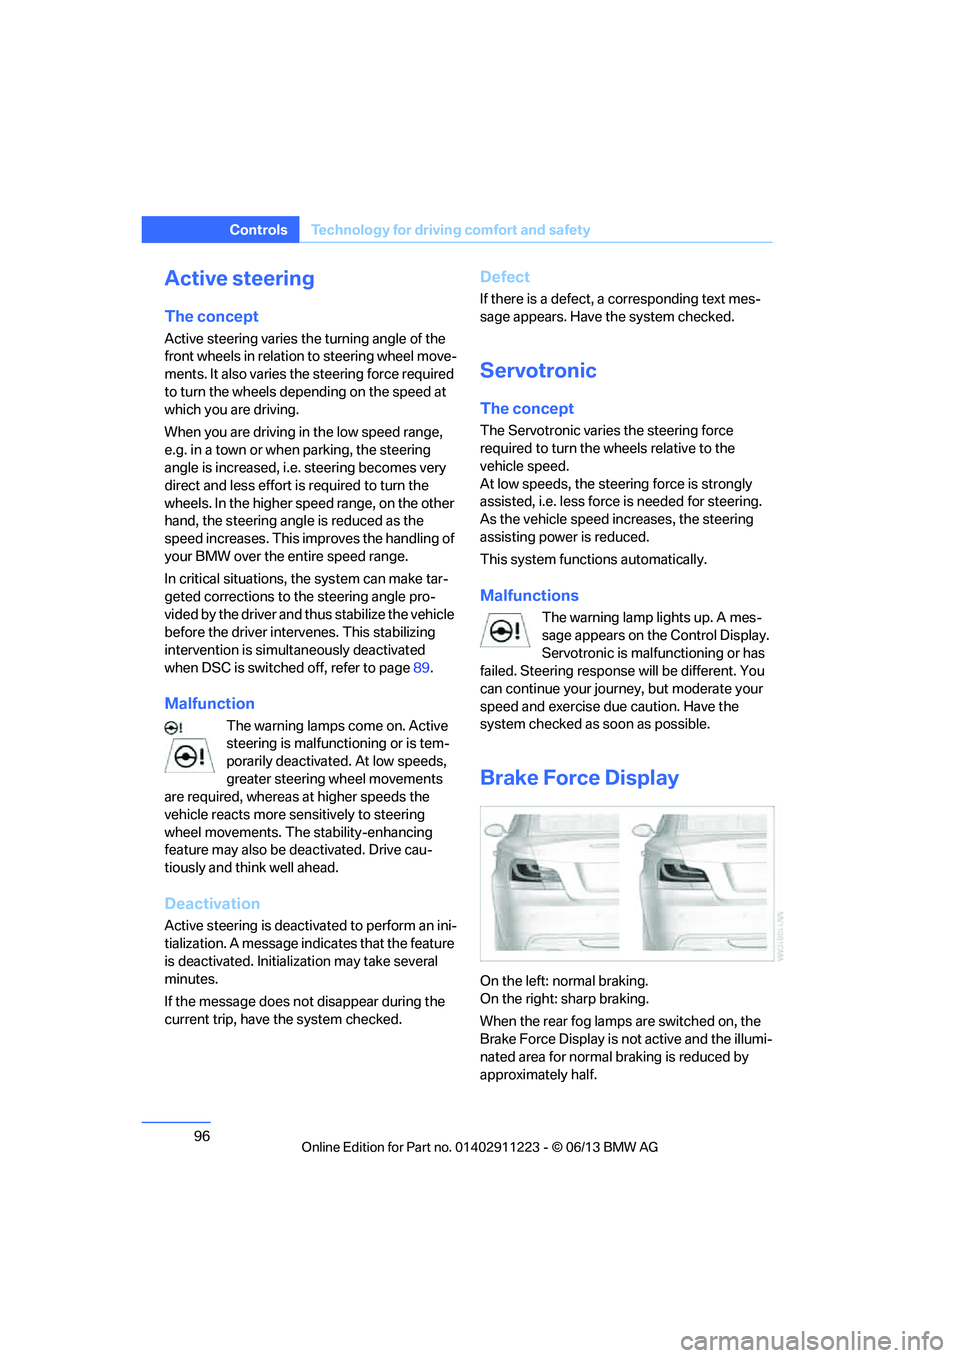
On the left: normal braking.
On the right: sharp braking.
When the rear fog lamps are switched on, the
Brake Force Display is no t active and the illumi-
nated area for normal braking is reduced by
approximately half.
00320051004F004C00510048000300280047004C0057004C005200510003
Page 98 of 284

97
Technology for driving comfort and safety
Controls
Airbags
The following airbags are located under the
marked covers:
1
Front airbags
2 Coupe: head airbags
3 Side airbags in the seat backrests
4 Convertible: knee airbags
Protective action
Observe the adjustment instructions on
page 49 to ensure the best possible
personal protection. <
The front airbags help protect the driver and
front passenger by responding to frontal
impacts in which safety belts alone cannot pro-
vide adequate restrain t. When needed, the
head and side airbags help provide protection in
the event of side impact. The relevant side air-
bag supports the side upper body area. The
head air bag supports the head.
The airbags have been designed to not be trig-
gered in every collision si tuation, e.g. not in
minor accidents or rear-end collisions.
Do not apply adhesive materials to the
cover panels of the airbags, cover them or
modify them in any other way.
Keep the dashboard and window on the front
passenger side clear, i. e., do not cover with
adhesive labels or coveri ngs, and do not attach
holders such as for navigation instruments and
mobile phones.
Do not attach seat cove rs, cushions or other
objects not specifically approved for seats with
integral side airbags to the front seats. Do not
hang items of clothing su ch as coats or jackets over the backrests. Do
not attempt to remove
the airbag retention system from the vehicle. Do
not modify the individu al components of the
system or its wiring in any way. This includes
the upholstered covers on the steering wheel,
instrument panel, seats and roof posts, as well
as the sides of the roof lining. Do not attempt to
remove or dismantle the steering wheel.
Do not touch the individual components imme-
diately after the system has been triggered,
because there is a danger of burns.
In the event of faults, immobilization, or after the
airbag system has been triggered, only have the
testing, repair, or disa ssembly and scrapping of
gas generator performed by your BMW center
or a workshop that has the required explosives
licenses. Unprofessional attempts to work on
the system could lead to failure in an emer-
gency or to undesired ai rbag activation, either
of which could result in personal injury. <
Warning notices and information about the
airbags can also be found on the sun visors.
Automatic deactivation of the front
passenger airbags
An analysis of the impr ession in the front pas-
senger seat cushion determines whether and
how the seat is occupied. The front and side air-
bags for the front passe nger are activated or
deactivated by the system accordingly.
The indicator lamp above the interior
rearview mirror shows the current status
of the front passenger ai rbags, deactivated or
activated, refer to Sta tus of front passenger
airbags below. <
00320051004F004C00510048000300280047004C0057004C005200510003
Page 102 of 284
101
Lamps
Controls
lighting conditions. For example, the system
cannot detect fog or hazy weather. To avoid
safety risks, you should always switch on the
low-beam headlamps ma
nually under these
conditions.<
Welcome lamps
If you leave the light switch in position 2 or 3
when you park the car, the parking lamps and
the interior lamps light up briefly when you
unlock the vehicle.
Activating/deactivating welcome
lamps
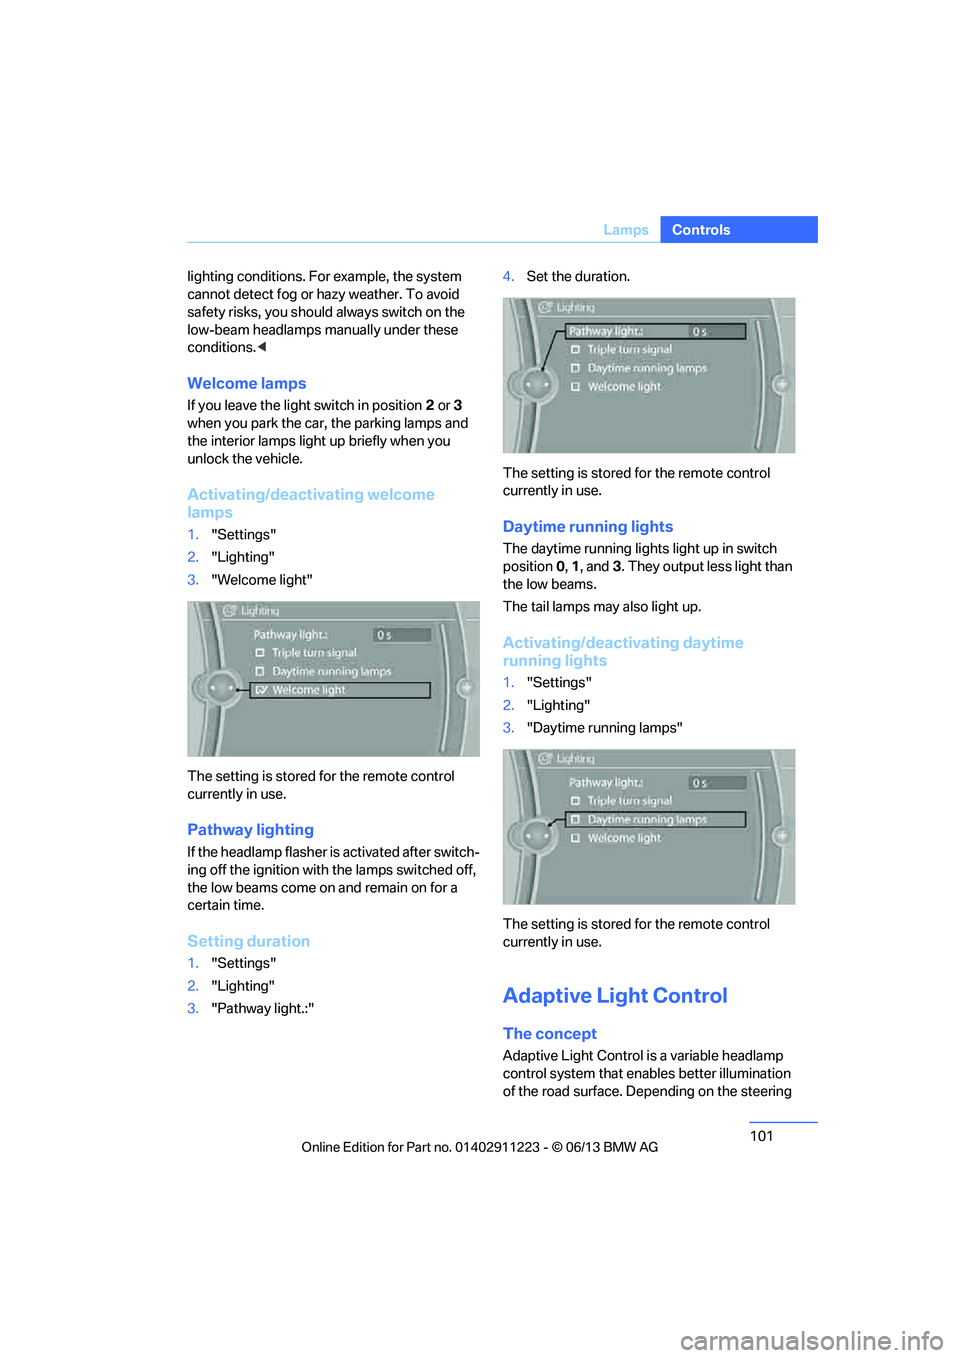
1. "Settings"
2. "Lighting"
3. "Welcome light"
The setting is stored for the remote control
currently in use.
Pathway lighting
If the headlamp flasher is activated after switch-
ing off the ignition with the lamps switched off,
the low beams come on and remain on for a
certain time.
Setting duration
1. "Settings"
2. "Lighting"
3. "Pathway light.:" 4.
Set the duration.
The setting is stored for the remote control
currently in use.
Daytime running lights
The daytime running light s light up in switch
position 0, 1 , and 3. They output less light than
the low beams.
The tail lamps may also light up.
Activating/deactivating daytime
running lights
1. "Settings"
2. "Lighting"
3. "Daytime running lamps"
The setting is stored for the remote control
currently in use.
Adaptive Light Control
The concept
Adaptive Light Control is a variable headlamp
control system that enables better illumination
of the road surface. Depending on the steering
00320051004F004C00510048000300280047004C0057004C005200510003