2013 BMW 135I CONVERTIBLE check engine light
[x] Cancel search: check engine lightPage 16 of 284
15
Dashboard
At a glance
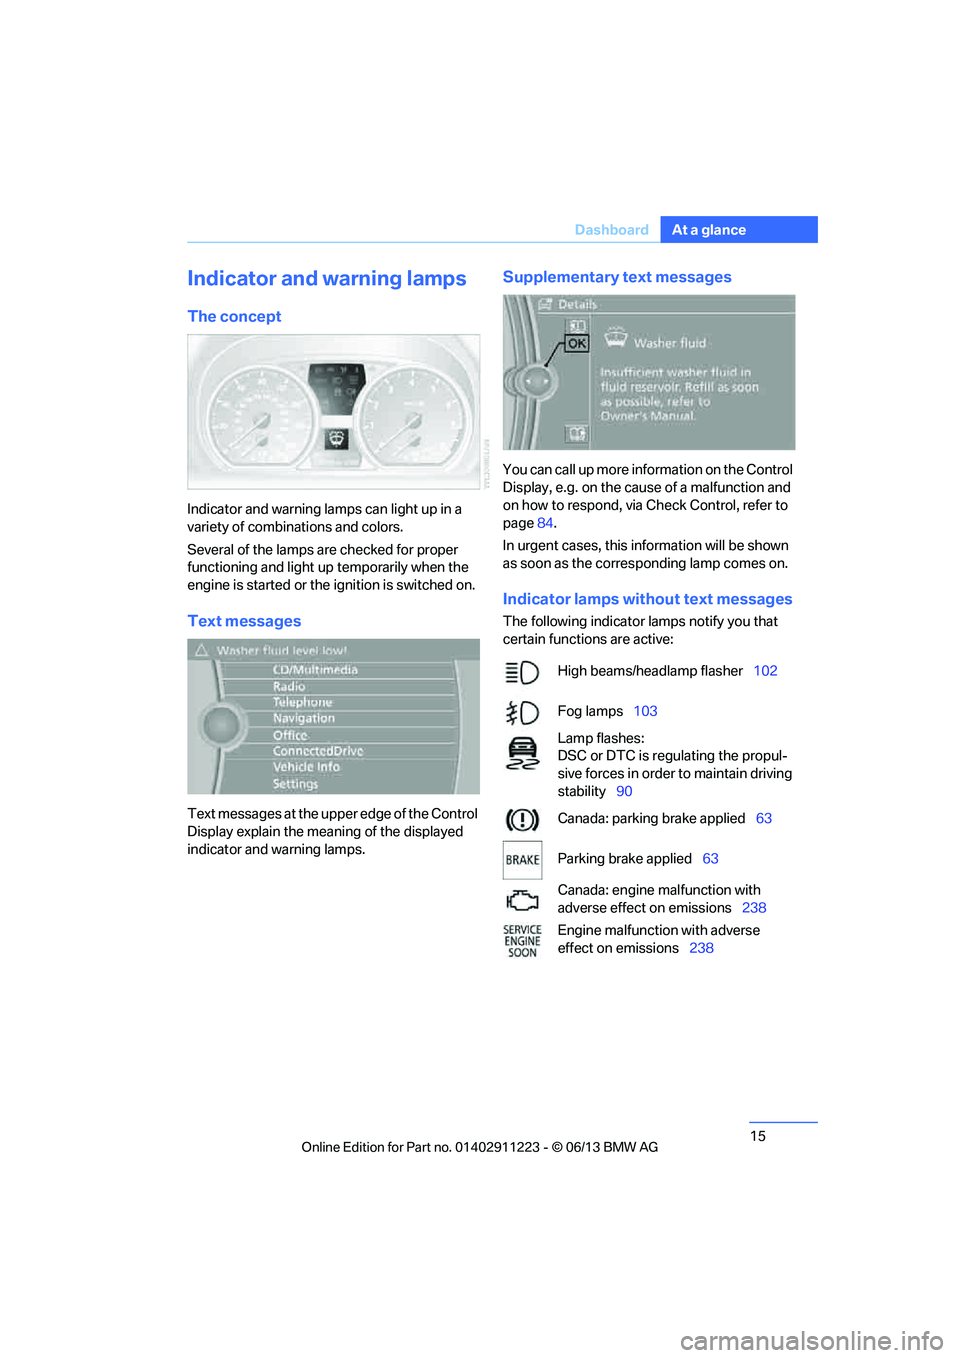
Indicator and warning lamps
The concept
Indicator and warning lamps can light up in a
variety of combinations and colors.
Several of the lamps are checked for proper
functioning and light up temporarily when the
engine is started or the ignition is switched on.
Text messages
Text messages at the uppe
r edge of the Control
Display explain the meaning of the displayed
indicator and warning lamps.
Supplementary text messages
You can call up more information on the Control
Display, e.g. on the cause of a malfunction and
on how to respond, via Check Control, refer to
page 84.
In urgent cases, this information will be shown
as soon as the corresponding lamp comes on.
Indicator lamps without text messages
The following indicator lamps notify you that
certain functions are active:
High beams/headlamp flasher 102
Fog lamps 103
Lamp flashes:
DSC or DTC is regulating the propul-
sive forces in order to maintain driving
stability 90
Canada: parking brake applied 63
Parking brake applied 63
Canada: engine malfunction with
adverse effect on emissions 238
Engine malfunction with adverse
effect on emissions 238
00320051004F004C00510048000300280047004C0057004C005200510003
Page 41 of 284
40
ControlsOpening and closing
Avoiding uninten tional alarms
The tilt sensor and interior motion sensor can
be deactivated together , for example in the
following situations:
> In car washes
> In stacking garages
> During transport on car-carrying trains,
boats/ships or on a trailer
> When leaving animals in the vehicle
Switching off tilt alarm sensor and
interior motion sensor
Once the vehicle is locked, press the
button on the remote control again
within approx. 10 seconds.
The indicator lamp light s up briefly and then
begins flashing again. Th e tilt alarm sensor and
the interior motion sensor are switched off until
the next time the vehicle is unlocked and subse-
quently locked again.
Comfort Access
The concept
It is possible to access the vehicle without actu-
ating the remote control. It is sufficient to have
the remote control with you, for example in your
jacket pocket. The vehicle automatically
detects the remote control in the vicinity or in
the passenger compartment.
Comfort Access supports the following func-
tions:
> Unlocking/locking the vehicle
> Convenient closing
> Unlocking the trunk lid separately
> Engine starting
Functional requirement
>There are no external sources of interfer-
ence in the vicinity.
> The remote control mu st be outside the
vehicle to lock it. >
The next unlocking and locking cycle is not
possible until after approx. 2 seconds.
> It is only possible to start the engine if the
remote control is inside the vehicle.
Comparison with ordinary remote
control
The above functions can be controlled by
pressing the remote control buttons or by using
Comfort Access.
If you notice a brief delay while opening or
closing windows, the glass roof or the
convertible top, the system is checking whether
a remote control is inside the vehicle. Please
repeat the opening or closing procedure, if
necessary. <
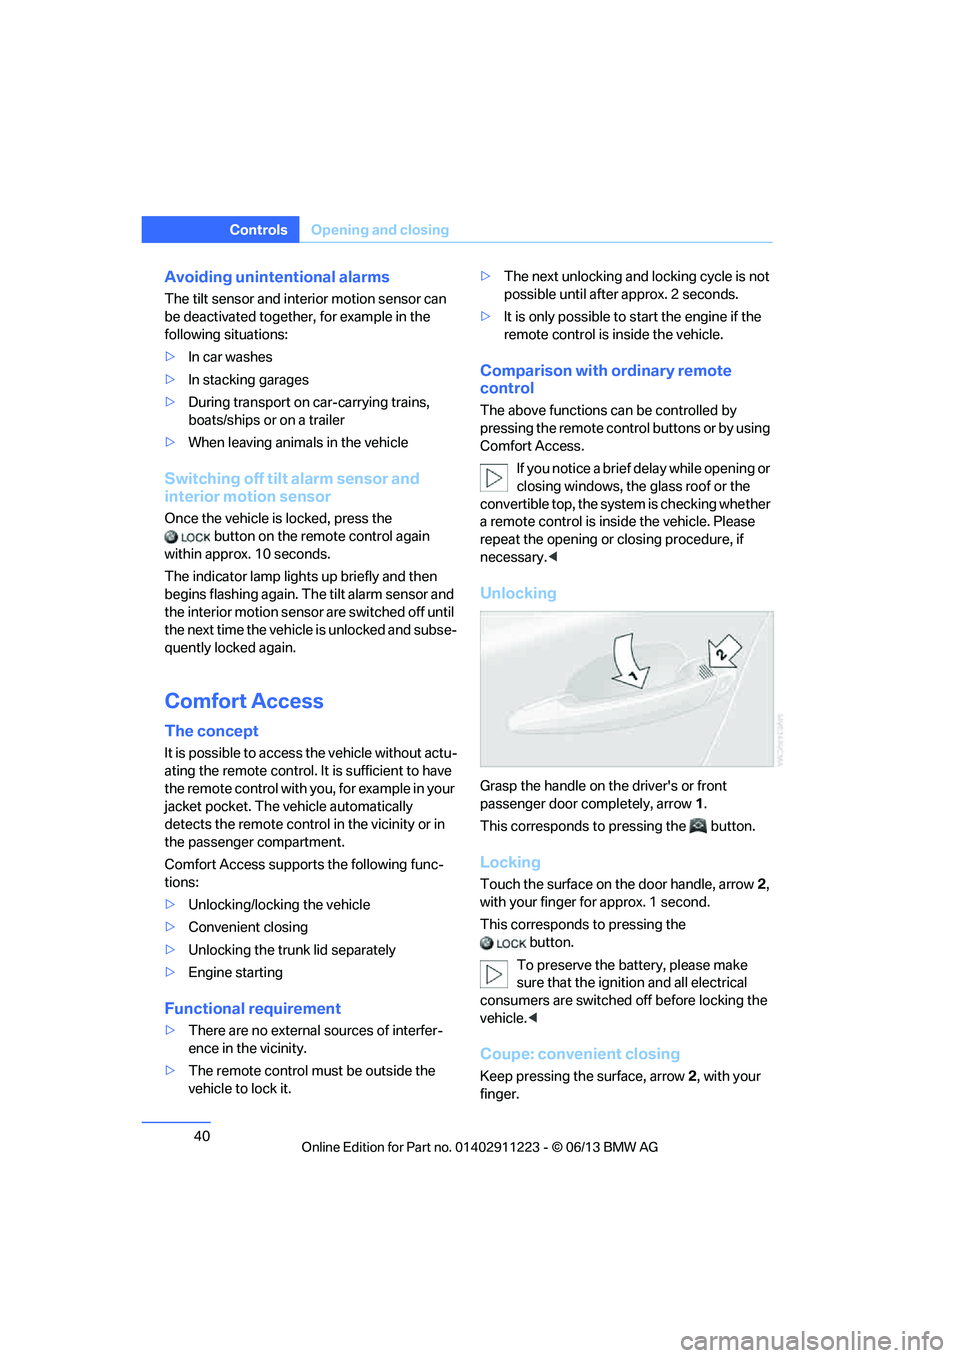
Unlocking
Grasp the handle on the driver's or front
passenger door completely, arrow 1.
This corresponds to pressing the button.
Locking
Touch the surface on the door handle, arrow 2,
with your finger for approx. 1 second.
This corresponds to pressing the button.
To preserve the battery, please make
sure that the ignition and all electrical
consumers are switched off before locking the
vehicle. <
Coupe: convenient closing
Keep pressing the surface, arrow 2, with your
finger.
00320051004F004C00510048000300280047004C0057004C005200510003
Page 42 of 284

41
Opening and closing
Controls
Convertible: window and convertible
top operation
With the ignition at radio readiness or beyond,
you can open and close the windows and the
convertible top when a remote control is
located inside the vehicle.
Unlocking the trunk lid separately
Press the button on the ou
tside of the trunk lid.
This corresponds to pressing the button. If the vehicle detects that a remote con-
trol has been accident ally left inside the
locked vehicle after the trunk lid is closed, the
lid will reopen. The haza rd warning flashers
flash and a signal sounds. <
Switching on radio readiness
Pressing the Start/Stop button switches on
radio readiness.
Do not depress the brake or the clutch; other-
wise, the engine will start immediately.
Starting the engine
The engine can be started or the ignition can be
switched on when a remote control is inside the
vehicle. It is not necessa ry to insert a remote
control into the ignition lock, refer to page 61.
Switching off the engine in cars with
automatic transmission
The engine can only be switched off when the
selector lever is in po sition P, refer to page 63.
To switch the engine off when the selector lever
is in position N, the remote control must be in
the ignition lock.
Malfunctions
Local radio waves can in terfere with the func-
tion of Comfort Access, for example when a
mobile phone is in the immediate vicinity of the
remote control or by when a mobile phone is
being charged in the vehicle. If this happens, open and close the vehicle via
the buttons on the remote control or using the
integrated key. To star
t the engine afterward,
insert the remote control into the ignition lock.
Warning lamps
The warning lamp in the instrument
cluster lights up when you attempt to
start the engine: the engine cannot
be started. The remote co ntrol is not inside the
vehicle or is malfunctio ning. Take the remote
control with you inside the vehicle or have it
checked. If necessary, insert another remote
control into the ignition lock.
The warning lamp in the instrument
cluster lights up wh ile the engine is
running: the remote control is no
longer inside the vehicle. After the engine is
switched off, the engine can only be restarted
within approx. 10 seconds.
The indicator lamp in the instrument
cluster comes on and a message
appears on the Control Display:
replace the battery in the remote control.
Replacing the battery
The remote control for Comfort Access con-
tains a battery that will need to be replaced from
time to time.
1. Take the integrated ke y out of the remote
control, refer to page 32.
2. Remove the cover.
00320051004F004C00510048000300280047004C0057004C005200510003
Page 46 of 284
45
Opening and closing
Controls
Before opening and closing
>
Comply with the sa fety precautions
described above.
> Ensure that the trunk partition is folded
down and engaged on both sides, refer to
page 118; otherwise, it will not be possible
to open the convertible top.
> Ensure that the cargo does not press
against the trunk partition from below.
> Ensure that the tr unk lid is closed.
Opening and closing
Convertible top operation with Comfort Access,
also refer to page 34.
As of radio readiness, refer to page 61:
To conserve battery power, if possible
operate the convertible top only while the
engine is running.
Prior to closing the conv ertible top, check for
and remove all debris from the windshield
frame; otherwise, the closing of the top may be
hampered. <
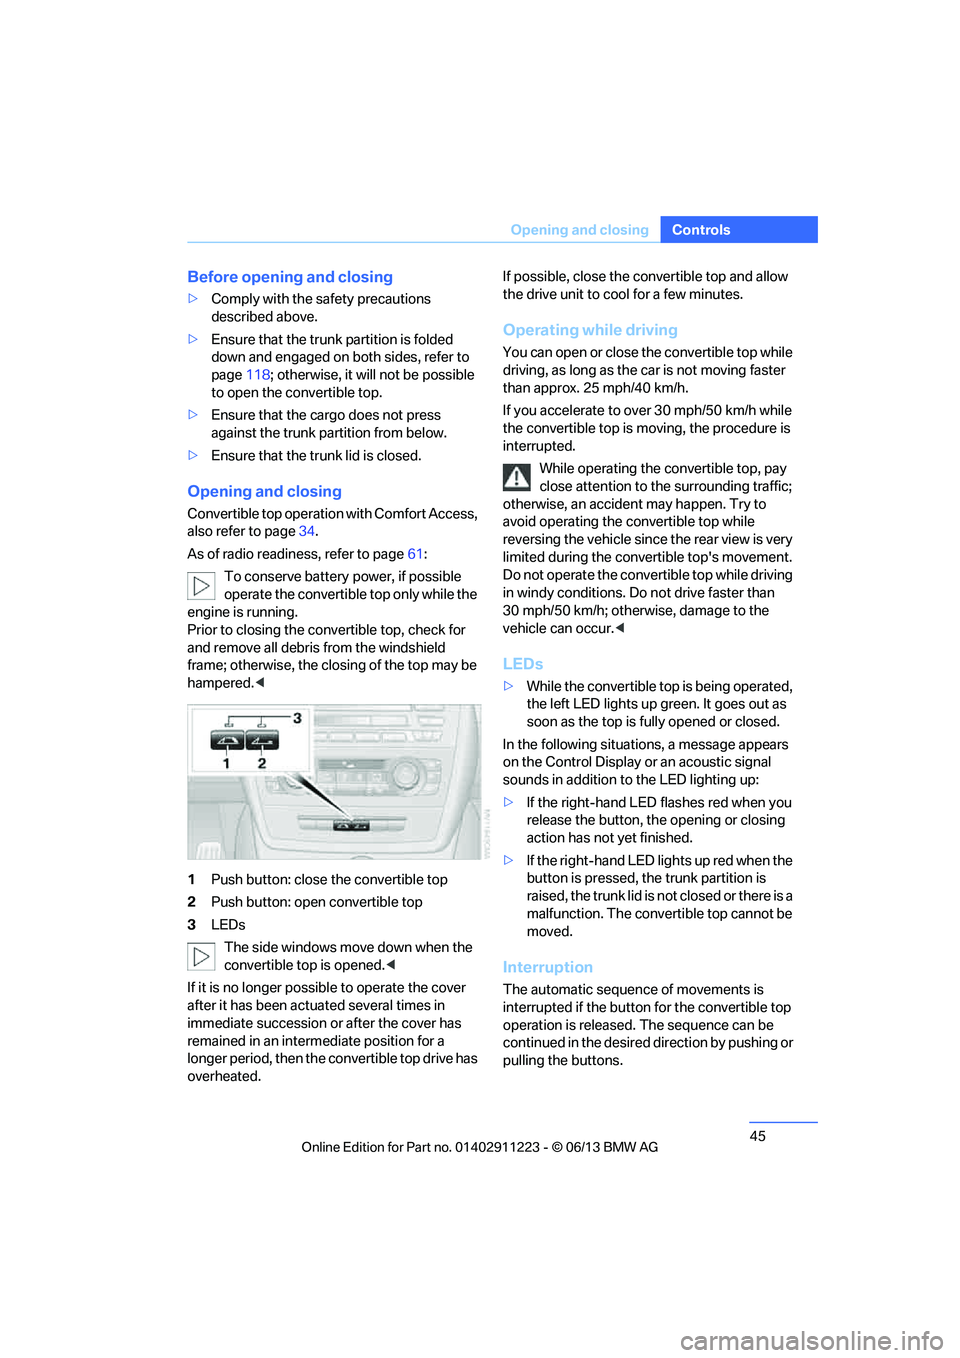
1 Push button: close the convertible top
2 Push button: open convertible top
3 LEDs
The side windows move down when the
convertible top is opened. <
If it is no longer possible to operate the cover
after it has been actuated several times in
immediate succession or after the cover has
remained in an interm ediate position for a
longer period, then the convertible top drive has
overheated. If possible, close the convertible top and allow
the drive unit to cool for a few minutes.
Operating while driving
You can open or close the convertible top while
driving, as long as the car is not moving faster
than approx. 25 mph/40 km/h.
If you accelerate to ov
er 30 mph/50 km/h while
the convertible top is moving, the procedure is
interrupted.
While operating the convertible top, pay
close attention to the surrounding traffic;
otherwise, an accident may happen. Try to
avoid operating the convertible top while
reversing the vehicle since the rear view is very
limited during the convertible top's movement.
Do not operate the convertible top while driving
in windy conditions. Do not drive faster than
30 mph/50 km/h; otherwise, damage to the
vehicle can occur. <
LEDs
>While the convertible top is being operated,
the left LED lights up green. It goes out as
soon as the top is fully opened or closed.
In the following situations, a message appears
on the Control Display or an acoustic signal
sounds in addition to the LED lighting up:
> If the right-hand LED flashes red when you
release the button, th e opening or closing
action has not yet finished.
> If the right-hand LED lights up red when the
button is pressed, the trunk partition is
raised, the trunk lid is not closed or there is a
malfunction. The convertible top cannot be
moved.
Interruption
The automatic sequence of movements is
interrupted if the button for the convertible top
operation is released. The sequence can be
continued in the desired direction by pushing or
pulling the buttons.
00320051004F004C00510048000300280047004C0057004C005200510003
Page 85 of 284
84
ControlsControls overview
Date
The settings are stored for the remote control
currently in use, refer also to Personal Profile on
page32.
Setting the date
In the instrument cluster
To set the dd/mm or mm/dd date format, refer
to Setting the date format below.
1. Push button 1 in the turn signal/high beam
lever up or down repe atedly until the appro-
priate symbol appear s in the display,
accompanied by the date and the word
"SET".
2. Press button 2.
3. Use button 1 to set the day of the month.
4. Press button 2 to confirm the entry.
5. Set the month and the ye a r i n t he s a m e w a y .
6. Press button 2.
The system stores the new date.
Via iDrive
1. "Settings"
2. "Time/Date"
3. "Date:"
4. Turn the controller until the desired day is
displayed, and press the controller.
5. Create the necessary settings for the
month and year.
The date is stored.
Setting the date format
1. "Settings"
2. "Time/Date"
3. "Format:"
4. Select the desired format.
The date format is stored.
Check Control
The concept
The Check Control monitors vehicle functions
and alerts you to any malfunctions in the sys-
tems monitored. Such a Check Control mes-
sage includes indicato r and warning lamps in
the instrument cluster and, in some circum-
stances, an acoustic signal as well as text
messages at the top of the Control Display.
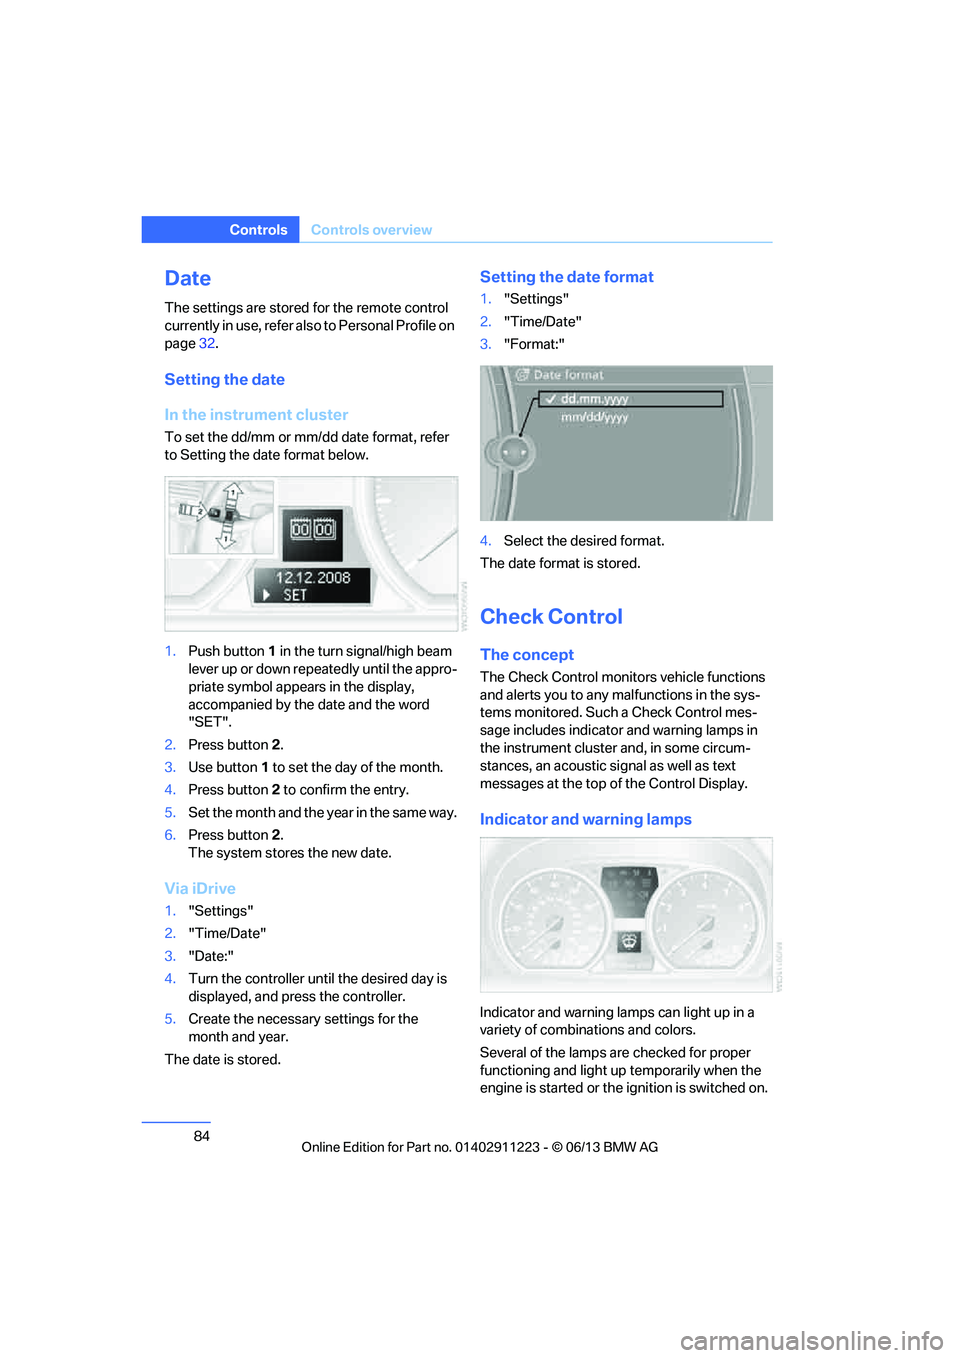
Indicator and warning lamps
Indicator and warning lamps can light up in a
variety of combinations and colors.
Several of the lamps are checked for proper
functioning and light up temporarily when the
engine is started or the ignition is switched on.
00320051004F004C00510048000300280047004C0057004C005200510003
Page 89 of 284
88
ControlsTechnology for driving comfort and safety
Technology for driving comfort and safety
Vehicle equipment
In this chapter, all pr oduction, country, and
optional equipment that is offered in the model
range is described. For this reason, descrip-
tions will be given of some equipment that may
not be available in a vehi cle, for example due to
the special options or national-market version
selected. This also app lies to safety related
functions and systems.
Park Distance Control PDC
The concept
The PDC assists you with maneuvering in tight
parking spaces. Acoustic signals and a visual
indicator warn you of the presence of an object
behind your vehicle. Four ultrasonic sensors in
the bumper measure the distance.
These sensors have a range of approx. 6.5 ft/
2 m. However, an acoustic warning does not
sound until an object is approx. 24 in/60 cm
from the corner sensors or approx. 5 ft/1.50 m
from the center sensors.
PDC is a parking aid that can indicate
objects when they are approached
slowly, as is usually th e case when parking.
Avoid approaching an object at high speed; oth-
erwise, physical circumstances may lead to the
system warning being issued too late. <
Switching on automatically
With the engine running or the ignition switched
on, the system is activated after approx. second
when you engage reverse gear or move the
automatic transmission selector lever to
position R. Wait this short period before driving.
Switching off automatically
After approx. 164 ft/50 m of driving or above
approx. 18 mph/30 km/h, the system switches
off and the LED goes out.
Signal tones
When nearing an object, its position is indicated
correspondingly by an in terval tone. As the dis-
tance between vehicle an d object decreases,
the intervals betwee n the tones become
shorter. If the distance to the nearest object
falls to below roughly 1 ft/30 cm, then a contin-
uous tone sounds.
An interval tone is interrupted after approx.
3seconds:
> If you stop in front of an object that has been
detected by only one of the corner sensors
> If you are driving parallel to a wall
Malfunction
The warning lamp lights up. A mes-
sage appears on the Control Display.
PDC is malfunctioning. Have the
system checked.
To avoid this problem, keep the sensors clean
and free of ice or snow in order to ensure that
they will continue to op erate effectively. When
using a high-pressure cleaner, do not spray the
sensors for extended periods of time and only
from a distance of at least 1 ft/30 cm.
PDC with visual warning
The approach of the vehicle to an object is
shown on the Control Display. Objects that are
farther away are displayed on the Control Dis-
play before a signal tone sounds. The display
appears on the Control Display as soon as PDC
is activated.
00320051004F004C00510048000300280047004C0057004C005200510003
Page 103 of 284
102
ControlsLamps
angle and other parameters, the light from the
headlamp follows the course of the road.
In tight curves such as on switchbacks or when
turning, at speeds up to approx. 40 mph/
70 km/h, an additional, cornering light is
switched on that lights up the area inside the
curve.
Activating Adaptive Light Control
With the ignition switched on, turn the light
switch to position 3, refer to page 100.
The corner-illuminating lamp is switched on
automatically, depending on the steering wheel
angle or turn signal indicator.
Standstill function: to avoid blinding oncoming
traffic, the Adaptive Light Control does not
direct light toward the driver's side when the
vehicle is at a standstill.
When you are reversing, only the corner-illumi-
nating lamps are switched on and active on
both sides.
Malfunction
The warning lamp lights up. A mes-
sage appears on the Control Display.
The Adaptive Light Control is mal-
functioning or failed. Ha ve the system checked
as soon as possible.
High beams/roadside parking
lamps
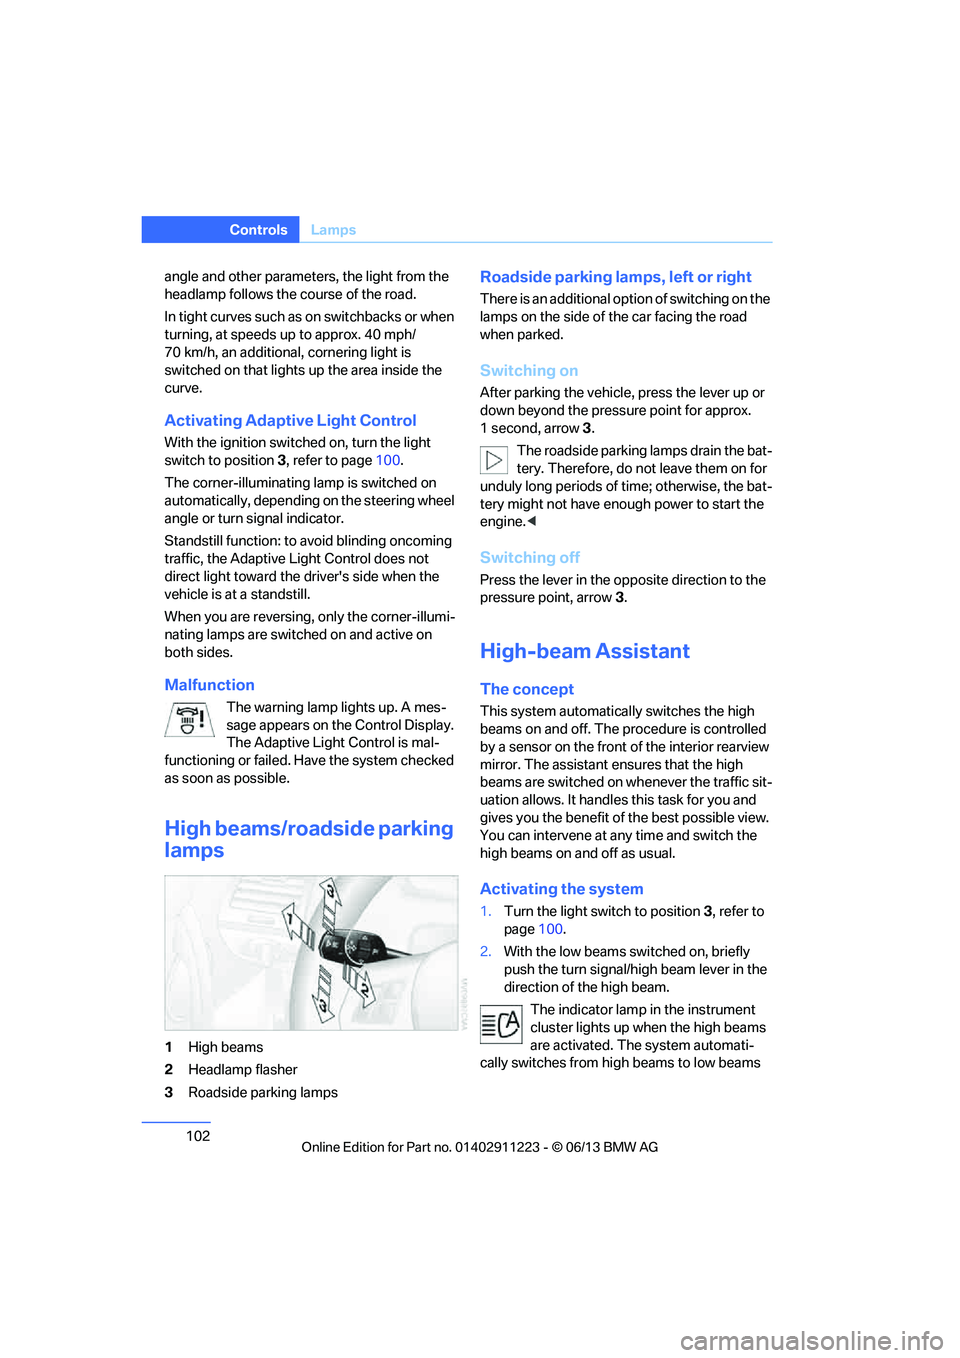
1 High beams
2 Headlamp flasher
3 Roadside parking lamps
Roadside parking lamps, left or right
There is an additional option of switching on the
lamps on the side of the car facing the road
when parked.
Switching on
After parking the vehicle, press the lever up or
down beyond the pressu re point for approx.
1 second, arrow 3.
The roadside parking lamps drain the bat-
tery. Therefore, do not leave them on for
unduly long periods of time; otherwise, the bat-
tery might not have enou gh power to start the
engine. <
Switching off
Press the lever in the o pposite direction to the
pressure point, arrow 3.
High-beam Assistant
The concept
This system automatically switches the high
beams on and off. The procedure is controlled
by a sensor on the front of the interior rearview
mirror. The assistant ensures that the high
beams are switched on whenever the traffic sit-
uation allows. It handle s this task for you and
gives you the benefit of the best possible view.
You can intervene at any time and switch the
high beams on and off as usual.
Activating the system
1. Turn the light switch to position 3, refer to
page 100.
2. With the low beams switched on, briefly
push the turn signal/high beam lever in the
direction of the high beam.
The indicator lamp in the instrument
cluster lights up when the high beams
are activated. The system automati-
cally switches from hi gh beams to low beams
00320051004F004C00510048000300280047004C0057004C005200510003
Page 126 of 284
125
Things to remember when driving
Driving tips
Check tire inflation pressure regularly
Check the tire inflation pr
essure at least twice a
month and before embarking on a long journey,
and correct it if necessary.
Low tire inflation pressure causes higher rolling
resistance and thus increases fuel consumption
and tire wear.
Set off immediately
Do not let the engine wa rm up while the car is
still standing, but set off immediately at moder-
ate engine speed. This is the fastest way for the
cold engine to reach its operating temperature.
Drive defensively
Avoid unnecessary acceleration and braking
maneuvers. To do so, keep an adequate dis-
tance between you and th e vehicle in front of
you. A defensive and smooth driving style
keeps fuel consumption down.
Avoid high engine speeds
Use first gear only for dr iving off. In second and
higher gears, accelerate without hesitation or
pauses. When accelerati ng, shift up before
reaching high engine speeds.
When you reach the desi red speed, shift into
the highest applicable ge ar and drive with the
engine speed as low as possible and at a con-
stant speed.
As a rule: driving at low engine speeds lowers
fuel consumption and reduces wear.
Coasting
When approaching a red lig ht, take your foot off
the accelerator and coast to a stop in the high-
est applicable gear.
On a downhill slope, take your foot off the accel-
erator and coast in a suitable gear.
The fuel supply is interrupted when coasting.
Switch off the engine during lengthy
stops
Switch off the engine when stopping for lengthy
periods, e.g. at traffic lights, railroad crossings
or in traffic congestions.
Switch off functions you do not need at
the moment
Functions such as the air conditioner, seat
heating or rear window defroster draw large
amounts of power and consume additional fuel.
Especially in city traffic and in stop-and-go driv-
ing they have a considerable impact. Therefore,
switch these functions off when they are not
really needed.
Have the vehicle serviced
Have the vehicle serviced regularly to achieve
good economy and a long vehicle life. BMW
recommends having the vehicle serviced at
your BMW center. Also note the BMW Mainte-
nance System, refer to page 237.
General driving notes
Close the trunk lid
Only drive with the trunk closed. Failure to
do so may endanger passengers or other
road users or may damage the vehicle in the
event of an accident or a braking and evasive
maneuver. In addition, exhaust gas may flow
into the passenger compartment. <
If special circumstance s make it absolutely
necessary to drive wi th the trunk open:
1. Close all windows and the glass roof.
2. Greatly increase the air volume of the
automatic climate cont rol system, refer to
page 108.
3. Drive cautiously.
00320051004F004C00510048000300280047004C0057004C005200510003