2013 BMW 128I warning lights
[x] Cancel search: warning lightsPage 34 of 284

33
Opening and closing
Controls
mum of four remote cont
rols. They are stored
for two remote controls if Comfort Access is in
use.
Personal Profile settings
For more information on specific settings, refer
to the specified pages.
> Programming the Programmable memory
keys, refer to page 25
> Response of the central locking system
when the car is unlocked, refer to page 34
> Automatic locking of th e vehicle, refer to
page 37
> Automatic call-up of th e driver's seat posi-
tion, refer to page 54
> Triple turn signal activation, refer to
page 71
> Settings for the display on the Control
Display and in the instrument cluster:
>12h/24h format of the clock, refer to
page 82
> Date format, refer to page 84
> Brightness of the Control Display, refer
to page 87
> Language of the Contro l Display, refer to
page 87
> Units of measure for fuel consumption,
distance covered/remaining distances,
and temperature, refer to page 80
> Show visual warning for Park Distance
Control PDC, refer to page 88
> Light settings:
>Welcome lamps, refer to page 101
> Pathway lighting, refer to page 101
> Daytime running lights, refer to
page 101
> High-beam Assistant, refer to page 102
> Automatic climate control: activating/deac-
tivating AUTO program, air conditioning
and automatic recirculated air control,
setting temperature, air volume and
distribution, refer to page 107 ff>
Entertainment:
>Tone control, refer to page 155
> Speed-dependent volume control, refer
to page 156
Central locking system
The concept
The central locking system functions when the
driver's door is closed.
The system simultaneously engages and
releases the locks on the following:
>Doors
> Trunk lid
> Fuel filler flap
Operating from outside
>Via the remote control
> Using the door lock
> In cars with Comfort Access, via the handles
on the driver's door or the front passenger
door
At the same time as locking and unlocking via
the remote control:
> Welcome lights, the inte rior light, and the
courtesy lighting are switched on or off.
> Alarm system, refer to page 38, is armed or
disarmed.
Operating from inside
By means of the button fo r central locking, refer
to page 37.
In the event of a sufficien tly severe accident, the
central locking system unlocks automatically. In
addition, the hazard warning flashers and inte-
rior lamps come on.
00320051004F004C00510048000300280047004C0057004C005200510003
Page 42 of 284
41
Opening and closing
Controls
Convertible: window and convertible
top operation
With the ignition at radio readiness or beyond,
you can open and close the windows and the
convertible top when a remote control is
located inside the vehicle.
Unlocking the trunk lid separately
Press the button on the ou
tside of the trunk lid.
This corresponds to pressing the button. If the vehicle detects that a remote con-
trol has been accident ally left inside the
locked vehicle after the trunk lid is closed, the
lid will reopen. The haza rd warning flashers
flash and a signal sounds. <
Switching on radio readiness
Pressing the Start/Stop button switches on
radio readiness.
Do not depress the brake or the clutch; other-
wise, the engine will start immediately.
Starting the engine
The engine can be started or the ignition can be
switched on when a remote control is inside the
vehicle. It is not necessa ry to insert a remote
control into the ignition lock, refer to page 61.
Switching off the engine in cars with
automatic transmission
The engine can only be switched off when the
selector lever is in po sition P, refer to page 63.
To switch the engine off when the selector lever
is in position N, the remote control must be in
the ignition lock.
Malfunctions
Local radio waves can in terfere with the func-
tion of Comfort Access, for example when a
mobile phone is in the immediate vicinity of the
remote control or by when a mobile phone is
being charged in the vehicle. If this happens, open and close the vehicle via
the buttons on the remote control or using the
integrated key. To star
t the engine afterward,
insert the remote control into the ignition lock.
Warning lamps
The warning lamp in the instrument
cluster lights up when you attempt to
start the engine: the engine cannot
be started. The remote co ntrol is not inside the
vehicle or is malfunctio ning. Take the remote
control with you inside the vehicle or have it
checked. If necessary, insert another remote
control into the ignition lock.
The warning lamp in the instrument
cluster lights up wh ile the engine is
running: the remote control is no
longer inside the vehicle. After the engine is
switched off, the engine can only be restarted
within approx. 10 seconds.
The indicator lamp in the instrument
cluster comes on and a message
appears on the Control Display:
replace the battery in the remote control.
Replacing the battery
The remote control for Comfort Access con-
tains a battery that will need to be replaced from
time to time.
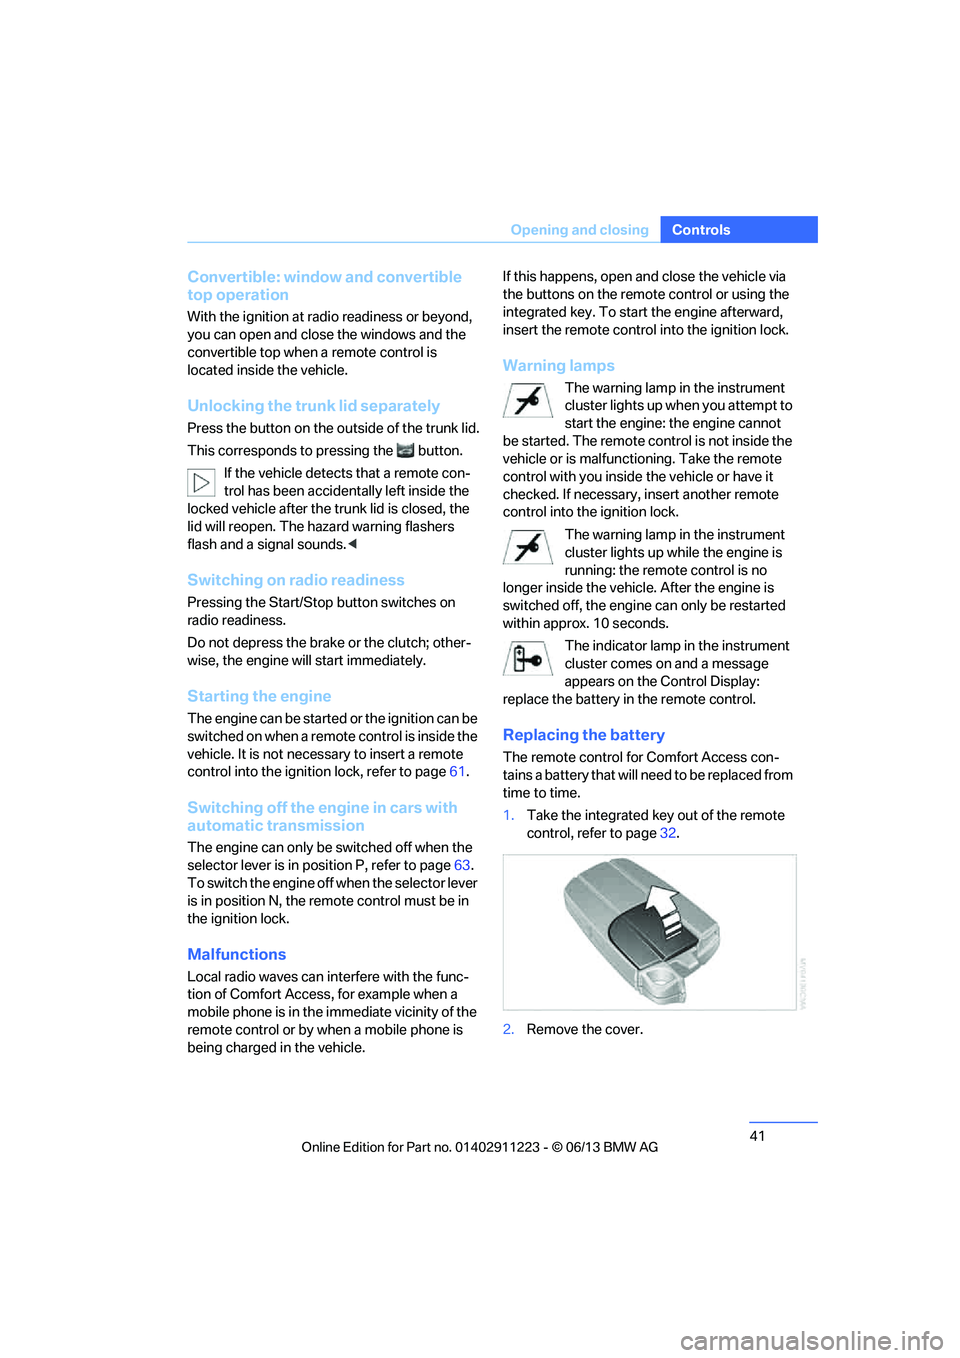
1. Take the integrated ke y out of the remote
control, refer to page 32.
2. Remove the cover.
00320051004F004C00510048000300280047004C0057004C005200510003
Page 76 of 284

75
Controls overview
Controls
Controls overview
Vehicle equipment
In this chapter, all production, country, and
optional equipment that is offered in the model
range is described. For this reason, descrip-
tions will be given of some equipment that may
not be available in a vehi
cle, for example due to
the special options or national-market version
selected. This also app lies to safety related
functions and systems.
Odometer, outside
temperature display, clock
1 Knob in the instrument cluster
2 Outside temperature and clock
3 Odometer and trip odometer
Knob in the instrument cluster
>To reset the trip odomet er while the ignition
is switched on
> To display the time, outside temperature
and odometer briefly while the ignition is
switched off
Units of measure
To select the respective units of measure, miles
or km for the odometer as well as 7 or 6 for
the outside temperature, refer to Units of mea-
sure on page 80.
The setting is stored for the remote control
currently in use.
Time, outside temperature display
Setting the time, refer to page 82.
Outside temperature warning
When the displayed temperature sinks to
approx. +377/+3 6, a signal sounds and a
warning lamp lights up. There is an increased
risk of black ice.
Black ice can also form at temperatures
above +37 7/+3 6. You should there-
fore drive carefully on bridges and shaded
roads, for example; otherwise, there is an
increased risk of an accident. <
Odometer and trip odometer
Resetting the trip odometer:
With the ignition switched on, press button 1 in
the instrument cluster.
When the vehicle is parked
If you still want to view the time, outside tem-
perature and odometer reading briefly after the
remote control has been taken out of the igni-
tion lock:
Press button 1 in the instrument cluster.
00320051004F004C00510048000300280047004C0057004C005200510003
Page 87 of 284
86
ControlsControls overview
2.Press button 2.
"CHECK OK" appears if there are no Check
Control messages. If a Check Control mes-
sage has been stored, the corresponding
lamp lights up. It is accompanied by a text
message on the Control Display.
3. Push button 1 to check for other messages.
4. Press button 2.
The display again shows the outside
temperature and the time.
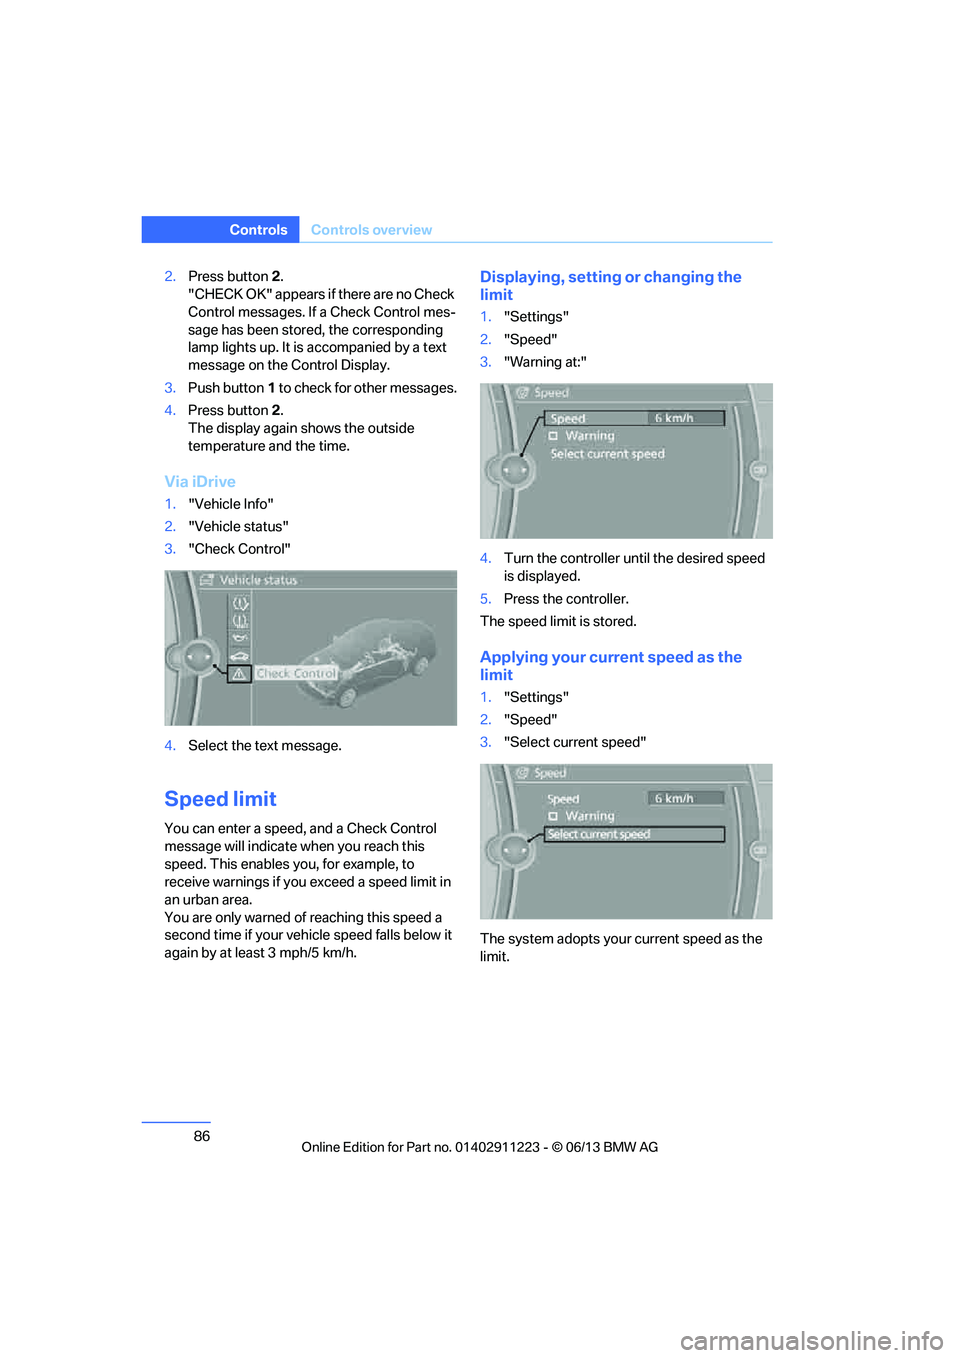
Via iDrive
1. "Vehicle Info"
2. "Vehicle status"
3. "Check Control"
4. Select the text message.
Speed limit
You can enter a speed, and a Check Control
message will indicate when you reach this
speed. This enables you, for example, to
receive warnings if you exceed a speed limit in
an urban area.
You are only warned of reaching this speed a
second time if your vehi cle speed falls below it
again by at least 3 mph/5 km/h.
Displaying, setting or changing the
limit
1. "Settings"
2. "Speed"
3. "Warning at:"
4. Turn the controller until the desired speed
is displayed.
5. Press the controller.
The speed limit is stored.
Applying your curr ent speed as the
limit
1. "Settings"
2. "Speed"
3. "Select current speed"
The system adopts your current speed as the
limit.
00320051004F004C00510048000300280047004C0057004C005200510003
Page 89 of 284
88
ControlsTechnology for driving comfort and safety
Technology for driving comfort and safety
Vehicle equipment
In this chapter, all pr oduction, country, and
optional equipment that is offered in the model
range is described. For this reason, descrip-
tions will be given of some equipment that may
not be available in a vehi cle, for example due to
the special options or national-market version
selected. This also app lies to safety related
functions and systems.
Park Distance Control PDC
The concept
The PDC assists you with maneuvering in tight
parking spaces. Acoustic signals and a visual
indicator warn you of the presence of an object
behind your vehicle. Four ultrasonic sensors in
the bumper measure the distance.
These sensors have a range of approx. 6.5 ft/
2 m. However, an acoustic warning does not
sound until an object is approx. 24 in/60 cm
from the corner sensors or approx. 5 ft/1.50 m
from the center sensors.
PDC is a parking aid that can indicate
objects when they are approached
slowly, as is usually th e case when parking.
Avoid approaching an object at high speed; oth-
erwise, physical circumstances may lead to the
system warning being issued too late. <
Switching on automatically
With the engine running or the ignition switched
on, the system is activated after approx. second
when you engage reverse gear or move the
automatic transmission selector lever to
position R. Wait this short period before driving.
Switching off automatically
After approx. 164 ft/50 m of driving or above
approx. 18 mph/30 km/h, the system switches
off and the LED goes out.
Signal tones
When nearing an object, its position is indicated
correspondingly by an in terval tone. As the dis-
tance between vehicle an d object decreases,
the intervals betwee n the tones become
shorter. If the distance to the nearest object
falls to below roughly 1 ft/30 cm, then a contin-
uous tone sounds.
An interval tone is interrupted after approx.
3seconds:
> If you stop in front of an object that has been
detected by only one of the corner sensors
> If you are driving parallel to a wall
Malfunction
The warning lamp lights up. A mes-
sage appears on the Control Display.
PDC is malfunctioning. Have the
system checked.
To avoid this problem, keep the sensors clean
and free of ice or snow in order to ensure that
they will continue to op erate effectively. When
using a high-pressure cleaner, do not spray the
sensors for extended periods of time and only
from a distance of at least 1 ft/30 cm.
PDC with visual warning
The approach of the vehicle to an object is
shown on the Control Display. Objects that are
farther away are displayed on the Control Dis-
play before a signal tone sounds. The display
appears on the Control Display as soon as PDC
is activated.
00320051004F004C00510048000300280047004C0057004C005200510003
Page 96 of 284
95
Technology for driving comfort and safety
Controls
Message for unsuc
cessful system
reset
Yellow warning lamp lights up. A
message appears on the Control
Display.
The system has detected a wheel change, but
was not reset. A reliable warning is not possible
at the current inflation pressures.
Check the tire inflation pressure and reset the
system, refer to page 93.
Malfunction
The small warning lamp flashes in
yellow and then lights up continu-
ously; the large warning lamp lights
up in yellow. The tires appear in gray
in the Control Display. No punctures can be
detected.
Display in the following situations:
> A wheel without TPM electronics has been
installed:
Have it checked by your BMW center.
> Malfunction
Have the system checked
> Tire Pressure Monitor was unable to
complete the resetting process. Reset the
system again.
The small warning lamp flashes in
yellow and then lights up continu-
ously; the large warning lamp lights
up in yellow. The tires appear in gray
in the Control Display.
Display in the following situations:
Interference from systems or devices that use
the same radio frequency. The system auto-
matically becomes active again when the vehi-
cle moves out of the interference zone.
Declaration according to NHTSA/
FMVSS 138
Tire Pressure Monitoring Systems
Each tire should be checked monthly when cold
and inflated to the inflation pressure recom-
mended by the vehicle manufacturer on the vehicle placard or tire infl
ation pressure label. If
your vehicle has tires of a different size than the
size indicated on the vehi cle placard or tire infla-
tion pressure label, you should determine the
proper tire inflation pressure for those tires. As
an added safety feature, your vehicle has been
equipped with a tire pr essure monitoring sys-
tem, TPMS, that illuminate s a low tire pressure
t e l l t a l e w h e n o n e o r m o r e o f y o u r t i r e s a r e s i g n i f -
icantly underinflated. Accordingly, when the
low tire pressure telltal e illuminates, you should
stop and check your tires as soon as possible,
and inflate them to the proper pressure. Driving
on a significantly underinflated tire causes the
tire to overheat and ca n lead to tire failure.
Underinflation also reduces fuel efficiency and
tire tread life and may a ffect the vehicle's han-
dling and stopping ability. Please note that the
TPMS is not a substitute for proper tire mainte-
nance, and it is the driver's responsibility to
maintain correct tire pr essure, even if underin-
flation has not reached th e level to trigger illumi-
nation of the TPMS low tire pressure indicator.
The TPMS malfunction indicator is combined
with the low tire pressure telltale. When the sys-
tem detects a malfunction, the telltale will flash
for approximately one minute and then remain
continuously lit. This sequence will continue
upon subsequent vehicle startups as long as
the malfunction exists. When the malfunction
indicator is illuminated, the system may not be
able to detect or signal low tire pressure as
intended. TPMS malfunctions may occur for a
variety of reasons, includ ing the installation of
replacement or alternate tires or wheels on the
vehicle that prevent the TPMS from functioning
properly. Always check the TPMS malfunction
telltale after replacing one or more tires or
wheels on your vehicle to ensure that the
replacement or alternate tires and wheels allow
the TPMS to continue to function properly.
00320051004F004C00510048000300280047004C0057004C005200510003
Page 97 of 284
96
ControlsTechnology for driving comfort and safety
Active steering
The concept
Active steering varies the turning angle of the
front wheels in relation to steering wheel move-
ments. It also varies the steering force required
to turn the wheels depending on the speed at
which you are driving.
When you are driving in the low speed range,
e.g. in a town or when parking, the steering
angle is increased, i.e. steering becomes very
direct and less effort is required to turn the
wheels. In the higher speed range, on the other
hand, the steering angle is reduced as the
speed increases. This improves the handling of
your BMW over the entire speed range.
In critical situations, the system can make tar-
geted corrections to th e steering angle pro-
vided by the driver and thus stabilize the vehicle
before the driver intervenes. This stabilizing
intervention is simult aneously deactivated
when DSC is switched off, refer to page 89.
Malfunction
The warning lamps come on. Active
steering is malfunctioning or is tem-
porarily deactivate d. At low speeds,
greater steering wheel movements
are required, whereas at higher speeds the
vehicle reacts more sensitively to steering
wheel movements. Th e stability-enhancing
feature may also be deactivated. Drive cau-
tiously and think well ahead.
Deactivation
Active steering is deacti vated to perform an ini-
tialization. A message indicates that the feature
is deactivated. Initializ ation may take several
minutes.
If the message does not disappear during the
current trip, have the system checked.
Defect
If there is a defect, a corresponding text mes-
sage appears. Have the system checked.
Servotronic
The concept
The Servotronic varies the steering force
required to turn the wh eels relative to the
vehicle speed.
At low speeds, the steering force is strongly
assisted, i.e. less force is needed for steering.
As the vehicle speed increases, the steering
assisting power is reduced.
This system functions automatically.
Malfunctions
The warning lamp lights up. A mes-
sage appears on the Control Display.
Servotronic is malfunctioning or has
failed. Steering response will be different. You
can continue your journey, but moderate your
speed and exercise due caution. Have the
system checked as soon as possible.
Brake Force Display
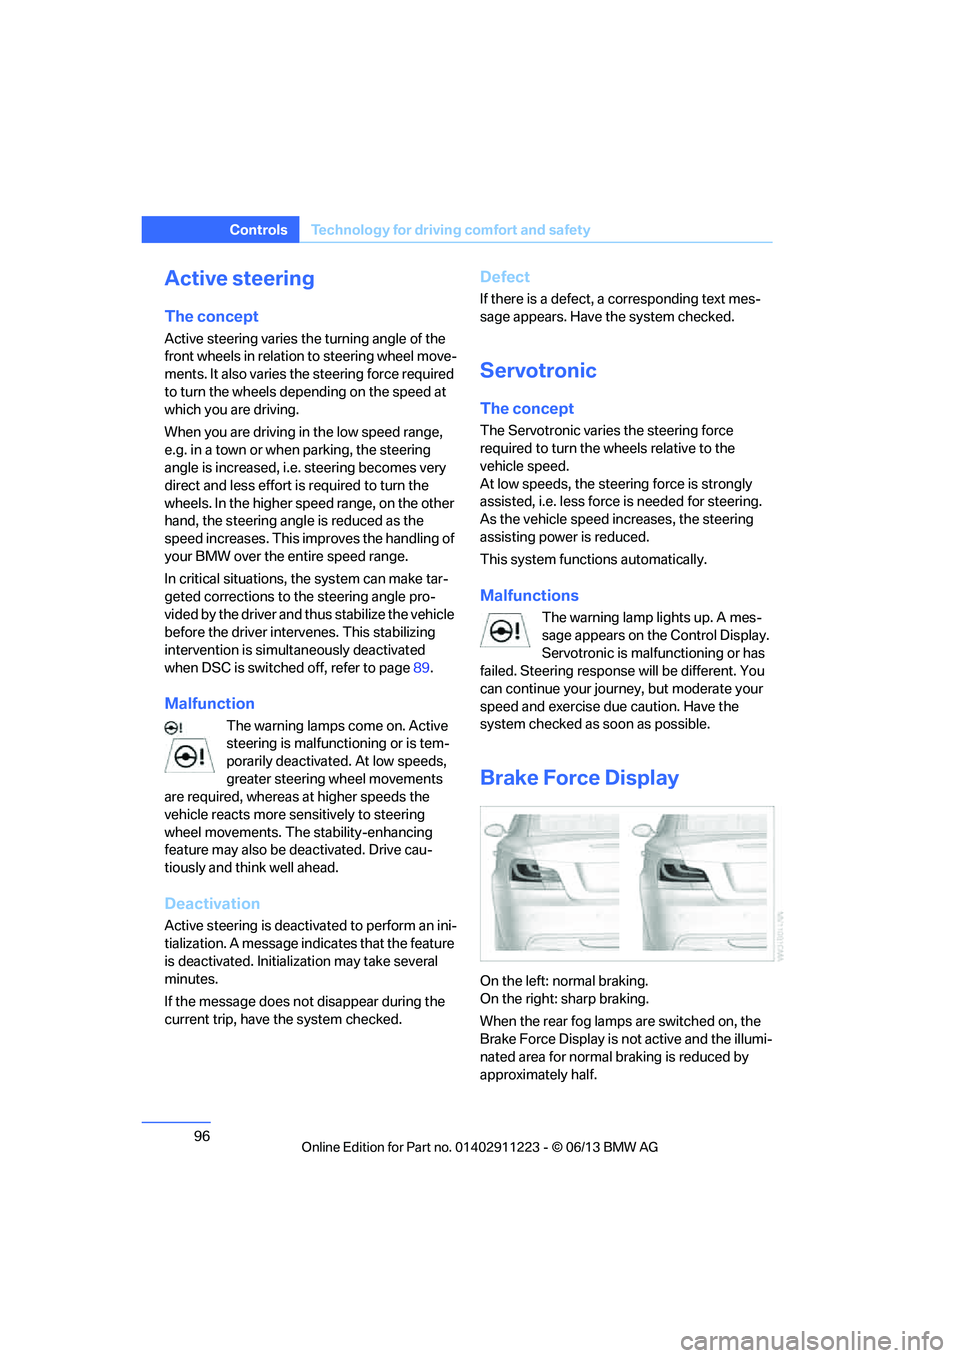
On the left: normal braking.
On the right: sharp braking.
When the rear fog lamps are switched on, the
Brake Force Display is no t active and the illumi-
nated area for normal braking is reduced by
approximately half.
00320051004F004C00510048000300280047004C0057004C005200510003
Page 99 of 284
98
ControlsTechnology for driving comfort and safety
Before transporting a child on the front
passenger seat, read the safety precau-
tions and handling inst ructions under Trans-
porting children safely, refer to page 58.
The front and side airbags can also be deacti-
vated by adolescents and adults sitting in cer-
tain positions; the indi cator lamp for the front
passenger airbags lights up. In such cases, the
passenger should change his or her sitting
position so that the fr ont passenger airbags are
activated and the indicator lamp goes out. If the
desired airbag status cannot be achieved by
changing the sitting position, transport the rele-
vant passenger on a rear seat. Do not attach
seat covers, seat cushion padding, ball mats or
other items to the front passenger seat unless
they are specifically recommended by BMW.
Do not place any items under the seat which
could press against the seat from below. Other-
wise, a correct analysis of the seat cushion is
not ensured. <
Status of front passenger airbags
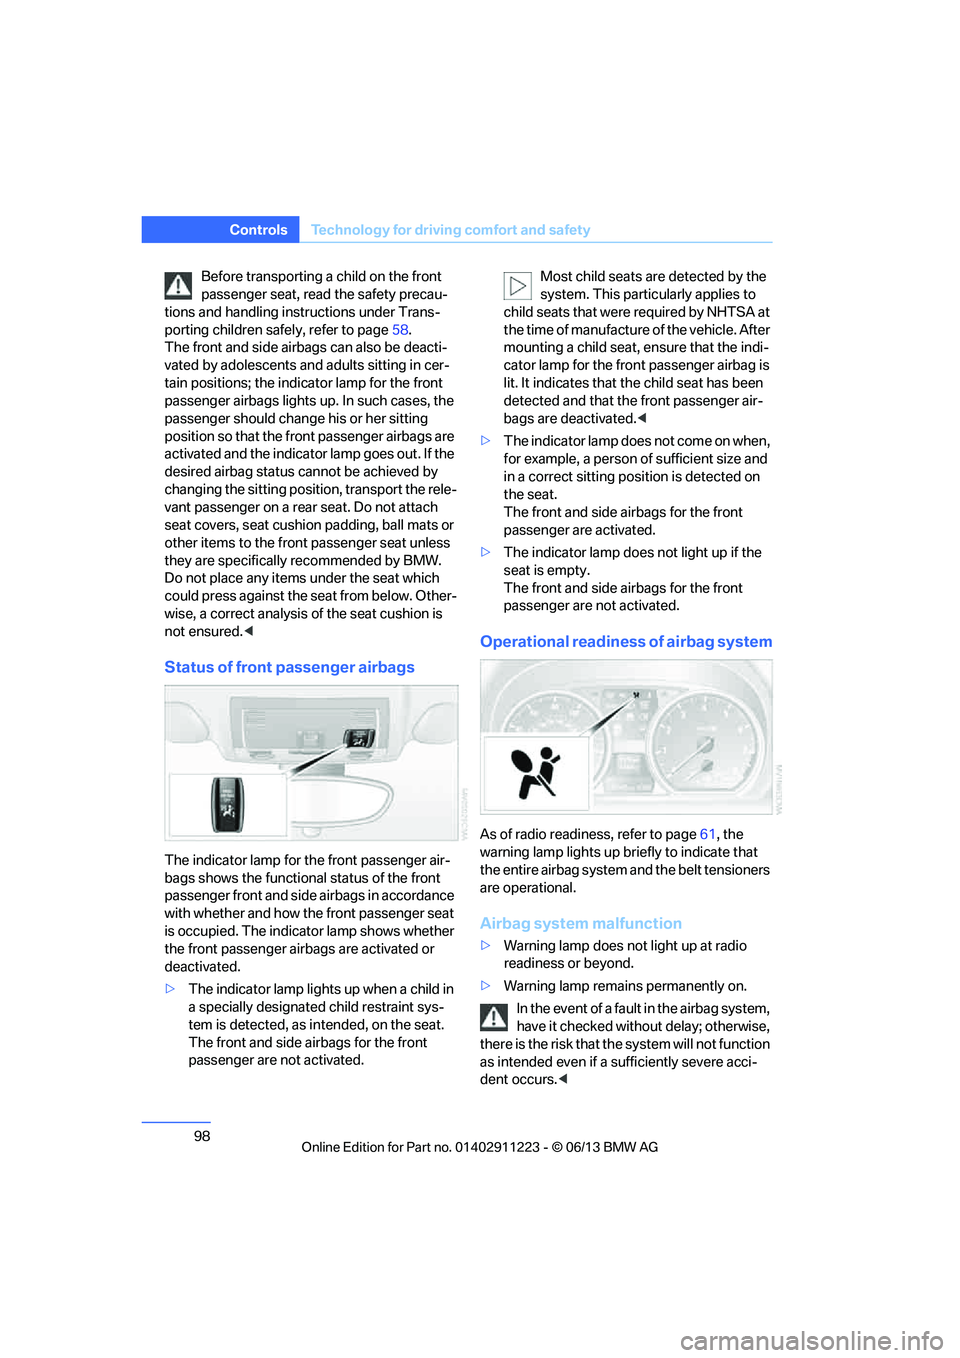
The indicator lamp for the front passenger air-
bags shows the functional status of the front
passenger front and side airbags in accordance
with whether and how the front passenger seat
is occupied. The indicator lamp shows whether
the front passenger airbags are activated or
deactivated.
>The indicator lamp lights up when a child in
a specially designated child restraint sys-
tem is detected, as in tended, on the seat.
The front and side airbags for the front
passenger are not activated. Most child seats are detected by the
system. This partic
ularly applies to
child seats that were required by NHTSA at
the time of manufacture of the vehicle. After
mounting a child seat, ensure that the indi-
cator lamp for the fron t passenger airbag is
lit. It indicates that th e child seat has been
detected and that the front passenger air-
bags are deactivated. <
> The indicator lamp does n o t c o m e o n w h e n ,
for example, a person of sufficient size and
in a correct sitting position is detected on
the seat.
The front and side airbags for the front
passenger are activated.
> The indicator lamp does not light up if the
seat is empty.
The front and side airbags for the front
passenger are not activated.
Operational readine ss of airbag system
As of radio readiness, refer to page 61, the
warning lamp lights up br iefly to indicate that
the entire airbag system and the belt tensioners
are operational.
Airbag system malfunction
> Warning lamp does not light up at radio
readiness or beyond.
> Warning lamp remains permanently on.
In the event of a fault in the airbag system,
have it checked withou t delay; otherwise,
there is the risk that th e system will not function
as intended even if a sufficiently severe acci-
dent occurs. <
00320051004F004C00510048000300280047004C0057004C005200510003