2013 BMW 128I COUPE instrument cluster
[x] Cancel search: instrument clusterPage 83 of 284

82
ControlsControls overview
Entering deadlines for legally required
inspections
Make sure the date on the Control Display is
always set correctly, refer to page 84; other-
wise, the effectiveness of Condition Based
Service CBS is not ensured.
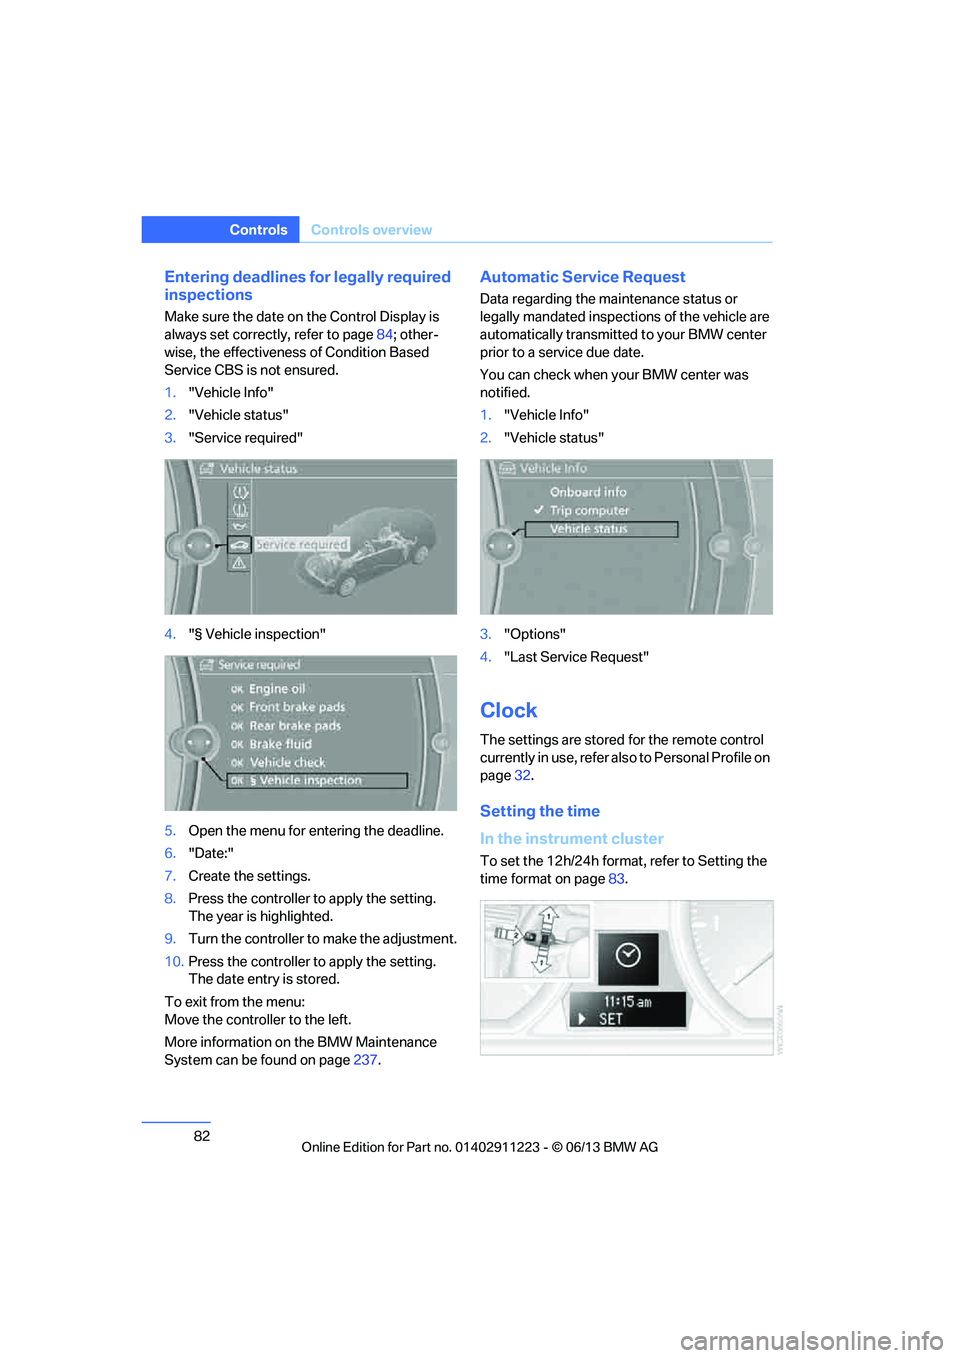
1. "Vehicle Info"
2. "Vehicle status"
3. "Service required"
4. "§ Vehicle inspection"
5. Open the menu for entering the deadline.
6. "Date:"
7. Create the settings.
8. Press the controller to apply the setting.
The year is highlighted.
9. Turn the controller to make the adjustment.
10. Press the controller to apply the setting.
The date entry is stored.
To exit from the menu:
Move the controller to the left.
More information on the BMW Maintenance
System can be found on page 237.
Automatic Service Request
Data regarding the ma intenance status or
legally mandated inspecti ons of the vehicle are
automatically transmitted to your BMW center
prior to a service due date.
You can check when your BMW center was
notified.
1. "Vehicle Info"
2. "Vehicle status"
3. "Options"
4. "Last Service Request"
Clock
The settings are stored for the remote control
currently in use, refer also to Personal Profile on
page 32.
Setting the time
In the instrument cluster
To set the 12h/24h format , refer to Setting the
time format on page 83.
00320051004F004C00510048000300280047004C0057004C005200510003
Page 85 of 284

84
ControlsControls overview
Date
The settings are stored for the remote control
currently in use, refer also to Personal Profile on
page32.
Setting the date
In the instrument cluster
To set the dd/mm or mm/dd date format, refer
to Setting the date format below.
1. Push button 1 in the turn signal/high beam
lever up or down repe atedly until the appro-
priate symbol appear s in the display,
accompanied by the date and the word
"SET".
2. Press button 2.
3. Use button 1 to set the day of the month.
4. Press button 2 to confirm the entry.
5. Set the month and the ye a r i n t he s a m e w a y .
6. Press button 2.
The system stores the new date.
Via iDrive
1. "Settings"
2. "Time/Date"
3. "Date:"
4. Turn the controller until the desired day is
displayed, and press the controller.
5. Create the necessary settings for the
month and year.
The date is stored.
Setting the date format
1. "Settings"
2. "Time/Date"
3. "Format:"
4. Select the desired format.
The date format is stored.
Check Control
The concept
The Check Control monitors vehicle functions
and alerts you to any malfunctions in the sys-
tems monitored. Such a Check Control mes-
sage includes indicato r and warning lamps in
the instrument cluster and, in some circum-
stances, an acoustic signal as well as text
messages at the top of the Control Display.
Indicator and warning lamps
Indicator and warning lamps can light up in a
variety of combinations and colors.
Several of the lamps are checked for proper
functioning and light up temporarily when the
engine is started or the ignition is switched on.
00320051004F004C00510048000300280047004C0057004C005200510003
Page 90 of 284

89
Technology for driving comfort and safety
Controls
System limitations
Even with PDC, final responsibility for
estimating the distance between the
vehicle and any obstructions always remains
with the driver. Even when sensors are pro-
vided, there is a blind spot in which objects can
no longer be detected. The system is also sub-
ject to the physical limit s that apply to all forms
of ultrasonic measurement, such as those
encountered with traile r towbars and hitches,
thin or wedge-shaped objects, etc. Low objects
that have already been displayed, e.g. curbs,
can disappear again from the detection area of
the sensors before or after a continuous tone
sounds. Higher, protruding objects, e.g. ledges,
cannot be detected. Loud sound sources out-
side or inside the car can drown out the PDC
signal. Therefore, always drive cautiously; oth-
erwise, there is a risk of personal injury or prop-
erty damage. <
Driving stability control
systems
Your BMW has a number of systems that help
to maintain the vehicle's stability even in
adverse driving conditions.
Antilock Brake System ABS
ABS prevents locking of the wheels during
braking. Safe steering response is maintained
even during full braking. Active safety is thus
increased.
The ABS is operational every time you start the
engine. Braking safely, refer to page 126.
Electronic brake-force distribution
EBV
The system controls the brake pressure in the
rear wheels to ensure stable braking behavior.
Dynamic Brake Control DBC
When you apply the brakes rapidly, this system
automatically produces the maximum braking
force boost and thus helps to achieve the short-
est possible braking distance during full brak-
ing. This system exploi ts all of the benefits
provided by ABS.
Do not reduce the pressu re on the brake for the
duration of the full braking application.
Dynamic Stability Control DSC
DSC prevents the driving wheels from losing
traction when you pull aw ay from rest or accel-
erate. The system also recognizes unstable
driving conditions, for example if the rear of the
car is about to swerve or if momentum is acting
at an angle past the front wheels. In these
cases, DSC helps the vehicle maintain a safe
course within physical limits by reducing engine
output and through brakin g actions at the indi-
vidual wheels.
The laws of physics cannot be repealed,
even with DSC. An appropriate driving
style always remains th e responsibility of the
driver. Therefore, do no t reduce the additional
s a f e t y m a r g i n a g a i n b y t a k i n g r i s k s , a s t h i s c o u l d
result in an accident. <
Deactivating DSC
Press the button for at least 3 seconds until the
indicator lamp for DSC OFF lights up and DSC
OFF is displayed in the instrument cluster.
Dynamic Traction Cont rol DTC and DSC have
been simultaneously de activated. Stabilizing
and drive-output promoting actions are no
longer executed.
00320051004F004C00510048000300280047004C0057004C005200510003
Page 91 of 284

90
ControlsTechnology for driving comfort and safety
In the same way as with a differential interlock,
even if DSC is deactivated, brake actions are
still performed on the rear axle to enhance drive
output if the drive whee ls experience a signifi-
cant loss of traction.
To increase vehicle stability, activate DSC again
as soon as possible.
Activating DSC
Press the button again; th e indicator lamp in the
instrument cluster goes out.
For better control
If the indicator lamp flashes: the DSC
controls the driving and braking forces.
If the indicator lamp lights up: DSC and
DTC have failed.
The indicator lamp lights up and
DSC OFF is displayed in the instrument
cluster: DSC is deactivated.
Dynamic Traction Control DTC
DTC is a version of DSC in which the drive out-
put is optimized for part icular road conditions,
e.g. unplowed snow-covered roads. The sys-
tem assures the maximal drive output, but with
reduced driving stability. It is therefore neces-
sary to drive with appropriate caution.
You may find it useful to briefly activate DTC
under the following sp ecial circumstances:
> When driving uphill on snow-covered roads,
in slush or on unplowed, snow-covered
roads
> When rocking a stuck vehicle free or start-
ing off in deep snow or on loose ground
> When driving with snow chains
Activating DTC
Press the button; the indicator lamp for DSC
OFF lights up and TRACTION is displayed in
the instrument cluster.
For better control
If the indicator lamp flashes: DTC con-
trols the driving and braking forces.
If the indicator lamp lights up: DSC and
DTC have failed.
The indicator lamp lights up and TRAC-
TION is displayed in the instrument
cluster: DTC is activated.
Deactivating DTC
Press the button again; th e indicator lamp in the
instrument cluster goes out.
Drive-off assistant
The drive-off assistant enables you to drive off
smoothly on uphill gradients. It is not necessary
to use the parking brake for this.
1. Hold the car in place by depressing the
brake.
2. Release the brake and drive off without
delay.
The drive-off assistant holds the car in
place for approx. 2 seconds after the
brake is released. Drive off without delay after
releasing the brake. Otherwise, the drive-off
assistant will no longer hold the car in place
after approx. 2 seconds and the car will start to
roll backwards. <
00320051004F004C00510048000300280047004C0057004C005200510003
Page 103 of 284

102
ControlsLamps
angle and other parameters, the light from the
headlamp follows the course of the road.
In tight curves such as on switchbacks or when
turning, at speeds up to approx. 40 mph/
70 km/h, an additional, cornering light is
switched on that lights up the area inside the
curve.
Activating Adaptive Light Control
With the ignition switched on, turn the light
switch to position 3, refer to page 100.
The corner-illuminating lamp is switched on
automatically, depending on the steering wheel
angle or turn signal indicator.
Standstill function: to avoid blinding oncoming
traffic, the Adaptive Light Control does not
direct light toward the driver's side when the
vehicle is at a standstill.
When you are reversing, only the corner-illumi-
nating lamps are switched on and active on
both sides.
Malfunction
The warning lamp lights up. A mes-
sage appears on the Control Display.
The Adaptive Light Control is mal-
functioning or failed. Ha ve the system checked
as soon as possible.
High beams/roadside parking
lamps
1 High beams
2 Headlamp flasher
3 Roadside parking lamps
Roadside parking lamps, left or right
There is an additional option of switching on the
lamps on the side of the car facing the road
when parked.
Switching on
After parking the vehicle, press the lever up or
down beyond the pressu re point for approx.
1 second, arrow 3.
The roadside parking lamps drain the bat-
tery. Therefore, do not leave them on for
unduly long periods of time; otherwise, the bat-
tery might not have enou gh power to start the
engine. <
Switching off
Press the lever in the o pposite direction to the
pressure point, arrow 3.
High-beam Assistant
The concept
This system automatically switches the high
beams on and off. The procedure is controlled
by a sensor on the front of the interior rearview
mirror. The assistant ensures that the high
beams are switched on whenever the traffic sit-
uation allows. It handle s this task for you and
gives you the benefit of the best possible view.
You can intervene at any time and switch the
high beams on and off as usual.
Activating the system
1. Turn the light switch to position 3, refer to
page 100.
2. With the low beams switched on, briefly
push the turn signal/high beam lever in the
direction of the high beam.
The indicator lamp in the instrument
cluster lights up when the high beams
are activated. The system automati-
cally switches from hi gh beams to low beams
00320051004F004C00510048000300280047004C0057004C005200510003
Page 105 of 284

104
ControlsLamps
The parking lamps or low beams must
be switched on for the fog lamps to
operate. The green indicator lamp in
the instrument cluster lights up whenever the
fog lamps are on.
The fog lamps are switched off while you acti-
vate the headlamp flasher or switch on the high
beams.
If the automatic headla mp control is acti-
vated, the low beams will come on auto-
matically when you swit ch on the fog lamps.<
Instrument lighting
You can adjust the brightness of the instrument
lighting only when the parking lamps or the low
beams are switched on.
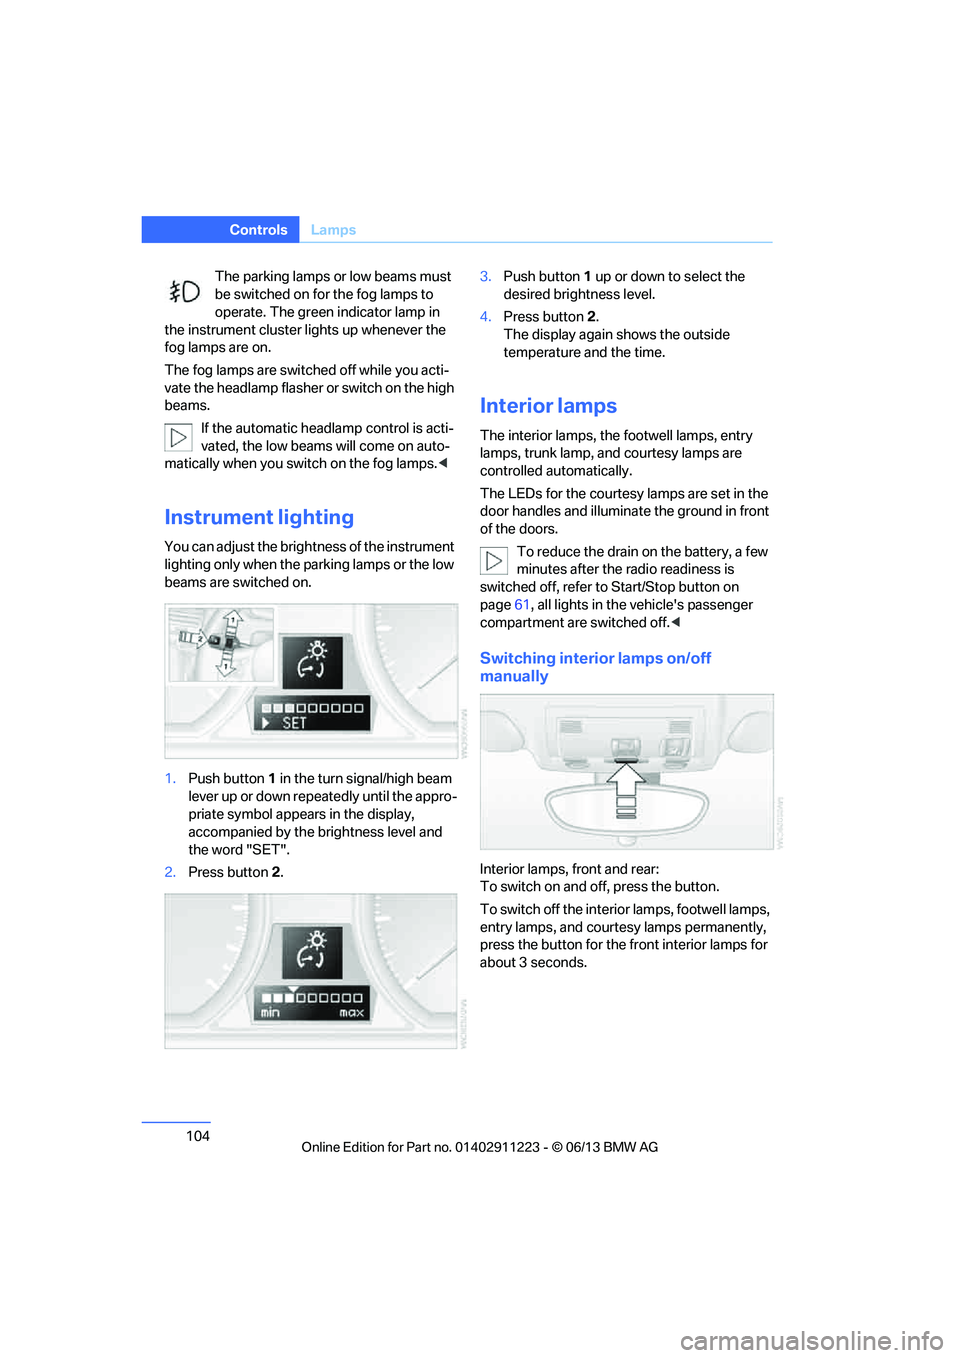
1.Push button 1 in the turn signal/high beam
lever up or down repe atedly until the appro-
priate symbol appear s in the display,
accompanied by the brightness level and
the word "SET".
2. Press button 2. 3.
Push button 1 up or down to select the
desired brightness level.
4. Press button 2.
The display again shows the outside
temperature and the time.
Interior lamps
The interior lamps, the footwell lamps, entry
lamps, trunk lamp, and courtesy lamps are
controlled automatically.
The LEDs for the courtesy lamps are set in the
door handles and illuminate the ground in front
of the doors.
To reduce the drain on the battery, a few
minutes after the radio readiness is
switched off, refer to Start/Stop button on
page 61, all lights in the vehicle's passenger
compartment are switched off. <
Switching interior lamps on/off
manually
Interior lamps, front and rear:
To switch on and off, press the button.
To switch off the interior lamps, footwell lamps,
entry lamps, and courtesy lamps permanently,
press the button for the front interior lamps for
about 3 seconds.
00320051004F004C00510048000300280047004C0057004C005200510003
Page 234 of 284

233
Engine compartment
Mobility
Releasing
Pull the lever.
Opening
To avoid damage, make sure that the
wiper arms are against the windshield
before you open the engine compartment. Do
not open the engine hood before the engine has
cooled down; otherwise, injuries may result. <
Press the release handle and open the hood.
Closing
Close the hood from a height of approx. 16 in/
40 cm with momentum. It must be clearly heard
to engage. Make sure that the
closing path of the
hood is clear; otherwise, injuries may
result.
If you see any signs while driving your vehicle
that the hood is not comp letely closed, stop at
once and close it securely. <
Engine oil
General information
The engine oil consumption is dependent on
driving style and operating conditions; for
example, the engine oil consumption is signifi-
cantly higher with a very sporty driving style.
For this reason, regularly check the oil level
after each time you refuel.
Checking oil level
Your car is equipped with an electronic oil-level
monitor.
For precise measurement and display of the oil
level, the engine must be at operating tempera-
ture, i.e. following at least 6.2 miles/10 km of
uninterrupted driving. Yo u can have the oil level
displayed while you are driving, or while the
vehicle is at a standstill on a level surface and
the engine is running.
Display in the instrument cluster
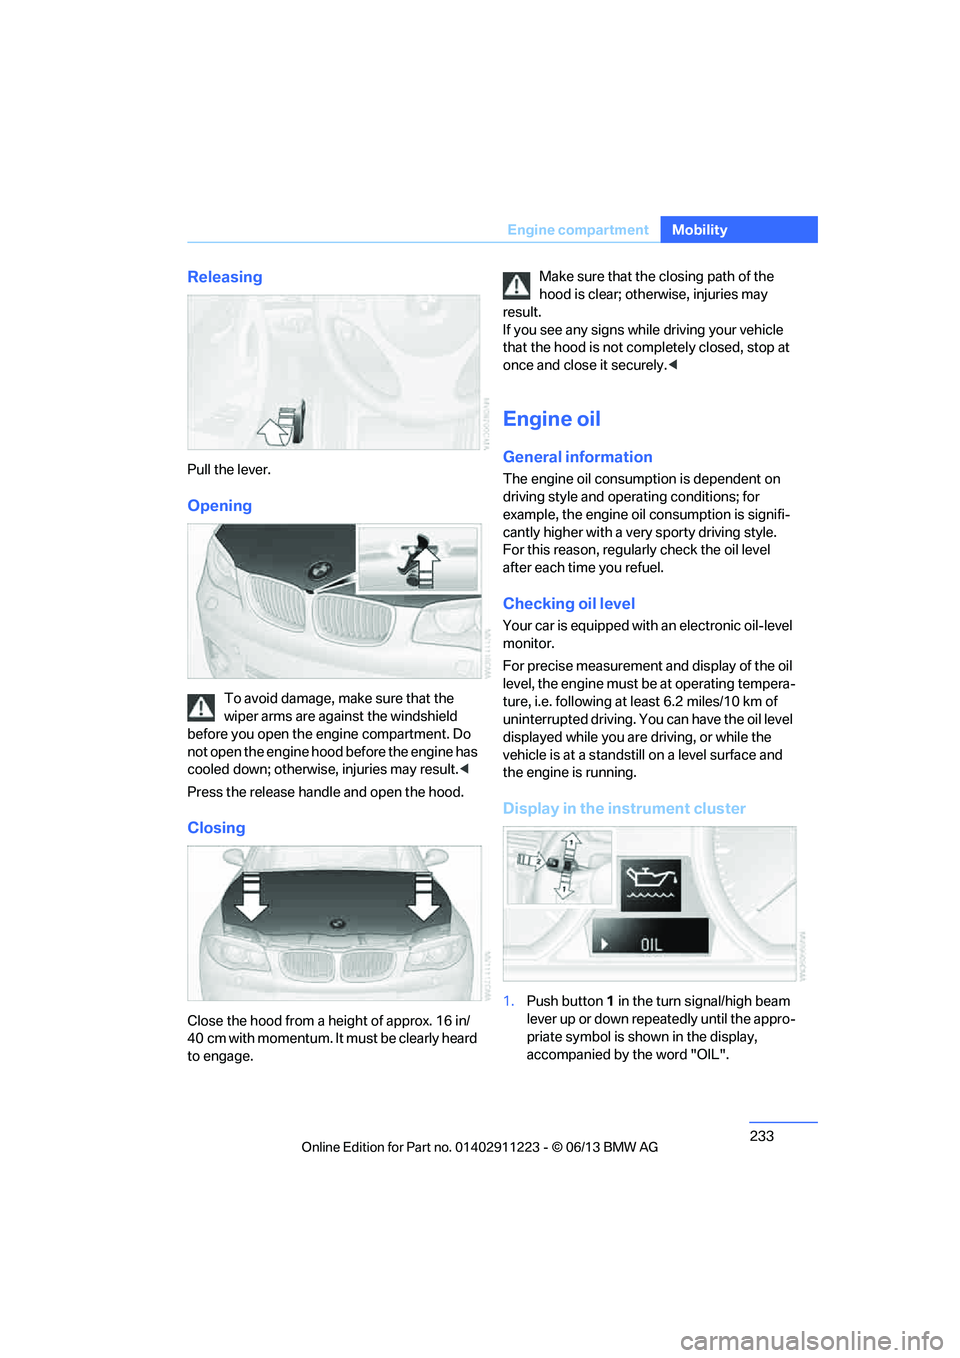
1. Push button 1 in the turn signal/high beam
lever up or down repeatedly until the appro-
priate symbol is shown in the display,
accompanied by the word "OIL".
00320051004F004C00510048000300280047004C0057004C005200510003
Page 242 of 284

241
Care
Mobility
In order to prevent staining, e.g due to clothing,
clean the leather approximately every two
months.
Clean light-colored leather
more frequently as it
shows dust and dirt more noticeably.
Use BMW Premium Leather Care since dirt and
grease will otherwise slow ly affect the protec-
tive layer of the leather.
Suitable care products are available at your
BMW center.
Upholstery care
Regularly vacuum with a vacuum cleaner.
To remove severe spots such as beverage
stains, use a soft sponge or lint-free microfiber
cloth and suitable interior cleaners.
Clean the upholstery down to the seams using a
sweeping motion. Avoid strong rubbing.
Opened Velcro fasteners on pants or
other articles of clothing can damage the
seat covers. Ensure that Velcro fasteners are
closed. <
Care of special parts
Light-alloy wheels
When cleaning on the vehicle, use only neutral
rim cleaner with a pH value of 5 to 9. Do not use
coarse cleansers and do not use steam clean-
ers at temperatures greater than 140 7/60 6.
Follow manufacturer's instructions.
Aggressive, acid-containing, or strongly alka-
line cleaning agents can destroy the protective
coating of nearby components such as the
brake discs.
Chrome look surfaces
Carefully clean vehicle parts such as the radia-
tor grill or door handles with copious quantities
of water and possibly a shampoo additive, par-
ticularly when roads ar e treated with deicing
salt.
Rubber parts
Treat only with water or rubber care products.
Do not use silicon-containing care products on
rubber seals; otherwis e, noise and damage
could occur.
Fine wood parts
Clean fine wood trim an d fine wood parts only
with a damp cloth. Wipe dry with a soft cloth.
Plastic parts
These include:
>Imitation leather surfaces
> Roofliner
> Lamp glasses
> Display pane of instrument cluster
> Parts spray painted matte black
> Painted parts in the passenger
compartment
Use a microfibre cloth for cleaning.
Moisten the cloth slightly with water.
Do not soak the roofliner. Do not use any cleaners that contain alco-
hol or solvents such as lacquer thinner,
cold cleaning agents, fuel, and the like; other-
wise, you may damage the surfaces. <
Safety belts
Dirty belt straps impede the reeling action and
thus have a negative impact on safety.
Do not clean chemic ally, as this may
destroy the webbing. <
Only clean with a mild soap solution in the
installed state.
Only reel in seat belts when they are dry.
00320051004F004C00510048000300280047004C0057004C005200510003