2013 BMW 128I COUPE low beam
[x] Cancel search: low beamPage 103 of 284

102
ControlsLamps
angle and other parameters, the light from the
headlamp follows the course of the road.
In tight curves such as on switchbacks or when
turning, at speeds up to approx. 40 mph/
70 km/h, an additional, cornering light is
switched on that lights up the area inside the
curve.
Activating Adaptive Light Control
With the ignition switched on, turn the light
switch to position 3, refer to page 100.
The corner-illuminating lamp is switched on
automatically, depending on the steering wheel
angle or turn signal indicator.
Standstill function: to avoid blinding oncoming
traffic, the Adaptive Light Control does not
direct light toward the driver's side when the
vehicle is at a standstill.
When you are reversing, only the corner-illumi-
nating lamps are switched on and active on
both sides.
Malfunction
The warning lamp lights up. A mes-
sage appears on the Control Display.
The Adaptive Light Control is mal-
functioning or failed. Ha ve the system checked
as soon as possible.
High beams/roadside parking
lamps
1 High beams
2 Headlamp flasher
3 Roadside parking lamps
Roadside parking lamps, left or right
There is an additional option of switching on the
lamps on the side of the car facing the road
when parked.
Switching on
After parking the vehicle, press the lever up or
down beyond the pressu re point for approx.
1 second, arrow 3.
The roadside parking lamps drain the bat-
tery. Therefore, do not leave them on for
unduly long periods of time; otherwise, the bat-
tery might not have enou gh power to start the
engine. <
Switching off
Press the lever in the o pposite direction to the
pressure point, arrow 3.
High-beam Assistant
The concept
This system automatically switches the high
beams on and off. The procedure is controlled
by a sensor on the front of the interior rearview
mirror. The assistant ensures that the high
beams are switched on whenever the traffic sit-
uation allows. It handle s this task for you and
gives you the benefit of the best possible view.
You can intervene at any time and switch the
high beams on and off as usual.
Activating the system
1. Turn the light switch to position 3, refer to
page 100.
2. With the low beams switched on, briefly
push the turn signal/high beam lever in the
direction of the high beam.
The indicator lamp in the instrument
cluster lights up when the high beams
are activated. The system automati-
cally switches from hi gh beams to low beams
00320051004F004C00510048000300280047004C0057004C005200510003
Page 104 of 284

103
Lamps
Controls
and vice versa in response
to oncoming traffic,
traffic ahead of you, and adequate ambient
lighting, e.g. on city streets.
Switching the high beams on and off
manually
Whenever you wish, or when the situation
requires, you can intervene:
> If the High-beam Assistant switches on the
high beams, but you would like to drive with
the low beams, simply switch off the high
beams using the turn signal/high beam
lever. This deacti vates the High-beam
Assistant.
To reactivate the syst em, briefly push the
turn signal/high beam lever toward the high
beams again.
> If the High-beam Assistant switches on the
low beams, but you would like to drive with
the high beams, switch on the high beams
as usual. This deacti vates the system and
the high beams need to be switched off
manually, if necessary.
To reactivate the syst em, briefly push the
turn signal/high beam lever toward the high
beams again.
> Use the headlamp flasher as usual with the
low beams switched on.
System limitations
The High-beam Assistant cannot serve
as a substitute for the driver's personal
judgment of when to use the high beams.
Therefore, manually switch off the high beams
in situations where this is required to avoid a
safety risk.<
The system is not fully fu nctional in situations
such as the following, and driver intervention
may be necessary:
> In very unfavorable weather conditions,
such as fog or heavy precipitation
> In detecting poorly-lit road users, such as
pedestrians, cyclists, horseback riders and
wagons; when driving close to train or ship
traffic; and at animal crossings >
In tight curves, on hilltops or in depressions,
in cross traffic or half-obscured oncoming
traffic on highways
> In poorly lit towns and cities and in the
presence of highly reflective signs
> At low speeds
> When the windshield in front of the interior
rearview mirror is fogged over, dirty or cov-
ered with stickers, etc.
> If the sensor is dirty. Clean the sensor on
the front of the interior r e a r v i e w m i r r o r u s i n g
a cloth moistened with a small amount of
glass cleaner.
Activating via iDrive
1. "Settings"
2. "Lighting"
3. "High beam assistant"
The setting is stored for the remote control
currently in use.
Fog lamps
To switch on/off, press the button.
00320051004F004C00510048000300280047004C0057004C005200510003
Page 105 of 284

104
ControlsLamps
The parking lamps or low beams must
be switched on for the fog lamps to
operate. The green indicator lamp in
the instrument cluster lights up whenever the
fog lamps are on.
The fog lamps are switched off while you acti-
vate the headlamp flasher or switch on the high
beams.
If the automatic headla mp control is acti-
vated, the low beams will come on auto-
matically when you swit ch on the fog lamps.<
Instrument lighting
You can adjust the brightness of the instrument
lighting only when the parking lamps or the low
beams are switched on.
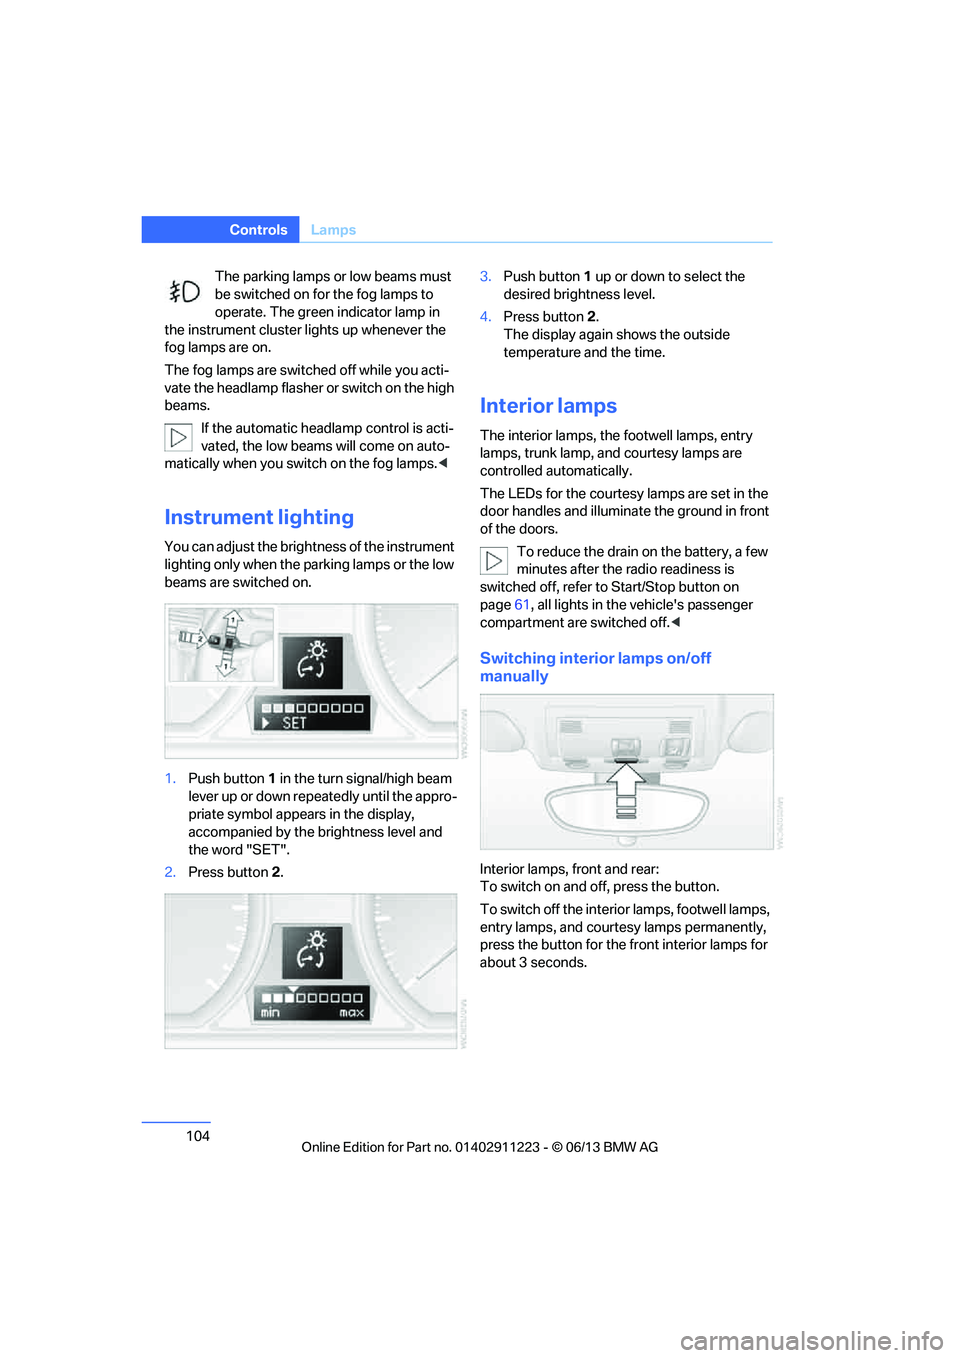
1.Push button 1 in the turn signal/high beam
lever up or down repe atedly until the appro-
priate symbol appear s in the display,
accompanied by the brightness level and
the word "SET".
2. Press button 2. 3.
Push button 1 up or down to select the
desired brightness level.
4. Press button 2.
The display again shows the outside
temperature and the time.
Interior lamps
The interior lamps, the footwell lamps, entry
lamps, trunk lamp, and courtesy lamps are
controlled automatically.
The LEDs for the courtesy lamps are set in the
door handles and illuminate the ground in front
of the doors.
To reduce the drain on the battery, a few
minutes after the radio readiness is
switched off, refer to Start/Stop button on
page 61, all lights in the vehicle's passenger
compartment are switched off. <
Switching interior lamps on/off
manually
Interior lamps, front and rear:
To switch on and off, press the button.
To switch off the interior lamps, footwell lamps,
entry lamps, and courtesy lamps permanently,
press the button for the front interior lamps for
about 3 seconds.
00320051004F004C00510048000300280047004C0057004C005200510003
Page 234 of 284

233
Engine compartment
Mobility
Releasing
Pull the lever.
Opening
To avoid damage, make sure that the
wiper arms are against the windshield
before you open the engine compartment. Do
not open the engine hood before the engine has
cooled down; otherwise, injuries may result. <
Press the release handle and open the hood.
Closing
Close the hood from a height of approx. 16 in/
40 cm with momentum. It must be clearly heard
to engage. Make sure that the
closing path of the
hood is clear; otherwise, injuries may
result.
If you see any signs while driving your vehicle
that the hood is not comp letely closed, stop at
once and close it securely. <
Engine oil
General information
The engine oil consumption is dependent on
driving style and operating conditions; for
example, the engine oil consumption is signifi-
cantly higher with a very sporty driving style.
For this reason, regularly check the oil level
after each time you refuel.
Checking oil level
Your car is equipped with an electronic oil-level
monitor.
For precise measurement and display of the oil
level, the engine must be at operating tempera-
ture, i.e. following at least 6.2 miles/10 km of
uninterrupted driving. Yo u can have the oil level
displayed while you are driving, or while the
vehicle is at a standstill on a level surface and
the engine is running.
Display in the instrument cluster
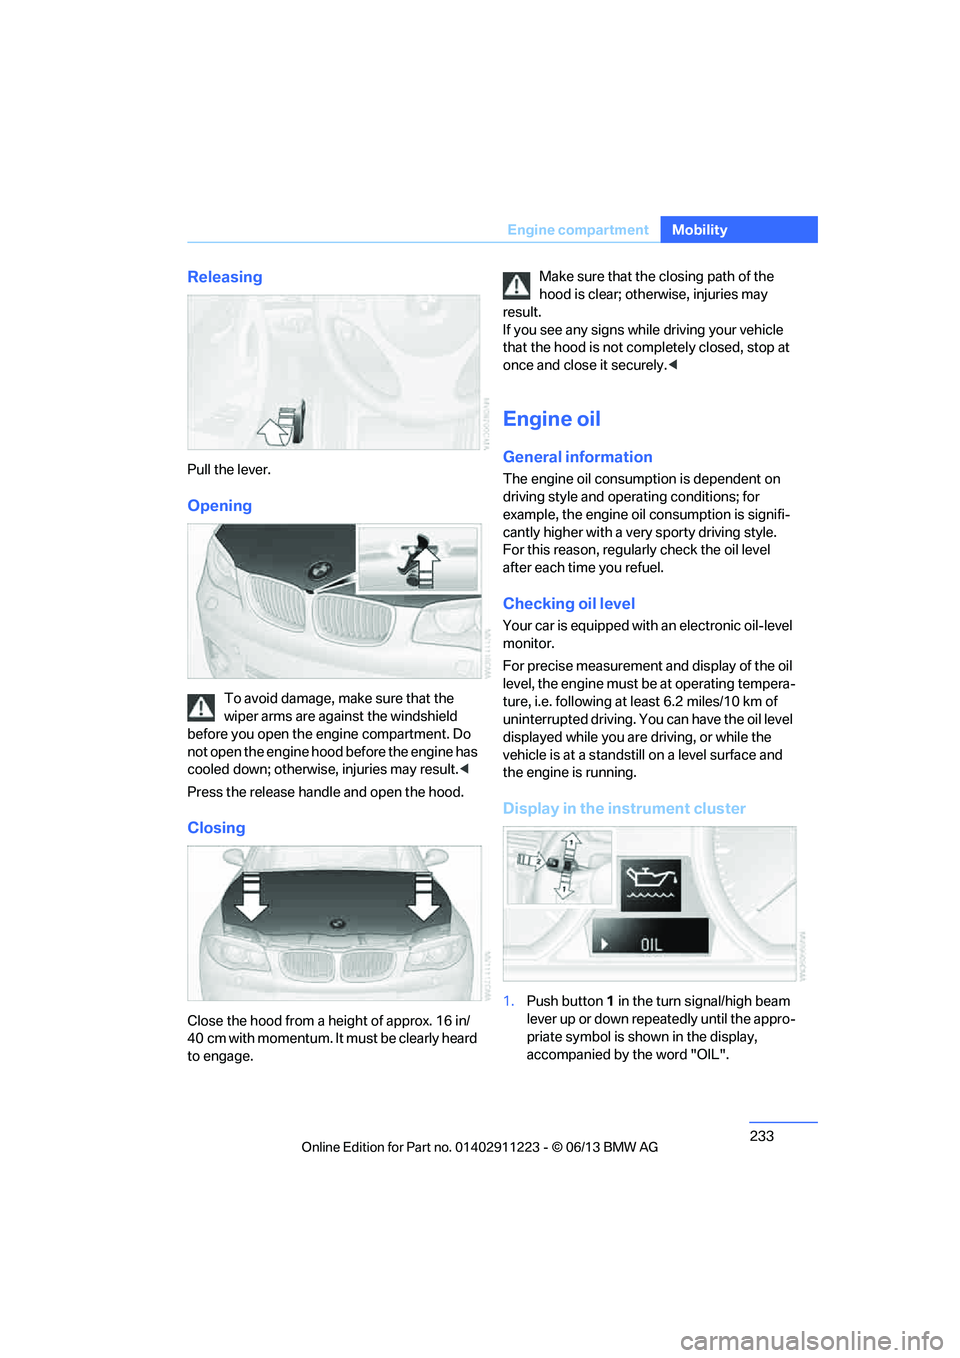
1. Push button 1 in the turn signal/high beam
lever up or down repeatedly until the appro-
priate symbol is shown in the display,
accompanied by the word "OIL".
00320051004F004C00510048000300280047004C0057004C005200510003
Page 245 of 284

244
MobilityReplacing components
Headlight lenses
In cool or humid weather, condensation may
form on the interior of outside lamps. The con-
densation will disappear after a short time when
driving with the headlamps switched on. The
headlamp glasses do not need to be changed.
If the headlamps do not defrost despite driving
with the headlamps switch ed on, and additional
moisture builds up, for example water droplets
in the lamps, have them checked by your BMW
center.
Xenon lamps
These bulbs have a very long service life and are
highly unlikely to fail. If a xenon lamp fails never-
theless, switch on the fog lamps and continue
the journey with great ca re, provided that local
legislation does not prohibit this.
Have all work on the xenon lamp system
performed only by your BMW center. Due
to high voltage, there is a risk of fatal injury if
work on the xenon lamps is carried out
improperly. <
Removing the headlamp cover
1.Pull the wire brackets over the notches, see
arrows, and fold to the side.
2. Fold away the headlamp cover.
Be careful when attaching the headlamp
cover and ensure that both wire brackets
are securely in place; otherwise, leaks could
occur and cause damage to the headlamp
system. <
Attach the headlamp cover in reverse order.
Halogen headlamps
Halogen low beams and high beams
H7 bulb, 55 watts Always wear gloves and eye protection;
the atmosphere within the H7 bulb is
pressurized. Otherwise, ther e is a risk of injury if
the bulb is damaged. <
The figure shows the right-hand headlamp.
1 High beams
2 Low-beam headlamps
1. Remove the headlamp cover.
2. Disconnect the plug from the lamp.
3. Push the wire bracket to the side out of the
mounting, arrow 1, and fold it down,
arrow 2.
4. Remove the bulb.
5. Insert a new bulb with the notch at the top.
6. Fold up the wire bracket and engage it.
7. Connect the plug.
8. Attach the headlamp cover.
00320051004F004C00510048000300280047004C0057004C005200510003
Page 254 of 284

253
Giving and receiving assistance
Mobility
Use only the tow fitting provided with the
vehicle and screw it a
ll the way in. Use the
tow fitting for towing on paved roads only. Avoid
lateral loading of the tow fitting, e.g. do not lift
the vehicle by the tow fitting. Otherwise, the
tow fitting and the vehicle could be damaged. <
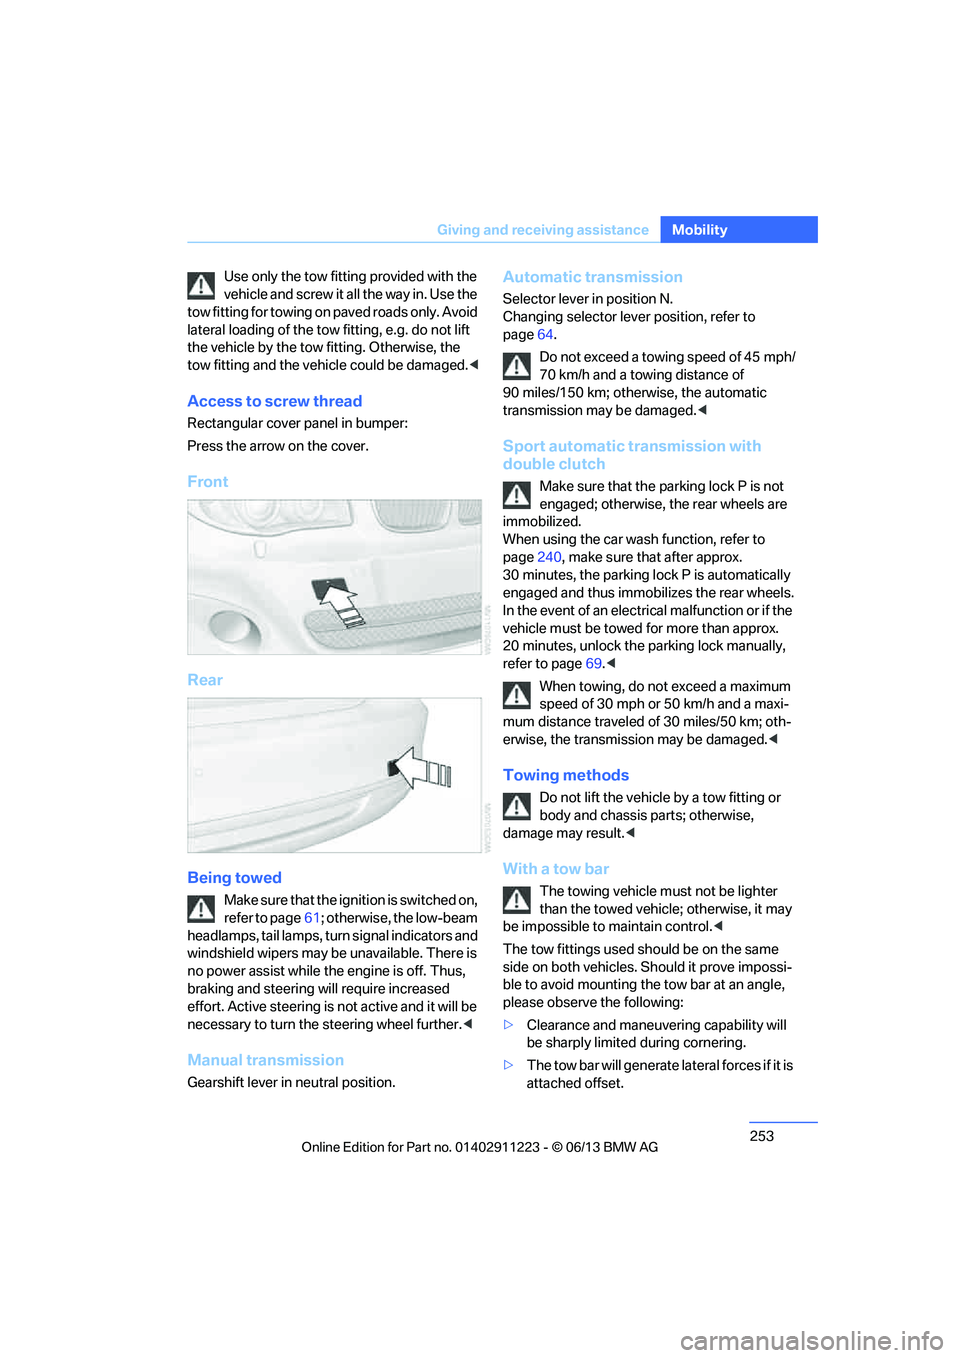
Access to screw thread
Rectangular cover panel in bumper:
Press the arrow on the cover.
Front
Rear
Being towed
Make sure that the ignition is switched on,
refer to page61; otherwise, the low-beam
headlamps, tail lamps, turn signal indicators and
windshield wipers may be unavailable. There is
no power assist while the engine is off. Thus,
braking and steering will require increased
effort. Active steering is not active and it will be
necessary to tu rn the steering wheel further. <
Manual transmission
Gearshift lever in neutral position.
Automatic transmission
Selector lever in position N.
Changing selector lever position, refer to
page 64.
Do not exceed a towing speed of 45 mph/
70 km/h and a towing distance of
90 miles/150 km; otherwise, the automatic
transmission may be damaged. <
Sport automatic transmission with
double clutch
Make sure that the parking lock P is not
engaged; otherwise, the rear wheels are
immobilized.
When using the car wash function, refer to
page 240, make sure that after approx.
30 minutes, the parking lock P is automatically
engaged and thus immobilizes the rear wheels.
In the event of an electrical malfunction or if the
vehicle must be towed for more than approx.
20 minutes, unlock the parking lock manually,
refer to page 69.<
When towing, do not exceed a maximum
speed of 30 mph or 50 km/h and a maxi-
mum distance traveled of 30 miles/50 km; oth-
erwise, the transmission may be damaged. <
Towing methods
Do not lift the vehicle by a tow fitting or
body and chassis parts; otherwise,
damage may result. <
With a tow bar
The towing vehicle must not be lighter
than the towed vehicle; otherwise, it may
be impossible to maintain control.<
The tow fittings used sh ould be on the same
side on both vehicles. Should it prove impossi-
ble to avoid mounting the tow bar at an angle,
please observe the following:
> Clearance and maneuvering capability will
be sharply limited during cornering.
> The tow bar will ge nerate lateral forces if it is
attached offset.
00320051004F004C00510048000300280047004C0057004C005200510003
Page 269 of 284

268
ReferenceEverything from A to Z
Everything from A to Z
Index
A
ABS Antilock Brake
System 89
Acceleration assistant, refer to Launch Control 70
Accessories, refer to Vehicle equipment 5
Accident, reporting, refer to
Emergency Request 250
Activated-charcoal filter 109
Active steering 96
Adaptive Light Control 101
Additives
– coolant 235
– engine oil 235
Address, entering 134,140
Address for navigation
– entering 134
Adjusting temperature 107
Airbags 97
– sitting safely 49
– warning lamp 98
Air conditioner 106
Air distribution
– automatic 107
Airing, refer to Ventilation 109
Air outlets, refer to Air vents 106
Air pressure, checking, refer to Tire inflation
pressure 223
Air recirculation, refer to Recirculated air mode 108
Air vents 106
Air volume 108
AKI, refer to Fuel grade 221Alarm system
38
– avoiding unintentional alarms 40
– interior motion sensor 39
– switching off an alarm 39
– tilt alarm sensor 39
Albums in music collection 175
ALL program 108
All-season tires, refer to Winter tires 231
AM, waveband 157
Ambient air, refer to Recirculated air mode 108
Antifreeze
– coolant 235
– washer fluid 72
Antilock Brake System
ABS 89
Anti-theft alarm system, refer
to Alarm system 38
Appointments, refer to Calendar 207
Approved axle loads, refer to Weights 259
Approved engine oils 235
Approved gross vehicle weight, refer to W
eights259
Apps 216
Armrest, refer to Center armrest 115
Arrival time
– computer 78
Ashtray 116
Assistance systems, refer to
Dynamic Stability Control
DSC 89 AUC Automatic recirculated
air control 108
Audible instructions, refer to
Voice instructions 145
Audio 154
– controls 154
– switching on/off 154
– tone control 155
– volume 155
Automatic
– air distribution 107
– air volume 107
– cruise control 73
– headlamp control 100
Automatic car washes 239
Automatic climate control 106
Automatic curb monitor 56
Automatic high beams and
low beams, refer to High-
beam Assistant 102
Automatic lamps
– refer to Welcome lamps 101
Automatic recirculated air
control AUC 108
Automatic Service Request 215
Automatic transmission with Steptronic 64
– selector lever lock 64
– shiftlock 64
– towing 252
– tow-starting 252
AUTO program for automatic climate control 107
AUX-In connection 177
Available services 216
Average fuel consumption 77
– setting the units 80
00320051004F004C00510048000300280047004C0057004C005200510003
Page 273 of 284

272
ReferenceEverything from A to Z
Directory for navigation, refer
to Address book 136
Display, refer to Control Display 20
Displaying contact
pictures 203
Display lighting, refer to Instrument lighting 104
Displays, refer to Instrument cluster 14
Displays and controls 12
Disposal
– of coolant 235
– remote control battery 42
– vehicle battery 249
Distance, refer to
Computer 78
Distance remaining to service, refer to Service
requirements 80
Distance to destination, refer to Computer 78
Distance warning, refer to Park Distance Control
PDC 88
Door key, refer to Integrated key/remote control 32
Door lock 36
Door lock, confirmation signals 35
Doors, manual operation 36
DOT Quality Grades 228
Draft-free ventilation 109
Drinks holders, refer to
Cupholders 116
Drive mode 68
Drive-off assistance, refer to
DSC 89
Drive-off assistant 90
Driving dynamics control 69
Driving lamps, refer to Parking lamps/low beams 100
Driving notes 124
Driving off on hills, refer to Drive-off assistant 90Driving stability control
systems 89
Driving through water 126
Driving tips, refer to Driving notes 124
Dry air, refer to Air conditioning 109
DSC Dynamic Stability
Control 89
DTC Dynamic Traction Control 90
– indicator lamps 90
DVD
– country codes 168
– settings 169
– video playback 168
DVD menu 169
DVD player, refer to CD player 166
DVD video 168
D y
namic Brake Control
DBC 89
Dynamic destination guidance 149
Dynamic Stability Control
DSC 89
Dynamic Traction Control DTC 90
– indicator lamps 90
E
EBV Electronic brake-force
distribution 89
Eject button, see buttons on the CD/DVD player 154
Electrical defect
– 7-gear Sport automatic transmission with double
clutch 69
Electrical malfunction
– door lock 36
– fuel filler flap 221
Electronic brake-force distribution EBV 89Electronic oil level check
233
Electronic Stability Program
ESP, refer to Dynamic
Stability Control DSC 89
E-mail 206
Emergency operation, refer to Manual operation
– door lock 36
– fuel filler flap 221
– transmission lock, automatic transmission 66
Emergency release, trunk lid 38
Emergency Request 250
Emergency services, refer to Roadside Assistance 251
Energy, saving
– saving fuel 124
Engine
– breaking in 124
– starting 62
– starting, Comfort Access 40
– switching off 63
Engine compartment 232
Engine coolant, refer to
Coolant 235
Engine oil
– adding 235
– additives 235
– alternative oil types 235
– approved engine oils 235
– BMW Maintenance System 237
– checking level 233
– intervals between changes, refer to Service
requirements 80
Engine oil level, checking 233
Engine starting, refer to Starting the engine 62
Entering the postal code for navigation 135
Entry map for destination 139
Equalizer, tone control 155
00320051004F004C00510048000300280047004C0057004C005200510003