2013 BMW 128I COUPE fuel
[x] Cancel search: fuelPage 77 of 284
76
ControlsControls overview
Tachometer
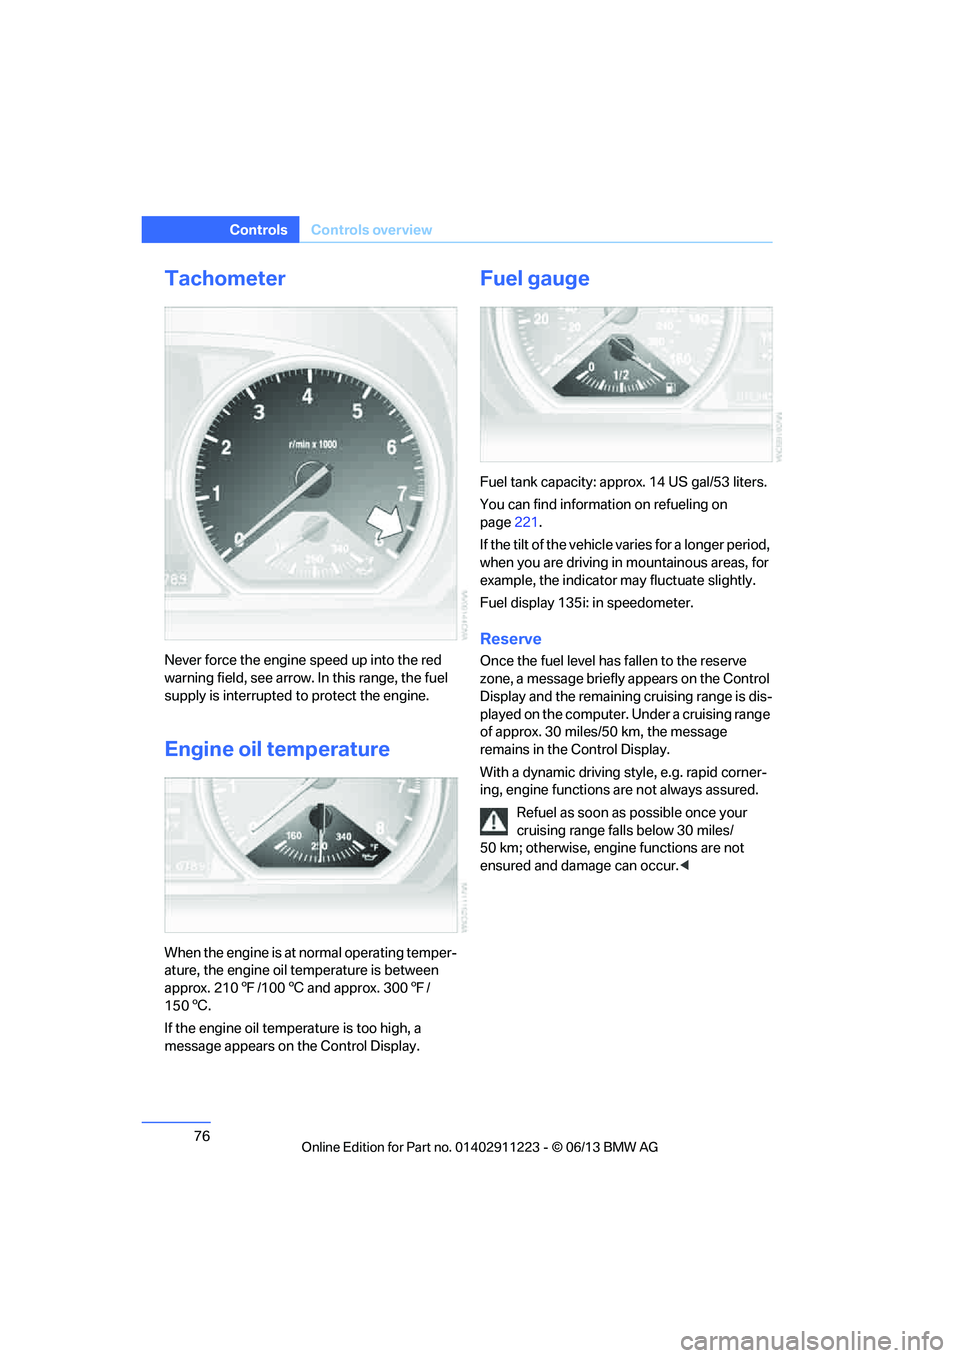
Never force the engine speed up into the red
warning field, see arrow. In this range, the fuel
supply is interrupted to protect the engine.
Engine oil temperature
When the engine is at normal operating temper-
ature, the engine oil temperature is between
approx. 2107/100 6 and approx. 300 7/
150 6.
If the engine oil temp erature is too high, a
message appears on the Control Display.
Fuel gauge
Fuel tank capacity: approx. 14 US gal/53 liters.
You can find information on refueling on
page 221.
If the tilt of the vehicle varies for a longer period,
when you are driving in mountainous areas, for
example, the indicator may fluctuate slightly.
Fuel display 135i: in speedometer.
Reserve
Once the fuel level ha s fallen to the reserve
zone, a message briefly appears on the Control
Display and the remaining cruising range is dis-
played on the computer. Under a cruising range
of approx. 30 miles/50 km, the message
remains in the Control Display.
With a dynamic driving style, e.g. rapid corner-
ing, engine functions are not always assured.
Refuel as soon as possible once your
cruising range falls below 30 miles/
50 km; otherwise, engine functions are not
ensured and damage can occur. <
00320051004F004C00510048000300280047004C0057004C005200510003
Page 78 of 284
77
Controls overview
Controls
Computer
Displays in the instrument cluster
Calling up information
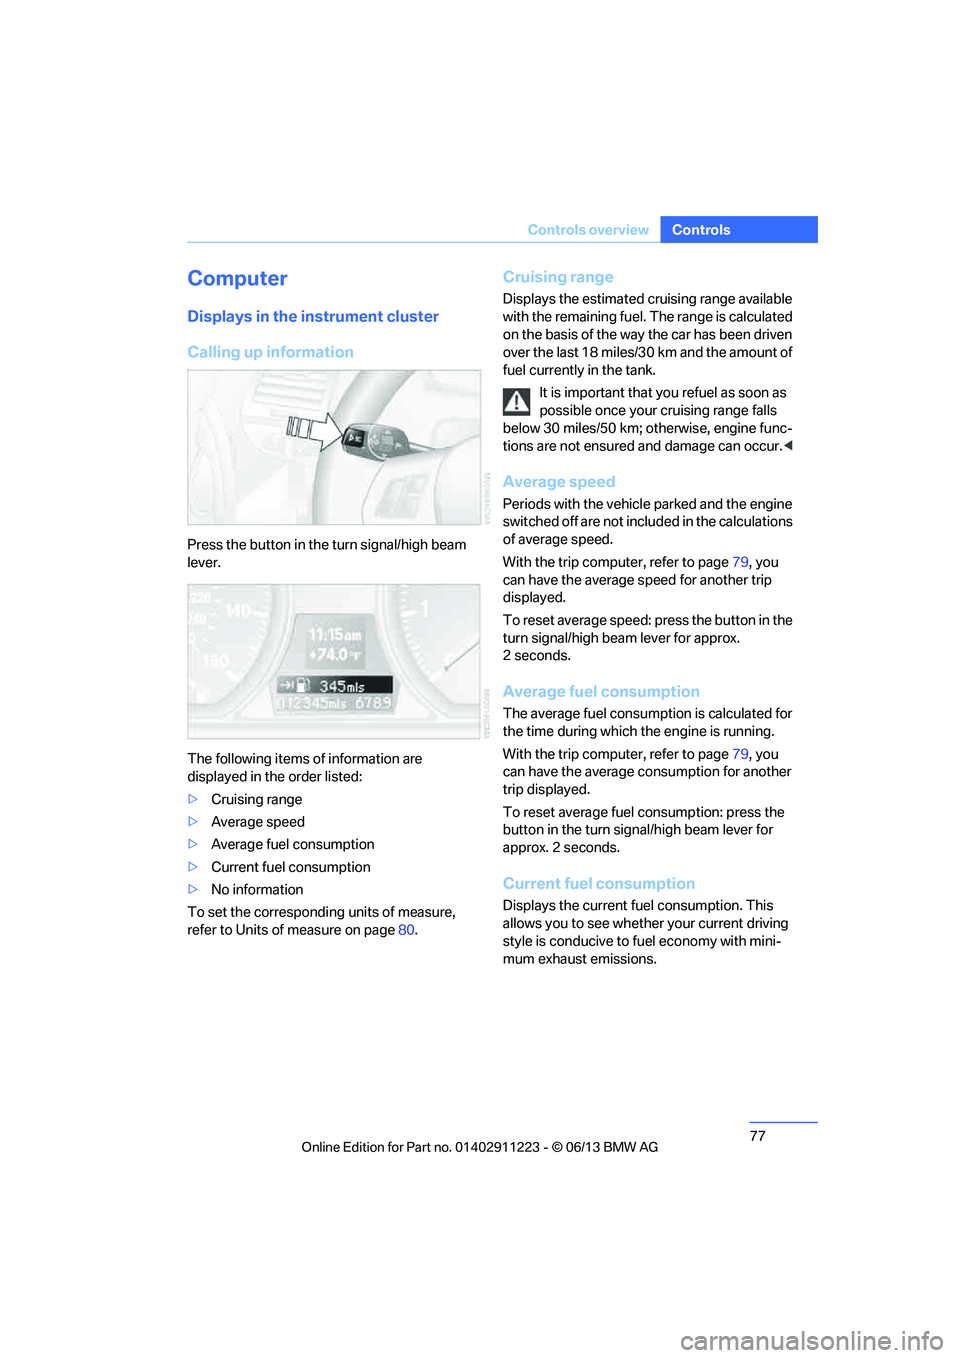
Press the button in the turn signal/high beam
lever.
The following items of information are
displayed in the order listed:
>
Cruising range
> Average speed
> Average fuel consumption
> Current fuel consumption
> No information
To set the corresponding units of measure,
refer to Units of measure on page 80.
Cruising range
Displays the estimated cruising range available
with the remaining fuel. The range is calculated
on the basis of the way the car has been driven
over the last 18 miles/30 km and the amount of
fuel currently in the tank.
It is important that you refuel as soon as
possible once your cruising range falls
below 30 miles/50 km; otherwise, engine func-
tions are not ensured and damage can occur. <
Average speed
Periods with the vehicle parked and the engine
switched off are not included in the calculations
of average speed.
With the trip comp uter, refer to page79, you
can have the average speed for another trip
displayed.
To reset average speed: press the button in the
turn signal/high beam lever for approx.
2seconds.
Average fuel consumption
The average fuel consumption is calculated for
the time during which the engine is running.
With the trip comp uter, refer to page79, you
can have the average consumption for another
trip displayed.
To reset average fuel consumption: press the
button in the turn signal/high beam lever for
approx. 2 seconds.
Current fuel consumption
Displays the current fuel consumption. This
allows you to see whethe r your current driving
style is conducive to fuel economy with mini-
mum exhaust emissions.
00320051004F004C00510048000300280047004C0057004C005200510003
Page 79 of 284

78
ControlsControls overview
Displays on the Control Display
The computer can also be opened via iDrive.
1."Vehicle Info"
2. "Onboard info" or "Trip computer"
Displaying "Onboard info":
> Cruising range
> Distance from destination
> Estimated time of arrival if a destination has
been entered in the navigation system.
Displaying "Trip computer":
> Departure time
> Trip duration
> Trip distance Both displays show:
>
The average speed and
> the average fuel consumption.
Resetting the fuel consumption and
speed
You can reset the values for average speed and
average consumption:
1.Select the respective menu entry.
2. Press the controller again to confirm your
selection.
Resetting the trip computer
You can reset all values:
1."Vehicle Info"
2. "Trip computer"
3. "Reset"
00320051004F004C00510048000300280047004C0057004C005200510003
Page 81 of 284
80
ControlsControls overview
Units of measure
You can change the units for fuel consumption,
route/distance, temperature and pressure.
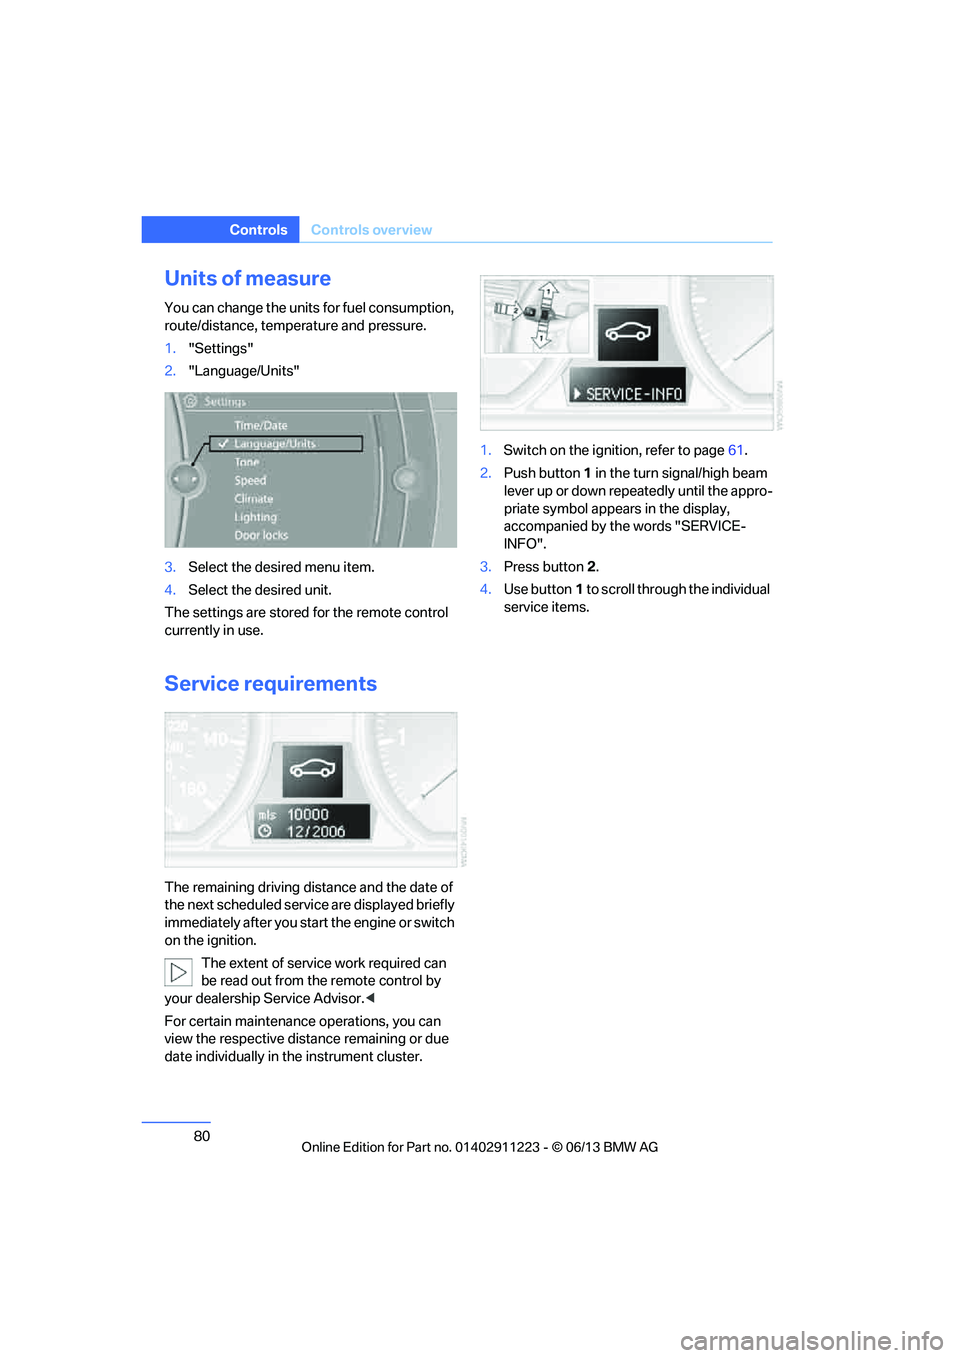
1."Settings"
2. "Language/Units"
3. Select the desired menu item.
4. Select the desired unit.
The settings are stored for the remote control
currently in use.
Service requirements
The remaining driving distance and the date of
the next scheduled servic e are displayed briefly
immediately after you start the engine or switch
on the ignition.
The extent of service work required can
be read out from the remote control by
your dealership Service Advisor. <
For certain maintenance operations, you can
view the respective distance remaining or due
date individually in the instrument cluster. 1.
Switch on the ignition, refer to page 61.
2. Push button 1 in the turn signal/high beam
lever up or down repe atedly until the appro-
priate symbol appear s in the display,
accompanied by the words "SERVICE-
INFO".
3. Press button 2.
4. Use button 1 to scroll through the individual
service items.
00320051004F004C00510048000300280047004C0057004C005200510003
Page 96 of 284
95
Technology for driving comfort and safety
Controls
Message for unsuc
cessful system
reset
Yellow warning lamp lights up. A
message appears on the Control
Display.
The system has detected a wheel change, but
was not reset. A reliable warning is not possible
at the current inflation pressures.
Check the tire inflation pressure and reset the
system, refer to page 93.
Malfunction
The small warning lamp flashes in
yellow and then lights up continu-
ously; the large warning lamp lights
up in yellow. The tires appear in gray
in the Control Display. No punctures can be
detected.
Display in the following situations:
> A wheel without TPM electronics has been
installed:
Have it checked by your BMW center.
> Malfunction
Have the system checked
> Tire Pressure Monitor was unable to
complete the resetting process. Reset the
system again.
The small warning lamp flashes in
yellow and then lights up continu-
ously; the large warning lamp lights
up in yellow. The tires appear in gray
in the Control Display.
Display in the following situations:
Interference from systems or devices that use
the same radio frequency. The system auto-
matically becomes active again when the vehi-
cle moves out of the interference zone.
Declaration according to NHTSA/
FMVSS 138
Tire Pressure Monitoring Systems
Each tire should be checked monthly when cold
and inflated to the inflation pressure recom-
mended by the vehicle manufacturer on the vehicle placard or tire infl
ation pressure label. If
your vehicle has tires of a different size than the
size indicated on the vehi cle placard or tire infla-
tion pressure label, you should determine the
proper tire inflation pressure for those tires. As
an added safety feature, your vehicle has been
equipped with a tire pr essure monitoring sys-
tem, TPMS, that illuminate s a low tire pressure
t e l l t a l e w h e n o n e o r m o r e o f y o u r t i r e s a r e s i g n i f -
icantly underinflated. Accordingly, when the
low tire pressure telltal e illuminates, you should
stop and check your tires as soon as possible,
and inflate them to the proper pressure. Driving
on a significantly underinflated tire causes the
tire to overheat and ca n lead to tire failure.
Underinflation also reduces fuel efficiency and
tire tread life and may a ffect the vehicle's han-
dling and stopping ability. Please note that the
TPMS is not a substitute for proper tire mainte-
nance, and it is the driver's responsibility to
maintain correct tire pr essure, even if underin-
flation has not reached th e level to trigger illumi-
nation of the TPMS low tire pressure indicator.
The TPMS malfunction indicator is combined
with the low tire pressure telltale. When the sys-
tem detects a malfunction, the telltale will flash
for approximately one minute and then remain
continuously lit. This sequence will continue
upon subsequent vehicle startups as long as
the malfunction exists. When the malfunction
indicator is illuminated, the system may not be
able to detect or signal low tire pressure as
intended. TPMS malfunctions may occur for a
variety of reasons, includ ing the installation of
replacement or alternate tires or wheels on the
vehicle that prevent the TPMS from functioning
properly. Always check the TPMS malfunction
telltale after replacing one or more tires or
wheels on your vehicle to ensure that the
replacement or alternate tires and wheels allow
the TPMS to continue to function properly.
00320051004F004C00510048000300280047004C0057004C005200510003
Page 125 of 284

124
Driving tipsThings to remember when driving
Things to remember when driving
Vehicle equipment
In this chapter, all pr oduction, country, and
optional equipment that is offered in the model
range is described. For this reason, descrip-
tions will be given of some equipment that may
not be available in a vehi cle, for example due to
the special options or national-market version
selected. This also app lies to safety related
functions and systems.
Break-in period
Moving parts need breaking-in time to adjust to
each other. Please follo w the instructions below
in order to achieve the optimal service life and
economy of operation for your vehicle.
Engine and differential
Always obey all official speed limits.
Up to 1,200 miles/2,000 km
Drive at varying engine and road speeds, but do
not exceed an engine speed of 4,500 rpm or a
road speed of 100 mph/160 km/h.
Avoid full-throttle operation and use of the
transmission's kickdown mode.
After driving 1,200 miles/2,000 km
Engine and vehicle speeds can be gradually
increased.
Tires
Due to technical factors associated with their
manufacture, tires do not achieve their full
traction potential until af ter an initial break-in
period. Therefore, drive cautiously during the
first 200 miles/300 km.
Brake system
Brakes require an initial break-in period of
approx. 300 miles/500 km to achieve optimized
contact and wear patterns between brake pads
and rotors. Drive cautiously during this break-in
period.
Clutch
The function of the clut ch reaches its optimal
level only after a distance driven of approx.
300 miles/500 km. During this break-in period,
engage the clutch gently.
Following part replacement
The same break-in procedures should be
observed if any of the components mentioned
above have to be renewe d in the course of the
vehicle's operating life.
Saving fuel
The fuel consumption of your vehicle depends
on several factors. You can lower fuel consump-
tion and the environmental impact by taking
certain measures, adjusting your driving style
and having the vehicl e serviced regularly.
Remove any unneeded cargo
Additional weight increases fuel consumption.
Remove any mounted parts after you
have finished using them
Remove unneeded additional mirrors, the roof
rack and the rear luggage rack after use.
Mounted parts affect th e vehicle's aerodynam-
ics and increase fuel consumption.
Close the windows and glass roof
An open glass roof or window causes higher
air resistance and thus increases fuel
consumption.
00320051004F004C00510048000300280047004C0057004C005200510003
Page 126 of 284

125
Things to remember when driving
Driving tips
Check tire inflation pressure regularly
Check the tire inflation pr
essure at least twice a
month and before embarking on a long journey,
and correct it if necessary.
Low tire inflation pressure causes higher rolling
resistance and thus increases fuel consumption
and tire wear.
Set off immediately
Do not let the engine wa rm up while the car is
still standing, but set off immediately at moder-
ate engine speed. This is the fastest way for the
cold engine to reach its operating temperature.
Drive defensively
Avoid unnecessary acceleration and braking
maneuvers. To do so, keep an adequate dis-
tance between you and th e vehicle in front of
you. A defensive and smooth driving style
keeps fuel consumption down.
Avoid high engine speeds
Use first gear only for dr iving off. In second and
higher gears, accelerate without hesitation or
pauses. When accelerati ng, shift up before
reaching high engine speeds.
When you reach the desi red speed, shift into
the highest applicable ge ar and drive with the
engine speed as low as possible and at a con-
stant speed.
As a rule: driving at low engine speeds lowers
fuel consumption and reduces wear.
Coasting
When approaching a red lig ht, take your foot off
the accelerator and coast to a stop in the high-
est applicable gear.
On a downhill slope, take your foot off the accel-
erator and coast in a suitable gear.
The fuel supply is interrupted when coasting.
Switch off the engine during lengthy
stops
Switch off the engine when stopping for lengthy
periods, e.g. at traffic lights, railroad crossings
or in traffic congestions.
Switch off functions you do not need at
the moment
Functions such as the air conditioner, seat
heating or rear window defroster draw large
amounts of power and consume additional fuel.
Especially in city traffic and in stop-and-go driv-
ing they have a considerable impact. Therefore,
switch these functions off when they are not
really needed.
Have the vehicle serviced
Have the vehicle serviced regularly to achieve
good economy and a long vehicle life. BMW
recommends having the vehicle serviced at
your BMW center. Also note the BMW Mainte-
nance System, refer to page 237.
General driving notes
Close the trunk lid
Only drive with the trunk closed. Failure to
do so may endanger passengers or other
road users or may damage the vehicle in the
event of an accident or a braking and evasive
maneuver. In addition, exhaust gas may flow
into the passenger compartment. <
If special circumstance s make it absolutely
necessary to drive wi th the trunk open:
1. Close all windows and the glass roof.
2. Greatly increase the air volume of the
automatic climate cont rol system, refer to
page 108.
3. Drive cautiously.
00320051004F004C00510048000300280047004C0057004C005200510003
Page 146 of 284
145
Destination guidance
Navigation
Resuming the original route
If the route section should no longer be
bypassed:
1.
"Navigation"
2. "Route information"
3. "New route for"
4. "Remove blocking"
Gas station re commendations
The remaining range is calculated and filling
stations along the route are displayed.
Even with the most up-t o-date navigation data,
information about certain special destinations
may have changed; for ex ample, filling stations
may not be in operation.
1. "Navigation"
2. "Route information"
3. "Recommended refuel"
A list of filling stations is displayed.
4. Select a gas station.
5. Select the symbol.
6. "Start guidance": route guidance to the
selected filling station is started.
"Add as another destination": the filling sta-
tion is incorporated into the route.
Destination guidance
through voice instructions
Switching voice instructions on/off
Voice instructions can be switched on or off
during destination guidance.
1. "Navigation"
2. "Map"
3. "Voice instructions"
For rapid access, the feature can be stored on a
programmable memory key, refer to page25.
Repeating a voice instruction
1."Navigation"
2. "Map"
3. Highlight the symbol.
4. Press the controller twice.
Adjusting volume for voice instructions
The volume can be adjusted only while a voice
instruction is being issued.
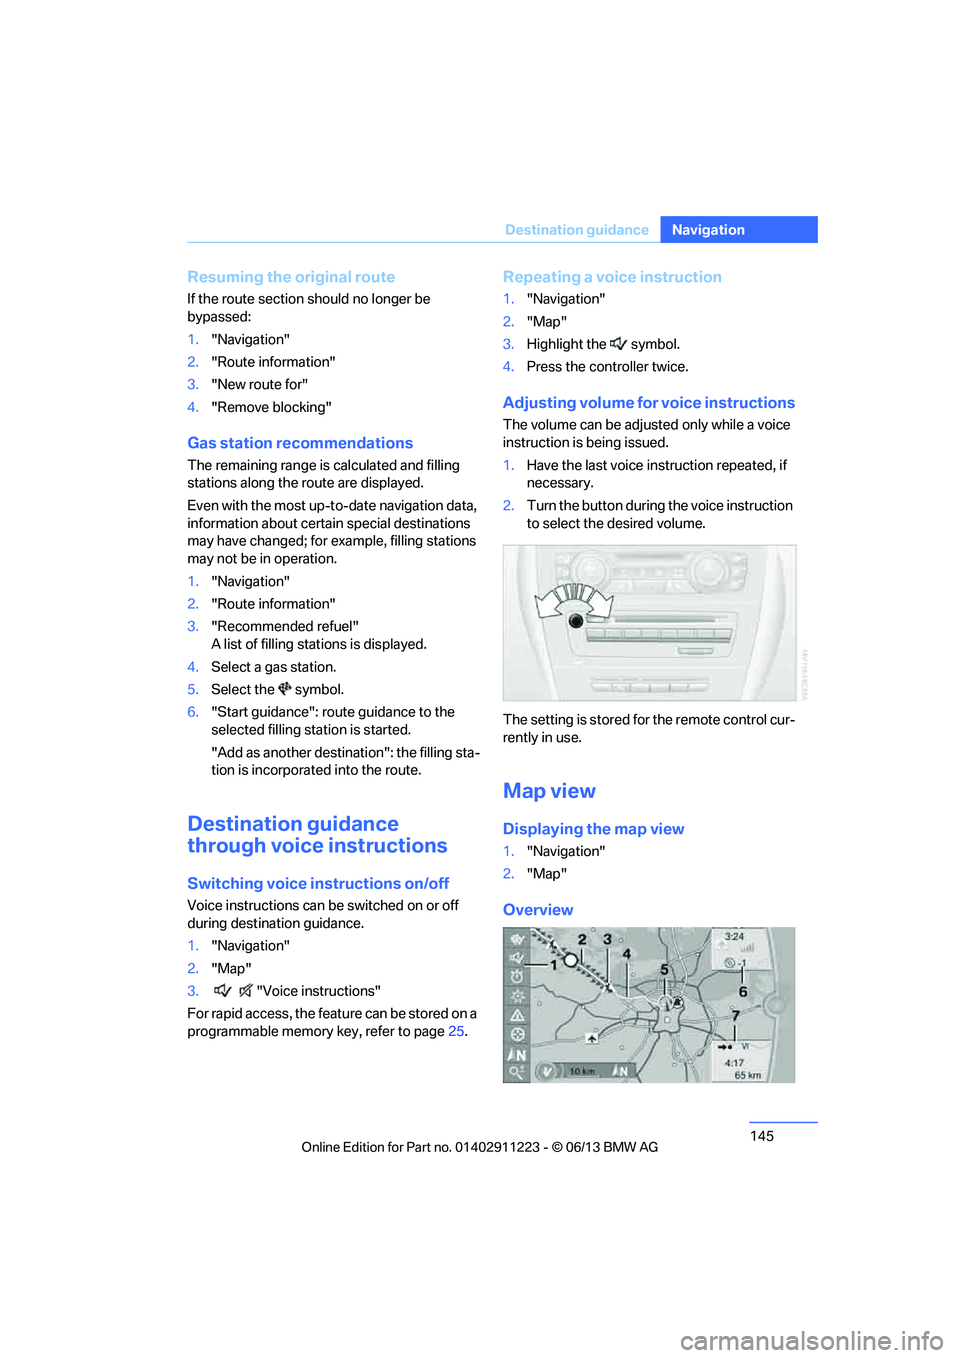
1.Have the last voice instruction repeated, if
necessary.
2. Turn the button during the voice instruction
to select the desired volume.
The setting is stored fo r the remote control cur-
rently in use.
Map view
Displaying the map view
1. "Navigation"
2. "Map"
Overview
00320051004F004C00510048000300280047004C0057004C005200510003