2013 BMW 128I COUPE brake
[x] Cancel search: brakePage 67 of 284
66
ControlsDriving
>To upshift, briefly pull the right shift
paddle +.
> To downshift, briefly pull the left shift
paddle –.
Upshifts and downshifts are executed only
when they will result in a plausible combination
of engine and vehicle speed; thus, for example,
a downshift that would cause the engine to
overrev will not be exec uted by the system.
The gear selected is briefly displayed in the
instrument cluster, followed again by the gear
actually in use.
Overriding selector lever lock
If the selector lever will not move out of
position P even though the ignition is switched
on, the brake is depressed, and the button on
the selector lever is pre ssed, the selector lever
lock can be overridden:
1. Unclip the sleeve of the selector lever.
2. Pull the sleeve up over the selector lever
until the sleeve is inside out.
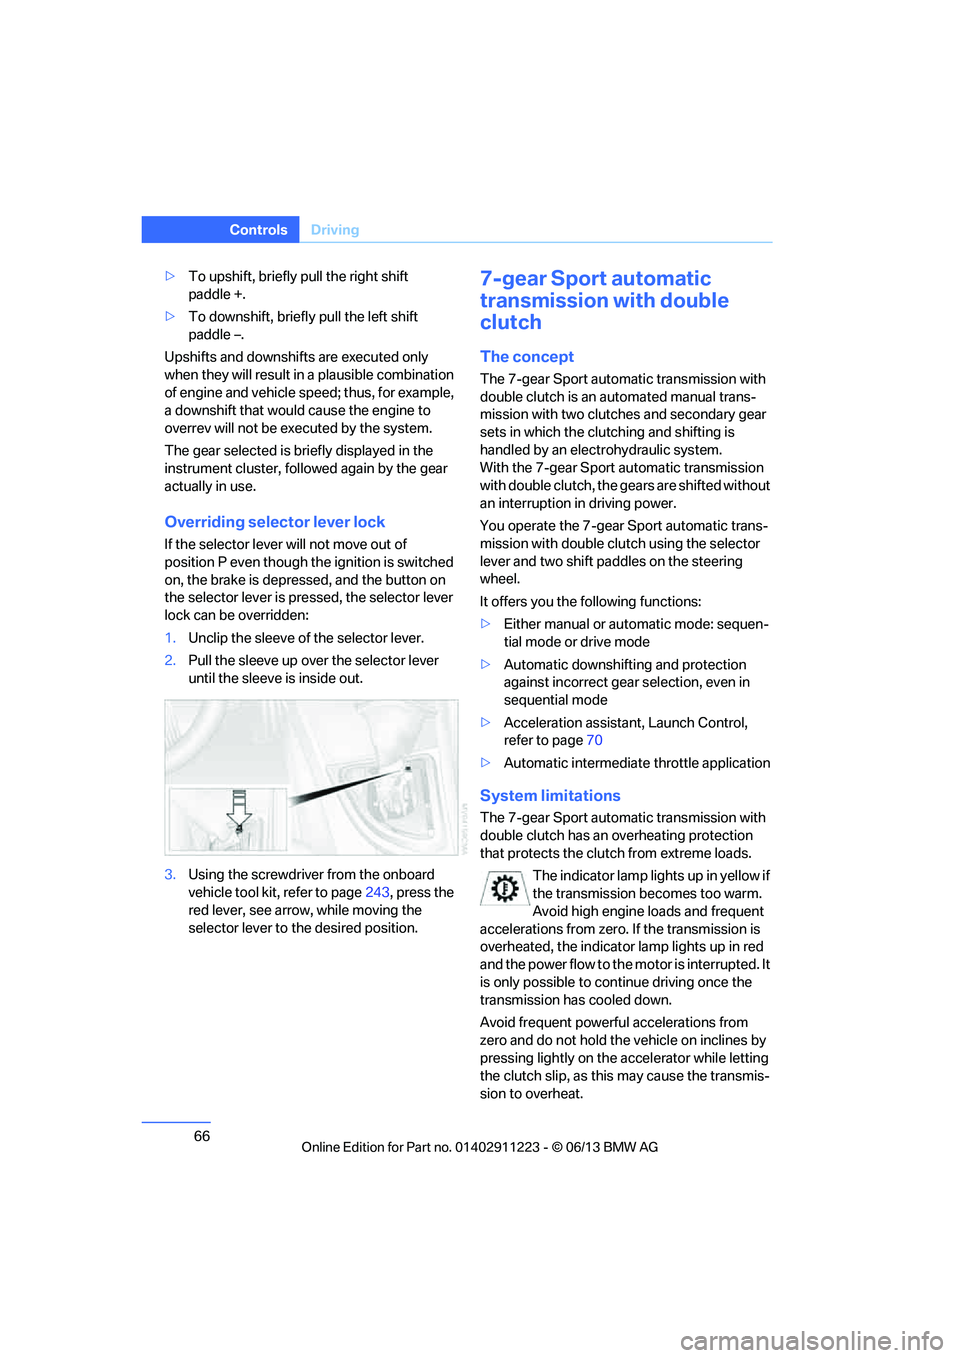
3. Using the screwdriver from the onboard
vehicle tool kit, refer to page 243, press the
red lever, see arrow, while moving the
selector lever to the desired position.
7-gear Sport automatic
transmission with double
clutch
The concept
The 7-gear Sport automatic transmission with
double clutch is an automated manual trans-
mission with two clutches and secondary gear
sets in which the clutching and shifting is
handled by an electr ohydraulic system.
With the 7-gear Sport automatic transmission
with double clutch, the gears are shifted without
an interruption in driving power.
You operate the 7-gear Sport automatic trans-
mission with double clutch using the selector
lever and two shift paddles on the steering
wheel.
It offers you the following functions:
> Either manual or au tomatic mode: sequen-
tial mode or drive mode
> Automatic downshifting and protection
against incorrect gear selection, even in
sequential mode
> Acceleration assistan t, Launch Control,
refer to page 70
> Automatic intermediate throttle application
System limitations
The 7-gear Sport automatic transmission with
double clutch has an overheating protection
that protects the clutch from extreme loads.
The indicator lamp lights up in yellow if
the transmission becomes too warm.
Avoid high engine loads and frequent
accelerations from zero. If the transmission is
overheated, the indicator lamp lights up in red
and the power flow to the motor is interrupted. It
is only possible to continue driving once the
transmission has cooled down.
Avoid frequent powerful accelerations from
zero and do not hold the vehicle on inclines by
pressing lightly on the accelerator while letting
the clutch slip, as this may cause the transmis-
sion to overheat.
00320051004F004C00510048000300280047004C0057004C005200510003
Page 68 of 284
67
Driving
Controls
Selector lever positions
P R N D M/S + –
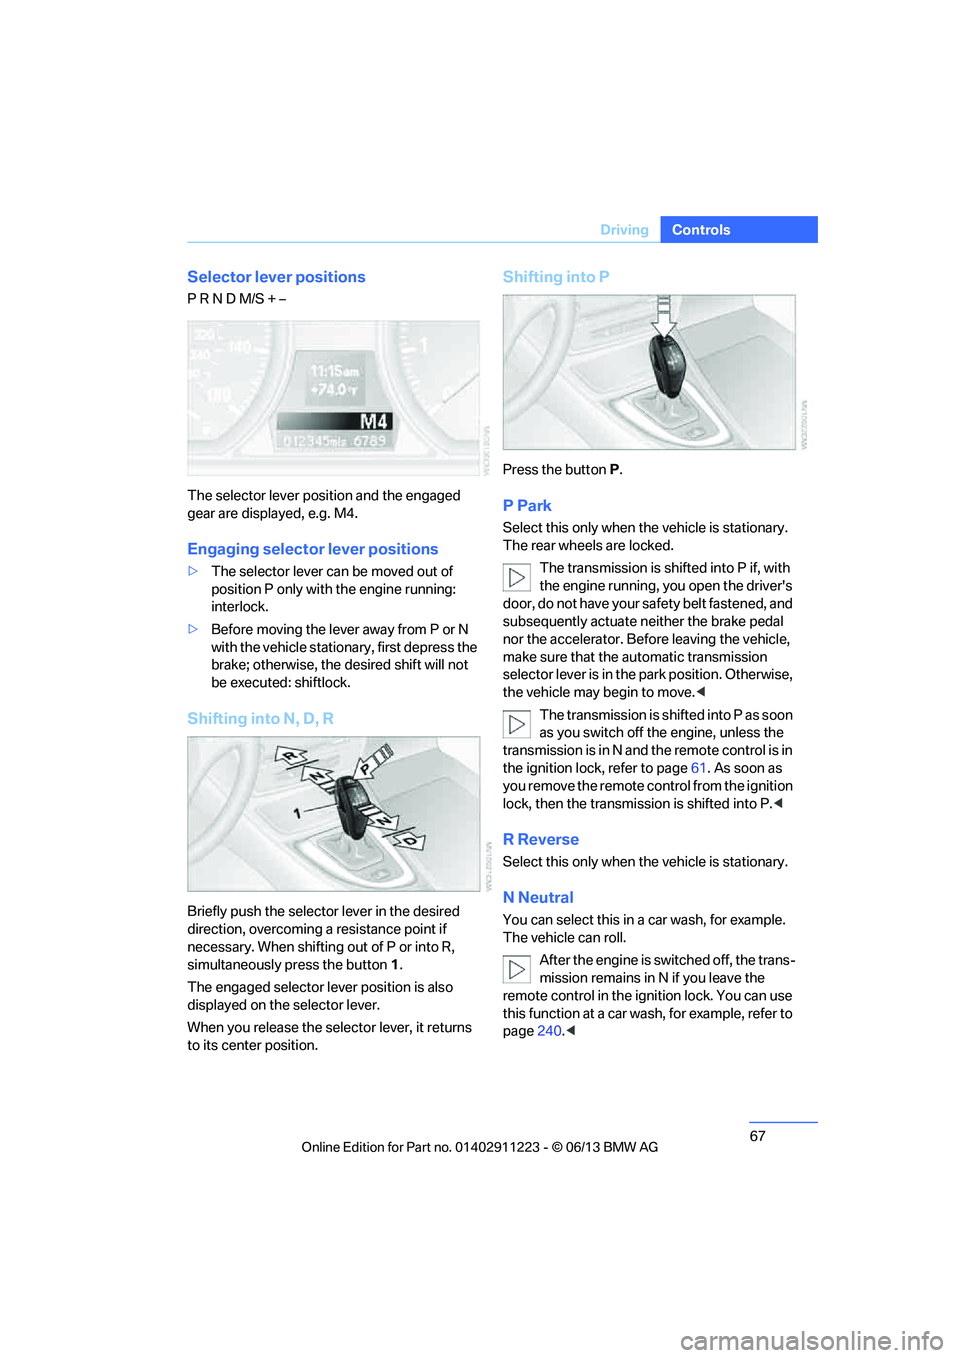
The selector lever position and the engaged
gear are displayed, e.g. M4.
Engaging selector lever positions
>
The selector lever can be moved out of
position P only with the engine running:
interlock.
> Before moving the lever away from P or N
with the vehicle statio nary, first depress the
brake; otherwise, the desired shift will not
be executed: shiftlock.
Shifting into N, D, R
Briefly push the selector lever in the desired
direction, overcoming a resistance point if
necessary. When shifting out of P or into R,
simultaneously press the button 1.
The engaged selector lever position is also
displayed on the selector lever.
When you release the sele ctor lever, it returns
to its center position.
Shifting into P
Press the button P.
P Park
Select this only when the vehicle is stationary.
The rear wheels are locked.
The transmission is shifted into P if, with
the engine running, you open the driver's
doo r, do not have yo ur sa fety belt fastened, and
subsequently actuate neither the brake pedal
nor the accelerator. Befo re leaving the vehicle,
make sure that the au tomatic transmission
selector lever is in the park position. Otherwise,
the vehicle may begin to move. <
The transmission is shifted into P as soon
as you switch off th e engine, unless the
transmission is in N and the remote control is in
the ignition lock, refer to page 61. As soon as
you remove the remote control from the ignition
lock, then the transmission is shifted into P. <
R Reverse
Select this only when the vehicle is stationary.
N Neutral
You can select this in a car wash, for example.
The vehicle can roll.
After the engine is switched off, the trans-
mission remains in N if you leave the
remote control in the ignition lock. You can use
this function at a car wash, for example, refer to
page 240.<
00320051004F004C00510048000300280047004C0057004C005200510003
Page 70 of 284
69
Driving
Controls
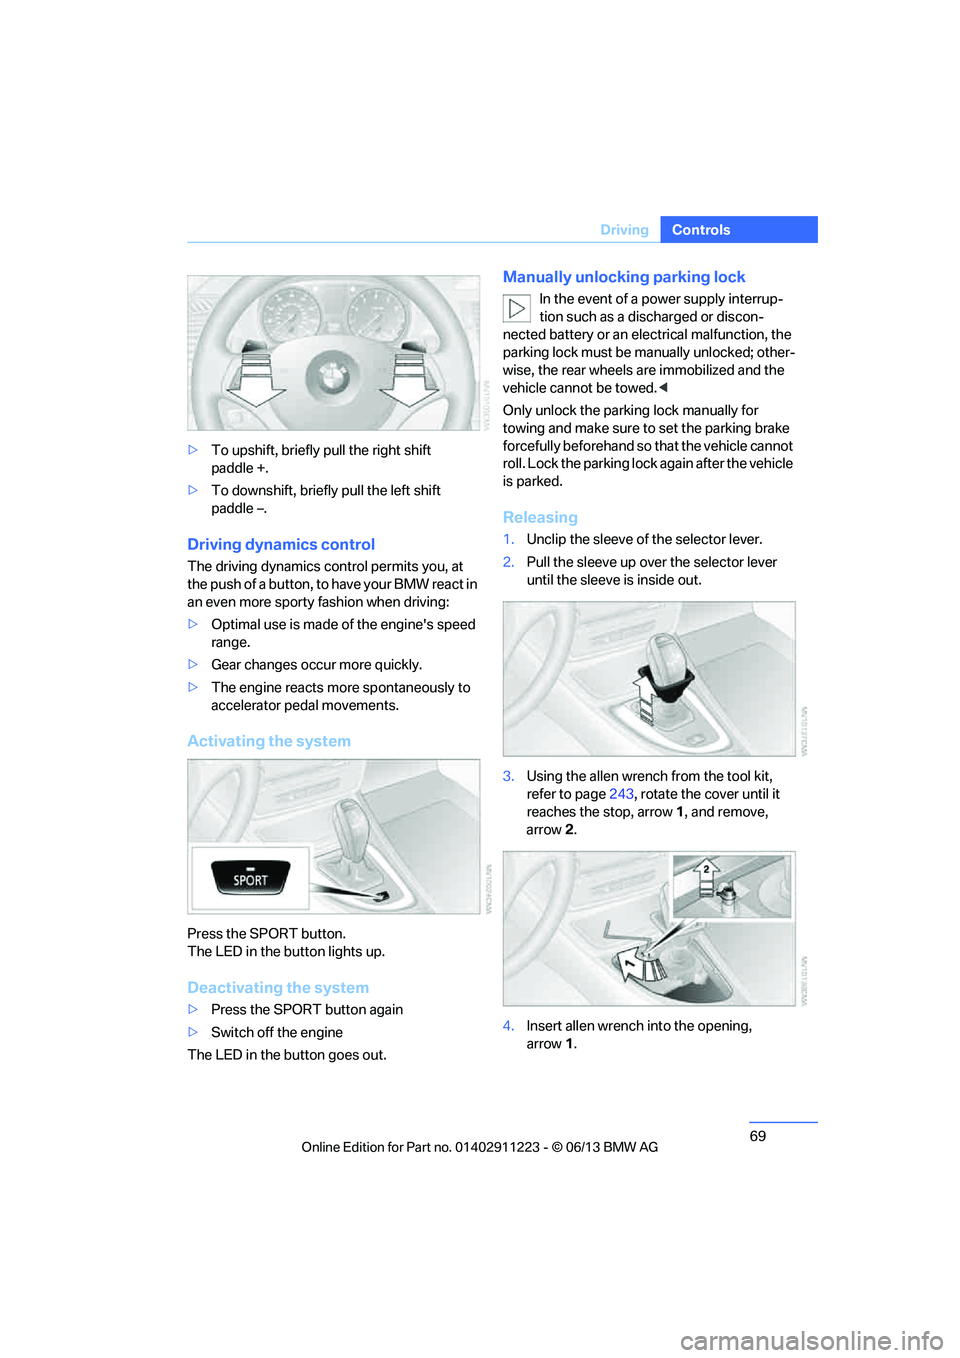
>
To upshift, briefly pull the right shift
paddle +.
> To downshift, briefly pull the left shift
paddle –.
Driving dynamics control
The driving dynamics control permits you, at
the push of a button, to have your BMW react in
an even more sporty fashion when driving:
> Optimal use is made of the engine's speed
range.
> Gear changes occur more quickly.
> The engine reacts more spontaneously to
accelerator pe dal movements.
Activating the system
Press the SPORT button.
The LED in the button lights up.
Deactivating the system
>Press the SPORT button again
> Switch off the engine
The LED in the button goes out.
Manually unlocking parking lock
In the event of a power supply interrup-
tion such as a discharged or discon-
nected battery or an elec trical malfunction, the
parking lock must be ma nually unlocked; other-
wise, the rear wheels are immobilized and the
vehicle cannot be towed. <
Only unlock the parkin g lock manually for
towing and make sure to set the parking brake
forcefully beforehand so that the vehicle cannot
roll. Lock the parking lock again after the vehicle
is parked.
Releasing
1. Unclip the sleeve of the selector lever.
2. Pull the sleeve up over the selector lever
until the sleeve is inside out.
3. Using the allen wrench from the tool kit,
refer to page 243, rotate the cover until it
reaches the stop, arrow 1, and remove,
arrow 2.
4. Insert allen wrench into the opening,
arrow 1.
00320051004F004C00510048000300280047004C0057004C005200510003
Page 71 of 284
70
ControlsDriving
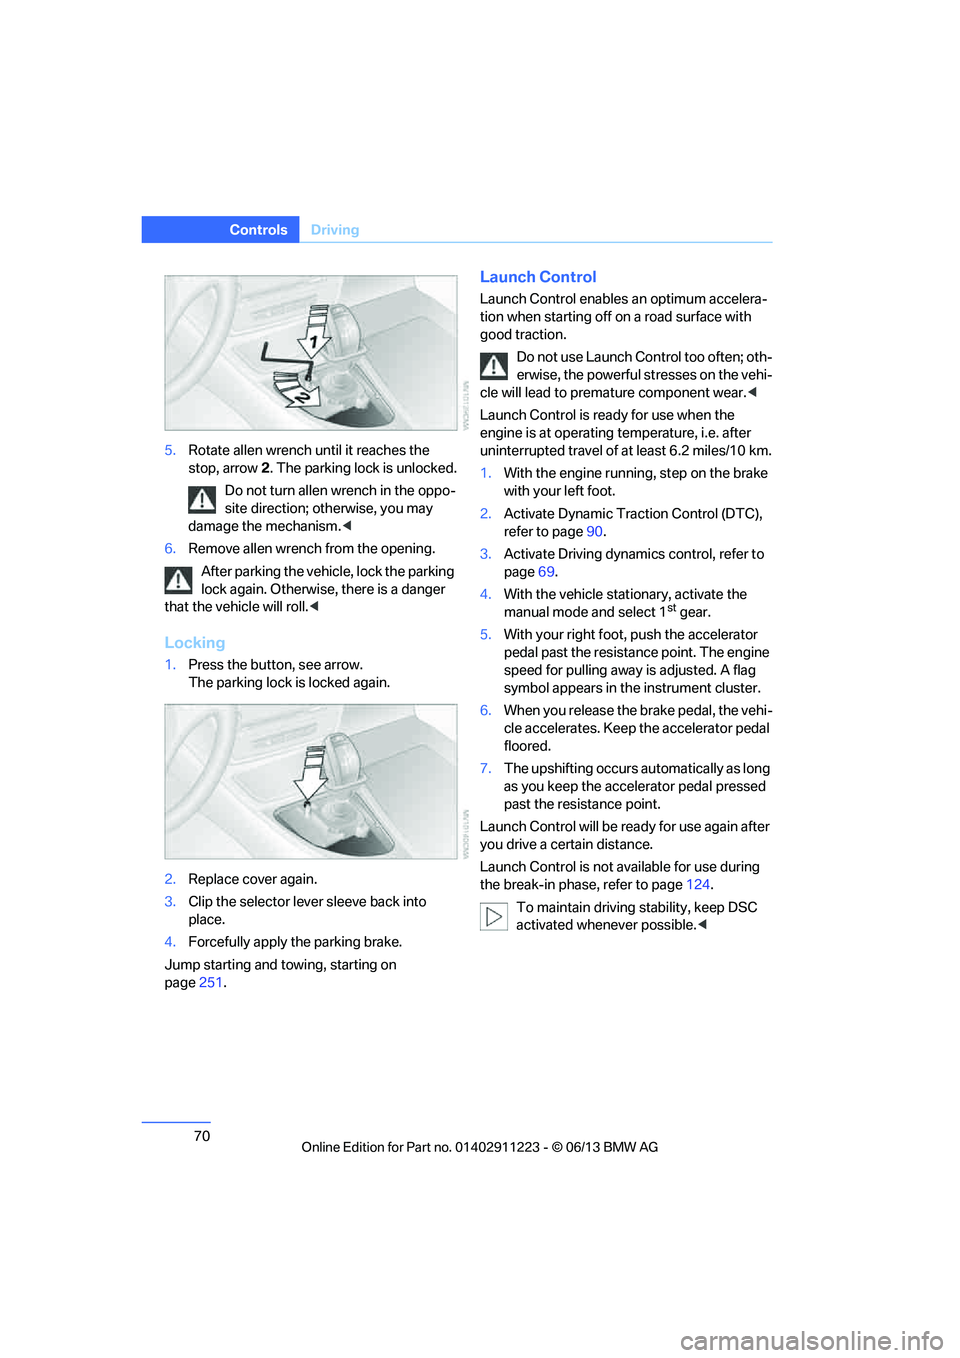
5.Rotate allen wrench until it reaches the
stop, arrow 2. The parking lock is unlocked.
Do not turn allen wrench in the oppo-
site direction; otherwise, you may
damage the mechanism. <
6. Remove allen wrench from the opening.
After parking the vehicle, lock the parking
lock again. Otherwise, there is a danger
that the vehicle will roll. <
Locking
1.Press the button, see arrow.
The parking lock is locked again.
2. Replace cover again.
3. Clip the selector lever sleeve back into
place.
4. Forcefully apply the parking brake.
Jump starting and towing, starting on
page 251.
Launch Control
Launch Control enables an optimum accelera-
tion when starting off on a road surface with
good traction.
Do not use Launch Control too often; oth-
erwise, the powerful stresses on the vehi-
cle will lead to premature component wear. <
Launch Control is ready for use when the
engine is at operating temperature, i.e. after
uninterrupted travel of at least 6.2 miles/10 km.
1. With the engine running, step on the brake
with your left foot.
2. Activate Dynamic Trac tion Control (DTC),
refer to page 90.
3. Activate Driving dynami cs control, refer to
page 69.
4. With the vehicle stationary, activate the
manual mode and select 1
stgear.
5. With your right foot, push the accelerator
pedal past the resistance point. The engine
speed for pulling away is adjusted. A flag
symbol appears in the instrument cluster.
6. When you release the brake pedal, the vehi-
cle accelerates. Keep the accelerator pedal
floored.
7. The upshifting occurs automatically as long
as you keep the accelerator pedal pressed
past the resistance point.
Launch Control will be ready for use again after
you drive a certain distance.
Launch Control is not available for use during
the break-in phase, refer to page 124.
To maintain driving stability, keep DSC
activated whenever possible. <
00320051004F004C00510048000300280047004C0057004C005200510003
Page 75 of 284
74
ControlsDriving
Increasing speed
Briefly press the lever, arrow 1, until the desired
speed is reached.
Each time the lever is pr essed briefly, the speed
is increased by approx. 1 mph/1 km/h.
Accelerating using the lever
Press the lever, arrow 1, until the desired speed
is reached.
The vehicle accelerates without pressure on
the accelerator pedal. The system stores and
maintains the speed.
Decreasing speed
Repeatedly pull the lever, arrow 2, until the
desired speed is reached.
The functions here are the same as for increas-
ing the speed or accelera ting, except that the
speed will be decreased.
Deactivating cruise control
Push the lever briefly upwards or downwards,
arrow 3.
In addition, the system is automatically
deactivated:
> When the brakes are applied.
> When the clutch of the manual transmission
is engaged or the transmission is shifted
into neutral.
> When the automatic transmission selector
lever is moved into th e neutral position N.
> When the selector lever of the sport auto-
matic transmission with double clutch is
moved into the neutral position N.
> When the vehicle travels faster or slower
than the set speed for an extended period,
e.g. when the accelerator is depressed.
> When DSC is intervening.
Resuming a previously stored speed
Press the button, arrow 4.
The last stored speed is resumed and
maintained.
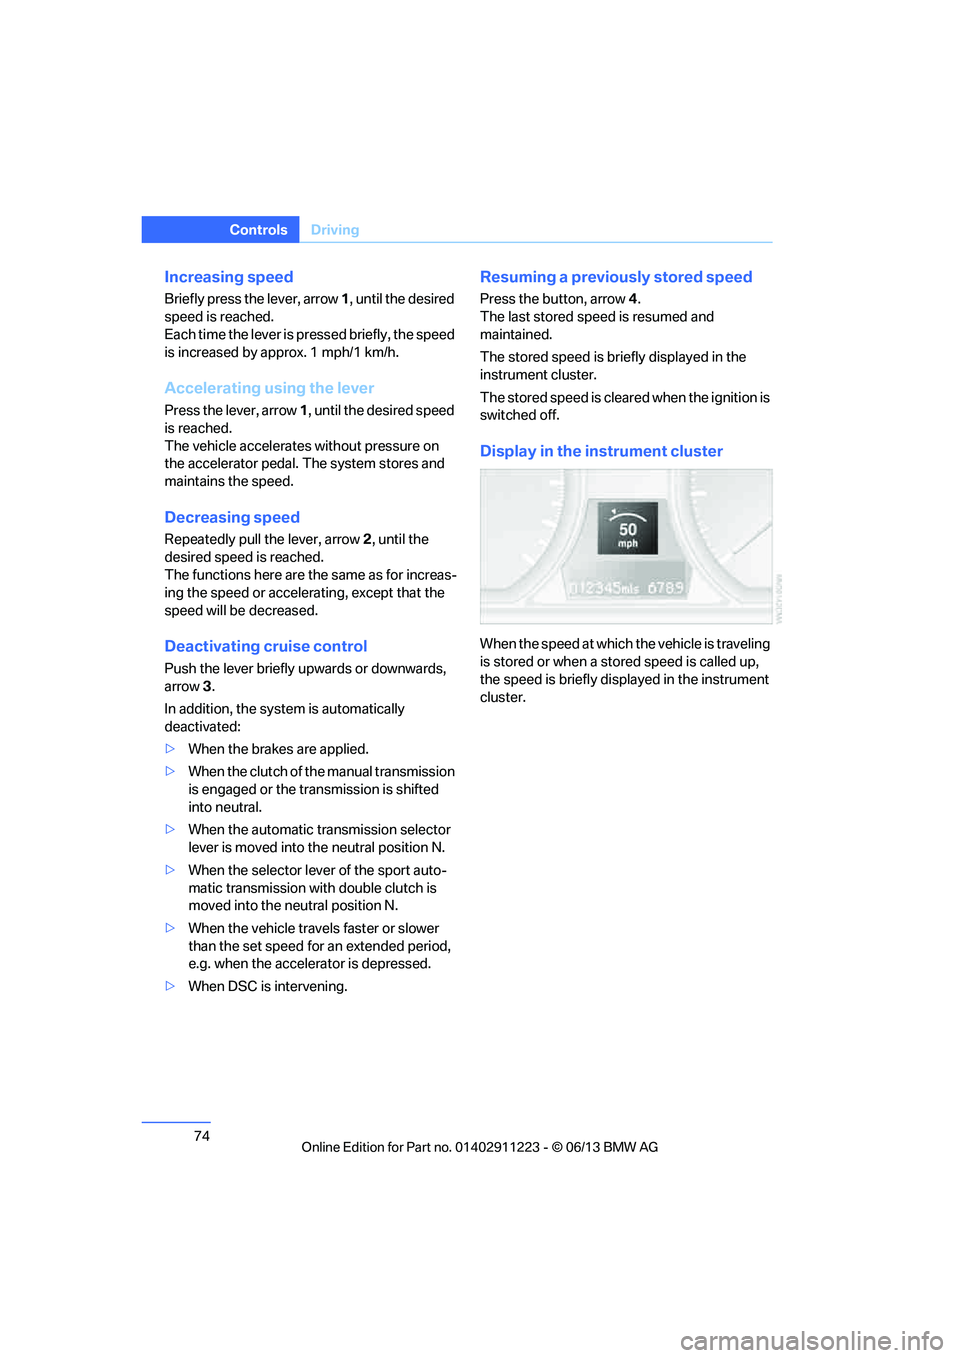
The stored speed is briefly displayed in the
instrument cluster.
The stored speed is cleared when the ignition is
switched off.
Display in the instrument cluster
When the speed at which the vehicle is traveling
is stored or when a stored speed is called up,
the speed is briefly disp layed in the instrument
cluster.
00320051004F004C00510048000300280047004C0057004C005200510003
Page 82 of 284
81
Controls overview
Controls
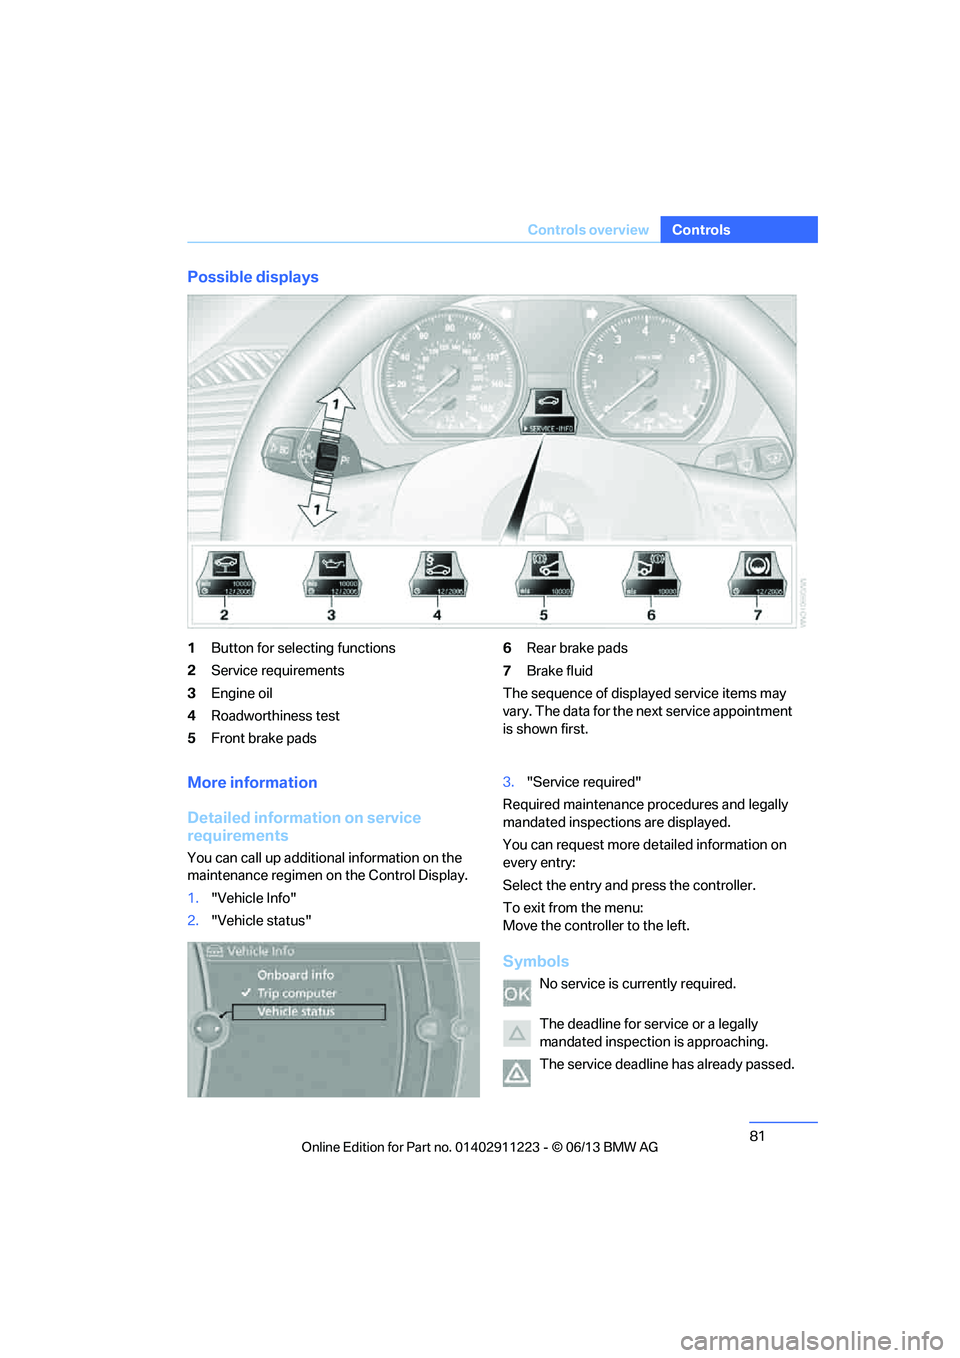
Possible displays
1
Button for selecting functions
2 Service requirements
3 Engine oil
4 Roadworthiness test
5 Front brake pads 6
Rear brake pads
7 Brake fluid
The sequence of displayed service items may
vary. The data for the ne xt service appointment
is shown first.
More information
Detailed information on service
requirements
You can call up additional information on the
maintenance regimen on the Control Display.
1. "Vehicle Info"
2. "Vehicle status" 3.
"Service required"
Required maintenance pr ocedures and legally
mandated inspections are displayed.
You can request more de tailed information on
every entry:
Select the entry and press the controller.
To exit from the menu:
Move the controller to the left.
Symbols
No service is currently required.
The deadline for serv ice or a legally
mandated inspection is approaching.
The service deadline has already passed.
00320051004F004C00510048000300280047004C0057004C005200510003
Page 90 of 284

89
Technology for driving comfort and safety
Controls
System limitations
Even with PDC, final responsibility for
estimating the distance between the
vehicle and any obstructions always remains
with the driver. Even when sensors are pro-
vided, there is a blind spot in which objects can
no longer be detected. The system is also sub-
ject to the physical limit s that apply to all forms
of ultrasonic measurement, such as those
encountered with traile r towbars and hitches,
thin or wedge-shaped objects, etc. Low objects
that have already been displayed, e.g. curbs,
can disappear again from the detection area of
the sensors before or after a continuous tone
sounds. Higher, protruding objects, e.g. ledges,
cannot be detected. Loud sound sources out-
side or inside the car can drown out the PDC
signal. Therefore, always drive cautiously; oth-
erwise, there is a risk of personal injury or prop-
erty damage. <
Driving stability control
systems
Your BMW has a number of systems that help
to maintain the vehicle's stability even in
adverse driving conditions.
Antilock Brake System ABS
ABS prevents locking of the wheels during
braking. Safe steering response is maintained
even during full braking. Active safety is thus
increased.
The ABS is operational every time you start the
engine. Braking safely, refer to page 126.
Electronic brake-force distribution
EBV
The system controls the brake pressure in the
rear wheels to ensure stable braking behavior.
Dynamic Brake Control DBC
When you apply the brakes rapidly, this system
automatically produces the maximum braking
force boost and thus helps to achieve the short-
est possible braking distance during full brak-
ing. This system exploi ts all of the benefits
provided by ABS.
Do not reduce the pressu re on the brake for the
duration of the full braking application.
Dynamic Stability Control DSC
DSC prevents the driving wheels from losing
traction when you pull aw ay from rest or accel-
erate. The system also recognizes unstable
driving conditions, for example if the rear of the
car is about to swerve or if momentum is acting
at an angle past the front wheels. In these
cases, DSC helps the vehicle maintain a safe
course within physical limits by reducing engine
output and through brakin g actions at the indi-
vidual wheels.
The laws of physics cannot be repealed,
even with DSC. An appropriate driving
style always remains th e responsibility of the
driver. Therefore, do no t reduce the additional
s a f e t y m a r g i n a g a i n b y t a k i n g r i s k s , a s t h i s c o u l d
result in an accident. <
Deactivating DSC
Press the button for at least 3 seconds until the
indicator lamp for DSC OFF lights up and DSC
OFF is displayed in the instrument cluster.
Dynamic Traction Cont rol DTC and DSC have
been simultaneously de activated. Stabilizing
and drive-output promoting actions are no
longer executed.
00320051004F004C00510048000300280047004C0057004C005200510003
Page 91 of 284

90
ControlsTechnology for driving comfort and safety
In the same way as with a differential interlock,
even if DSC is deactivated, brake actions are
still performed on the rear axle to enhance drive
output if the drive whee ls experience a signifi-
cant loss of traction.
To increase vehicle stability, activate DSC again
as soon as possible.
Activating DSC
Press the button again; th e indicator lamp in the
instrument cluster goes out.
For better control
If the indicator lamp flashes: the DSC
controls the driving and braking forces.
If the indicator lamp lights up: DSC and
DTC have failed.
The indicator lamp lights up and
DSC OFF is displayed in the instrument
cluster: DSC is deactivated.
Dynamic Traction Control DTC
DTC is a version of DSC in which the drive out-
put is optimized for part icular road conditions,
e.g. unplowed snow-covered roads. The sys-
tem assures the maximal drive output, but with
reduced driving stability. It is therefore neces-
sary to drive with appropriate caution.
You may find it useful to briefly activate DTC
under the following sp ecial circumstances:
> When driving uphill on snow-covered roads,
in slush or on unplowed, snow-covered
roads
> When rocking a stuck vehicle free or start-
ing off in deep snow or on loose ground
> When driving with snow chains
Activating DTC
Press the button; the indicator lamp for DSC
OFF lights up and TRACTION is displayed in
the instrument cluster.
For better control
If the indicator lamp flashes: DTC con-
trols the driving and braking forces.
If the indicator lamp lights up: DSC and
DTC have failed.
The indicator lamp lights up and TRAC-
TION is displayed in the instrument
cluster: DTC is activated.
Deactivating DTC
Press the button again; th e indicator lamp in the
instrument cluster goes out.
Drive-off assistant
The drive-off assistant enables you to drive off
smoothly on uphill gradients. It is not necessary
to use the parking brake for this.
1. Hold the car in place by depressing the
brake.
2. Release the brake and drive off without
delay.
The drive-off assistant holds the car in
place for approx. 2 seconds after the
brake is released. Drive off without delay after
releasing the brake. Otherwise, the drive-off
assistant will no longer hold the car in place
after approx. 2 seconds and the car will start to
roll backwards. <
00320051004F004C00510048000300280047004C0057004C005200510003