2013 BMW 128I COUPE automatic transmission
[x] Cancel search: automatic transmissionPage 69 of 284
68
ControlsDriving
D Drive mode
In Drive mode, all forward gears are shifted
automatically.
Kickdown
For sudden acceleration maneuvers such as
passing, depress the accelerator past the resis-
tance point. This prov ides maximum accelera-
tion.
Sport program and manual operation
M/S
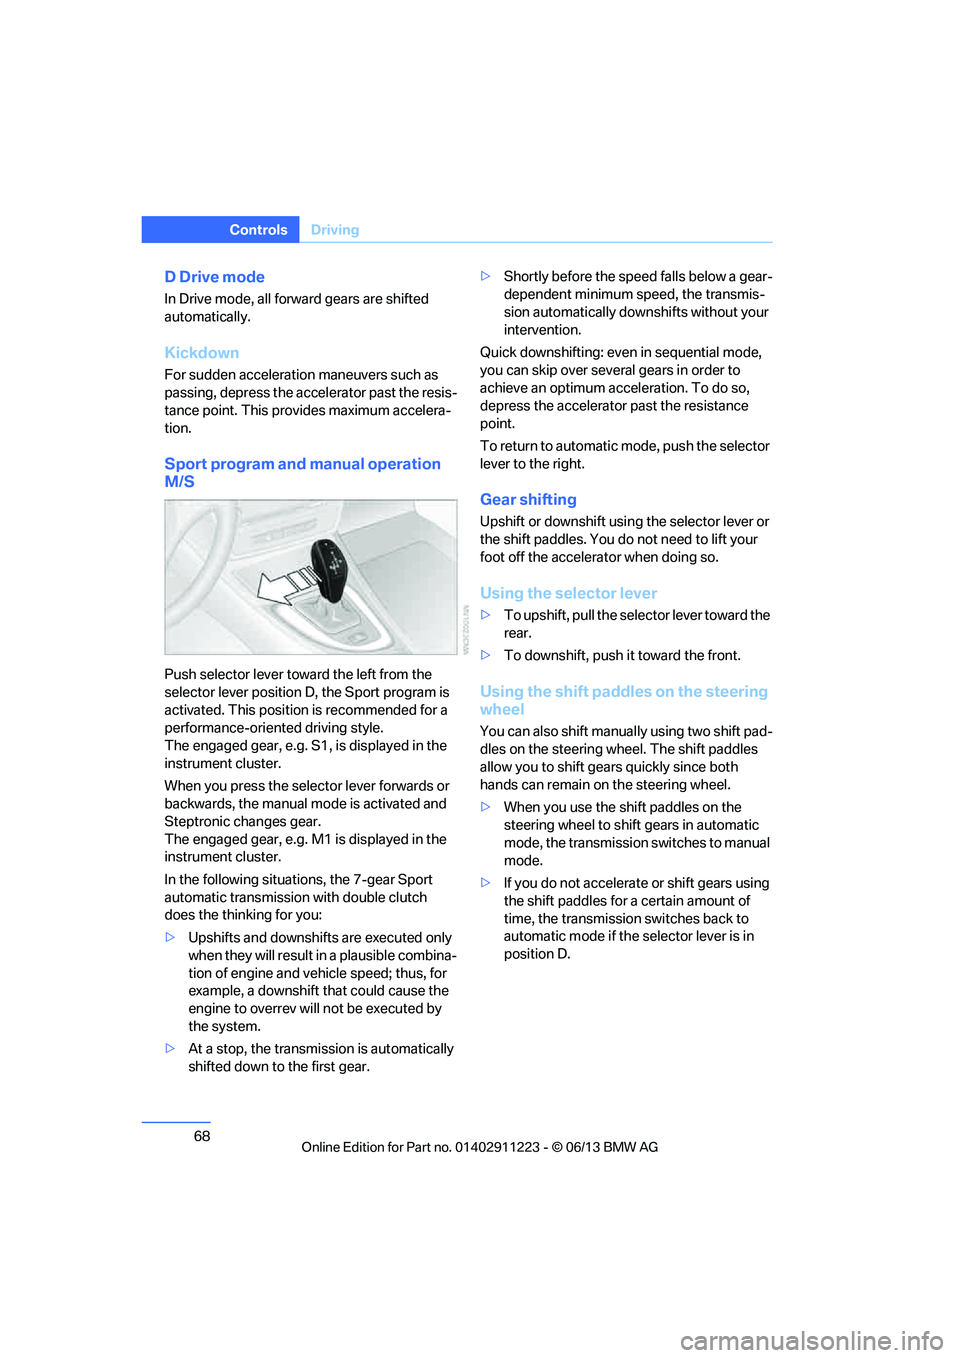
Push selector lever towa rd the left from the
selector lever position D, the Sport program is
activated. This position is recommended for a
performance-oriented driving style.
The engaged gear, e.g. S1, is displayed in the
instrument cluster.
When you press the selector lever forwards or
backwards, the manual mode is activated and
Steptronic changes gear.
The engaged gear, e.g. M1 is displayed in the
instrument cluster.
In the following situat ions, the 7-gear Sport
automatic transmission with double clutch
does the thinking for you:
> Upshifts and downshifts are executed only
when they will result in a plausible combina-
tion of engine and vehicle speed; thus, for
example, a downshift that could cause the
engine to overrev will not be executed by
the system.
> At a stop, the transmission is automatically
shifted down to the first gear. >
Shortly before the spee d falls below a gear-
dependent minimum speed, the transmis-
sion automatically down shifts without your
intervention.
Quick downshifting: even in sequential mode,
you can skip over several gears in order to
achieve an optimum acceleration. To do so,
depress the accelerator past the resistance
point.
To return to automatic mode, push the selector
lever to the right.
Gear shifting
Upshift or downshift usin g the selector lever or
the shift paddles. You do not need to lift your
foot off the accelerator when doing so.
Using the selector lever
> To upshift, pull the sele ctor lever toward the
rear.
> To downshift, push it toward the front.
Using the shift paddl es on the steering
wheel
You can also shift manua lly using two shift pad-
dles on the steering wheel. The shift paddles
allow you to shift gear s quickly since both
hands can remain on the steering wheel.
> When you use the shift paddles on the
steering wheel to shift gears in automatic
mode, the transmission switches to manual
mode.
> If you do not accelerate or shift gears using
the shift paddles for a certain amount of
time, the transmission switches back to
automatic mode if the selector lever is in
position D.
00320051004F004C00510048000300280047004C0057004C005200510003
Page 75 of 284
74
ControlsDriving
Increasing speed
Briefly press the lever, arrow 1, until the desired
speed is reached.
Each time the lever is pr essed briefly, the speed
is increased by approx. 1 mph/1 km/h.
Accelerating using the lever
Press the lever, arrow 1, until the desired speed
is reached.
The vehicle accelerates without pressure on
the accelerator pedal. The system stores and
maintains the speed.
Decreasing speed
Repeatedly pull the lever, arrow 2, until the
desired speed is reached.
The functions here are the same as for increas-
ing the speed or accelera ting, except that the
speed will be decreased.
Deactivating cruise control
Push the lever briefly upwards or downwards,
arrow 3.
In addition, the system is automatically
deactivated:
> When the brakes are applied.
> When the clutch of the manual transmission
is engaged or the transmission is shifted
into neutral.
> When the automatic transmission selector
lever is moved into th e neutral position N.
> When the selector lever of the sport auto-
matic transmission with double clutch is
moved into the neutral position N.
> When the vehicle travels faster or slower
than the set speed for an extended period,
e.g. when the accelerator is depressed.
> When DSC is intervening.
Resuming a previously stored speed
Press the button, arrow 4.
The last stored speed is resumed and
maintained.
The stored speed is briefly displayed in the
instrument cluster.
The stored speed is cleared when the ignition is
switched off.
Display in the instrument cluster
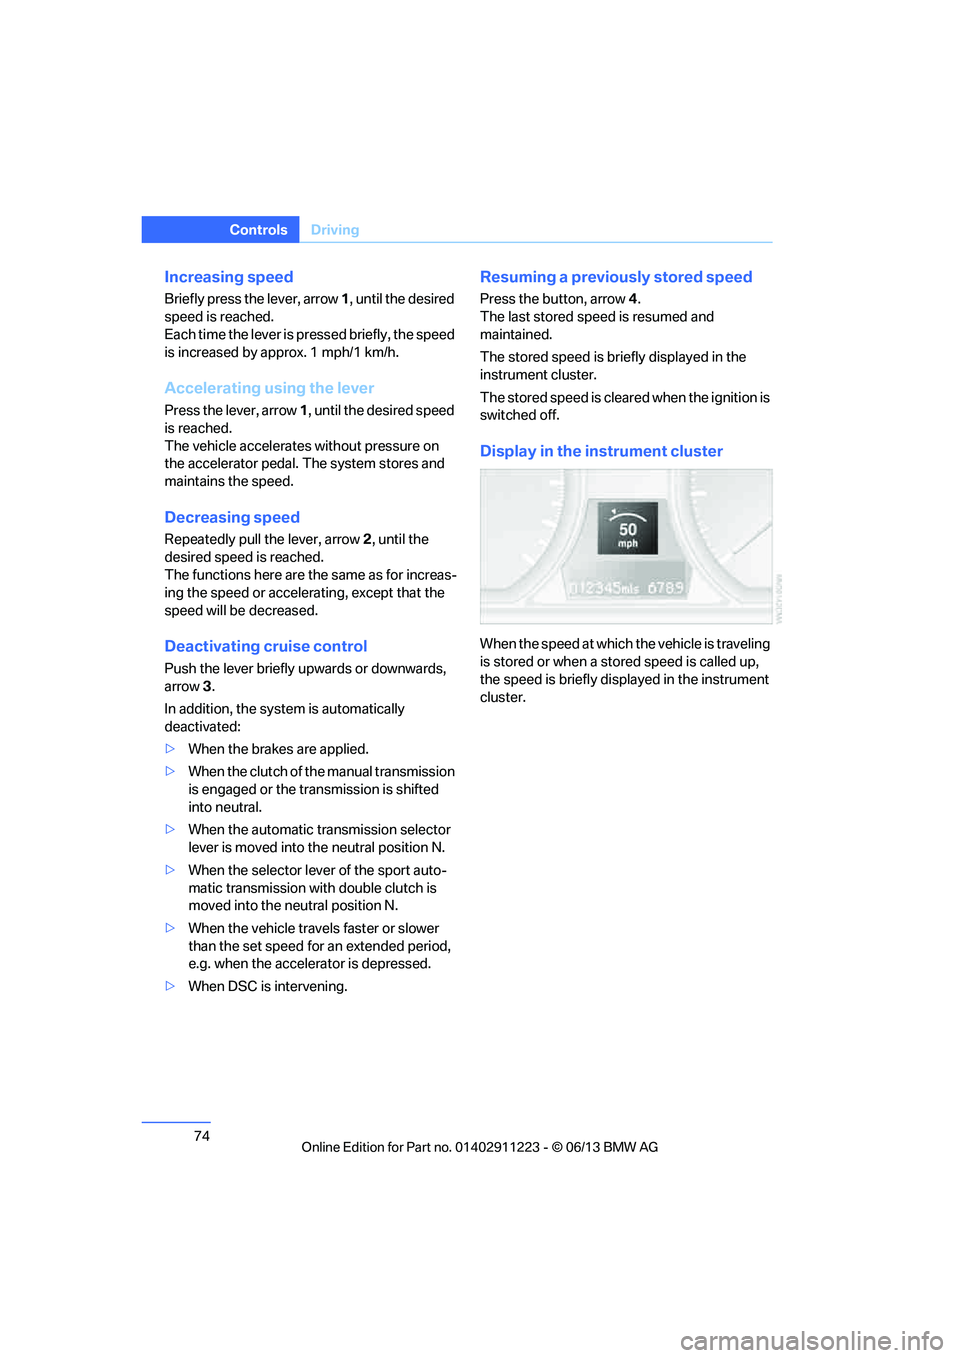
When the speed at which the vehicle is traveling
is stored or when a stored speed is called up,
the speed is briefly disp layed in the instrument
cluster.
00320051004F004C00510048000300280047004C0057004C005200510003
Page 89 of 284

88
ControlsTechnology for driving comfort and safety
Technology for driving comfort and safety
Vehicle equipment
In this chapter, all pr oduction, country, and
optional equipment that is offered in the model
range is described. For this reason, descrip-
tions will be given of some equipment that may
not be available in a vehi cle, for example due to
the special options or national-market version
selected. This also app lies to safety related
functions and systems.
Park Distance Control PDC
The concept
The PDC assists you with maneuvering in tight
parking spaces. Acoustic signals and a visual
indicator warn you of the presence of an object
behind your vehicle. Four ultrasonic sensors in
the bumper measure the distance.
These sensors have a range of approx. 6.5 ft/
2 m. However, an acoustic warning does not
sound until an object is approx. 24 in/60 cm
from the corner sensors or approx. 5 ft/1.50 m
from the center sensors.
PDC is a parking aid that can indicate
objects when they are approached
slowly, as is usually th e case when parking.
Avoid approaching an object at high speed; oth-
erwise, physical circumstances may lead to the
system warning being issued too late. <
Switching on automatically
With the engine running or the ignition switched
on, the system is activated after approx. second
when you engage reverse gear or move the
automatic transmission selector lever to
position R. Wait this short period before driving.
Switching off automatically
After approx. 164 ft/50 m of driving or above
approx. 18 mph/30 km/h, the system switches
off and the LED goes out.
Signal tones
When nearing an object, its position is indicated
correspondingly by an in terval tone. As the dis-
tance between vehicle an d object decreases,
the intervals betwee n the tones become
shorter. If the distance to the nearest object
falls to below roughly 1 ft/30 cm, then a contin-
uous tone sounds.
An interval tone is interrupted after approx.
3seconds:
> If you stop in front of an object that has been
detected by only one of the corner sensors
> If you are driving parallel to a wall
Malfunction
The warning lamp lights up. A mes-
sage appears on the Control Display.
PDC is malfunctioning. Have the
system checked.
To avoid this problem, keep the sensors clean
and free of ice or snow in order to ensure that
they will continue to op erate effectively. When
using a high-pressure cleaner, do not spray the
sensors for extended periods of time and only
from a distance of at least 1 ft/30 cm.
PDC with visual warning
The approach of the vehicle to an object is
shown on the Control Display. Objects that are
farther away are displayed on the Control Dis-
play before a signal tone sounds. The display
appears on the Control Display as soon as PDC
is activated.
00320051004F004C00510048000300280047004C0057004C005200510003
Page 128 of 284

127
Things to remember when driving
Driving tips
Hills
To prevent overheating and the resulting
reduced efficiency of the brake system,
drive long or steep downhill gradients in the
gear in which the least br aking is required. Even
light but consistent brak e pressure can lead to
high temperatures, brake wear and possibly
even brake failure. <
You can increase the engine's braking effect
by shifting down, all the way to first gear if nec-
essary. This strategy helps you avoid placing
excessive loads on the brake system. Down-
shifting in manual mo de of the automatic
transmission, refer to page 65.
Sport automatic transm ission with double
clutch: never drive with the transmission
in neutral or with the en gine switched off; other-
wise, there will be no en gine braking action and
no power assistance to the brakes and steering.
Manual transmission: never drive with the
clutch held down, with the transmission in neu-
tral or with the engine switched off; otherwise,
there will be no engine braking action and no
power assistance to the brakes and steering.
Never allow floor mats, carpets or any other
objects to protrude into the area around the
pedals; otherwise, pedal function could be
impaired. <
Corrosion on brake rotors
When the vehicle is driv en only occasionally,
during extended periods when the vehicle is not
used at all, and in operating conditions where
brake applications are le ss frequent, there is an
increased tendency for corrosion to form on
rotors, while contaminan ts accumulate on the
brake pads. This occurs because the minimum
pressure which must be exerted by the pads
during brake applications to clean the rotors is
not reached.
Should corrosion form on the brake rotors, the
brakes will tend to respond with a pulsating
effect that even extended application will fail to
cure.
When the vehicle is parked
Condensation forms while the automatic
climate control is in operation, and then exits
under the vehicle. Traces of condensed water
under the vehicle are therefore normal.
Cargo loading
To avoid loading the tires beyond their
approved carrying ca pacity, never over-
load the vehicle. Overlo ading can lead to over-
heating and increases the rate at which damage
develops inside the tires. In some situations,
this can result in sudden loss of tire pressure. <
Avoid fluid spills in the trunk as they could
damage the vehicle. <
Determining loading limit
1.Locate the following statement on your
vehicle's placard:
The combined weight of occupants
and cargo should never exceed
XXX kg or YYY lbs. Otherwise damage to
the vehicle may occur and unstable driving
conditions may result.<
2. Determine the combined weight of the
driver and passengers that will be riding in
your vehicle.
3. Subtract the combined weight of the driver
and passengers from XXX kilograms or YYY
pounds.
4. The resulting figure equals the available
amount of cargo and luggage load capacity.
For example, if the YYY amount equals
00320051004F004C00510048000300280047004C0057004C005200510003
Page 164 of 284
163
Satellite radio
Entertainment
Selecting category
1.
"Radio"
2. "Satellite radio"
3. "Category"
4. Select the desired category.
Time shift
Approximately one hour of the channel cur-
rently being listened to is temporarily stored in a
cache memory. Prerequisite: the signal must be
available.
The stored audio track can be played back at a
different time from the live broadcast. If the
cache memory is full, then the older tracks are
recorded over. The cache memory is deleted if
a new channel is selected.
Accessing Time shift
1. "Radio"
2. "Satellite radio"
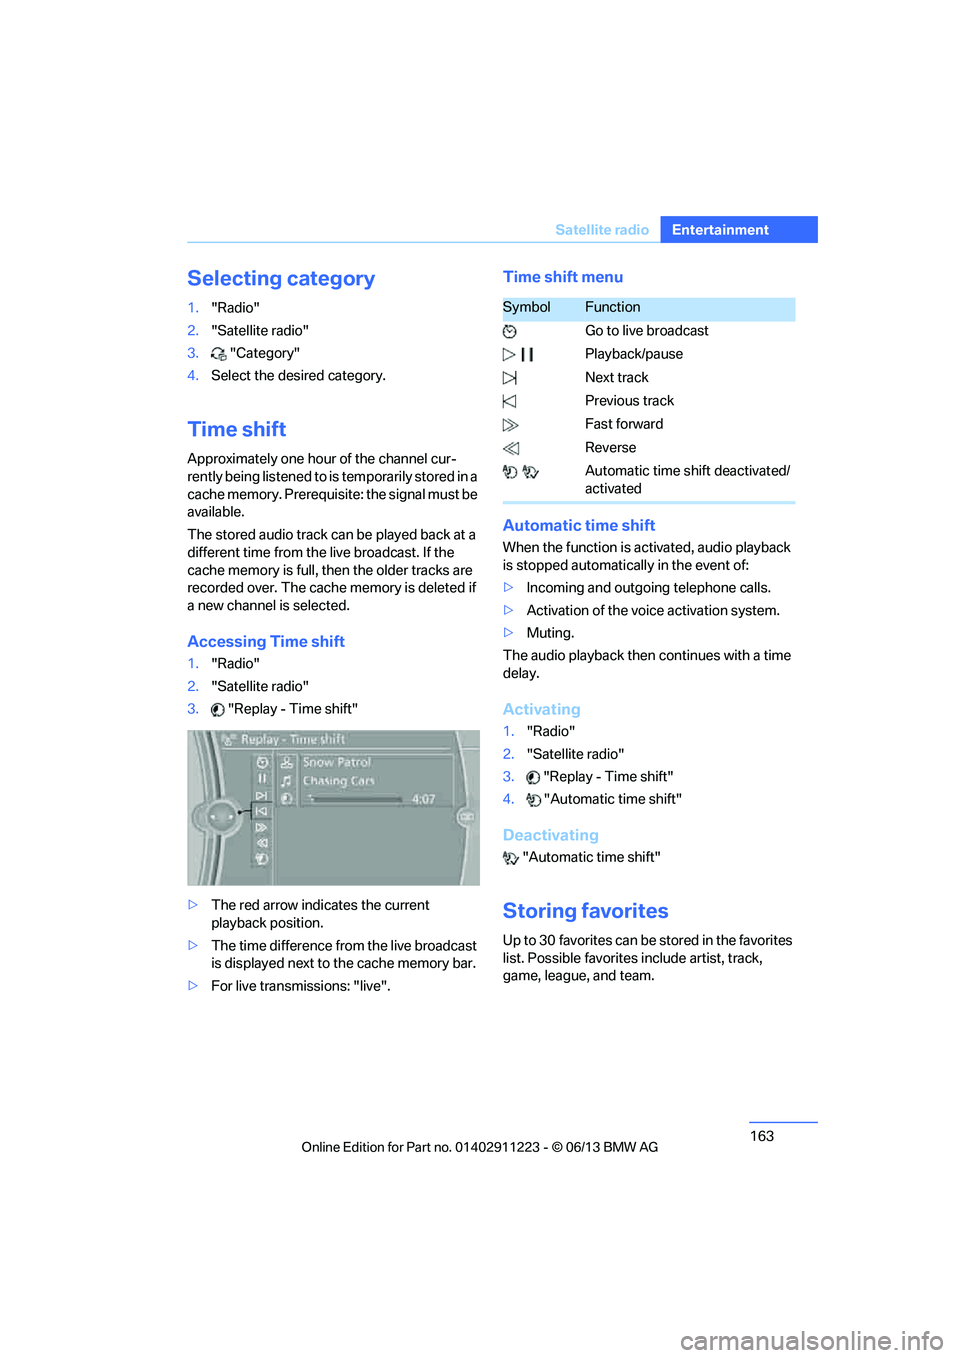
3. "Replay - Time shift"
> The red arrow indicates the current
playback position.
> The time difference from the live broadcast
is displayed next to the cache memory bar.
> For live transmissions: "live".
Time shift menu
Automatic time shift
When the function is ac tivated, audio playback
is stopped automatica lly in the event of:
> Incoming and outgoing telephone calls.
> Activation of the voic e activation system.
> Muting.
The audio playback then continues with a time
delay.
Activating
1. "Radio"
2. "Satellite radio"
3. "Replay - Time shift"
4. "Automatic time shift"
Deactivating
"Automatic time shift"
Storing favorites
Up to 30 favorites can be stored in the favorites
list. Possible favorites include artist, track,
game, league, and team.
SymbolFunction
Go to live broadcast
Playback/pause
Next track
Previous track
Fast forward
Reverse
Automatic time shift deactivated/
activated
00320051004F004C00510048000300280047004C0057004C005200510003
Page 215 of 284
214
CommunicationsConnectedDrive
Starting BMW Roadside Assistance
without BMW Assist or TeleService
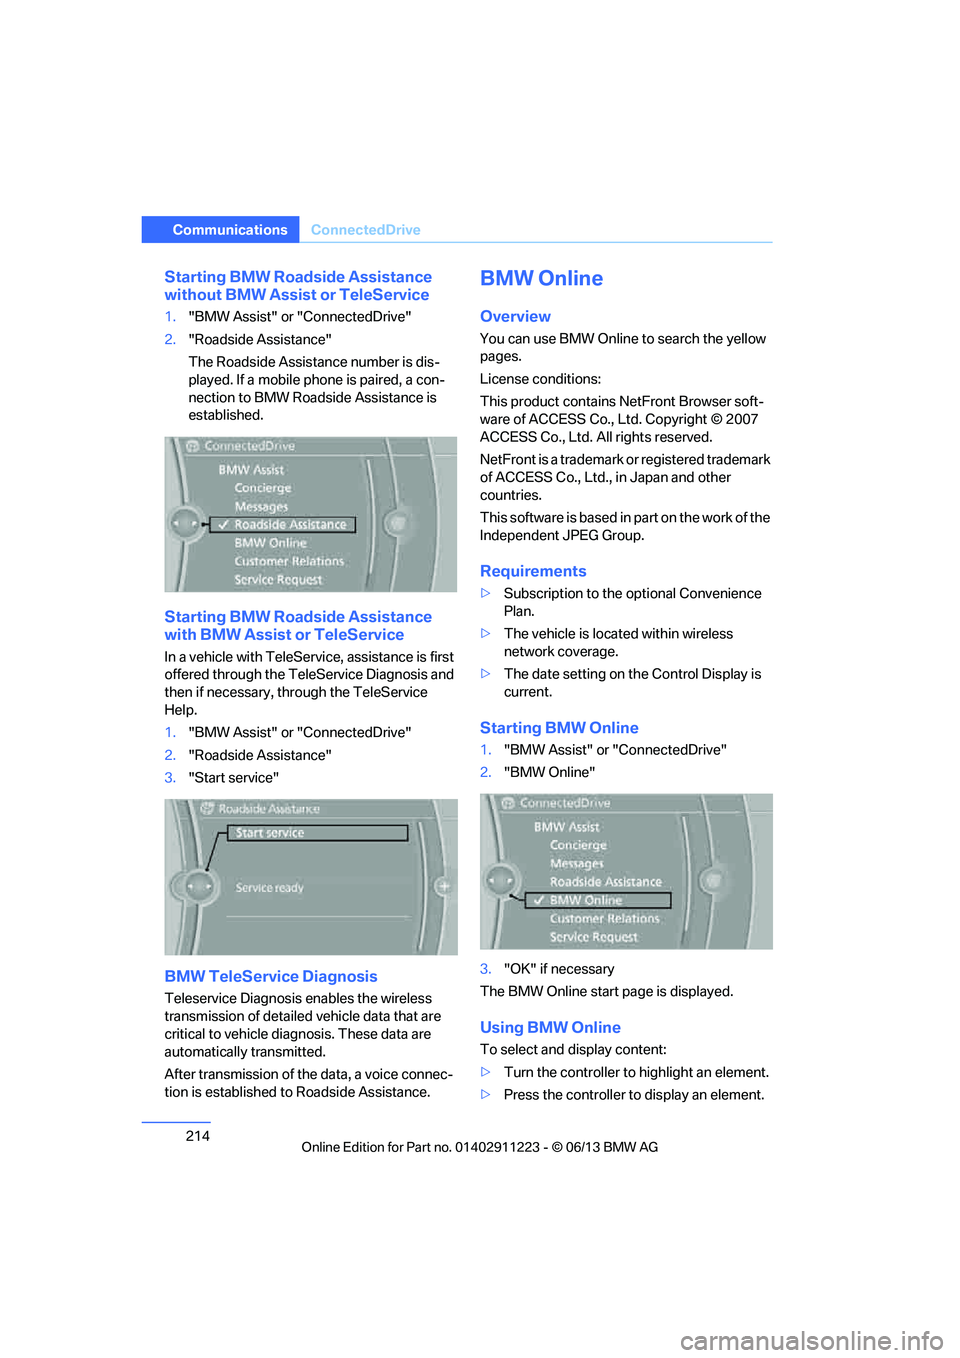
1."BMW Assist" or "ConnectedDrive"
2. "Roadside Assistance"
The Roadside Assistance number is dis-
played. If a mobile phone is paired, a con-
nection to BMW Roadside Assistance is
established.
Starting BMW Road side Assistance
with BMW Assist or TeleService
In a vehicle with TeleServ ice, assistance is first
offered through the TeleService Diagnosis and
then if necessary, th rough the TeleService
Help.
1. "BMW Assist" or "ConnectedDrive"
2. "Roadside Assistance"
3. "Start service"
BMW TeleService Diagnosis
Teleservice Diagnosis enables the wireless
transmission of detailed vehicle data that are
critical to vehicle diag nosis. These data are
automatically transmitted.
After transmission of the data, a voice connec-
tion is established to Roadside Assistance.
BMW Online
Overview
You can use BMW Online to search the yellow
pages.
License conditions:
This product contains NetFront Browser soft-
ware of ACCESS Co., Ltd. Copyright © 2007
ACCESS Co., Ltd. All rights reserved.
NetFront is a trademark or registered trademark
of ACCESS Co., Ltd., in Japan and other
countries.
T h i s s o f t w a r e i s b a s e d i n p a r t o n t h e w o r k o f t h e
Independent JPEG Group.
Requirements
> Subscription to the optional Convenience
Plan.
> The vehicle is located within wireless
network coverage.
> The date setting on th e Control Display is
current.
Starting BMW Online
1. "BMW Assist" or "ConnectedDrive"
2. "BMW Online"
3. "OK" if necessary
The BMW Online start page is displayed.
Using BMW Online
To select and display content:
> Turn the controller to highlight an element.
> Press the controller to display an element.
00320051004F004C00510048000300280047004C0057004C005200510003
Page 241 of 284
240
MobilityCare
Driving into an automatic car wash
Perform the following steps to ensure that the
vehicle can roll:
Manual transmission:
1.Shift into neutral.
2. Release parking brake, refer to page 63.
3. Switch off the engine.
4. Leave the remote control in the ignition
lock.
Automatic transmission:
1. Insert the remote cont rol into the ignition
lock, even with Comfort Access.
2. Shift selector lever into position N.
3. Release parking brake, refer to page 63.
4. Switch off the engine.
5. Leave the remote control in the ignition
lock.
Sport automatic transmission with double
clutch:
1. Insert the remote cont rol into the ignition
lock, even with Comfort Access.
2. Shift selector lever into position N.
3. Release parking brake, refer to page 63.
4. Switch off the engine.
5. Leave the remote control in the ignition
lock.
The transmission is switched into position P:
> Automatically after approx. 30 minutes
> If you remove the infrared remote control
from the ignition lock
Headlamps
Do not rub them dry and do not use abrasive or
corrosive cleaning agents.
Loosen dirt, e.g. insects, with shampoo and
rinse away with water.
Thaw ice with a de-icer and do not use an ice
scraper.
After washing the vehicle
After washing the vehicle, apply the
brakes briefly to dry them; otherwise,
water can reduce braking efficiency over the
short term and the brake discs can corrode. <
R e m o v e r e s i d u e s o n t h e windows completely in
order to prevent impaired vision due to smear
formation and to reduce wiper noise and wiper
blade wear.
Vehicle care
Care products
BMW recommends using BMW cleaning and
care products since they have been tested and
approved for this purpose.
Follow the instructions on the packaging.
When cleaning inside the vehicle, always
open the doors and windows. Only use prod-
ucts designed for cleaning vehicles. Cleaning
agents can contain substa nces that are danger-
ous or hazardous to your health. <
Vehicle paintwork
Regular care contributes to driving safety and
value retention. Environmental influences in
regions with elevated levels of air pollution or
natural contaminants such as tree sap or pollen
can impact vehicle paintwork. The frequency
and scope of car care should be adapted
accordingly.
Immediately remove particularly corrosive sub-
stances such as spilled fuel, oil, grease, or bird
droppings to prevent damage to the paintwork.
Leather care
Frequently remove dust from the leather using
a cloth or vacuum cleaner.
Otherwise, dust and road grit in the pores and
folds of the leather will otherwise have an abra-
sive effect, resulting in increased wear and
causing the leather surf ace to become brittle
prematurely.
00320051004F004C00510048000300280047004C0057004C005200510003
Page 254 of 284
253
Giving and receiving assistance
Mobility
Use only the tow fitting provided with the
vehicle and screw it a
ll the way in. Use the
tow fitting for towing on paved roads only. Avoid
lateral loading of the tow fitting, e.g. do not lift
the vehicle by the tow fitting. Otherwise, the
tow fitting and the vehicle could be damaged. <
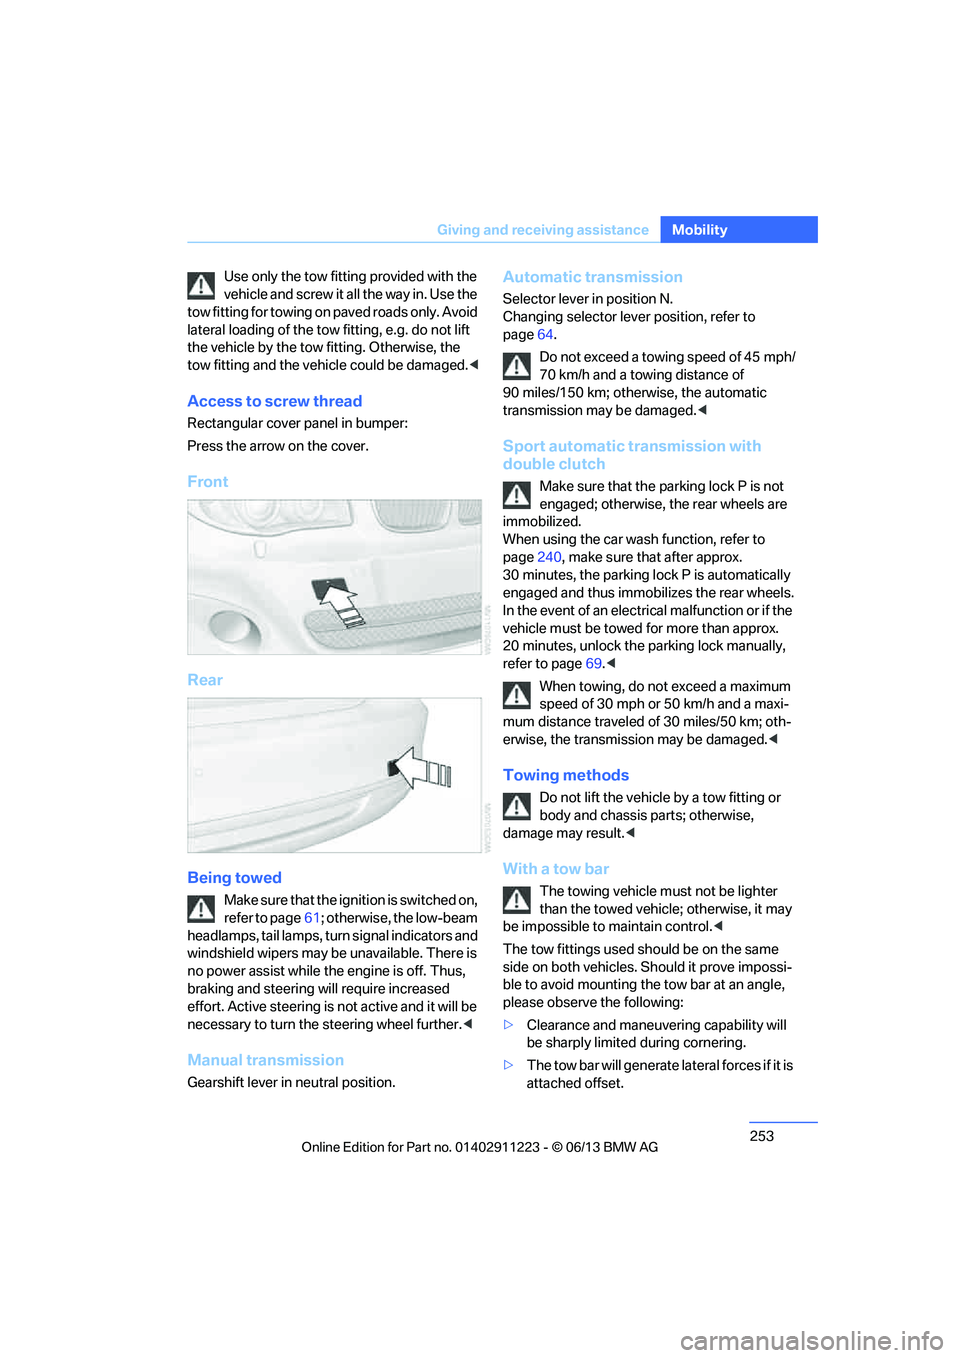
Access to screw thread
Rectangular cover panel in bumper:
Press the arrow on the cover.
Front
Rear
Being towed
Make sure that the ignition is switched on,
refer to page61; otherwise, the low-beam
headlamps, tail lamps, turn signal indicators and
windshield wipers may be unavailable. There is
no power assist while the engine is off. Thus,
braking and steering will require increased
effort. Active steering is not active and it will be
necessary to tu rn the steering wheel further. <
Manual transmission
Gearshift lever in neutral position.
Automatic transmission
Selector lever in position N.
Changing selector lever position, refer to
page 64.
Do not exceed a towing speed of 45 mph/
70 km/h and a towing distance of
90 miles/150 km; otherwise, the automatic
transmission may be damaged. <
Sport automatic transmission with
double clutch
Make sure that the parking lock P is not
engaged; otherwise, the rear wheels are
immobilized.
When using the car wash function, refer to
page 240, make sure that after approx.
30 minutes, the parking lock P is automatically
engaged and thus immobilizes the rear wheels.
In the event of an electrical malfunction or if the
vehicle must be towed for more than approx.
20 minutes, unlock the parking lock manually,
refer to page 69.<
When towing, do not exceed a maximum
speed of 30 mph or 50 km/h and a maxi-
mum distance traveled of 30 miles/50 km; oth-
erwise, the transmission may be damaged. <
Towing methods
Do not lift the vehicle by a tow fitting or
body and chassis parts; otherwise,
damage may result. <
With a tow bar
The towing vehicle must not be lighter
than the towed vehicle; otherwise, it may
be impossible to maintain control.<
The tow fittings used sh ould be on the same
side on both vehicles. Should it prove impossi-
ble to avoid mounting the tow bar at an angle,
please observe the following:
> Clearance and maneuvering capability will
be sharply limited during cornering.
> The tow bar will ge nerate lateral forces if it is
attached offset.
00320051004F004C00510048000300280047004C0057004C005200510003