2013 BMW 128I CONVERTIBLE change wheel
[x] Cancel search: change wheelPage 96 of 284
95
Technology for driving comfort and safety
Controls
Message for unsuc
cessful system
reset
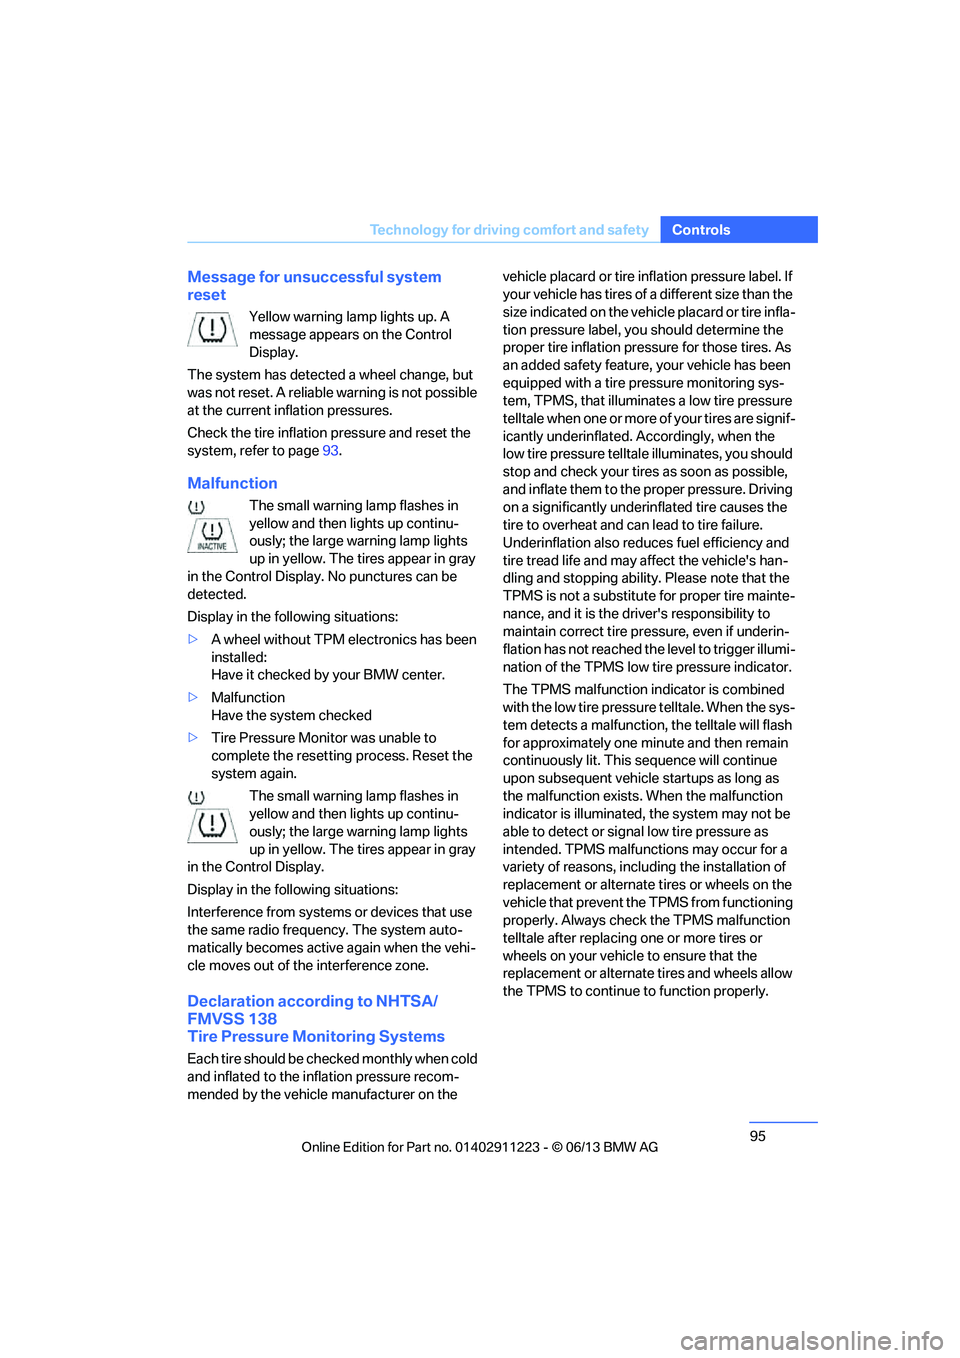
Yellow warning lamp lights up. A
message appears on the Control
Display.
The system has detected a wheel change, but
was not reset. A reliable warning is not possible
at the current inflation pressures.
Check the tire inflation pressure and reset the
system, refer to page 93.
Malfunction
The small warning lamp flashes in
yellow and then lights up continu-
ously; the large warning lamp lights
up in yellow. The tires appear in gray
in the Control Display. No punctures can be
detected.
Display in the following situations:
> A wheel without TPM electronics has been
installed:
Have it checked by your BMW center.
> Malfunction
Have the system checked
> Tire Pressure Monitor was unable to
complete the resetting process. Reset the
system again.
The small warning lamp flashes in
yellow and then lights up continu-
ously; the large warning lamp lights
up in yellow. The tires appear in gray
in the Control Display.
Display in the following situations:
Interference from systems or devices that use
the same radio frequency. The system auto-
matically becomes active again when the vehi-
cle moves out of the interference zone.
Declaration according to NHTSA/
FMVSS 138
Tire Pressure Monitoring Systems
Each tire should be checked monthly when cold
and inflated to the inflation pressure recom-
mended by the vehicle manufacturer on the vehicle placard or tire infl
ation pressure label. If
your vehicle has tires of a different size than the
size indicated on the vehi cle placard or tire infla-
tion pressure label, you should determine the
proper tire inflation pressure for those tires. As
an added safety feature, your vehicle has been
equipped with a tire pr essure monitoring sys-
tem, TPMS, that illuminate s a low tire pressure
t e l l t a l e w h e n o n e o r m o r e o f y o u r t i r e s a r e s i g n i f -
icantly underinflated. Accordingly, when the
low tire pressure telltal e illuminates, you should
stop and check your tires as soon as possible,
and inflate them to the proper pressure. Driving
on a significantly underinflated tire causes the
tire to overheat and ca n lead to tire failure.
Underinflation also reduces fuel efficiency and
tire tread life and may a ffect the vehicle's han-
dling and stopping ability. Please note that the
TPMS is not a substitute for proper tire mainte-
nance, and it is the driver's responsibility to
maintain correct tire pr essure, even if underin-
flation has not reached th e level to trigger illumi-
nation of the TPMS low tire pressure indicator.
The TPMS malfunction indicator is combined
with the low tire pressure telltale. When the sys-
tem detects a malfunction, the telltale will flash
for approximately one minute and then remain
continuously lit. This sequence will continue
upon subsequent vehicle startups as long as
the malfunction exists. When the malfunction
indicator is illuminated, the system may not be
able to detect or signal low tire pressure as
intended. TPMS malfunctions may occur for a
variety of reasons, includ ing the installation of
replacement or alternate tires or wheels on the
vehicle that prevent the TPMS from functioning
properly. Always check the TPMS malfunction
telltale after replacing one or more tires or
wheels on your vehicle to ensure that the
replacement or alternate tires and wheels allow
the TPMS to continue to function properly.
00320051004F004C00510048000300280047004C0057004C005200510003
Page 109 of 284
108
ControlsClimate
At the same time, a condensation sensor
controls the program so as to prevent window
condensation as much as possible.
The program is switched off when the air distri-
bution is set manually or the button is pressed
again.
Intensity of the AUTO program
With the AUTO progra m switched on, auto-
matic control of the air volume and air
distribution can be adjusted:
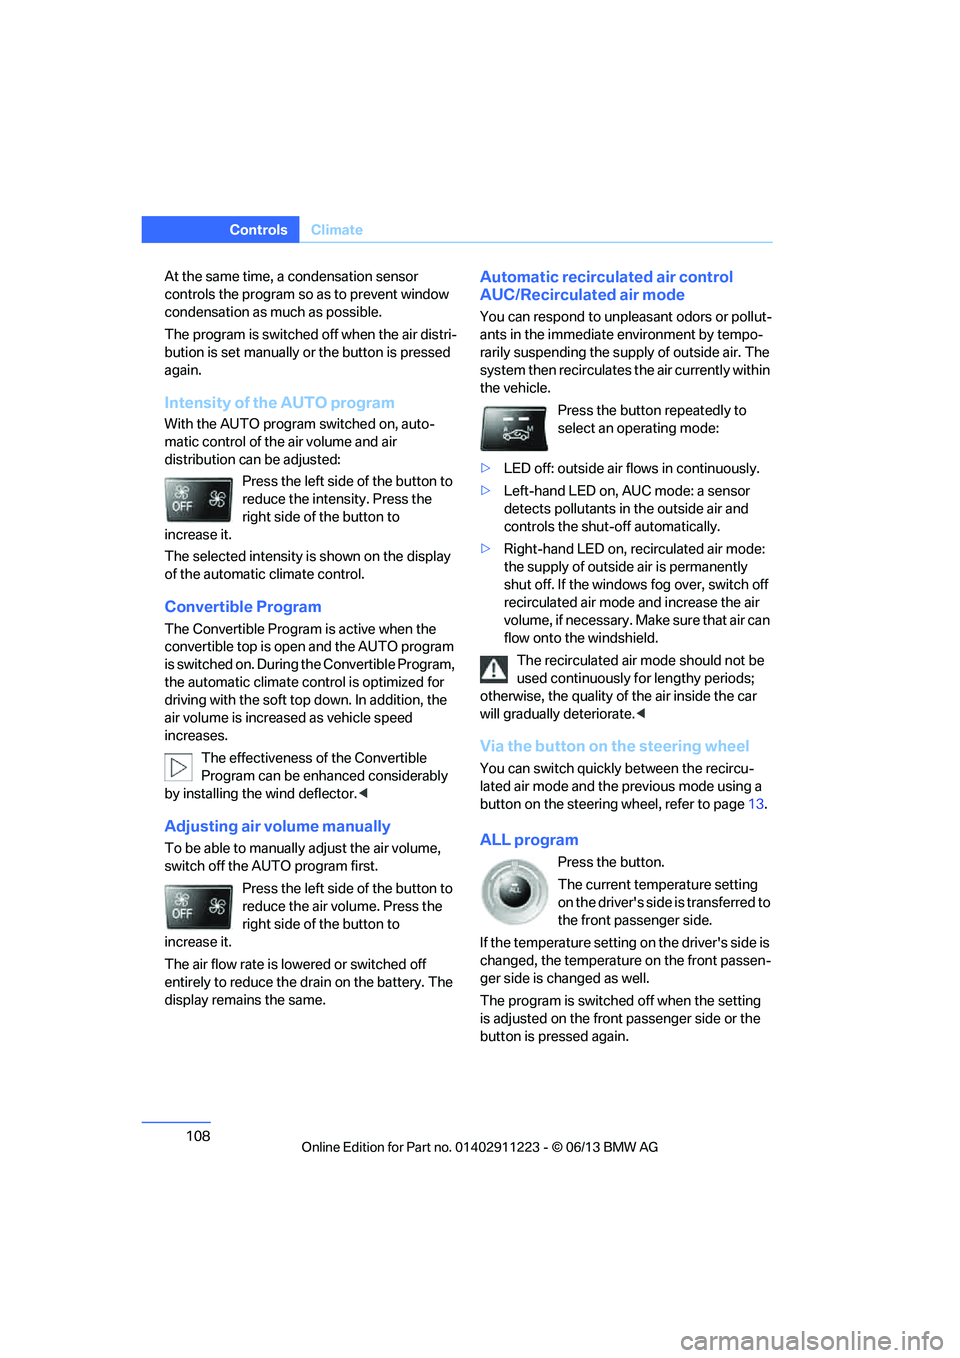
Press the left side of the button to
reduce the intensity. Press the
right side of the button to
increase it.
The selected intensity is shown on the display
of the automatic climate control.
Convertible Program
The Convertible Program is active when the
convertible top is open and the AUTO program
is switched on. During the Convertible Program,
the automatic climate co ntrol is optimized for
driving with the soft top down. In addition, the
air volume is increa sed as vehicle speed
increases.
The effectiveness of the Convertible
Program can be enhanced considerably
by installing the wind deflector. <
Adjusting air volume manually
To be able to manually adjust the air volume,
switch off the AUTO program first.
Press the left side of the button to
reduce the air volume. Press the
right side of the button to
increase it.
The air flow rate is lowered or switched off
entirely to reduce the drain on the battery. The
display remains the same.
Automatic recirculated air control
AUC/Recirculated air mode
You can respond to unpleasant odors or pollut-
ants in the immediate environment by tempo-
rarily suspending the supply of outside air. The
system then recirculates the air currently within
the vehicle.
Press the button repeatedly to
select an operating mode:
> LED off: outside air fl ows in continuously.
> Left-hand LED on, AUC mode: a sensor
detects pollutants in the outside air and
controls the shut-off automatically.
> Right-hand LED on, recirculated air mode:
the supply of outside air is permanently
shut off. If the windows fog over, switch off
recirculated air mode and increase the air
volume, if necessary. Ma ke sure that air can
flow onto the windshield.
The recirculated air mode should not be
used continuously fo r lengthy periods;
otherwise, the quality of the air inside the car
will gradually deteriorate. <
Via the button on the steering wheel
You can switch quickly between the recircu-
lated air mode and the previous mode using a
button on the steering wheel, refer to page 13.
ALL program
Press the button.
The current temperature setting
on the driver's side is transferred to
the front passenger side.
If the temperature setting on the driver's side is
changed, the temperature on the front passen-
ger side is changed as well.
The program is switched off when the setting
is adjusted on the front passenger side or the
button is pressed again.
00320051004F004C00510048000300280047004C0057004C005200510003
Page 110 of 284
109
Climate
Controls
Defrosting windows and removing
condensation
Press the button.
Quickly removes ice and conden-
sation from the windshield and
front side windows.
For this purpose, also switch on the air
conditioning.
Switching air conditioning on/off
The passenger compartment can only be
cooled while the engine is running.
Press the button.
The air is cooled and dehumidified
and – depending on the tempera-
ture setting – warmed again.
Depending on the weathe r, the windshield may
fog up briefly when the engine is started.
Pressing the AUTO button automatically
switches on the air conditioning.
Rear window defroster
Press the button.
The defroster is switched off auto-
matically after a certain time.
Depending on your vehicle's equipment, the
upper wires serve as an antenna and are not
part of the rear window defroster.
Switching the system on/off
Switching off
Press and hold the left button or
press the left button at the lowest
level.
All displays are cleared except for the rear
window defroster if it is switched on.
The outside air supply is blocked when
the automatic climate control is switched
off. If the air quality de teriorates or the window
fogs over, switch the system back on and
increase the air volume. <
Switching on
Press any button, except the buttons for the
ALL program or the rear window defroster.
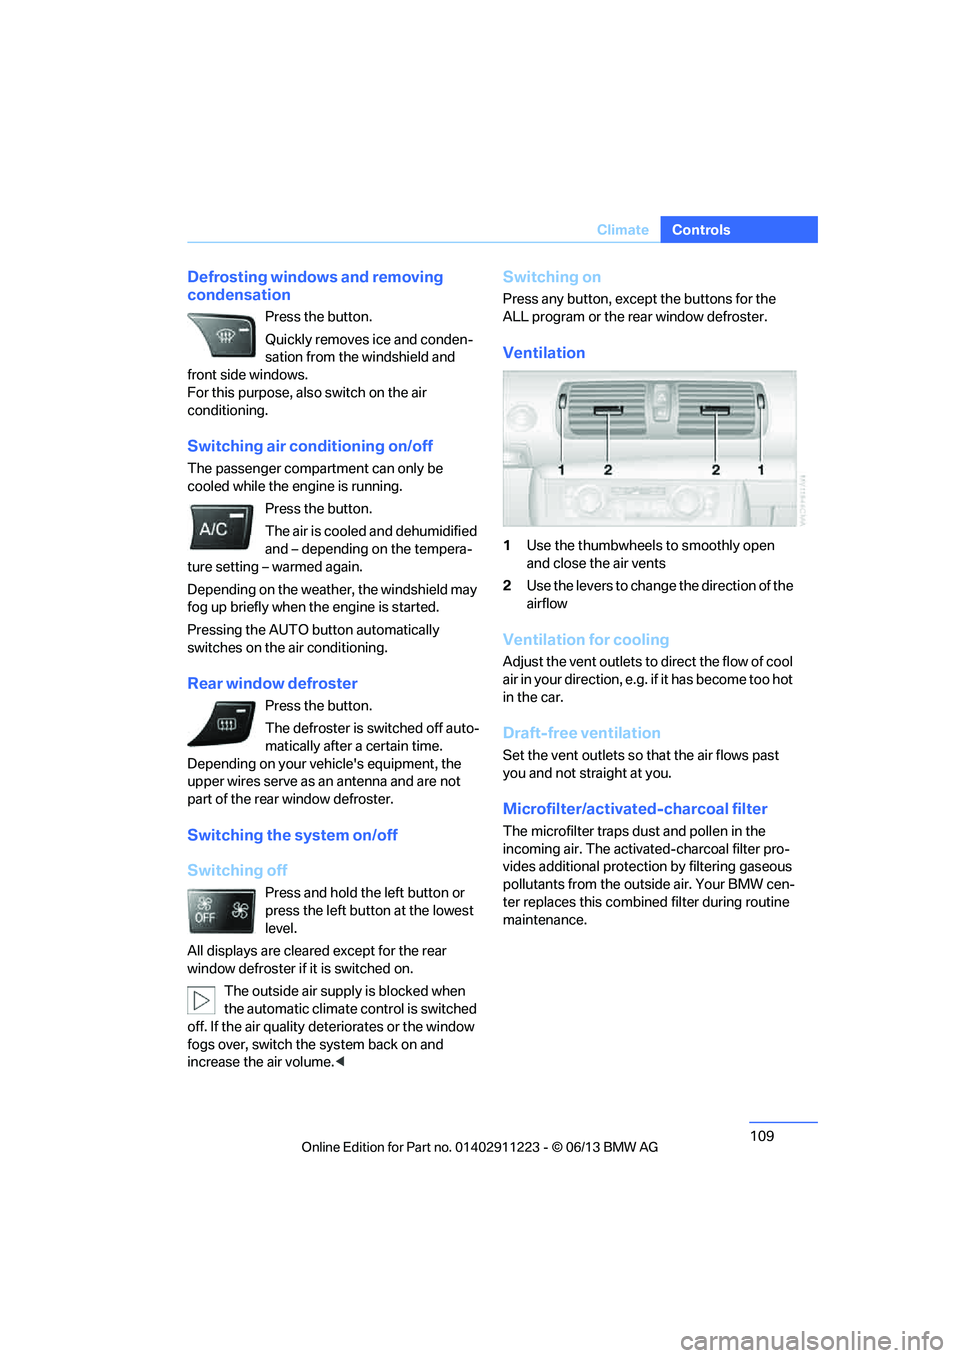
Ventilation
1 Use the thumbwheels to smoothly open
and close the air vents
2 Use the levers to change the direction of the
airflow
Ventilation for cooling
Adjust the vent outlets to direct the flow of cool
air in your direction, e.g. if it has become too hot
in the car.
Draft-free ventilation
Set the vent outlets so that the air flows past
you and not straight at you.
Microfilter/activated-charcoal filter
The microfilter traps dust and pollen in the
incoming air. The activated-charcoal filter pro-
vides additional protection by filtering gaseous
pollutants from the outs ide air. Your BMW cen-
ter replaces this combined filter during routine
maintenance.
00320051004F004C00510048000300280047004C0057004C005200510003
Page 155 of 284
154
EntertainmentOn/off and tone
On/off and tone
Vehicle equipment
In this chapter, all pr oduction, country, and
optional equipment that is offered in the model
range is described. Equipment is also described
that is not available because of, for example,
selected options or country version. This also
applies to safety related functions and systems.
General information
The following audio and video sources share
the same control elements and adjustments:
> Radio
> CD/DVD player
> Video
> External devices, e.g. MP3 player
Controls
The audio and video sources can be controlled
using the:
>Buttons near th e CD/DVD player
> iDrive
> Buttons on the steering wheel, refer to
page 13
> Programmable memory keys, refer to
page 25
> Voice activation system
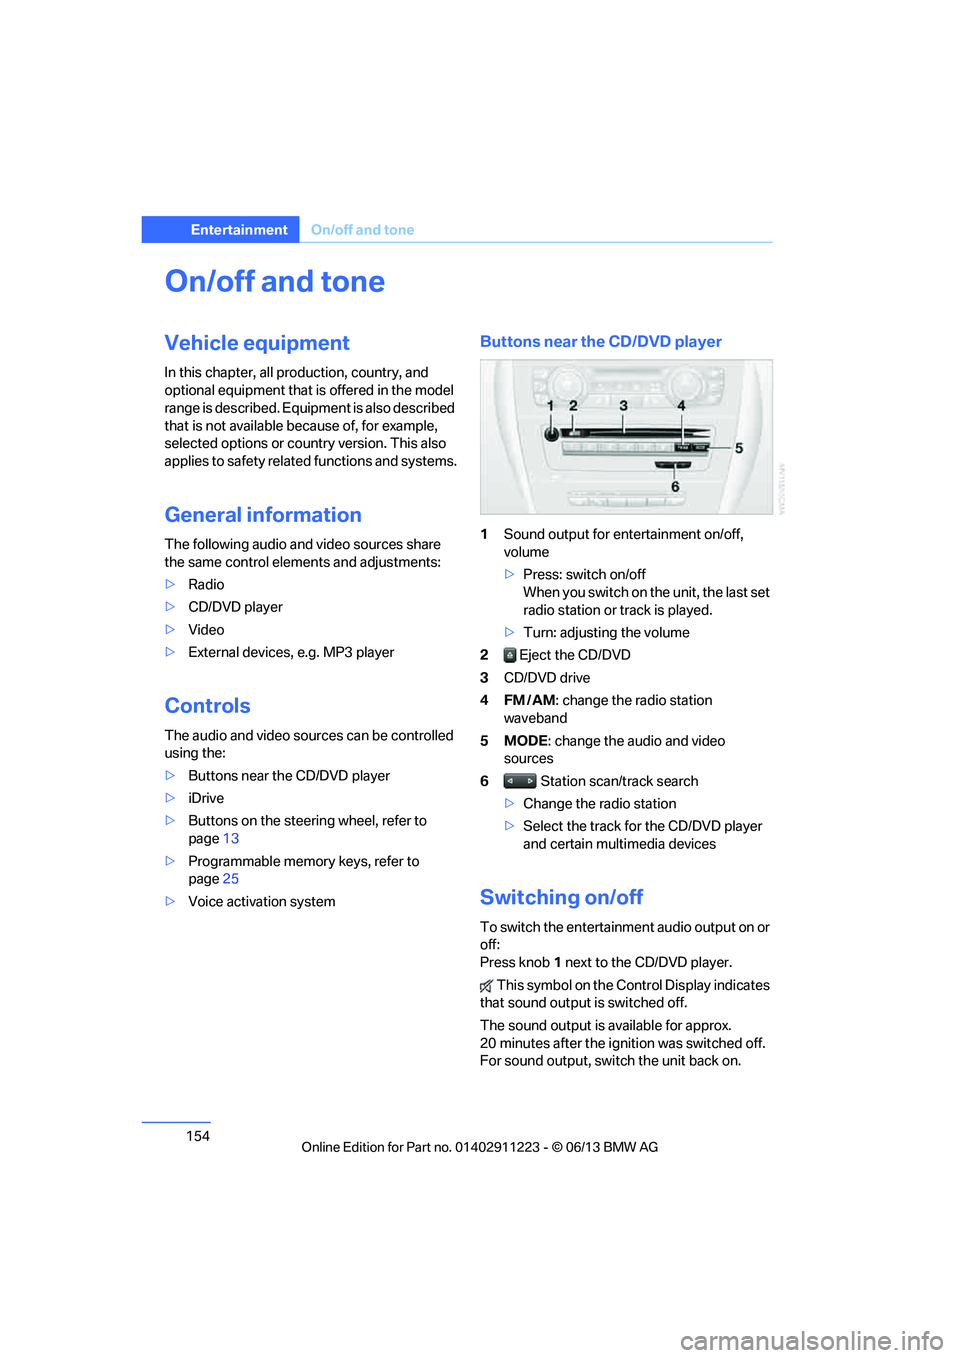
Buttons near the CD/DVD player
1Sound output for entertainment on/off,
volume
>Press: switch on/off
When you switch on the unit, the last set
radio station or track is played.
> Turn: adjusting the volume
2 Eject the CD/DVD
3 CD/DVD drive
4FM/AM : change the radio station
waveband
5MODE : change the audio and video
sources
6 Station scan/track search
> Change the radio station
> Select the track for the CD/DVD player
and certain multimedia devices
Switching on/off
To switch the entertainment audio output on or
off:
Press knob 1 next to the CD/DVD player.
This symbol on the Co ntrol Display indicates
that sound output is switched off.
The sound output is available for approx.
20 minutes after the ignition was switched off.
For sound output, switch the unit back on.
00320051004F004C00510048000300280047004C0057004C005200510003
Page 247 of 284
246
MobilityReplacing components
Turn signals, front
PY21W bulb, 21 watts
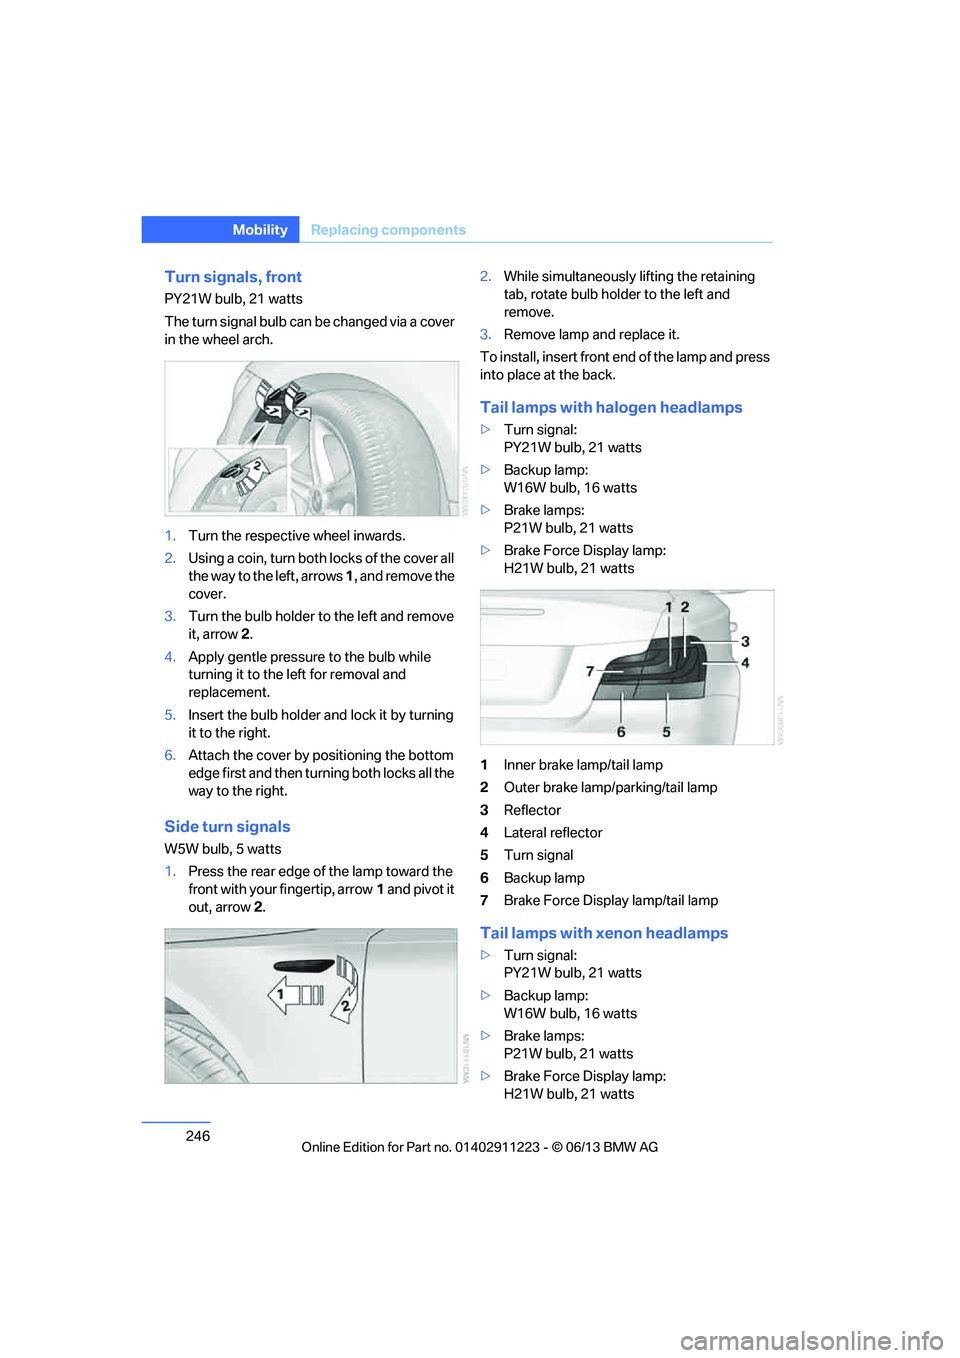
The turn signal bulb can be changed via a cover
in the wheel arch.
1.Turn the respecti ve wheel inwards.
2. Using a coin, turn both locks of the cover all
the way to the left, arrows 1, and remove the
cover.
3. Turn the bulb holder to the left and remove
it, arrow 2.
4. Apply gentle pressure to the bulb while
turning it to the left for removal and
replacement.
5. Insert the bulb holder and lock it by turning
it to the right.
6. Attach the cover by positioning the bottom
edge first and then turn ing both locks all the
way to the right.
Side turn signals
W5W bulb, 5 watts
1. Press the rear edge of the lamp toward the
front with your fingertip, arrow 1 and pivot it
out, arrow 2. 2.
While simultaneously lifting the retaining
tab, rotate bulb hold er to the left and
remove.
3. Remove lamp and replace it.
To install, insert front end of the lamp and press
into place at the back.
Tail lamps with halogen headlamps
> Turn signal:
PY21W bulb, 21 watts
> Backup lamp:
W16W bulb, 16 watts
> Brake lamps:
P21W bulb, 21 watts
> Brake Force Display lamp:
H21W bulb, 21 watts
1 Inner brake lamp/tail lamp
2 Outer brake lamp/parking/tail lamp
3 Reflector
4 Lateral reflector
5 Turn signal
6 Backup lamp
7 Brake Force Display lamp/tail lamp
Tail lamps with xenon headlamps
>Turn signal:
PY21W bulb, 21 watts
> Backup lamp:
W16W bulb, 16 watts
> Brake lamps:
P21W bulb, 21 watts
> Brake Force Display lamp:
H21W bulb, 21 watts
00320051004F004C00510048000300280047004C0057004C005200510003
Page 249 of 284
248
MobilityReplacing components
Changing wheels
Your BMW is equipped with run-flat tires as
standard. This eliminates the need to change a
wheel immediately in the event of a puncture.
For information on continuing to drive with a
damaged tire, refer to Indica tion of a flat tire on
page 92.
The symbol identifying run- flat tires is a circle
with the letters RSC on the sidewall, refer to
New wheels and tires, page 230.
When mounting new tires or changing over
from summer to winter tires and vice versa,
mount run-flat tires for your own safety. In the
event of a flat, no spare wheel is available. Your
BMW center will be glad to advise you. Refer
also to New wheels and tires, page 230.
The tools for changing wheels are avail-
able as optional accessories from your
BMW center. <
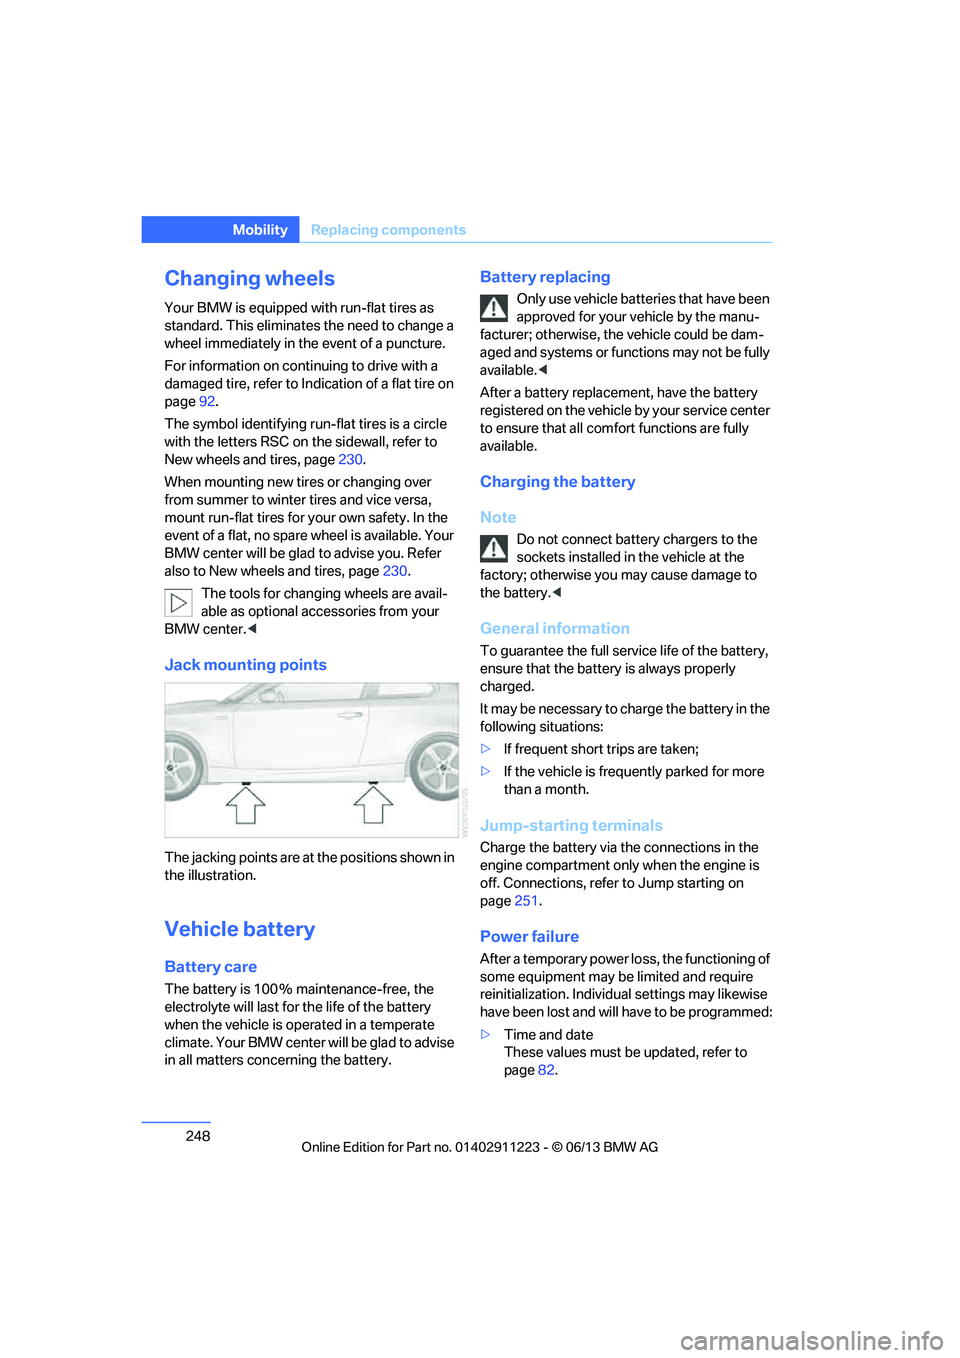
Jack mounting points
The jacking points are at the positions shown in
the illustration.
Vehicle battery
Battery care
The battery is 100 % maintenance-free, the
electrolyte will last for the life of the battery
when the vehicle is operated in a temperate
climate. Your BMW center will be glad to advise
in all matters conc erning the battery.
Battery replacing
Only use vehicle batteries that have been
approved for your vehicle by the manu-
facturer; otherwise, the vehicle could be dam-
aged and systems or functions may not be fully
available. <
After a battery replacem ent, have the battery
registered on the vehicle by your service center
to ensure that all comfort functions are fully
available.
Charging the battery
Note
Do not connect battery chargers to the
sockets installed in the vehicle at the
factory; otherwise you may cause damage to
the battery. <
General information
To guarantee the full serv ice life of the battery,
ensure that the battery is always properly
charged.
It may be necessary to ch arge the battery in the
following situations:
> If frequent short trips are taken;
> If the vehicle is frequently parked for more
than a month.
Jump-starting terminals
Charge the battery via the connections in the
engine compartment only when the engine is
off. Connections, refer to Jump starting on
page 251.
Power failure
After a temporary power lo ss, the functioning of
some equipment may be limited and require
reinitialization. Individual settings may likewise
have been lost and will have to be programmed:
> Time and date
These values must be updated, refer to
page 82.
00320051004F004C00510048000300280047004C0057004C005200510003
Page 271 of 284
270
ReferenceEverything from A to Z
Care239
– automatic car washes 239
– care products 240
– carpets 242
– chrome parts 241
– convertible top 242
– displays 242
– fine wood parts 241
– headlamps 240
– leather 240
– light-alloy wheels 241
– paintwork 240
– plastic parts 241
– rubber seals 241
– safety belts 241
– sensors and cameras 242
– upholstery and cloth trim 241
Cargo, securing 128
Cargo area, refer to Trunk
Cargo area lid, refer to Trunk lid 37
Cargo loading 127
– securing cargo 128
– stowing cargo 128
– vehicle 127
Car jack
– jacking points 248
Car key, refer to Integrated key/remote control 32
Car phone
– installation location, refer to Center armrest 115
Car phone, refer to
Telephone 188
Car radio, refer to Radio 157
Car wash 239
Catalytic converter, refer to Hot exhaust system 126
CD, audio playback 166CD player
166
– controls 154
– fast forward/reverse 168
– random sequence 167
– selecting a track 166
– switching on/off 154
– tone control 155
– volume 155
Center armrest 115
Center brake lamp, replacing bulb 247
Center console, refer to Around the center
console 16
Central key, refer to Integrated key/remote control 32
Central locking
– from inside 37
– from outside 33
Central lo cking
system33
– comfort access 40
Changes, technical, refer to
For your own safety 5
Changing bulbs 243
Changing gears 68
Changing the language on the Control Display 87
Changing wheels 248
Chassis number, refer to Engine compartment 232
Check Control 84
Child restraint fixing system LATCH 59
Child restraint systems 58
Child seats 58
Chrome parts 241
Chrome polish 241
Cigarette lighter 117
Cleaning headlamps 72
– washer fluid 73
Cleaning your BMW, refer to Care 239 Climate control
– automatic air
distribution 107
Clock 75
– 12h/24h mode 83
– setting the time and date 83
– setting time 82
Closing
– from inside 37
– from outside 34
Clothes hooks 116
Cold start, refer to Starting the engine 62
Comfort Access 40
– replacing the battery 41
Comfort area, refer to Around
the center console 16
Compartment for remote control, refer to Ignition
lock 61
Compass 113
Computer 77
– displays on Control Display 78
Computer, refer to iDrive 20
Concierge service 213
Condensation, refer to When the vehicle is parked 127
Condition Based Service CBS 237
Configuring settings, refer to
Personal Profile 32
Confirmation signals for locking/unlocking the
vehicle 35
ConnectedDrive 212
Con n
ecting a music player,
AUX-In connection 177
Connecting a music player, USB audio interface 178
Connecting an iPod, refer to AUX-In connection 177
Connecting an iPod, refer to
USB audio interface 178
00320051004F004C00510048000300280047004C0057004C005200510003