2013 AUDI S4 SEDAN remove seats
[x] Cancel search: remove seatsPage 58 of 294
56 Seats and storage
Power seat adjustment
App lies to vehicles: with power adjustable seats
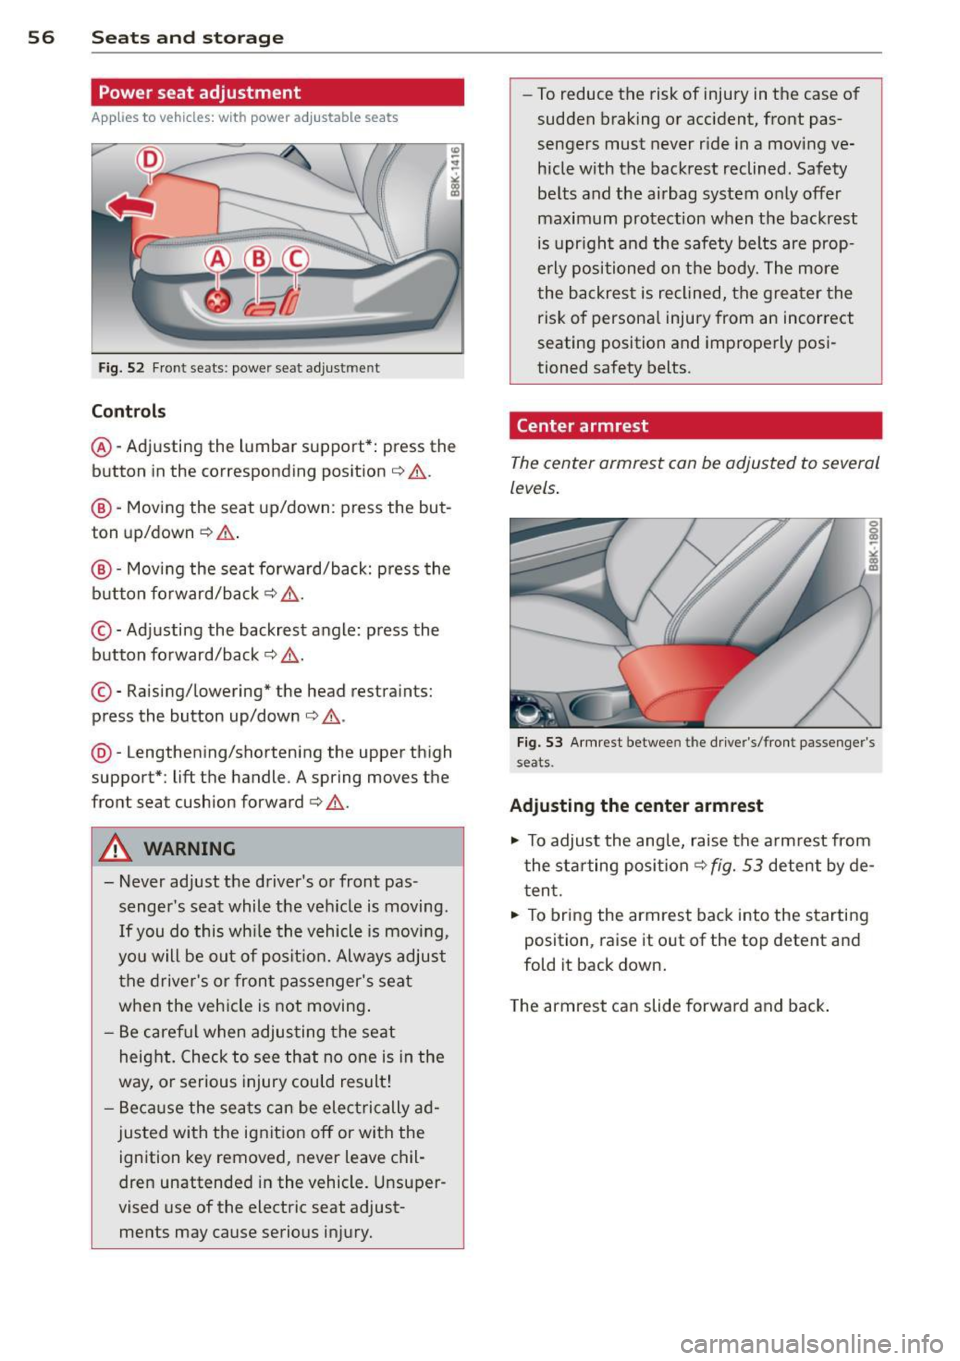
Fig. 52 Front seats: power seat adjustment
Controls
@ -Adj usting the lumbar support*: press the
button in the corresponding position¢ .&..
@-Moving the seat up/down: press the but
ton up/down¢ .&..
@-Moving the seat forward/back: p ress the
button fo rward/back
¢ & .
©-Adjusting the backrest angle: press the
button fo rward/back
¢ & .
©-Raising/lowering* the head restraints:
press the button up/down ¢ .&. .
@ -Lengthening/shortening the upper thigh
support*: lift the handle. A spring moves the
front seat cushion forward¢&.
A WARNING
- Never adjust the d river's or front pas
senger 's seat while the veh icle is moving.
If you do this wh ile the vehicle is movi ng,
yo u will be out of posit ion. Always adjus t
the drive r's or front passenger's seat
when the vehicle is not moving .
- Be care ful when adjus ting the seat
heig ht. Check to see that no one is in the
way, o r serious injury could result!
- B eca use the sea ts can be elec trically ad
justed with the ignit ion off or with the
ignition key removed, never leave chil
dren unattended in the vehicle. Unsuper
vised use of the electric seat adjust ments may cause serious injury. -
To reduce the risk of injury in the case of
sudden braking or accident, front pas
sengers must never r ide in a moving ve
hicle with the backrest reclined. Safety
be lts and the airbag system only offer
maximum protection when the backrest is upr ight and the safety belts are prop
e rly po sitioned on the body. The more
the backres t is reclined, the grea ter the
risk of persona l injury from an incorrect
seating position and imprope rly posi
tioned safety belts.
Center armrest
The center armrest can be adjusted to several
levels .
Fig. 53 A rm rest between the driver's/front passenger's
seats.
Ad ju sting the center armrest
"" To adjust the ang le, raise the arm rest from
the starting position
¢ fig. 53 detent by de
t en t.
.,. To bring the armres t back into the starting
position, raise it out of the top detent and
fold it back down.
T he armrest can slide forwar d and back .
Page 60 of 294

58 Seats and storage
Install ing the head restraints
.,. Slide the posts on the head restra int down
into the guides un til you feel the posts click
into place.
.,. Press the button @
Q fig. 55 and slide the
head restraint all the way down. You sho uld
not be able to pull the head restra int out of
the backrest .
So that the driver can have a better view to
the rear, the head restraints should be pushed
down complete ly when the rear seats are not
occupied.
A WARNING
- Read and heed all WARNINGS
9page 130 .
-Only remove the rear seat head rest raints
when necessa ry in order to install a chi ld
sea t
Q page 173. Insta ll the head re
stra in t again immedia tely once the c hild
sea t is removed. Driving w ithout head re
st raints or w ith head restra ints that a re
not properly adjusted increases the risk
of serious or fata l neck injury dramatical
ly.
@ Tips
Correctly adjus ted head restraints and
safety belts are an extremely effective
comb inat ion of safety features .
Seat memory
Description
Applies to vehicles: wit h memory fu nctio n
The memo ry function a llows you to quickly
and eas ily s to re and reca ll personal seating
profiles for the dr iver. The memory func tion is
operated through the master key and the memory buttons in the driver's door .
The driver's seating profi le is stored and as
signed to the master key each t ime the vehicle
is locked. The seating p rof ile is recalled auto
matica lly when the vehicle is un locked. If two
peop le use one vehicle, it is recommended t
h at each person always uses "their own"
master key .
Up to 2 seat p rofiles can be stored i n the
memo ry but tons in the drive r's door . Once
they are stored, these seat profiles can be se
lected at any time.
In add ition to the dr iver's se at settings, yo u
c a n a lso store and access the exterior mirror
adjus tment setti ngs * using the remote con
tro l key or memory button.
Remote control key
Applies to veh icles: w it h seat memory
To assign the dr iver's seat settings to the re
mote control key when locking the vehicle, the
funct ion must be act ivated in the radio or
MMI*
.,. Select: !CAR ! function button> Seat adjust
ment > Dr iver's seat
> Remote control ke y >
on.Or
.,. Select : I CAR I function b utton > Car systems
cont ro l butto n > Ve hicle setting s > Seats >
Driver's sea t> Remote contr ol ke y> On.
(@ Tips
If yo u do not want anothe r drive r's set·
ti ngs to be assigned to the remote key,
swi tc h off the memory f unct ion usi ng the
radio or
M MI* or th e IOFFI butto n
9page 58.
Memory buttons
Applies to veh icles : w it h seat memory
Fig . 57 Drive r's door : mem ory function buttons
The memory buttons a re located in the driv
er's door.
Page 61 of 294
Switching the memory function on/off
• Press the !O FF ! button to sw itch the memo
ry function on/off. The word
OFF lights up
when the memory function is switched off .
S eat profi le s are not stor ed .
Storing a seat profile
" Press the !SE T! button. When the word SET
lights up, the memory is ready to store set
tings.
" Press a memory button
([II or rn ) briefly. A
tone confirms that the s ett ing s wer e stored.
Accessing a seat profile
" If the driver's door is open, press a memory
button.
" If the driver 's door is closed, press and ho ld
the memory button until the seat adjust
ment is complete .
.&_ WARNING
- For safety reasons, the seat sett ing can
only be recalled when the veh icle is sta
tionary- otherwise you risk having an ac
c ident .
- In an emergency the recall procedure can
be cancelled by press ing the
!OF F! switch
or by tapping the memory buttons .
Ashtray
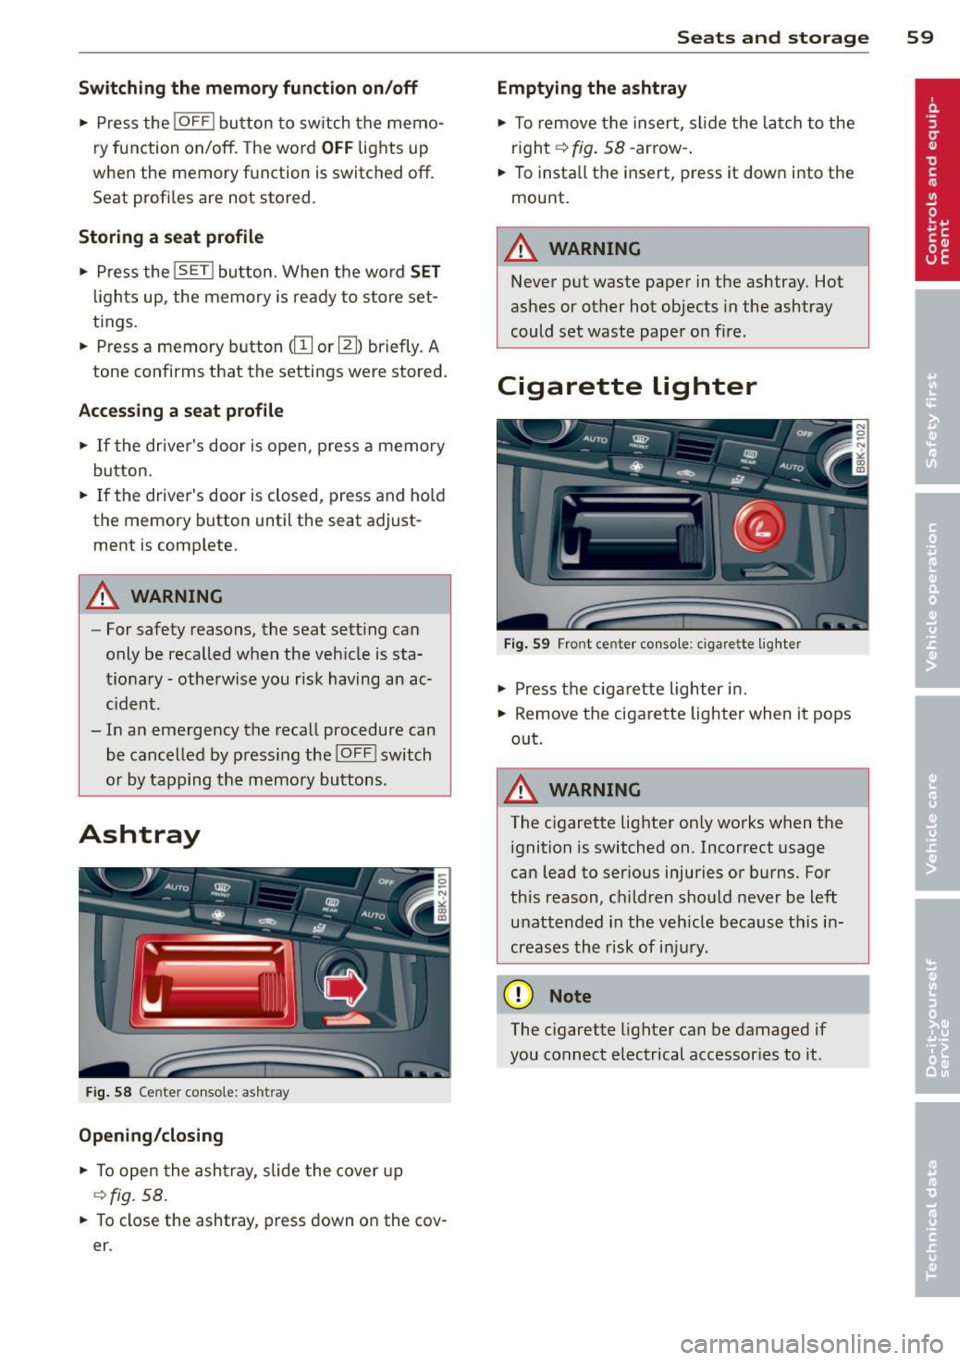
Fig. 58 Cente r conso le: ash tray
Opening /closing
• To open the ashtray , slide the cover up
¢ fig. 58 .
.. To close the ashtray, press down on the cov
e r.
Seats and storage 59
Emptying the ashtray
" To remove the insert, slide the latch to the
r ight ¢
fig. 58 -arrow- .
.. To insta ll the insert, press it down into the
mount.
.&_ WARNING
--Never put waste paper in the ashtray. Hot
ashes or other hot objects in the ashtray
could set waste paper on fire .
Cigarette lighter
Fig. 59 Fro nt ce nter con sole : cigare tte lighter
" Press the cigarette lighter in.
" Remove the cigarette lighter when it pops
out .
A WARNING
The cigarette lighter on ly works when the
ignition is switched on .1ncorrect usage
can lead to ser ious injuries or burns. For
this reason, children should never be left
unattended in the vehicle because this in
creases the risk of injury .
(D Note
The cigarette lighter can be damaged if
you connect electrical accessories to it .
Page 62 of 294
60 Seats and st o rage
12-volt socket
Appl ies to vehicles: wit h 12-volt socket
Electrical accessories can be connected to the
12-volt socket.
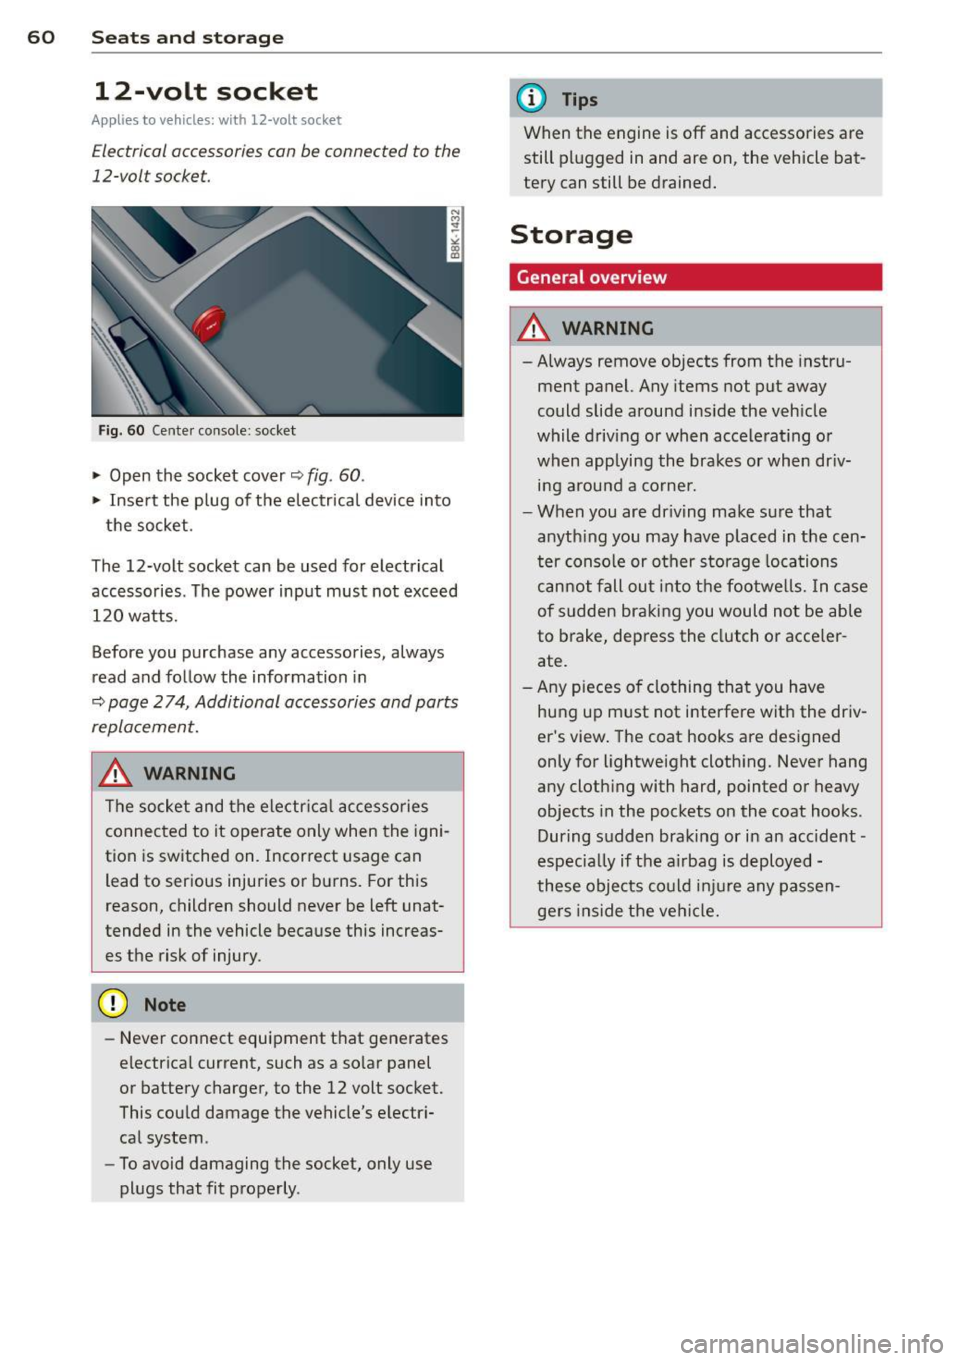
Fig. 60 Cente r console: socket
.,. Open the socket cover~ fig. 60 .
.,. Insert the plug of the electrical device into
the socket.
The 12-volt socket can be used for electrical accessories. The power input must not exceed 120 watts.
Before you purchase any accessories, always
read and follow the information in
~ page 2 74, Additional accessories and parts
replacement.
.&_ WARNING
The socket and the electr ica l accesso ries
connected to it operate only when the igni
tion is switched on. Incorrect usage can lead to ser ious injuries or burns. For this
reason, children should never be Left unat
tended in the vehicle because this increas es the risk of injury.
- Never connect equipment that generates
electrical current, such as a so lar panel
or battery charger, to the 12 volt socket.
This could damage the vehicle's electr i
cal system .
- To avoid damaging the socket, only use
plugs that fit properly .
(D Tips
When the engine is off and accessories are
still plugged in and are on, the vehicle bat
tery can still be drained.
Storage
General overview
.&_ WARNING
-Always remove objects from the instru
ment panel. Any items not put away
could slide around inside the veh icle
while driv ing or when accelerat ing o r
when applying the brakes or when dr iv
ing around a corne r .
- When you are driving make sure that
anyth ing you may have placed in the cen
ter console or other storage locations
cannot fall out into the footwells. In case
of sudden braking you would not be able
to brake, depress the clutch or acce ler
ate.
- Any pieces o f clothing that you have
hung up must not i nterfere wit h the driv
er's view . The coat hooks are designed
only for lightweight clothing. Never hang
any cloth ing with hard, pointed or heavy
objects in the pockets on the coat hooks .
During sudden braking or in an accident -
especia lly if the a irbag is deployed -
these objects could injure any passen gers inside the vehicle.
-
Page 66 of 294
64 Seats and storage
loading the roof rack
Always distribute loads evenly . Make sure
anything on the roof rack is securely tied
down.
,. Always distribute the loads on the roof rack
evenly .
,. Always attach items to the roof rack secure-
ly befo re you dr ive off.
The maximum perm iss ible roof we ight is
2 00 lb (90 kg ). The roof weight is the total of
the we ight of the roof rack, the attachments
and the cargo you are car ry ing. You m ust also
not exceed the maximum load weight for the
roof rack you are using.
When us ing a roof rack system which has a
l owe r load carry ing capac ity, you must not use
up the total max imum pe rm issib le load carry
i ng capac ity specified
above . Instead, you
should load the roof rack system only to the
maximum capacity specified by the manufac
turer of the roof rack system.
A WARNING
Weak, damaged or improper straps used to secure items to the roof rack can fail
during hard braking or in a collision and
cause se rious personal injury .
- Make sure the roof rack is insta lled exact
ly as specified
above ¢ page 63.
- Always use suitable mounting straps for
sec uring items to the roof rack to help
prevent items from shift ing o r fly ing for
wa rd.
- Items on the roof rack must always be sec urely mounted.
- The use of a roof rack can negative ly af
fect the way a vehicle handles . Ca rgo
that is larg e, h eavy, bulky, long o r flat
will have a g reater negative influence on
the vehicle's aerodynamics, center of
gravity and overal l ha ndling. Always
dr ive slowly, avo id sudden braking and
mane uvers when transporting cargo o n
the roof of your vehicle.
- Never exceed the maxim um permissible
load carrying capacity of the roof of your
veh icle, the permissible axle weights and
the permissible total weight of your vehi cle ¢
page 268, Weights.
(D Note
Make sure that the opened rear lid does
not come in contact with the cargo on the
r oof.
@ For the sake of the environment
As a result of the increased wind resist
ance created by a roof rack, your vehicle is
us ing fuel unnecessarily. So
remove the
r oof rack after using it .
Luggage compartment
, General information
A WARNING
-Read and follow the important safety pre-
cautions on¢
page 132, Stowing lug
gage.
Enlarging the luggage compartment
Applies to vehicles: with folding rear seatback
The rear seat backrests can be folded forward
either separately or together .
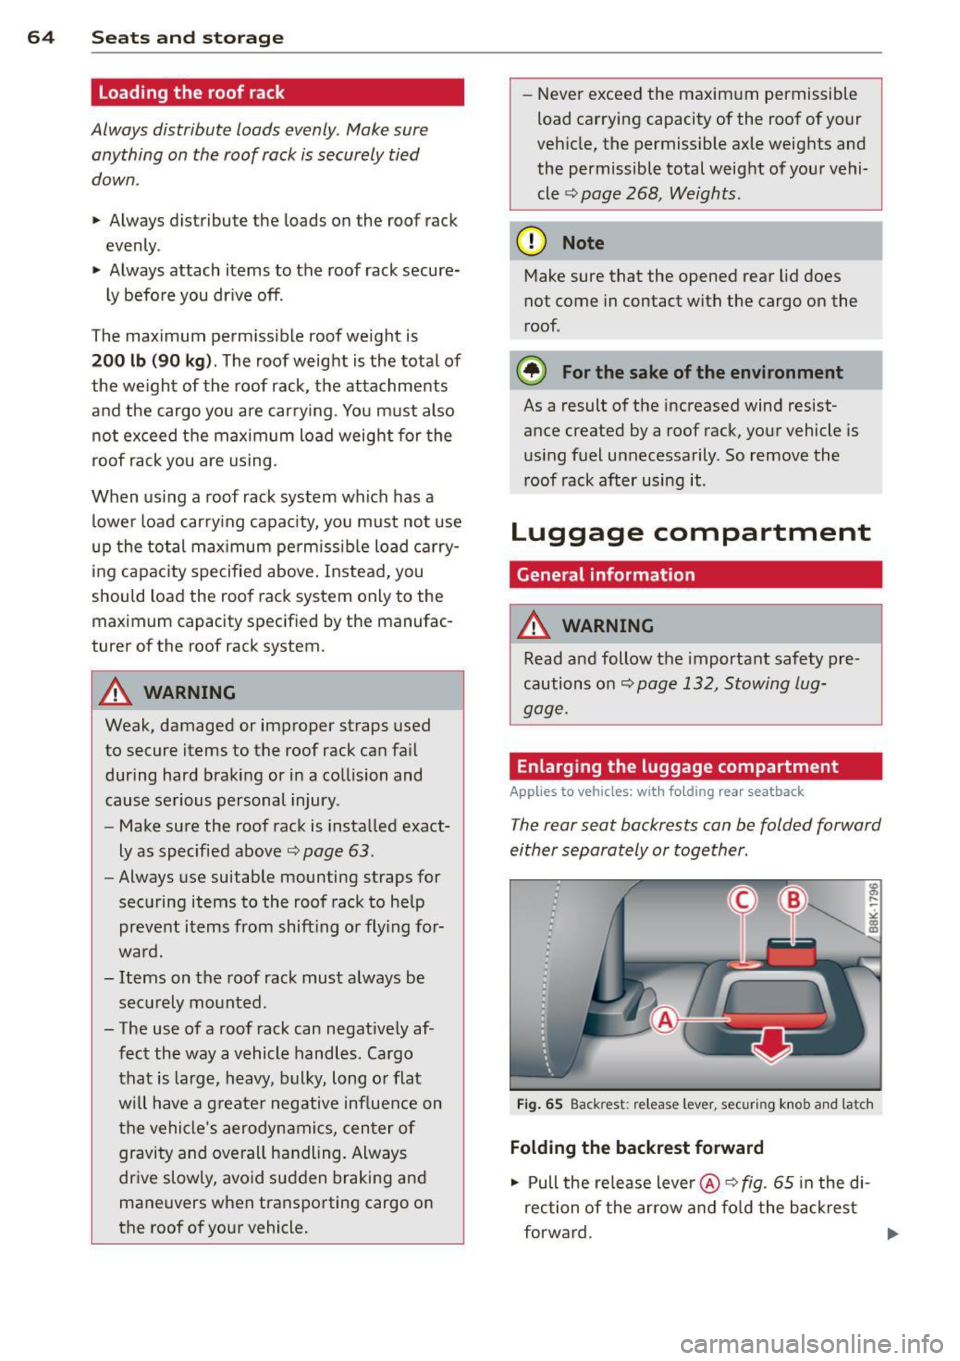
Fig . 65 Back rest : re lease lever , securing knob and latch
Folding the backr est forward
,. Pull the release lever @¢
fig. 65 in the di
rection of the arrow and fo ld the back rest
forward.
IJ,-
Page 67 of 294
Folding the backrest back into the upright
position
• Fold the backrest back up again until it
latches and the red marking @ is no longer
visible ¢&_ .
You can lock the backrest when it is latched in
p lace using the mechanica l key ¢
page 34 ©
¢ fig. 65. This prevents any access to the lug
gage compartment from the vehicle interior.
You can only enlarge the luggage compart
ment if the backrest is not locked.
A WARNING
-The backrest must always be securely
latched so that the safety belt of the cen
ter seating position can work properly to
help protect the occupant.
- The backrest must be securely latched in
posit ion so that no items contained in
the luggage compartment can slide for
ward upon sudden braking .
-Always check whether the latch is fully
engaged by pulling the seatback for
ward.
- Never allow safety belts to become dam
aged by being caught in door or seat
hardware.
- Torn or frayed safety belts can tear and
damaged belt hardware can break in a
crash . Inspect the belts periodically .
Belts showing damage to webbing, bind
ings, buckles, or retractors must be re
placed.
(D Note
- If yo u move the front seat back when the
rear seat backrest is fo lded forward, yo u
could damage the head restraints on the
rear seat.
- Slide the belt guide on the outside safety
belt all the way up before folding the
backrest back forward. Make sure the
seat belt is not pinched or damaged
when the rear seat backrest if folded
back. Other objects should be removed
Seats and storage 65
from the rear seat bench to protect the
seatback from damage.
Tie-downs and cargo net
Applies to veh icles: w ith cargo net
The cargo net prevents small objects from
sliding.
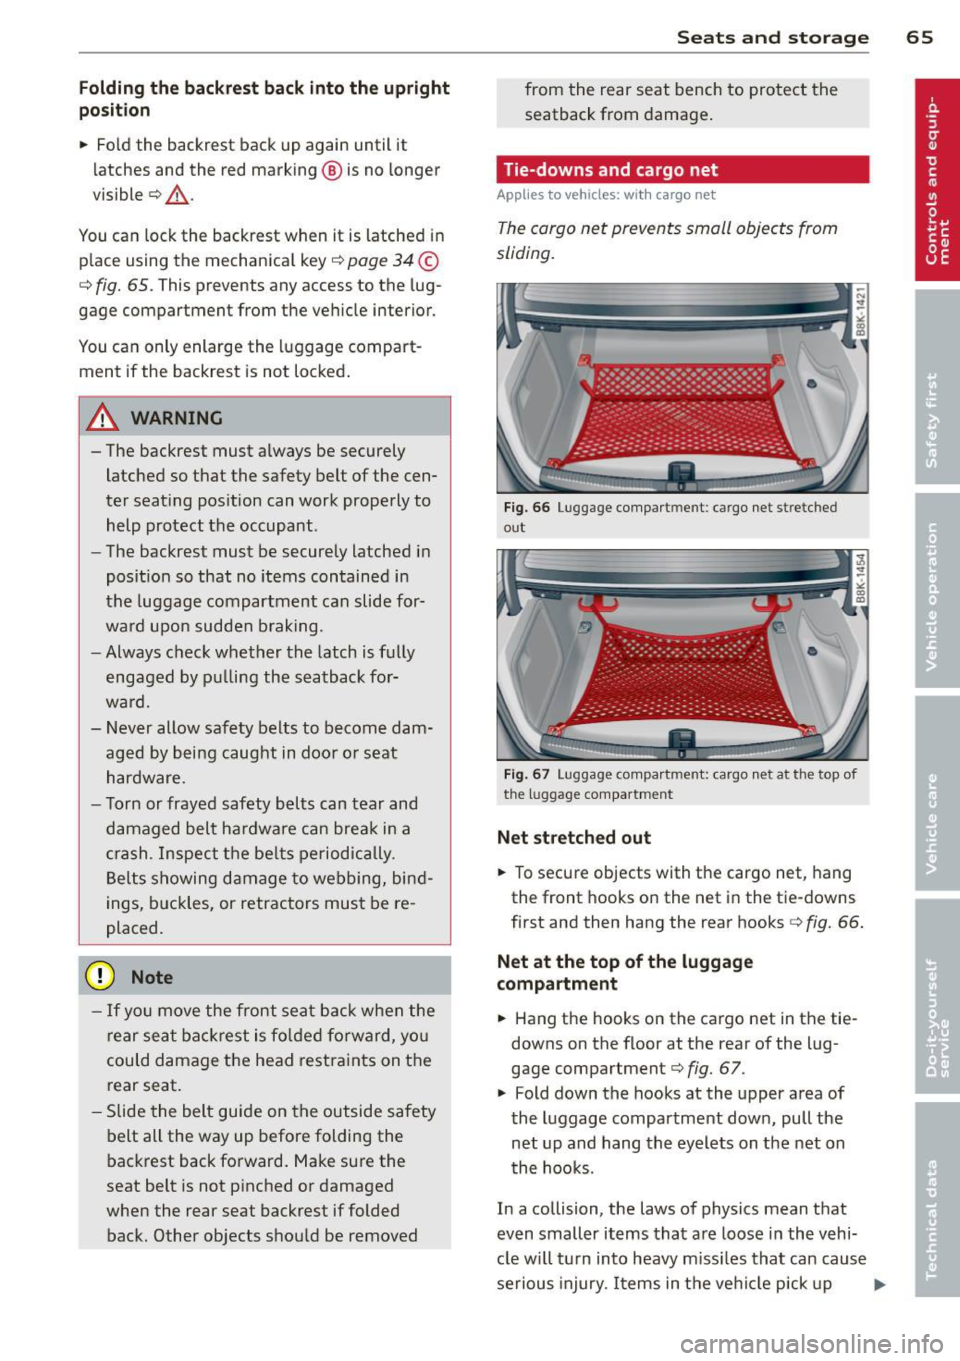
Fig. 66 Lu gga ge compa rtm ent: cargo net str etch ed
o ut
Fig . 67 Lu ggage compart men t: ca rgo net at the top of
the lu gg age compartment
Net stretched out
• To secure objects with the cargo net , hang
the front hooks on the net in the tie-downs
first and then hang the rear hooks¢
fig. 66.
Net at the top of the luggage
compartment
• Hang the hooks on the cargo net in the tie
downs on the floor at the rear of the lug
gage compartment¢
fig. 67.
• Fold down the hooks at the upper area of
the luggage compartment down, pull the
net up and hang the eyelets on the net on
the hooks .
In a collision, the laws of physics mean that
even smaller items that are loose in the vehi
cle w ill turn into heavy m iss iles that can cause
serious injury. Items in the vehicle pick up
IJi,,-
Page 142 of 294
140 Safet y belts
To provide maximum protection, sa fety belts
must always be positioned correctly on the
wearer 's body .
.,. Adjus t the front seat and head restra int
properly ¢
page 54, Seats and storage .
.,. Make sure the seatback of the rear seat
bench is in an upright pos ition and securely
latched in place befo re using the belt¢.&, .
.,. Hold the belt by the tongue and pull it
evenly across the chest and pelvis
c:> .&, .
.,. Insert the tongue into the co rrect buckle of
you r seat until you hea r it latch securely
¢ fig . 135.
.,. Pull on the be lt to make sure that it is se-
curely latched in the b uckle .
Automatic safety belt retractors
Every safety belt is equipped w ith an automat
ic belt retractor on the shoulder be lt . T his fea
ture locks the be lt when the belt is pulled out
fast, dur ing hard bra king and in an acci dent.
The belt may also lock when yo u drive up or
down a steep hill or through a sharp curve. During normal driving the belt lets you move
freely .
Safety belt pretensioners
The sa fe ty belts are equippe d wi th a be lt pre
tensioner that helps to t igh ten the safety bel t
and remove s lack when the pretensioner is ac
tivated. The function of the pretensioner is
monitored by a warning light¢
page 20 .
Switchable locking feature
Every sa fe ty belt ex cep t the one on the dr iver
seat is eq uipped w it h a switchable locking fea
ture that
mu st be used w hen the safety belt is
used to attach a child safety seat . Be sure to
read the important inf ormation about this
feature
¢ page 175.
A WARNING
Imprope rly positioned safety belts can
cause serious injury in an accident
¢ page 140, Safety belt position .
- Safety belts offe r optimum protection
only when the seatback is up right and
-
be lts are properly posit ioned on the
body.
- Always make sure that the rear seat
backrest to wh ich the center rear safety
be lt is attached is securely latched when
ever the rea r center safety belt is being
used. If the backrest is not secure ly
latched, t he passenger w ill move for
ward with the ba ckr est dur ing sudd en
bra king, in a sudden maneuver and es pe
ci ally in a cra sh .
- Neve r at tach t he safety be lt to t he buck
le for an other se at. At taching the belt to
the wrong buckle will redu ce s afe ty be lt
effec tiveness and can cause serio us per
sonal injury.
- A passenger who is not properly restrain
ed can be seriously injured by the safety
be lt itself w hen it moves from the stro n
ger parts of the body into cr itical areas
like the abdomen .
- Always loc k the convertible locking re
tractor when you are secu ring a child
safety seat in the vehicle
c:> page 177 .
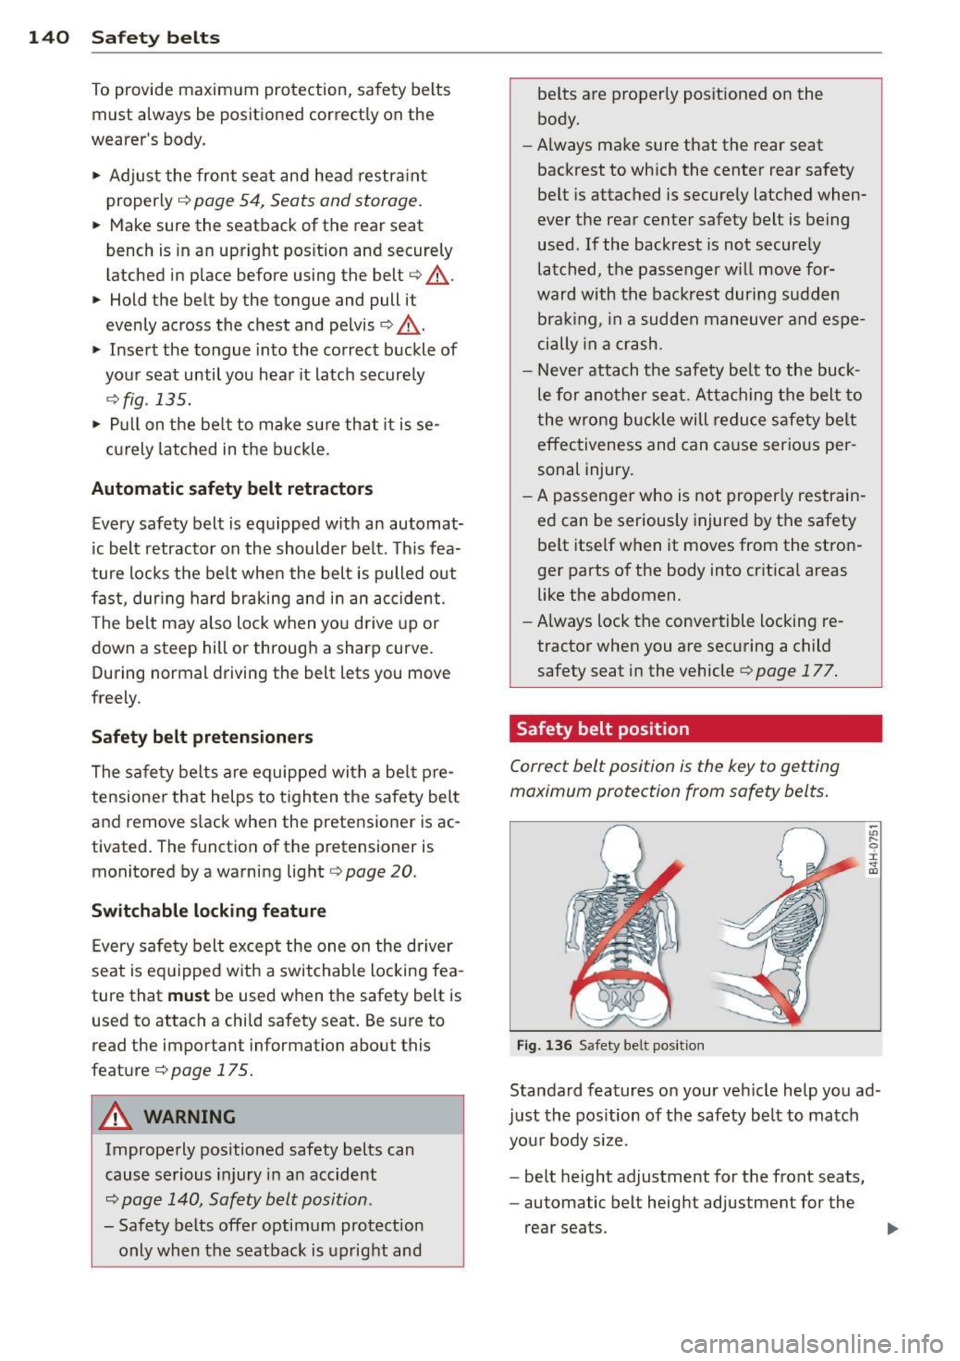
Safety belt position
Correct belt position is the key to gett ing
maximum protection from safety belts.
Fig . 1 36 Safe ty bel t pos it ion
Standard features on your veh icle help you ad
j u st the pos ition of the safety be lt to match
you r body si ze.
- be lt height adjustment for the front seats,
- automatic belt height adjustment for the
rear seats .
Page 154 of 294

152 Airbag sys te m
- Improper repair or disassembly of the
front passenger and driver seat will pre
vent the Advanced Airbag System from
functioning properly.
- Repairs to the front passenger seat must
be performed by qualified and properly
trained workshop personnel.
- Never remove the front passenger or
dr iver seat from the veh icle .
- Never remove the upholstery from the
front passenger seat.
- Never disassemble or remove parts from the seat or disconnect wires from it.
- Never carry sharp objects in your pockets
or place them on the seat. If the weight
sensing mat in the passenger seat is punctured it cannot work properly.
- Never carry things on your lap or carry
objects on the passenger seat. Such
items can increase the weight registered
by the weight-sens ing ma t and send the
wrong info rmation to the airbag control
uni t.
- Never sto re items under the front pas·
senger seat. Parts of the Advanced Ai r
b ag System under the p assenge r seat
cou ld be damaged, prevent ing them and
the airbag system from wo rking proper
ly .
- Never place seat covers or replacement
upholste ry that have not been specifical
ly approved by A udi on the front seats.
- Seat covers can prevent the A dvanced
Air bag System from recognizing child re
straints or occupants on the front pas
senger seat and prevent the side airbag in the seat backrest from deploy ing prop
erly.
- Never use c ush ions, pillows, blankets or
similar items on the front passenger
seat. The add it iona l padd ing will prevent
the weight-sensing mat in the seat from
accu rately reg iste ring the c hild restra int
or person on the seat and prevent the
Adva nce d Airb ag System from func tion
ing properly .
-If you mus t use a child restra int on the
front passenger seat and the ch ild re- straint manufacture
r's instructions re
qu ire the use of a towel, foam cushion or
something e lse to properly pos ition the
child restraint, make certain that the
PASSENGER AIR BAG OFF light comes
on and stays on whenever the ch ild re·
s t raint is installed on the front passen
ge r seat.
- If the PASSENGER AIR BAG OFF light
does not come on a nd stay on, immed i
a tely insta ll child restrain t in a rear se at
ing position and have the ai rbag system
inspected by your authorized A udi dealer.
How the Advanced Airbag System
components work together
The front Advanced Airbag System and the
s ide airbags supp lement the protection of
fered by the front three-poi nt safety belts
with pretensioners and load limiters a nd the
adjustable head rest raints to help redu ce the
risk of inj ury in a wide range of accident and
c rash situations. Be s ure to read the impor
tant information about safety and heed the
WARNINGS in this chapter.
Deployment of the Adv a need A irba g System
and t he activation of the safety belt preten
sioners depend on the deceleration measured
by the crash sensors and registered by the
electron ic control unit. The amount of infla
tion of the front airbags can a lso be adapted
to the front sea t pos ition, depending on the
distance between the respect ive front seat
and the steer ing w heel or instrument panel as
registered by sensors in the seats. Crash se·
verity depends on speed and decelerat ion as
well as the mass and st iffness of t he vehicle
o r object involved in the crash .
On the passenger side, regardless of safety
belt use, the ai rbag w ill be tu rned off if the
we ight on the passenger seat is less than the
amount programmed in the e lectron ic control
u nit. The front airbag on the passenger side
will a lso be turned off if one of the child safe -
ty seats that has been certified under Federal
Motor Vehicle Safety Standard 208 has been
recogni zed on the seat . The
PAS SENGER AIR .,..