2013 AUDI S4 SEDAN cruise control
[x] Cancel search: cruise controlPage 4 of 294
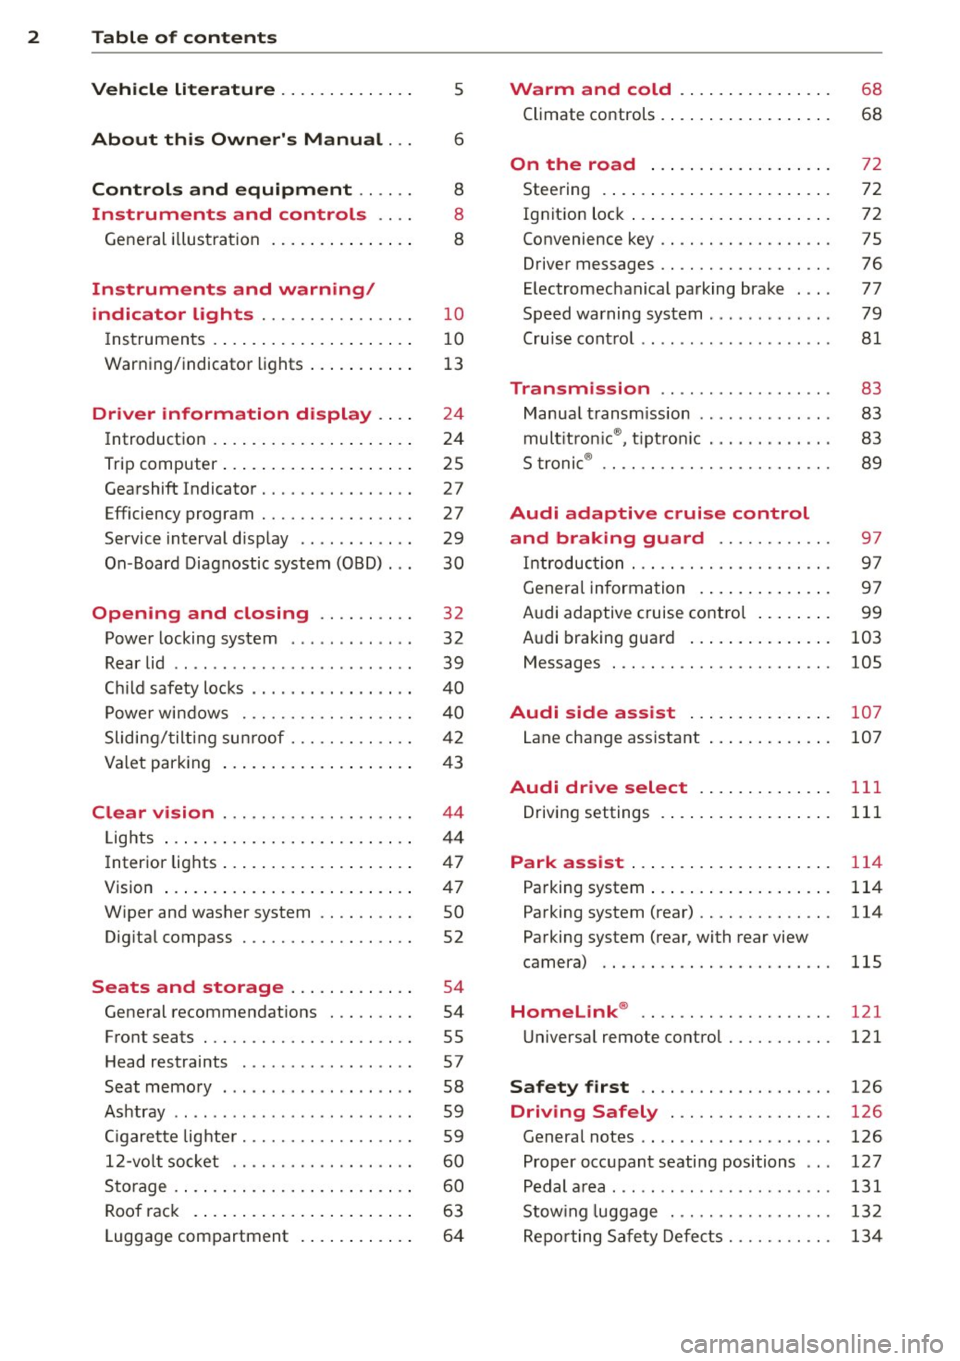
2 Table of contents Vehicle literature .. .. .. .. .. ... .
5
About this Owner's Manual . . . 6
Controls and equipment .. ... .
Ins truments and controls .. . .
General illus tration .... ... .. .. ... .
Instruments and warning /
indicator lights ........ .. .. .. . .
Ins truments . .. .. ..... ... .. .. ... .
War ning/ indi cator lights ... .. ... .. .
Driver information d isplay .. . .
Introduct ion . .. .. ..... ... .. .. ... .
Trip computer .. .. ..... ... .. .. ... .
Gearshift Indicator ........ .. .. ... .
Efficiency program ........ .. .. .. . .
Service interval d isp lay .. .. .. .. .. . .
On -Board Diagnostic system (OBD) .. .
Opening and closing .... .. .. . .
Power locking system .. ... .. .. .. . .
R ear lid .. .. ................ ... . . 8
8
8
10
1 0
1 3
24
24
25
27
27
29
30
32
32
39
C hil d safety locks . . . . . . . . . . . . . . . . . 40
P ower wi ndows ........ .. .. .. .. . .
Sliding/ tilt ing su nroof ..... .. .. .. . .
Va let par king .. .. ..... ... .. .. ... .
Clear vision .. ........ .. .. .. .. . .
Lig hts ..... ... . ...... ... .. .. ... .
I nter ior lights .. .. ..... ... .. .. ... .
V1s 1on ..... ... .. ..... ... .. .. ... .
W iper and washer system .. .. .. .. . .
Dig ita l compass .............. ... .
Seats and storage ... .. .. ... .. .
General recommendat ions . .. .. ... .
Front seats .............. .. .. ... .
H ead restraints . .......... ... .. . .
Seat memory ............. ... .. . .
Ashtr ay .. .. ... .... ...... .. .. .. . .
C igarette lig hte r .......... .. .. .. . .
12-vo lt socket ........... .... ... .
S torage . ... .. . .. ..... ... .. .. ... .
Roo f rack . .... .. ..... ... .. .. ... .
Luggage compartment . ... .. .. ... . 4
0
42
4 3
44
4 4
47
4 7
so
52
54
54
55
57
58
59
5 9
60
60
63
64
Warm and cold ... .. ..... .... . .
Climate co ntrols . ... ... ..... ... .. .
68
68
On the road . . . . . . . . . . . . . . . . . . . 72
Stee ring . . . . . . . . . . . . . . . . . . . . . . . . 72
Ign it io n lock . . . . . . . . . . . . . . . . . . . . . 72
Convenience key . . . . . . . . . . . . . . . . . . 75
Driver messages . . . . . . . . . . . . . . . . . . 76
E lectromechanical parking brake . . . . 77
Speed warning system . . . . . . . . . . . . . 79
Cru ise cont ro l . . . . . . . . . . . . . . . . . . . . 81
Transmission . . . . . . . . . . . . . . . . . . 83
Manua l transm ission . . . . . . . . . . . . . . 83
mult it ron ic ® , t ipt ron ic . . . . . . . . . . . . . 83
S troni c® . . . . . . . . . . . . . . . . . . . . . . . . 89
Audi adaptive cruise control
and braking guard . . . . . . . . . . . .
97
I n troduc tion . . . . . . . . . . . . . . . . . . . . . 9 7
Genera l informa tion . . . . . . . . . . . . . . 9 7
Audi adaptive cruise contro l . . . . . . . . 99
Audi braking gua rd . . . . . . . . . . . . . . . 103
Messages . . . . . . . . . . . . . . . . . . . . . . . 105
Audi side assist .... ..... ... .. .
Lane change ass istant 107
107
Audi drive select
. . . . . . . . . . . . . . 111
Driving settings . . . . . . . . . . . . . . . . . . 111
Park assist . . . . . . . . . . . . . . . . . . . . . 114
Pa rking system . . . . . . . . . . . . . . . . . . . 114
Pa rking system (rear) . . . . . . . . . . . . . . 114
Pa rking system (rear, with rear view
camera) . . . . . . . . . . . . . . . . . . . . . . . . 115
Homelink ® . . . . . . . . . . . . . . . . . . . . 121
U niversa l remote control........ ... 121
Safety first . . . . . . . . . . . . . . . . . . . . 126
Driving Safely . . . . . . . . . . . . . . . . . 126
Genera l notes . . . . . . . . . . . . . . . . . . . . 126
Proper occupant seating positions . . . 127
Pedal a rea . . . . . . . . . . . . . . . . . . . . . . . 131
Stow ing luggage . ............. .. . 132
Repo rting Safe ty Defe cts . . . . . . . . . . . 13 4
Page 11 of 294

CD
@
®
©
®
®
(j)
Door handle
Memory buttons (dr iver's seat)
Power locking sw itch
Button for side ass ist
A ir outlets
L ight switch
Control lever for :
- T urn signal and high beam
@ Multi-function steering wheel
with:
- Horn
- Driver's airbag
- Audio/video, telephone, navi
gation and vo ice recognition
buttons
- Rocker switches for tiptron ic 58
36
107
44
45
148
opera tion or . . . . . . . . . . . . . . 88, 93
® ISET lbutton . . . . . . . . . . . . . . . . 11
@ Instrument cluster . . . . . . . . . . 10
@ Reset button for trip odometer 12
@ Sw itches for:
- Windsh ield wiper/washer 50
- Trip computer . . . . . . . . . . . . . 25
@ Ignition lock ............. . .
(8) Adjustable s teer ing column
@ Control lever for :
- Cruise contro l ......... ... .
- Adaptive cruise control .. .. .
@ Ins trumen t lighting .... .. .. .
@ Release lever for the engine
hood .. .. .. .. ........... .. .
@ Data L ink Connector for On
B oard Diag nostics (OBD II) . .. .
@ Sw itch for unlock ing the trunk
lid .. .. .. ................. .
@ Adjuster control fo r outside m ir-
r ors .. .. .. .. ........... .. .
@ Power window switches ... .. .
@ Rad io-Display1l or MMI-Display 72
72
8
1
97
47
215
30
39
47
40
l) T he image in t he d is pl ay will app ear e it h er in mu lt iple
c o lor s or in a singl e co lor , de pen din g o n th e vehicl e
e q ui pment. T he m ulti co lo r im age w ill b e used i n this
O w ner's M anual becau se bo th mu lt i co lo r and sin gle
c o lor ver sio ns are almos t ide ntic al.
In strument s and control s 9
@) Depending on options:
- Rad io system
- CD changer
Emergency flasher
G love compartment (lockab le)
Front passenger's airbag .....
Depend ing o n options, sw itches
for:
46
61
148
- Audi drive se lect .......... .
111
- Electronic Stabilization Con-
trol . ... .. .. .. . .. ... .... .
- Rear window sun shade .. .. . 184
49
@ Deluxe automat ic cl imate con-
trol ...... .. .... .......... .
@) Depending on options, selecto r
lever or shift lever for :
68
-Manual transmission . . . . . . . 83
- Automatic transmission . . . . . 83
@ Asht ray with ciga rette lighter 59, 59
@ Depend ing on options:
- MMI contro l console or :
- Aud i drive select........... 111
- Electronic Stabilizat ion Con-
trol button . . . . . . . . . . . . . . . 184
- Power switch for rear window sun shade . . . . . . . . . . . . . . . . 49
@ I STA RT ENGI NE STOPI button 75
@) Electromec hanical pa rking
brake . . . . . . . . . . . . . . . . . . . . . 77
(D Tips
-Some of the equipment o r fea tures
show n in the genera l ill ustration may be
standard equ ipment on your vehicle or
may be optional eq uipment depending
on your model. Always as k your author
ized Aud i dea ler if you have a quest ion
about your vehicle.
- Operat ion of the Multi Med ia Interface
(MMI) is described in a separate manua l.
Page 17 of 294

Instrument s and warnin g/indic ator ligh ts 15
ml
adaptive light *
¢page22
m
Light-/rain sensor*
¢page22
-
B
Adaptive dampers*
¢page 22
Ill
Sport differential *
¢page22
m
Ignition lock
¢page 23
Ill
Steering column lock
¢page 18
,1,ij
Electromechanical steering, dy-
namic steering*./
¢page 188
Transmission
g
-multitronic®, tiptronic
¢page88
- S tronic® ¢ page 95
m
Transmission
-S t ro nic ® ¢ page 95
Other indicator l ight s
11
1!11 Turn signals
llfa ¢page23
CRUISE
•
I
•
USA models: Cruise control
¢page81
Canada models : Cruise control
¢page 81
Audi adaptive cruise control *
¢page 100
Audi adaptive cru ise control *
¢page 100
-High beam
¢page45
BRAKE /((J)) Brake system
The ligh t illum ina tes when the ignition is
sw itche d on.
It goes out a fter the eng ine has been started. This
indicates that the b rake
warning light is functioning properly.
If th e brake warning light doe s not light up
when the engine is cranking, th ere may be a
malfunction in the electrical system . In thi s
case, contact your Audi dealer .
If the brake system wa rn ing/ indica tor light
t u rns o n, there is a b ra ke sys tem ma lfunction .
1111 (USA model s)/. (Canada model s)
Stop v ehicl e and check brake fluid lev el
If the indicator l ight turns on and the mes
sage appears , proceed as follows:
.,. Pull off the road.
.,. Stop the vehicle.
.,. Tu rn off the engine.
.,. Check the b rake fluid level¢
page 224.
.,. Contact your nearest autho rized repair fa-
cility if necessa ry.
Warning! Fault in brake system . Contact
d ealer
If the ABS indicator light fl!S (USA models)/
(11 (Canada mode ls), the ESC ind icator light
Ji1 and the b rake system indicator light
1111 (U SA mode ls)/ . (Canada mode ls) turn
o n and the message appears, the ABS, ESC
and braking d is tribut ion are not worki ng ¢ ,&. .
Carefully drive to your author ized Audi dealer
immediately to have the malfunct ion correct
ed ¢,&. .
1111 (USA models )/. (Canada models)
Parking brake system fault! See owner' s
manual
- If the ind icator light and the message ap
pear
when stationary or after switch ing the
ignition on ,
check if you can release the
park ing brake . Afte r releasing the parki ng
brake, carefully d rive to your au thor ized
Audi dea le r i mmedia tely t o have the ma l
fu nction corre cted. If yo u can not release the
parking brake, see k professiona l assistance .
-If the ind icator light and the message ap-
pea r
while driving , th e e mergen cy b ra ki ng
fu nction may not be avail able.
It may not be .,..
Page 26 of 294
24 Driver information d isplay
Driver information
display
Introduction
The Driver information display inside the in
strument cluster provides you, the driver ,
with important information.
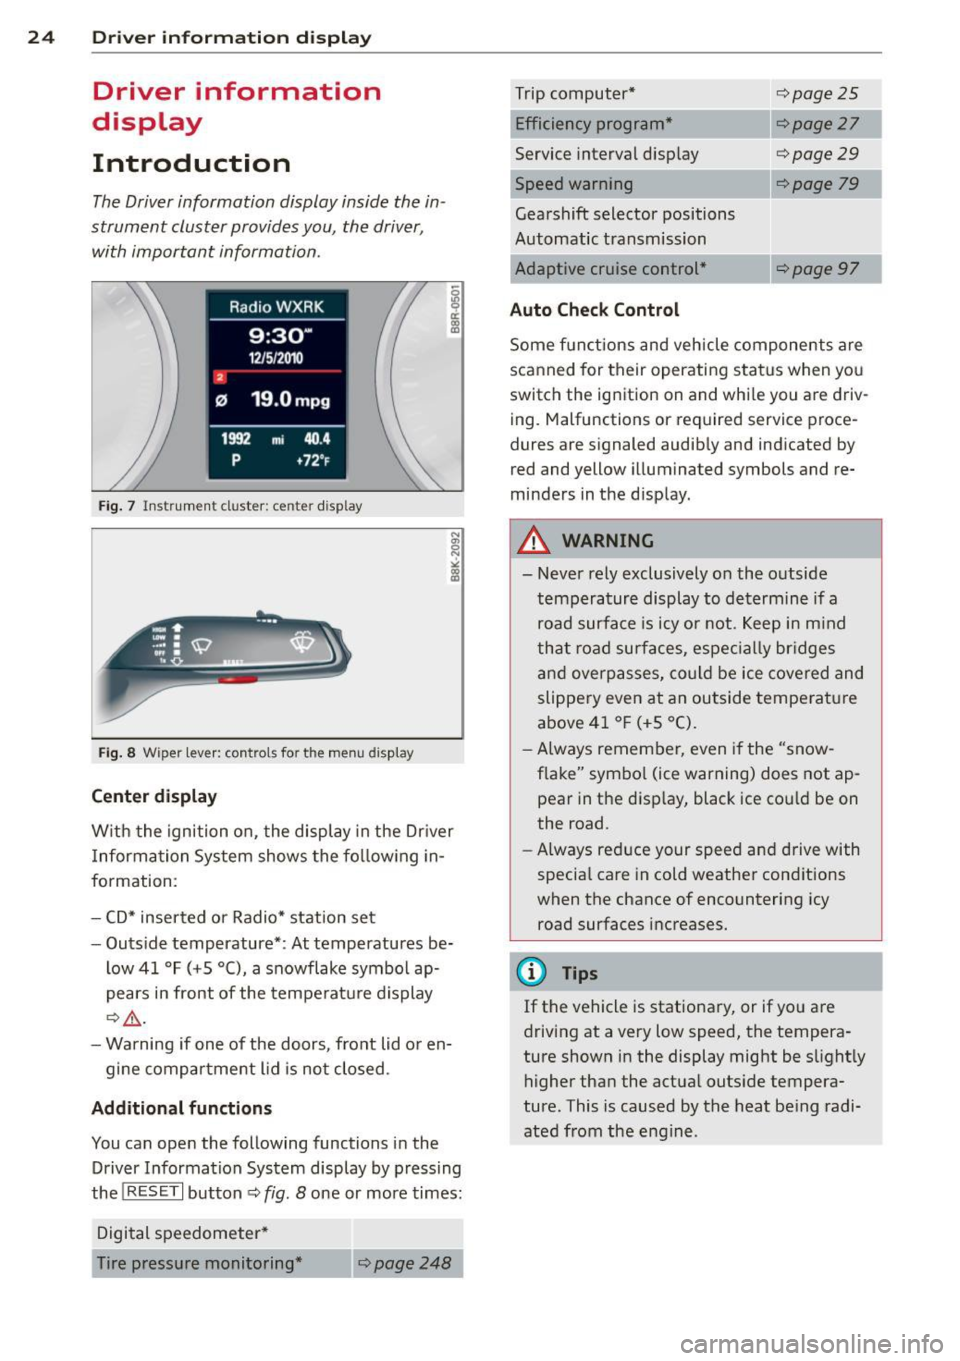
Fig. 7 Ins trum en t cl uster : ce nter display
Fig. 8 W iper lev er: con trols fo r th e menu disp lay
Center display
W ith the ignition on, the display in the Dr iver
I nformation System shows the following in
formation :
- CD* inserted or Radio* station set
- Outside temperature* : At temperatures be-
low 41 °F (+5 °C), a snowflake symbol ap
pears in front of the temperature display
c::> .&_.
-Warning if one of the doors, front lid or en-
gine compartment lid is not closed .
Additional functions
You can open the following functions in the
Driver Information System display by pressing
the
! RESET I button c::> fig. 8 one or more times:
Digital speedometer*
Tire pressure monitoring *
~page248
Trip computer*
Efficiency program*
Service interval display
c::>page25
c::> page 27
c::> page 29
--·-
Gearshift selector positions
Automatic transmission
Adaptive cruise control*
Auto Check Control
c::> page 79
Some functions and vehicle components are
scanned for their operating status when you
switch the ignition on and whi le you are driv
ing. Malfunctions or required service proce
dures are signaled audibly and indicated by
red and yellow illuminated symbols and re
minders in the d isplay.
A WARNING
--- Never rely exclusively on the outside
temperature display to determine if a
road surface is icy or not. Keep in mind
that road surfaces, especially br idges
and overpasses, could be ice covered and
slippery even at an outside temperature
above 41 °F (+5 °C).
- Always remember, even if the "snow
flake" symbol (ice warning) does not ap
pear in the disp lay, black ice cou ld be on
the road.
- Always reduce your speed and drive with
specia l care in cold weather cond itions
when the chance of encountering icy
road surfaces increases.
¢j) Tips
If the vehicle is stationary, or if you are
driving at a very low speed, the tempera
ture shown in the display might be s light ly
higher than the actual outs ide tempera
ture. This i.s caused by the heat being radi
ated from the engine .
Page 35 of 294

-If the power lock ing system should ma l
function, you can lock the driver's door
using the mechanical key
~ page 3 7.
- If the power locking system should fail,
you can still open the fue l tank flap in an
emergency <=>
page 214.
-You are well advised not to keep valua
bles inside an unattended vehicle, visible
or not . Even a properly locked vehicle
cannot provide the security of a safe .
- If the LED in the upper edge of the driv
er's door panel comes on for about
30
seconds after the vehicle is locked, there
i s a malfunction in the power locking or
the anti-theft warning system. Have the
malfunction corrected by an author ized
Audi dealersh ip or qua lified repair fac ili
ty.
Key set
Fig. 19 Key set
@ Remote cont rol k ey with me chanical
ke y
You can centrally lock and unlock your vehicle
and start the engine with the master key with
remote control. A mechanical key is integrat
ed i n the master key
<=> page 34 .
@ Emerg ency key
The emergency key is not intended for con
stant use.
It should on ly be used in an emer
gency, for example, in place of the ign ition key
<=> page 74. Keep it in a safe p lace and do
not carry it on your key ring .
Openin g an d clos ing 33
Ke y re plac ement
If you lose a key, contact your author ized Audi
dealer immediate ly to have the
lost key disa
bled. Be sure to bring all your keys with you .
Number of keys
You can check the number of assigned keys to
you r vehicle <=>
page 11. This allows you to
make sure you have re ceived all of the keys
when you purchase a used vehicle.
Data in th e mast er ke y
During driving, service and maintenance-rele
vant data is continuously stored on your mas
ter key. Your Audi service adviser can read out
this data and tell you abo ut the work yo ur ve
hicle needs . This applies also to vehicles with
convenience key*.
Person al comf ort settings
If two people use one vehicle, it is recom
mended that each person always uses "their
own'' master key. When the ignition is turned
off or when the vehicle is locked, pe rsonal
convenience settings for the following sys
tems are stored and assigned to the remote
master key.
- Climate control
- Powe r locking system
- Seat memory*
- Parking system*
- Adaptive cruise control*
- Audi side assist*
- Audi drive se lect*
T he sto red settings are automatically recalled
when you unlock the vehicle, when you open
the doors or when you turn on the ignition .
A WARNING
--
-Do not leave your vehicle unattended
with the key in the ignition lock . Entry by
unauthorized persons could endanger
you or result in theft or damage the vehi
cle .
- Do not leave ch ildren unattended in t he
veh icle, especially with access to vehicle
Page 83 of 294
.. Select : ICAR lfunction button> Car systems
control button > Driver assist > Speed
warning.
Warning thresho ld 2 can be set in the speed
range starting from 20 mph to 150 mph (30
km/h to 240 km/h). Settings can each be ad
justed in intervals of 6 mph (10 km/h).
Cruise control
Switching on
The cruise control system makes it possible to
drive at a constant speed starting at 20 mph (30 km/h).
®
f
®t
0
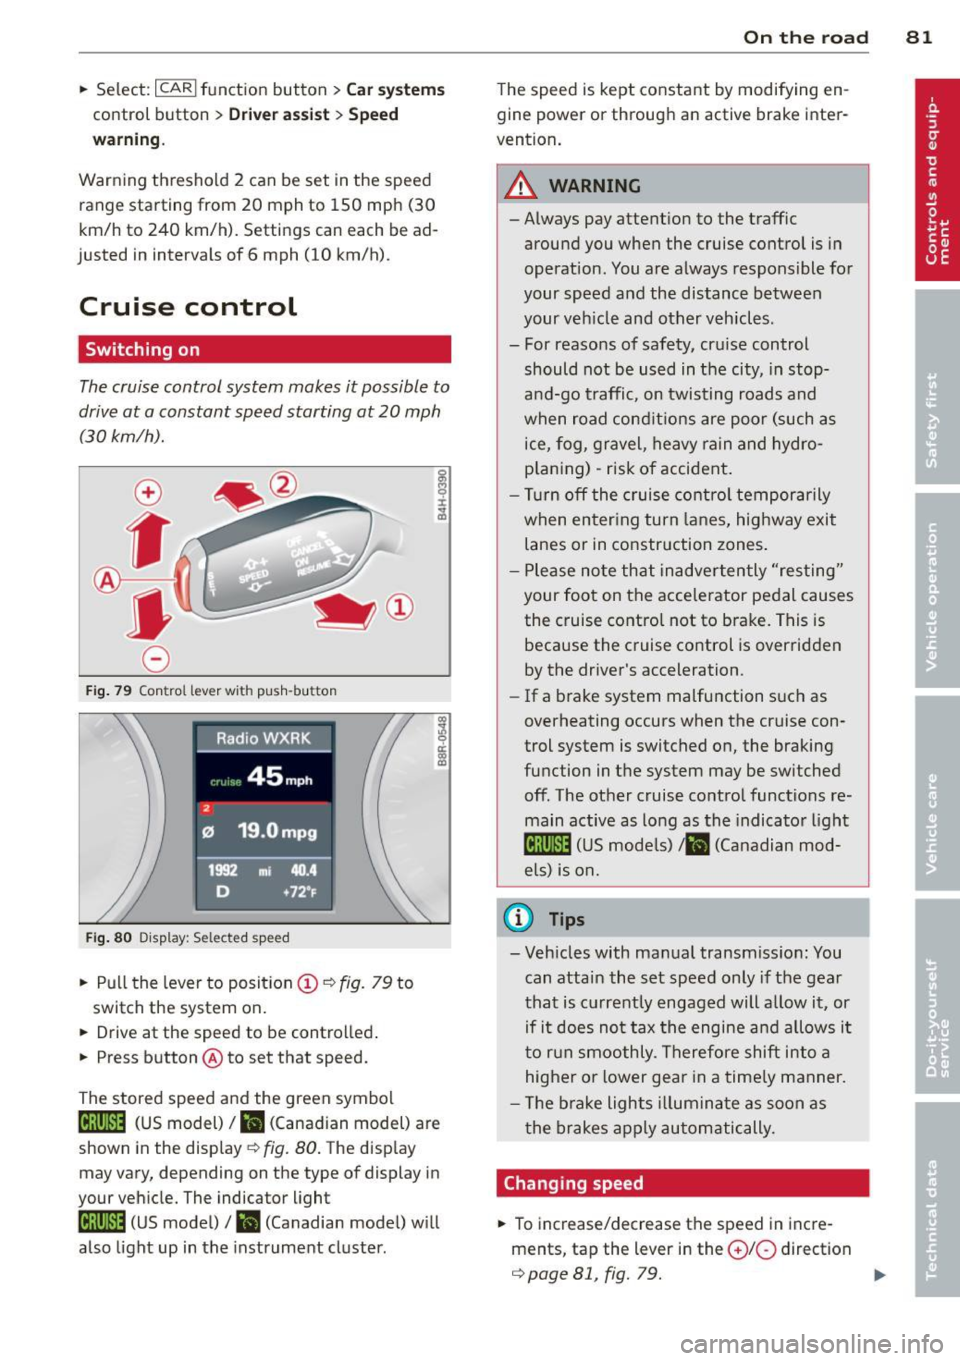
Fig. 79 Con tro l lev er w it h push-bu tton
Fig. 80 D isplay : S ele ct ed speed
.. Pull the lever to position (D ¢ fig. 79 to
switch the system on.
.. Drive at the speed to be controlled .
.. Press button @to set that speed.
The stored speed and the green symbol
[ij;jl)~i~ (US model)/ .. (Canadian model) are
shown in the display ¢ fig. 80. The display
may vary, depending on the type of display in
your vehicle. The indicator light
[ij;(l)~i~ (US model)/ B (Canadian model) w ill
also light up in the instrument cluster.
On the road 81
The speed is kept constant by modifying en
gine power or through an active brake inter
vention.
_& WARNING
- Always pay attent ion to the traffic
around you when the cruise control is in
operation. You are always responsible for
your speed and the distance between
your veh icle and other vehicles .
- For reasons of safety, cru ise control
should not be used in the city, in stop
and-go traffic, on twisting roads and
when road conditions are poor (such as
ice, fog, gravel, heavy rain and hydro
p lani ng) -risk of accident.
- Turn off the cruise control temporarily
when enter ing turn lanes, highway exit
lanes or in construction zones .
- Please note that inadvertently "resting"
your foot on the accelerator pedal causes
the cruise control not to brake. This is
because the cruise control is overridden
by the driver's acceleration .
-If a brake system malfunction such as
overheating occurs when the cruise con
trol system is switched on, the braking
function in the system may be switched off. The other cruise control functions re
main active as long as the indicato r light
lijj(l )~i~ (US models) li'I (Canadian mod
e ls ) is on.
@ Tips
-Veh icles with manual transmiss ion: You
can attain the set speed only if the gear
that is currently engaged will allow it, or
if it does not tax the engine and allows i t
to run smoothly. Therefore shift into a
higher or lower gear in a timely manner.
- The brake lights illuminate as soon as
the brakes apply automatically.
Changing speed
.. To increase/decrease the speed in incre
ments, tap the lever in the
0 10 direction
¢ page 81, fig. 79. Ill>
Page 84 of 294
82 On the road
• To increase/dec rease the speed qu ickly,
hold the lever in the
G) !Q direction unti l
the des ired speed is d isplayed.
You can a lso press the accelerator pedal down
to increase your speed , e .g. if you want to
pass someone . The speed yo u saved earlier
will resume as soon as you let off of the accel
erator pedal.
If , however, you exceed your saved speed by
6 mph (10 km/h) for longer than 5 minutes ,
the cruise contro l will be turned off tempora
rily. The green symbol in the display turns
white . The saved speed remains the same .
Presetting your speed
You con preset your desired speed while the
vehicle is not moving.
• Switch on the ignition.
• Pu ll lever into pos ition
CD c:> page 81 ,
fig. 79.
• Press the lever in the 0 or O direction to
incr ease or decrease yo ur speed .
• Re lease the lever to save that speed .
This funct ion makes it possible, for example,
to save the speed you want before driving on
the hig hway . Once o n the hig hway, activate
the cruise contro l by pulling the lever towa rd
(D .
Switching off
Temporary deactivation
• Pres s the bra ke peda l, or
• Manual transmission : Keep the clutch pedal
pressed down
longer , or
• Press the lever into position @ (not clicked
into p lace)
¢ page 81, fig . 79, or
• Drive for longer than 5 minutes at more
t h an 6 mph (10 km/h) above the stored
speed .
Switching off completely
• Press lever into position @(clicked into
place), or
• Switch the ignition off. The speed you saved will be retained if the
cruise control has been switched off tempora
rily . To resume the saved speed, let up on the
brake or clutch pedal and pu ll the lever to po
s ition (!).
Switching the ignition off erases the saved
speed.
_& WARNING
You shou ld only return to the saved speed
if it is not too fast for the current traffic
conditions -risk of an accident!
Page 95 of 294
press the brake pedal to prevent the ve
hicle from rolling .
- Allow ing the ve hicl e to roll when the en
gine is stopped and the selector lever is i n N will dama ge the S tronic transm is
s ion because it is not lubricated under
those c ircumstances.
@ Tips
For safety reasons, the park ing brake is re
leased automatically only when the dr iv-
er's safety belt is engaged in the buck le.
Hill descent control
Applies to vehicles: with S tro nic transmiss ion and hill de
scent co ntrol
T he hill descen t control sys tem assists the
driver when driving down declines .
Hill desce nt co ntrol is activated when these
l ec to r lever is in D/S and you press the bra ke
p edal. The S tro nic tr ansm ission au tom atically
shifts down into a gear sui table for the de
cline. Hi ll descent control tr ies to maintain
the speed achieved at the time of braking,
wit hin physical and techn ica l limitations . If
may still be necessary to adjust the speed
with the brakes.
H ill descent control switches off once the de
cline levels out or you press t he accelerator
pedal.
On ve hicles with the cruise co ntrol system *
c::> page 81, hill descent control is also act ivat
ed when the speed is set.
A WARNING
-
Hi ll descent control cannot overcome
physical l imitations, so it may not be able
t o m aintain a cons tant speed under all
c o nditions. Alway s be r eady to app ly th e
br ak es.
Transm ission 93
Manual shift program
Applies to vehicles: wit h S tronic transm ission
Using the manual shift program you can
manually select gears .
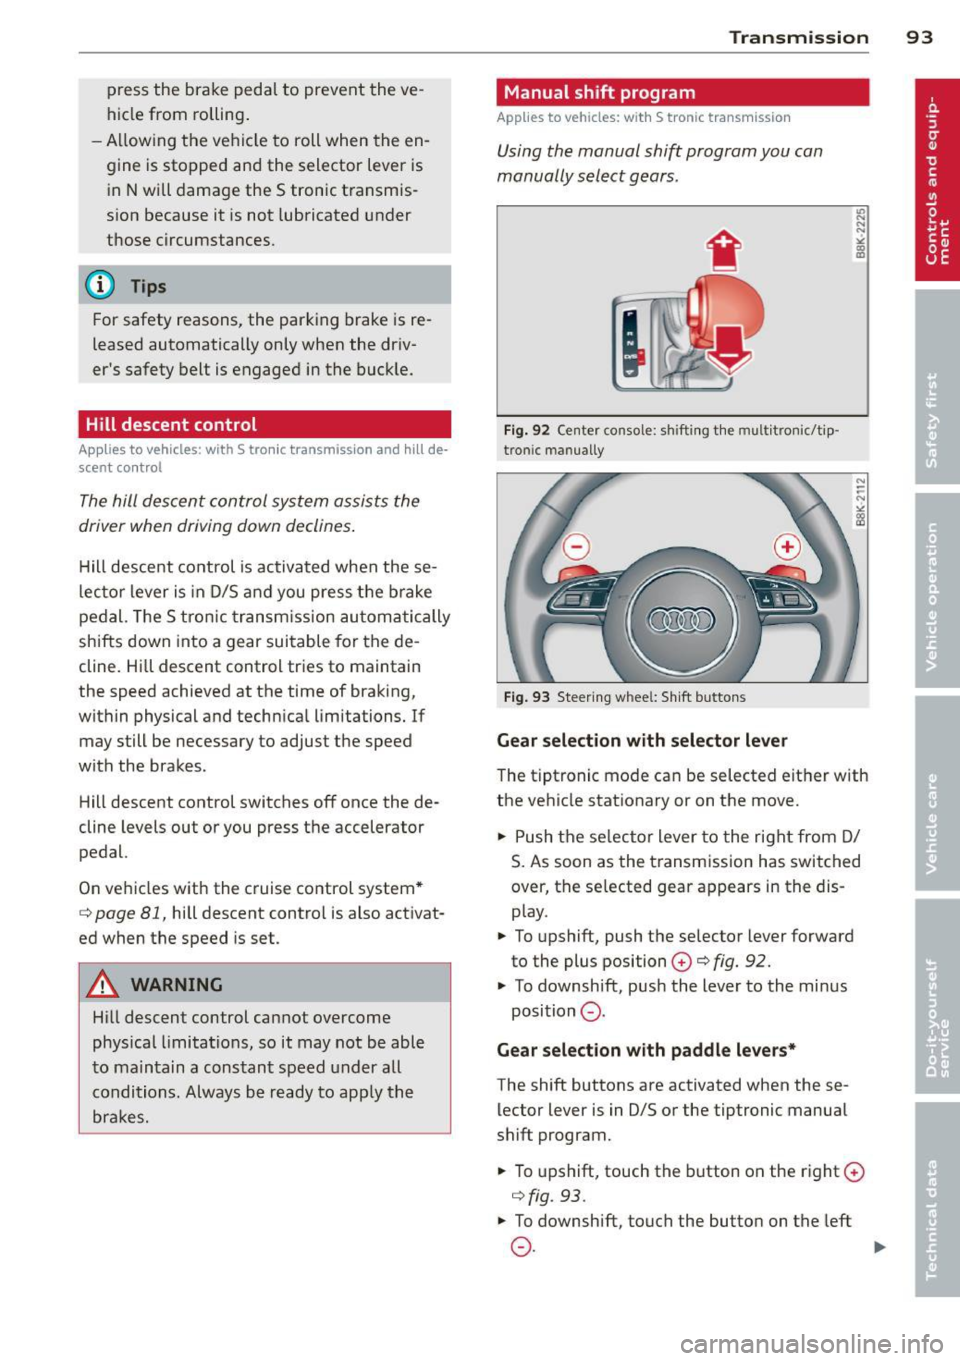
Fig. 92 Center console : sh ift in g t he m ult itron ic/t ip ·
tro nic m an u ally
Fig. 93 Steering w hee l: S hift b utto ns
Gear selection with selector lever
"' ... .... "!
"' co a,
The tipt ronic mode can be selected eit her with
the ve hicle stat ionary or on the move.
.,. Push the se lec tor lever to the rig ht from D/
S. As soon as the t ransmission has switched
over, the se lected gear ap pears in the dis
p lay .
.,. To upshift, push the se lector lever forward
to the plus position
0 c::> fig. 92.
.,. To downshift, pus h the lever to the mi nus
position
0 .
Gear selection with paddle levers*
The shift buttons are activated when these
lector lever is in D/S or the tiptronic manual
shift program .
.,. To upshift, touch the button o n the right ©
c::> fig. 93 .
.,. To downshift , touch the butto n on the left
0 . ~