Page 253 of 617
General Information●When using CD-R, CD-RW, DVD-R
or DVD-RW discs, use only high
quality discs labeled for audio use.●When recording a CD-R, CD-RW,
DVD-R or DVD-RW the recording
must be closed for it to be used by
the disc player.●When using DVD-R/RW discs,
they should meet DVD verification
standards.●Play only standard, round, 5-inch
(12 cm) discs. Smaller or odd-
shaped discs may jam in the drive
or cause other problems.●Handle your discs properly to
prevent damage and skipping.
Do not use discs with adhesive labels.
The label can curl up and cause the disc
to jam in the unit.Protecting Discs
When a disc is not being played,
store it in its case to protect it from
dust and other contamination. To
prevent warpage, keep discs out of
direct sunlight and extreme heat.
To clean a disc, use a clean soft cloth.
Wipe across the disc from the center
to the outside edge.
A new disc may be rough on the
inner and outer edges. The small
plastic pieces causing this roughness
can flake off and fall on the recording
surface of the disc, causing skipping
or other problems. Remove these
pieces by rubbing the inner and
outer edges with the side of a pencil
or pen.Never try to insert foreign objects in
the disc player.
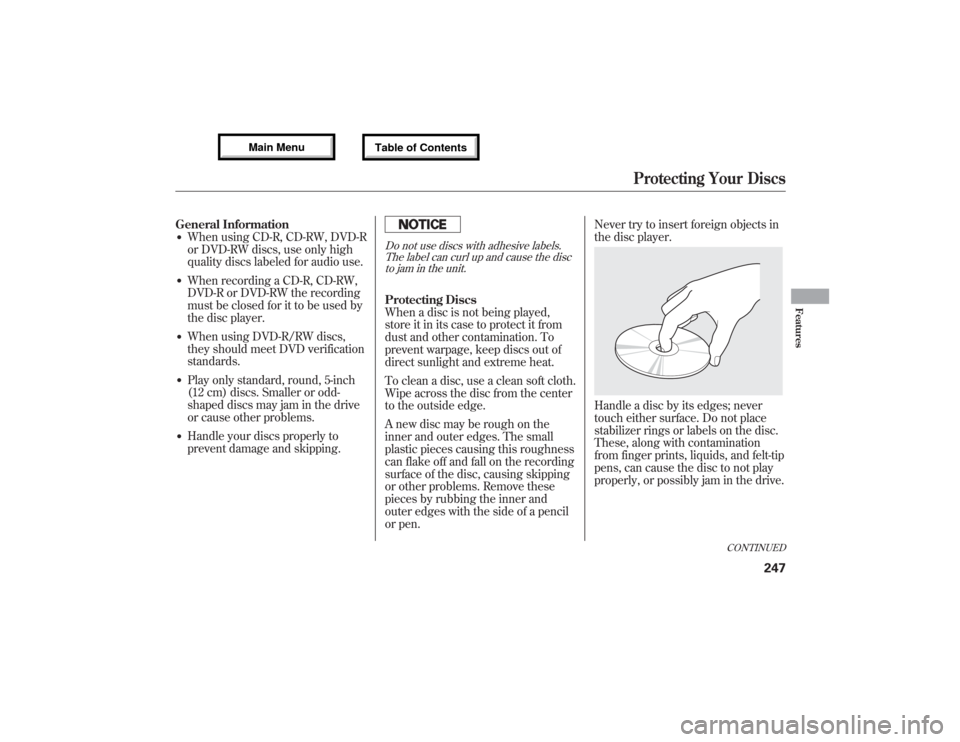
Handle a disc by its edges; never
touch either surface. Do not place
stabilizer rings or labels on the disc.
These, along with contamination
from finger prints, liquids, and felt-tip
pens, can cause the disc to not play
properly, or possibly jam in the drive.
CONTINUED
Protecting Your Discs
247
Features
12/07/17 18:10:57 13 ACURA MDX MMC North America Owner's M 50 31STX660 enu
Page 254 of 617
Additional Information on
Recommended Discs
The in-dash disc player has a
sophisticated and delicate
mechanism. If you insert a damaged
disc as indicated in this section, it
may become stuck inside and
damage the audio unit.
Examples of these discs are shown to
the right:1. Bubbled, wrinkled, labeled, and excessively thick discs
2. Damaged discs
3. Poor quality discs
Bubbled/
WrinkledWith Label/
StickerUsing Printer
Label KitSealed With Plastic
RingChipped/
CrackedWarped
Burrs
Protecting Your Discs24812/07/17 18:10:57 13 ACURA MDX MMC North America Owner's M 50 31STX660 enu
Page 285 of 617
To Play an iPod
ᤎ
This audio system can select and
play the audio files on the iPod
ᤎwith
the same controls used for the in-
dash disc player. To play an iPod,
connect it to the USB adapter cable
in the console compartment by using
your dock connector, then press the
USB/AUX button. The ignition
switch must be in the ACCESSORY
(I) or the ON (II) position. The iPod
will also be charged with the ignition
switch in these settings.The audio system reads and plays
sound files to be playable on the
iPod. The system cannot operate an
iPod as a mass storage device. The
system will only play songs stored on
the iPod with iTunes.
iPod and iTunes are registered
trademarks owned by Apple Inc.
Voice Control SystemYou can select the AUX mode by
using the navigation system voice
control buttons, but cannot operate
the play mode functions.
The voice command music search
feature, Song By Voice™, is also
available. Refer to the navigation
system manual for complete details.iPod models confirmed to be
compatible with your audio system
using the USB adapter cable are:
Model
iPod (5th generation)
iPod classic 80GB/160GB
iPod classic 120GB
iPod classic 160GB (launch in 2009)
iPod touch
iPod nanoThis system may not work with all
software versions of these devices.
CONTINUED
Playing an iPod
®(Models with navigation system)
279
Features
12/07/17 18:10:57 13 ACURA MDX MMC North America Owner's M 50 31STX660 enu
Page 294 of 617
To Play a USB Flash Memory
Device
This audio system can select and
play the audio files on a USB flash
memory device with the same
controls used for the disc player. To
play a USB flash memory device,
connect it to the USB adapter cable
in the console compartment, then
press the USB/AUX button until you
see‘‘USB’’in the display. The
ignition switch must be in
ACCESSORY (I) or ON (II) position.The audio system reads and plays
the audio files on the USB flash
memory device in MP3, WMA or
ACC
ᤳformats.
ᤳ: Only AAC format files recorded
with iTunes are playable on this
audio unit.
The recommended USB flash
memory devices are 256 MB or
higher, and formatted with the FAT
file system. Some digital audio
players may be compatible as well.
Some USB flash memory devices
(such as devices with security
lockout features, etc.) will not work
in this audio unit.
NOTE:
●Do not use a device such as a card
reader or hard drive as it or your
files may be damaged.
●Do not connect your USB flash
memory device using a hub.●Do not use an extension cable to
the USB adapter cable equipped
with your vehicle.●Do not keep a USB flash memory
device in the vehicle. Direct
sunlight and high heat will damage
it.●We recommend backing up your
data before playing a USB flash
memory device.●Some devices cannot be powered
or charged via the USB adapter, if
this is the case use the accessory
adapter to supply power to your
device.●Depending on the type and
number of files, it may take some
time before they begin to play.
Playing a USB Flash Memory Device (Models with navigation system)28812/07/17 18:10:57 13 ACURA MDX MMC North America Owner's M 50 31STX660 enu
Page 316 of 617
U.S. Technology Package with
Entertainment, Advance Package with
Entertainment, Canadian Technology,
and Elite PackagesYour vehicle is equipped with a rear
entertainment system that includes a
DVD player for the enjoyment of the
rear passengers.
With this system, the rear
passengers can enjoy a different
entertainment source (radio, disc,
HDD, USB, iPod
®, DVD player, or
XM Radio) than the front seat
occupants. The audio is broadcast
through the supplied wireless
headphones.
The ignition switch must be in the
ACCESSORY (I) or the ON (II)
position to operate the rear
entertainment system.
This vehicle's overhead mounted video
display, if so equipped, includes
mercury-containing components. Upon
removal, please reuse, recycle, or
dispose of as hazardous waste.To Turn On the System
Press the REAR PWR button. The
overhead screen will open to the
position it was last set. The indicator
on the REAR PWR button will come
on, as well as the indicator on the
FRONT SOURCE button. The rear
seat passengers can then operate the
rear system from the control panel in
the ceiling. The rear control panel
can also be detached and used as a
remote control, by pushing the
RELEASE button, and pulling the
remote toward you.
Rear Entertainment System31012/07/17 18:10:57 13 ACURA MDX MMC North America Owner's M 50 31STX660 enu
Page 317 of 617
Pressing the REAR CTRL OFF
button disables rear control. The
indicator in the button comes on and
your passengers can no longer
operate the system with the rear
control panel. When the button is
pressed, the‘‘CTRL OFF’’message
appears in the overhead screen to let
your passengers know that the
control panel is disabled.
The rear system selects the source it
was last set to. If that source has
been removed (the DVD has been
ejected from the player, for example),
you will see‘‘No Disc’’in the display.
You should select another source or
insert a DVD.Rear Speakers
When you turn on the system, the
rear speakers are automatically
turned off if the rear system selects a
different entertainment source than
the front system. You will see the
Rear Speakers Off icon both in the
audio display and the overhead
screen. The sound for the rear
system is sent to the wireless
headphones.If you want to turn the rear speakers
on again, press and hold the REAR
PWR button until the Rear Speakers
Off icon goes off.
NOTE:The rear speakers are
connected to the front system, so
they will always play the source that
the front system is set to.
CONTINUED
Rear Entertainment System
311
Features
12/07/17 18:10:57 13 ACURA MDX MMC North America Owner's M 50 31STX660 enu
Page 319 of 617
To Select Rear Entertainment
from the Front Control Panel
To operate the rear entertainment
system from the front panel, press
the REAR SOURCE button. You will
hear two beeps and the indicator in
the button comes on to show that the
control panel is enabled.
If you do not operate the rear
entertainment system from the front
panel within 10 seconds, the
indicator goes off and the FRONT
SOURCE indicator comes on
automatically.
Radio controls for the front
entertainment system can also be
used to operate the rear
entertainment system.Operating the DVD Player from
the Front Control Panel
The DVD player in your rear
entertainment system can play DVD
video discs, audio CDs, MP3/WMA
discs, and DTS CDs.
Press the REAR PWR button in the
front panel or press the
button in
the rear control panel when REAR
PWR is on. The overhead screen will
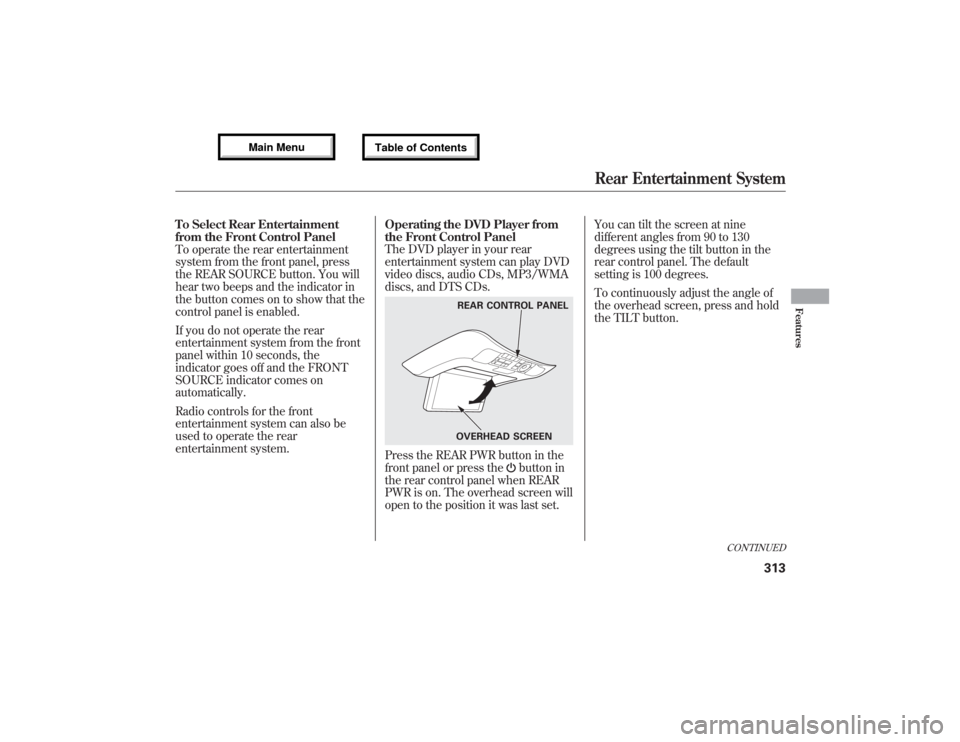
open to the position it was last set.You can tilt the screen at nine
different angles from 90 to 130
degrees using the tilt button in the
rear control panel. The default
setting is 100 degrees.
To continuously adjust the angle of
the overhead screen, press and hold
the TILT button.
REAR CONTROL PANEL
OVERHEAD SCREEN
CONTINUED
Rear Entertainment System
313
Features
12/07/17 18:10:57 13 ACURA MDX MMC North America Owner's M 50 31STX660 enu
Page 320 of 617
Insert a DVD into the lower DVD/
CD slot in the audio unit.
Push the DVD in halfway, the drive
will pull it in the rest of the way.
PLAY-Press the DVD (
)
button if the DVD does not start
playing automatically.
PAUSE-Press the DVD ()
button to pause the DVD. Press the
button again or press PLAY to
resume. Pause works only with the
DVD player.
SKIP BUTTONS
PLAY/PAUSE BUTTONEJECT BUTTON
Rear Entertainment System31412/07/17 18:10:57 13 ACURA MDX MMC North America Owner's M 50 31STX660 enu