2013.5 PEUGEOT 5008 parking brake
[x] Cancel search: parking brakePage 47 of 404

2
Multifunction screens45
Vehicle confi guration
Options
Once the "Options" menu has been selected, you can start diagnostics of the status of the equipment (active, not active, faulty).
Languages
Once the "Languages" menu has been selected, you can change the language used by the display (Français, Italiano, Nederlands, Portugues, Portugues-Brasil, Türkçe, Deutsch, English, Espanol).
Date and time
Once the "Display settings" menu has been selected, you can gain access to the following settings: - ye a r, - month, - d ay, - h o u r, - minutes, - 12 or 24 hour mode. Units
Once the "Units" menu has been selected, you can change the units for: - temperature (°C or °F), - fuel consumption (l/100 km, mpg or km/l).
Once you have selected a setting, press the "OK" button to change its value.
Wait for approximately ten seconds without any action to allow the changed data to be recorded or press the "ESC" button to cancel. The screen then returns to the normal display.
Once the " Vehicle configuration" menu has been selected, you can activate or deactivate the following equipment (according to country): - wiper linked with reverse gear (refer to the "Visibility" section), - selective unlocking (refer to the " Access" section), - "guide-me-home" and welcome lighting (refer to the " Visibility" section), - interior mood lighting (refer to the "Visibility" section), - directional headlamps (refer to the "Visibility" section), - automatic or manual parking brake (refer to the "Driving" section), - parking space sensors (se the "Driving" section), - ...
For safety reasons, configuration of the multifunction screen by the driver must only be done when stationary.
Page 49 of 404

2
Multifunction screens47
Date and time
Once the "DATE AND TIME" menu has been selected, you can gain access to the following settings: - ye a r, - month, - d ay, - h o u r, - minutes, - 12 or 24 hour mode.
Languages
Once the "Languages" menu has been selected, you can change the language used by the display.
Units
Once the "Units" menu has been selected, you can change the units of the following parameters: - temperature (°C or °F), - fuel consumption (l/100 km, mpg or km/l).
Once you have selected a setting, press t h e " " or " " buttons to change its value.
Press the " " or " " buttons to switch respectively to the previous or next setting. Press the "OK" button to record the change and return to the normal display or press the " < ] arrow" button to cancel.
Vehicle confi guration
Once the " Vehicle Configuration" menu has been selected, you can activate or deactivate the following equipment (according to country): - wiper linked with reverse gear (refer to the "Visibility" section), - selective unlocking (refer to the "Access" section), - guide-me-home and welcome lighting (refer to the " Visibility" section), - interior mood lighting (refer to the "Visibility" section), - directional headlamps (refer to the "Visibility" section), - automatic or manual parking brake (refer to the "Driving" section), - ...
Options
Once the "Options" menu has been selected, you can start diagnostics of the status of the equipment (active, not active, faulty).
For safety reasons, configuration of the multifunction screen by the driver must only be done when stationary.
Page 51 of 404

2
Multifunction screens49
"Trip computer" menu
Alert log
This summarises the active warning messages, displaying them in succession in the multifunction screen
Status of functions
This summarises the status of the functions present on the vehicle.
Press the "MENU" button to gain access to the general menu. Press the arrows, then the "OK" button to select the "Trip computer" menu.
Once this menu has been selected, you can consult information concerning the status of the vehicle (alert log, status of the functions...).
Defi ne the vehicle parameters
Once this menu has been selected, you can activate or deactivate the following equipment (according to country): - wiper linked with reverse gear (see " Visibility" section), - selective unlocking (see the "Access" section), - guide-me-home lighting (see the " Visibility" section), - interior mood lighting (see the " Visibility" section), - directional headlamps (see the "Visibility" section), - automatic or manual parking brake (see the "Driving" section), - ...
"Personalisation-
Configuration" menu
Once this menu has been selected, you can gain access to the following functions: - define the vehicle parameters, - display configuration, - choice of language.
On the "Trip computer" menu, select one of the applications:
This allows you to enter an approximate value for the distance to the final destination.
Enter the distance to the destination
Page 54 of 404

Multifunction screens
52
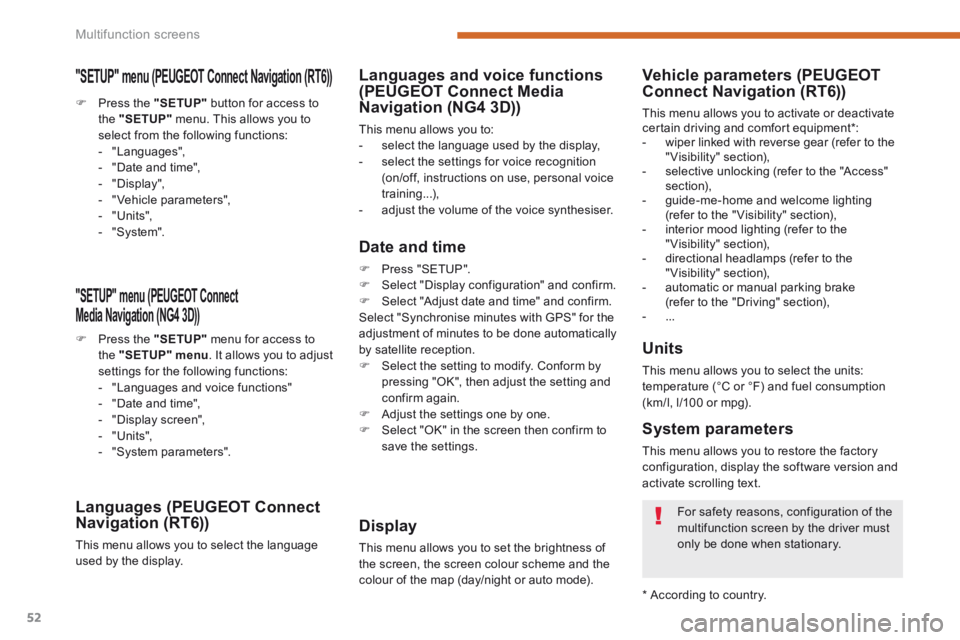
"SETUP" menu (PEUGEOT Connect PEUGEOT Connect PEUGEOT
Media Navigation (NG4 3D))
Press the "SETUP" menu for access to the "SETUP" menu . It allows you to adjust settings for the following functions: - "Languages and voice functions" - "Date and time", - "Display screen", - "Units", - "System parameters".
Languages (PEUGEOT Connect Navigation (RT6))
This menu allows you to select the language used by the display.
Languages and voice functions (PEUGEOT Connect Media Navigation (NG4 3D))
This menu allows you to: - select the language used by the display, - select the settings for voice recognition (on/off, instructions on use, personal voice training...), - adjust the volume of the voice synthesiser.
Date and time
Press "SETUP". Select "Display configuration" and confirm. Select "Adjust date and time" and confirm. Select "Synchronise minutes with GPS" for the adjustment of minutes to be done automatically by satellite reception. Select the setting to modify. Conform by pressing "OK", then adjust the setting and confirm again. Adjust the settings one by one.
Select "OK" in the screen then confirm to save the settings.
Display
This menu allows you to set the brightness of the screen, the screen colour scheme and the colour of the map (day/night or auto mode).
Units
This menu allows you to select the units: temperature (°C or °F) and fuel consumption (km/l, l/100 or mpg).
System parameters
This menu allows you to restore the factory configuration, display the software version and activate scrolling text.
For safety reasons, configuration of the multifunction screen by the driver must
only be done when stationary.
* According to country.
Vehicle parameters (PEUGEOTConnect Navigation (RT6))
This menu allows you to activate or deactivate certain driving and comfort equipment * : - wiper linked with reverse gear (refer to the "Visibility" section), - selective unlocking (refer to the "Access" section), - guide-me-home and welcome lighting (refer to the " Visibility" section), - interior mood lighting (refer to the "Visibility" section), - directional headlamps (refer to the "Visibility" section), - automatic or manual parking brake (refer to the "Driving" section), - ...
Press the "SETUP" button for access to the "SETUP" menu. This allows you to select from the following functions: - "Languages", - "Date and time", - "Display", - " Vehicle parameters", - "Units", - "System".
"SETUP" menu (PEUGEOT Connect Navigation (RT6)) PEUGEOT Connect Navigation (RT6)) PEUGEOT
Page 168 of 404

Driving
166
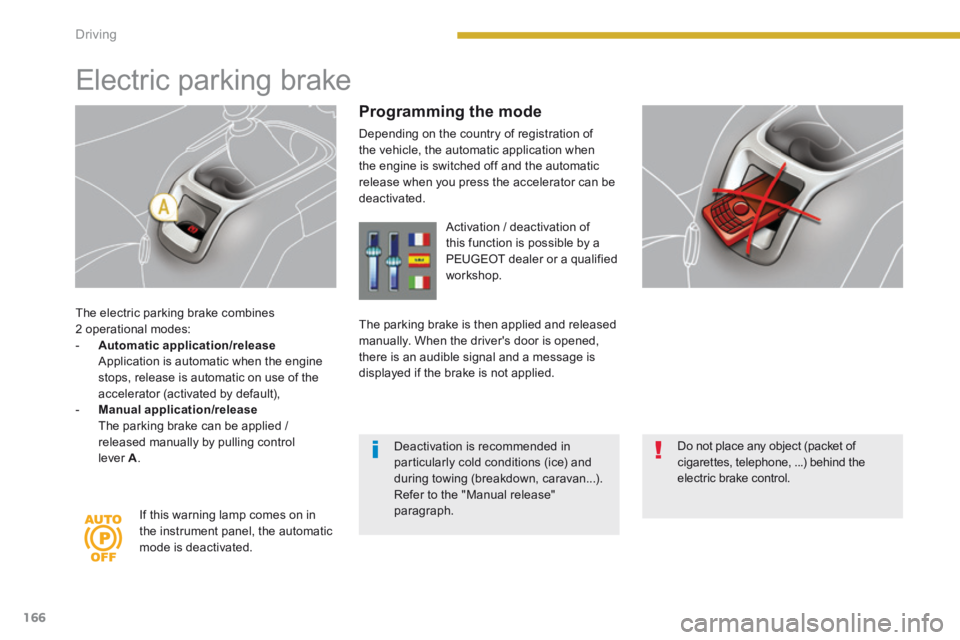
The electric parking brake combines 2 operational modes: - Automatic application/release Application is automatic when the engine stops, release is automatic on use of the accelerator (activated by default), - Manual application/release The parking brake can be applied / released manually by pulling control lever A .
Electric parking brake
Programming the mode
Depending on the country of registration of the vehicle, the automatic application when the engine is switched off and the automatic release when you press the accelerator can be deactivated.
If this warning lamp comes on in the instrument panel, the automatic mode is deactivated.
Activation / deactivation of this function is possible by a PEUGEOT dealer or a qualified workshop.
The parking brake is then applied and released manually. When the driver's door is opened, there is an audible signal and a message is displayed if the brake is not applied.
Do not place any object (packet of cigarettes, telephone, ...) behind the electric brake control.
Deactivation is recommended in particularly cold conditions (ice) and during towing (breakdown, caravan...). Refer to the "Manual release" paragraph.
Page 169 of 404

9
Driving167
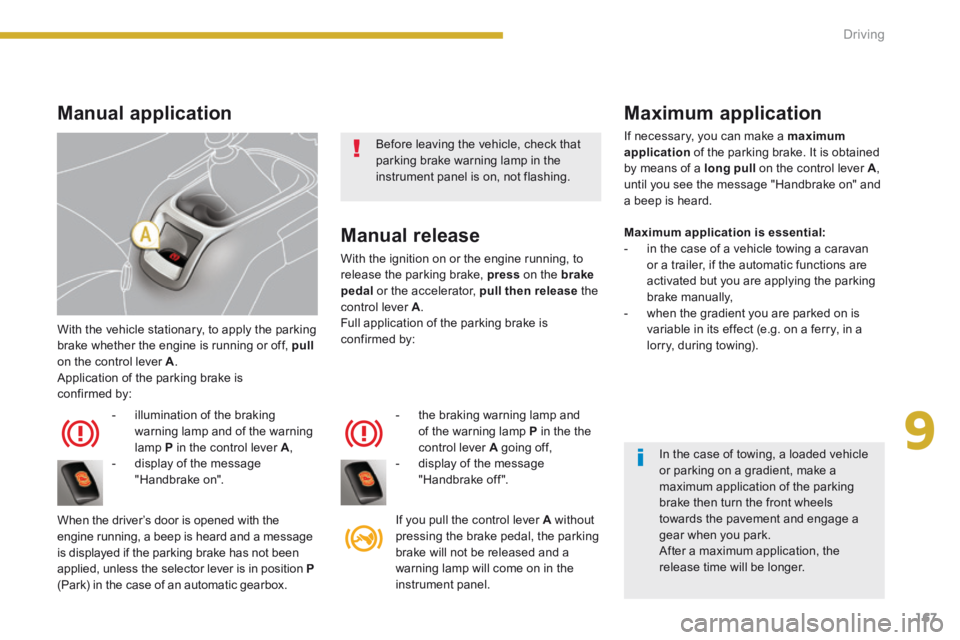
With the vehicle stationary, to apply the parking brake whether the engine is running or off, pullon the control lever A . Application of the parking brake is confirmed by:
- illumination of the braking
warning lamp and of the warning lamp P in the control lever A , - display of the message "Handbrake on".
When the driver’s door is opened with the engine running, a beep is heard and a message is displayed if the parking brake has not been applied, unless the selector lever is in position P
(Park) in the case of an automatic gearbox.
Manual release
With the ignition on or the engine running, to release the parking brake, press on the brakepedal or the accelerator, pull then release the control lever A . Full application of the parking brake is confirmed by:
- the braking warning lamp and
of the warning lamp P in the the control lever A going off, - display of the message "Handbrake off ".
If you pull the control lever A without pressing the brake pedal, the parking brake will not be released and a warning lamp will come on in the
instrument panel.
Manual application Maximum application
If necessary, you can make a maximum application of the parking brake. It is obtained by means of a long pull on the control lever A , until you see the message "Handbrake on" and a beep is heard.
Maximum application is essential: - in the case of a vehicle towing a caravan or a trailer, if the automatic functions are activated but you are applying the parking brake manually, - when the gradient you are parked on is variable in its effect (e.g. on a ferry, in a lorry, during towing).
Before leaving the vehicle, check that parking brake warning lamp in the instrument panel is on, not flashing.
In the case of towing, a loaded vehicle or parking on a gradient, make a maximum application of the parking brake then turn the front wheels towards the pavement and engage a gear when you park. After a maximum application, the release time will be longer.
Page 170 of 404

Driving
168
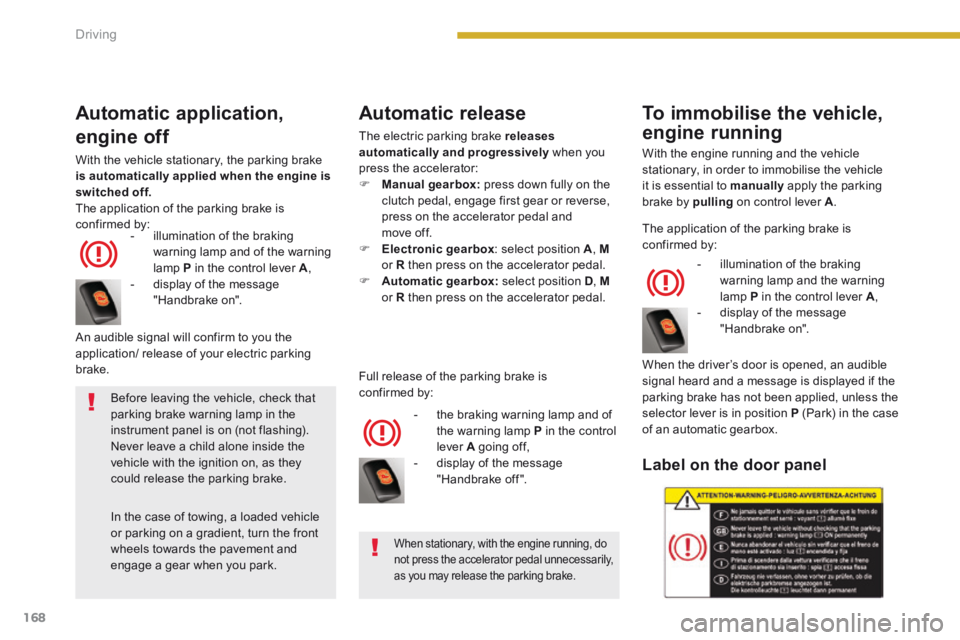
Automatic application,
engine off
With the vehicle stationary, the parking brake is automatically applied when the engine is switched off. The application of the parking brake is
confirmed by: - illumination of the braking confirmed by: - illumination of the braking confirmed by:
warning lamp and of the warning lamp P in the control lever A , - display of the message "Handbrake on".
Automatic release
The electric parking brake releases automatically and progressively when you press the accelerator: Manual gearbox: press down fully on the clutch pedal, engage first gear or reverse, press on the accelerator pedal and move off. Electronic gearbox : select position A , Mor R then press on the accelerator pedal. Automatic gearbox: select position D , Mor R then press on the accelerator pedal.
- the braking warning lamp and of the warning lamp P in the control lever A going off, - display of the message "Handbrake off ".
An audible signal will confirm to you the application/ release of your electric parking brake. Full release of the parking brake is confirmed by:
To immobilise the vehicle,
engine running
With the engine running and the vehicle stationary, in order to immobilise the vehicle it is essential to manually apply the parking brake by pulling on control lever A .
- illumination of the braking warning lamp and the warning lamp P in the control lever A , - display of the message "Handbrake on".
When the driver’s door is opened, an audible signal heard and a message is displayed if the parking brake has not been applied, unless the selector lever is in position P (Park) in the case of an automatic gearbox.
Label on the door panel
When stationary, with the engine running, do not press the accelerator pedal unnecessarily, as you may release the parking brake.
Before leaving the vehicle, check that parking brake warning lamp in the
instrument panel is on (not flashing). Never leave a child alone inside the vehicle with the ignition on, as they could release the parking brake.
In the case of towing, a loaded vehicle or parking on a gradient, turn the front wheels towards the pavement and engage a gear when you park.
The application of the parking brake is confirmed by:
Page 171 of 404

9
Driving169
Emergency braking
In the event of a failure of the main service brake or in an exceptional situation (e.g. driver taken ill, under instruction, etc) a continuous pull on the control lever on the control lever on the control leverA will stop the vehicle . The dynamic stability control (DSC) provides stability during emergency braking. If there is a fault with the emergency braking,
one of the following messages will be displayed: - "Parking brake faulty". - "Parking brake control faulty".
If a failure of the DSC system is signalled by the illumination of this warning lamp, then braking stability is not guaranteed. In this event, stability must be assured by the driver by repeating alternate "pull release" actions on control lever A .
Before leaving the vehicle, check that parking brake warning lamp in the instrument panel is on, not flashing.
The emergency braking must only be used in exceptional circumstances.
Particular situations
In certain situations (e.g. starting the engine), the parking brake can automatically alter its force. This is normal operation. To advance your vehicle a few centimetres without starting the engine, but with the ignition on, press on the brake pedal and release the parking brake by pulling then releasing control lever A . The full release of the parking brake is confirmed by the warning lamp in the control lever A and the warning
lamp in the instrument panel going off and the display of the message "Handbrake off ". If a parking brake fault occurs while applied or if the battery runs flat, an emergency release is always possible.