2013.5 Peugeot 308 CC heating
[x] Cancel search: heatingPage 10 of 268
87, 88 85 56 233
179
8
FAMILIARISATION
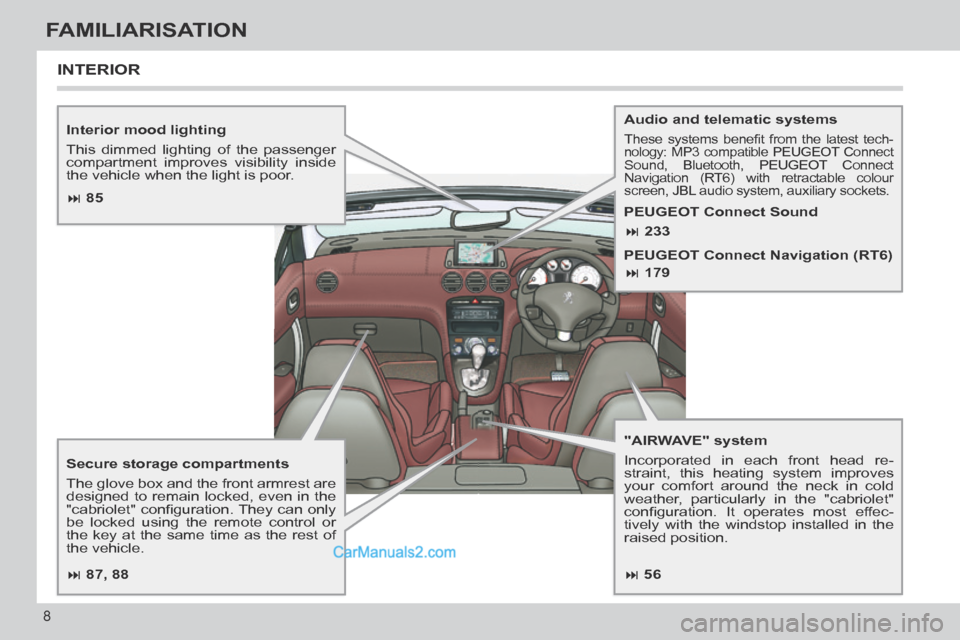
Interior mood lighting
This dimmed lighting of the passenger
compartment improves visibility inside
the vehicle when the light is poor.
"AIRWAVE" system
Incorporated in each front head re-
straint, this heating system improves
your comfort around the neck in cold
weather, particularly in the "cabriolet"
confi guration. It operates most effec-
tively with the windstop installed in the
raised position. Audio and telematic systems These systems benefi t from the latest tech-nology: MP3 compatible PEUGEOT Connect Sound, Bluetooth, PEUGEOT Connect
Navigation (RT6) with retractable colour
screen, JBL audio system, auxiliary sockets.
Secure storage compartments
The glove box and the front armrest are
designed to remain locked, even in the
"cabriolet" confi guration. They can only
be locked using the remote control or
the key at the same time as the rest of
the vehicle.
INTERIOR
PEUGEOT Connect Sound
PEUGEOT Connect Navigation (RT6)
Page 12 of 268

10
FAMILIARISATION
INSTRUMENTS AND CONTROLS
1. Steering wheel adjustment control.
2. Cruise control / speed limiter switches.
3. Lighting and direction indicator control stalk.
4. Central adjustable air vents.
5. Multifunction screen.
6. Sunshine sensor.
7. Passenger's front airbag.
8. Glove box / Audio/video sockets / Fusebox.
9. Bonnet release.
10. Retractable roof control.
Control for all four windows.
11 . Storage compartment.
12. "AIRWAVE" system controls.
13. Front armrest.
14. Front ashtray.
15. Heating / air conditioning controls.
16. Audio and telematics system.
17. Emergency call button.
Alarm button.
Central locking button.
Hazard warning lamps button.
Dynamic stability control (DSC/ASR systems) button.
Parking sensors button.
PEUGEOT services button.
Page 30 of 268
1
28
MONITORING
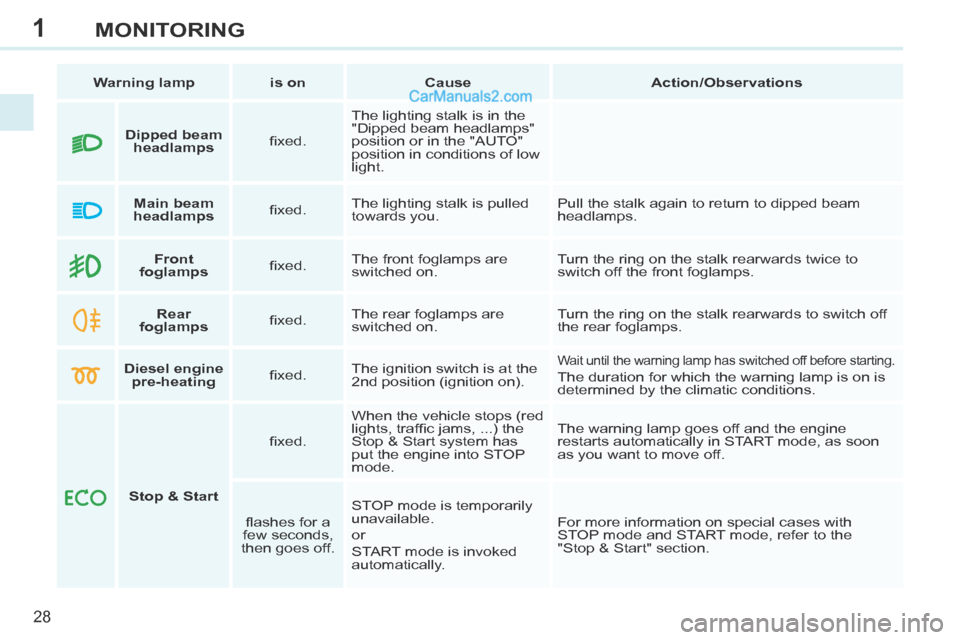
Warning lamp is on Cause Action/Observations
Front
foglamps fi xed. The front foglamps are
switched on. Turn the ring on the stalk rearwards twice to
switch off the front foglamps.
Rear
foglamps fi xed. The rear foglamps are
switched on. Turn the ring on the stalk rearwards to switch off
the rear foglamps.
Diesel engine
pre-heating fi xed. The ignition switch is at the
2nd position (ignition on).
Wait until the warning lamp has switched off before starting.
The duration for which the warning lamp is on is
determined by the climatic conditions.
Stop & Start fi xed.
When the vehicle stops (red
lights, traffi c jams, ...) the
Stop & Start system has
put the engine into STOP
mode. The warning lamp goes off and the engine
restarts automatically in START mode, as soon
as you want to move off.
fl ashes for a
few seconds,
then goes off. STOP mode is temporarily
unavailable.
or
START mode is invoked
automatically. For more information on special cases with
STOP mode and START mode, refer to the
"Stop & Start" section.
Dipped beam
headlamps fi xed. The lighting stalk is in the
"Dipped beam headlamps"
position or in the "AUTO"
position in conditions of low
light.
Main beam
headlamps fi xed. The lighting stalk is pulled
towards you. Pull the stalk again to return to dipped beam
headlamps.
Page 47 of 268
3
45
COMFORT
VENTILATION Air treatment
The incoming air follows various routes
depending on the controls selected by
the driver:
- direct arrival in the passenger com-partment (air intake),
- passage through a heating circuit (heating),
- passage through a cooling circuit (air conditioning). The temperature control enables you to
obtain the level of comfort required by
mixing the air of the various circuits.
The air distribution control enables you
to diffuse the air in the passenger com-
partment combining several air vents.
The air fl ow control enables you to in-
crease or reduce the speed of the ven-
tilation blower. Air intake
The air circulating in the passenger
compartment is fi ltered and originates
either from the outside via the grille lo-
cated at the base of the windscreen or
from the inside in air recirculation mode.
Control panel
The controls of this system are grouped
together on control panel
A on the centre
console. Depending on the model, the
functions offered are:
- the level of comfort required,
- air fl ow,
- air distribution,
- demisting-defrosting,
- manual or digital air conditioning controls.
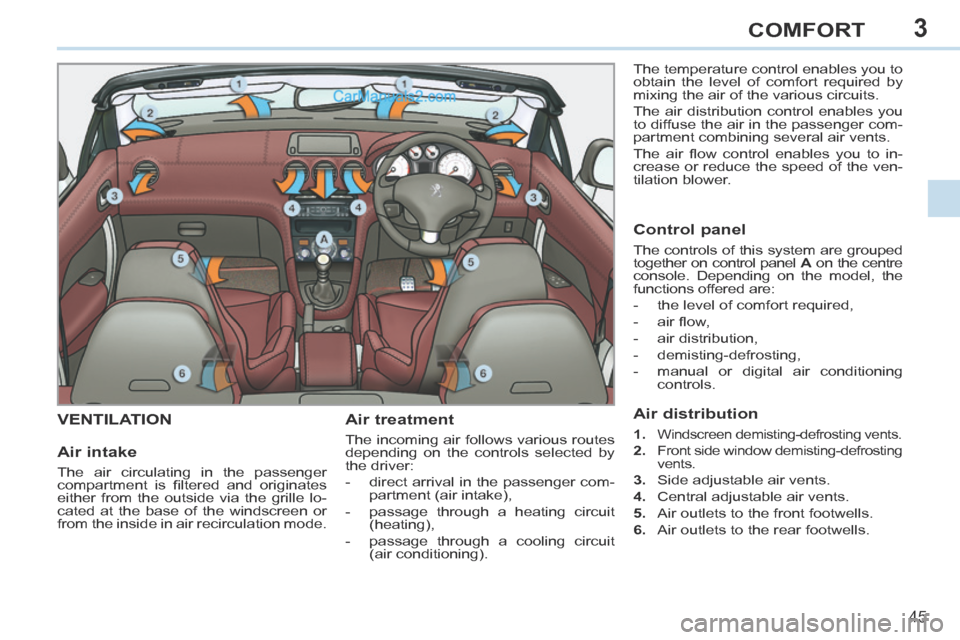
Air distribution
1. Windscreen demisting-defrosting vents.
2. Front side window demisting-defrosting
vents.
3. Side adjustable air vents.
4. Central adjustable air vents.
5. Air outlets to the front footwells.
6. Air outlets to the rear footwells.
Page 48 of 268
3
i
i
46
COMFORT
The condensation created by the
air conditioning results in a dis-
charge of water under the vehicle
which is perfectly normal.
RECOMMENDATIONS FOR VENTILATION AND AIR CONDITIONING
In order for these systems to be fully effective, follow the guidelines on opera-
tion and maintenance below:
To obtain an even air distribution, take care not to obstruct the exterio\
r air intake grilles located at the base of the windscreen, the nozzles, the v\
ents
and the air outlets, as well as the air extractor located in the boot.
Do not cover the sunshine sensor, located on the dashboard; this is used for regulation of the air conditioning system.
Operate the air conditioning system for at least 5 minutes, once or twic\
e a month to keep it in perfect working order.
Ensure that the passenger compartment fi lter is in good condition and have the fi lter elements replaced regularly (refer to the "Checks" section).
We recommend the use of a combined passenger compartment fi lter. Thanks to its second special active fi lter, it contributes to the purifi cation
of the air breathed by the occupants and the cleanness of the passenger \
compartment (reduction of allergic symptoms, bad odours and greasy de-
posits).
To ensure correct operation of the air conditioning system, you are also \
advised to have it checked regularly, as recommended in the warranty and
maintenance record.
If the system does not produce cold air, switch it off and contact a PEUGEOT dealer or a qualifi ed workshop.
In the "cabriolet" confi guration, installing the windstop and using the
"AIRWAVE" systems improves comfort.
When towing the maximum load on a steep gradient in high temperatures,
switching off the air conditioning permits the recovery of engine power and
therefore improvement of the towing capacity. If the interior temperature remains
very high after the vehicle has been
parked in the sun for a considerable
time, fi rst ventilate the passenger
compartment for a few minutes.
Place the air fl ow control at a suf-
fi cient level to provide an adequate
renewal of air in the passenger com-
partment.
The air conditioning system does not
contain chlorine and does not pres-
ent any danger to the ozone layer.
Stop & Start
The heating and air conditioning systems only work when the engine is ru\
n-
ning. To maintain a comfortable temperature in the passenger compartment,
you can temporarily deactivate the Stop & Start system (see the corresp\
ond-
ing section).
Page 49 of 268
3
i
i
47
COMFORT
The control button is located
on the heating or air condition-
ing system control panel.
REAR SCREEN DEMIST - DEFROST
Switching on
The rear screen demisting/defrosting
can only operate when the engine is
running.
Press this button to demist/defrost the rear screen and (depending on
version) the door mirrors. The indi-
cator lamp associated with the but-
ton comes on.
Switching off
The demisting/defrosting switches off
automatically to prevent an excessive
consumption of current.
It is possible to stop the demisting/de-frosting operation before it is switched
off automatically by pressing the button
again. The indicator lamp associated
with the button switches off.
If the engine is switched off before the
demisting/defrosting is switched off au-
tomatically, demisting/defrosting will re-
sume next time the engine is switched on.
Switch off the demisting/de-frosting of the rear screen and
door mirrors as soon as ap-
propriate as lower current con-
sumption results in reduced
fuel consumption.
The demist/defrost is deactivated
when the retractable roof is stored
in the boot.
Page 51 of 268
3
!
i
49
COMFORT
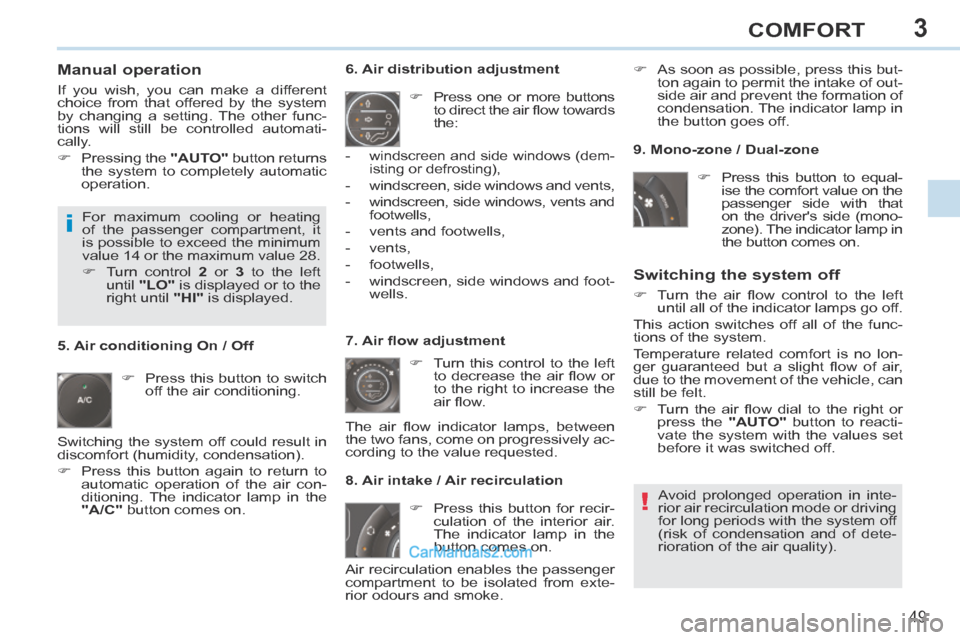
Manual operation
If you wish, you can make a different
choice from that offered by the system
by changing a setting. The other func-
tions will still be controlled automati-
cally.
Pressing the "AUTO" button returns
the system to completely automatic
operation.
Press this button to switch off the air conditioning. 6. Air distribution adjustment
Press one or more buttons to direct the air fl ow towards
the:
7. Air fl ow adjustment Turn this control to the left to decrease the air fl ow or
to the right to increase the
air fl ow.
8. Air intake / Air recirculation
Switching the system off
Turn the air fl ow control to the left until all of the indicator lamps go off.
This action switches off all of the func-
tions of the system.
Temperature related comfort is no lon-
ger guaranteed but a slight fl ow of air,
due to the movement of the vehicle, can
still be felt.
Turn the air fl ow dial to the right or press the "AUTO" button to reacti-
vate the system with the values set
before it was switched off.
Press this button for recir- culation of the interior air.
The indicator lamp in the
button comes on.
5. Air conditioning On / Off
Avoid prolonged operation in inte-
rior air recirculation mode or driving
for long periods with the system off
(risk of condensation and of dete-
rioration of the air quality).
-
windscreen and side windows (dem-
isting or defrosting),
- windscreen, side windows and vents,
- windscreen, side windows, vents and
footwells,
- vents and footwells,
- vents,
- footwells,
- windscreen, side windows and foot- wells.
The air fl ow indicator lamps, between
the two fans, come on progressively ac-
cording to the value requested. As soon as possible, press this but-
ton again to permit the intake of out-
side air and prevent the formation of
condensation. The indicator lamp in
the button goes off.
For maximum cooling or heating
of the passenger compartment, it
is possible to exceed the minimum
value 14 or the maximum value 28.
Turn control 2 or 3 to the left
until "LO" is displayed or to the
right until "HI" is displayed. 9. Mono-zone / Dual-zone
Press this button to equal-ise the comfort value on the
passenger side with that
on the driver's side (mono-
zone). The indicator lamp in
the button comes on.
Air recirculation enables the passenger
compartment to be isolated from exte-
rior odours and smoke.
Switching the system off could result in
discomfort (humidity, condensation).
Press this button again to return to
automatic operation of the air con-
ditioning. The indicator lamp in the
"A/C" button comes on.
Page 58 of 268
3
i!
i
56
COMFORT
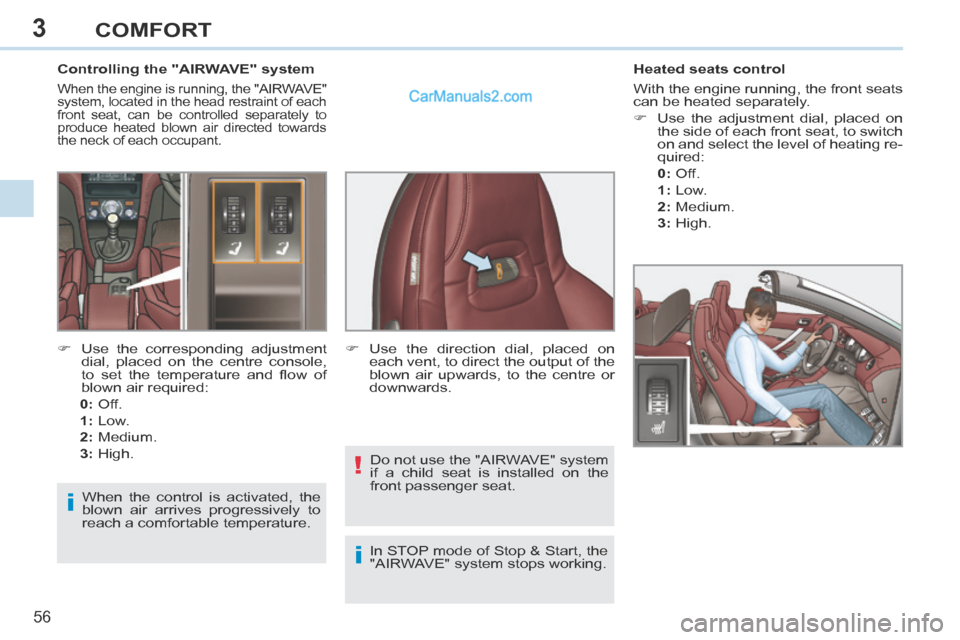
Controlling the "AIRWAVE" system
When the engine is running, the "AIRWAVE"
system, located in the head restraint of each
front seat, can be controlled separately to
produce heated blown air directed towards
the neck of each occupant.
Heated seats control
With the engine running, the front seats
can be heated separately.
Use the adjustment dial, placed on
the side of each front seat, to switch
on and select the level of heating re-
quired:
0 : Off.
1 : Low.
2 : Medium.
3 : High.
Use the corresponding adjustment dial, placed on the centre console,
to set the temperature and fl ow of
blown air required:
0: Off.
1: Low.
2: Medium.
3: High. Use the direction dial, placed on
each vent, to direct the output of the
blown air upwards, to the centre or
downwards.
When the control is activated, the
blown air arrives progressively to
reach a comfortable temperature. Do not use the "AIRWAVE" system
if a child seat is installed on the
front passenger seat.
In STOP mode of Stop & Start, the
"AIRWAVE" system stops working.