Page 70 of 90

EAU23272
Checking the front fork
The condition and operation of the
front fork must be checked as follows
at the intervals specified in the perio-
dic maintenance and lubrication
chart.
To check the condition
Check the inner tubes for scratches,
damage and excessive oil leakage.
To check the operation
1. Place the vehicle on a level surfa-
ce and hold it in an upright posi-
tion. WARNING! To avoid injury,
securely support the vehicle so
there is no danger of it falling
over.
[EWA10751]
2. While applying the front brake,
push down hard on the handle-
bars several times to check if the
front fork compresses and
rebounds smoothly.
ECA10590
If any damage is found or the front
fork does not operate smoothly,
have a Yamaha dealer check or
repair it.
EAU45511
Checking the steering
Worn or loose steering bearings may
cause danger. Therefore, the opera-
tion of the steering must be checked
as follows at the intervals specified in
the periodic maintenance and lubrica-
tion chart.
1. Place the vehicle on the centers-
tand. WARNING! To avoid
injury, securely support the
vehicle so there is no danger of
it falling over.
[EWA10751]
2. Hold the lower ends of the front
fork legs and try to move them
forward and backward. If any free
play can be felt, have a Yamaha
dealer check or repair the stee-
ring.
NOTICE
PERIODIC MAINTENANCE AND ADJUSTMENT
6-24
6
Page 71 of 90

EAU23291
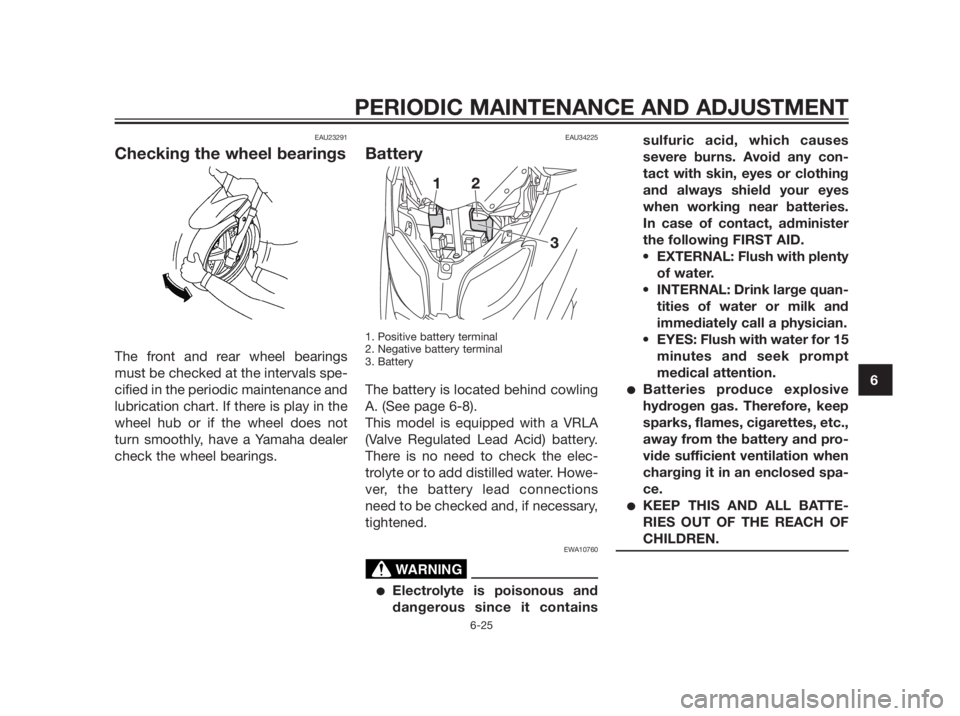
Checking the wheel bearings
The front and rear wheel bearings
must be checked at the intervals spe-
cified in the periodic maintenance and
lubrication chart. If there is play in the
wheel hub or if the wheel does not
turn smoothly, have a Yamaha dealer
check the wheel bearings.
EAU34225
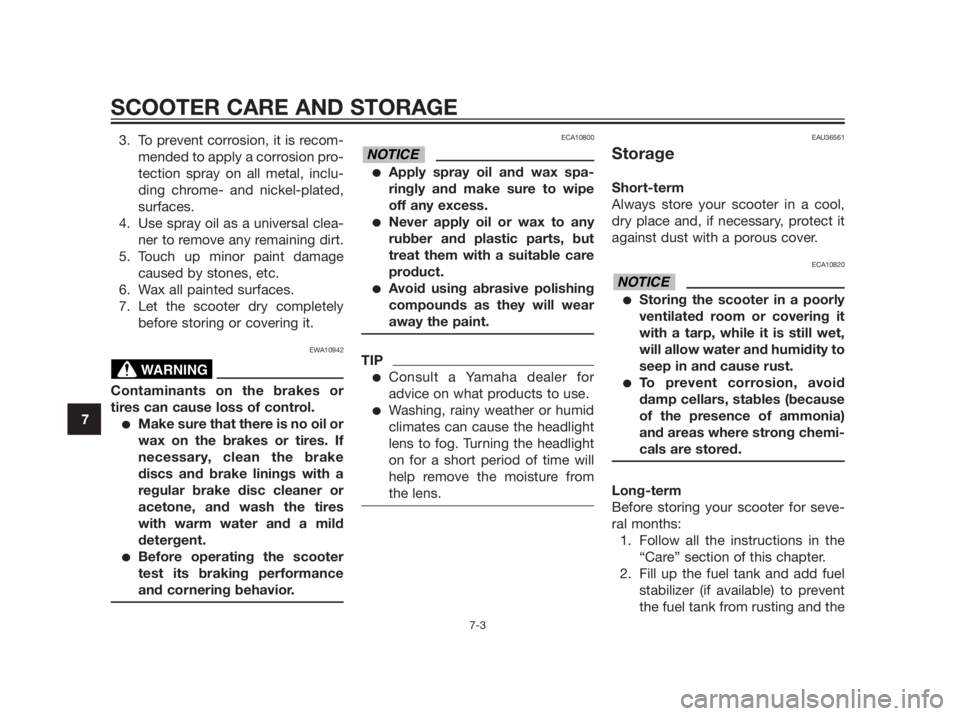
Battery
1. Positive battery terminal
2. Negative battery terminal
3. Battery
The battery is located behind cowling
A. (See page 6-8).
This model is equipped with a VRLA
(Valve Regulated Lead Acid) battery.
There is no need to check the elec-
trolyte or to add distilled water. Howe-
ver, the battery lead connections
need to be checked and, if necessary,
tightened.
EWA10760
�Electrolyte is poisonous and
dangerous since it containssulfuric acid, which causes
severe burns. Avoid any con-
tact with skin, eyes or clothing
and always shield your eyes
when working near batteries.
In case of contact, administer
the following FIRST AID.
EXTERNAL: Flush with plenty
of water.
INTERNAL: Drink large quan-
tities of water or milk and
immediately call a physician.
EYES: Flush with water for 15
minutes and seek prompt
medical attention.
�Batteries produce explosive
hydrogen gas. Therefore, keep
sparks, flames, cigarettes, etc.,
away from the battery and pro-
vide sufficient ventilation when
charging it in an enclosed spa-
ce.
�KEEP THIS AND ALL BATTE-
RIES OUT OF THE REACH OF
CHILDREN.
WARNING
PERIODIC MAINTENANCE AND ADJUSTMENT
6-25
6
Page 72 of 90

To charge the battery
Have a Yamaha dealer charge the
battery as soon as possible if it seems
to have discharged. Keep in mind that
the battery tends to discharge more
quickly if the vehicle is equipped with
optional electrical accessories.
ECA16521
To charge a VRLA (Valve Regulated
Lead Acid) battery, a special (cons-
tant-voltage) battery charger is
required. Using a conventional bat-
tery charger will damage the bat-
tery.
To store the battery
1. If the vehicle will not be used for
more than one month, remove
the battery, fully charge it, and
then place it in a cool, dry place.
NOTICE: When removing the
battery, be sure the key is tur-
ned to “OFF”, then disconnect
the negative lead before dis-
connecting the positive lead.
[ECA16302]
2. If the battery will be stored for
more than two months, check it
at least once a month and fully
charge it if necessary.
3. Fully charge the battery before
installation. NOTICE:When ins-
talling the battery, be sure the
key is turned to “OFF”, then
connect the positive lead befo-
re connecting the negative
lead.
[ECA16840]
4. After installation, make sure that
the battery leads are properly
connected to the battery termi-
nals.
ECA16530
Always keep the battery charged.
Storing a discharged battery can
cause permanent battery damage.
EAUS1880
Replacing the fuses
The fuse box, which contains the
fuses for the individual circuits, is
located behind cowling A. (See page
6-8).
TIP
The main fuse, which is in a different
and hard-to-reach location, must be
replaced by a Yamaha dealer.
If a fuse for the individual circuits is
blown, replace it as follows.
1. Turn the key to “OFF” and turn off
the electrical circuit in question.
2. Remove the blown fuse, and then
install a new fuse of the specified
amperage. WARNING! Do not
use a fuse of a higher ampera-
ge rating than recommended
to avoid causing extensive
damage to the electrical sys-
tem and possibly a fire.
[EWA15131]
NOTICE
NOTICE
PERIODIC MAINTENANCE AND ADJUSTMENT
6-26
6
Page 77 of 90
EWA15141
When checking the fuel system, do
not smoke, and make sure there
are no open flames or sparks in the
area, including pilot lights from
water heaters or furnaces. Gasoli-
ne or gasoline vapors can ignite or
explode, causing severe injury or
property damage.
WARNING
PERIODIC MAINTENANCE AND ADJUSTMENT
6-31
6
Page 79 of 90

Engine overheatingEWAT1040
�Do not remove the radiator cap when the engine and radiator are hot. Scalding hot fluid and steam may be
blown out under pressure, which could cause serious injury. Be sure to wait until the engine has cooled.
�Place a thick rag, like a towel, over the radiator cap, and then slowly rotate the cap counterclockwise to the
detent to allow any residual pressure to escape. When the hissing sound has stopped, press down on the
cap while turning it counterclockwise, and then remove the cap.
TIP
If coolant is not available, tap water can be temporarily used instead, provided that it is changed to the recommended
coolant as soon as possible.
Wait until the
engine has cooled.Check the coolant level in the
reservoir and radiator.
The coolant level
is OK.
The coolant level is low.
Check the cooling system
for leakage.
Have a Yamaha dealer checkand repair the cooling system.
Add coolant. (See TIP.)
Start the engine. If the engine overheats again, have a
Yamaha dealer check and repair the cooling system.
There is
leakage.
There is
no leakage.
WARNING
PERIODIC MAINTENANCE AND ADJUSTMENT
6-33
6
Page 82 of 90

3. To prevent corrosion, it is recom-
mended to apply a corrosion pro-
tection spray on all metal, inclu-
ding chrome- and nickel-plated,
surfaces.
4. Use spray oil as a universal clea-
ner to remove any remaining dirt.
5. Touch up minor paint damage
caused by stones, etc.
6. Wax all painted surfaces.
7. Let the scooter dry completely
before storing or covering it.
EWA10942
Contaminants on the brakes or
tires can cause loss of control.
�Make sure that there is no oil or
wax on the brakes or tires. If
necessary, clean the brake
discs and brake linings with a
regular brake disc cleaner or
acetone, and wash the tires
with warm water and a mild
detergent.
�Before operating the scooter
test its braking performance
and cornering behavior.
ECA10800
�Apply spray oil and wax spa-
ringly and make sure to wipe
off any excess.
�Never apply oil or wax to any
rubber and plastic parts, but
treat them with a suitable care
product.
�Avoid using abrasive polishing
compounds as they will wear
away the paint.
TIP
�Consult a Yamaha dealer for
advice on what products to use.
�Washing, rainy weather or humid
climates can cause the headlight
lens to fog. Turning the headlight
on for a short period of time will
help remove the moisture from
the lens.
EAU36561
Storage
Short-term
Always store your scooter in a cool,
dry place and, if necessary, protect it
against dust with a porous cover.
ECA10820
�Storing the scooter in a poorly
ventilated room or covering it
with a tarp, while it is still wet,
will allow water and humidity to
seep in and cause rust.
�To prevent corrosion, avoid
damp cellars, stables (because
of the presence of ammonia)
and areas where strong chemi-
cals are stored.
Long-term
Before storing your scooter for seve-
ral months:
1. Follow all the instructions in the
“Care” section of this chapter.
2. Fill up the fuel tank and add fuel
stabilizer (if available) to prevent
the fuel tank from rusting and the
NOTICE
NOTICE
WARNING
SCOOTER CARE AND STORAGE
7-3
7
Page 83 of 90

fuel from deteriorating.
3. Perform the following steps to
protect the cylinder, piston rings,
etc. from corrosion.
a Remove the spark plug cap
and spark plug.
b Pour a teaspoonful of engine
oil into the spark plug bore.
c Install the spark plug cap
onto the spark plug, and then
place the spark plug on the
cylinder head so that the
electrodes are grounded.
(This will limit sparking during
the next step.)
d Turn the engine over several
times with the starter. (This
will coat the cylinder wall with
oil.)
e Remove the spark plug cap
from the spark plug, and then
install the spark plug and the
spark plug cap. WARNING!
To prevent damage or injury
from sparking, make sure
to ground the spark plug
electrodes while turning the
engine over.
[EWA10951]
4. Lubricate all control cables and
the pivoting points of all levers
and pedals as well as of the
sidestand/centerstand.
5. Check and, if necessary, correct
the tire air pressure, and then lift
the scooter so that both of its
wheels are off the ground. Alter-
natively, turn the wheels a little
every month in order to prevent
the tires from becoming degra-
ded in one spot.
6. Cover the muffler outlet with a
plastic bag to prevent moisture
from entering it.
7. Remove the battery and fully
charge it. Store it in a cool, dry
place and charge it once a
month. Do not store the battery in
an excessively cold or warm pla-
ce [less than 0 °C (30 °F) or more
than 30 °C (90 °F)]. For more
information on storing the bat-
tery, see page 6-25.
TIP
Make any necessary repairs before
storing the scooter.
SCOOTER CARE AND STORAGE
7-4
7
Page 86 of 90
Voltage, capacity:
12 V, 8.0 Ah
Headlight:Bulb type:
Halogen bulb
Bulb voltage, wattage x quantity:Low beam headlight:
12 V, 55.0 W x 1
High beam headlight:
12 V, 55.0 W x 1
Tail/brake light:
12 V, 5.0 W/21.0 W x 2
Front turn signal light:
12 V, 10.0 W x 2
Rear turn signal light:
12 V, 10.0 W x 2
Auxiliary light:
12 V, 5.0 W x 2
License plate light:
12 V, 5.0 W x 1
Meter lighting:
12 V, 2.0 W x 3
High beam indicator light:
12 V, 1.4 W x 1
Turn signal indicator light:
12 V, 1.4 W x 2
Engine trouble warning light:
12 V, 1.4 W x 1
ABS warning light (for ABS models):
12 V, 1.4 W x 1
Immobilizer system indicator light:
LED
Fuses:Main fuse:
30.0 A
Headlight fuse:
15.0 A
Signaling system fuse:
10.0 A
Ignition fuse:
10.0 A
Radiator fan fuse:
7.5 A
Hazard fuse:
10.0 A
ECU fuse:
5.0 A
ABS control unit fuse (for ABS models):
5.0 A
ABS motor fuse (for ABS models):
30.0 A
ABS solenoid fuse (for ABS models):
20.0 A
Backup fuse:
5.0 A
SPECIFICATIONS
8-3
8