Page 21 of 86

INSTRUMENT AND CONTROL FUNCTIONS
3-5
3
EAUM1471
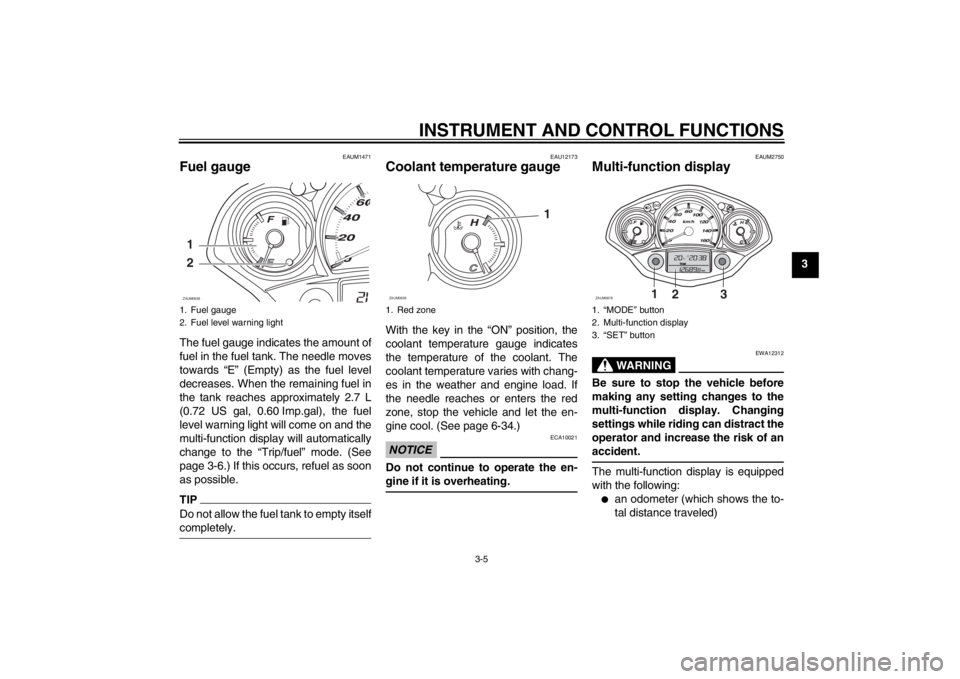
Fuel gauge The fuel gauge indicates the amount of
fuel in the fuel tank. The needle moves
towards “E” (Empty) as the fuel level
decreases. When the remaining fuel in
the tank reaches approximately 2.7 L
(0.72 US gal, 0.60 Imp.gal), the fuel
level warning light will come on and the
multi-function display will automatically
change to the “Trip/fuel” mode. (See
page 3-6.) If this occurs, refuel as soon
as possible.TIPDo not allow the fuel tank to empty itself
completely.
EAU12173
Coolant temperature gauge With the key in the “ON” position, the
coolant temperature gauge indicates
the temperature of the coolant. The
coolant temperature varies with chang-
es in the weather and engine load. If
the needle reaches or enters the red
zone, stop the vehicle and let the en-
gine cool. (See page 6-34.)NOTICE
ECA10021
Do not continue to operate the en-
gine if it is overheating.
EAUM2750
Multi-function display
WARNING
EWA12312
Be sure to stop the vehicle before
making any setting changes to the
multi-function display. Changing
settings while riding can distract the
operator and increase the risk of an
accident.The multi-function display is equipped
with the following:●
an odometer (which shows the to-
tal distance traveled)
1. Fuel gauge
2. Fuel level warning light1
2ZAUM0638
1. Red zone
1
ZAUM0639
1. “MODE” button
2. Multi-function display
3. “SET” button
1
2
3
ZAUM0878
U16PE3E0.book Page 5 Tuesday, June 19, 2012 5:17 PM
Page 25 of 86

INSTRUMENT AND CONTROL FUNCTIONS
3-9
3
EAUS1020
Dimmer switch “ / ”
Set this switch to “ ” for the high
beam and to “ ” for the low beam.
With the headlight on low beam, press
this switch downwards to flash the
headlight.
EAU12460
Turn signal switch “ / ”
To signal a right-hand turn, push this
switch to “ ”. To signal a left-hand
turn, push this switch to “ ”. When re-
leased, the switch returns to the center
position. To cancel the turn signal
lights, push the switch in after it has re-
turned to the center position.
EAU12500
Horn switch “ ”
Press this switch to sound the horn.
EAU12721
Start switch “ ”
With the sidestand up, push this switch
while applying the front or rear brake to
crank the engine with the starter. See
page 5-1 for starting instructions prior
to starting the engine.
EAU12901
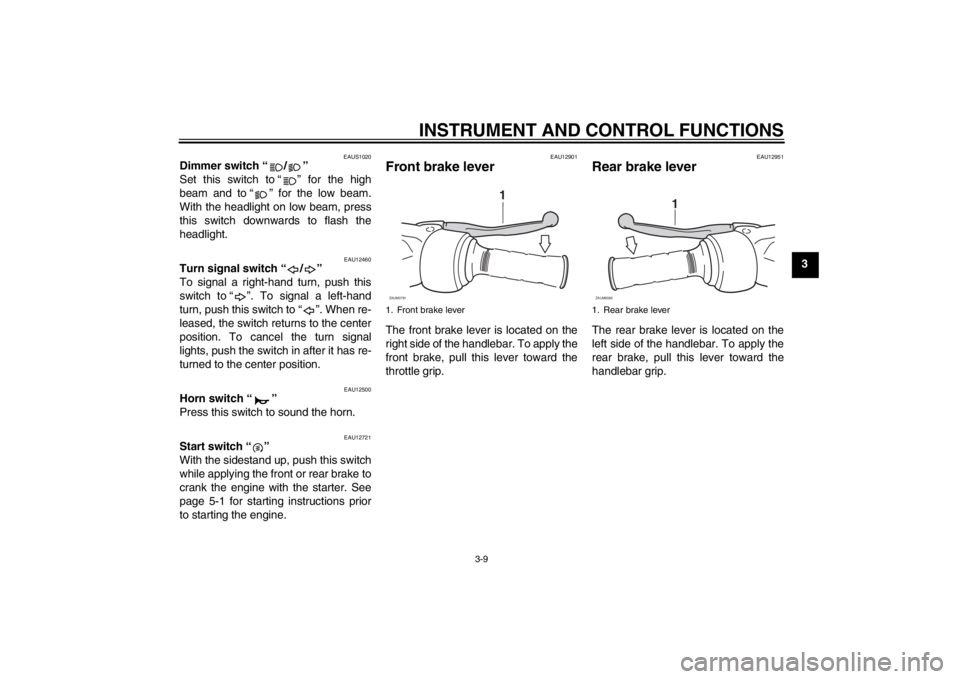
Front brake lever The front brake lever is located on the
right side of the handlebar. To apply the
front brake, pull this lever toward the
throttle grip.
EAU12951
Rear brake lever The rear brake lever is located on the
left side of the handlebar. To apply the
rear brake, pull this lever toward the
handlebar grip.
1. Front brake lever
1
ZAUM0791
1. Rear brake lever
1
ZAUM0085
U16PE3E0.book Page 9 Tuesday, June 19, 2012 5:17 PM
Page 75 of 86

PERIODIC MAINTENANCE AND ADJUSTMENT
6-34
6 Engine overheating
WARNING
EWA10400
●
Do not remove the radiator cap when the engine and radiator are hot. Scalding hot fluid and steam may be
blown out under pressure, which could cause serious injury. Be sure to wait until the engine has cooled.
●
After removing the radiator cap retaining bolt, place a thick rag, like a towel, over the radiator cap, and then
slowly rotate the cap counterclockwise to the detent to allow any residual pressure to escape. When the hissing
sound has stopped, press down on the cap while turning it counterclockwise, and then remove the cap.
TIPIf coolant is not available, tap water can be temporarily used instead, provided that it is changed to the recommended coolant
as soon as possible.
Wait until the
engine has cooled.
Check the coolant level in the
reservoir and radiator.
The coolant level
is OK.The coolant level is low.
Check the cooling system
for leakage.
Have a Yamaha dealer checkand repair the cooling system.Add coolant. (See TIP.)
Start the engine. If the engine overheats again,
have a
Yamaha dealer check
and repair the cooling system.
There is
leakage.
There is
no leakage.
U16PE3E0.book Page 34 Tuesday, June 19, 2012 5:17 PM