2012 VOLKSWAGEN TRANSPORTER tank flap
[x] Cancel search: tank flapPage 5 of 486

Overview of the vehicle
Exterior views
Side view
Fig. 1 Overview of the left vehicle side. The items G).@,@.® and® are also at the same position on the right side of the vehicle (depending on the equipment).
Key to Fig. 1:
G) Exterior mirrors ................................................................ .
-Integrated aerial Radio, provision for mobile telephone, infotainment system, navigation system
-Lane change assist system display (Side Assist) ................................ .
@ Tank flap . . . . . . . . . . . . . . . . . . . .................................... .
@ Door release lever ................................................... .
@ Side sliding door rail ............. .
® Jacking points ..
® Additional turn signal light .. _ .
Exterior views
121
312
340, 346
45,46
46
420
106
Page 193 of 486
@ Kitchen unit with:
-Gas cooker ................................... . 233
242
242
-230-volt grounded safety socket ................. .
-12-volt socket .............................•..................................
-Cupboard with two sliding doors
-Drawer
-Waste water tank with drain lever and opening for cleaning ...... . 237
-First aid kit on the rear panel of the left stowage compartment in the cupboard
@ Refrigerator box ...
@ Wardrobe with:
241
-Cleaning opening for fresh water tank . . . . . . . . . . . . . . . . . . . . . . . . . . . . . . . . . . . . . . . 237
-Second additional battery . . . . . ........ , . . . . . . . . . . . . . . . . . . . . . . . . . . 248
-Lockable stowage compartment . . . . . . . . . . . . . . . . . . . . . . . . . . . . . . . . . . . . . . . . . . . . . . . . 214
@ Stowage area with:
-Residual current circuit breaker ............... , ...... . 247
233
229
-Gas bottle holder .................. .
® Tailgate with room for stowing two camping chairs
Number of seats
The vehicle has a total of 4 seats: 2 at the front and 2 at the rear. Each seat is equipped with a seat belt.
Retrofitting seats
Additional seats can be retrofitted, provided that the maximum number of seats quoted by the man-ufacturer is not exceeded. For this purpose, seat anchor points should be fitted to the vehicle floor by a specialist workshop in accordance with Volks-wagen AG guidelines.
These additional seats must also have seat belt anchor points and suitable seat belts.
The Volkswagen Commercial Vehicles dealership can provide you with more information on retrofit-ting seats.
Furniture Catches
The flaps and doors are fitted with furniture catch-es to prevent them from opening when the vehicle is in motion.
Seat functions, rear, California
ClJ Introduction
This chapter contains information on the following subjects:
Bench seat/bed . . . . . . . . . . . . . . . . . . . . • • . . . 195
Bed (bench seat/bed) . . . . . . . . . . . 196 Mattress, bench seat/bed . . . . . . . . . . . . . . . . . 197
Components of the mattress, 3-seat bench . . 198
To open the doors in the kitchen unit, press and hold the catch. Slide the door open.
Equipment accessible only from the outside of the vehicle
• Opening for filling the fresh water tank on the rear left side of the vehicle (with lockable lid and separate key)
• 230-volt electrical feed on the rear left side of the vehicle (with flap cover)
• Fresh water tank drain opening under the vehi-cle.
• Waste water tank drain opening under the vehi-cle.
• Awning rails on the left and right side of the top of the vehicle on the roof frame.
• Awning adapter on left (if vehicle is fitted with an awning) and on right in the awning rail.
• Awning: attach to aluminium rail on right side over sliding door only.
Mattress for a medium-length bed, 3-seat bench . . . . . . . . . . . . . . . . . . . . . . . . . . . . 199 Mattress for a long bed, 3-seat bench . . . . . . . 201 Stowing the mattress, 3-seat bench . . . . . . . . 203 .,..
Equipment, California 1193
Page 342 of 486
A WARNING_tContlnued)
• The power steering, all driver assist sys-tems and brake assist systems will not func-tion if the engine "sputters" or stops com-pletely due to a lack of fuel or Irregular fuel supply.
• Always fill the tank when it is stlll1/4 full. This reduces the risk of running out of fuel and breaking down.
Filling the tank with petrol or diesel
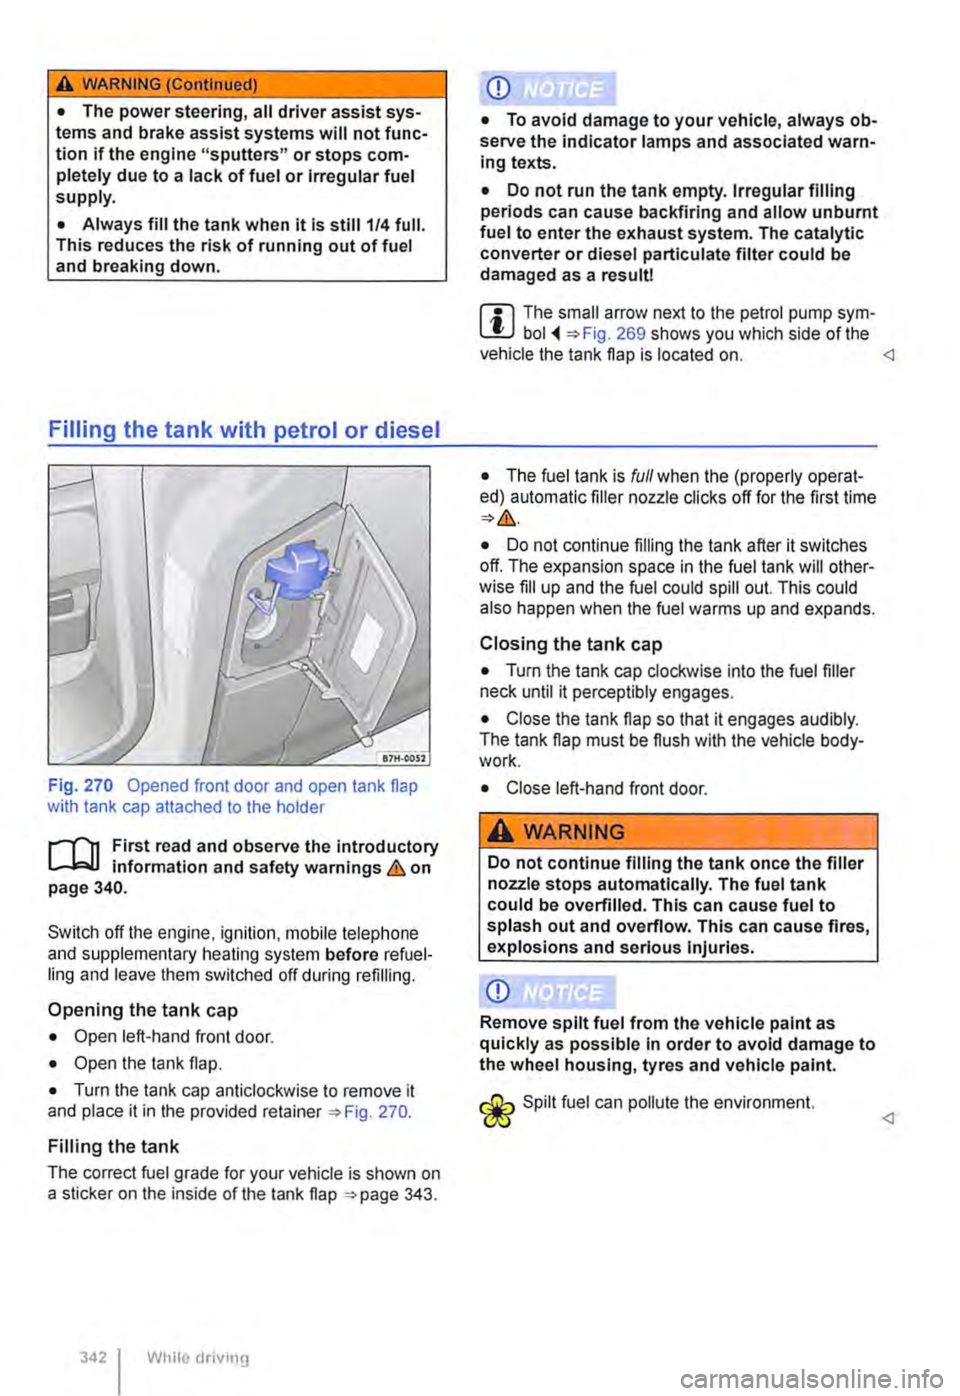
Fig. 270 Opened front door and open tank flap with tank cap attached to the holder
r--f"'n First read and observe the introductory L-.1=.1.1 information and safety warnings & on page 340.
Switch off the engine, ignilion. mobile lelephone and supplementary heating system before refuel-ling and leave them switched off during refilling.
Opening the tank cap
• Open left-hand front door.
• Open the lank flap.
• Turn the tank cap anticlockwise to remove it and place it in the provided retainer 270.
Filling the tank
The correct fuel grade for your vehicle is shown on a sticker on the inside of the tank flap 343.
While driv111g
Q)
• To avoid damage to your vehicle, always ob-serve the indicator lamps and associated warn-ing texts.
• Do not run the tank empty. Irregular filling periods can cause backfiring and allow unburnt fuel to enter the exhaust system. The catalytic converter or diesel partlculate filter could be damaged as a result!
m The small arrow next to the petrol pump sym-L!J bol 269 shows you which side of the vehicle the tank flap is located on.
• The fuel tank is full when the (properly operat-ed) automatic filler nozzle clicks off for the first time
• Do not continue filling the tank after it switches off. The expansion space in the fuel tank will other-wise fill up and the fuel could spill out. This could also happen when the fuel warms up and expands.
Closing the tank cap
• Turn the tank cap clockwise into the fuel filler neck until it perceptibly engages.
• Close the tank flap so that it engages audibly. The tank flap must be flush with the vehicle body-work.
• Close left-hand front door.
A WARNING
Do not continue filling the tank once the filler nozzle stops automatically. The fuel tank could be overfilled. This can cause fuel to splash out and overflow. This can cause fires, explosions and serious Injuries.
Q)
Remove spilt fuel from the vehicle paint as quickly as possible in order to avoid damage to the wheel housing, tyres and vehicle paint.
Spilt fuel can pollute lhe environment.
Page 343 of 486

Capacities
r--('n First read and observe the introductory L-W.I information and safety warnings & on page 340.
Checks when filling the tank
r--r'n First read and observe the introductory L-W.I information and safety warnings & on page 340.
Checklist
Never carry out any work on the engine or in the engine compartment if you are not familiar with the necessary procedures and the general safety re-quirements or if the correct operating equipment, fluids and unsuitable tools are not available 350, Preparation for working in the engine compartment! The work should be carried out by a qualified workshop if you are uncertain. Please en-sure that the following are checked regular1y, pref-erably every time you fill the tank:
..( Windscreen washer fluid level 116
..( Engine oil level 353
Fuel
c:QJ Introduction
This chapter contains information on the following subjects:
Petrol
Diesel ...
344 345
Different engines require different fuels. The facto-ry-fitted sticker on the inside of the tank flap indi-cates the fuel type that is required for your particu-lar vehicle.
Volkswagen Commercial Vehicles recommends us-ing fuels with a low sulphur content or which are sulphur-free in order to reduce fuel consumption and prevent damage to the engine.
If the engine is not running smoothly or begins to judder, this can indicate poor or inadequate fuel quality, e.g. water in the fuel. If these symptoms appear, reduce the vehicle speed immediately and drive to the nearest qualified workshop at medium engine speeds, avoiding high engine loading. If these symptoms occur immediately after the vehi-
Fuel tank capacity
Approx. 80.0 I,
..( Engine coolant level 358
..( Brake fluid level 269
..( Tyre pressure 367
..( Vehicle lighting necessary for traffic safety:
-Turn signals
-Side lights, dipped beam headlights and main beam headlights
-Tail light cluster
-Brake lights
-Rear fog light 1 08
Information on changing bulbs 432.
cle has been refuelled, switch the engine off as soon as it is safe to do so and seek expert assis-tance. This can help to prevent further damage.
Additional information and warnings:
• Filling the tank 340
• Engine management system and exhaust puri-fication system 407
• Service schedule
A WARNING
Incorrect handling of fuel can cause explo-sions, fire, serious burns and other injuries.
• Fuel is highly explosive and inflammable.
• Never handle fuel near open flames, sparks or glowing matter (e.g. cigarettes).
• Keep naked flames, hot parts and sparks at a safe distance.
At the filling station 1343
Page 348 of 486
![VOLKSWAGEN TRANSPORTER 2012 Owners Manual Refilling AdBiue®
Fig. 271 Behind the tank flap: filler cap of the Ad Blue tank unscrewed [A CD and attached in holder [[ ®. Fill the Ad Blue tank using a filler bottle [B@ or a filler nozzle C] @.](/manual-img/18/55785/w960_55785-347.png "VOLKSWAGEN TRANSPORTER 2012 Owners Manual Refilling AdBiue®
Fig. 271 Behind the tank flap: filler cap of the Ad Blue tank unscrewed [A CD and attached in holder [[ ®. Fill the Ad Blue tank using a filler bottle [B@ or a filler nozzle C] @.")
Refilling AdBiue®
Fig. 271 Behind the tank flap: filler cap of the Ad Blue tank unscrewed [A CD and attached in holder [[ ®. Fill the Ad Blue tank using a filler bottle [B@ or a filler nozzle C] @.
,....-.('n First read and observe the Introductory 1.-J=,U Information and safety warnings & on page 346.
To refill with Ad Blue®, park the vehicle on a level surface and not on any kind of incline. The tank level gauge may not detect the refill quantity cor-rectly if the vehicle is not parked on a level surface.
Do not fill fuel and AdBiue® at the same lime.
If a message about the Ad Blue® level appears on the instrument cluster display, refill with at least 7 litres of Ad Blue®. A smaller amount of refill is insufficient. if no message about the AdBiue® level appears on the instrument cluster display, use any quantity to refill the tank to the maximum level.
Opening the tank filler neck
• Opening the tank flap.
• Unscrew the cap of the tank filler neck =>Fig. 271 anticlockwise.
• Fit the cap of the filler neck into the holder]) @.
Use only Ad Blue® that complies with the stand-ard ISO 22241-1.
Refilling using a refill bottle
• Please read the manufacturer's notes and infor-mation on the refill bottle.
• Observe the expiry date.
• Remove the screw top of the refill bottle.
• Place the neck of the refill bottle =>Fig. 271 [ID @ vertically onto the tank filler neck and turn it clockwise hand-tight.
• Push the refill bottle towards the filler neck, press and hold down.
348 While driving
• Wait until the contents of the refill bottle have entered the Ad Blue® tank. Do not crumple up or damage the refill bottle!
• Unscrew the refill bottle anticlockwise and lift it carefully up and out =>CD.
• When the Ad Blue® tank is full, Ad Blue® will no longer flow out of the bottle and into the tank.
Refilling using a filler bottle
• Please read the manufacturer's notes and infor-mation on the container.
• Observe the expiry date.
• Use the integrated spout.
• Refill at least 7 litres of AdBiue®. A smaller amount of refill is insufficient.
• Do overfill the tank. The Ad Blue® tank is com-pletely filled when Ad Blue® reaches the top level of tank filler neck.
Refilling using a filler nozzle
• The procedure for refilling with an Ad Blue® filler nozzle =>Fig. 271 @]@) is the same as for refilling the fuel tank with fuel =>CD.
• The Ad Blue® tank is full as soon as the (proper-ly operated) filler nozzle clicks off for the first time =>CD.
Closing the tank filler neck
• Screw the cap onto the tank filler neck =>Fig. 271 clockwise until it clicks into place.
• Close the tank flap.
Page 405 of 486

A WARNING
Handling the vehicle Incorrectly will Increase the risk of accident and Injuries.
• Comply with legal regulations.
• Observe the owner's manual.
Information stickers and plates
r--('n First read and observe the introductory L-1=.1.1 information and safety warnings & on page 404.
Safety certificates, stickers and plates showing im-portant vehicle operation information are factory-fit-ted in the engine compartment and on certain parts such as the tank flap, front passenger sun visor, the driver door pillar or in the luggage compart-ment floor.
• Never remove or damage the safety certifi-cates, stickers and plates. They must remain legi-ble at all times.
• If vehicle parts bearing safety certificates, stick-ers or plates are removed from the vehicle, re-placement safety certificates, stickers or plates with the same information must be applied properly to the new parts by the qualified workshop.
CD
Handling the vehicle incorrectly could lead to the vehicle becoming damaged.
• Comply with legal regulations.
• Carry out service jobs in accordance with the service schedule.
• Observe the owner's manual.
Safety certificate
A safety certificate on the door pillar of the driver door provides the information that all necessary safety standards and specifications of the transport safety authorities of the individual country have been met at the time of production. The month and year of production and the chassis number may al-so be listed.
High voltage warning sticker
There is a sticker near the bonnet lock showing a warning about the high voltage in the vehicle's electrical system. The vehicle's ignition system ful-fils the requirements of standards that include
r--('n First read and observe the lntrod uctory L-Jo-ll Information and safety warnings & on page 404.
The vehicle has been manufactured specifically for a particular country and complies with the registra-tion regulations that applied in that country at the time of vehicle production.
If you want to use the vehicle abroad for a short period, all relevant information and Instructions should be followed 34, Driving abroad.
If the vehicle is going to be sold in another country or used in another country for an extended period, the legal requirements applicable in that country must be observed.
In some cases, certain equipment will have to be fitted or removed and functions deactivated. The service scope and service types could also be af-
fected. This is particularly important if the vehicle is driven in another climate region for a long period of time.
Because different frequency bands are used in dif-ferent countries, the factory-fitted radio or naviga-tion system may not work in other countries.
Rail transport
Due to differing tunnel heights and loading stand-ards in some countries, there may be restrictions on transporting your vehicle by rail or special measures may be required. Volkswagen Commer-cial Vehicles Service will provide information on
Vehicle care and maintenance 405
Page 450 of 486

Technical data
Technical data
Vehicle data
COJ Introduction
This chapter contains information on the following subjects:
Vehicle identification data . . . . . . . . . . . . . . . . . 451
Dimensions ........................... . 452
Unless otherwise specified, the technical data of the basic model apply. The values quoted here may differ if additional equipment is fitted, for differ-ent models, for special vehicles or if country-specif-ic equipment is fitted. All data in the official vehicle documents take precedence over these data.
Engine
The vehicle data sticker and the official vehicle documents show which engine is installed in your vehicle.
Weight
The values for the kerb weight in the following ta-bles apply for the road-ready vehicle with driver (75 kg), service fluids including fuel tank carrying 90% of its capacity and, if applicable, toolkit and spare tyre =>&.Additional equipment and retrofit-ted accessories increase the stated kerb weight and reduce the maximum permitted load accord-ingly.
The load comprises the weights of the following:
• Passengers
• Allluggage
• Roof load including the mounts or roof bars and the load carrier system
• Drawbar load when towing a trailer
Performance figures
The performance figures were measured without equipment which may influence performance, such as a roof carrier or mud flaps.
Gross combination weight rating
The gross combination weight ratings listed are on-ly applicable for altitudes up to 1 ,000 m above sea level. The maximum weight of the car and trailer must be reduced by approximately 10% for every further 1 ,000 m in altitude.
450 I Tcchn1cal data
Descriptions of the tables
Gearbox abbreviations: MG = manual gearbox, DSG® = dual clutch gearbox DSG®.
Additional information and warnings:
• Transporting =:o page 125
• Driving with respect for the environment =:.page 278
• Fuel =:.page 343
• Engine oil =:o page 353
• Engine coolant =:o page 358
• Wheels and tyres =>page 367
• Consumer information =>page 404
,A WARNING
Exceeding the maximum permissible weights, payload, dimensions, vehicle speed and axle weight rating could cause damage to the vehicle, accidents and serious Injuries.
• Do not exceed the permitted weights, loads, dimensions and maximum speeds.
• The actual axle loads must never exceed the maximum permissible axle loads.
• The payload and the distribution of the load In the vehicle have an effect on the driv-ing response and braking distance of the ve-hicle. Adjust your speed accordingly.
,A WARNING
Accidents and severe injuries can occur if the maximum permitted gross combination weight Is exceeded.
• Never exceed the specified gross combi-nation weight rating.