2012 VOLKSWAGEN TRANSPORTER rims
[x] Cancel search: rimsPage 152 of 486
Cooling the stowage compartment
There is a vent in the rear panel 117 Q). If the air conditioning is switched on, cooled air can be directed into the compartment. Turn the vents to open and close them.
A WARNING
If the stowage compartment on the front pas-senger side is left open, this can Increase the risk of serious injury In the event of an acci-dent or during sudden braking or driving ma-noeuvres.
Other stowage compartments
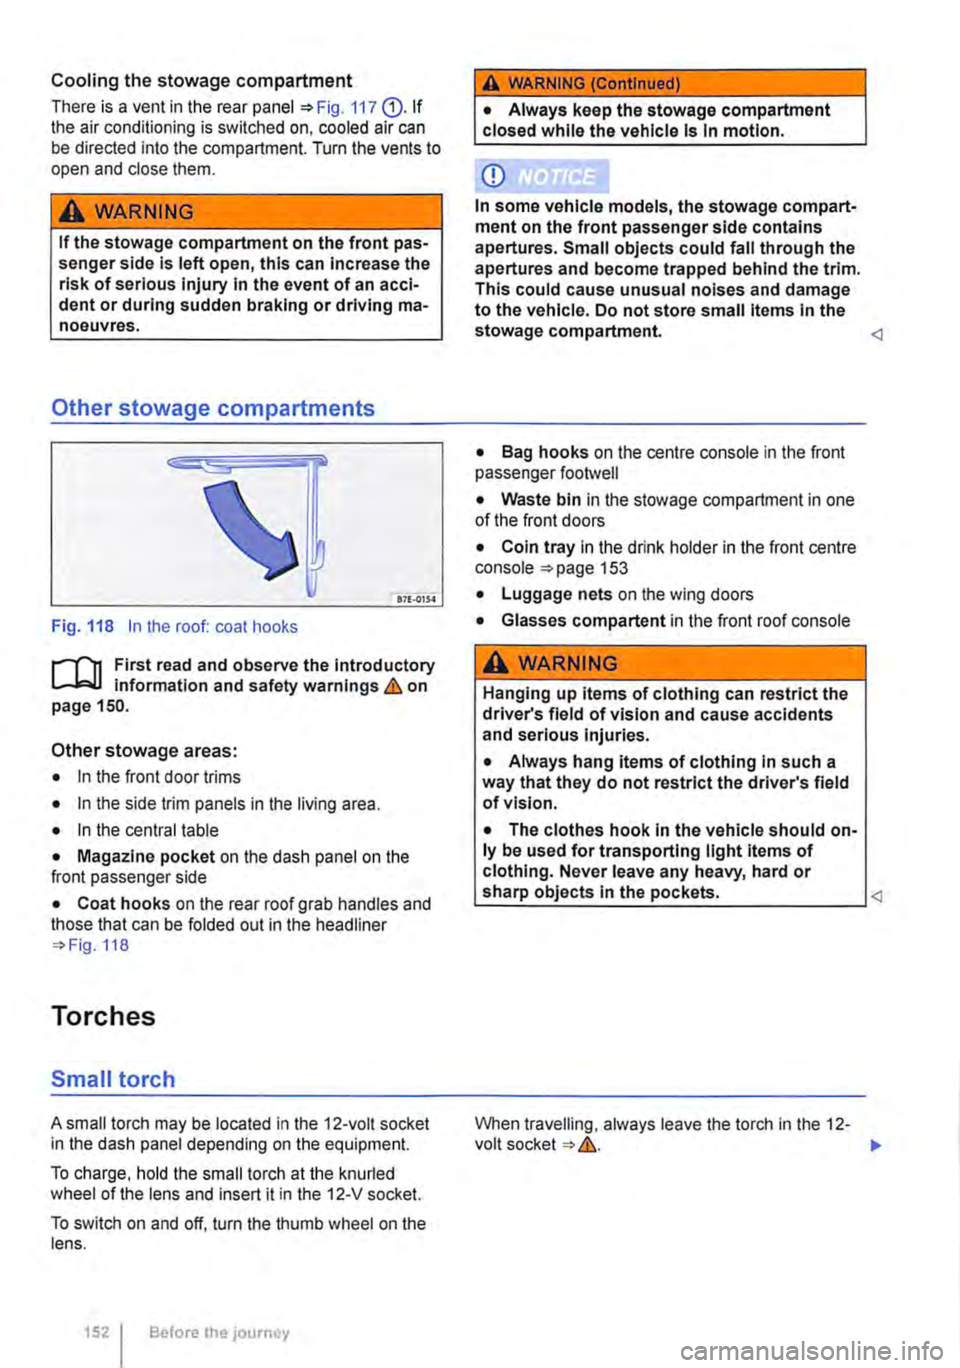
Fig. 118 In the roof: coat hooks
r-T'n First read and observe the Introductory 1...-J,:.lJ information and safety warnings&. on page 150.
Other stowage areas:
• In the front door trims
• In the side trim panels in the living area.
• In the central table
• Magazine pocket on the dash panel on the front passenger side
• Coat hooks on the rear roof grab handles and those that can be folded out in the headliner 118
Torches
Small torch
A small torch may be located in the 12-volt socket in the dash panel depending on the equipment.
To charge, hold the small torch at the knurled wheel of the lens and insert it in the 12-V socket.
To switch on and off, turn the thumb wheel on the lens.
1521 Before the journey
A WARNING (Continued)
• Always keep the stowage compartment closed while the vehicle Is In motion.
CD
In some vehicle models, the stowage compart-ment on the front passenger side contains apertures. Small objects could fall through the apertures and become trapped behind the trim. This could cause unusual noises and damage to the vehicle. Do not store small Items In the stowage compartment.
• Bag hooks on the centre console in the front passenger footwell
• Waste bin in the stowage compartment in one of the front doors
• Coin tray in the drink holder in the front centre console 153
• Luggage nets on the wing doors
• Glasses compartent in the front roof console
A WARNING
Hanging up items of clothing can restrict the driver's field of vision and cause accidents and serious Injuries.
• Always hang items of clothing In such a way that they do not restrict the driver's field of vision.
• The clothes hook In the vehicle should on-ly be used for transporting light Items of clothing. Never leave any heavy, hard or
When travelling, always leave the torch in the 12-volt socket &.. ..,.
Page 155 of 486
Opening the drink holder in the centre console
• Press onto drink holder "'Fig. 120 G). The drink holder will then open automatically.
• Push the holder® slightly to the side and place the bottle or can into the drink holder.
Opening and closing the drink holder in the rear side trim panel
• Press button "'Fig. 121 G). The drink holder will then open automatically.
Bottle holders
1"'111 First read and observe the introductory L-J,::.ll information and safety warnings & on page 153.
Depending on the vehicle equipment level, the bot-tle holders may be found at the following locations:
• In the front door trims
• In the lower section of the centre console
• In the side trim panels in the living area.
• In the central table
Opening and closing the bottle holder in the centre console
• To open, pull the handle of the bottle holder. The bottle holder will then open automatically.
• To close, push the bottle holder until it clicks in-to place.
Tables
o:::n Introduction
This chapter contains information on the following subjects:
Folding table in the side panel . . . . . . • . . . . . . 156 Central table . . . . . . . . . . . . 156
Additional information and warnings:
• Stowage "'page 150
• Drink holder 153
Opening the drink holder in the central table
• Press lhe symbol i on the cover of the drink holder and pull the drink holder out fully.
Closing the drink holder
• Remove the bottle or can.
• Push the drink holder in until it engages secure-
Bottle holder in the central table
The bottle holder in the central table can be ac-cessed after the table module has been raised.
m The bottle holder in the centre console must W be removed to gain access to the fuses in Multivan with left-hand drive 429.
A WARNING
Improper use of the tables could cause seri-ous injury.
• Never use the tables while the vehicle is in motion.
• All tables must be securely stowed while the vehicle is In motion.
• Never sit or stand on the tables.
CD
Never place hot objects, such as pots or pans, on the tables. Such objects could damage these surfaces.
Practical equipment 155
Page 209 of 486
Interior lights in the living area
OSG.OI12
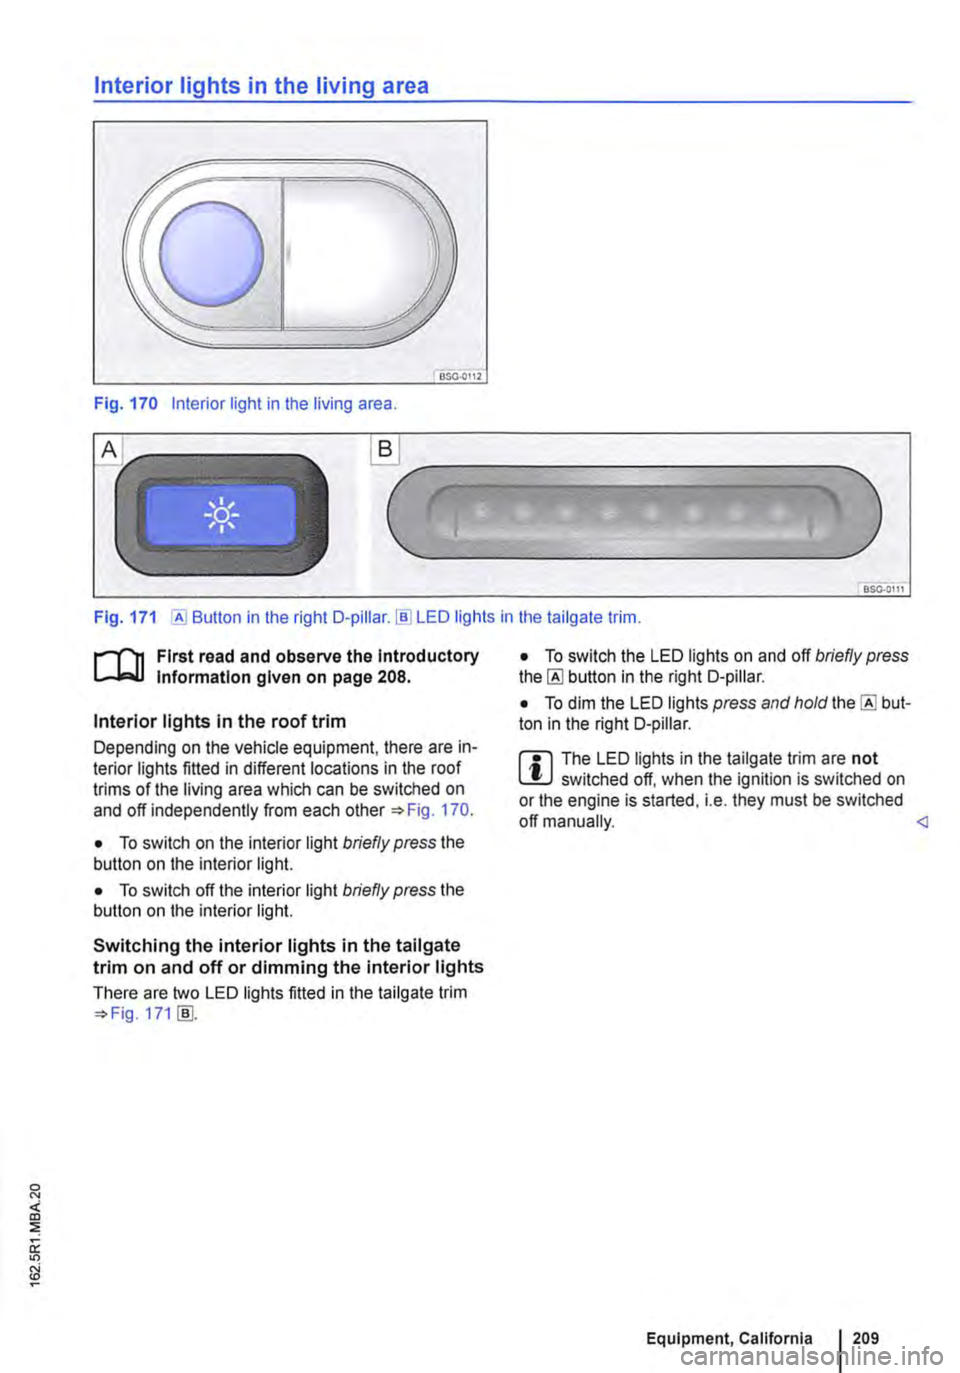
Fig. 170 Interior light in the living area .
.._______)
Fig. 171 [AI Button in the right D-pillar.!ID LED lights in the tailgate trim.
r-1'11 First read and observe the Introductory t.....J,..,lJ Information given on page 208.
Interior lights in the roof trim
Depending on the vehicle equipment, there are in-terior lights fitted in different locations in the roof trims of the living area which can be switched on and off independently from each other 170.
• To switch on the interior light briefly press the button on the interior light.
• To switch off the interior light briefly press the button on the interior light.
Switching the interior lights in the tailgate trim on and off or dimming the interior lights
There are two LED lights fitted in the tailgate trim 171 [ID.
• To switch the LED lights on and off briefly press the [AI button in the right D-pillar.
• To dim the LED lights press and hold the [AI but-ton in the right D-pillar.
m The LED lights in the tailgate trim are not W switched off, when the ignition is switched on or the engine is started, i.e. they must be switched off manually.
Page 217 of 486
Opaque shades kit, integrated
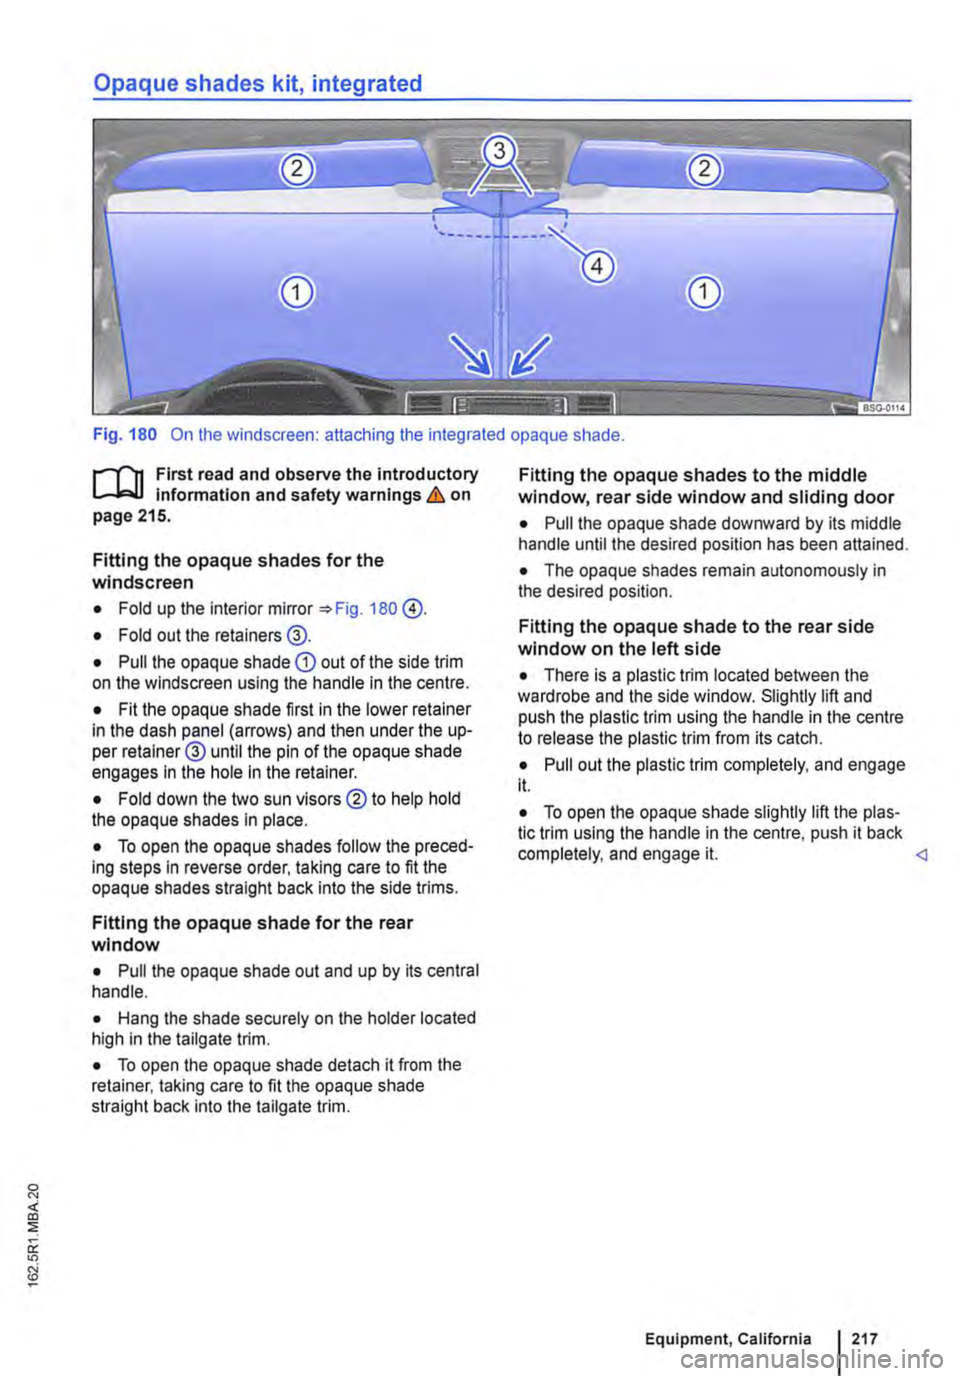
Fig. 180 On the windscreen: attaching the integrated opaque shade.
f""""'('n First read and observe the introductory L-W.I information and safety warnings & on page 215.
Fitting the opaque shades for the windscreen
• Fold up the interior mirror 180 @.
• Fold out the retainers@.
• Pull the opaque shade CD out of the side trim on the windscreen using the handle in the centre.
• Fit the opaque shade first in the lower retainer in the dash panel (arrows) and then under the up-per retainer@ until the pin of the opaque shade engages In the hole in the retainer.
• Fold down the two sun visors ®to help hold the opaque shades in place.
• To open the opaque shades follow the preced-ing steps in reverse order, taking care to fit the opaque shades straight back Into the side trims.
Fitting the opaque shade for the rear window
• Pull the opaque shade out and up by its central handle.
• Hang the shade securely on the holder located high in the tailgate trim.
• To open the opaque shade detach it from the retainer, taking care to fit the opaque shade straight back into the tailgate trim.
Fitting the opaque shades to the middle window, rear side window and sliding door
• Pull the opaque shade downward by its middle handle until the desired position has been attained.
• The opaque shades remain autonomously in the desired position.
Fitting the opaque shade to the rear side window on the left side
• There is a plastic trim located between the wardrobe and the side window. Slightly lift and push the plastic trim using the handle in the centre to release the plastic trim from its catch.
• Pull out the plastic trim completely, and engage it.
• To open the opaque shade slightly lift the plas-tic trim using the handle in the centre, push it back completely, and engage it.
Page 274 of 486

A WARNING (Continued)
• If the brake servo does not function or the vehicle is being towed, the brake pedal will have to be depressed more forcefully as the braking distance will be Increased due to the lack of assistance for the brake system.
CD
• Never let the brakes "rub" by applying light pressure to the brake when it is not necessary to brake. Continual pressure on the brake pedal will overheat the brakes. This can considerably reduce the brake effect, increase the braking distance and, In certain circumstances, cause the brake system to fail completely.
Brake support systems
r-f'n First read and observe the Introductory l..-Wl information and safety warnings&. on page 269.
The brake support systems ESC, ABS, BAS, TCS and EDL only function when the engine is running. They make a considerable contribution to active driving safety.
Electronic stability control (ESC)
The ESC helps to reduce the risk of skidding and to improve driving stability by braking individual wheels in certain driving situations. The ESC de-tects critical driving situations such as oversteer, understeer and wheelspin. The system helps to stabilise the vehicle through targeted application of the brakes or by reducing engine torque.
ESC has its limitations. lt is important to realise that ESC cannot overcome the laws of physics. ESC will not be able to assist in every situation faced by a driver. For example, ESC will not be able to assist every time that there is a sudden change in the road surface quality. If a section of dry road is suddenly covered with water, mud or snow, ESC will not be able to assist in the same manner as on a dry road. If the vehicle aquaplanes (drives on a layer of water rather than on the road surface), ESC will not be able to assist in steering the vehicle as the contact to the road surface has been interrupted and it is therefore no longer pos-sible to steer or brake the vehicle. When driving at speed through bends, particularly on stretches of road with many bends, the ESC will not always be able to process complicated driving situations as
2741 While dnvang
m If the front brake pads are tested, the rear L!..J brake pads should be tested at the same time. Regularly check the thickness of the brake pads through the openings in the rims or from the underside of the vehicle. If necessary, remove the wheels to carry out a comprehensive check. Volks-wagen Commercial Vehicles recommends using a Volkswagen Commercial Vehicles dealership for this purpose.
Always adapt your speed and driving style to suit visibility, weather, road and traffic conditions. ESC cannot defy the laws of motion, improve the availa-ble power output, or keep the vehicle on the road if insufficient care and attention on the part of the driver causes the vehicle to leave the road. In-stead, the ESC improves the chances of keeping the vehicle under control and, in extreme on-road driving situations, exploits the driver's steering in-put to keep the vehicle travelling in the desired di-rection. If the vehicle is driving at a speed that leads it to leave the road before the ESC can pro-vide any kind of support, the ESC will be unable to provide any assistance.
The ASS, BAS, TCS and EDL systems are integra-ted into the ESC. The ESC is always on. If the trac-tion achieved in certain situations is not sufficient, TCS can be switched off by pressing the ASR (TCS) button =>Fig. 224. Always ensure that ASR (TCS) is switched back on again once traction is sufficient.
Automatic Post-Collision Braking System
In the event of an accident, the Automatic Post-Collision Braking System can help the driver to re-duce the risk of skidding, and the danger of secon-dary collisions, through automatic braking.
Page 367 of 486

Wheels and tyres
Useful information about wheels and tyres
o:::n Introduction
This chapter contains information on the following subjects:
Handling wheels and tyres .............. .
Rims
368
369
New wheels and tyres . . . . . . . . . . . . . . . . . . . 370 Tyre pressure . . . . . . . . . . . . . . . . 371
Tread depth and wear indicators 372 Tyre damage 373
Spare wheel . . . . . . . . . . . . . . . . . . . . . . . . . . . . 374
Tyre lettering . . . . . . . . . . . . . . . . . . . . . . . . . . . 375
Winter tyres . . . . . . . . . . • . • • . . . . . . . . . . . . 378 Snow chains . . . . . . . . . . . . . . . . . 379
Volkswagen Commercial Vehicles recommends that work on tyres and wheels is carried out by a qualified workshop. They are familiar with the pro-cedure and have the necessary special tools and spare parts and the proper facilities for disposing of the old tyres. Volkswagen Commercial Vehicles recommends using a Volkswagen Commercial Ve-hicles dealership for this purpose.
Additional information and warnings:
• Transporting 125
• Towing a trailer 139
• Braking, stopping and parking 269
• Tyre monitoring system 318
• Cleaning and caring for the vehicle exterior 380
• Consumer information 404
• Vehicle tool kit 416
• Hubcaps 417
• Changing a wheel 420
• Breakdown set 425
A WARNING
New tyres or tyres which are old, worn down or damaged cannot provide full levels of vehi-cle control and braking power.
• Incorrect handling of wheels and tyres can reduce vehicle safety and cause accidents and serious injuries.
A WARNING (Continued)
• All four wheels must be fitted with radial tyres of the same type, size (rolling circum-ference) and the same tread.
• New tyres will have to be run In as they will initially have reduced grip and braking ef-fect. Drive particularly carefully for the first 600 km in order to prevent accidents and se-rious injury.
• Check tyre pressures regularly and always keep to the specified tyre pressure value. If the tyre pressure is too low, it Is possible that the tyre temperature will Increase to such an extent when driving that the tread peels off and the tyre bursts.
• Never drive with worn tyres or tyres that are damaged (cuts, cracks or blisters). Driv-Ing with tyres in this condition can result in blown tyres, accidents and serious Injuries. Worn or damaged tyres must be replaced as soon as possible.
• Never exceed the top speed and load per-mitted for the fitted tyres.
• The effectiveness of the driver assist sys-tems and brake support systems depends on the tyre grip.
• If you notice unusual vibration or if the ve-hicle pulls to one side when driving, stop the car immediately and check the wheels and tyres for damage.
• In order to reduce the risk of losing con-trol of the vehicle, and the risk of accident and serious injury, never loosen the bolts on rims with bolted on rim rings.
• Do not use wheels or tyres if you do not know their history. Used wheels and tyres could be damaged, even If the damage is not visible.
• Old tyres (even if never used) can sudden-ly Jose pressure or burst, especially at high speeds. This can cause accidents and seri-ous injuries. Avoid using tyres that are more than six years old. If you have no alternative, drive slowly and with extra care at all times.
m For technical reasons, it is not generally pos-L!.J sible to use the wheels from other vehicles. This can also apply to wheels of the same vehicle .,.
Wheels and tyres I 367
Page 368 of 486
type. Refer to the vehicle documentation and ask a Volkswagen Commercial Vehicles dealership if necessary.
//.(/ '\
'(j
... '5I'
IJ
7rr.Oii2
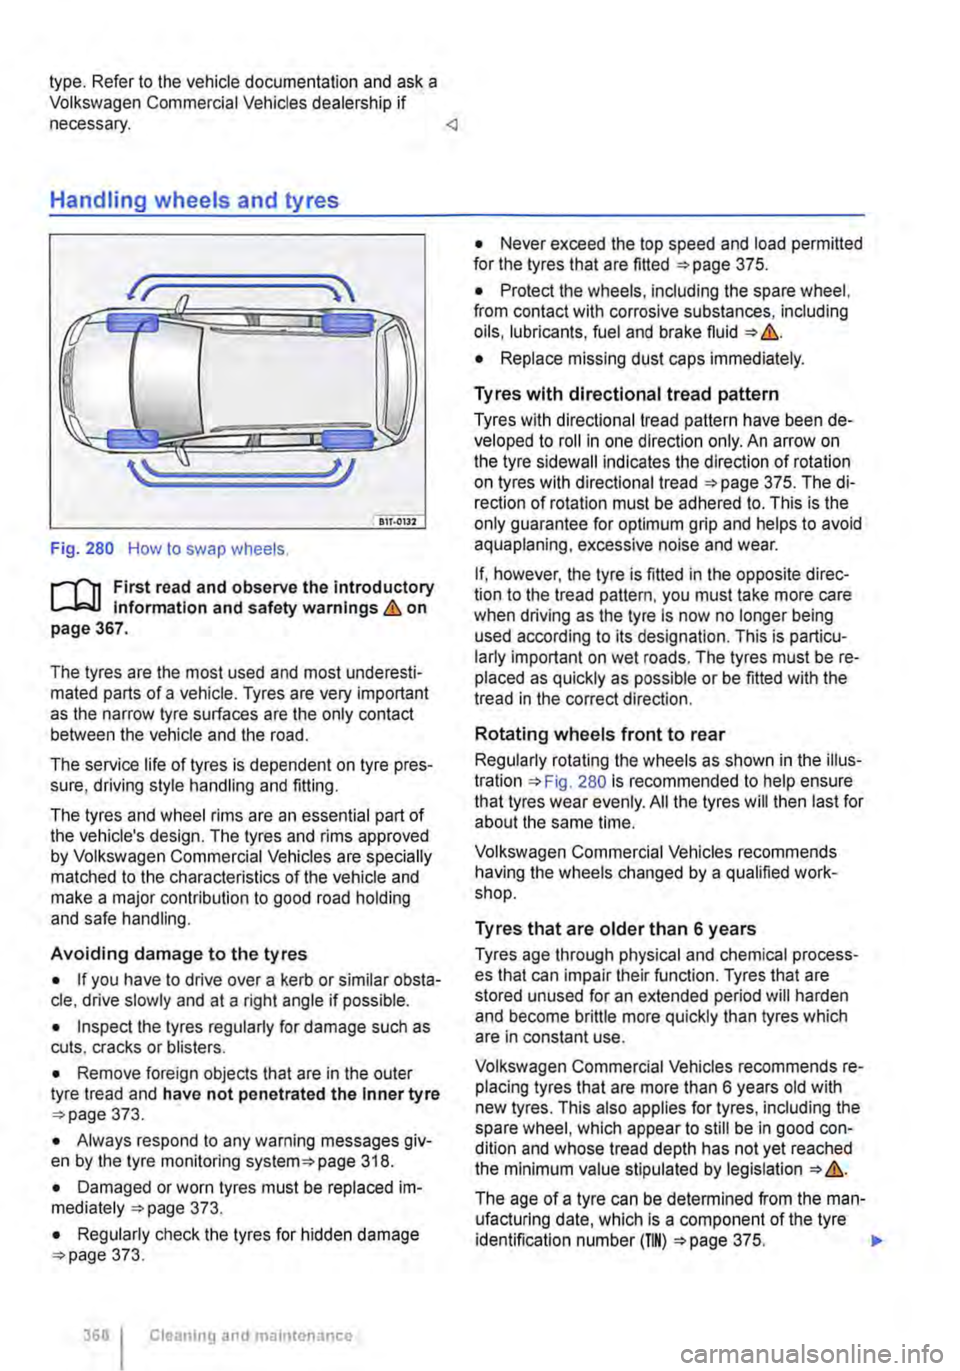
Fig. 280 How to swap wheels.
.....-r'n First read and observe the introductory L-W! Information and safety warnings & on page 367.
The tyres are the most used and most underesti-mated parts of a vehicle. Tyres are very important as the narrow tyre surfaces are the only contact between the vehicle and the road.
The service life of tyres is dependent on tyre pres-sure, driving style handling and fitting.
The tyres and wheel rims are an essential part of the vehicle's design. The tyres and rims approved by Volkswagen Commercial Vehicles are specially matched to the characteristics of the vehicle and make a major contribution to good road holding and safe handling.
Avoiding damage to the tyres
• If you have to drive over a kerb or similar obsta-cle, drive slowly and at a right angle if possible.
• Inspect the tyres regularly for damage such as cuts. cracks or blisters.
• Remove foreign objects that are in the outer tyre tread and have not penetrated the Inner tyre 373.
• Always respond to any warning messages giv-en by the tyre monitoring system=:opage 318.
• Damaged or worn tyres must be replaced im-mediately =:o page 373.
• Regularly check the tyres for hidden damage =:-page 373.
368 Cleaning and maintenance
• Never exceed the top speed and load permitted for the tyres that are fitted =:o page 375.
• Protect the wheels, including the spare wheel, from contact with corrosive substances, including oils, lubricants, fuel and brake fluid =:o &.
• Replace missing dust caps immediately.
Tyres with directional tread pattern
Tyres with directional tread pattern have been de-veloped to roll in one direction only. An arrow on the tyre sidewall indicates the direction of rotation on tyres with directional tread =:o page 375. The di-rection of rotation must be adhered to. This is the only guarantee for optimum grip and helps to avoid aquaplaning, excessive noise and wear.
If, however, the tyre is fitted in the opposite direc-tion to the tread pattern, you must take more care when driving as the tyre is now no longer being used according to its designation. This is particu-larly important on wet roads. The tyres must be re-placed as quickly as possible or be fitted with the tread in the correct direction.
Rotating wheels front to rear
Regularly rotating the wheels as shown in the illus-tration =:o Fig. 280 is recommended to help ensure that tyres wear evenly. All the tyres will then last for about the same time.
Volkswagen Commercial Vehicles recommends having the wheels changed by a qualified work-shop.
Tyres that are older than 6 years
Tyres age through physical and chemical process-es that can impair their function. Tyres that are stored unused for an extended period will harden and become brittle more quickly than tyres which are in constant use.
Volkswagen Commercial Vehicles recommends re-placing tyres that are more than 6 years old with new tyres. This also applies for tyres, including the spare wheel, which appear to still be in good con-dition and whose tread depth has not yet reached the minimum value stipulated by legislation =:o &.
The age of a tyre can be determined from the man-ufacturing date, which Is a component of the tyre identification number (TIN) =:o page 375. .,..
Page 369 of 486
Storing tyres
Mark tyres before you remove them to indicate the direction of rotation. This ensures you will be able to mount them correctly when you replace them (left, right, front, rear). When removed, the wheels or tyres should be stored in a cool, dry and pref-erably dark place. Do not store tyres mounted on the rim vertically.
Any tyres not fitted on rims should be kept in suita-ble sleeves to protect against dirt and should be stored vertically (standing on the tread).
All-terrain tyres
Some vehicles can be fitted at the factory with "all-terrain tyres". These tyres have a deep-tread pro-file that alters the vehicle's driving properties (such as comfort, consumption, braking distance, corner-Ing behaviour, rolling noise)=>&.
A WARNING
Corrosive liquids and other substances can cause visible and Invisible damage to the tyres, which can cause the tyre to burst.
• Always keep chemicals, oils, lubricants, fuel, brake fluid and other corrosive substan-ces away from the tyres.
A WARNING
Old tyres (even if never used) can suddenly lose pressure or burst, especially at high speeds. This can cause accidents and seri-ous injuries.
• Avoid using tyres that are more than six years old. If you have no alternative, drive slowly and with extra care at all times.
Rims
,....-('n First read and observe the Introductory L-J.:.ll information and safety warnings & on page 367.
The design of the wheel bolts is matched to the rims. If different rims are fitted, the correct wheel bolts with the right length and correctly shaped bolt heads must be used. This ensures that wheels are fitted securely and that the brake system works properly =>page 420.
For technical reasons, it is not generally possible to use the wheels from other vehicles. This can al-so apply to wheels of the same vehicle type.
A WARNING
The deep-tread profile of all-terrain tyres can considerably increase the braking distance or cornering behaviour and thus cause acci-dents and serious injuries.
• Always bear the modified vehicle handling in mind, and drive carefully.
CD
Avoid heavy impacts and drive round obstacles whenever possible. Tyres, particularly low-pro-file tyres, can be considerably compressed and deformed by potholes and curb edges especial-ly. This can cause the tyre's webbing reinforce-ment to brake, and cause dents or rips on the side walls or deformations or cracks on the rims.
Old tyres should be disposed of as required !!IS by legislation.
Wheel bolts
Wheel boils must always be tightened with the cor-rect tightening torque =>page 420.
Rims with bolted-on rings
Rims with bolted-on rings consist of several com-ponents. These components are fastened using special bolts and special fastening technology. This ensures that the wheel functions proper1y, does not leak, remains safe and runs true. For this reason, damaged rims should be replaced. They may only .,..
Wheels and tyres I 369