2012 VOLKSWAGEN TRANSPORTER battery
[x] Cancel search: batteryPage 41 of 486

ro First read and observe the Introductory Information and safety warnings & on page 39.
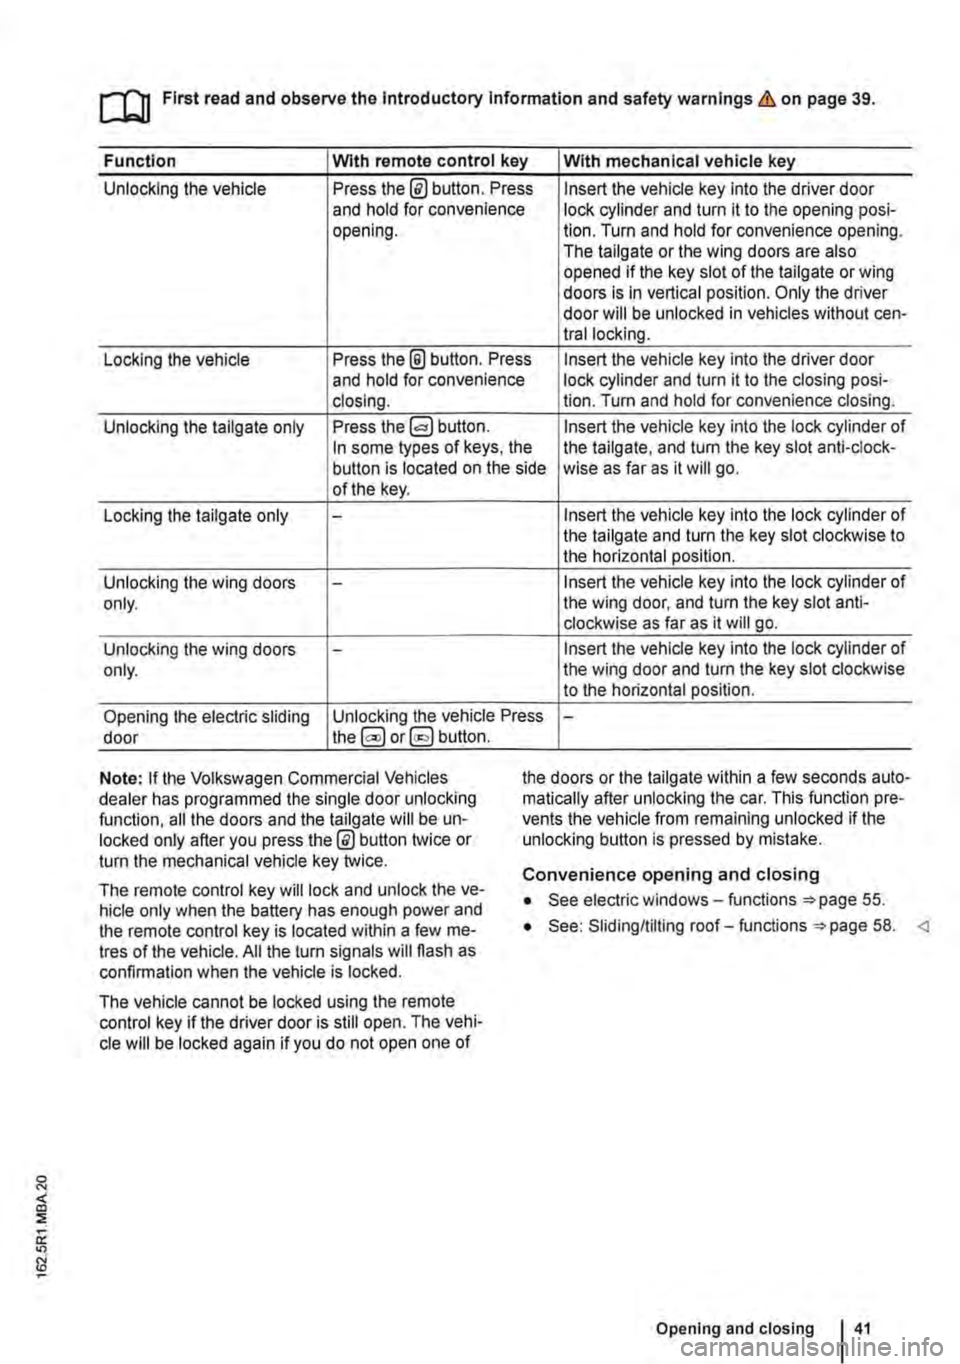
Function Wlth remote control key With mechanical vehicle key
Unlocking the vehicle Press the@ button. Press Insert the vehicle key into the driver door and hold for convenience lock cylinder and turn it to the opening posi-opening. lion. Turn and hold for convenience opening. The tailgate or the wing doors are also opened if the key slot of the tailgate or wing doors is in vertical position. Only the driver door will be unlocked in vehicles without cen-trallocking.
Locking the vehicle Press the @ button. Press Insert the vehicle key into the driver door and hold for convenience lock cylinder and turn it to the closing posi-closing. lion. Turn and hold for convenience closing.
Unlocking the tailgate only Press the Insert the vehicle key into the lock cylinder of In some types of keys, the the tailgate, and turn the key slot anti-clock-button is located on the side wise as far as it will go. of the key.
Locking the tailgate only -Insert the vehicle key into the lock cylinder of the tailgate and turn the key slot clockwise to the horizontal position.
Unlocking the wing doors -Insert the vehicle key into the lock cylinder of only. the wing door, and turn the key slot anti-clockwise as far as it will go.
Unlocking the wing doors -Insert the vehicle key into the lock cylinder of only. the wing door and turn the key slot clockwise to the horizontal position.
Opening the electric sliding Unlocking the vehicle Press -door the@ or§] button.
Note: If the Volkswagen Commercial Vehicles dealer has programmed the single door unlocking function, all the doors and the tailgate will be un-locked only after you press the @ button twice or turn the mechanical vehicle key twice.
the doors or the tailgate within a few seconds auto-matically after unlocking the car. This function pre-vents the vehicle from remaining unlocked if the unlocking button is pressed by mistake.
The remote control key will lock and unlock the ve-hicle only when the battery has enough power and the remote control key is located within a few me-tres of the vehicle. All the turn signals will flash as confirmation when the vehicle is locked.
The vehicle cannot be locked using the remote control key if the driver door is still open. The vehi-cle will be locked again if you do not open one of
Convenience opening and closing
• See electric windows-functions 55.
• See: Sliding/tilting roof-functions =:>page 58.
Page 43 of 486

• If the SAFELOCK mechanism has been activa-ted using the remote control key: the anti-theft alarm is active.
Indicator lamp in the driver door
After locking the vehicle:
• If the SAFELOCK mechanism has been activa-ted using the remote control key in the driver door lock cylinder: the anti-theft alarm is not active.
• The interior monitoring system and anti-tow alarm are deactivated.
Meaning
A red LED flashes for approximately 2 seconds, firstly at short inteNals and then more slowly. The SAFELOCK mechanism is activated.
A red LED flashes for approximately 2 seconds and then goes out. The LED light starts to flash again after approxi-mately 30 seconds.
The SAFELOCK mechanism is deactivated.
A red LED lights up steadily for approximately 30 seconds. Fault in the locking system. Go to a qualified workshop.
Notes for vehicles without SAFELOCK
mechanism
Please note the following when the vehicle is locked with the remote control key or with the vehi-cle key in the driver door lock cylinder:
• The anti-theft alarm and the interior monitoring system are immediately activated. All turn signals flash briefly to confirm activation.
Anti-theft alarm
rflt First read and observe the introductory 1..-.L::.U information and safety warnings & on page 39.
The anti-theft alarm makes it more difficult to break into the vehicle or steal it.
The anti-theft alarm system is automatically activa-ted when the vehicle is locked.
When does the system trigger an alarm?
The anti-theft alarm will sound an acoustic alarm for approximately 30 seconds and trigger a visible warning for up to 5 minutes if any of the following unauthorised actions are performed while the vehi-cle is locked:
• Mechanical unlocking of the vehicle with the ve-hicle key and failure to switch on the ignition within 15 seconds
• A door is opened.
A WARNING
Take care when using the SAFELOCK mecha-nism to avoid accidents or injuries.
• Never leave anybody in the vehicle if the vehicle has been locked using the remote control key. The doors can no longer be opened from the inside once the SAFELOCK mechanism is activated.
• Locked doors make it more difficult for emergency service personnel to gain access to the vehicle and provide assistance when needed. In an emergency, people locked in-side the vehicle would not be able to leave the vehicle by unlocking the doors.
• The tailgate is opened.
• The ignition is switched on using an invalid key.
• Movement inside the vehicle (in vehicles with interior monitoring).
• The vehicle is towed (vehicles with anti-tow alarm).
• The vehicle is lifted (vehicles with anti-tow alarm).
• Transportation of the vehicle on a ferry or train.
• Disconnection of the vehicle battery (only an acoustic alarm)
Switching off the alarm
Unlock the vehicle using the release button on the remote control key or insert the ignition key into the ignition lock. 11>-
Opening and closing 43
Page 44 of 486

m Due to the current legislation on the Israel W market, the acoustic warning signals are de-activated there.
m The alarm will be triggered again if a person W gains access to the same or a different se-cured zone after the alarm has been switched off. For example, if the tailgate is opened after a door had been opened.
m The anti-theft alarm will not be activated if W the vehicle is locked from the Inside using the central locking button @.
m If you unlock the driver door mechanically us-L!J ing the vehicle key, only the driver door is un-locked, and not the whole vehicle. The SAFELOCK mechanism on all doors is not deactivated and the central locking button is not activated until you switch on the ignition (however the doors will not be unlocked).
m The anti-theft alarm will not function correctly W if the vehicle battery is weak or discharged.
m lt is not possible to include the trailer in the W anti-theft alarm system.
81f·01U
Fig. 25 Next to the driver seat: button for switch-ing off the interior monitoring system and anti-tow alarm.
r-f"n First read and observe the introductory information and safety warnings & on page 39.
The interior monitoring system will trigger an alarm if movement is detected inside the vehicle when the vehicle is locked.
The anti-tow alarm will be triggered if the vehicle is lifted.
Switching on the interior monitoring system and anti-tow alarm
Lock the vehicle using the remote control key. When the anti-theft alarm is switched on, the interi-or monitoring system and the anti-tow alarm are al-so active.
Switching off the interior monitoring system and anti-tow alarm
The orientation lighting in the =>Fig. 25 button must be lit up when switching the systems off. To switch the orientation lighting on, remove the key from the ignition or open one of the doors.
Before the journey
• Press the =>Fig. 25 button. A yellow indicator lamp will light up in the button until the vehicle is locked.
• Close all doors and the tailgate.
• Lock the vehicle using the remote control key. The interior monitoring system and anti-towing alarm are switched off until the next time the vehi-cle is locked.
The interior monitoring system and anti-tow alarm should therefore be switched off before the vehicle is locked in any of the following, or similar, situa-tions:
• If any people or animals are to remain inside the vehicle for a short period & =>page 39.
• If the vehicle is to be loaded onto another vehi-cle.
• If the vehicle is being transported (e.g. on a fer-ry).
• If the vehicle is going to be towed with one axle off the ground.
• If the vehicle is to be parked in a car wash.
Risk of false alarm
Interior monitoring can only work properly if the ve-hicle is completely closed. Comply with legal regu-lations. A false alarm can be triggered in any of the following circumstances:
• If one or more windows are fully or partly open.
• If the slidingflilting roof is completely or partly open.
• If items such as loose pieces of paper and items attached to the Interior mirror (e.g. air-fresh-eners) are left in the vehicle.
• If a mobile telephone that is left in the vehicle vibrates. 11>-
Page 56 of 486

A WARNING
Always take care when using the mechanical or electric windows otherwise you could cause serious accidents or injuries.
• Windows should only be opened or closed when you are sure that nobody is In their op-erating area.
• Never leave children or people requiring assistance alone in the vehicle when the ve-hicle is locked. Electric windows can no lon-ger be opened in an emergency.
A WARNING (Continued)
• Always take all vehicle keys with you ev-ery time you leave the vehicle. The electric windows can still be operated using the but-tons several minutes after the ignition has been switched off, provided the driver door and the front passenger door are not opened.
CD
During sudden rain showers, water can enter the vehicle interior via open windows and cause damage to the vehicle.
'----------------: BSG-0031
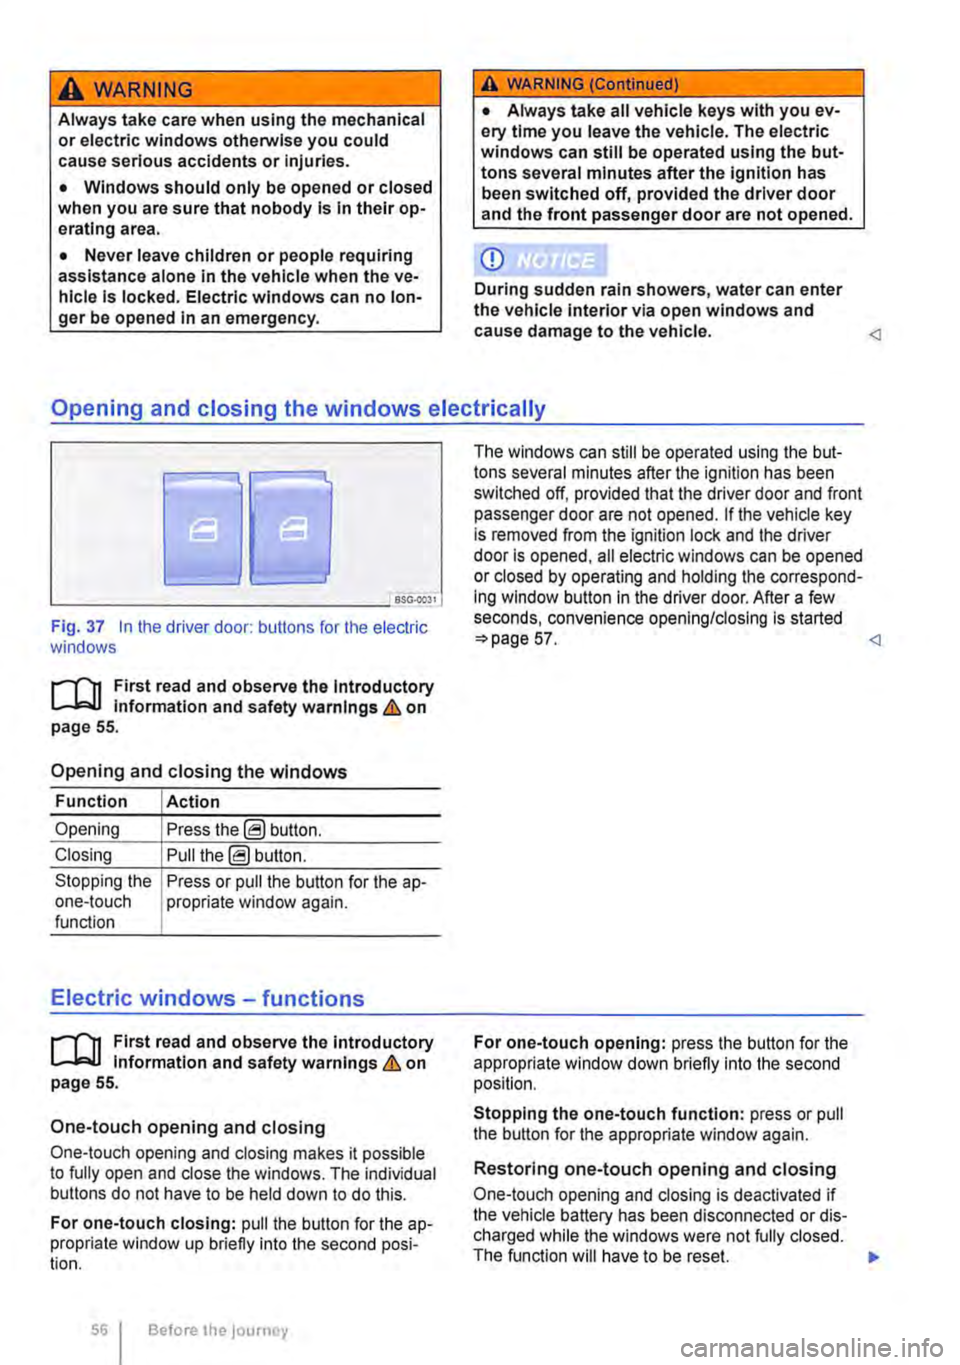
Fig. 37 In the driver door: butlons for the electric windows
r-111 First read and observe the Introductory L-J,::.JJ information and safety warnings & on page 55.
Opening and closing the windows
Function Action
Opening Press the@ button.
Closing Pull the@ button.
Stopping the Press or pull the button for the a p-one-touch propriate window again. function
Electric windows -functions
r-111 First read and observe the introductory L-J,::.JJ information and safety warnings & on page 55.
One-touch opening and closing
One-touch opening and closing makes it possible to fully open and close the windows. The individual buttons do not have to be held down to do this.
For one-touch closing: pull the butlon for the ap-propriate window up briefly into the second posi-tion.
56 Before the journey
The windows can still be operated using lhe but-tons several minutes after the ignition has been switched off, provided that the driver door and front passenger door are not opened. If the vehicle key is removed from the ignition lock and lhe driver door Is opened, all electric windows can be opened or closed by operating and holding lhe correspond-ing window button in the driver door. After a few seconds, convenience opening/closing is started 57.
Stopping the one-touch function: press or pull the button for the appropriate window again.
Restoring one-touch opening and closing
One-touch opening and closing is deactivated if the vehicle battery has been disconnected or dis-charged while the windows were not fully closed. The function will have to be reset.
Page 67 of 486

Fig. 44 Pressing the switch In the appropriate area:
CD or@ Adjusts the curve of the lumbar support.
@ or@ Adjusts the height of the lumbar support.
A wARNING
Careless or unsupervised use of the electric front seats can result in severe Injuries.
• The electrical front seat adjustment also works when the ignition is switched off. Nev-er leave children or people requiring assis-tance alone in the vehicle.
• In the event of an emergency, stop the electrical adjustment by pressing another switch.
CD
To avoid damaging the electrical components in the front seats, do not kneel on the seats or apply sharp pressure at a single point on the seat cushion and backrest.
m 11 may not be possible to adjust the seat elec-l!J trically if the battery charge level is too low.
m Starting the engine will interrupt the seat ad-l!J justment procedure.
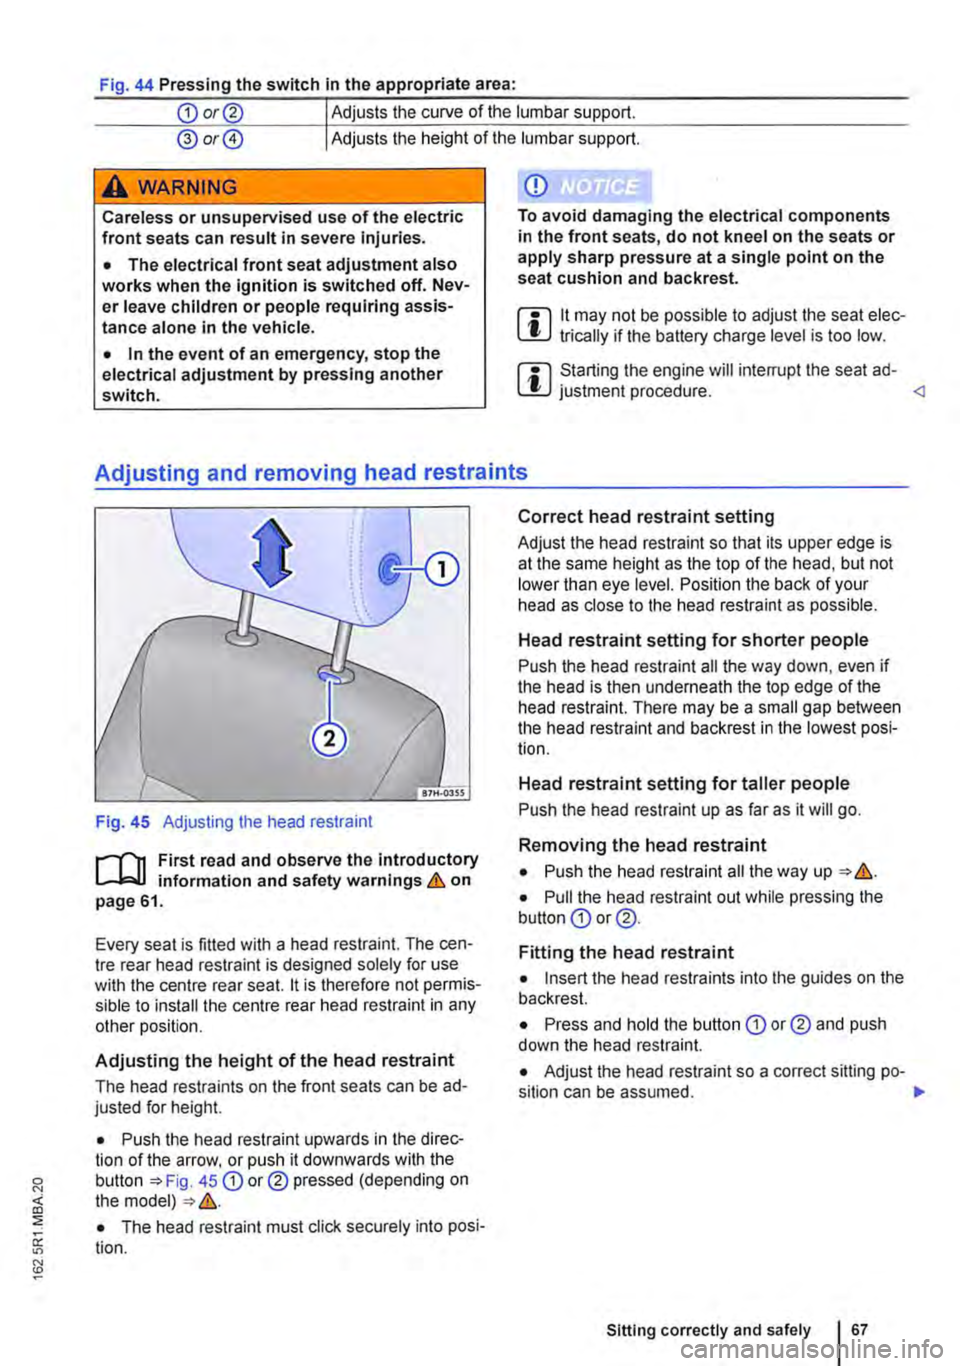
Fig. 45 Adjusting the head restraint
r--("'n First read and observe the introductory L--J,::.U information and safety warnings & on page 61.
Every seat is fitted with a head restraint. The cen-tre rear head restraint is designed solely for use with the centre rear seat. 11 is therefore not permis-sible to install the centre rear head restraint in any other position.
Adjusting the height of the head restraint
The head restraints on the front seats can be ad-justed for height.
• Push the head restraint upwards in the direc-tion of the arrow, or push it downwards with the button 45 CD or® pressed (depending on the model) &.
• The head restraint must click securely into posi-tion.
Correct head restraint setting
Adjust the head restraint so that its upper edge is at the same height as the top of the head, but not lower than eye level. Position the back of your head as close to the head restraint as possible.
Head restraint setting for shorter people
Push the head restraint all the way down, even if the head is then underneath the top edge of the head restraint. There may be a small gap between the head restraint and backrest in the lowest posi-tion.
Head restraint setting for taller people
Push the head restraint up as far as it will go.
Removing the head restraint
• Push the head restraint all the way up &.
• Pull the head restraint out while pressing the button CD or @.
Fitting the head restraint
• Insert the head restraints into the guides on the backrest.
• Press and hold the button CD or® and push down the head restraint.
• Adjust the head restraint so a correct sitting po-sition can be assumed. .,.
Sitting correctly and safely 167
Page 109 of 486

Turn the light switch to the required position 86:
When the Ignition Is switched off
0 The fog lights, dipped beam headlights and side lights are switched off.
,. The orientation lighting can be switched on.
) , The side lights are switched on.
Dipped beam headlights are switched off.
"'D While the vehicle key is in lhe ignition lock, the side lights will stay on.
Fog lights
The indicator lamps or 0$ in the light switch or Instrument cluster indicate that the fog lights are switched on.
• To switch the fog light on, pull the light switch out of the position "" or tD to the first stop.
• To switch the rear fog light 0$ on, pull the light switch out of position ,.,, or gD as far as it will go.
• To switch the fog lights off, press the light switch or move it to position 0.
Signal tones if lights are not switched off
If the key is removed from the ignition lock and the driver door is opened, a signal tone will sound in any of the following situations. This will remind you to switch off the lights as necessary.
Lights and vision -functions
1""1'11 First read and observe the introductory L-lo:.U Information and safety warnings & on page 106.
Parking light
When the parking lights (left and right turn signals) are switched on, the headlight on the correspond-ing side of the vehicle lights up along with the tail light and parts of the tail light cluster. The parking light only lights up when the Ignition is switched off and if the turn signal and main beam lever was in the central position before being operated.
Side lights
If the light switch is in position ;.o; both headlights with side lights light up, along with parts of the rear light cluster, the number plate lighting, the instru-ment cluster lighting and the buttons in the centre console and the dash panel.
If the charge level of the battery is too low, the side lights will switch off automatically &. This pre-vents the vehicle battery from being discharged
When the Ignition Is switched on
Lights switched off or daytime headlights are switched on.
The automatic headlight control and, if applica-ble, the daytime headlights are switched on.
The side lights are switched on.
The dipped beam headlights are switched on.
• If the parking light is switched on 107.
• If the light switch is in position '"'·
• If the light switch is in position iD or 0$ 112.
A WARNING
The side lights or daytime running lights are not bright enough to Illuminate the road ahead and to ensure that other road users are able to see you.
• Always switch the dipped beam head-lights on if it is dark, raining or visibility Is
completely and thus allows for still starting the en-gine 366, Automatic switch-off for electri-cal consumers.
Daytime running lights
There are separate lights in the headlights for the daytime running lights.
Only the separate lights light up when the daytime running lights are switched on &.
The daytime running lights are switched on when the ignition is switched on if the light switch is in position 0 or AUTO.
If the light switch is in position AUTO, a rain sensor will switch the dipped beam and the lighting in the instruments and switches on and off automatically.
The daytime running lights cannot be switched on or off manually. ,._
Lights and vision 1109
Page 114 of 486

Interior and reading lights
0 ( )
ITT·0116
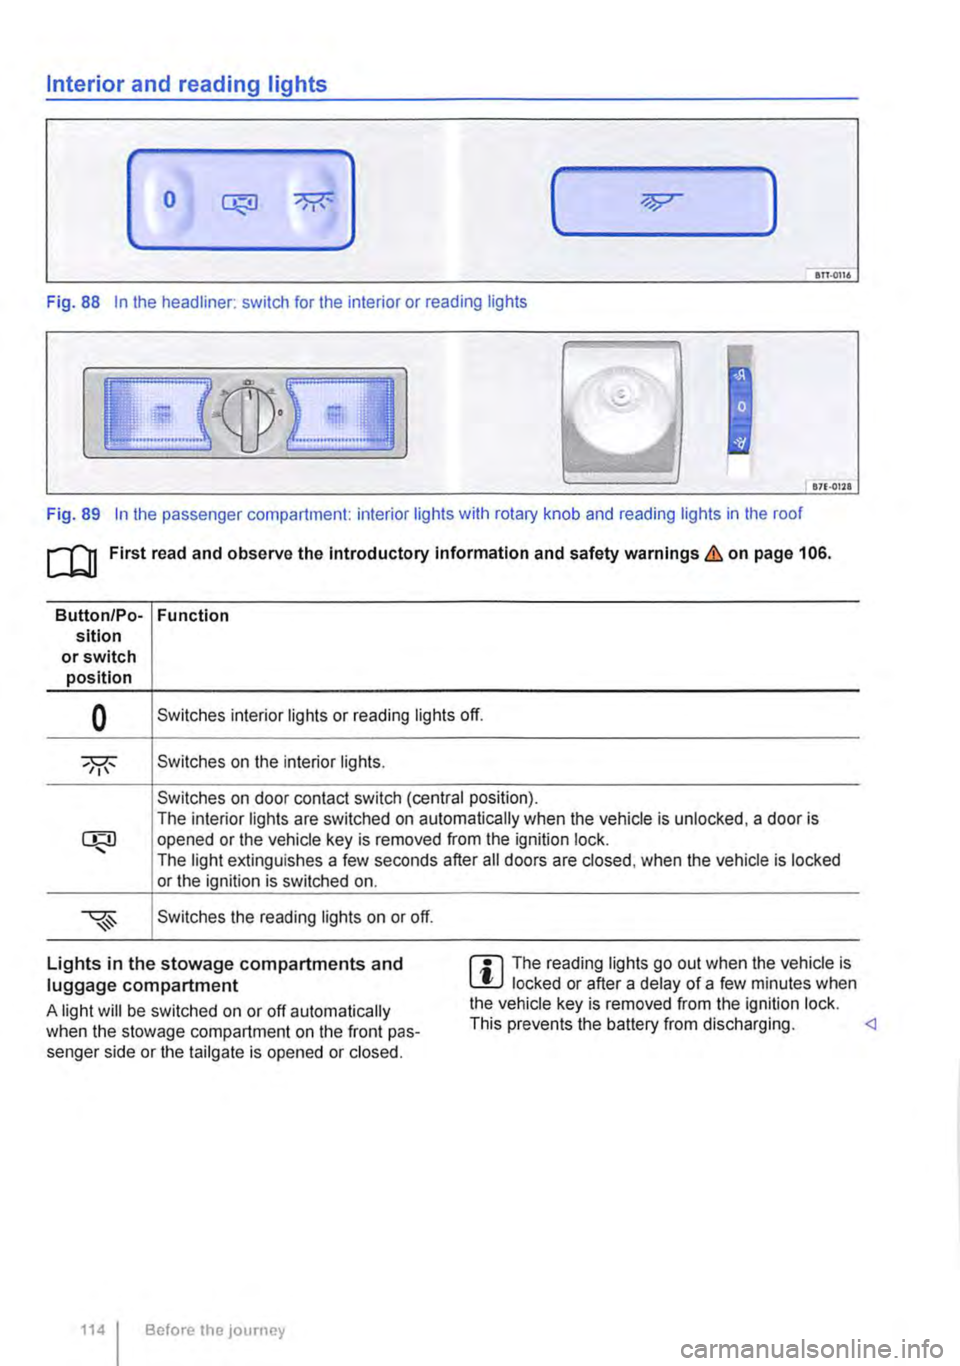
Fig. 88 In the headliner: switch for the interior or reading lights
871·01ll
Fig. 89 In the passenger compartment: interior lights with rotary knob and reading lights in the roof
[Q] First read and observe the Introductory information and safety warnings&. on page 106.
Button/Po-Function sition or switch position
0 Switches interior lights or reading lights off.
Switches on the interior lights.
Switches on door contact switch (central position). The interior lights are switched on automatically when the vehicle is unlocked, a door is opened or the vehicle key is removed from the ignition lock. The light extinguishes a few seconds after all doors are closed, when the vehicle is locked or the ignition is switched on.
Switches the reading lights on or off.
Lights in the stowage compartments and luggage compartment
A light will be switched on or off automatically when the stowage compartment on the front pas-senger side or the tailgate is opened or closed.
1141 Before the journey
m The reading lights go out when the vehicle is W locked or after a delay of a few minutes when the vehicle key is removed from the ignition lock. This prevents the battery from discharging.
Page 145 of 486

Key to diagram Fig. 114:
Pin Meaning
8 Reversing light
9 Permanent live
10 Charging cable plus
11 Earth pin 10, charging cable
12 Not assigned
13 Earth pin 9, permanent live
Trailer socket
A 13-pin trailer socket makes the electrical connec-tion between the towing vehicle and the trailer. When the engine is running, electrical consumers in the trailer are supplied with voltage (charging ca-ble) via the electrical connection (pin 10 of the trail-er socket). If required, the charging cable charges the caravan's battery.
When a trailer is electrically detected, electrical consumers in the trailer are supplied with voltage (permanent live) via the electrical connection (pin 9). Permanent live supplies a trailer's interior lighting for example. Electrical consumers such as a caravan refrigerator are supplied with voltage on-ly when the engine is running (pin 1 0).
To avoid overloading the electrical system, do not inter-connect the three earth wires (pins 3, 11 and 13).
If the trailer has a 7 -pin plug you will need to use a suitable adapter cable. Pin 10 (charging cable) is then without function.
Emergency breakaway cable
Always fasten the trailer's emergency breakaway cable properly to the towing vehicle. Leave enough slack in the emergency breakaway cable so that the vehicle can still drive around corners. However the emergency breakaway cable should not drag along the ground while you are driving.
Trailer rear lights
Ensure that the trailer lights work properly and meet legal requirements. Do not exceed the maxi-mum power consumption for the trailer 142.
Connection to the anti-theft alarm
The trailer is integrated in the anti-theft system if the following conditions are fulfilled:
• When the vehicle has a factory-fitted anti-theft alarm and a factory-fitted towing bracket.
• When the trailer is electrically connected to the towing vehicle via the trailer socket.
• When the vehicle and trailer electric systems are functional, fault-free and undamaged.
• When the vehicle is locked with the vehicle key and the anti-theft alarm is active.
When the vehicle is locked, the alarm will be trig-gered as soon as the electrical connection to the trailer is interrupted.
Always switch off the anti-theft alarm when a trailer is being hitched or unhitched. The tilt sensor could otherwise trigger an alarm unnecessarily.
Trailer with LED rear lights
For technical reasons, trailers with LED tail lights cannot be integrated into the anti-theft alarm sys-tem.
When the vehicle is locked, the alarm is not trig-gered as soon as the electrical connection to the trailer with LED rear lights is interrupted.
A WARNING
Any electrical cables that are not connected properly could cause a power surge to the trailer. This could cause faults tn the entire vehicle electronics system and also lead to accidents and serious Injuries.
• All work on the electric system should be carried out by a qualified workshop.
• Never connect the trailer's electrical sys-tem directly to the electrical connections of the tail lights or to other sources of electrici-ty.
CD
If you park the trailer using the support wheel or other trailer supports, disconnect the trailer from the vehicle. The vehicle could rock up and down if the load changes or if there is damage to the tyres. If this happens, a great deal of force will be exerted on the towing bracket and trailer, which could lead to damage to the vehi-cle and trailer.
CD
Maximum power consumption of the trailer should not be exceeded. Otherwise, the vehicle electrical system could be damaged.
m If there is a fault in the vehicle or trailer elec-L.:!.J trical systems or in the anti-theft alarm, have the systems checked by a qualified workshop.
m If the engine is not running and electrical L.:!.J equipment is switched on in the trailer via the trailer socket, the vehicle battery will discharge. .,.
Transporting Items 145