2012 VOLKSWAGEN GOLF PLUS warning light
[x] Cancel search: warning lightPage 104 of 541
Child restraints and Advanced front airbag system
Please firs t read informatio n and heed the WARNINGS o n page
vehi cle is equipped w ith front complies with United States Federal Motor Vehicle and with Vehicle Safety dard
The Advanced Airbag requirements
for 3 and 6 yea r-old children (a s defined in the
standard) o n the passenger sid e and adults
o n th e side." Low risk" de ployment occurs
in those cras hes place at lower decelerations programmed in the e lectronic control unit. The low risk deployment c riteria are in
t e nded to reduce the risk through int eractio n with the airbag can occur in these colli
sio ns. for example, b y being too close to the steerin g wheel or in strument pan el when the airbag In addition, the system has been certifi ed to comply with the requirements of the Safe ty rd. to turn off the
f ront airbag fo r infant s up to 12 months w ho are restrained on th e front passenger seat in one of the c hild restraint s that a re lis ted in the
Airbag children, especially
those 12 years and younger. mus t a lways ride in the backseat properly re strained for their age and size. The airbag o n the passe nge r sid e makes the front scat potentiall y dangerous place for a child to
ride. The front seat is not the safest place for a child in a forward-facing child seat. la rger child in a rearward -fac ing seat.
The ,\dvanced Airb ag Syste m in your vehicle detects the presence o f a n in fant or child in a child straint on the front passenger seat using th e weight-sen sin g mat in th e scat cushion and the
se nsor in the sa fe ty be lt buckle on the fro nt passenger that measures the tension on the safet y
belt.
The weight-sen sin g measures total weight of the c hild and the child seat and
i.e. the size
pro perly ond safely
and shape of the botto m of the chi ld restraint as it
s it s on the seat. The weight of a chi ld restraint and its vary for different k inds of c hild re
straints and for the diff erent mode ls o f th e same ki nd of child restra int offered by child restraint manufacturers.
The weight ranges for the in div idual types, makes a nd models of child res traint s
the Adva nced Airbag
Syste m compares th e weight measured by the weight-sen sing w ith the information sto re d in the electro ni c cont rol unit.
se nsor in the belt buckle fo r th e front seat
pnssenger measures th e te nsion on th e belt and sends thi s information to the electro ni c control
m odule for the sys tem. The tensio n on the safety belt for the front passenger seat w ill be dif
ferent for an i s properly using the safety
belt, as
w hether th ere is a child res tra int with
restraints and Advanced Airbags
Regnrdlessofthcchild rest raint that yo u u se, make
s u re th at it bee n certifi ed to meet United States Federa l Mo tor Vehicle Standard Motor Vehicl e if you live in sure that the child re
straint yo u arc usin g been cerlifi ed b y its m anufacturer for use w ith airb ag. Always be s ure that th e ch ild restra int is properly installed at one of t h e rear seatin g position s.
of th e information on child
safety and Adva nced
that
th e passenger front is turne d off. that the is light.
Many types have been availn ble over th e years, new models are in-troduced r egularly in corporating new and im-
Page 108 of 541
-Always make sure that the forward-facing seat has been designed and certified by its manufacturer for use on a front passenge r seat with a front and side airbag.
- Always carefully follow the
turer's instructions provided with the child seat or carrier.
- Never install a child restraint without a
properly attached top
tether strap if th e child
restraint manufacturer's instructions quire the top tether strap to be used.
- Never
put the forward-facing child
ment panel.
- Always set
the safety belt upper anchorage to the adjustment position that permits proper installation in accordance with tl1e child restraint manufacturer's instructions.
- Always move the
passenger seat to the high est position in the up and down
straint.
- Always make sure
that nothing prevents the front passen ge r's seat from being moved
to the rearmost position in its fore and aft
-Always make sure that the backrest is in the upright position.
- Never place additional
item s on th e seat that can increase the total weight registered
by the weight-sensing mat and ca use injury
in a crash.
Always buckle the child seat firmly in place
eve n if a
Alway s read and heed aU WARNINGS eve r using a child restraint in a vehicle page
light
comes on and stays on whenever a child straint is installed on tl1e front passenger seat and the ignition is switched on.
AIR BAG
page82.
the off senger seat and install it properly at one of the rear seating positions if the
Have the airbag system inspected by your authorized Volkswagen dealer or aulhorized Volkswagen Service Facility immediat ely .
Page 122 of 541
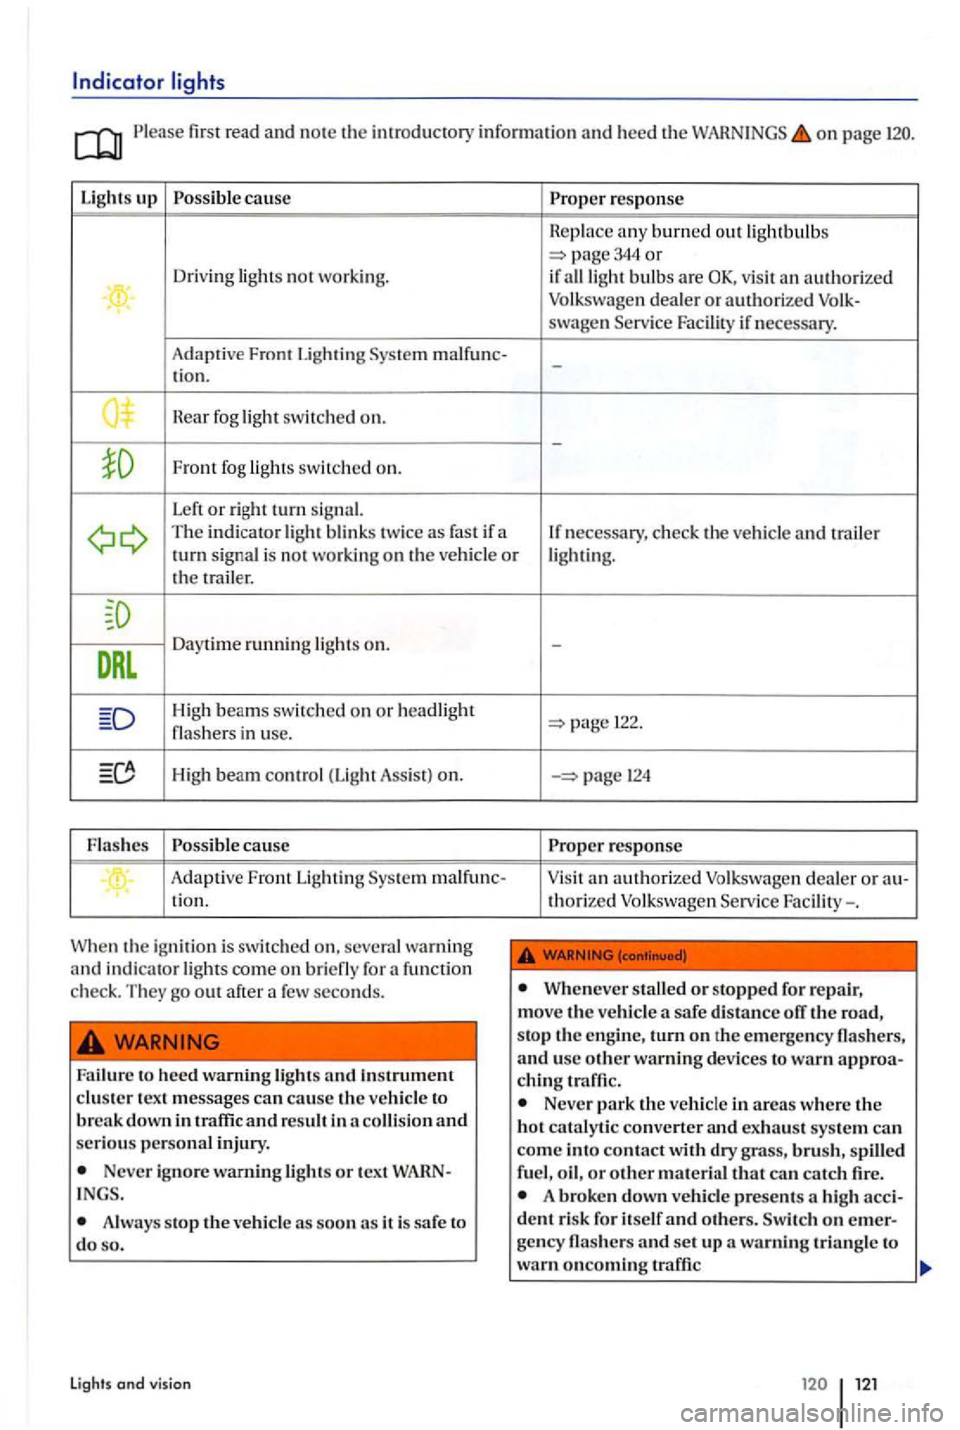
Please first read and no te th e im rod uc tory info rmation a nd heed th e on page
Light s up Possible cau se Proper re sponse
any burned out lightbulb s page 344 or Driving not worki ng.
if ligh t bulbs are d ea le r or authorized ... swage n Serv ice Facility if necess ary.
Adaptive Front Ligh
ting Sys te m malfunc-
t ion. -
near fog s witc h e d on.
-
Front fog
T he in dicato r blin ks twice as fas t if a
If necessary, ch ec k th e vehicle and t railer turn signal is not wo rking on the vehi cle or
DRL
Daytime runnin g on.
High beams switched on or headligh t in use.
High beam co ntrol (Lig ht Assis t) on.
F las h
es Poss ible cause
.. Adap tive Front Lighting Syste m malfun c-tio n.
Whe n the ig nition is swi tched
Failure to heed warning light s and Instrument clu ste r t ex t m essages can cause the vehicle to break down in traffic and result in and seriou s personal injury.
Never i gno re warn ing lights or t ex t INGS.
Alwa ys stop the as soon as it is safe to do so.
light s and vision
-
122.
Proper respon se
a n authorize d
Wheneve r safe di stance ofT the sto p th e e ng in e, turn on th e em erge ncy flasher s,
and usc other warning dev ices to warn chin g
Neve r park the ve hicl e in areas where th e
h o t catalyt ic converter and exhau st syst em can
come int o contact with dry grass, brush, oil , or other m ate rial that can catch fire. A broken down ve h icle present s a high
ge ncy flash ers and se t up warning triangl e to
wa rn oncoming traffic
Page 123 of 541
Note
Failure to heed warning lights or tex t can result in vehicle damage.
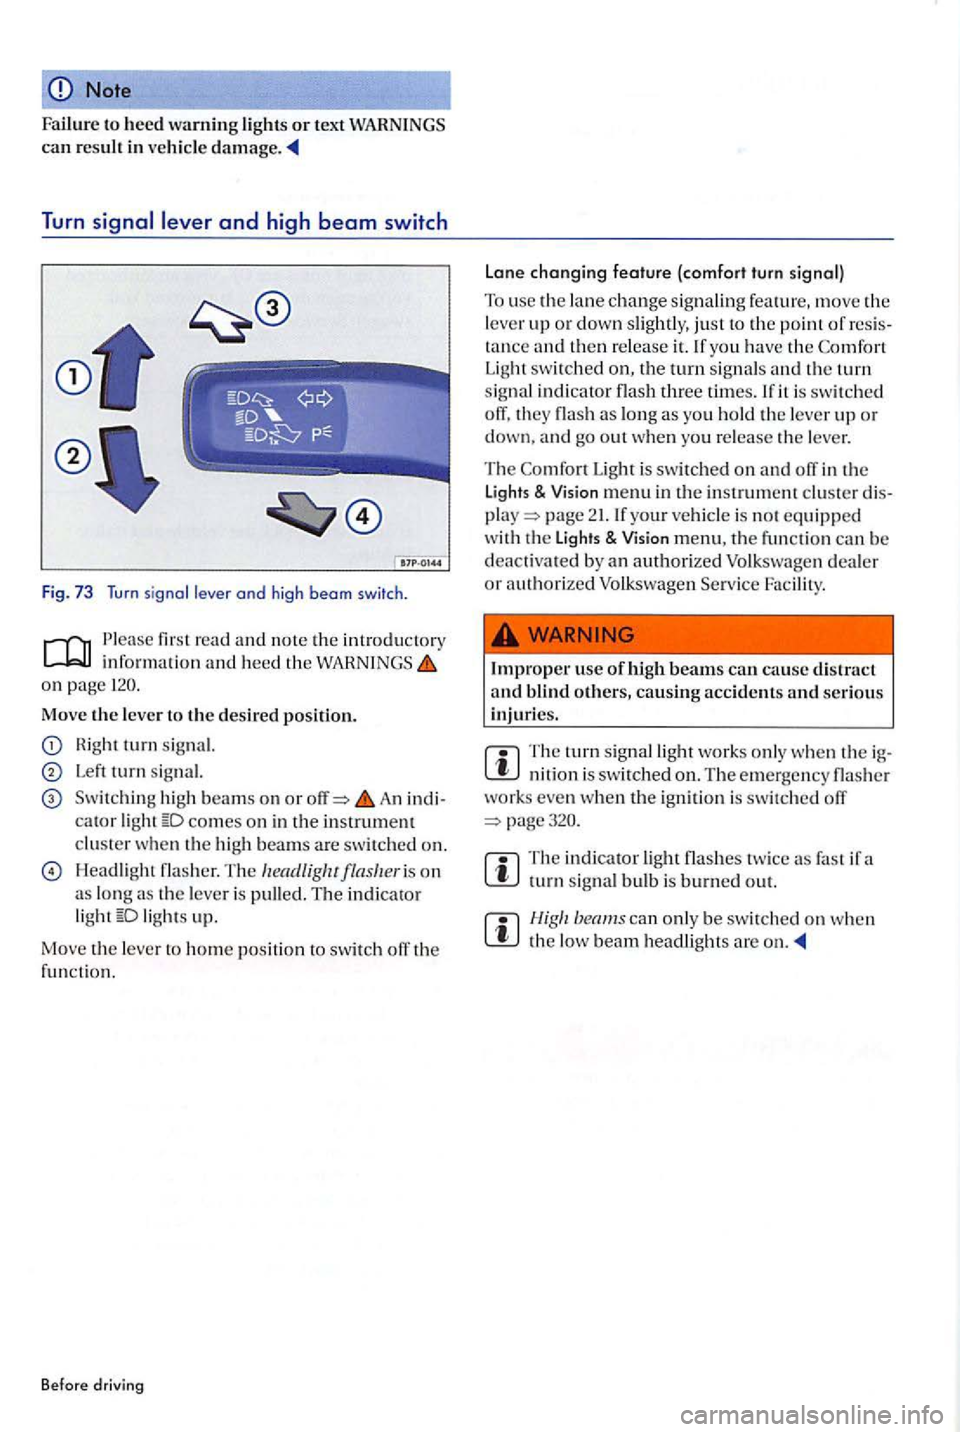
Turn signal le v e r and high beam switch
Fig. 73 Tu rn sig nal leve r and high b eam switch.
P lease first read and note the introduc to ry informa tio n and heed the on page
signal.
Left sig n al.
hi gh beams on o r An
H eadlig h t fla sh er. The headligluflash eris o n
a s lon g as th e lever i s pulled . The indicator light
Light is swi tc h ed on and off in the Lights & Visio n m enu in tl1e instrument clu ste r page 21. If your v e h icl e is not e q uipped
w ith th e Lights & Vision menu, the
The turn signal works only when the
The indicator light fla sh es tw ic e as fast if a turn s ignal bul b is burned out.
the beam headlights are on .
Page 124 of 541
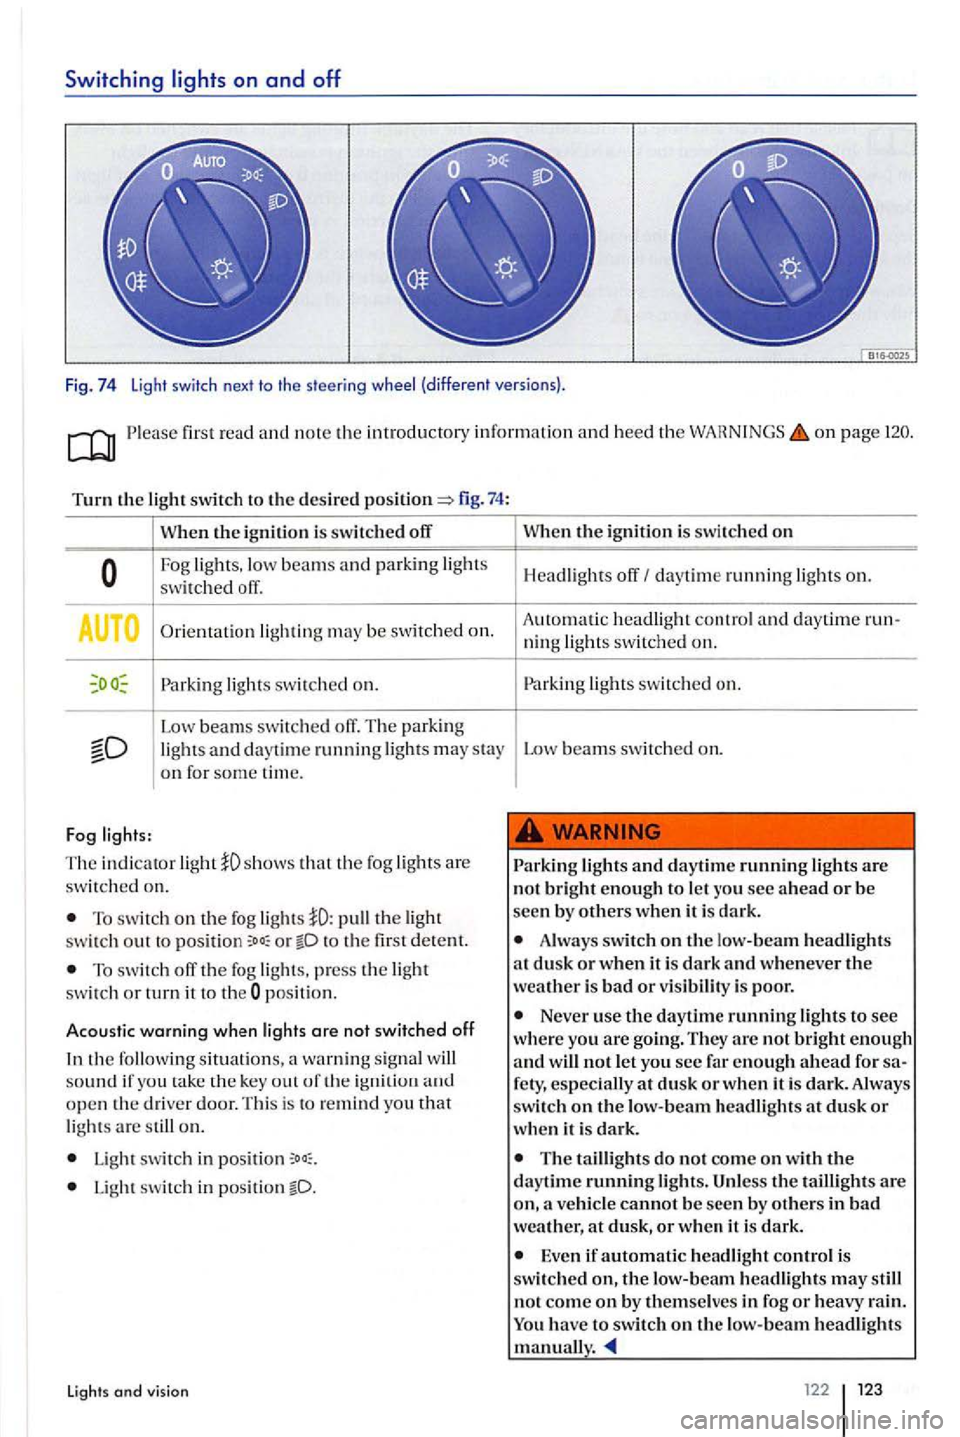
Switching lights on and off
Fig. 74 Light switch next to the steeri ng (different versions).
first read and note the introducto ty information and heed the o n page
Turn the switch to the desired fig . 74:
When t11e ignition is swit ch ed off
Fog lights,
Orientation light ing may be switched on.
light s sw itched on.
--Low beam s swi tc h ed off. T he park ing and day tim e runnin g light s may stay on for some time.
Fog
The indicator light
To switch on the fog the swi tc h out to o r to the first detent.
T o switch th e fog lights, press the ligh t switch or turn it to t he pos ition.
Acoustic warning when lights are not switched off
the following situati on s, a wa rnin g sig nal sound if you take the k ey out o f th e op en th e driver door. This is to remind you that lights are on.
Light switch in
Light switch in position
Lights and vision
t11c ignition is swi tched on
Headligh ts daytim e running on.
A ut
omatic headligh t and daytime ning lights sw itched on.
switched on.
Low beams switched on.
lights and daytime running lights are not bright enough to let
Always switch on t11e lo w-beam headlights at dus k or when it is dark and whenever weather is bad or visibility is poor.
Never use the daytime running lights to see where you are going. They are not bright enough and will not let you see far enough ahead for
The taillight s do not come on t11e daytime running light s. the taillight s are on,
Even if automatic headlig h t control is switched on, the headlights may st ill
not come on by themsel ves in fog or heavy rain. have to switch on the low-beam headlights manual!.
122 123
Page 129 of 541
In this section you'll find information on th e lowing:
Indicator light . . . . . . . . . . . . . . . . . . . . . . . . . . . . . . 128
func tions . . . . . . . . . . . . . . . . . . . . . . . . . . . . .
w iper service pos itio n . . . . . . . . . . . .
Rain sensor . . . . . . . . . . . . . . . . . . . . . . . . . . . . . . . . . 131
and refilling wind shi eld washer fluid 132
More information :
Air condition er air rec irculation mode page 226
Preparatio ns for working in the engin e page 242
Exte rior care and cleaning=> pag e 262
washer fluid without enough frost can freeze on the windshield and duce visibility.
Never use the wind shield wipers/washers when it is freezing without first defrosting the windshield. The washer solution may freeze on the windshie ld and reduce visibility.
sonal injury.
Always replac e wiper blades that are worn,
damaged, or do not kee p the windshield clear.
Note
To help prevent damage to the wiper blades and the wiper motor when it is cold outside, always make sure that blades are not frozen to the shi eld before operating the wipers. When parking the vehicle in freezing weather, it can be he lpful to
plac e th e windshield wipers in the so they do not fr eeze to the windshie ld
Plea se first read and note th e imrodu cto ry informati on and hee d the on page 128.
Light s up Possibl e ca use
was her and re ar windo w
was he r fluid leve l too low.
the ignition is switc h ed Note
Failure to heed warning ligh ts or text can resu lt in ve hicl e damage
Page 132 of 541
lifting and folding the wiper blades away from
th e
windshield
Move the wiper arm s th e serv ice position
Do not handle the wiper b lades; h andle the
wipe r arms o nl y at the a uachment above the w iper blades.
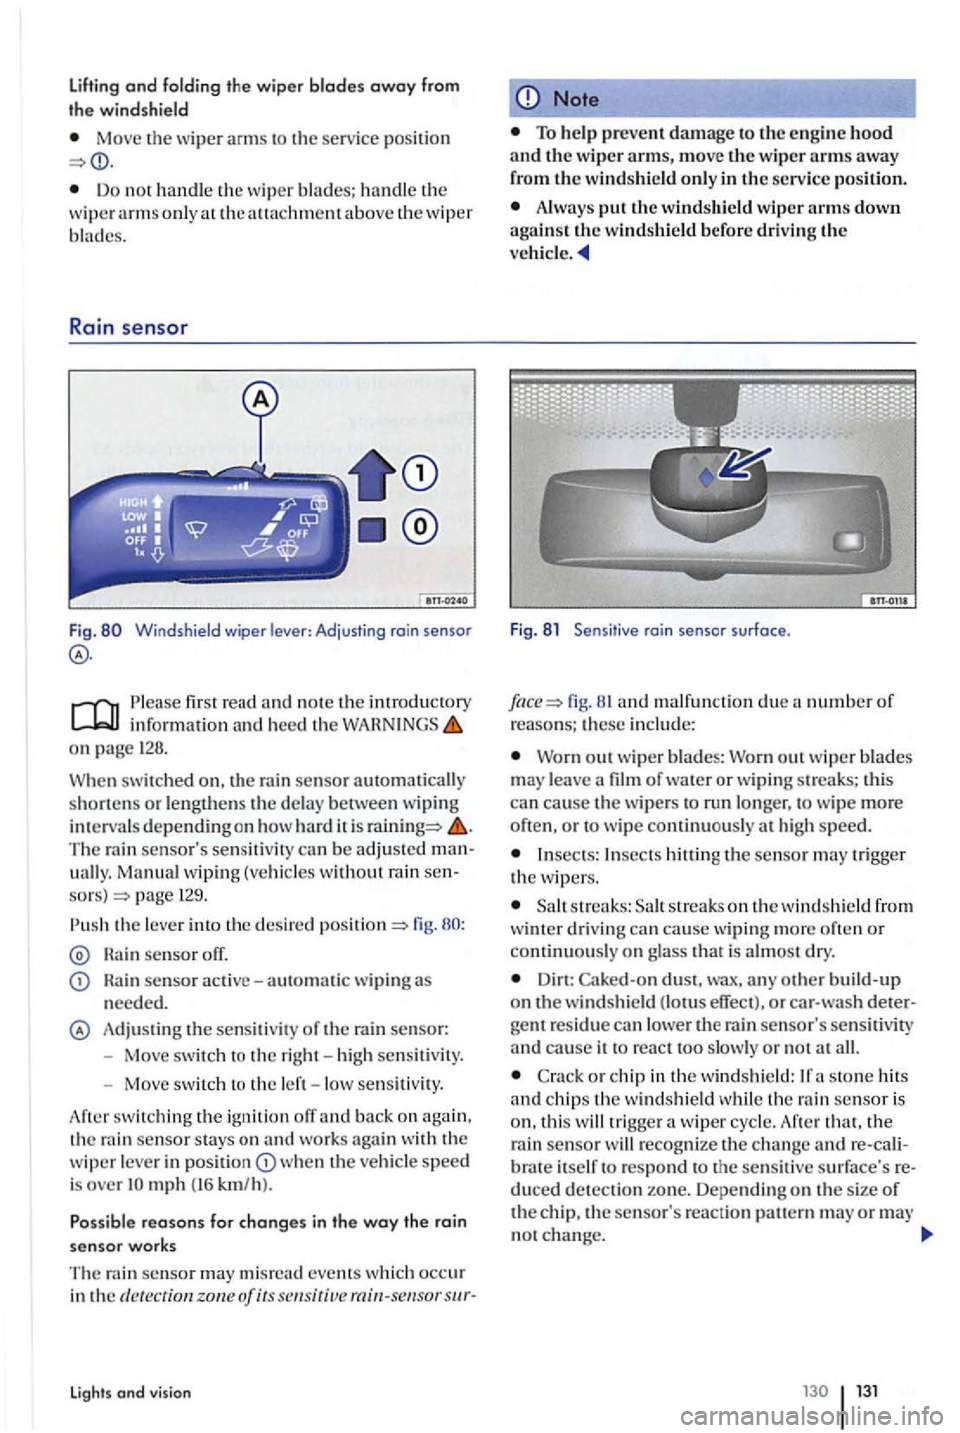
Rai n sens or
Fig. Windshield wiper lever : Adjusting rain senso r
first read and note the introductory information and heed th e WARNINGS on page 128.
When
swit ched on. the rain sensor automatically
shorte n s or le ngthens the de lay betwee n wiping in tervals depend in g on how hard it is The rain sensor's sensiti vity can be adjusted manuall y. Manual wiping (vehicle s w ith out rain sensors) page 129.
Rain sensor off.
sensor active-automatic wiping needed.
Adju stin g the sensit iv it y of the rain sensor:
- Move switc h t o the right -hi gh sen siti vity.
- Move sw itch to the left - low se nsitivity.
swit ch in g th e ignition off an d back on again ,
t h e ra in sensor stays o n and works agai n with the wiper leve r in w he n the vehicle speed is over
events which occur in the dete ction zone of its
Lights and vision
Note
Always the windshield wiper arms down against the windshield before driving the ve hicle.
Fig . 8 1 Sensit ive rai n sensor surface .
fig. 81 an d malfu nction due number of reasons; these in clu de:
Worn out w ip er blades: Wo rn out w iper blades m ay lea ve a film of water or w ipi ng streaks; thi s can cause the wipers run longe r, to wip e more often , o r to w ipe continu ously at h ig h speed.
Insects: Insects the sensor may tri gger the w ipers .
s tr eaks: streaks o n th e w indsh ie ld from
w inter drivin g can cause wiping more often or continu ously on g lass that is almos t dry.
Dirt: Caked-on dust, wax, any build- up on the windshield (lotus effect), or car -w ash detergent residue can lower the rain sensor's sen siti vity and cause it to react too slowly or n o t all.
C ra ck or chip in the wind shi eld :
th at, th e
rai n sensor will recog nize the c ha nge re -cal iitself to respond to the sensit ive su rface's reduced detection zone. Depending on th e s ize of the chip, the sensor's reaction ern may or may no t change.
Page 181 of 541
Warning and indicator
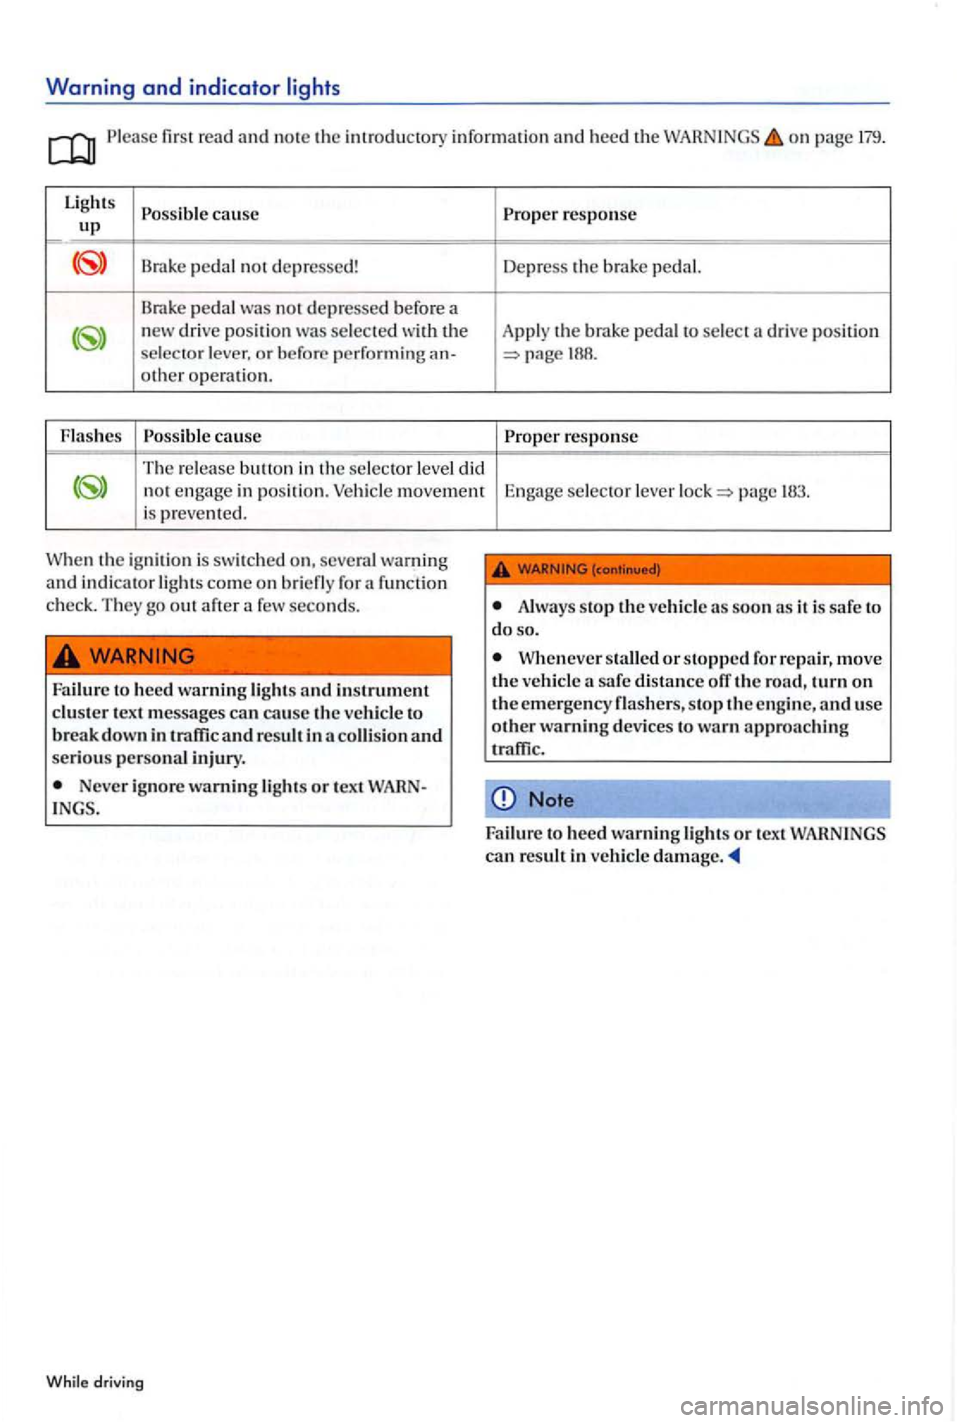
Please fir st r ead and not e th e int rod uc tory informatio n and heed th e on pag e 179.
Light s
Possibl e cause up
Brak e pedal not d ep ressed!
Brake pedal w as not depressed before a new drive position wa s selected with the
se lec to r l eve r. o r be fo re pe rformin g
Possibl e caus e
The re lease bul!on in th e s elec tor leve l did
n o t en gage in po siti on. V ehicle is preve nted.
th e ig niti on i s s witch ed on, seve ral warnin g
and indica to r lig hts c om e on briefly fo r a function
c heck . T hey go out aft er few sec o nd s.
to hee d warning light s and in strument
clu ste r te xt m essages cause the v ehicl e to
b reak d own in and result in colli sion and seri ou s persona l injury.
Neve r ignore warning lig ht .s or t ext
drivin g
Prop er re sponse
Dep ress the brake pedal.
Appl y th e brake pedal to sele ct a dri ve position
Prop er re sp o nse
E ngage se lecto r lev er
page 183.
Alwa ys stop the ve hicl e as s oo n it is safe to
d o s o.
stalled or stopped f or r epa ir , move the ve hicl e a safe di sta n ce
Note
Fa ilur e to heed warning lights o r tex t