2012 VOLKSWAGEN GOLF PLUS Wiper
[x] Cancel search: WiperPage 239 of 541
Introduction
In thi s sectio n you'll find information on the lowing:
Warning light . . . . . . . . . . . . . . . . . . . . . . . . . . . . 244
Getting ready to work in the engine comportment 245
ond closing tho engine comportment . . . 246
A lways
pos iti on th e ve hicl e on a firm and leve l face befor e doin g a ny work in the e ngin e ment.
Th e e ngin e com p
artment of a ve hicle is a hazardo us
area. Neve r do any work on the en gine or in
the engine compartment unless you
- know exactly how to carry out the job, -have th e correc t tec hnica l information and the
prop er tools and supplies, and -are famili ar with the necessary safe ty
I f you are un certain in any way, have the work done by an aut horized Volkswage n dea le r or authorized Volk swage n Se rvice
Wind shi eld wiper and 128
Sta rtin g and stopping th e page 172
Brake 188
Vehicle
while 234
Engi ne
En gin e 252
Part s, accessories, repairs and modificat ions pag e303
Core, maint enance
Unintended vehicle movement during
Neve r work under the unless you have safely secured the vehicle from moving. If
you mus t work under the
are strong enough to support the weight of the vehicle. The jack supplied the vehicle is no t st ro ng enough for purpose and can collapse ca using seriou s personal in-
Th e engine
compartment of any motor vehicl e is
a potentially dangerous and can cause riou s per sonal injury .
Always use extrem e ca ution when doing any work in the engine comp artm ent. Alway s follow
c ommonl y accepted safety practice s and use common sense. Neve r risk personal injury.
Never perform any work in the engine partm ent unl ess you know exactly how to carry
o ut the job and hav e th e correct tec hni cal mation and the correct tools.
w age n dealer ,
We stron gly recommend th at you always
hav e gas disc harg e lamp s (Xenon) and
Page 243 of 541
first r ea d and note th e int roduc tory information and h ee d th e on page242 .
Opening the engine hood
Befo re you open th e hood, make sure that the
w ind shi eld wiper arm s are res tin g on the w ind
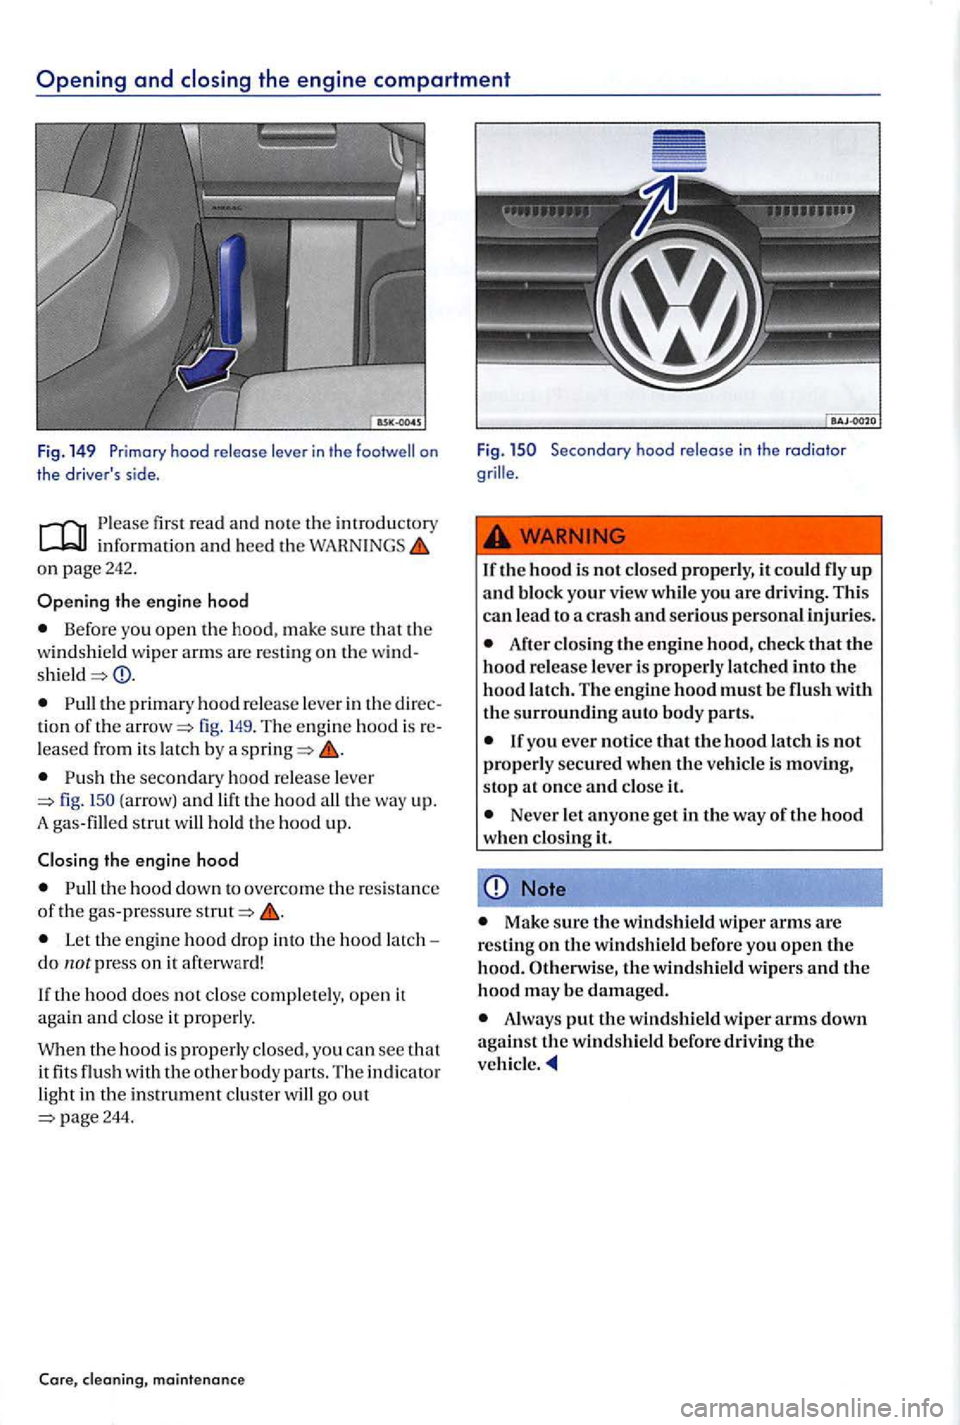
fig. 14 9 . The engine hood is re
l ease d from its latc h by a
the seco ndary hoo d rele ase leve r fig. (arrow) and
th e hoo d dow n to overcome the res ista nce of th e g as-pressure
L et th e engine hood drop into th e hood latch do not press on it afterw ard!
If th e hoo d do es not close compl ete ly, o pe n it aga in and close it properly.
W h
en the ho od is properly clo sed, you ca n see that
it fits flu sh with th e oth er bod y parts. The indi cato r
light in the instrument clu ster will go out
Secondary hood release in th e radia tor
grille .
If
the h ood is not clos ed properly , it could fly up and block your view while you are driving. This can lead to a crash and serious pe rs onal injuries.
After clo sing the e n gine hood, ch eck that the hood releas e le ver is properly l a tc hed into the hood lat ch. The engine hood must be flush with the surrounding auto body parts.
If you ever notic e that tl1e hood latch is not properl y secu re d when the vehicl e is moving,
s top at once and close it.
Nev er le t anyone get in the way of the hood when closing it.
N ote
Make sure the windshield wiper arms are
resting on the winds hi eld before you open tJ1e hood. Otherwi se, the windshield wipers and the hood may be damaged.
Always put the windshield wiper arms down against the windshield before driving the vehicle.
Page 259 of 541
In this section information on th e fol
l owing:
Washing the vehicle . . . . . . . . . . . . . . . . . . . . . . . . . 263
Washing with a power washer ................ .
Cleaning windows
and outside mirrors ......... .
Cleaning
and changing the winds hield wiper
b l
ades .......................
. . . . . . . 267
Cleaning wheel rims . . . . . . . . . . . . . . . . . . . . . . . . . 268
Care of rubber door and window seals . . . . . . . . . 268
De-icing door lock cylinders . . . . . . . . . . . . . . . . . . . 268
Undercoating . . . . . . . . . . . . . . . . . . . . . . . . . . . . . . . 268
Cleaning the engine comportment ....... -. . . . . 269
Regu l
ar and expert ca re helps to preserve the value of your vehicle. expert care may also be o ne of th e requirements of you r New Vehicle Lim ited if co rros ion re pair or repa intin g is neces
s ary.
Veh icle care produc ts avai lable fro m your au
th orized Volkswagen d eale r or A uthorized
Int erio r care and page
Preparations for work ing in the e ngine compage 242
Parts. accessorie s. repair s and modifications
Vehicle care produc ts ca n be dangerous. Im
proper usc c a n cause accid ents, burns, poisonin g, or oth er seri ous persona l injuries.
Alway s sto re vehicle care products only in o rigina l co ntainers that are securely closed.
Alway s read and heed all th e in structions and all o n the pac kag e.
To reduce the risk of poiso ning, never usc empty food or beverage containers that might m is lead someone int o frum
A lways keep vehicl e ca re products out of the reach of childre n .
Never usc fuel, turpentine, eng in e o il, nail poli sh r emov er or ot her vo la til e fluid s for ve
hicl e ca re. They are po isonous and hi ghl y flam
mable.
Improper care and cleaning of ve hicl e component s can impact the safe ty feature s of the ve
hicl e and cause serio us personal injury.
A lways clea n and maintain vehicl e component s according to manufacturer's instructions.
use ap1>roved or recomm ended
clean ers.
Vehi cle care products containing s olvents can damage plastics and other ve hicl e th e material s.
Wash th e ve hicl e only des ig nated was h loca tio ns to preve nt wa ter con
t a minated with oil. grease and fuel from enterin g the storm drain sewe r system. In some are a s it is
a gains t th e to wash motor ve hicles anywhere than other than sp ecified design ated car
was hing locatio n s.
choo se those that are no t harmful to the environ ment.
Never th row out ve hicl e care produ cts with ordina ry house ho ld waste. Always read and hee d all th e in structi ons and on the
Page 261 of 541
To he lp prev ent paint damage to the engine
hood , place wiper blades against th e winds hie ld
after they have dried . Do not le t them snap back
in to p lace.
Washing with a power washer
first r ead and note the introdu ctory information and heed the on pagc262.
A lways follow the instr u ctions
th ere is enoug h dis tan ce to soft ma te
ria ls s uch as rubb er h ose s or insulatin g material as
well a s th e s en so rs of the Dis tance Co ntrol
sys te m . Th e
Never usc conce ntrated jet nozz les or dirt bla sters
Imp rope r usc of power washers can cause se
rious invisibl e permanent d a m age leading to
ti re failur e and loss of ve hicle cont rol. This can cause accide nts and se riou s person al injury.
Keep sufficient di stance b e tween wate r je t
and tir es. Never wash tir es with a no zzle that sprays th e wa ter out in a direct stream re g ard
l ess of th e di stance to the tir e and even for a very
short time .
Neve r u sc b lasters ." to clean tires. Even
a relatively long spraying dista nce and very
s hort applicatio n tim e can do visi ble or inv is ibl e damage to tire s.
Core, maintenance
Lock the hatc h to prevent unintentional ope ning in the car
the ve hicl e has been wash ed , th e wet
b ra kes or, in winter, brake discs or pads coated
w ith icc, rea ct slowe r and need l onger stopping
dista nces.
A lways dry the brakes and clean off any ic e
coa ting s with a few care ful applicatio ns of th e
bra ke. Make sure no t to endan ge r ot11er motor
i sts or c yclists or disobey legal requi rements.
Note
Wate r temperature should not be m ore tha n
To he lp prevent damag e to paint, do not was h th e ve hicl e in dir ect sunli ght.
In order for and Assis t to work correctly, the sensors in the rear bumper must b e kept clean and clear of snow and ice. When using a pow er was her or steam clean er,
onl y spray the se n so rs directly for a short peri od
o f tim e and always keep the nozzle at l eas t4
in ch es em) from the sensor.
D o not clea n icy or snow- covere d w indow s
w ith
When washin g or rinsin g the vehicle in cold
weather, do no t let wate r ge t into the lock cylin
d
ers or po int the hose at gaps around th e doo rs ,
hood or rea r hatcl1. The w ate r could freeze on t11c
locks and sea ls and mak e it difficu lt to open th e
Page 262 of 541
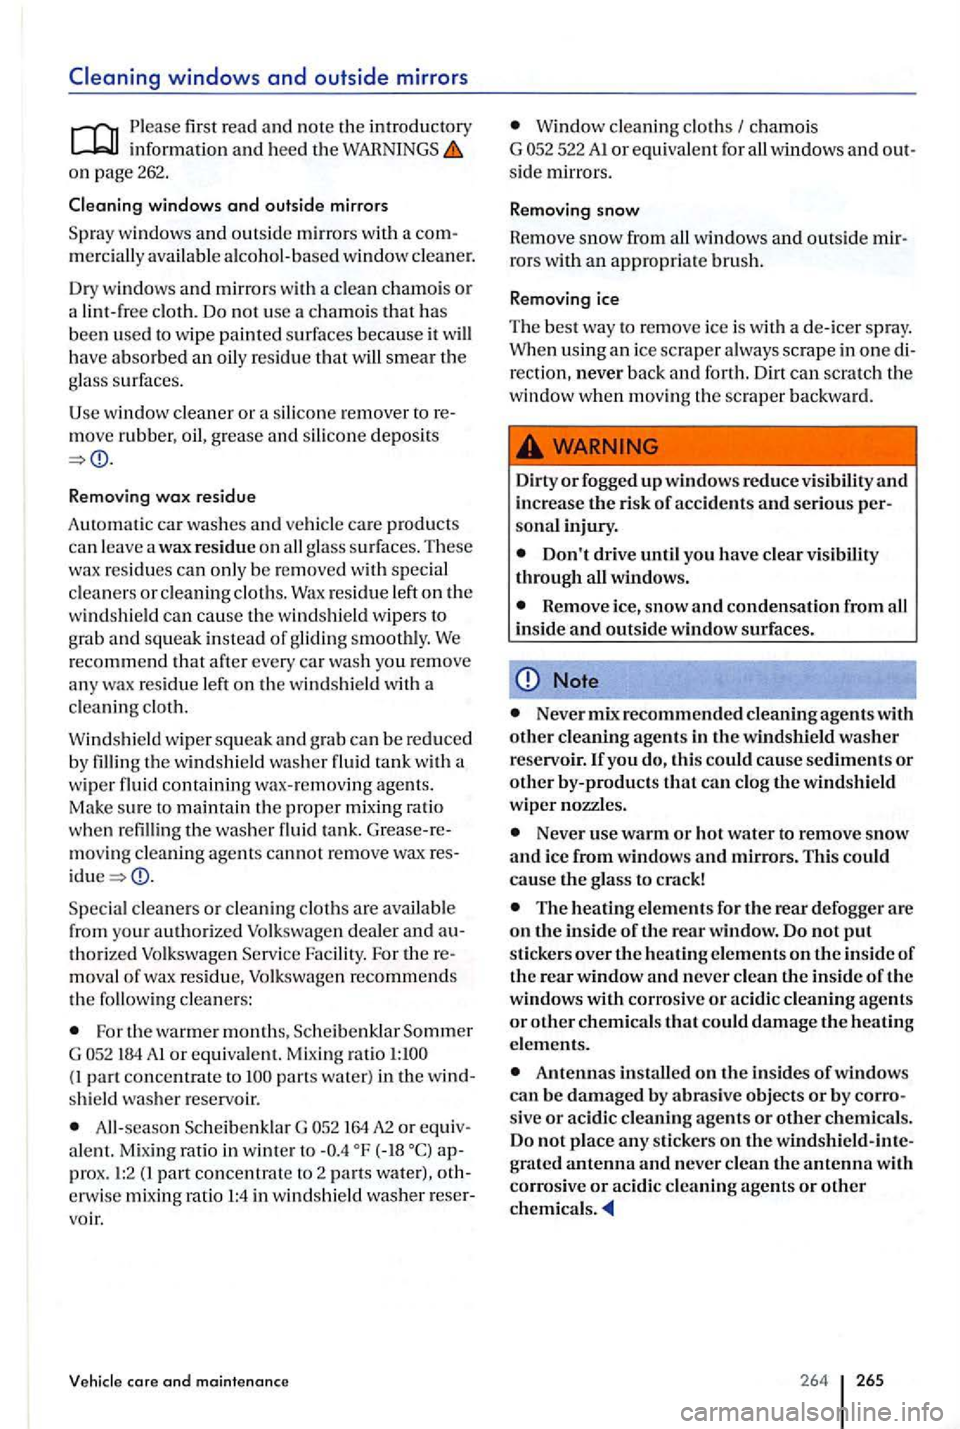
Please first read and n o te the introduc tory informa tion and heed the on page 262.
Cleaning windows
and outside mirrors
windows and outside mirror s with a mercially available alcohol-based window cleaner.
Dry windows
and mirrors with a clean chamois or a lint -free cloth. Do no t use a ch amoi s that has
b ee n used to wip e painted surfaces because it have absorbed an oily res idue that will smear the
g lass surf aces .
Usc window cleaner
or a silicone remover move rubb er, oil, gre ase a nd silico ne depos its
Removing wax residue
A utomat ic ca r was hes an d ve hicl e c
are produ cts
ca n leave a wax res idu e on all glass s u rfaces. These
wax residues can only be re m ove d with special clea ne rs o r cleani ng cloths. Wax re sidue left on t h e
windshield can cause the windshield w ipe rs to
g rab and squeak instead of glidin g smoothly. We recommend that after every car wash you remove
any wax resid ue left on th e w indsh ield w ith a
clea ning cloth.
W ind shi eld w ip
er squeak and grab can be red uced
b y the windshi eld was her fluid tank with a
w ip er fluid containin g wax-remov ing ag ents. Make sur e to maint ain the proper mixing ratio
w hen movin g cleaning cannot remove wax
mova l of wax residu e, Volkswagen recomme nds th e follow ing clean ers :
For the warme r months, Scheib cnklar Sommer
G 184 A I or equival ent. Mixing ratio parts wa te r) in the shi eld was her reservoir.
All-seaso n Scheib en kla r G 164 A2 or ale nt. Mixing ratio in winter
erwise mixing ratio 1:4 in winds hield washe r
Window cleaning cloths 522 AI or equivalent f o r all w ind ows and side mirrors.
Removing snow
Hemove
snow from all wind ows and outsid e
rec tion, never back and forth. Dirt can scratch the
w indow when m ov ing th e sc raper backwa rd.
Dirt y or fogged up window s re duce visibility and in cre ase the ri sk of accidents and seriou s sonal injury.
Don't drive until you have clear visibility through all windows.
Note
Never mix recomm ended cleaning agents wit h
o th er cleaning agents in the windshield washer reservoir.lfyou thi s co uld cause sediments or o th er by-produ cts that ca n clog the windshield wiper nozzles.
Neve r use warm or ho t water to remove snow and ice from windows and mirror s. This could cause the glass to crack!
Antennas installed on th e insides of windows can be damaged b y abrasive objects or by sive or acidic cleaning agents or other ch emicals. Do not plac e any stick ers on the
2 64 265
Page 263 of 541
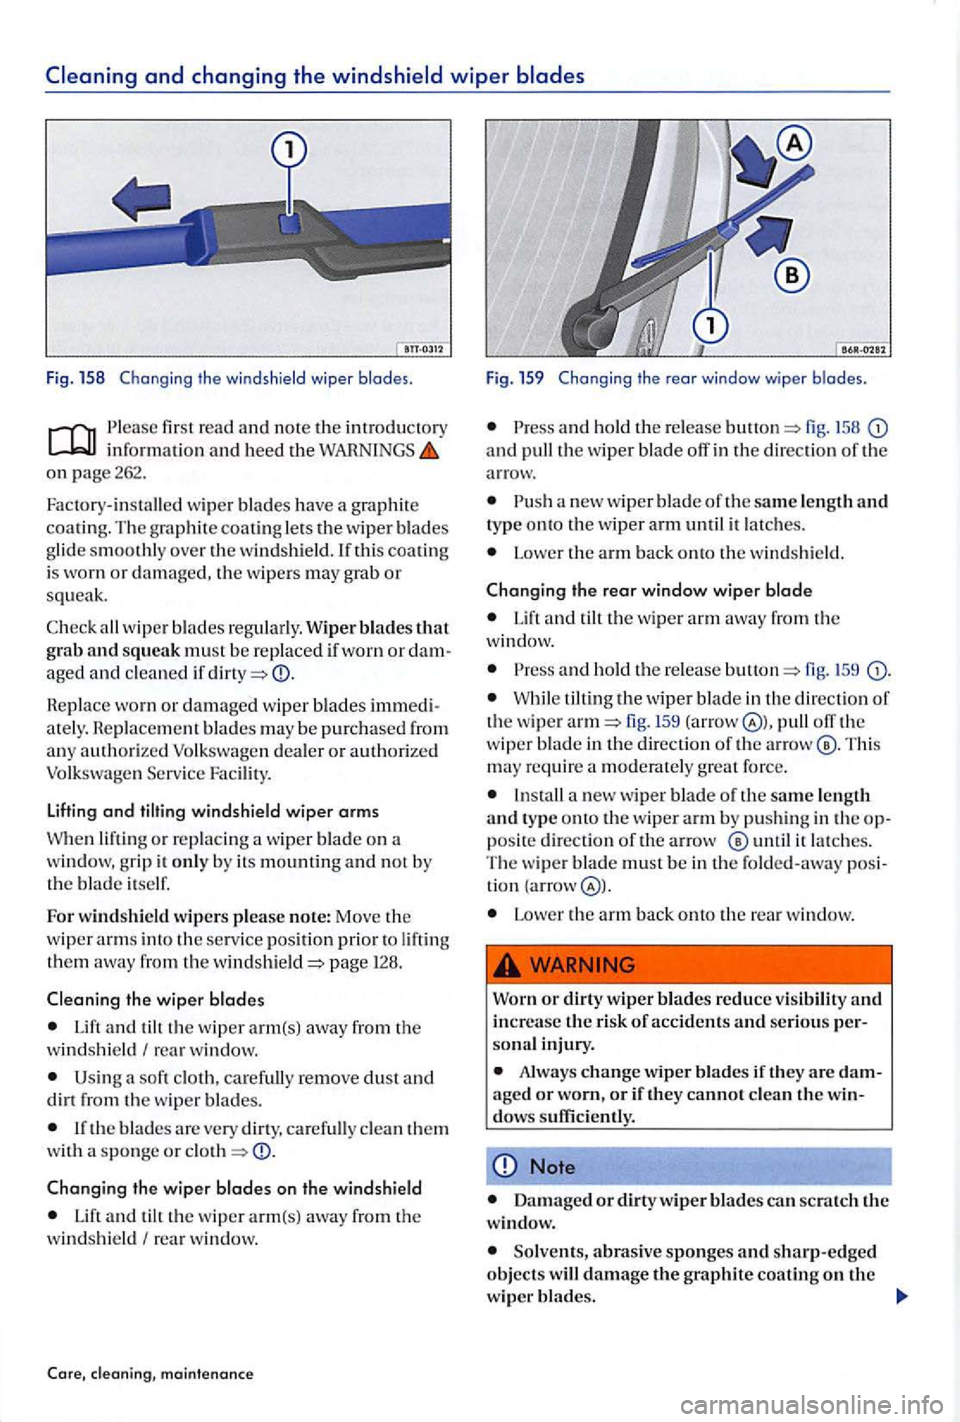
first r ead and not e th e introdu cto ry in fo rmati on and heed th e on page 262.
wip er b lades have a g raphit e
coating. Th e gra phit e coating le ts th e w ip er b la d es
g lid e smoothl y over the w ind shi eld.lfthis coating
i s worn or d am age d, the w ipers m ay grab or squ eak.
wip er bla d es regularly. Wiper blades that grab and squeak m ust b e re placed if worn or
Replace wo m or damaged wip er b lades ate ly. R ep lac em ent may be purch ased fro m
a ny authorize d Se rv ic e Faci lity
Lifting and windshield wiper arms
W he n lift in g o r re plac ing a w iper b la d e o n grip it onl y b y its m ounting and not by
th e blad e itself.
For windshi eld wipe rs p lease note: M ove the
w ip er a rm s in to th e serv ice pos ition prior to lifting
th em awa y fro m the page 128.
Cleaning th e wiper blades
Lift and the wip er arm(s) awa y from the
w ind shi eld I rea r w indow.
Usin g a soft cloth, care full y re m ove dust a nd dirt fro m th e wiper bla d es.
clean th em
w ith a sp onge or
Changing the w ip er blades on th e windshi eld
Lift and th e wipe r arm(s ) awa y from th e
w in dsh ie ld I re a r w ind ow .
maintenanc e
Fig. 159 Changing the rear windo w wip e r b lades.
and h o ld th e re le a se 15 8 and th e w iper blade off in the direc tio n of th e
a rro w.
a
Lo we r th e arm b ack onto the w in d shield .
Changing the rear window w iper
Lift and tilt th e w iper a rm aw ay fro m the
w ind ow.
and ho ld t he re lease 1 5 9
W hile th e w iper b lade in the direc tio n of th e w ip e r !59 (arro w off th e
wip er blade in the dir ection of th e This
m ay require moderat ely
a new wiper bl ade o f th e same length and type onto th e w ip er a rm b y pu shin g in the pos ite dir ectio n of th e arrow ® until it l atc h es.
Th e w ip e r b lade must b e in the fo ld ed -aw ay
Low er th e arm bac k onto the rea r w indow.
Worn
or d ir ty wiper blades reduce visibilit y and increase the ri sk of accidents and se riou s so n al in jury.
Always change wip er blades if th ey are or if they cannot clea n the
Note
Damag ed or dirty w ip er blades can sc ra tch the window.
graphit e coating on th e
wiper blades.
Page 370 of 541

Water under vehicle . . . . . . . . . . . . . . . . . 231
Wipers ............................. 129
S peed rating code le tter ................. 293
Stalling
Protecting th e ve hicle ................
S teering ...............................
Cou nter- steering support ............
E lectro-mechanical. . . . . . . . . . . . . . . . . .
Indicator light. ......................
to one side ................... 286 Servo steering .......................
Steering co lumn lock .... ............
Steering wheel
A dju sti
ng . . . . . . . . . . . . . . . . . . . . . . . . . . . . 63 S hift paddles (Ti ptron ic) . . . . . . . . . . . . . 185
Sticke rs . . . . . . . . . . . . . . . . . . . . . . . . . . . . . . . 311
Storage areas . . . . . . . . . . . . . . . . . . . . . . . . . .
storage compartments . . . . . . . . . 165
Overhead console . . . . . . . . . . . . . . . . . . . 161
manual. . . . . . . . . . . . . . . . . . . . . 16 3
Pa sse nge r sid e . . . . . . . . . . . . . . . . . . . . . . 16 3 Storage compartment light . . . . . . . . . . . 125
Stow ing luggage . . . . . . . . . . . . . . . . . . . . . . . 13 8
protection. . . . . . . . . . . . . . . . . . . . . . . . . 126
brak e sys tem (ABS) . . . . . . . . . 194
Regulation . . . . . . . . . . . . . . . . . 196
194
Launch control program . . . . . . . . . . . . . 186
Assis t . . . . . . . . . . . . . . . . . . . . . . . . . .
Distance Control. . . . . . . . . . . . . . . .
Rear Assist . . . . . . . . . . . . . . . . . . . . . . . . . .
C urb weight. . . . . . . . . . . . . . . . . . . . . . . . .
Dimensions. . . . . . . . . . . . . . . . . . . . . . . . . . 33
Displacement . . . . . . . . . . . . . . . . . . . . . . . . 32 E ngin e data an d dimensions . . . . . . . . . . 32
Engine oil specifications . . . . . . . . . . . . . 248
Filling capacity. . . . . . . . . . . . . . . . . . . . . . 132
Fu el capacities . . . . . . . . . . . . . . . . . . . . . . 237 Gross vehicle we ight. . . . . . . . . . . . . . . . .
.............................. 32
Roof load . . . . . . . . . . . . . . . . . . . . . . . . . . . 15 1
Sa fety Compliance Certif ic ation Label. . 3 1
Tir e pressure . . . . . . . . . . . . . . . 283 Tongue load . . . . . . . . . . . . . . . . . . . . . . . . 152 Weights . . . . . . . . . . . . . . . . . . . . . . . . . . . .
Technical modifica tions . . . . . . . . . . . . . . . .
temperature . . . . . . . . . . . . . . . . . . 17
Temperature gauge
E n gin e coolant . . . . . . . . . . . . . . . . . . . . . . 252
hooks........................ 146
T ighteni ng torque Whee l bo lts . . . . . . . . . . . . . . . . . . . . . . . . . 332
372 373
Page 373 of 541
Vehicle identification number ............ 3 1
Vehicle key
Indi
cator light . . . . . . . . . . . . . . . . . . . . . . . 36
Vehicle key set. . . . . . . . . . . . . . . . . . . . . . . . . . 34
Vehicle keys
button......................... 34 Regio nal diff ere nces . . . . . . . . . . . . . . . . . . 34
Sy nchronizing ........................ 37
Valet ke y . . . . . . . . . . . . . . . . . . . . . . . . . . . . 35
Vehicl e labels ............................ 31
V eh icle modifications. . . . . . . . . . . . . . . . . . Signs. . ........................... 311
Sticker s . . . . . . . . . . . . . . . . . . . . . . . . . . . . .
. . . . . . . . . . . . . . . . . . . . . . . . . . . . 326
V ehi cle washing
Spec ia l con sid eration s. . . . . . . . . . . . . . . 263
Volk swage n Information System .......... 21
Displa ys. . . . . . . . . . . . . . . . . . . . . . . . . . . . . . 21 Menu structure ........... ............ 21
w
Warning light
Alternator.. . . . . . . . . . . . . . . . . . . . . . . . . 258
Brak e sys tem .......... .............. 189
Cruise co ntrol .................... .. . 215
Depre ssing
the brake ................. 189
Doors... ............................ 43
Engine coo la nt. . . . . . . . . . . . . . . . . . . . . . 252 Engine hood. . . . . . . . . . . . . . . . . . . . . . . . 244 Engine oil pressure ................... 247
Overv iew . . . . . . . . . . . . . . . . . . . . . . . . . . . . . 13
Rear h atc h . . . . . . . . . . . . . . . . . . . . . . . . . . . 46
Safety belt s . . . . . . . . . . . . . . . . . . . . . . . . . . 68
Shiftin g ............................. S teerin g column lock.. . . . . . . . . . . . . . .
. . . . . . . . . . . . . . . . . . . . . . . . . . .
Washing vehicl e
S p
ecia l con sideration s. . . . . . . . . . . . . . . . 42
Waxing the paint . . . . . . . . . . . . . . . . . . . . . . 267
Wear indicato r . . . . . . . . . . . . . . . . . . . . . . . . 286
Weights ................................
What if? ..................•............. 318
Whe el bolts . . . . . . . . . . . . . . . . . . . . . . . 332
Cove r caps . . . . . . . . . . . . . . . . . . . . . . . . . 329
Tightening
torque ....... . ............ 332
Whe el change ........... ..... ......... 331
Wheel covers . . . . . . . . . . . . . . . . . . . . . . . . . . 328 Full w heel cover . . . . . . . . . . . . . . . . . . . . 329
Hubcap ................. ..... ...... 328
Whee l bolt c
aps. . . . . . . . . . . . . . . . . . . . . 329
Wheel rims. . . . . . . . . . . . . . . . . . . . . . . . . . . .
Bolted deco rative cover. . . . . . . . . . . . . .
Bolted rim ring . . . . . . . . . . . . . . . . . . . . .
C leaning . . . . . . . . . . . . . . . . . . . . . . . . . . . 268
Window s
power windows . . . . . . . . . . . . . . . . . . 48
Wind shi eld
Insulat ed ............................ 127
Wind shi eld washer ..................... 128
Windshield washer
C heck ing ............................ 132
Indicator li ght ....................... 128
R efi llin g ............................. 132
Wind shield
wiper
F un ction s .. .........................
Headlight washer sys te m ............. H eated wash er no zzles ...............
Lifting off the wiper blade ............. Lifting th e w ip er blade ................
po siti on ...................... W in d shi eld wip er leve r ............... 129
Wind shield wiper serv ice position .......
Wind shie ld wipers ...................... 128
Wind shi eld-integrated antenna .......... 312
Wint er di esel ........................... 241
Winter ope
ration
F ue l consumptio n . . . . . . . . . . . . . . . . . . Headli ght wa sher sys tem .............
H ea te d was he r n ozz les ............... Menu s e ttin g . . . . . . . . . . . . . . . . . . . . . . . . 25 s treak s ......... ................. 13 1