Page 137 of 516
21 or the power locking buttons 22 are pushed repeatedly in quick succes
sion , the power locking system is switched off for a
br i
ef period to help keep it from being overloaded.
Mechanical key
Fig. 17 Mechanical key.
tory information and heed the WARNon page 36.
The vehicle is then unlocked for about secon ds. Unless a door or the rear hatch is opened in this
span of lime , th e vehicle is automatically locked af-
leiWards.
The vehicle key set may also include a mechanical
key 17 .
Use the mechanical key for:
locking and unlocking the vehicle
Starting the engine
light in the remote control vehicle
key .
Please first read and note the introductory information and heed the WARNon page 36.
Before driving
the indicator light 18 (arrow )
repeatedly .
the indicator light in the remote control vehicle
key does not come on whe n the button is pressed,
t he battery inside
the key mus t be rep laced
293.
Page 141 of 516

Automatic locking (Auto Lock)
The vehicle locks au tomatically when it reaches a
speed of about 10 mph (15 km/h) . When the vehi
cle is locked , the indicator light comes on in the
power lock ing button
a door once.
-
a door once.
- Lock the vehicle with the remote control vehicle key.
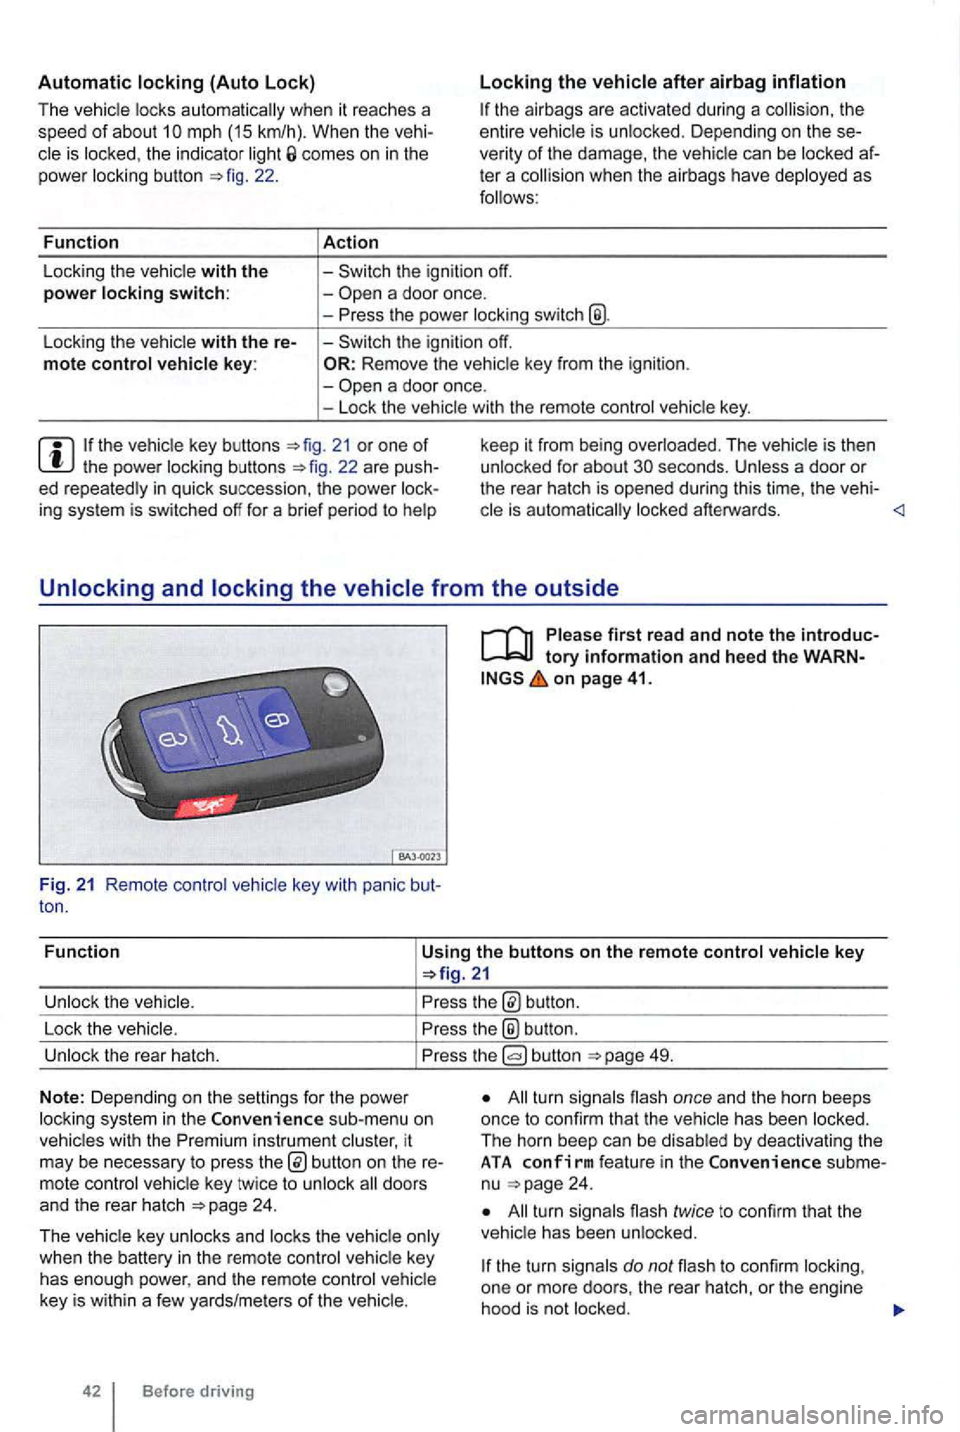
21 or one of th e power locking buttons
on page 41.
Fun c
tion
Using the buttons on the remote control vehicle key
button.
Lock the vehic le.
the® button .
Unlock the rear hatch. button 49.
N o
te: Depending on the settin gs for the power
l ock ing system in the sub-menu on
vehicles with the instrument cluster, it
may be necessary to press
24 .
T he vehicle key unlocks and locks the vehicle only
when the battery
in the remote control vehicle key
has enough power, and the remote control vehicle
key is wi
thin a few yards/me ters of the vehicle.
42 Before driving
All turn signals flash once and the horn beeps
once to confirm that the vehic le has been locked.
The horn beep can be disabled
by deactivating the ATA co nfirm feat ure in the subme
nu 24 .
All turn signals flash twice to confirm that the
vehicle has been unlocked.
the turn signals do not flash to confirm lock ing,
one or mor e doors , the rear hatch, or the engine
hood is not
locked.
Page 144 of 516

N
if a seco nd valid
by press ing a button on the deactivated key.
by pressing a door handle sensor when the de
activated key is outside of the vehicle , but with in
range .
by starting the engine with the starter butto n.
Automatic deactivation of sensors
deactivated .
is activated too often, for instance by a bush or hedge that rubs against the the sensors in the door handle on that side of the vehicle are
switched off for a short time.
T he door handle sensors become active again if
one of the even ts occurs:
A short time has passed.
The rear hatch is opened .
The key .
Anti-theft
tory information and hee d the WARN on page 41.
T he anti-theft alarm system makes it more difficult
for someon e to break into or steal the veh icle .
The anti-theft alarm system is
key i s within range of the vehicle.
T he door may not open if the outside and in side door handles are used at the same time.
the vehicle battery or the battery in the remote control vehicle key is weak or dead , it
might not be possible to unlock and using Keyless Access. The vehicle can locked or unlocked with the key bit
The driver message Key not in ra nge ap pears in the instrument cluster display if there
is no remote control vehicle key inside the vehicle
or if the system does not recognize the
key. The key may not be recognized , for example, if it is
covered by something that interferes with the sig
(such as a briefcase) , or if the remote control
vehicle key battery is weak. Electronic devices
such
as phones can interfere with the sig
Dirt on the door handles that conta ins a of in winter) can affect the way
the door handle sensors work.
with this problem .
Automatic transmissio n vehic les can
Opening a door that has been un
locked and not switching on the igni tion with in
about 15 seconds.
Forcibly opening a door.
Forcibly opening the engine hood.
Forcib ly opening the rea r hat ch.
and closi ng 45
Page 155 of 516
Power
protection for the power sunroof
More information:
Volkswagen 24
locking and closi ng system
Emergency closing and opening
56
57
57
cess to the vehicle key. Unsupervised use of the remote control vehicle key makes it sible to lock the vehicle, start the engine, turn on the ignition and operate the sliding and tilting roof.
Remove leaves and other objects from the sunroof guiderails regularly either by hand or
using a vacuum cleaner.
the powe r sunroof malfunctions, pinch tection may not function properly . an
Opening and
the headliner : rotary switch for the
on page 56.
56 Before driving Turn
the
31 rotary switch to the desi red pos i
tio n to set the power sunroof in the following posi
tions :
® Closed .
@
Tilted.
You must switch on the ignition to operate the
Page 161 of 516
on page 58.
The cont rols on the front passenger seat mirro r
those on the driver seat. Fig
. 36 Lumbar support control (if app licable) .
There
may be both manual and elect rical
Forward or back-Adjust backrest angle. ward.
Press fig. 36 switch for each area:
Adjust lumbar support.
Adjust lumbar support height.
Improper use of electrical seat controls can cause serious personal injuries.
up the stored memory set-
tings for the front seats.
on ply concentrated pressure to a area of the seat or backrest.
the vehicle battery is too weak , the elect rical seat adjustment controls may not work .
When entering and exiting the vehicle , be careful not to come into contact with any
switches that could change the seat adjustment.
Starting the engine stops seat adjustment.
Page 172 of 516

Safety belts protect
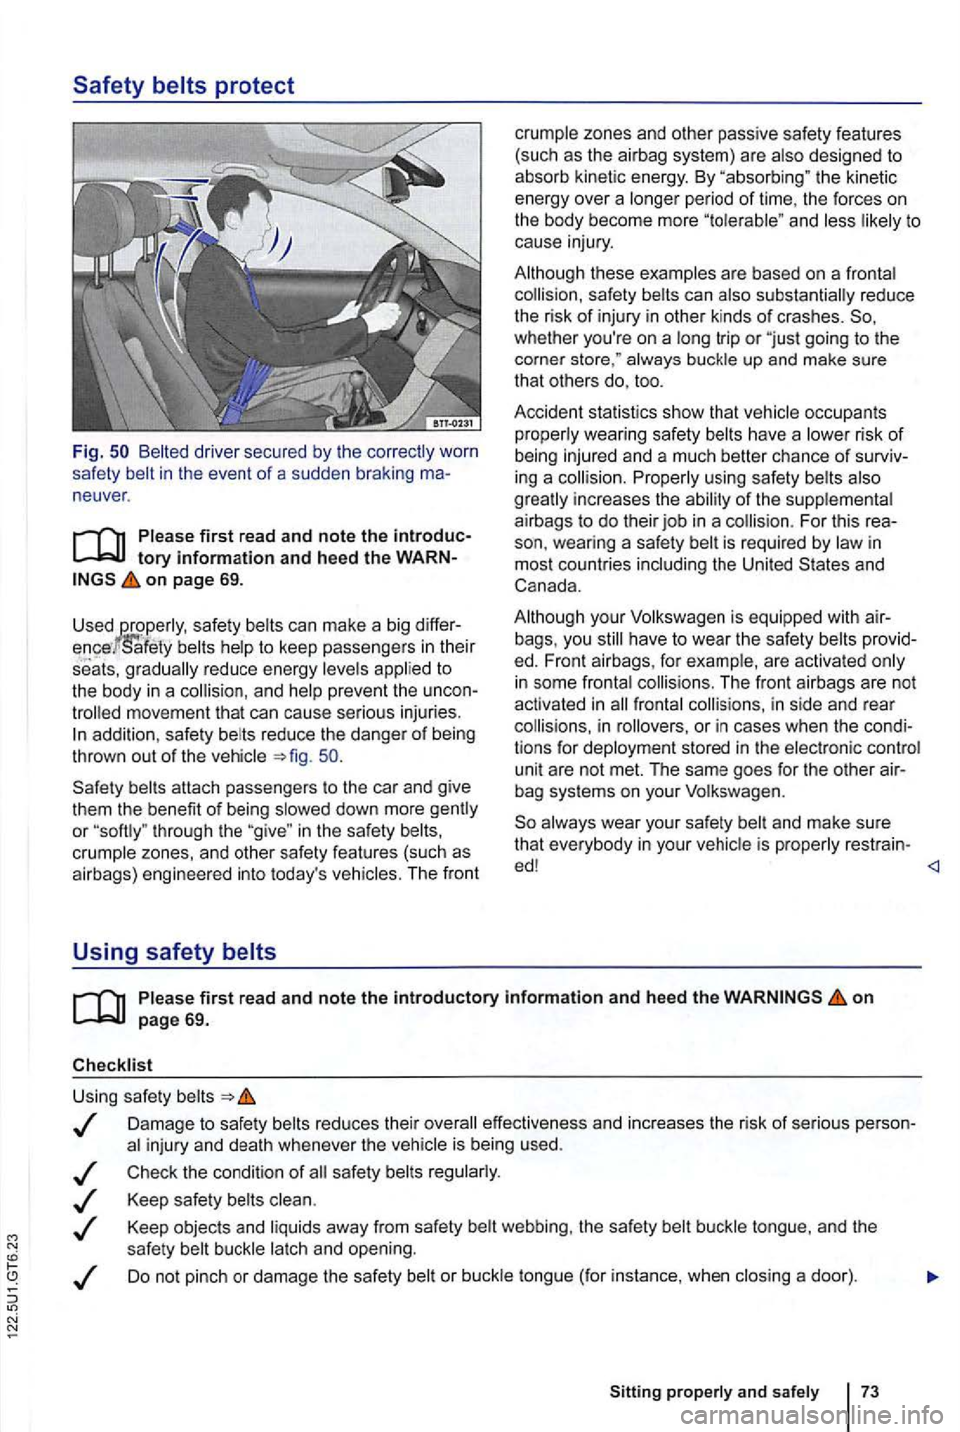
Fig. Belted driver secured by the
neuver .
on page 69.
Used safe ty can make a big
to
the body in a co llision , and help prevent the
addition , safe ty reduce the danger of being
thrown out of the vehicle
or through the in the safety crumple zones, and other safety features (such as
airbags) engineered into today's The front
Using safety belts
crumple zones and other passive safety features
(such as the airbag system) are also designed to
absorb kinetic energy. By "absorbing " the kinetic
energy over a longe r pe riod
of time, the forces on
the body become more to
cause injury.
Although these examples are based on a fronta l
collision , safety
whether you're on a long trip or "just going to the
corner always buckle up and make sure
that others do, too.
Accident statist ics show that vehicle occupants
p roperly wearing safety
also
g reatly increases the ability of the supp lementa l
airbags to do thei r job in a collision. For this is required by in
most countries including the United
your Volkswagen is equipped with have to wear the safety
bag systems on your Volkswagen.
always wear your safety is properly restra in -
ed!
o n
Damage to safety reduces their overall effectiveness and increases the risk of serious injury and death whenever the
Check the condition of
webbing , the safety buckle tongue, and the
safety buckle latch and opening.
Do not pinch or damage the safety
Page 228 of 516
find information about:
Indicator light . . . . . . . . . . . . . . . . . . . . . . . . . . .
129
W indshield wiper lever . . . . . . . . . . . . . . . . . . .
Windshield wiper funct ions ................ 131
Windshiel d wiper service position . . . . . . . . . . 132
Checking and
Exterior views 6
Climate control
Preparations for working in the engine compart
ment page 222
Exterior care and cleani ng
Windshield washer fluid without enough frost protection can freeze on the windshield and reduce
..
Worn or dirty wiper blades reduce
132.
on
windshield washer reservoir at the next
opportun ity 132 .
Failure to heed warning lights or text WARNcan result in vehicle damage .
Light s and vision
129
Page 231 of 516
Windshield wiper service position
Fig. 78
first re ad and no te the introduc
on page 129.
away from the
Press the wiper down briefly 76 @ when the ign ition is off.
Wipers move into service position.
be
fore driving! Switch the ignition on and press the
down briefly position.
Lifting the wipe r blades and tilting them a w ay from the windshield
Put the wiper arms in service position
Do not the wiper the wip
er arms
To pre ven t da mage to the e ngine hood
and the winds hi eld wiper arms, o nl y when th ey
a re in the service position.
put the wipe r arm s down ag ai nst the
Checking and
washer fluid reservoir .
first r ea d an d note the intro duc
on p age 12 9.
the
the engine hood 222.
The washer 79.
if there is was her
with an appropriate
weather, use a that
capacity
T h e washer reservoir