Page 207 of 744
207
2-2. Instrument cluster
2
When driving
Accessor y meter
Outside temperature display (if equipped)
Displays the outside air temperature. (P. 491)
Outside temperature and trip information display (if equipped)
Displays the outside temperature and trip information.
(P. 2 0 8 491)
Clock ( P. 490)
H (Hour) button
( P. 490)
M (Minute) button ( P. 490)
INFO button (if equipped)
SELECT RESET button (if equipped)
SETUP button (if equipped)
Page 208 of 744

208 2-2. Instrument cluster
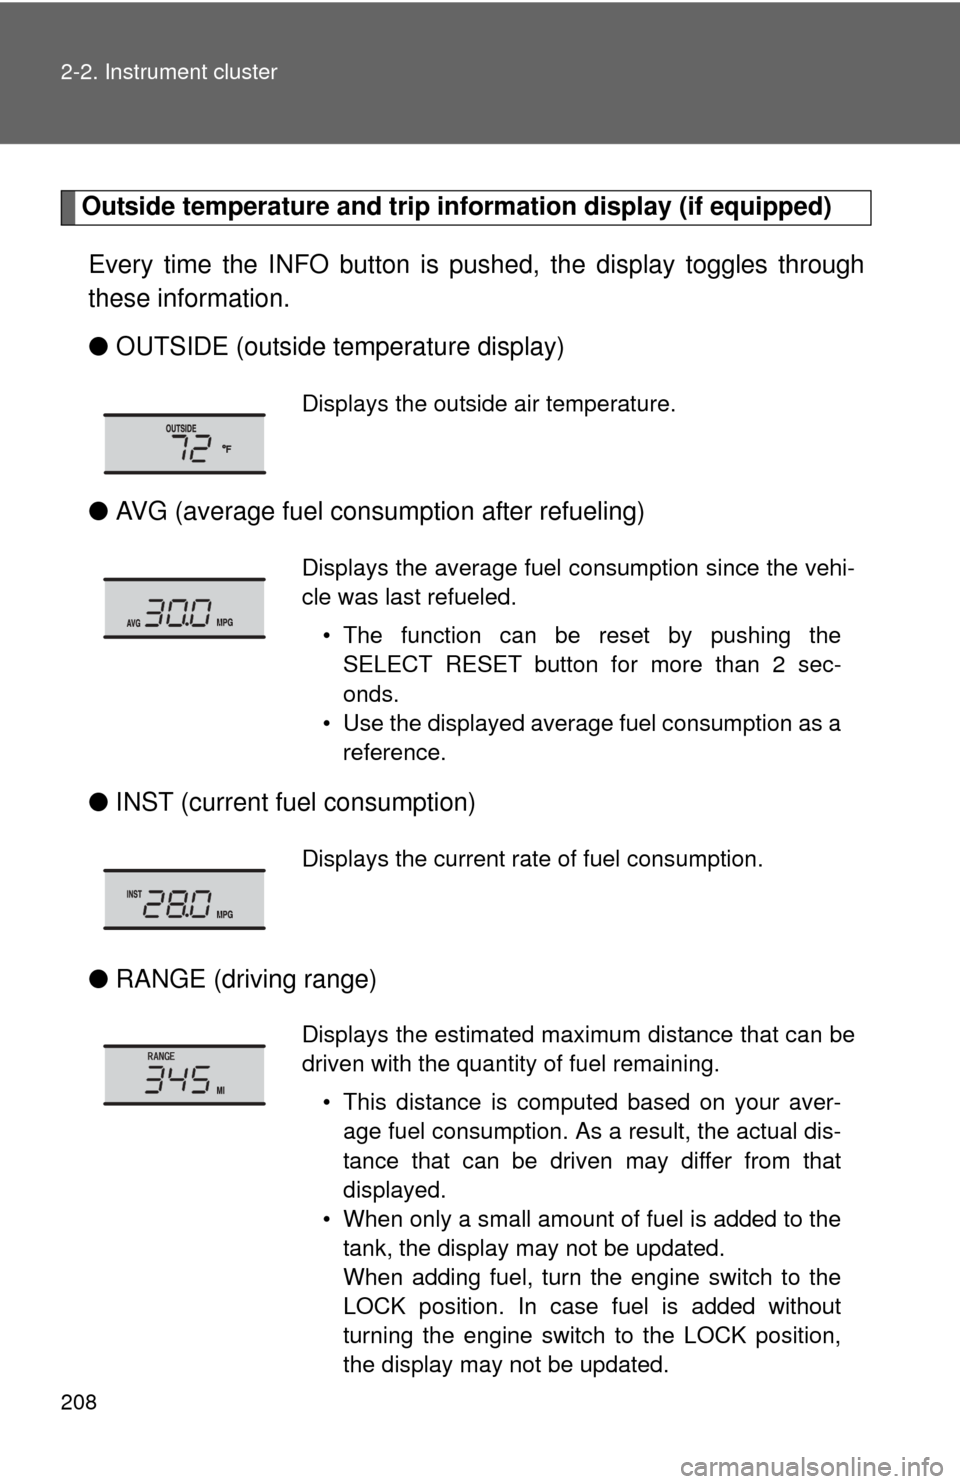
Outside temperature and trip information display (if equipped)
Every time the INFO button is pushed, the display toggles through
these information.
● OUTSIDE (outside temperature display)
● AVG (average fuel consumption after refueling)
● INST (current fu el consumption)
● RANGE (driving range)
Displays the outside air temperature.
Displays the average fuel consumption since the vehi-
cle was last refueled.
• The function can be reset by pushing theSELECT RESET button for more than 2 sec-
onds.
• Use the displayed average fuel consumption as a reference.
Displays the current rate of fuel consumption.
Displays the estimated maximum distance that can be
driven with the quantity of fuel remaining.
• This distance is computed based on your aver-age fuel consumption. As a result, the actual dis-
tance that can be driven may differ from that
displayed.
• When only a small amount of fuel is added to the tank, the display may not be updated.
When adding fuel, turn the engine switch to the
LOCK position. In case fuel is added without
turning the engine switch to the LOCK position,
the display may not be updated.
Page 209 of 744
209
2-2. Instrument cluster
2
When driving
●
Display off
■The accessory meter can be operated when
The engine switch must be in the ON position.
■ To select the unit A (English/U.S. customary system) or unit B (metric
unit) (vehicles without mu lti-information display)
Press the SETUP button to change the units.
CAUTION
■ Caution while driving
Do not adjust the display.
Doing so may cause the driver to mishandle the vehicle and cause an acci-
dent, resulting in death or serious injury.
InformationUnit AUnit B
Average fuel consumption and
current fuel consumption MPG L/100 Km
Driving range MILES Km
Outside temperature °F °C
Page 214 of 744

214 2-3. Operating the lights and wipers
■Automatic light off system
●When the headlights come on: The headlights and tail lights automati-
cally turn off after 30 seconds when all doors are closed with the engine
switch turned to the ACC or LOCK position. (The lights turn off immedi-
ately if the button on the wireless remote control is pressed after all
doors are locked.)
● When only the tail lights come on: The tail lights turn off automatically
with the engine switch turned to the ACC or LOCK position and the
driver’s door is opened.
Vehicles with automatic light control system: If any of the doors is kept open,
the lights automatically turn off after 20 minutes.
To turn the lights on again, turn the engine switch to the ON position, or turn
the headlight switch off once and then back to the or position.
■ Customization
●That can be configured at Toyota dealer. (vehicles without multi-informa-
tion display)
Settings (automatic light off system) can be changed. (Customizable
features P. 696)
● It is possible to change the settings. (vehicles with multi-information dis-
play) (Feature customization P. 203)
NOTICE
■To prevent battery discharge
Do not leave the lights on longer than necessary when the engine is not run-
ning.
Page 234 of 744
234
2-4. Using other driving systems
Rear view monitor system
: If equipped
The rear view monitor system assists the driver by displaying an
image of the area behind the vehicle. The image is displayed in
reverse on the screen. This reversed im age is a similar image to the
one on the inside rear view mirror.
Vehicles with a navigation system
Refer to the “Navigation System Owner’s Manual”.
Vehicles without a navigation system
The rear view image is dis-
played on the inside rear view
mirror.
The screen is turned off if any
one of the following conditions
are met:
• The shift lever is shifted outof R
• The screen remains on for 5
minutes
Shift lever
Screen
Page 235 of 744

235
2-4. Using other
driving systems
2
When driving
■The rear view monitor system can be operated when
The shift lever is in R and the engine switch is ON.
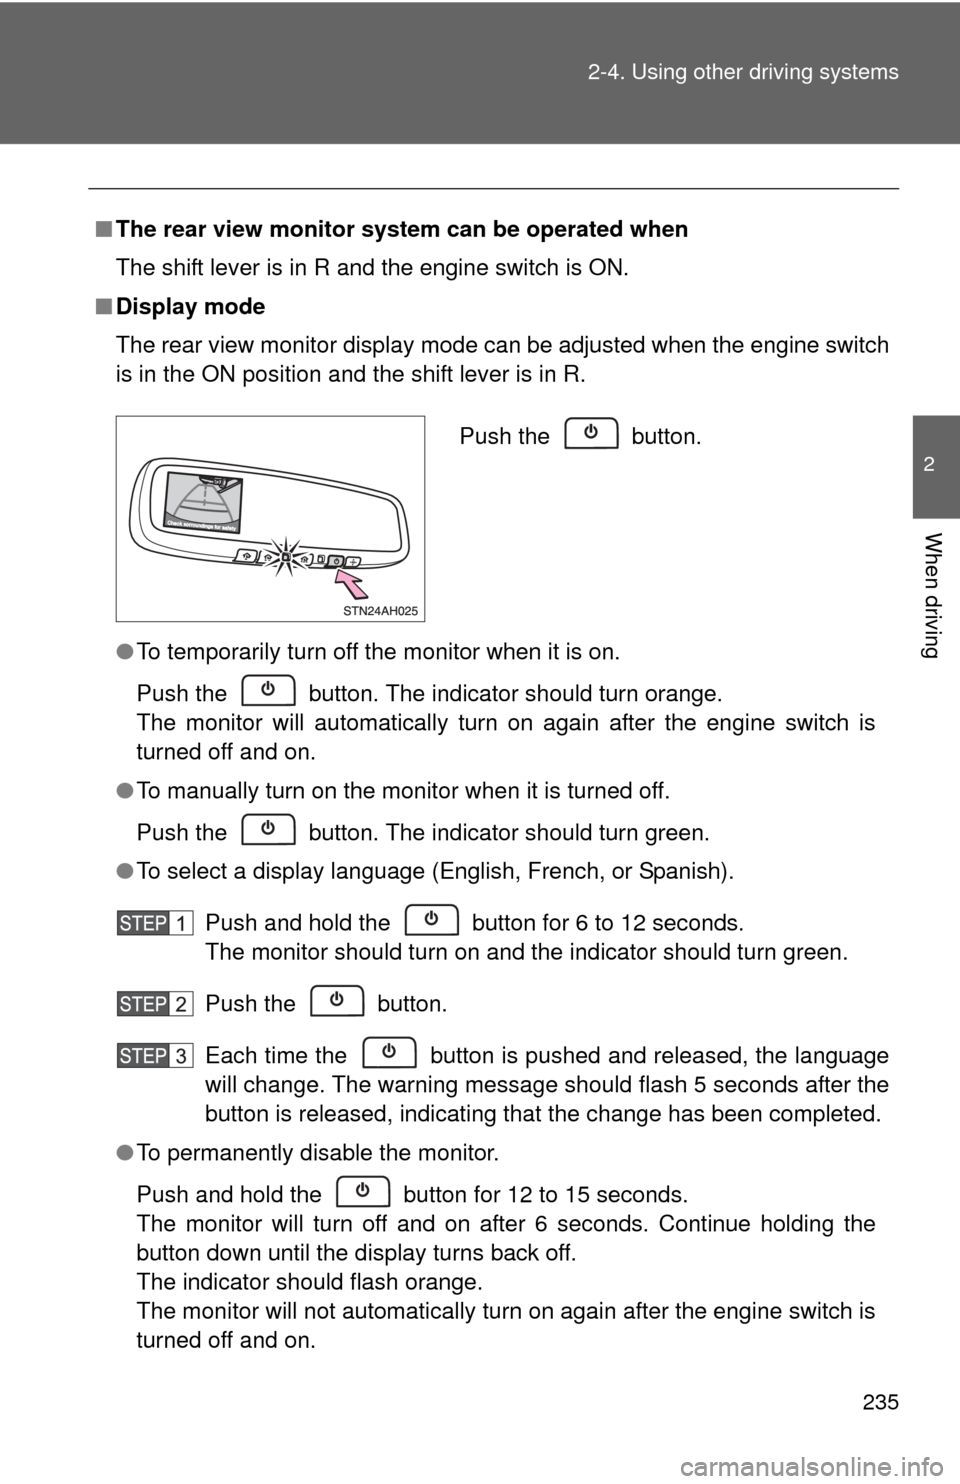
■ Display mode
The rear view monitor display mode can be adjusted when the engine switch
is in the ON position and the shift lever is in R.
●To temporarily turn off the monitor when it is on.
Push the button. The indicator should turn orange.
The monitor will automatically turn on again after the engine switch is
turned off and on.
● To manually turn on the monitor when it is turned off.
Push the button. The indicator should turn green.
● To select a display language (English, French, or Spanish).
Push and hold the button for 6 to 12 seconds.
The monitor should turn on and the indicator should turn green.
Push the button.
Each time the button is pushed and released, the language
will change. The warning message should flash 5 seconds after the
button is released, indicating that the change has been completed.
● To permanently disable the monitor.
Push and hold the button for 12 to 15 seconds.
The monitor will turn off and on after 6 seconds. Continue holding the
button down until the display turns back off.
The indicator should flash orange.
The monitor will not automatically turn on again after the engine switch is
turned off and on.
Push the button.
Page 236 of 744
236 2-4. Using other driving systems
■Displayed area
■ Rear view monitor guide lines
●Guide lines are displayed on the monitor.
Vehicle width extension guide lines (blue)
These lines indicate the estimated vehicle width extension.
Distance guide line (blue)
This line indicates a position on the ground about 3 ft. (1 m) behind on the
ground of the rear bumper of your vehicle.
Distance guide line (red)
This line indicates a position on the ground about 1.5 ft. (0.5 m) behind on
the ground of the rear bumper of your vehicle.
Vehicle center guide lines (blue)
These lines indicate the estimated vehicle center on the ground.
The area covered by the camera is lim-
ited. Objects that are close to either
corner of the bumper or under the
bumper cannot be seen on the screen.
The area displayed on the screen may
vary according to vehicle orientation or
road conditions.
Corners of bumper
Page 240 of 744

240 2-4. Using other driving systems
■Flicker effect
When the camera is used under fluorescent lights, sodium lights, mercury
lights etc., the lights and the illuminated areas may appear to flicker.
CAUTION
■When using the rear view monitor system
Observe the following precautions to avoid an accident that could result in
death or serious injuries
● Never depend solely on the rear view monitor system when reversing.
● Always check visually and with the mirrors to confirm your intended path is
clear.
● Always check the vehicle surroundi ng area, because the guide lines are
estimates of distance and location.
● The guide lines are assistant lines and do not change even if the steering
wheel is turned.
● Depicted distances between objects and flat surfaces differ from actual
distances.
● Do not use the system if the tailgate open.
■ Conditions which may affect the rear view monitor system
● If the back of the vehicle has been hit, the camera’s position and mounting
angle may have changed. Have the vehicle inspected by your Toyota
dealer.
● Rapid temperature changes, such as when hot water is poured on the
vehicle in cold weather, may cause the system to function abnormally.
● If the camera lens is dirty, it cannot transmit a clear image. Rinse with
water and wipe with a soft cloth. If extremely dirty, wash with a mild
cleanser and rinse.
● The displayed image may be darker and moving images may be slightly
distorted when the system is cold.
■ Caution while driving in reverse
Do not change modes while the vehicle is moving.