Page 285 of 744
285
2-5. Driving information
2
When driving
Positions for towing hitch receiver
Hitch receiver pin hole posi-
tion: 46.4 in. (1179 mm)
Connecting trailer lightsUse the wire harness stored in the rear end under the vehicle body. 4 pin connector
4 pin, 7 pin connectors
Page 286 of 744

286 2-5. Driving information
Trailer towing tipsYour vehicle will handle differently when towing a trailer. Help to avoid
an accident, death or serious injury, keep the following in mind when
towing:
● Speed limits for towing a trailer vary by state or province. Do not
exceed the posted towing speed limit.
● Toyota recommends that the vehicle-trailer speed limit is 65 mph
(104 km/h) on a flat, straight, dry road. Do not exceed this limit, the
posted towing speed limit or the speed limit for your trailer as set
forth in your trailer owner’s man ual, whichever is lowest. Instability
of the towing vehicle-trailer combin ation (trailer sway) increases as
speed increases. Exceeding speed limits may cause loss of con-
trol.
● Before starting out, check the trailer lights, tires and the vehicle-
trailer connections. Recheck after driving a short distance.
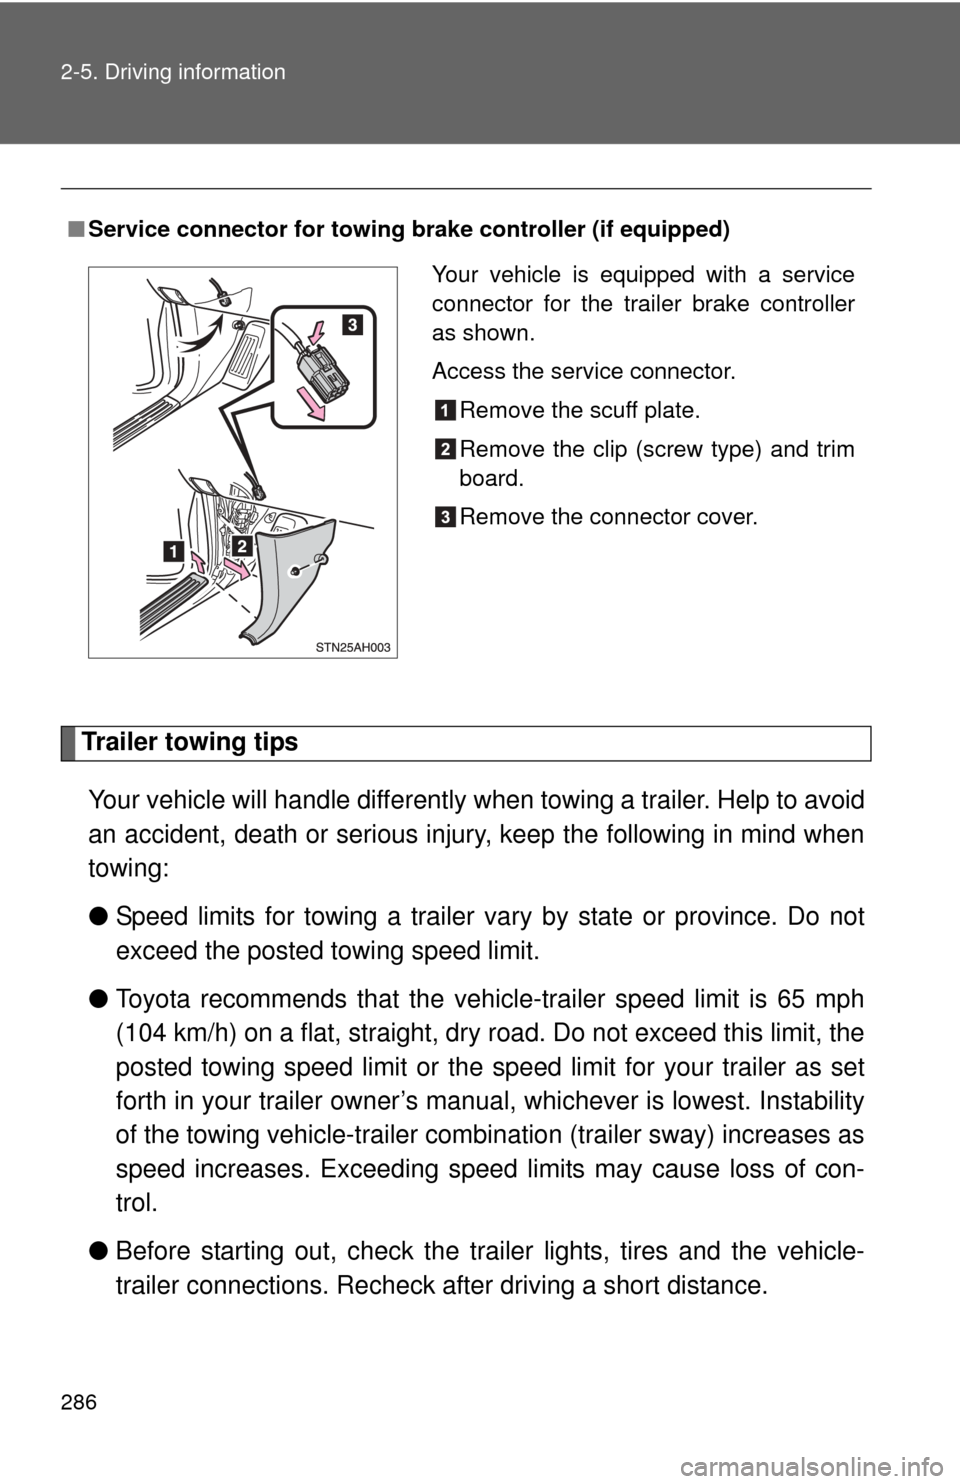
■Service connector for towing brake controller (if equipped)
Your vehicle is equipped with a service
connector for the trailer brake controller
as shown.
Access the service connector.
Remove the scuff plate.
Remove the clip (screw type) and trim
board.
Remove the connector cover.
Page 289 of 744

289
2-5. Driving information
2
When driving
●
When restarting after parking on a slope:
With the transmission in P, start the engine. Be sure to keep
the brake pedal pressed.
Shift into D or R (if reversing).
Release the parking brake and brake pedal, and slowly pull or
back away from the wheel blocks. Stop and apply the brakes.
Have someone retrieve the blocks.
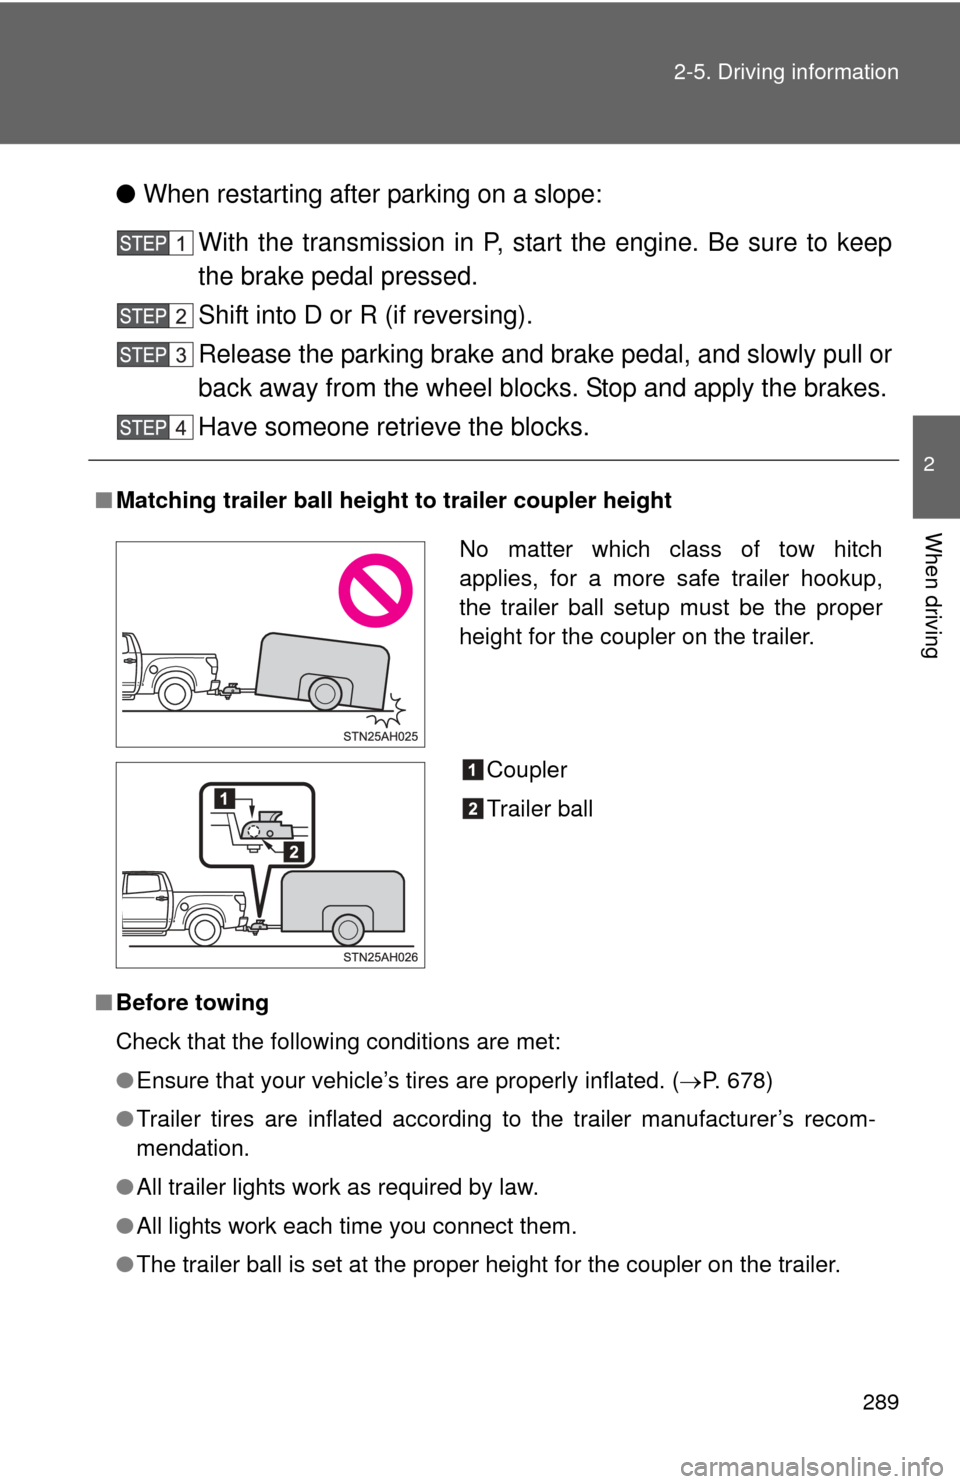
■ Matching trailer ball height to trailer coupler height
■ Before towing
Check that the following conditions are met:
●Ensure that your vehicle’s tires are properly inflated. ( P. 678)
● Trailer tires are inflated according to the trailer manufacturer’s recom-
mendation.
● All trailer lights work as required by law.
● All lights work each time you connect them.
● The trailer ball is set at the proper height for the coupler on the trai\
ler.
No matter which class of tow hitch
applies, for a more safe trailer hookup,
the trailer ball setup must be the proper
height for the coupler on the trailer.
Coupler
Trailer ball
Page 293 of 744

293
2-5. Driving information
2
When driving
CAUTION
■
When towing a trailer
Toyota recommends trailers with brakes that conform to any applicable fed-
eral and state/provincial regulations.
● If the gross trailer weight exceeds unbraked TWR, trailer brakes are
required. Toyota recommends trailers wi th brakes that conform to all appli-
cable federal and state/provincial regulations.
● Never tap into your vehicle’s hydraulic system, as this will lower the vehi-
cle’s braking effectiveness.
● Never tow a trailer without using a safety chain securely attached to both
the trailer and the vehicle. If damage occurs to the coupling unit or hitch
ball, there is danger of the trailer wandering into another lane.
NOTICE
■When installing a trailer hitch
Use only the position recommended by your Toyota dealer. Do not install the
trailer hitch on the bumper; this may cause body damage.
■ Do not directly splice trailer lights
Do not directly splice trailer lights. Directly splicing trailer lights may damage
your vehicle’s electrical system and cause a malfunction.
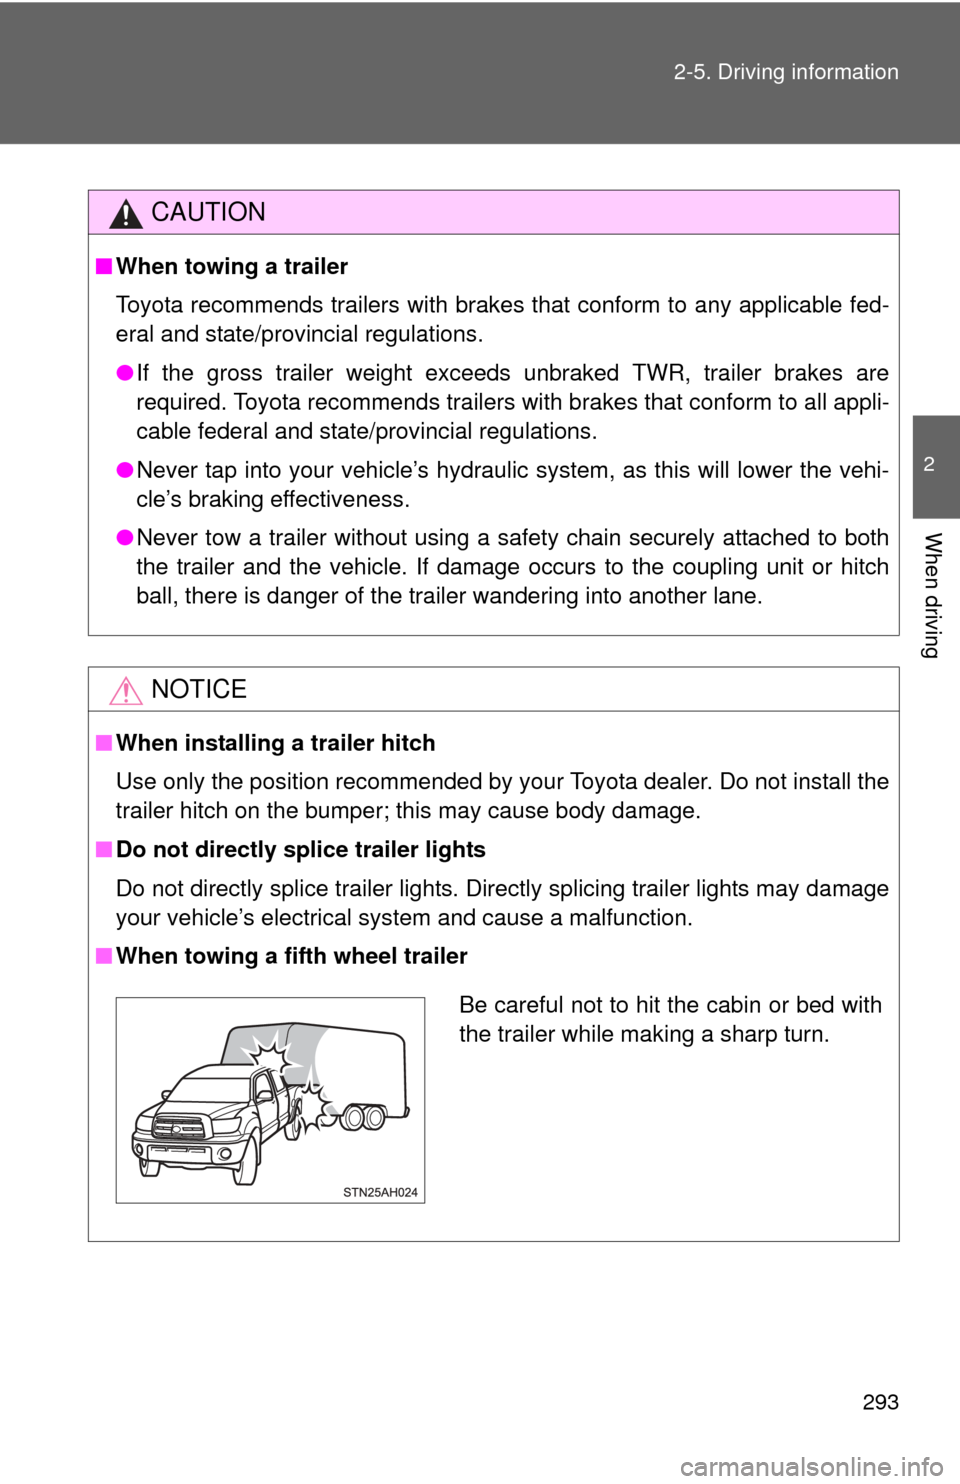
■ When towing a fifth wheel trailer
Be careful not to hit the cabin or bed with
the trailer while making a sharp turn.
Page 297 of 744

Interior and exteriorfeatures3
297
3-5. Using the hands-free phone
system (for cellular phone)
Hands-free phone system (for cellular phone)
features .......................... 426
Using the hands-free phone system ................ 430
Making a phone call ......... 438
Setting a cellular phone ... 442
Security and system setup .............................. 446
Using the phone book ...... 449
3-6. Using the interior lights Interior lights list ............... 455
• Personal/interior light main switch .................... 457
• Personal/interior lights ... 457
• Cargo lamp main switch ............................. 460
3-7. Using the storage features List of storage features .... 461
• Glove boxes ................... 463
• Console box ................... 465
• Card holder .................... 467
• Map holder ..................... 470
• Pen holder ..................... 473
• Tissue pocket................. 475 • Overhead console .......... 477
• Front cup holders ........... 478
• Rear cup holders ........... 480
• Bottle holders ................. 481
• Auxiliary boxes ............... 483
• Storage box ................... 485
3-8. Other interior features Sun visors ........................ 488
Vanity mirrors ................... 489
Clock ................................ 490
Outside temperature display............................ 491
Power outlets (12V DC) ........................ 493
Power outlets (115V AC) ...................... 498
Seat heaters..................... 502
Seat heaters and ventilators ...................... 504
Armrest (CrewMax models only) .................. 506
Seatback table ................. 507
Floor mat .......................... 508
Luggage compartment features .......................... 510
Garage door opener......... 513
Compass .......................... 520
Page 340 of 744
340 3-2. Using the audio system
NOTICE
■CD player precautions
Failure to follow the precautions below may result in serious damage to the
CDs or the player itself.
●Do not insert anything other than CDs into the CD slot.
● Do not apply oil to the CD player.
● Store CDs away from direct sunlight.
● Never try to disassemble any part of the CD player.
●Do not insert more than one CD at a
time.
Page 392 of 744
392 3-4. Using the rear audio/video system
Opening and closing the displayPress the lock release button to
open the display.
Pull the display down to an easily
viewable angle (between 90 and
125 ).
To close the display, push the
display up until a click is heard.
The illumination of the screen is
automatically turned off when the
display is closed. However, the
rear seat entertainment system is
not turned off.
Loading a disc
Insert the disc into the slot with
the label side up.
The DISC indicator light turns on
while the disc is loaded.
The player will play the track or
chapter, and will repeat it after it
reaches the end.
Page 402 of 744
402 3-4. Using the rear audio/video system
Turning on/off the control icon screenPress or to turn on the control icon screen.
Press or once again or select to turn off the control
icon screen.
NOTICE
■ Cleaning the screen
Wipe the screen with a dry soft cloth.
If the screen is wiped with a rough cloth, the surface of the screen may be
scratched.
■ To prevent damage to the remote controller
●Keep the remote controller away from direct sunlight, heat and high
humidity.
● Do not drop or knock the remote controller against hard objects.
● Do not sit on or place heavy objects on the remote controller.
■ DVD player
Never try to disassemble or oil any part of the DVD player. Do not insert any-
thing other than a disc into the slot.
■ Operating from the front audio system
Press: Selecting a chapter
Press and hold: Fast-for-
warding/reversing a disc
Stopping/playing a disc
Selecting the DVD mode
Starting a disc
Displaying a elapsed time
Playing/pausing a disc