Page 249 of 580

249
3-2. Using the audio system
3
Interior features
■
If the satellite radio does not operate normally
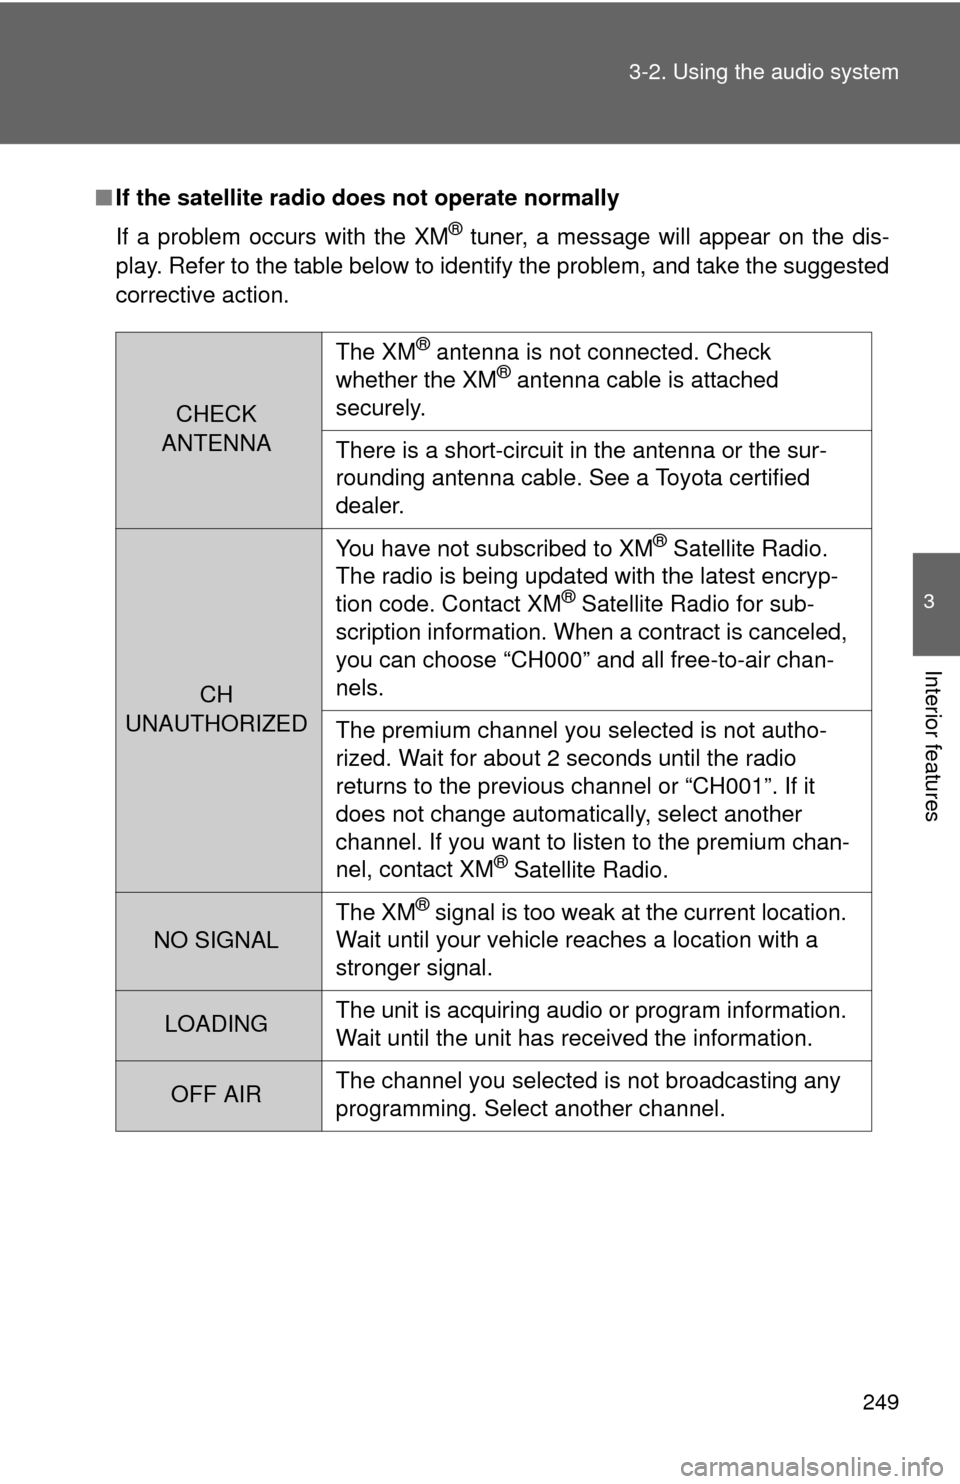
If a problem occurs with the XM
® tuner, a message will appear on the dis-
play. Refer to the table below to identify the problem, and take the suggested
corrective action.
CHECK
ANTENNA
The XM® antenna is not connected. Check
whether the XM® antenna cable is attached
securely.
There is a short-circuit in the antenna or the sur-
rounding antenna cable. See a Toyota certified
dealer.
CH
UNAUTHORIZED You have not subscribed to XM
® Satellite Radio.
The radio is being updated with the latest encryp-
tion code. Contact XM
® Satellite Radio for sub-
scription information. When a contract is canceled,
you can choose “CH000” and all free-to-air chan-
nels.
The premium channel you selected is not autho-
rized. Wait for about 2 seconds until the radio
returns to the previous channel or “CH001”. If it
does not change automatically, select another
channel. If you want to listen to the premium chan-
nel, contact XM
® Satellite Radio.
NO SIGNAL The XM
® signal is too weak at the current location.
Wait until your vehicle reaches a location with a
stronger signal.
LOADING The unit is acquiring audio or program information.
Wait until the unit has received the information.
OFF AIRThe channel you selected is not broadcasting any
programming. Select another channel.
Page 377 of 580
377
3-7. Other interior features
3
Interior features
Operating the HomeLink
Press the appropriate HomeLink button. The HomeLink indicator
light on the HomeLink transceiver should turn on.
The HomeLink continues to send a signal for up to 20 seconds as long
as the button is pressed.
Reprogramming a HomeLink® button
Press and hold the desired HomeLink
® button. After 20 seconds, the
HomeLink
® indicator light will start flas hing slowly. Keep pressing the
HomeLink
® button and press and hold the transmitter button until the
HomeLink
® indicator light changes from a slow to a rapid flash.
Release the buttons.
Erasing the entire HomeLink memory (all three programs)
Press and hold down the 2 out-
side buttons for 10 seconds until
the indicator light flashes.
If you sell your vehicle, be sure to
erase the programs stored in the
HomeLink
memory.
Page 447 of 580
4
Maintenance and care
447
4-3. Do-it-yourself maintenance
FuseAmpereCircuit
9 STOP No.3 7.5 A Electronic controlled transmission
system, multiport fuel injection
system/sequential multiport fuel
injection system
10 INJ 15 A Multiport fuel injection system/
sequential multiport fuel injection
system
11 AM2 7.5 A Starter system
12 DOOR No.1 25 A Multiplex communication system
13 ALT-S 7.5 A Charging system
14 ETCS 10 A Multiport fuel injection system/
sequential multiport fuel injection
system
15 IG2 25 A Multiport fuel injection system/
sequential multiport fuel injection
system, electronic controlled
transmission system
16 TURN/HAZ 15 A Turn signal lights
17 AMP 30 A Audio system
18 EFI No.3 7.5 A Smart key system, electronic con-
trolled transmission system
19 STR LOCK 15 A Steering lock system
20 STOP No.1 15 A Multiplex communication system
Page 455 of 580
455
4-3. Do-it-yourself maintenance
4
Maintenance and care
Light bulbs
You may replace the following bulbs yourself. The difficulty level of
replacement varies depending on the bulb. If necessary bulb
replacement seems difficult to perfor m, contact your Toyota dealer.
For more information about replacing other light bulbs, contact your
Toyota dealer.
■ Prepare a replacement light bulb.
Check the wattage of the light bulb being replaced. ( P. 527)
■ Remove the engine compartment cover
P. 407
■ Front bulb locations
Front side marker light
Front turn signal/parking light
Front fog light
Headlight high beam and
daytime running light
Auxiliary light
Headlight low beam
Page 456 of 580
456 4-3. Do-it-yourself maintenance
Replacing light bulbs■ Headlight low beams (vehicle s with halogen headlights)
Turn the bulb base counterclock-
wise.
Unplug the connector while
pushing the lock release.
■ Rear bulb locations
Rear side marker light
Rear turn signal light Back-up light
License plate light
St o p li gh t
STEP1
STEP2
Page 462 of 580
462 4-3. Do-it-yourself maintenance
Turn and secure the socket and
plug the connector.
After installing the socket, turn the
fog lights on once and visually
confirm that no light is leaking
through the mounting.
■Front turn signal/parking lights
Remove the fender liner clip.
Partly remove the fender liner
and turn the bulb base counter-
clockwise.
STEP5
STEP1
STEP2
Page 465 of 580
4
Maintenance and care
465
4-3. Do-it-yourself maintenance
■
Rear turn signal lights, stop lights and rear side marker lights
Open the trunk and remove the
cover as follows.
Turn the bulb bases counter-
clockwise and remove (upper
and lower), or squeeze bulb
base and remove (center).
Remove the light bulb.
Stop light
Rear side marker light
Rear turn signal light
STEP1
STEP2
STEP3
Page 468 of 580

468 4-3. Do-it-yourself maintenance
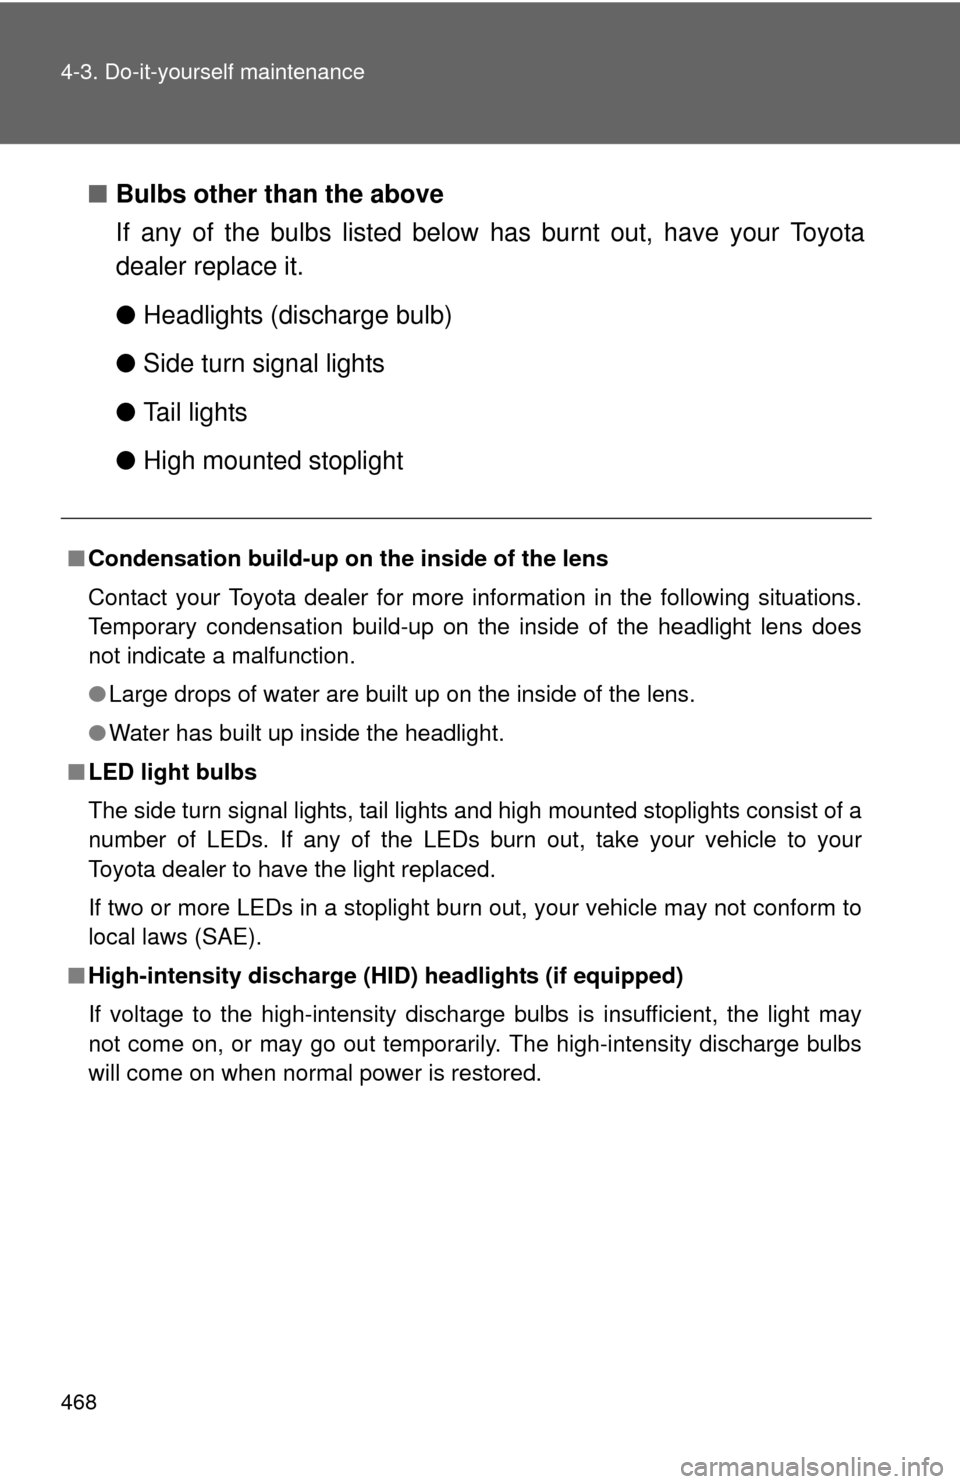
■Bulbs other than the above
If any of the bulbs listed below has burnt out, have your Toyota
dealer replace it.
● Headlights (discharge bulb)
● Side turn signal lights
● Tail lights
● High mounted stoplight
■Condensation build-up on th e inside of the lens
Contact your Toyota dealer for more information in the following situations.
Temporary condensation build-up on the inside of the headlight lens does
not indicate a malfunction.
● Large drops of water are built up on the inside of the lens.
● Water has built up inside the headlight.
■ LED light bulbs
The side turn signal lights, tail lights and high mounted stoplights consist of a
number of LEDs. If any of the LEDs burn out, take your vehicle to your
Toyota dealer to have the light replaced.
If two or more LEDs in a stoplight bur n out, your vehicle may not conform to
local laws (SAE).
■ High-intensity discharge (HID) headlights (if equipped)
If voltage to the high-intensity discharge bulbs is insufficient, the light may
not come on, or may go out temporarily. The high-intensity discharge bulbs
will come on when normal power is restored.