Page 137 of 299

TELEPHONE AND INFORMATION
137
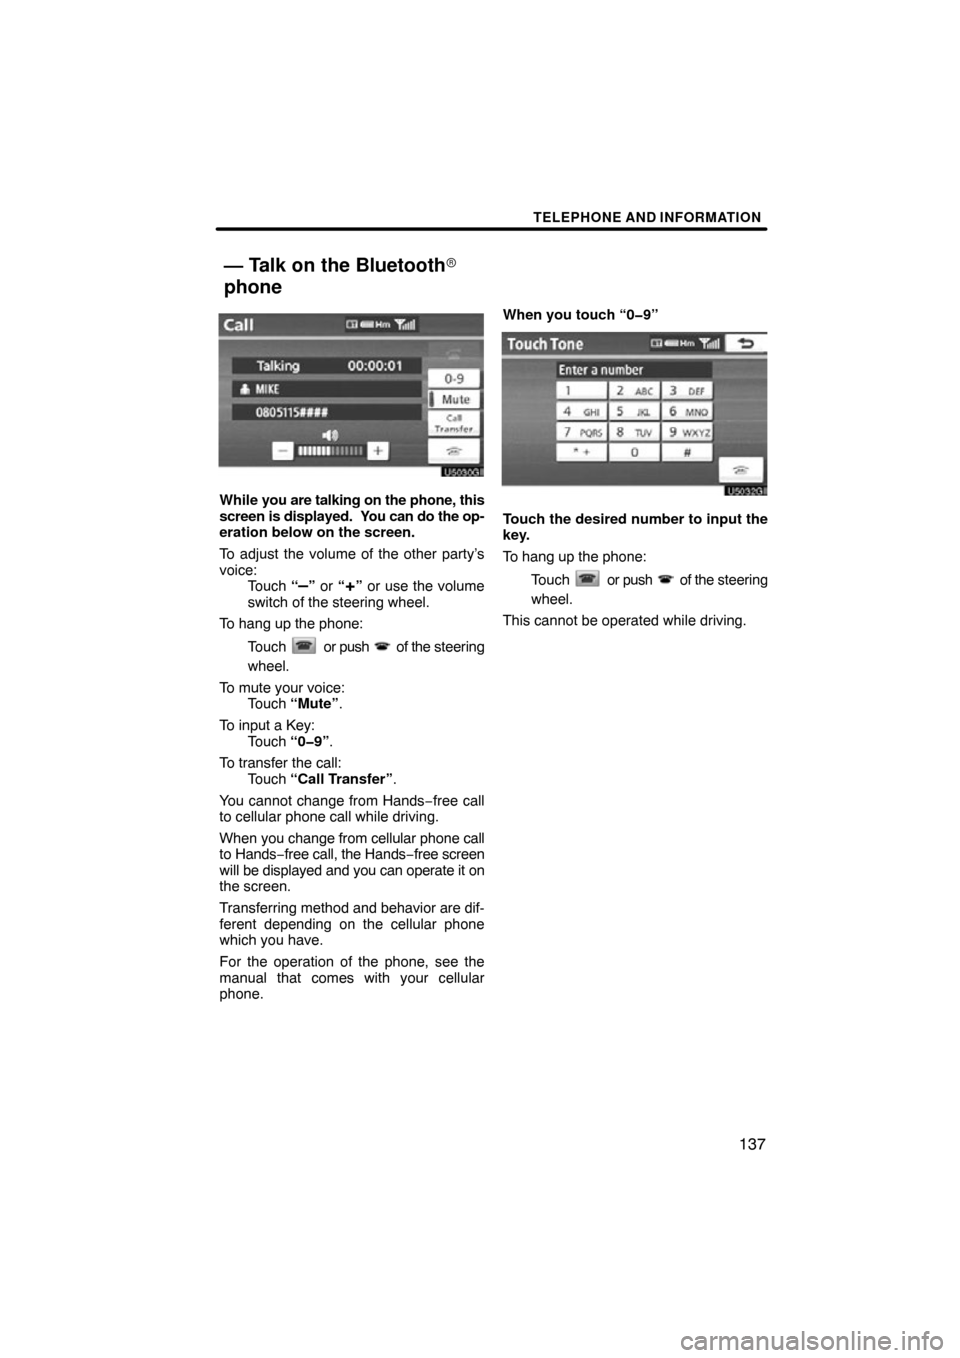
While you are talking on the phone, this
screen is displayed. Y ou can do the op-
eration below on the screen.
To adjust the volume of the other party’s
voice: Touch “
–” or “+” or use the volume
switch of the steering wheel.
To hang up the phone:
Touch
or push of the steering
wheel.
To mute your voice: Touch “Mute” .
To input a Key: Touch “0�9” .
To transfer the call: Touch “Call Transfer” .
You cannot change from Hands −free call
to cellular phone call while driving.
When you change from cellular phone call
to Hands −free call, the Hands −free screen
will be displayed and you can operate it on
the screen.
Transferring meth od and behavior are dif-
ferent depending on the cellular phone
which you have.
For the operation of the phone, see the
manual that comes with your cellular
phone. When you touch “0�9”
Touch the desired number to input the
key.
To hang up the phone:
Touch
or push of the steering
wheel.
This cannot be operated while driving.
— Talk on the Bluetooth�
phone
Page 189 of 299

AUDIO SYSTEM
189
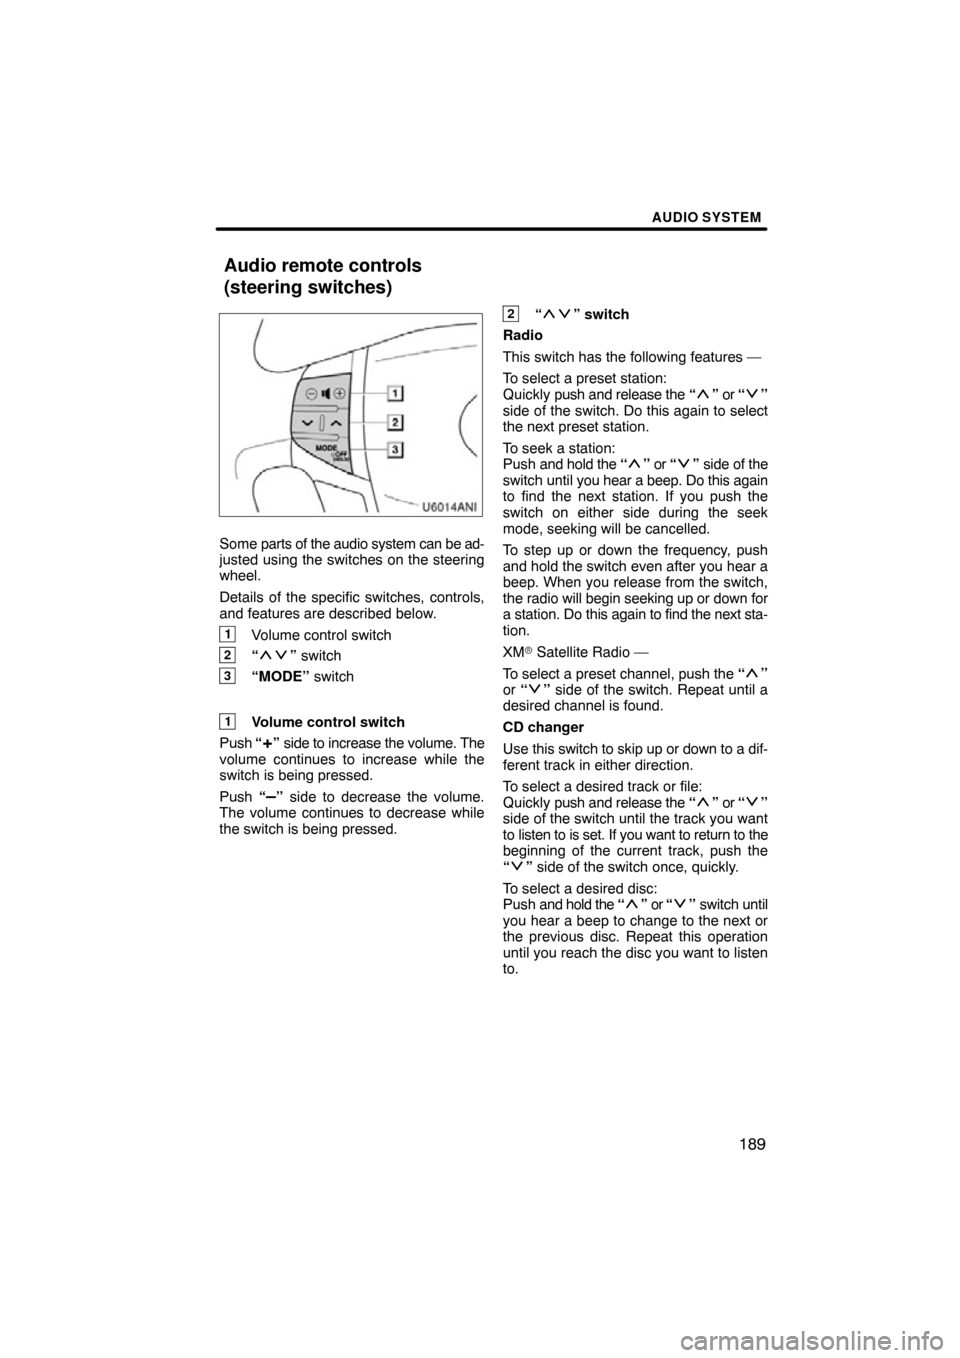
Some parts of the audio system can be ad-
justed using the switches on the steering
wheel.
Details of the specific switches, controls,
and features are described below.
1Volume control switch
2“” switch
3“MODE” switch
1Volume control switch
Push “
+” side to increase the volume. The
volume continues to increase while the
switch is being pressed.
Push “
–” side to decrease the volume.
The volume continues to decrease while
the switch is being pressed.
2“” switch
Radio
This switch has the following features —
To select a preset station:
Quickly push and release the “
” or “”
side of the switch. Do this again to select
the next preset station.
To seek a station:
Push and hold the “
” or “” side of the
switch until you hear a beep. Do this again
to find the next station. If you push the
switch on either side during the seek
mode, seeking will be cancelled.
To step up or down the frequency, push
and hold the switch even after you hear a
beep. When you release from the switch,
the radio will begin seeking up or down for
a station. Do this again to find the next sta-
tion.
XM � Satellite Radio —
To select a preset channel, push the “
”
or “” side of the switch. Repeat until a
desired channel is found.
CD changer
Use this switch to skip up or down to a dif-
ferent track in either direction.
To select a desired track or file:
Quickly push and release the “
” or “”
side of the switch until the track you want
to listen to is set. If you want to return to the
beginning of the current track, push the
“
” side of the switch once, quickly.
To select a desired disc:
Push and hold the “
” or “” switch until
you hear a beep to change to the next or
the previous disc. Repeat this operation
until you reach the disc you want to listen
to.
Audio remote controls
(steering switches)
Page 200 of 299

REAR VIEW MONITOR SYSTEM
200
The rear view monitor system assists
the driver by displaying an image of the
view behind the vehicle while backing
up. The left and right displayed on the
screen are the same as those of the in-
side rear view mirror.
Vehicles with smart key system —
To display the rear view image on the
screen, place the shift lever in the “R”
position when the “ENGINE START
STOP” switch is in IGNITION ON mode.
Vehicles without smart key system —
To display the rear view image on the
screen, place the shift lever in the “R”
position when the engine switch is in
the “ON” position.
If you move the shift lever out of the “R”
position, the screen returns to the previous
screen. Operating another function of the
navigation system will display another
screen.
The rear view monitor system is a supple-
ment device intended to assist back up.
When backing up, be sure to check behind
and all around the vehicle visually.
CAUTION
�Never depend on the rear view
monitor system entirely when
backing up. Always make sure
your intended path is clear.
Use caution, just as you would
when backing up any vehicle.
�Never back up while looking only at
the screen. The image on the
screen is different from actual
conditions. Depicted distances
between objects and flat surfaces
will differ from actual distance. If
you back up while looking only at
the screen, you may hit a vehicle, a
person or an object. When backing
up, be sure to check behind and all
around the vehicle visually and
with mirrors before proceeding.
�Always check the vehicle sur-
rounding area, because the guide
lines are ancillary lines.
�The guide lines are ancillary lines
and do not change even if the steer-
ing wheel is turned.
�Do not use the system when the
trunk is not completely closed.
�Use your own eyes to confirm the
vehicle’s surroundings, as the dis-
played image may become faint or
dark, and moving images will be
distorted, or not entirely visible
when the outside temperature is
low. When backing up, be sure to
check behind and all around the ve-
hicle visually and with mirror be-
fore proceeding.
�Do not use the system in the follow-
ing cases:
�On icy or slick road surfaces, or
in snow.
�When using tire chains or emer-
gency tires.
�On an uneven road, such as a
slope.
Rear view monitor system —