2012 SUBARU OUTBACK trunk release
[x] Cancel search: trunk releasePage 18 of 474

&Instrument panel1) Door locks (page 2-4)
2) Electronic parking brake switch
(page 7-31)
3) Hill Holder switch (page 7-32)
4) Trunk lid opener switch (page 2-24)
5) Vehicle Dynamics Control OFF switch (page 7-28)
6) Remote control mirror switch (page 3-51)
7) Illumination brightness control (page 3-29)
8) Light control switch (page 3-27)
9) Audio control buttons (page 5-41)
10) Combination meter (page 3-5)
11) Cruise control (page 7-35)
12) Paddle shift (page 7-21)
13) Wiper control lever (page 3-30)
14) Horn (page 3-52)
15) SRS airbag (page 1-36)
16) Fuse box (page 11-44)
17) Hood lock release knob (page 11-7)
18) Power windows (page 2-20) 15
– CONTINUED –
Page 32 of 474

&Folding down the rear seat- back
WARNING
. When you fold down the seat-
back, check that there are no
passengers or objects on the
rear seat. Not doing so creates
a risk of injury or property da-
mage if the seatback suddenly
folds down.
. Never allow passengers to ride
on the folded rear seatback or in
the cargo area or trunk. Doing so
may result in serious injury ordeath.
. Secure all objects and especially
long items properly to prevent
them from being thrown around
inside the vehicle and causing
serious injury during a sudden
stop, a sudden steering maneu-
ver or a rapid acceleration.
. When you return the seatback to
its original position, shake the
seatback slightly to confirm that
it is securely fixed in place. If the
seatback is not securely fixed in
place, the seatback may sud-
denly fold down in the event of
sudden braking, or objects may move out from the cargo area,
which could cause serious injury
or death.
. After returning the rear seat to its
original position, be certain to
place all of the seatbelts and the
tab attached to the seat cushion
above the seat cushion. Also,
make certain that the shoulder
belts are fully visible.
CAUTION
The rear seatback may fold down
quickly due to the internal spring.
Hold the seatback while pulling the
release lever to slow it down.
! Legacy
To fold down the seatback, perform the
following procedure.
1. Open the trunk lid. Refer to “Opening
the trunk lid (Legacy) ”F 2-9 or “To open
the trunk lid from inside ”F 2-24.1) Release lever
2. Pull the release lever on the side that
you want to fold down.
3. Fold the seatback down.
To return the seatback to its original
position, raise the seatback until it locks
into place and make sure that it is securelylocked. Seat, seatbelt and SRS airbags
1-9
– CONTINUED –
Page 57 of 474

1-34Seat, seatbelt and SRS airbags
!Outback
Three tether anchorages, i.e., ones for the
right, center and left positions, are already
installed on the rear edge of the roof.
Open the cover flap to use each ancho- rage. !
To hook the top tether
CAUTION
Always remove the head restraint
when mounting a child restraint
system with a top tether. Failure to
do so may prevent the top tether
from being fastened tightly.
! Legacy
1. Fold down the rear seatback for the
window side seating position. Refer to“ Folding down the rear seatback ”F 1-9.
2. Remove the head restraint at the
seating position where the child restraint
system has been installed with the seat-
belt or lower anchorages; lift up the head restraint while pressing the release button.
Store the head restraint in the trunk. Avoid
placing the head restraint in the passen-
ger compartment to prevent it from being
thrown around in the passenger compart-
ment in a sudden stop or a sharp turn.
3. Open the cover flaps to use the anchorages.
Page 90 of 474

Keys..................................................................... 2-2
Key number ........................................................ 2-2
Immobilizer .......................................................... 2-3
Security ID plate .................................................. 2-3
Security indicator light ........................................ 2-4
Key replacement ................................................. 2-4
Door locks ........................................................... 2-4
Locking and unlocking from the outside .. ............ 2-4
Locking and unlocking from the inside ................ 2-5
Battery drainage prevention function ................... 2-6
Power door locking switches ............................. 2-6
Key lock-in prevention function ........................... 2-7
Remote keyless entry system ............................ 2-7
Locking the doors ............................................... 2-8
Unlocking the doors ............................................ 2-9
Opening the trunk lid (Legacy) ............................. 2-9
Unlocking the rear gate (Outback) ........................ 2-9
Vehicle finder function ......................................... 2-9
Sounding a panic alarm ...................................... 2-10
Selecting audible signal operation ...................... 2-10
Replacing the battery ......................................... 2-10
Replacing lost transmitters ................................. 2-12 Alarm system
..................................................... 2-15
System alarm operation ..................................... 2-15
Activating and deactivating the alarm system ..... 2-15
If you have accidentally triggered the alarm system ............................................................ 2-16
Arming the system ............................................ 2-16
Disarming the system ........................................ 2-17
Valet mode ........................................................ 2-18
Passive arming .................................................. 2-18
Tripped sensor identification .............................. 2-19
Shock sensors (dealer option).. .......................... 2-19
Child safety locks .............................................. 2-19
Windows ............................................................. 2-20
Power window operation by driver ..................... 2-20
Power window operation by passengers ............. 2-22
Initialization of power window .. .......................... 2-23
Trunk lid (Legacy) .............................................. 2-23
To open and close the trunk lid from outside . ..... 2-23
To open the trunk lid from inside. ....................... 2-24
Internal trunk lid release handle ......................... 2-24
Rear gate (Outback) ........................................... 2-26
Moonroof (if equipped) ...................................... 2-27
Moonroof switches ............................................ 2-28
Sun shade ......................................................... 2-29 Keys and doors
2
Page 113 of 474

2-24Keys and doors
trunk lid down until the latch engages. NOTE . Do not leave your valuables in the
trunk when you leave your vehicle. . Even when the trunk lid cannot be
opened using the remote keyless entry
system, you can open the trunk lid by
using the key. Refer to “Trunk lid
(Legacy) –if the trunk lid cannot be
opened ”F 9-19.
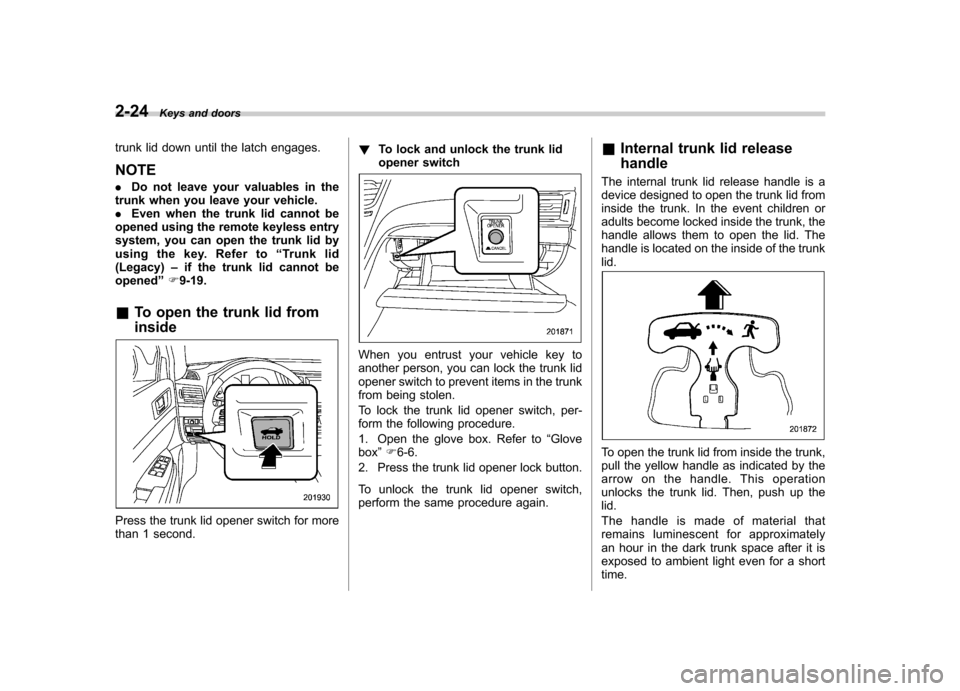
& To open the trunk lid from inside
Press the trunk lid opener switch for more
than 1 second. !
To lock and unlock the trunk lid
opener switch
When you entrust your vehicle key to
another person, you can lock the trunk lid
opener switch to prevent items in the trunk
from being stolen.
To lock the trunk lid opener switch, per-
form the following procedure.
1. Open the glove box. Refer to “Glove
box ”F 6-6.
2. Press the trunk lid opener lock button.
To unlock the trunk lid opener switch,
perform the same procedure again. &
Internal trunk lid release handle
The internal trunk lid release handle is a
device designed to open the trunk lid from
inside the trunk. In the event children or
adults become locked inside the trunk, the
handle allows them to open the lid. The
handle is located on the inside of the trunklid.
To open the trunk lid from inside the trunk,
pull the yellow handle as indicated by the
arrow on the handle. This operation
unlocks the trunk lid. Then, push up thelid.
The handle is made of material that
remains luminescent for approximately
an hour in the dark trunk space after it is
exposed to ambient light even for a shorttime.
Page 114 of 474

WARNING
Never allow any child to get in the
trunk and play with the release
handle. If the driver starts the vehi-
cle without knowing that a child is
inside the trunk and the child opens
the lid using the release handle, the
child could fall out and be killed or
seriously injured.
CAUTION
. Do not close the lid while grip-
ping the release handle. The
handle may be damaged.
. Do not use the handle as a hook
to fasten straps or ropes to
secure your cargo in the trunk.
Such use may result in damage
of the handle.
. Load the trunk so that cargo
cannot strike the release handle.
If the cargo hits the handle while
the vehicle is being driven, the
handle may be pulled and the
trunk lid may open. That may
cause cargo to fall out of the
trunk, which could create a traffic
safety hazard. !
Inspection
Perform the following steps at least twice
a year to check the release handle for
correct operation.
1. Open the trunk lid.
2. Use a flat-head screwdriver with a thin
blade. Slide the flat-head screwdriver
blade from the slit aperture of the lock
assembly fully to the end until you hear a click.
This places the latch in the locked posi- tion.
3. Move the release handle, from outside
the vehicle, in the direction of the arrow to
check if the latch is released. Keys and doors
2-25
– CONTINUED –
Page 115 of 474

2-26Keys and doors
If the latch is not released, contact your
SUBARU dealer.
In that case, use the key to release the
latch, then close the trunk lid.
Also, if the movement of the release
handle feels restric ted or not entirely
smooth during operation, or the handle
and/or handle base is cracked, contact
your SUBARU dealer. Rear gate (Outback)
The rear gate can be locked and unlocked
using any of the following systems. .
Power door locking switch: Refer to
“ Power door locking switches ”F 2-6.
. Remote keyless entry system: Refer to
“ Remote keyless entry system ”F 2-7.
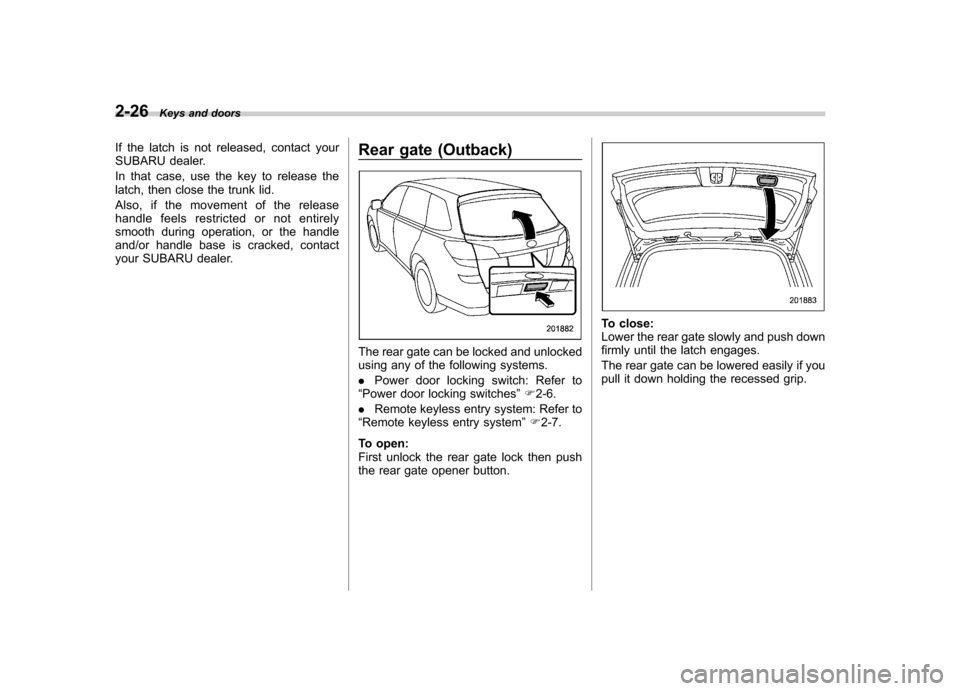
To open:
First unlock the rear gate lock then push
the rear gate opener button.
To close:
Lower the rear gate slowly and push down
firmly until the latch engages.
The rear gate can be lowered easily if you
pull it down holding the recessed grip.
Page 138 of 474

be applied. !Frequent operation warning
The brake system warning light flashes for
20 seconds and a chirp sound will be
heard if the parking brake switch is
operated too frequently. In this case, the
operation of the parking brake switch is
restricted to protect the electronic parking
brake system. NOTE
Wait until the warning light turns off. ! Emergency released warning
The brake system warning light flashes
when the parking brake is automatically
released in case of an emergency. & Hill Holder indicator light
WARNING
If the Hill Holder indicator light does
not illuminate even when the Hill
Holder switch is pressed to activate
the Hill Holder function, the electro-
nic parking brake system may be
malfunctioning. Immediately stop
the vehicle in a safe location and
contact your SUBARU dealer. The light illuminates when the Hill Holder
switch is pressed to activate the Hill
Holder function. For details about the Hill
Holder function,
“Hill Holder function ”F 7-
32.
& Low fuel warning light
The low fuel warning light illuminates
when the tank is nearly empty approxi-
mately 2.6 US gal (10.0 liters, or 2.2 Imp
gal). It only operates when the ignition
switch is in the “ON ”position.
NOTE
This light does not turn off unless the
tank is replenished up to an internal
fuel quantity of approximately 3.7 US
gal (14 liters, 3.1 Imp gal).
CAUTION
Promptly put fuel in the tank when-
ever the low fuel warning light
illuminates. Engine misfires as a
result of an empty tank could cause
damage to the engine. &
Door open indicator light
When any of the doors, the rear gate
(Outback) or the trunk lid (Legacy) is not
fully closed, the door open indicator light
illuminates. This function is effective even
if the ignition switch is in the “LOCK ”or
“ Acc ”position or the key is removed from
the ignition switch.
The open door is indicated by the corre-
sponding part of the door open warninglight.
Always make sure this light is not illumi-
nated before you start to drive. & Windshield washer
fluid warning light
This light illuminates when the fluid level in
the windshield washer fluid tank de-
creases to the lower limit (approximately
0.6 US qt, 0.6 liter, 0.5 Imp qt). Instruments and controls
3-19
– CONTINUED –