2012 SUBARU IMPREZA WRX stop start
[x] Cancel search: stop startPage 291 of 416
8-8Driving tips
vehicle control.
CAUTION
Avoid prolonged continuous driving
in snowstorms. Snow will enter the
engine ’s intake system and may
hinder the airflow, which could re-
sult in engine shutdown or evenbreakdown.
! Wiper operation when snowing
Before driving in cold weather, make sure
the wiper blades are not frozen to the
windshield or rear window.
If the front wiper blades are frozen to the
windshield, use the defroster with the
airflow control dial in the “
”position
and the temperature control dial set for
maximum warmth until the wiper blades
are completely thawed out. For details,
refer to the following section. . For the manual climate control system,
refer to “Defrosting or defogging the
windshield ”F 4-5.
. For the automatic climate control sys-
tem, refer to “Control panel ”F 4-8.
If your vehicle is equipped with a wind-
shield wiper deicer, it is helpful to thaw the
windshield wiper blades. Refer to “Defog- ger and deicer
”F 3-45.
If the rear wiper blade is frozen to the rear
window, use the rear window defogger.
Refer to “Defogger and deicer ”F 3-45.
When driving in snow, if frozen snow starts
to stick on the surface of the windshield
despite wiper operation, use the defroster
with the airflow control dial in “
”and the
temperature control dial set for maximum
warmth. After the windshield gets warmed
enough to melt the frozen snow on it,
wash it away using the windshield washer.
Refer to “Washer ”F 3-36.
Snow stuck on the wiper arm prevents the
wiper from working effectively. If snow is
stuck on the wiper arm, pull off the road to
a safe place, then remove it. If you stop
the vehicle at road side, use the hazard
warning flasher to alert other drivers.
We recommend use of non-freezing type
wiper blades (winter blades) during the
seasons you could have snow and freez-
ing temperatures. Blades of this type give
superior wiping performance in snowy
conditions. Be sure to use blades that
are suitable for your vehicle.
CAUTION
During high-speed driving, non-
freezing type wiper blades may not perform as well as standard wiper
blades. If this happens, reduce the
vehicle speed.
NOTE
When the season requiring non-freez-
ing type wiper blades is over, replace
them with standard wiper blades. & Corrosion protection
Refer to “Corrosion protection ”F 10-4.
& Snow tires
WARNING
. When replacing original tires with
winter (snow) tires, make sure
you use only tires of the same
size, circumference, construc-
tion, brand (tread pattern), speed
symbol and load index as the
original tires listed on the tire
placard. Using tires of other sizes
or constructions may affect
speedometer/odometer calibra-
tion and clearance between the
body and tires. It also may be
dangerous and lead to loss of
vehicle control.
Page 295 of 416
8-12Driving tips
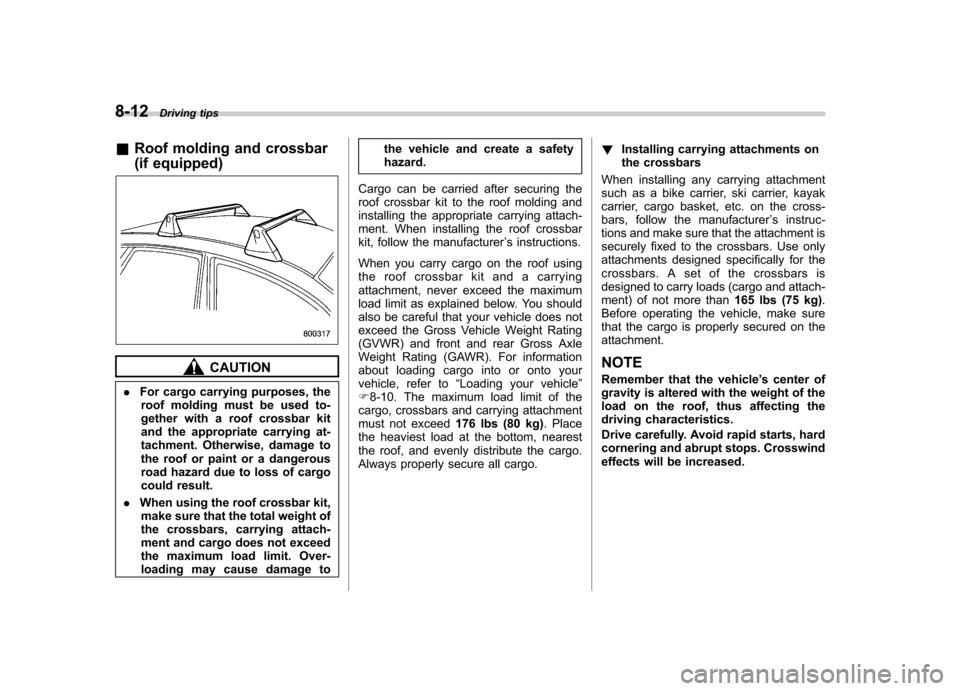
&Roof molding and crossbar
(if equipped)
CAUTION
. For cargo carrying purposes, the
roof molding must be used to-
gether with a roof crossbar kit
and the appropriate carrying at-
tachment. Otherwise, damage to
the roof or paint or a dangerous
road hazard due to loss of cargo
could result.
. When using the roof crossbar kit,
make sure that the total weight of
the crossbars, carrying attach-
ment and cargo does not exceed
the maximum load limit. Over-
loading may cause damage to the vehicle and create a safetyhazard.
Cargo can be carried after securing the
roof crossbar kit to the roof molding and
installing the appropriate carrying attach-
ment. When installing the roof crossbar
kit, follow the manufacturer ’s instructions.
When you carry cargo on the roof using
the roof crossbar kit and a carrying
attachment, never exceed the maximum
load limit as explained below. You should
also be careful that your vehicle does not
exceed the Gross Vehicle Weight Rating
(GVWR) and front and rear Gross Axle
Weight Rating (GAWR). For information
about loading cargo into or onto your
vehicle, refer to “Loading your vehicle ”
F 8-10. The maximum load limit of the
cargo, crossbars and carrying attachment
must not exceed 176 lbs (80 kg). Place
the heaviest load at the bottom, nearest
the roof, and evenly distribute the cargo.
Always properly secure all cargo. !
Installing carrying attachments on
the crossbars
When installing any carrying attachment
such as a bike carrier, ski carrier, kayak
carrier, cargo basket, etc. on the cross-
bars, follow the manufacturer ’s instruc-
tions and make sure that the attachment is
securely fixed to the crossbars. Use only
attachments designed specifically for the
crossbars. A set of the crossbars is
designed to carry loads (cargo and attach-
ment) of not more than 165 lbs (75 kg).
Before operating the vehicle, make sure
that the cargo is properly secured on theattachment.
NOTE
Remember that the vehicle ’s center of
gravity is altered with the weight of the
load on the roof, thus affecting the
driving characteristics.
Drive carefully. Avoid rapid starts, hard
cornering and abrupt stops. Crosswind
effects will be increased.
Page 325 of 416
11-4Maintenance and service
guard against getting oil or fluids
in your eyes. If something does
get in your eyes, thoroughly
wash them out with clean water.
. Do not tamper with the wiring of
the SRS airbag system or seat-
belt pretensioner system, or at-
tempt to take its connectors
apart, as that may activate the
system or it can render it inop-
erative. NEVER use a circuit
tester for this wiring.
If your SRS airbag or seatbelt
pretensioner needs service, con-
sult your nearest SUBARU deal-
er. &
Before checking or servicing
in the engine compartment
WARNING
. Always stop the engine and set
the parking brake firmly to pre-
vent the vehicle from moving.
. Always let the engine cool down.
Engine parts become very hot
when the engine is running and
remain hot for some time after
the engine is stopped.
. Do not spill engine oil, engine
coolant, brake fluid or any other
fluid on hot engine components.
This may cause a fire.
. Always remove the key from the
ignition switch. When the ignition
switch is in the “ON ”position,
thecoolingfanmayoperate
suddenly even when the engine
is stopped.
. Before performing any servicing
on a vehicle equipped with a
remote engine start system (a
dealer option) temporarily place
that system in the service mode
to prevent it from unexpectedly
starting the engine. &
When checking or servicing
in the engine compartment
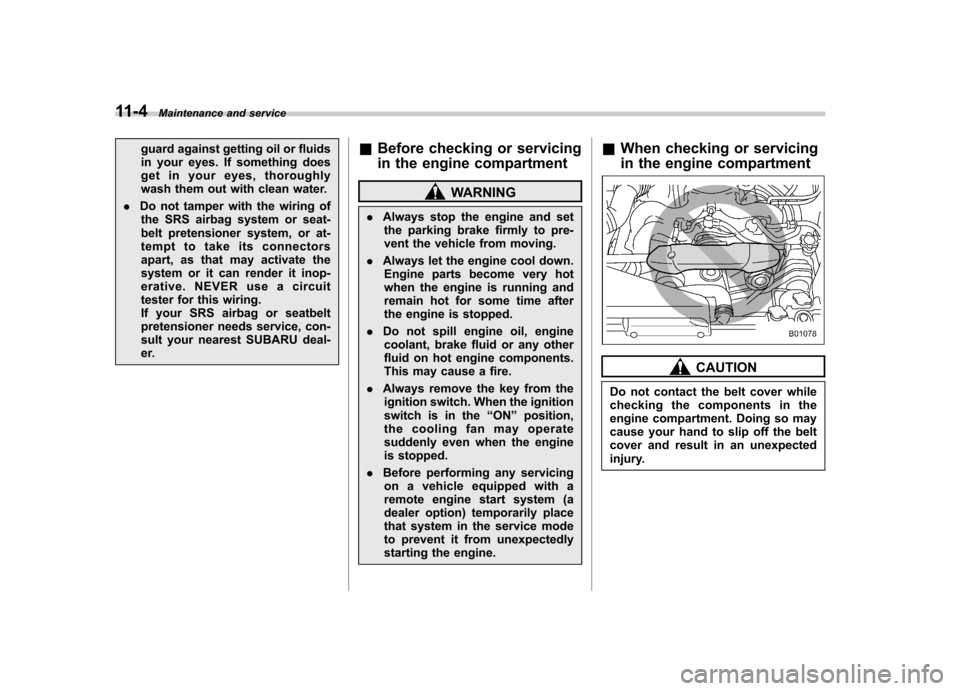
CAUTION
Do not contact the belt cover while
checking the components in the
engine compartment. Doing so may
cause your hand to slip off the belt
cover and result in an unexpected
injury.
Page 331 of 416
11-10Maintenance and service
thin coat of engine oil to the seal.
9. Clean the rubber seal seating area of
the bottom of engine and install the oil
filter by hand turning. Be careful not to
twist or damage the seal.
10. Tighten the oil filter by the amount
indicated in the following table after the
seal makes contact with the bottom ofengine.
Oil filter color Part number Amount of
rotation
Black 15208AA100 1 rotation
Blue 15208AA12A 7/8
rotation
CAUTION
. Never over tighten the oil filter
because that can result in an oil leak.
. Thoroughly wipe off any engine
oil that has spilled over the
exhaust pipe and/or under-cover.
If spilled oil is not promptly
wiped up, the oil could cause afire.
11. Reinstall under cover.
12. Pour engine oil through the filler neck.
For the oil capacity (guideline), refer to “
Engine oil ”F 12-5.
The oil quantity indicated above is onlyguideline.
The necessary quantity of oil depends on
the quantity of oil that has been drained.
The quantity of drained oil differs slightly
depending on the temperature of the oil
and the time the oil is left flowing out. After
refilling the engine with oil, therefore, you
must use the level gauge to confirm that
the level is correct.
13. Start the engine and make sure that no
oil leaks appear around the filter ’s rubber
seal and drain plug.
14. Run the engine until it reaches the
normal operating temperature. Then stop
the engine and wait a few minutes to allow
the oil drain back. Check the oil level
again and if necessary, add more engineoil.
CAUTION
Be careful not to spill engine oil
when adding it. If oil touches the
exhaust pipe, it may cause a bad
smell, smoke, and/or a fire. &
Recommended grade and viscosity
CAUTION
Use only engine oil with the recom-
mended grade and viscosity.
Refer to “Engine oil ”F 12-5.
NOTE
Engine oil viscosity (thickness) affects
fuel economy. Oils of lower viscosity
provide better fuel economy. However,
in hot weather, oil of higher viscosity is
required to properly lubricate the en-gine. & Synthetic oil
You should use synthetic engine oil that
meets the same requirements given for
conventional engine oil. When using
synthetic oil, you must use oil of the same
classification, viscosity and grade shown
in this Owner ’s Manual. Refer to “Engine
oil ”F 12-5. Also, you must follow the oil
and filter changing intervals shown in the
Warranty and Maintenance booklet.
NOTE
Synthetic oil of the grade and viscosity
noted in chapter 12 is the recom-
Page 341 of 416
11-20Maintenance and service
Brake booster
If the brake booster does not operate as
described in the following, have it checked
by your SUBARU dealer.
1. With the engine off, depress the brake
pedal several times, applying the same
pedal force each time. The distance the
pedal travels should not vary.
2. With the brake pedal depressed, start
the engine. The pedal should move
slightly down to the floor.
3. With the brake pedal depressed, stop
the engine and keep the pedal depressed
for 30 seconds. The pedal height should
not change.
4. Start the engine again and run for
approximately one minute then turn it off.
Depress the brake pedal several times to
check the brake booster. The brake
booster operates properly if the pedal
stroke decreases with each depression. NOTE
For vehicles equipped with the brake
assist system, when you depress the
brake pedal strongly or suddenly, you
might feel that lighter depression of the
brake pedal generates a greater brak-
ing force. However, even though these
occur, they do not indicate any mal- functions, and the brake assist system
is operating properly.
Brake assist is not a system that brings
more braking ability to the vehicle
beyond its breaking capability.
Brake pedal
Check the brake pedal free play and
reserve distance according to the main-
tenance schedule in the
“Warranty and
Maintenance Booklet ”.
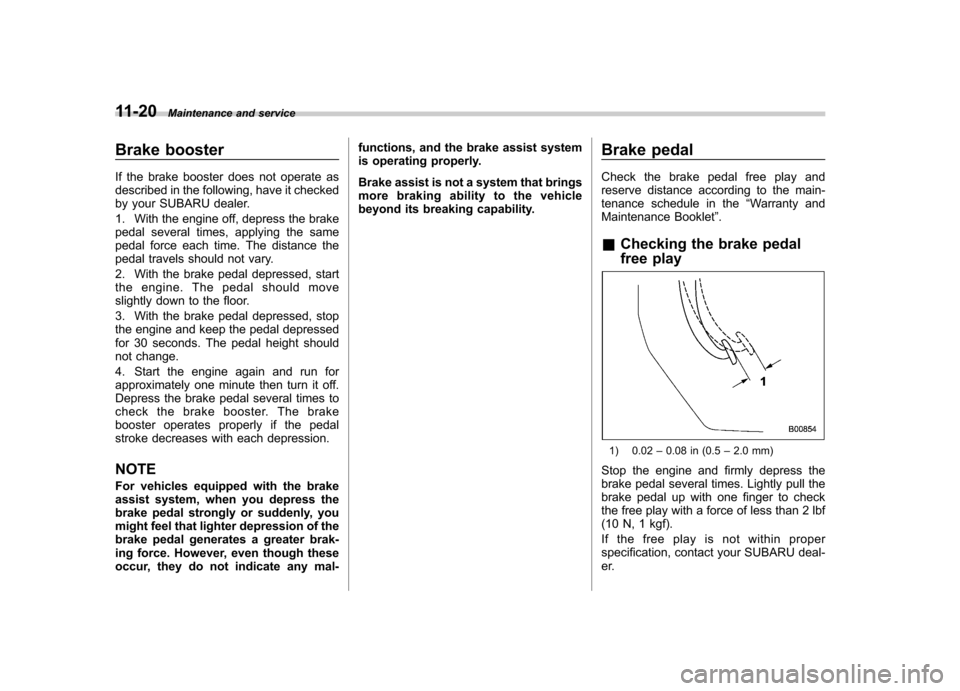
& Checking the brake pedal
free play
1) 0.02 –0.08 in (0.5 –2.0 mm)
Stop the engine and firmly depress the
brake pedal several times. Lightly pull the
brake pedal up with one finger to check
the free play with a force of less than 2 lbf
(10 N, 1 kgf).
If the free play is not within proper
specification, contact your SUBARU deal-
er.
Page 343 of 416
11-22Maintenance and service
Hill start assist system
Ensure that the Hill start assist system
operates properly under the followingcircumstances:
1. Stop the vehicle on an uphill grade by
depressing the brake pedal and clutch
pedal, with the engine running.
2. Make sure that the vehicle does not
move backward even after the brake
pedal is released.
3. Then make sure the vehicle starts
climbing the grade by following the normal
starting procedures.
If the Hill start assist system does not
operate as described above, contact with
your SUBARU dealer. Replacement of brake pad
and lining
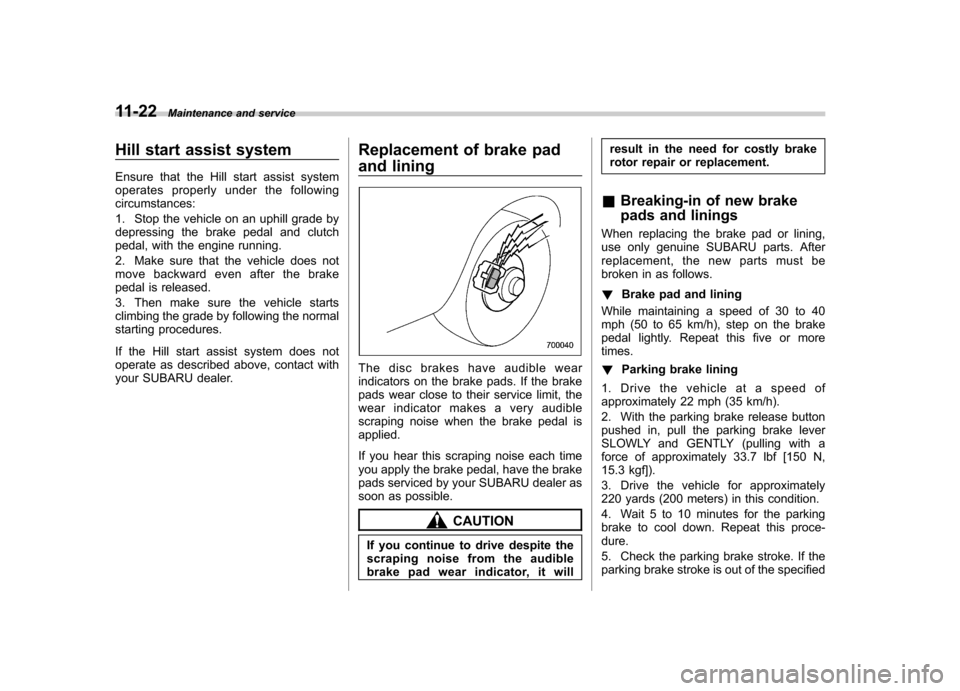
The disc brakes have audible wear
indicators on the brake pads. If the brake
pads wear close to their service limit, the
wear indicator makes a very audible
scraping noise when the brake pedal isapplied.
If you hear this scraping noise each time
you apply the brake pedal, have the brake
pads serviced by your SUBARU dealer as
soon as possible.
CAUTION
If you continue to drive despite the
scraping noise from the audible
brake pad wear indicator, it will result in the need for costly brake
rotor repair or replacement.
& Breaking-in of new brake
pads and linings
When replacing the brake pad or lining,
use only genuine SUBARU parts. After
replacement, the new parts must be
broken in as follows. ! Brake pad and lining
While maintaining a speed of 30 to 40
mph (50 to 65 km/h), step on the brake
pedal lightly. Repeat this five or moretimes. ! Parking brake lining
1. Drive the vehicle at a speed of
approximately 22 mph (35 km/h).
2. With the parking brake release button
pushed in, pull the parking brake lever
SLOWLY and GENTLY (pulling with a
force of approximately 33.7 lbf [150 N,
15.3 kgf]).
3. Drive the vehicle for approximately
220 yards (200 meters) in this condition.
4. Wait 5 to 10 minutes for the parking
brake to cool down. Repeat this proce-dure.
5. Check the parking brake stroke. If the
parking brake stroke is out of the specified
Page 407 of 416
14-4Index
Coolant ............................................................ 11-12, 12-8
Cooling system ......................................................... 11-11
Corrosion protection ................................................... 10-4
Cruise control ............................................................ 7-37
Indicator light ......................................................... 3-24
Set indicator light ................................................... 3-24
Cup holder .................................................................. 6-5
Front passenger ’s .................................................... 6-5
Rear passenger ’s..................................................... 6-7
D
Daytime running light system ....................................... 3-30
Defogger ................................................................... 3-45
Deicer ...................................................................... 3-45
Differential gear oil Front .................................................................... 12-6
Rear ............................................................ 11-16, 12-6
Dimensions ............................................................... 12-2
Disarming the alarm system ........................................ 2-17
Disc brake pad wear warning indicators ........................ 7-25
Dome light ........................................................ 6-2, 11-47
Door Locks ..................................................................... 2-4
Open warning light ................................................. 3-20
Drive belts. ............................................................... 11-15
Driver ’s Control Center Differential ............................... 7-18
Auto indicator light ................................................. 3-24
Indicator light ......................................................... 3-25
Driving AWD vehicles .......................................................... 8-4
Car phone/cell phone .................................................. 8 Drinking.
.................................................................... 7
Drugs ........................................................................ 7
Foreign countries ..................................................... 8-4
Pets .......................................................................... 8
Snowy and icy roads ............................................... 8-7
Tips ................................................. 7-16, 7-17, 8-2, 8-4
Tired or sleepy ........................................................... 8
Winter .................................................................... 8-6
E
Electrical system ........................................................ 12-3
Electronic Brake Force Distribution (EBD) system... 3-19, 7-26
Emergency Locking Retractor (ELR) ............................. 1-12
Engine Compartment overview ............................................ 11-6
Coolant ....................................................... 11-12, 12-8
Exhaust gas (carbon monoxide) ............................. 6, 8-2
Hood .................................................................... 11-5
Oil ................................................................ 11-8, 12-5Overheating ........................................................... 9-12
Starting .................................................................. 7-9
Stopping ................................................................ 7-10
Exterior care .............................................................. 10-2
F
Flat tires ..................................................................... 9-5
Floor mat ................................................................... 6-10
Fluid level
Brake .................................................................. 11-18
Clutch ................................................................. 11-19
Power steering ..................................................... 11-17
Page 408 of 416
Fog lightBulb .................................................................... 11-42
Indicator light ......................................................... 3-24
Switch .................................................................. 3-33
Folding mirror switch .................................................. 3-45
Front
Differential gear oil ................................................. 12-6
Fog light ...................................................... 3-33, 11-42
Fog light indicator light ............................................ 3-24
Seatbelt pretensioners ............................................ 1-19
Turn signal light .................................................... 11-42
Front seats .................................................................. 1-2
Active head restraint ................................................. 1-5
Forward and backward adjustment ............................. 1-3
Head restraint adjustment ......................................... 1-4
Reclining ................................................................. 1-3
Seat cushion height adjustment ................................. 1-4
Fuel ........................................................................... 7-3
Consumption indicator ............................................ 3-26
Economy hints ......................................................... 8-2
Filler lid and cap ...................................................... 7-4
Gauge .................................................................... 3-9
Requirements .................................................. 7-3, 12-4
Fuses ...................................................................... 11-37
Fuses and circuits .................................................... 12-10
G
GAWR (Gross Axle Weight Rating) .............................. 8-11
Glove box ................................................................... 6-5
GVWR (Gross Vehicle Weight Rating) .......................... 8-11H
Hands-free system.
..................................................... 5-35
Hazard warning flasher .......................................... 3-5, 9-2
Head restraint adjustment Front seat ............................................................... 1-4
Rear seat ............................................................... 1-8
Headlight Beam leveler. ......................................................... 3-31
Bulb replacement ................................................. 11-39
Bulb replacing ...................................................... 11-39
Bulb wattage ........................................................ 12-14
Control switch ........................................................ 3-29
Flasher .................................................................. 3-30
Indicator light ......................................................... 3-24
Heater operation (manual climate control system) ... ......... 4-5
High beam indicator light ............................................. 3-24
High mount stop light ................................................ 11-47
High/low beam change (dimmer) .................................. 3-29
Hill start assist (MT models) ............................... 7-35, 11-22
OFF indicator light .................................................. 3-20
To activate/deactivate .............................................. 7-35
Warning light .......................................................... 3-20
HomeLink
®................................................................. 3-38
Hook Cargo tie-down ....................................................... 6-13
Shopping bag ........................................................ 6-11
Towing and tie-down ............................................... 9-13
Horn ......................................................................... 3-48
Hose and connections ............................................... 11-11 Index
14-5