2012 SUBARU IMPREZA WRX service
[x] Cancel search: servicePage 157 of 416
3-40Instruments and controls
!Compass calibration
1. If a “C ” is displayed in the compass
window, the compass needs to be cali- brated.
2. Drive the vehicle in a circle at 5 mph (8
km/h) or less until the display reads a direction.
3. You can also calibrate the compass by
driving your vehicle on your everyday
routine. The compass will be calibrated
once it has tracked a complete circle.
4. To recalibrate your compass, push and
hold the compass display button for 9
seconds until a “C ” appears in the
compass window.
5. Calibrate the compass according to
step 2 or step 3. ! HomeLink
®Wireless Control Sys-
tem
The HomeLink
®Wireless Control System
can be used to activate remote control
devices such as gate operators, garage
door openers, door locks, home lighting
and security systems.
There are three HomeLink
®buttons on the
mirror, each of which can be programmed
for operation of one desired device. For
details on the device types which can be
operated by this system, consult the HomeLink
®website at: www.homelink.com or call 1-800-355-3515.
Note the following information about this system.
Ifyourvehicleisequippedwiththe HomeLink
®Wireless Control System, it
complies with Part 15 of the Federal
Communications Commission Rules in
the U.S. and the RSS-210 of Industry
Canada in Canada. Its operation is subject
to the following two conditions:
(1) this device may not cause harmful
interference, and (2) this device must
accept any interference received, includ-
ing interference that may cause undesiredoperation.
Changes and modifications to this system
by anyone other than an authorized
service facility could void authorization to
use this equipment. HomeLink
®and the HomeLink®house are
registered trademarks of Johnson Con-
trols, Inc.
WARNING
. When programming the
HomeLink
®Wireless Control Sys-
tem, you may be operating a
garage door opener or other
device. Make sure that people and objects are out of the way of
the garage door or other device
to prevent potential harm ordamage.
. Do not use the HomeLink
®Wire-
less Control System with a gar-
age door opener that lacks the
safety stop and reverse feature
as required by applicable safety
standards. A garage door opener
which cannot detect an object,
signaling the door to stop and
reverse, does not meet these
safety standards. Using a garage
door opener without these fea-
tures increases risk of serious
injury or death. For more infor-
mation, consult the HomeLink
®website at www.homelink.com or
call 1-800-355-3515.
CAUTION
When programming the HomeLink
®Wireless Control System to operate
a garage door opener or an entrance
gate, unplug the device ’s motor
from the outlet during programming
to prevent motor burnout.
Page 178 of 416
system. &Air conditioner compressor
shut-off when engine is
heavily loaded
To improve acceleration and gas mileage,
the air conditioner compressor is designed
to temporarily shut off during air condi-
tioner operation whenever the accelerator
is fully depressed such as during rapid
acceleration or when driving on a steepupgrade. & Refrigerant for your climate
control system
Your air conditioner uses ozone friendly
refrigerant HFC134a. Therefore, the meth-
od of adding, changing or checking the
refrigerant is different from the method for
CFC12 (freon). Consult your SUBARU
dealer for service. Repairs needed as a
result of using the wrong refrigerant are
not covered under warranty. Air filtration system
Replace the filter element according to the
replacement schedule as follows. This
schedule should be followed to maintain
the filter
’s dust collection ability. Under
extremely dusty conditions, the filter
should be replaced more frequently. It is
recommended that you have your filter
checked or replaced by your SUBARU
dealer. For replacement, use only a
genuine SUBARU air filter kit.
Replacement schedule: Every 12 months or 7,500 miles (12,000
km) whichever comes first
CAUTION
Contact your SUBARU dealer if the
following occurs, even if it is not yet
time to change the filter: . Reduction of the airflow through
the vents.
. Windshield gets easily fogged or
misted.
NOTE
The filter can influence the air condi-
tioning, heating and defroster perfor- mance if not properly maintained. &
Replacing an air filter
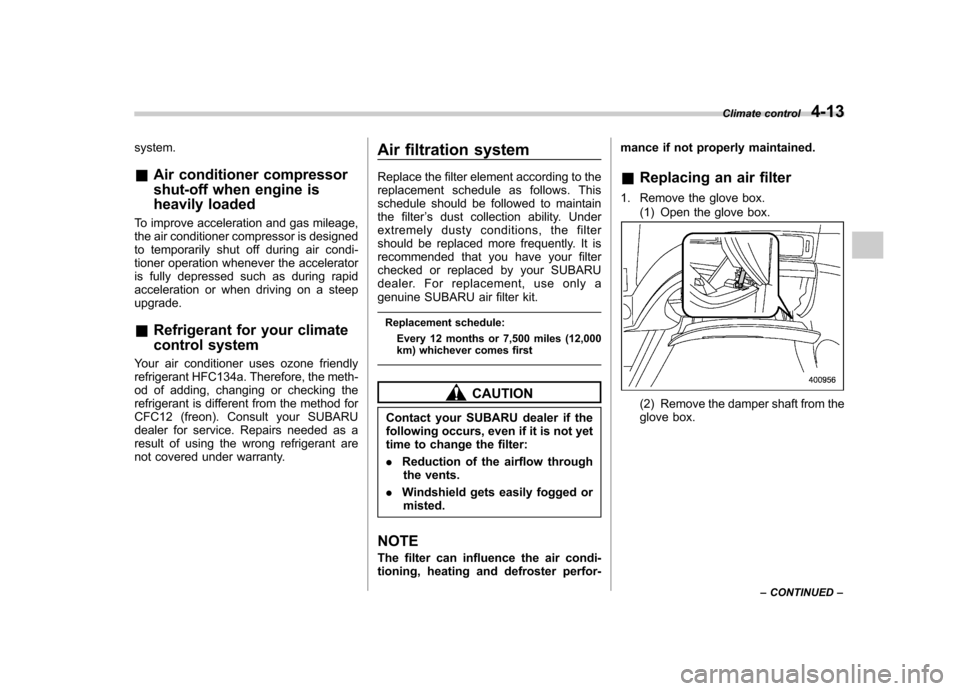
1. Remove the glove box. (1) Open the glove box.(2) Remove the damper shaft from the
glove box. Climate control
4-13
– CONTINUED –
Page 180 of 416
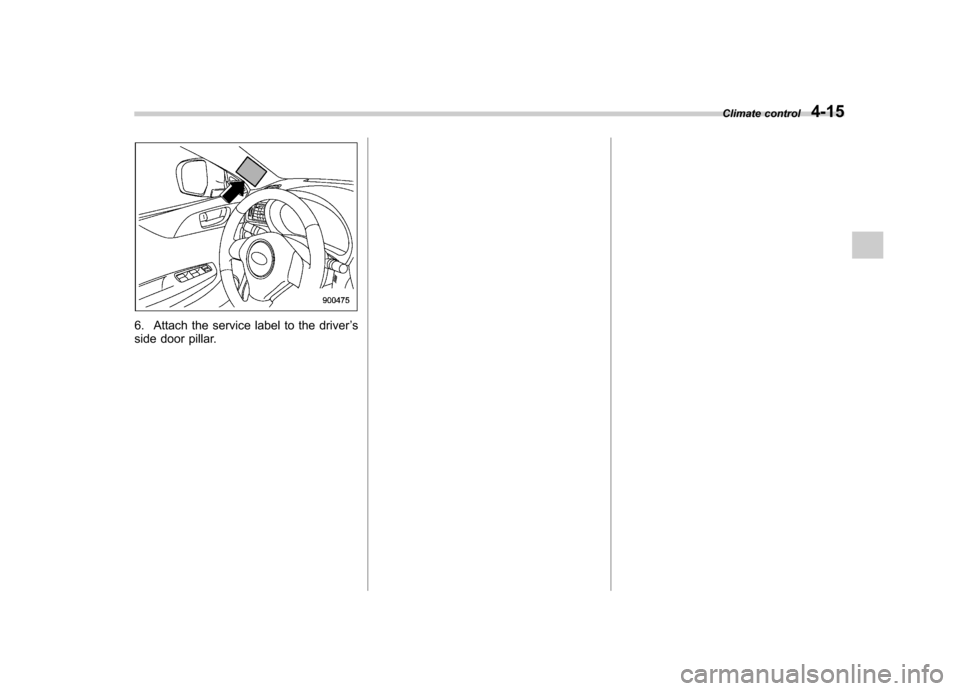
6. Attach the service label to the driver’s
side door pillar. Climate control
4-15
Page 182 of 416

Antenna system.................................................. 5-3
Roof antenna ...................................................... 5-3
FM reception ....................................................... 5-3
Installation of accessories .................................. 5-4
Audio set ............................................................. 5-4
Type A audio set (if equipped) ............................. 5-5
Type B audio set (if equipped) ............................. 5-6
Power and sound controls ................................. 5-7
Power switch and volume control ........................ 5-7
Sound control ..................................................... 5-7
Adjustable level of each mode ............................. 5-9
FM/AM radio operation ...................................... 5-10
FM/AM selection ................................................. 5-10
Tuning ............................................................... 5-10
Displaying radio PS (Program Service Name) and RT (Radio Text) ................................................ 5-12
Station preset .................................................... 5-12
Satellite radio operation (if equipped) .............. 5-13
Sirius XM
TMSatellite Radio Activation (for U.S.A.
only) ................................................................ 5-13
Sirius satellite radio (for Canada only) ................ 5-13
Satellite radio reception ...................................... 5-13
Displaying satellite radio ID of tuner ................... 5-14
Band selection ................................................... 5-15
Channel and category selection .......................... 5-15
Channel preset ................................................... 5-16
Display selection ................................................ 5-16
CD player operation ........................................... 5-16
Play file. ............................................................. 5-17
How to insert a CD(s) (type A) ............................ 5-17
How to insert a CD (type B) ................................ 5-18 How to play back a CD
...................................... 5-18
To select a track from the beginning .................. 5-18
Fast-forwarding and rewinding . .......................... 5-19
Repeating .......................................................... 5-19
Random playback .............................................. 5-20
Scan ................................................................. 5-20
Display selection ............................................... 5-21
Folder selection ................................................. 5-21
How to eject CDs from the player (type A) ..... ..... 5-22
How to eject a CD from the player (type B) .... ..... 5-22
When the following messages are displayed. . ..... 5-22
Auxiliary input jack (if equipped). ..................... 5-23
Precautions to observe when handling a compact disc ................................................... 5-24
USB storage device / iPod
®operations
(type B audio) ................................................. 5-26
Play file ............................................................. 5-26
Connectable USB storage device ....................... 5-26
Connectable iPod
®models ................................. 5-27
Connecting USB storage device / iPod®............. 5-27
How to play back ............................................... 5-28
To select a track from the beginning .................. 5-29
To select a chapter from the beginning when connecting iPod
®............................................. 5-29
Fast-forwarding and rewinding . .......................... 5-29
Repeating .......................................................... 5-29
Random playback .............................................. 5-29
SCAN (only when connecting USB storage device) ............................................................ 5-30
Selecting category (only when connecting iPod
®) ............................................................. 5-30 Audio
5
Page 193 of 416
5-12Audio
seeks within that PTY group.
The control function returns to the normal
mode after approximately 10 seconds. &Displaying radio PS (Pro-
gram Service Name) and RT
(Radio Text)
Type A audio
Type B audio
If the PS (Program Service Name) and/or
RT (Radio Text) are available, pressingthe “TEXT ”button changes the display
among PS, RT and frequency. The initial
setting is “PS ”.
NOTE . The maximum number of characters
that can be displayed for PS is 8. . The maximum number of characters
that can be displayed for RT is 64. . If RT is 13 characters or longer,
press and hold the “TEXT ”button in
order to change the page. &
Station preset
! How to preset stations
1. Select the preferred reception mode.
2. Select the preferred station.
3. Press and hold one of the preset
buttons (from
to) to store the
frequency. If the button is pressed briefly,
the preceding selection will remain in the
memory.
NOTE . Up to six stations for each reception
mode may be preset. . If the connection between the radio
and battery is broken for any reason
such as vehicle maintenance or radio
removal, all stations stored in the
preset buttons are cleared. If this
occurs, it is necessary to reset the
preset buttons.. If a cell phone is placed near the
radio, it may cause the radio to emit
noise when a phone call is received.
This noise does not indicate a radiomalfunction. !
Selecting preset stations
1. Select the preferred reception mode.
2. Press the preferred preset button (from
to) briefly.
Page 194 of 416
Satellite radio operation (if equipped)
To receive satellite radio, it is necessary to
install the SUBARU genuine satellite
receiver (optional equipment) and to enter
into a contract. For details, please contact
your SUBARU dealer. &Sirius XM
TMSatellite Radio
Activation (for U.S.A. only)
Models with Sirius XM
TMare eligible for a
3-month complimentary subscription to
the Sirius XM
TMSatellite Radio service.
! Activation process
If you would like to activate your Satellite
Radio online, please visit
http://www.sir-iusxm.com/activationhelp and follow the
step-by-step instructions for easy activa-tion. & Sirius satellite radio (for
Canada only)
Sirius satellite radio is a recent innovation
that allows the listener to experience
digital sound quality and to have a greater
variety of channels.
Use of satellite radio (Sirius) requires a
tuner, antenna and a service contract. For
details, please contact your SUBARU dealer or visit Sirius Satellite Radio at
www.sirius.ca or call 1-888-539-7474 for
more information. Sirius, the Sirius dog
logo, channel names and logos are trade-
marks of SIRIUS Satellite Radio Inc. &
Satellite radio reception
Satellite radio signals are best received in
areas with a clear view of the open sky. In
areas where there are tall buildings, trees,
tunnels or other structures that may
obstruct the signal of the satellites, there
may be signal interruptions. Other circum-
stances that may result in signal loss
include driving near a wall, steep cliff, hill
or driving on the lower level of a multi-
tiered road or inside of a parking garage.
To help reduce this condition, satellite
radio providers have installed ground-
based repeaters in heavily populated
areas. However, you may still experience
reception problems in some areas. !
Sirius XM
TMsatellite radio reception
tips for antenna on the windshield
(for U.S.A. only —if equipped)
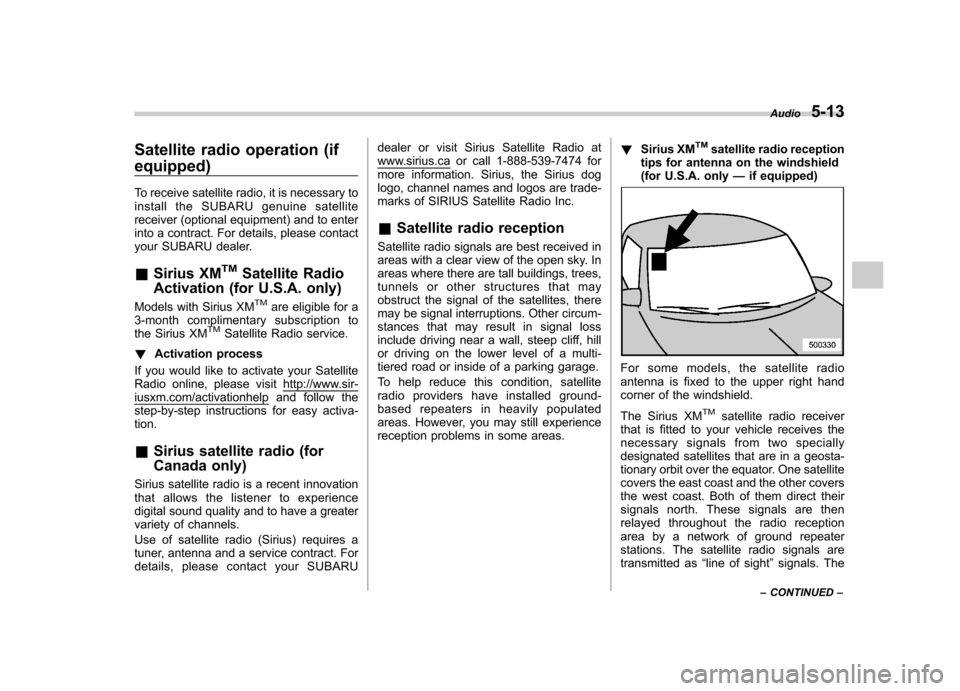
For some models, the satellite radio
antenna is fixed to the upper right hand
corner of the windshield.
The Sirius XM
TMsatellite radio receiver
that is fitted to your vehicle receives the
necessary signals from two specially
designated satellites that are in a geosta-
tionary orbit over the equator. One satellite
covers the east coast and the other covers
the west coast. Both of them direct their
signals north. These signals are then
relayed throughout the radio reception
area by a network of ground repeater
stations. The satellite radio signals are
transmitted as “line of sight ”signals. The
Audio
5-13
– CONTINUED –
Page 244 of 416
Fuel...................................................................... 7-3
Fuel requirements ............................................... 7-3
Fuel filler lid and cap ........................................... 7-4
State emission testing (U.S. only) ...................... 7-7
Preparing to drive ............................................... 7-8
Starting the engine .............................................. 7-9
Stopping the engine ........................................... 7-10
Remote engine start system (dealer option) .............................................................. 7-10
Starting your vehicle .......................................... 7-10
Remote start safety features ............................... 7-11
Entering the vehicle while it is running via remote start ................................................................. 7-11
Entering the vehicle following remote engine start shutdown ......................................................... 7-11
Pre-heating or pre-cooling the interior of the vehicle ............................................................. 7-11
Service mode ..................................................... 7-11
Remote engine start transmitter programming and programmable feature option ..................... 7-12
System maintenance .......................................... 7-12
Manual transmission –6 speeds (STI) ............. 7-14
Selecting reverse gear ........................................ 7-15
Shifting speeds .................................................. 7-15
Driving tips ........................................................ 7-16
Manual transmission –5 speeds (except
STI) ................................................................... 7-16
Shifting speeds .................................................. 7-17
Driving tips ........................................................ 7-17
Driver ’s Control Center Differential (DCCD)
(STI) .................................................................. 7-18 To change mode of driver
’s control center
differential ....................................................... 7-18
Auto mode ........................................................ 7-19
Manual mode ..................................................... 7-20
Temporary release ............................................. 7-21
SI-DRIVE (STI) .................................................... 7-22
Intelligent (I) mode ............................................. 7-22
Sport (S) mode .................................................. 7-22
Sport Sharp (S#) mode. ...................................... 7-23
SI-DRIVE selector .............................................. 7-23
Limited slip differential (LSD) (STI) .................. 7-24
Power steering ................................................... 7-24
Braking ............................................................... 7-24
Braking tips ....................................................... 7-24
Brake system .................................................... 7-25
Disc brake pad wear warning indicators ............. 7-25
ABS (Anti-lock Brake System) .......................... 7-26
ABS system self-check ...................................... 7-26
ABS warning light .............................................. 7-26
Electronic Brake Force Distribution (EBD) system ............................................................. 7-26
Steps to take if EBD system malfunctions ..... ..... 7-27
Vehicle Dynamics Control system .................... 7-28
Vehicle Dynamics Control system monitor..... ..... 7-29
Vehicle Dynamics Control mode switch (STI) . ..... 7-29
Vehicle Dynamics Control OFF switch (except STI) ................................................................. 7-30
Tire pressure monitoring system (TPMS) (U.S.-spec. models). ........................................ 7-32
Parking your vehicle ......................................... 7-33
Starting and operating
7
Page 246 of 416
Fuel
CAUTION
Use of a fuel which is low in quality
or use of an inappropriate fuel
additive may cause engine damage.
& Fuel requirements
! Except STI
The engine is designed to operate usingpremium unleaded gasoline with an
octane rating of 91 AKI (95 RON) or
higher . If premium unleaded gasoline is
not available, regular unleaded gasoline
with an octane rating of 87 AKI (90 RON)
or higher may be temporarily used. For
optimum engine performance and drive-
ability, it is required that you use premium
grade unleaded gasoline. NOTE
Be sure to use premium unleaded
gasoline of 91 AKI (95 RON) or higher.
If other gasoline (lower than 91 AKI (95
RON)) is used, knocking, reduced out-
put and poor accelerator response willresult. !
STI
The engine is designed to operate at
maximum performance using unleaded
gasoline with an octane rating of 93 AKI
(98 RON) or higher . If 93 AKI (98 RON)
fuel is not readily available in your area,
unleaded gasoline with an octane rating of
91 AKI (95 RON) may be used with no
detriment to engine durability or driveabil-
ity. However, you may notice a slight
decrease in maximum engine perfor-
mance while using 91 AKI (95 RON) fuel.
Use of 91 AKI (95 RON) fuel will not affect
your warranty coverage. ! Fuel octane rating
This octane rating is the average of the
Research Octane and Motor Octane
numbers and is commonly referred to as
the Anti Knock Index (AKI).
Using a gasoline with a lower octane
rating can cause persistent and heavy
knocking, which can damage the engine.
Do not be concerned if your vehicle
sometimes knocks lightly when you drive
up a hill or when you accelerate. Contact
your SUBARU dealer if you use a fuel with
the specified octane rating and your
vehicle knocks heavily or persistently. ! Unleaded gasoline
The neck of the fuel filler pipe is designed
to accept only an unleaded gasoline filler nozzle. Under no circumstances should
leaded gasoline be used because it will
damage the emission control system and
may impair driveability and fuel economy. !
Gasoline for California-certified LEV
If your vehicle was certified to California ’s
low emission vehicle (LEV) standards as
indicated on the underhood tune-up label,
it is designed to optimize engine and
emission performance with gasoline that
meets the clean burning low-sulfur Cali-
fornia gasoline specifications. If you live in
any other state than California, your
vehicle will operate on gasoline meeting
Federal specifications. Gasoline sold out-
side California is permitted to have higher
sulfur levels, which may affect the perfor-
mance of your vehicle ’s catalytic converter
and may produce a sulfur exhaust odor or
smell. SUBARU recommends that you try
a different brand of unleaded gasoline
having lower sulfur to determine if the
problem is fuel related before returning
your vehicle to an authorized dealer forservice. ! MMT
Some gasoline contains an octane-en-
hancing additive called MMT (Methylcy-
clopentadienyl Manganese Tricarbonyl). If
you use such fuels, your emission control Starting and operating
7-3
– CONTINUED –