2012 SUBARU FORESTER manual transmission
[x] Cancel search: manual transmissionPage 6 of 438

&Abbreviation list
You will find several abbreviations in this
manual. The meanings of the abbrevia-
tions are shown in the following list.
Abbreviation Meaning
A/C Air conditioner A/ELR Automatic/Emergency locking retractor
ABS Anti-lock brake system
AKI Anti knock index
ALR Automatic locking retractor
AT Automatic transmission
ATF Automatic transmission fluid
AWD All-wheel drive
DRL Daytime running light EBD Electronic brake force distri- bution
ELR Emergency locking retractor
FWD Front-wheel drive
GAW Gross axle weight
GAWR Gross axle weight rating
GVW Gross vehicle weight
GVWR Gross vehicle weight rating
HID High intensity discharge
INT Intermittent Abbreviation Meaning
LATCH Lower anchors and tethers for
children
LED Light emitting diode
LSD Limited slip differential
MIL Malfunction indicator light MMT Methylcyclopentadienyl man-
ganese tricarbonyl
MT Manual transmission
OBD On-board diagnostics
RON Research octane number SRS Supplemental restraint sys- tem
TIN Tire identification number TPMS Tire pressure monitoring sys- tem
VDC Vehicle dynamics control Vehicle symbols
There are some of the symbols you may
see on your vehicle.
For warning and indicator lights, refer to “
Warning and indicator lights ”F 21.
Mark Name
WARNING
CAUTION
Power door lock
Power door unlock
Power window with automatic
open (all models) and close (if
equipped) function
Passengers ’windows lock
and unlock
Fuel
Front fog lights 3
– CONTINUED –
Page 115 of 438

3-4Instruments and controls
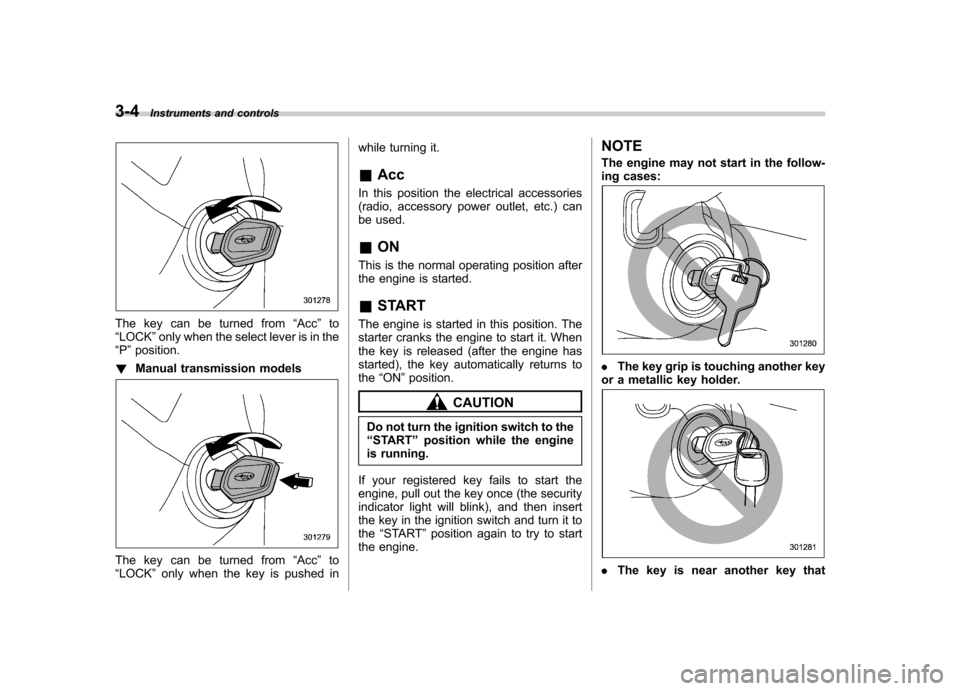
The key can be turned from “Acc ”to
“ LOCK ”only when the select lever is in the
“ P ”position.
! Manual transmission models
The key can be turned from “Acc ”to
“ LOCK ”only when the key is pushed in while turning it. &
Acc
In this position the electrical accessories
(radio, accessory power outlet, etc.) can
be used. & ON
This is the normal operating position after
the engine is started. & START
The engine is started in this position. The
starter cranks the engine to start it. When
the key is released (after the engine has
started), the key automatically returns tothe “ON ”position.
CAUTION
Do not turn the ignition switch to the “ START ”position while the engine
is running.
If your registered key fails to start the
engine, pull out the key once (the security
indicator light will blink), and then insert
the key in the ignition switch and turn it tothe “START ”position again to try to start
the engine. NOTE
The engine may not start in the follow-
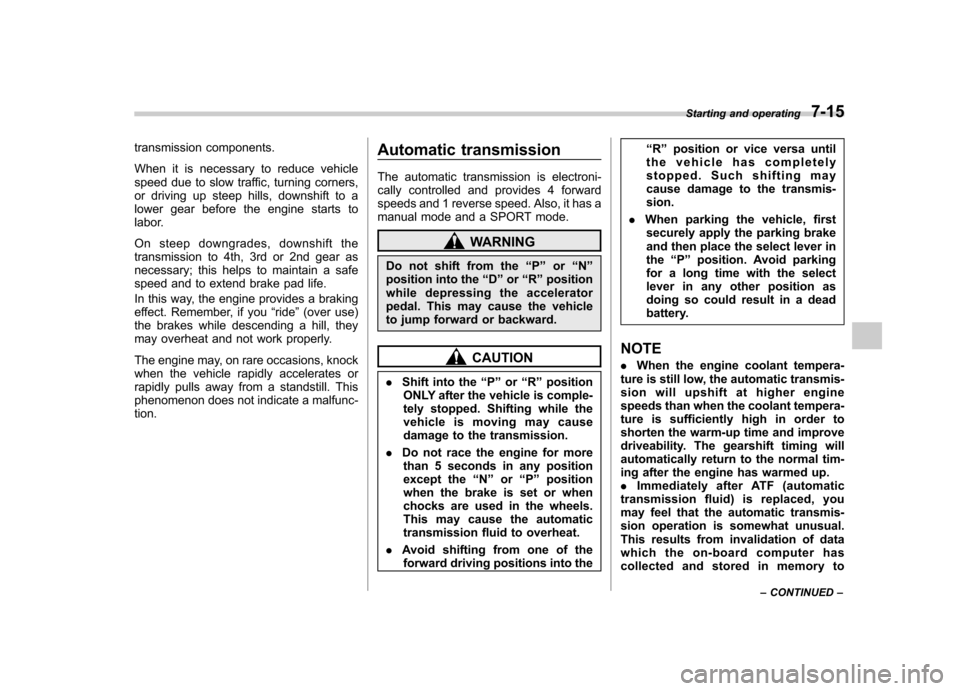
ing cases:
.
The key grip is touching another key
or a metallic key holder.
. The key is near another key that
Page 135 of 438

3-24Instruments and controls
equipped with the security alarm system
and the immobilizer system.
This indicator light shows the status of the
alarm system. It also indicates operation
of the immobilizer system. ! Alarm system
It blinks to show the driver the operational
status of the alarm system. For detailed
information, refer to “Alarm system ”F 2-
14. ! Immobilizer system
This light blinks approximately 60 seconds
after the ignition switch is turned from“ ON ”position to the “Acc ”or “LOCK ”
position or immediately after the key is
pulled out. Refer to “Immobilizer ”F 2-3.
If the indicator light does not flash, it may
indicate that immobilizer system may be
malfunctioning. Contact your nearest
SUBARU dealer immediately.
In the event that an unauthorized key (for
example, an unauthorized duplicate) is
used, the security indicator light illumi-nates.
NOTE
Even if the security indicator light
flashes irregularly or its fuse blows
(the light does not flash if its fuse is
blown), the immobilizer system will function normally.
& SPORT mode indicator
light (AT models)
When the select lever is moved to the
manual gate, the SPORT mode is se-
lected and the indicator light illuminates.
Refer to “SPORT mode ”F 7-20.
& Select lever and gear posi-
tion indicator (AT models)
Type A
Type B
This indicator shows the position of the
select lever.
When the manual mode is selected, the
gear position indicator (which shows the
current gear selection) and the upshift/
downshift indicator light up. Refer to“ Automatic transmission ”F 7-15.
& Turn signal indicator lights
These lights show the operation of the turn
signal or lane change signal.
If the indicator lights do not blink or blink
rapidly, any of the turn signal light bulbs
may be burned out. Replace the bulb as
soon as possible. Refer to “Replacing
bulbs ”F 11-45.
Page 252 of 438

Fuel...................................................................... 7-2
Fuel requirements ............................................... 7-2
Fuel filler lid and cap ........................................... 7-3
State emission testing (U.S. only) ...................... 7-6
Preparing to drive ............................................... 7-7
Starting the engine .............................................. 7-7
MT models .......................................................... 7-7
AT models ........................................................... 7-8
Stopping the engine ............................................ 7-9
Remote engine start system (dealer option) ..... 7-9
Starting your vehicle .......................................... 7-10
Remote start safety features ............................... 7-10
Entering the vehicle while it is running via remote start ................................................................. 7-10
Entering the vehicle following remote engine start shutdown ......................................................... 7-10
Pre-heating or pre-cooling the interior of the vehicle ............................................................. 7-11
Service mode ..................................................... 7-11
Remote transmitter programming and programmable feature option ............................ 7-11
System maintenance .......................................... 7-12
Manual transmission .......................................... 7-13
Shifting speeds .................................................. 7-14
Driving tips ........................................................ 7-14
Automatic transmission ..................................... 7-15
Select lever ........................................................ 7-16
Shift lock function .............................................. 7-17
Selection of manual mode .................................. 7-19
Driving tips ........................................................ 7-20 SPORT mode
..................................................... 7-20
Power steering ................................................... 7-21
Braking ............................................................... 7-22
Braking tips ....................................................... 7-22
Brake system .................................................... 7-22
Disc brake pad wear warning indicators ............. 7-23
ABS (Anti-lock Brake System) .......................... 7-23
ABS system self-check ...................................... 7-23
ABS warning light .............................................. 7-23
Electronic Brake Force Distribution (EBD) system ............................................................. 7-24
Steps to take if EBD system malfunctions ..... ..... 7-24
Vehicle Dynamics Control system .................... 7-25
Vehicle Dynamics Control system monitor..... ..... 7-26
Vehicle Dynamics Control OFF switch ................ 7-27
Tire pressure monitoring system (TPMS) (U.S.-spec. models). ........................................ 7-27
Parking your vehicle ......................................... 7-29
Parking brake .................................................... 7-29
Parking tips ....................................................... 7-29
Hill start assist system (MT models) ................ 7-31
Hill start assist warning light .............................. 7-32
Cruise control .................................................... 7-32
To set cruise control .......................................... 7-32
To temporarily cancel the cruise control ............. 7-33
To turn off the cruise control .............................. 7-34
To change the cruising speed .. .......................... 7-34
Cruise control indicator light .............................. 7-35
Cruise control set indicator light ........................ 7-35
Starting and operating
7
Page 264 of 438

2. Remove the circuit board from the
bottom half of the case and slide the white
plastic battery holder out from under the
battery tab releasing the batteries. Re-
move the old batteries and replace with
new ones. Be sure to observe the (+) sign
on the old batteries before removing them
to ensure that the new batteries are
inserted properly (battery“+ ” should be
pointed away from the transmitter circuit
board on both batteries).
3. Carefully snap the case halves back
together, then test the remote control.
CAUTION
FCC WARNING
Changes or modifications not ex-
pressly approved by the party re- sponsible for compliance could void
the user
’s authority to operate the
equipment.
NOTE
This device complies with Part 15 of
the FCC Rules and RSS-Gen of IC
Rules. Operation is subject to the
following two conditions: (1) this de-
vice may not cause harmful interfer-
ence, and (2) this device must accept
any interference received, including
interference that may cause undesiredoperation. Manual transmission
The manual transmission is a fully syn-
chromeshed, 5-forward-speed and 1-re-
verse-speed transmission.
The shift pattern is shown on the shift
lever knob. When shifting from 5th gear to
reverse gear, first return the shift lever to
the neutral position then shift into reverse
gear.
To change gears, fully depress the clutch
pedal, move the shift lever, and gradually
let up on the clutch pedal.
If it is difficult to shift into gear, put the
transmission in neutral, release the clutch
pedal momentarily, and then try again.Starting and operating
7-13
– CONTINUED –
Page 266 of 438

transmission components.
When it is necessary to reduce vehicle
speed due to slow traffic, turning corners,
or driving up steep hills, downshift to a
lower gear before the engine starts to
labor.
On steep downgrades, downshift the
transmission to 4th, 3rd or 2nd gear as
necessary; this helps to maintain a safe
speed and to extend brake pad life.
In this way, the engine provides a braking
effect. Remember, if you“ride ”(over use)
the brakes while descending a hill, they
may overheat and not work properly.
The engine may, on rare occasions, knock
when the vehicle rapidly accelerates or
rapidly pulls away from a standstill. This
phenomenon does not indicate a malfunc-tion. Automatic transmission
The automatic transmission is electroni-
cally controlled and provides 4 forward
speeds and 1 reverse speed. Also, it has a
manual mode and a SPORT mode.
WARNING
Do not shift from the “P ” or “N ”
position into the “D ” or “R ” position
while depressing the accelerator
pedal. This may cause the vehicle
to jump forward or backward.
CAUTION
. Shift into the “P ” or “R ” position
ONLY after the vehicle is comple-
tely stopped. Shifting while the
vehicle is moving may cause
damage to the transmission.
. Do not race the engine for more
than 5 seconds in any position
except the “N ” or “P ” position
when the brake is set or when
chocks are used in the wheels.
This may cause the automatic
transmission fluid to overheat.
. Avoid shifting from one of the
forward driving positions into the “
R ” position or vice versa until
the vehicle has completely
stopped. Such shifting may
cause damage to the transmis-sion.
. When parking the vehicle, first
securely apply the parking brake
and then place the select lever inthe “P ” position. Avoid parking
for a long time with the select
lever in any other position as
doing so could result in a dead
battery.
NOTE . When the engine coolant tempera-
ture is still low, the automatic transmis-
sion will upshift at higher engine
speeds than when the coolant tempera-
ture is sufficiently high in order to
shorten the warm-up time and improve
driveability. The gearshift timing will
automatically return to the normal tim-
ing after the engine has warmed up.. Immediately after ATF (automatic
transmission fluid) is replaced, you
may feel that the automatic transmis-
sion operation is somewhat unusual.
This results from invalidation of data
which the on-board computer has
collected and stored in memory to Starting and operating
7-15
– CONTINUED –
Page 267 of 438

7-16Starting and operating
allow the transmission to shift at the
most appropriate timings for the cur-
rent condition of your vehicle. Opti-
mized shifting will be restored as the
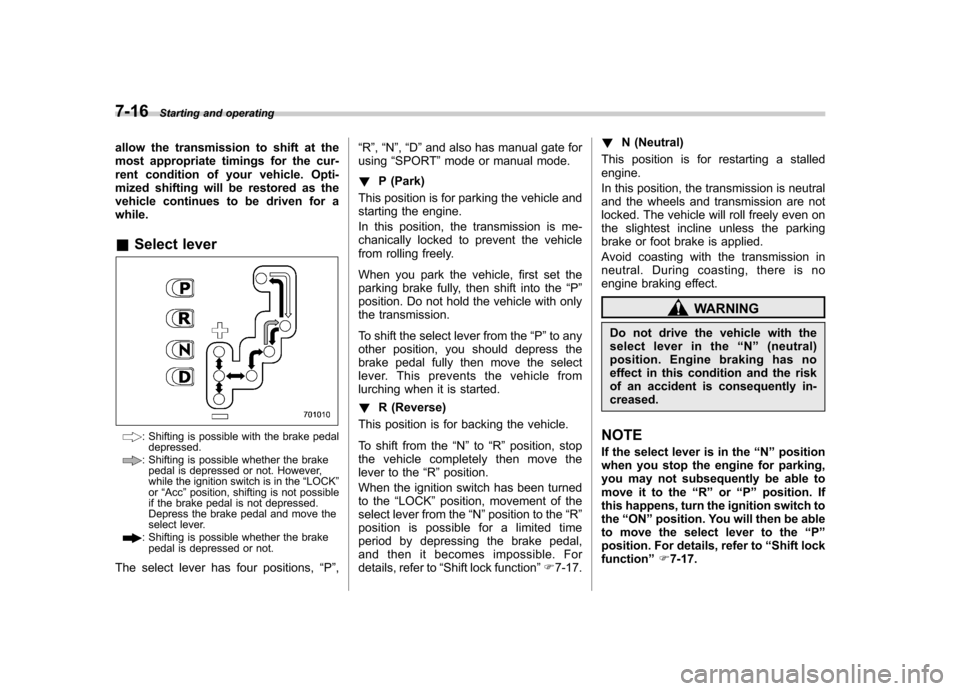
vehicle continues to be driven for awhile. &Select lever
: Shifting is possible with the brake pedal
depressed.
: Shifting is possible whether the brakepedal is depressed or not. However,
while the ignition switch is in the “LOCK ”
or “Acc ”position, shifting is not possible
if the brake pedal is not depressed.
Depress the brake pedal and move the
select lever.
: Shifting is possible whether the brake
pedal is depressed or not.
The select lever has four positions, “P ”, “
R ”, “N ”, “D ”and also has manual gate for
using “SPORT ”mode or manual mode.
! P (Park)
This position is for parking the vehicle and
starting the engine.
In this position, the transmission is me-
chanically locked to prevent the vehicle
from rolling freely.
When you park the vehicle, first set the
parking brake fully, then shift into the “P ”
position. Do not hold the vehicle with only
the transmission.
To shift the select lever from the “P ”to any
other position, you should depress the
brake pedal fully then move the select
lever. This prevents the vehicle from
lurching when it is started. ! R (Reverse)
This position is for backing the vehicle.
To shift from the “N ”to “R ” position, stop
the vehicle completely then move the
lever to the “R ”position.
When the ignition switch has been turned
to the “LOCK ”position, movement of the
select lever from the “N ”position to the “R ”
position is possible for a limited time
period by depressing the brake pedal,
and then it becomes impossible. For
details, refer to “Shift lock function ”F 7-17. !
N (Neutral)
This position is for restarting a stalledengine.
In this position, the transmission is neutral
and the wheels and transmission are not
locked. The vehicle will roll freely even on
the slightest incline unless the parking
brake or foot brake is applied.
Avoid coasting with the transmission in
neutral. During coasting, there is no
engine braking effect.
WARNING
Do not drive the vehicle with the
select lever in the “N ” (neutral)
position. Engine braking has no
effect in this condition and the risk
of an accident is consequently in-creased.
NOTE
If the select lever is in the “N ” position
when you stop the engine for parking,
you may not subsequently be able to
move it to the “R ” or “P ” position. If
this happens, turn the ignition switch tothe “ON ”position. You will then be able
to move the select lever to the “P ”
position. For details, refer to “Shift lock
function ”F 7-17.
Page 268 of 438

!D (Drive)
This position is for normal driving.
The transmission automatically shifts into
a suitable gear according to the vehicle
speed and the acceleration you require.
When more acceleration is required in this
position, depress the accelerator pedal
fully to the floor and hold that position. The
transmission will automatically downshift.
When you release the pedal, the transmis-
sion will return to the original gear posi-tion.
To use the “SPORT ”mode, move the lever
from this position into the manual gate.
To use the manual mode, move the lever
from this position into the manual gate
then move it toward the “+ ” or “� ” end.
! While climbing a grade
When driving up a hill, undesired upshift to
4th gear is prevented from taking place
when the accelerator pedal is released.
This minimizes the chance of subsequent
downshifting to a lower gear when accel-
erating again. This prevents repeated
upshifting and downshifting, resulting in
smoother operation of the vehicle.
NOTE
The transmission may downshift to 2nd
or 1st gear, depending on the way the
accelerator pedal is pressed to accel- erate the vehicle again. !
While going down a hill
When you are descending a hill or any
other slope in the “SPORT ”mode and you
apply the brakes, the transmission may
downshift to 3rd or 2nd gear depending on
how hard you depress the brake pedal,
causing engine braking to work. Reacce-
leration for a short time will cause the
transmission to upshift normally.
NOTE . A 4th-to-3rd automatic downshift
will not occur at speeds above 50
mph (80 km/h) and a 3rd-to-2nd auto-
matic downshift will not occur at
speeds above 24 mph (38 km/h).. Automatic downshifts may occur
even when driving on a level road
depending on conditions, such as
how hard you depress the brake pedal. & Shift lock function
The shift lock function helps prevent the
improper operation of the select lever. . The select lever cannot be operated
unless the ignition switch is turned to the “ ON ”position and the brake pedal is
depressed. . The select lever cannot be moved from
the “P ” position to any other position before the brake pedal is depressed.
Depress the brake pedal first, and then
operate the select lever. .
Only the “P ”position allows you to turn
the key from the “Acc ”position to the
“ LOCK ”position and remove the key from
the ignition key cylinder.. If the ignition switch is turned to the
“ LOCK ”position while the select lever is in
the “N ”position, the select lever may not
be moved to the “P ”position after a period
of time. Therefore, move the select lever
to the “P ” position with the brake pedal
depressed soon after the ignition switch is
turned to the “LOCK ”position.
! Shift lock release
If the select lever cannot be operated, turn
the ignition switch back to the “ON ”
position then move the select lever to the“ P ” position with the brake pedal de-
pressed.
If the select lever does not move after
performing the above procedure, perform
the following steps. Starting and operating
7-17
– CONTINUED –