2012 SUBARU FORESTER center console
[x] Cancel search: center consolePage 236 of 438

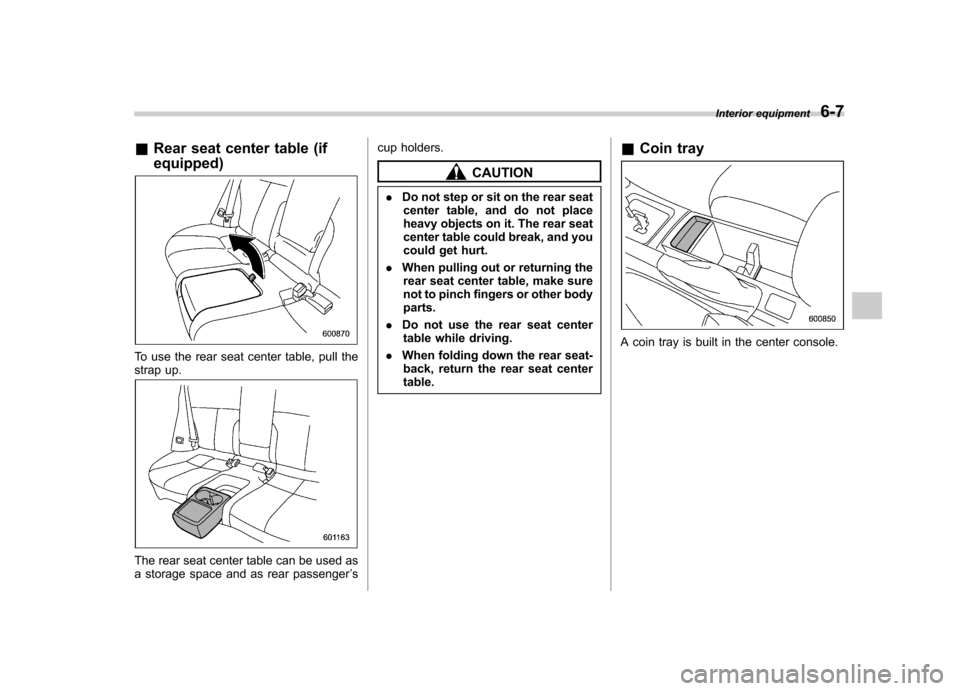
&Rear seat center table (if equipped)
To use the rear seat center table, pull the
strap up.
The rear seat center table can be used as
a storage space and as rear passenger ’s cup holders.
CAUTION
. Do not step or sit on the rear seat
center table, and do not place
heavy objects on it. The rear seat
center table could break, and you
could get hurt.
. When pulling out or returning the
rear seat center table, make sure
not to pinch fingers or other bodyparts.
. Do not use the rear seat center
table while driving.
. When folding down the rear seat-
back, return the rear seat centertable. &
Coin tray
A coin tray is built in the center console. Interior equipment
6-7
Page 237 of 438

6-8Interior equipment
Cup holders
CAUTION
Take care to avoid spills. Beverages,
if hot, might burn you or your
passengers. Spilled beverages may
also damage upholstery, carpets or
audio equipment.
& Front passenger ’s cup holder
CAUTION
Do not pick up a cup from the cup
holder or put a cup in the holder
while you are driving, as this may
distract you and lead to an accident.A dual cup holder is built in the center
console, beside the parking brake lever.
The cup holder rear partition can be
removed and placed on the front partition.
This space can be used to store smallitems. &
Rear passenger ’s cup holder
(if equipped)
A dual cup holder is located on the rear
seat center table.
Page 238 of 438

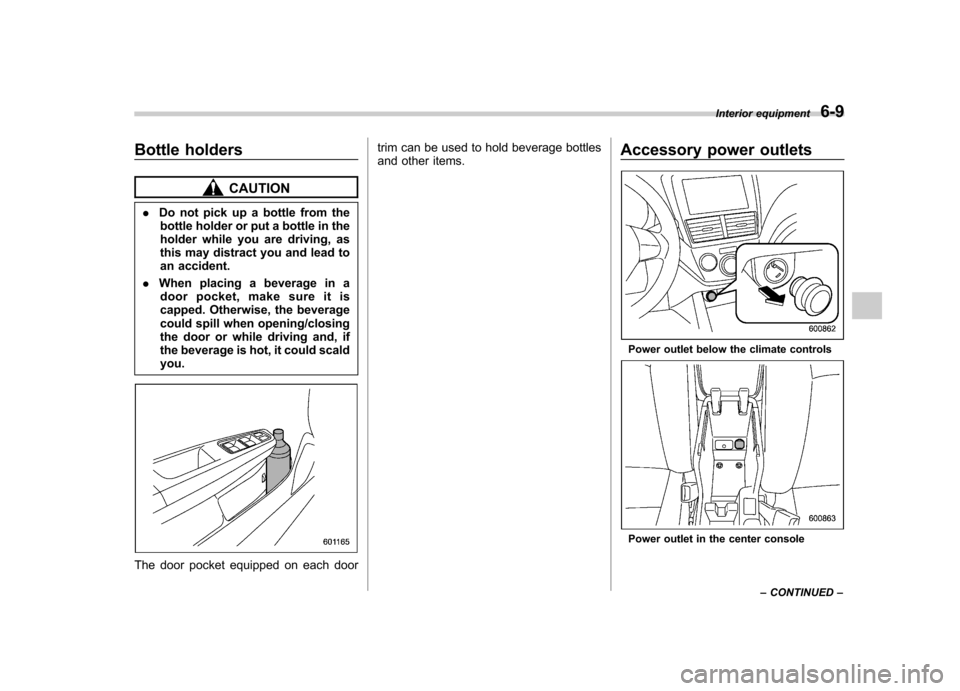
Bottle holders
CAUTION
. Do not pick up a bottle from the
bottle holder or put a bottle in the
holder while you are driving, as
this may distract you and lead to
an accident.
. When placing a beverage in a
door pocket, make sure it is
capped. Otherwise, the beverage
could spill when opening/closing
the door or while driving and, if
the beverage is hot, it could scaldyou.
The door pocket equipped on each door trim can be used to hold beverage bottles
and other items.
Accessory power outlets
Power outlet below the climate controls
Power outlet in the center consoleInterior equipment
6-9
– CONTINUED –
Page 239 of 438

6-10Interior equipment
Power outlet in the cargo area
Accessory power outlets are provided
below the climate controls, in the center
console and in the cargo area. Electrical
power (12V DC) from the battery is
available at any of the outlets when the
ignition switch is in either the “Acc ”or “ON ”
position.
You can use an electrical appliance by
connecting it to an outlet.
The maximum power rating of an appli-
ance that can be connected is 120W.Do
not use an appliance which exceeds the
indicated wattage for each outlet.
When using appliances connected to two
or more outlets simultaneously, the total
power consumed by them must not
exceed 120W.
CAUTION
. Do not attempt to use a cigarette
lighter plug in the accessory
power outlets.
. Do not place any foreign objects,
especially metal ones such as
coins or aluminum foil, into the
accessory power outlet. That
could cause a short circuit. Al-
ways put the cap on the acces-
sory power outlet when it is not
in use.
. Use only electrical appliances
which are designed for 12V DC.
The maximum power rating of an
appliance that can be connected
is 120W. Do not use an appliance
which exceeds the indicated wat-
tage for each outlet.
When using appliances con-
nected to two or more outlets
simultaneously, the total power
consumed by them must not
exceed 120W. Overloading the
accessory power outlet can
cause a short circuit. Do not use
double adapters. .
If the plug on your electric appli-
ance is either too loose or too
tight for the accessory power
outlet, this can result in a poor
contact or cause the plug to get
stuck. Only use plugs that fit
properly.
. Use of an electric appliance in the
accessory power outlet for a long
period of time while the engine is
not running can cause batterydischarge.
. Before driving your vehicle, make
sure that the plug and the cord
on your electrical appliance will
not interfere with your shifting
gears and operating the accel-
erator and brake pedals. If they
do, do not use the electrical
appliance while driving.
& Cigarette lighter (dealer op- tion)
A cigarette lighter may be installed in
place of an accessory power outlet. The
cigarette lighter assembly is available
from your SUBARU dealer.
The cigarette lighter operates only when
the ignition switch is in the “ON ”or “Acc ”
position.
Page 338 of 438

Cleaning the interior
Use a soft, damp cloth to clean the climate
control panel, audio equipment, instru-
ment panel, center console, combination
meter panel, and switches. (Do not use
organic solvents.) &Seat fabric
Remove loose dirt, dust or debris with a
vacuum cleaner. If the dirt is caked on the
fabric or hard to remove with a vacuum
cleaner, use a soft brush then vacuum it.
Wipe the fabric surface with a tightly
wrung cloth and dry the seat fabric
thoroughly. If the fabric is still dirty, wipe
using a solution of mild soap and luke-
warm water then dry thoroughly.
If the stain does not come out, try a
commercially available fabric cleaner. Use
the cleaner on a hidden place and make
sure it does not affect the fabric adversely.
Use the cleaner according to its instruc-tions. NOTE
When cleaning the seat, do not use
benzine, paint thinner, or any similarmaterials. &
Leather seat materials
The leather used by SUBARU is a high
quality natural product which will retain its
distinctive appearance and feel for many
years with proper care.
Allowing dust or road dirt to build up on the
surface can cause the material to become
brittle and to wear prematurely. Regular
cleaning with a soft, moist, natural fiber
cloth should be performed monthly, taking
care not to soak the leather or allow water
to penetrate the stitched seams.
A mild detergent suitable for cleaning
woolen fabrics may be used to remove
difficult dirt spots, rubbing with a soft, dry
cloth afterwards to restore the luster. If
your SUBARU is to be parked for a long
time in bright sunlight, it is recommended
that the seats and headrests be covered,
or the windows shaded, to prevent fading
or shrinkage.
Minor surface blemishes or bald patches
may be treated with a commercial leather
spray lacquer. You will discover that each
leather seat section will develop soft folds
or wrinkles, which is characteristic of
genuine leather. &
Synthetic leather upholstery
The synthetic leather material used on the
SUBARU may be cleaned using mild soap
or detergent and water, after first vacuum-
ing or brushing away loose dirt. Allow the
soap to soak in for a few minutes and wipe
off with a clean, damp cloth. Commercial
foam-type cleaners suitable for synthetic
leather materials may be used when
necessary. NOTE
Strong cleaning agents such as sol-
vents, paint thinners, window cleaner
or gasoline must never be used on
leather or synthetic interior materials. & Climate control panel, audio
panel, instrument panel,
console panel, and switches
Use a soft, damp cloth to clean the climate
control panel, audio equipment, instru-
ment panel, center console, combination
meter panel, and switches. NOTE
Do not use organic solvents such as
paint thinners or gasoline, or strong
cleaning agents that contain thosesolvents. Appearance care
10-5
– CONTINUED –
Page 402 of 438

Fuses and circuits &Fuse panel located in the passenger compartmentFuse
panel Fuse
rating Circuit
1 20A .Trailer
2 Empty
3 15A .Door locking
4 10A .Front wiper deicer relay
5 10A .Combination meter
6 7.5A .Remote control rear
view mirrors
. Seat heater relay
7 15A .Combination meter
. Integrated unit
8 20A .Stop light
9 15A .Front wiper deicer
10 7.5A .Power supply (battery)
11 7.5A .Turn signal unit
. Clock
12 15A .Automatic transmission
unit
. Engine control unit
. Integrated unit
13 20A .Accessory power outlet
(center console)
14 15A .Position light
. Tail light
. Rear combination light
15 Empty (FWD connector for AWD AT models)
Specifications
12-11
– CONTINUED –
Page 428 of 438

Parking........................................................ 7-29, 11-29
Pedal .................................................................. 11-26
System ................................................................. 7-22
Brake pedal Free play ............................................................. 11-26
Reserve distance .................................................. 11-26
Brake system ............................................................ 7-22
Warning light ......................................................... 3-20
Braking ..................................................................... 7-22
Tips...................................................................... 7-22
Breaking-in of new brake pads and linings ................... 11-28
Bulb Chart .................................................................. 12-15
Replacing ............................................................. 11-45
C
Cargo area Cover ................................................................... 6-14
Light ............................................................. 6-3, 11-50
Tie-down hooks ..................................................... 6-15
Cargo tray ................................................................. 10-6
Catalytic converter ....................................................... 8-3
Center
Console .................................................................. 6-5
Changing Flat tire ................................................................... 9-6
Oil and oil filter ..................................................... 11-11
Charge warning light .................................................. 3-17
CHECK ENGINE warning light/Malfunction indicator light ....................................................................... 3-16 Checking
Brake pedal free play ............................................ 11-26
Brake pedal reserve distance ................................. 11-26
Clutch function ..................................................... 11-27
Clutch pedal free play ........................................... 11-27
Coolant level ........................................................ 11-14
Fluid level (automatic transmission fluid) .................. 11-20
Fluid level (brake fluid) .......................................... 11-23
Fluid level (clutch fluid) .......................................... 11-24
Fluid level (power steering fluid) .. ........................... 11-22
Fluid level (washer fluid) ........................................ 11-37
Oil level (engine oil) ................................................ 11-9
Oil level (front differential gear oil) .......................... 11-21
Oil level (manual transmission oil) .......................... 11-19
Child restraint systems ................................................ 1-22
Installation of a booster seat .................................... 1-28
Installation with A/ELR seatbelt ... ............................. 1-25
Lower and tether anchorages ................................... 1-29
Top tether anchorages ............................................ 1-32
Child safety ................................................................... 5
Locks .................................................................... 2-19
Chime
Key........................................................................ 3-5Light ..................................................................... 3-29
Seatbelt. ................................................................ 3-13
Cleaning Aluminum wheels ................................................... 10-3
Interior .................................................................. 10-5
Ventilation grille ...................................................... 4-10
Climate control system Automatic ............................................................... 4-6 Index
14-3