2012 SMART FORTWO COUPE steering wheel
[x] Cancel search: steering wheelPage 102 of 228

:
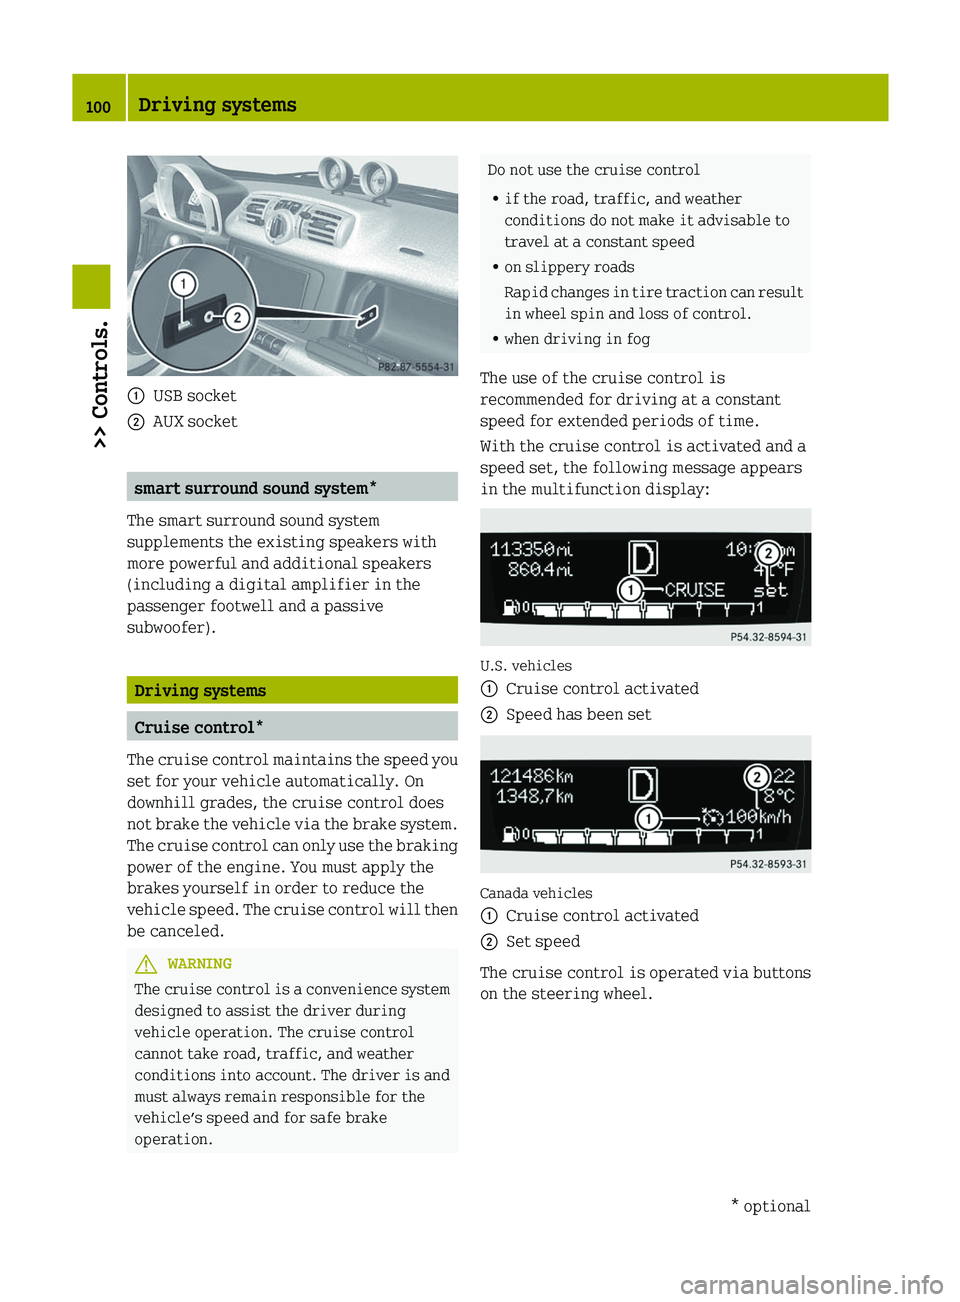
USB socket
; AUX socket smart surround sound system*
The smart surround sound system
supplements the existing speakers with
more powerful and additional speakers
(including a digital amplifier in the
passenger footwell and a passive
subwoofer). Driving systems
Cruise control*
The cruise control maintains the speed you
set for your vehicle automatically. On
downhill grades, the cruise control does
not brake the vehicle via the brake system.
The cruise control can only use the braking
power of the engine. You must apply the
brakes yourself in order to reduce the
vehicle speed. The cruise control will then
be canceled. G
WARNING
The cruise control is a convenience system
designed to assist the driver during
vehicle operation. The cruise control
cannot take road, traffic, and weather
conditions into account. The driver is and
must always remain responsible for the
vehicle’s speed and for safe brake
operation. Do not use the cruise control
R
if the road, traffic, and weather
conditions do not make it advisable to
travel at a constant speed
R on slippery roads
Rapid
changes in tire traction can result
in wheel spin and loss of control.
R when driving in fog
The use of the cruise control is
recommended for driving at a constant
speed for extended periods of time.
With the cruise control is activated and a
speed set, the following message appears
in the multifunction display: U.S. vehicles
:
Cruise control activated
; Speed has been set Canada vehicles
:
Cruise control activated
; Set speed
The cruise control is operated via buttons
on the steering wheel. 100
Driving systems
>> Controls.
* optional
Page 112 of 228

the pedals. This could restrict your ability
to brake or accelerate and could lead to
accidents and injury.
Coin holder The coin holder is located in front of the
gear selector lever.
Example illustration (coupé)
:
Coin holder
Door pockets The door pockets are located in the driver’s
and passenger door.
:
Door pocket
Storage trays next to the steering wheel The storage trays are located to the left and
right of the steering wheel. :
Storage tray
Glove box i
A clamp rail for slips of paper is
located on the outside of the glove box
lid. X
Opening: Pull on glove box lid
release : and fold down the glove box
lid.
X Closing: Lift up the glove box lid with a
bit of force until it engages.
X Locking: Insert the key into the glove box
lock and turn it to position 3.
X Unlocking: Insert the key into the glove
box lock and turn it to position 2.110
Loading and storing
>> Controls.
Page 127 of 228

R
If vehicle is heavily loaded, check tire
inflation pressure and correct as
required.
R Do not allow your tires to wear down too
far.
Adhesion properties on wet roads are
sharply reduced at tread depths of less
than 1
/ 8 in (3 mm). Recommended tire inflation pressure
G
WARNING
Follow recommended tire inflation
pressures.
Do not underinflate tires. Underinflated
tires wear excessively and/or unevenly,
adversely affect handling and fuel
economy, and are more likely to fail from
being overheated.
Do not overinflate tires. Overinflated
tires can adversely affect handling and
ride comfort, wear unevenly, increase
stopping distance, and result in sudden
deflation (blowout) because they are more
likely to become punctured or damaged by
road debris, potholes etc.
Do not overload the tires by exceeding the
specified load limit as indicated on the
Tire and Loading Information placard on
the
driver’s door B‑pillar. Overloading the
tires can overheat them, possibly causing
a blowout. Overloading the tires can also
result in handling or steering problems, or
brake failure.
Your vehicle is equipped with the Tire and
Loading Information placard located on
the driver’s door B‑pillar ( Y page 130).
The tire inflation pressure should be
checked regularly. Only adjust the tire
inflation pressure on cold tires. The tires
can be considered cold if the vehicle has
been parked for at least 3 hours or driven
less than 1 mile (1.6 km). Depending on the
ambient temperature, the driving speed
and the tire load, the tire temperature
changes. When the tire temperature changes by 18¦ (10¥), the tire inflation
pressure will change by approximately
10 kpa (0.1 bar, 1.5 psi). Keep this in mind
when checking tire inflation pressure on
warm tires and adjust the tire pressure
only if the tire inflation pressure is too
low for the current operating conditions.
If you check the tire inflation pressure
when the tires are warm, the reading will
be higher than the cold reading. This is
normal. Do not let air out to match the
specified cold tire inflation pressure.
Otherwise, the tire will be underinflated.
Follow recommended cold tire inflation
pressures listed on Tire and Loading
Information placard on the driver’s door
B‑pillar.
Keeping the tires properly inflated
provides the best handling, tread life and
riding comfort.
In addition to the Tire and Loading
Information placard on the driver’s door
B‑pillar, also consult the tire inflation
pressure
label (if available) on the inside
of the filler flap for any additional
information pertaining to special driving
situations. For more information, see
“Important notes on tire inflation
pressure” ( Y page 126).
i Data shown on Tire and Loading
Information placard example are for
illustration purposes only. Tire data are
specific to each vehicle and may vary
from data shown in the following
illustration. Refer to Tire and Loading
Information placard on vehicle for
actual data specific to your vehicle. Tires and wheels
125
>> Operation. Z
Page 129 of 228

stopping distance, and result in sudden
deflation (blowout) because they are more
likely to become punctured or damaged by
road debris, potholes etc.
Do not overload the tires by exceeding the
specified load limit as indicated on the
Tire and Loading Information placard on
the
driver’s door B‑pillar. Overloading the
tires can overheat them, possibly causing
a blowout. Overloading the tires can also
result in handling or steering problems, or
brake failure.
Check the tire inflation pressure at least
once a month.
Check and adjust the tire inflation
pressure when the tires are cold
(Y page 125).
Checking tire inflation pressure
manually Follow the steps below to achieve correct
tire inflation pressure:
X
Remove the cap from the valve on one tire.
X Firmly press a tire gauge onto the valve.
X Read the tire inflation pressure on tire
gauge and check against the
recommended tire inflation pressure on
the Tire and Loading Information
placard on the driver’s door B‑pillar
(Y page 130). If necessary, add air to
achieve the recommended tire inflation
pressure.
X If you have overfilled the tire, release
tire inflation pressure by pushing the
metal
stem of the valve with e.g. a tip of
a pen. Then recheck the tire inflation
pressure with the tire gauge.
X Install the valve cap.
X Repeat this procedure for each tire.
Tire Pressure Monitoring System (TPMS)* Your vehicle may be equipped with a Tire
Pressure
Monitoring System (TPMS). It monitors the tire inflation pressure in
all
four tires. A warning is issued to alert
you to a decrease in pressure in one or more
of the tires.
The Tire Pressure Monitoring System
(TPMS) is equipped with a combination low
tire pressure/TPMS malfunction telltale in
the instrument cluster. Depending on how
the telltale illuminates, it indicates a low
tire pressure condition or a malfunction in
the TPMS system itself:
R If the telltale illuminates continuously,
one or more of your tires is significantly
underinflated. There is no malfunction
in the TPMS.
R If the telltale flashes for 60 seconds and
then stays illuminated, the TPMS system
itself is not operating properly.
The TPMS only functions on wheels that are
equipped with the proper electronic
sensors. G
WARNING
The TPMS does not indicate a warning for
wrongly selected inflation pressures.
Always adjust tire inflation pressure
according to the Tire and Loading
Information placard on the driver’s door
B‑pillar.
The
TPMS is not able to issue a warning due
to a sudden dramatic loss of pressure (e.g.
tire blowout caused by a foreign object). In
this case bring the vehicle to a halt by
carefully applying the brakes and avoiding
abrupt steering maneuvers. G
WARNING
Each tire should be checked monthly when
cold
and inflated to the inflation pressure
recommended by the vehicle manufacturer
on the Tire and Loading Information
placard. If your vehicle has tires of a
different size than the size indicated on
the Tire and Loading Information placard,
you should determine the proper tire
inflation pressure for those tires. Tires and wheels
127
>> Operation.
* optional Z
Page 132 of 228

Always follow the recommended tire
inflation pressure (
Y page 125) for proper
tire inflation. Loading the vehicle
Two labels on your vehicle show how much
weight it may properly carry.
1) The Tire and Loading Information placard can be found on the driver’s
door B‑pillar. This placard tells you
important information about the
number of people that can be in the
vehicle
and the total weight that can be
carried in the vehicle. It also contains
information on the proper size and
recommended tire inflation pressures
for the original equipment tires on
your vehicle.
2) The certification label, also found on the driver’s door B‑pillar, tells you
about
the gross weight capacity of your
vehicle, called the Gross Vehicle
Weight Rating (GVWR). The GVWR
includes the weight of the vehicle, all
occupants, fuel and cargo. The
certification label also tells you about
the front and rear axle weight capacity,
called the Gross Axle Weight Rating
(GAWR). The GAWR is the total allowable
weight that can be carried by a single
axle (front or rear). Never exceed the
GVWR or GAWR for either the front axle
or rear axle. :
Driver’s door B‑pillar Following is a discussion on how to work
with
the information contained on the Tire
and Loading Information placard with
regards to loading your vehicle.
Tire and Loading Information G
WARNING
Do not overload the tires by exceeding the
specified load limit as indicated on the
Tire and Loading Information placard on
the
driver’s door B‑pillar. Overloading the
tires can overheat them, possibly causing
a blowout. Overloading the tires can also
result in handling or steering problems, or
brake failure.
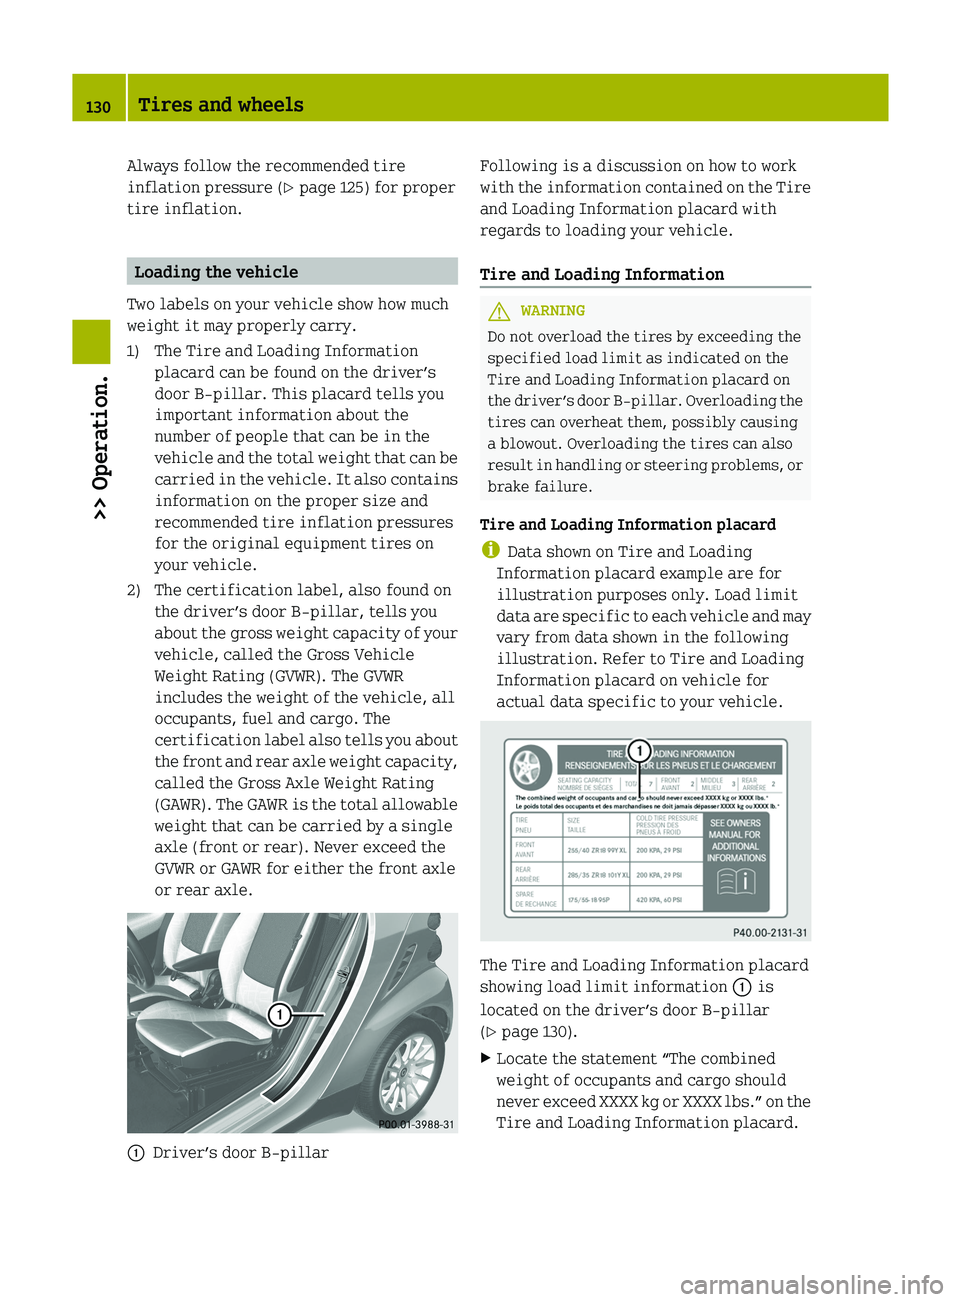
Tire and Loading Information placard
i Data shown on Tire and Loading
Information placard example are for
illustration purposes only. Load limit
data are specific to each vehicle and may
vary from data shown in the following
illustration. Refer to Tire and Loading
Information placard on vehicle for
actual data specific to your vehicle. The Tire and Loading Information placard
showing load limit information
: is
located on the driver’s door B‑pillar
(Y page 130).
X Locate the statement “The combined
weight of occupants and cargo should
never
exceed XXXX kg or XXXX lbs.” on the
Tire and Loading Information placard. 130
Tires and wheels
>> Operation.
Page 134 of 228

Examples for steps 1 to 3
Example 1 Example 2
Step 1 Combined weight limit of
occupants
and cargo from Tire and
Loading Information placard 540 lbs 540 lbs
Step 2 Number of occupants (driver and
passenger)
2 1
Occupants weight
Occupant 1: 150 lbs
Occupant 2: 180 lbs Occupant 1: 150 lbs
Combined weight of all occupants
330 lbs 150 lbs
Step 3 Available cargo weight (total load
limit from Tire and Loading
Information placard minus
combined weight of all occupants)
540 lbs - 330 lbs =
210 lbs 540 lbs - 150 lbs =
390 lbs
Certification label
Even after careful determination of the
combined
weight of all occupants and cargo
as to not exceed the permissible load
limit, you must make sure your vehicle
never exceeds the Gross Vehicle Weight
Rating (GVWR) and the Gross Axle Weight
Rating (GAWR) for either the front or rear
axle. You can obtain the GVWR and GAWR
from the certification label. The
certification label can be found on the
driver’s door B‑pillar, see “Technical
data” (Y page 214).
Gross Vehicle Weight Rating (GVWR) means:
The total weight of the vehicle, all
occupants, and all cargo must never exceed
the GVWR.
Gross Axle Weight Rating (GAWR) means:
The total allowable weight that can be
carried by a single axle (front or rear).
To assure that your vehicle does not exceed
the maximum permissible weight limits
(GVWR and GAWR for front and rear axle),
have the loaded vehicle (including driver,
passenger, and all cargo) weighed on a
suitable commercial scale. Maximum tire load
G
WARNING
Do not overload the tires by exceeding the
specified load limit as indicated on the
Tire and Loading Information placard on
the
driver’s door B‑pillar. Overloading the
tires can overheat them, possibly causing
a blowout. Overloading the tires can also
result in handling or steering problems, or
brake failure. i
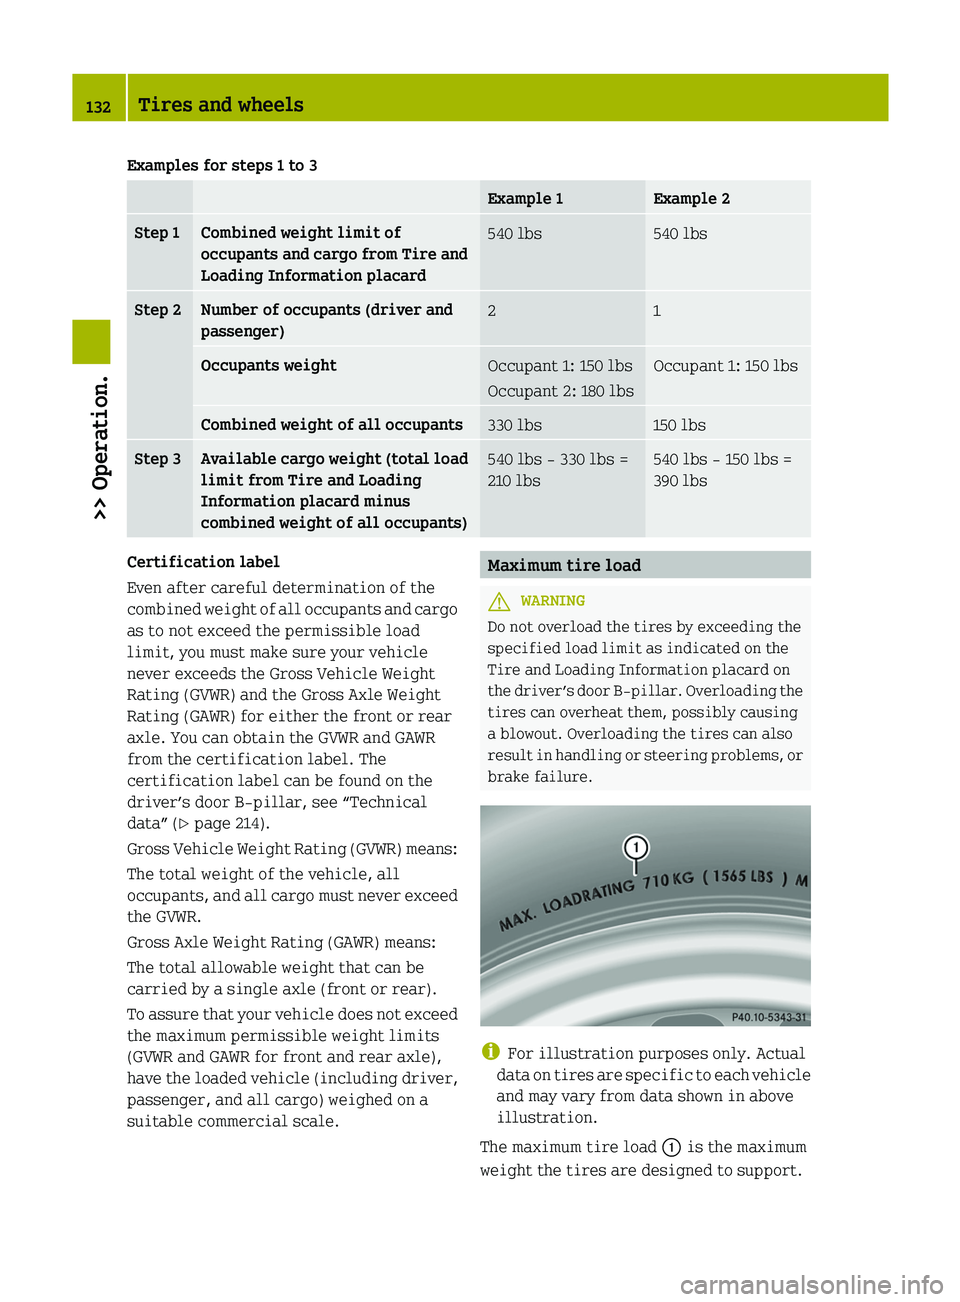
For illustration purposes only. Actual
data
on tires are specific to each vehicle
and may vary from data shown in above
illustration.
The maximum tire load : is the maximum
weight the tires are designed to support. 132
Tires and wheels
>> Operation.
Page 139 of 228

Tire load rating
G
WARNING
The tire load rating must always be at least
half of the GAWR of your vehicle. Otherwise,
tire failure may result and cause an
accident and/or serious personal injury to
you or others.
Always replace rims and tires with the same
designation, manufacturer and type as
shown on the original part. G
WARNING
Do not overload the tires by exceeding the
specified load limit as indicated on the
Tire and Loading Information placard on
the
driver’s door B‑pillar. Overloading the
tires can overheat them, possibly causing
a blowout. Overloading the tires can also
result in handling or steering problems, or
brake failure.
Tire load rating A is a numerical code
associated with the maximum load a tire
can support.
For example, a load rating of 91
corresponds to a maximum load of 1 356 lbs
(615 kg) the tire is designed to support.
See also “Maximum tire load” ( Y page 132)
where the maximum load associated with
the load index is indicated in kilograms
and lbs.
For additional information on tire load
rating, see “Load identification”
(Y page 138).
Tire speed rating G
WARNING
Even when permitted by law, never operate
a vehicle at speeds greater than the
maximum speed rating of the tires.
Exceeding the maximum speed for which
tires are rated can lead to sudden tire
failure,
causing loss of vehicle control and
possibly resulting in an accident and/or
personal injury and possible death, for you
and for others. Regardless of the tire speed rating, local
speed
limits should be obeyed. Use prudent
driving speeds appropriate to prevailing
conditions.
Tire speed rating B indicates the
approved maximum speed for the tire.
Summer tires Index Speed rating
Q up to 100 mph (160 km/h)
R up to 106 mph (170 km/h)
S up to 112 mph (180 km/h)
T up to 118 mph (190 km/h)
H up to 130 mph (210 km/h)
V up to 149 mph (240 km/h)
W up to 168 mph (270 km/h)
Y up to 186 mph (300 km/h)
ZR...Y above 186 mph (300 km/h)
ZR...(Y) above 186 mph (300 km/h)
ZR above 149 mph (240 km/h)
R
At the tire manufacturer’s option, any
tire with a speed capability above
149 mph (240 km/h) can include a “ZR” in
the size designation (for example:
245/40 ZR18). To determine the maximum
speed
capability of the tire, the service
description for the tire must be referred
to.
The service description is comprised of
tire load rating A and tire speed rating
B.
If your tire includes “ZR” in the size
designation and no service description
is given, the tire manufacturer must be
consulted for the maximum speed
capability.
If a service description is given, the
speed capability is limited by the speed Tires and wheels
137
>> Operation. Z
Page 141 of 228

The TIN is a unique identifier which
facilitates
efforts by tire manufactures to
notify purchasers in recall situations or
other safety matters concerning tires and
gives purchasers the means to easily
identify such tires.
The TIN is comprised of “Manufacturer’s
identification mark” ;, “Tire size” =,
“Tire type code” ?, and “Date of
manufacture” A.
i For illustration purposes only. Actual
data on tires are specific to each vehicle
and may vary from data shown in above
illustration.
DOT (Department of Transportation) Tire branding symbol
:
which denotes the
tire meets requirements of the U.S.
Department of Transportation.
Manufacturer’s identification mark Manufacturer’s identification mark
;
denotes the tire manufacturer.
New tires have a mark with two symbols.
Retreaded tires have a mark with four
symbols. For more information on
retreaded tires ( Y page 124).
Tire size Code = indicates the tire size. Tire type code Tire type code
? may, at the option of the
manufacturer, be used as a descriptive
code for identifying significant
characteristics of the tire.
Date of manufacture Date of manufacture
A
identifies the week
and year of manufacture.
The first two figures identify the week,
starting with “01” to represent the first
full week of the calendar year. The second
two figures represent the year.
For example, “3202” represents the 32nd
week of 2002. Tire ply material
i
For illustration purposes only. Actual
data
on tires are specific to each vehicle
and may vary from data shown in above
illustration.
This marking tells you about the type of
cord and number of plies in the
sidewall : and under the tread ;. Tire and loading terminology
Accessory weight The combined weight (in excess of those
standard items which may be replaced) of
automatic transmission, power steering,
power brakes, power windows, power seats, Tires and wheels
139
>> Operation. Z